PVC管炭笔素描
原文链接:https://createartwithme.com/pvc-pipe-charcoal-drawing/
日期: 2016-10-02
作者: Michelle East
分类: 六年级、美术课、炭笔课、素描课、小学美术、美术元素课、精选、高中美术、初中美术、静物
标签: 透视中的圆形、创意静物、绘制椭圆与圆形、绘制曲线、绘制圆柱体及圆柱形物体、绘制椭圆、观察能力训练、静物素描创意、观察式素描技能、视点、PVC管素描、静物构图、素描教学
适用年级: 六年级及以上
教学目标: 学生将通过肩部与肘部带动的流畅运笔动作,复习直线角度、曲线及椭圆的绘制,并练习比例与视点;运用“目测法”分析物体的角度及轮廓边缘的倾斜程度;学习圆柱体的构建方法,并借助方向线准确绘制PVC管;使用铅笔校验比例,比较静物构图中各PVC管之间的比例关系。
教学方式/活动: 曲率程度
教学演示与学生实践同步穿插进行。
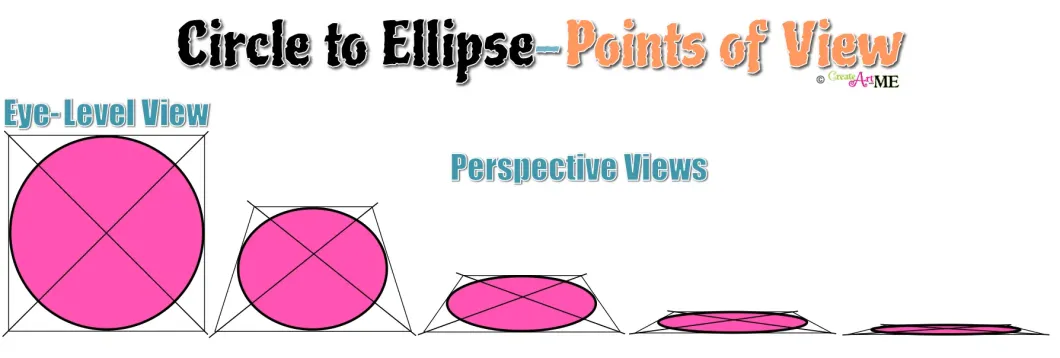
- 复习视点—— 你的视点如何影响圆柱体与球体的呈现?*展示实例,讨论可见变化。 当我们观察物体的视点发生变化时,圆形会转变为椭圆。若我们正俯视一个圆柱体(如一个罐子),所见为完整的圆形;当我们向一侧降低视线高度时,椭圆开口逐渐变窄,直至完全看不到圆柱体内部。在视平线高度上,椭圆则呈现为一条直线(即处于视平线位置)。
- 绘制曲线:
- 活动1: 从不同视点出发绘制曲线。*注意主要依靠肩部与肘部运笔(手腕动作尽量少)。 在纸张中央画一条水平线
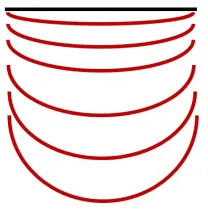 ,在纸张左侧、自地平线起始处画出至少六条曲线——越远离该水平线,曲线弯曲程度越大。在水平线上方同样完成此练习。(教师示范)
- 绘制椭圆: 先画若干圆形——以肘部为主、肩部为辅摆动手臂作画;让动作自由而放松;先尝试画圆,反复绕圈直至画准;切记轻画!待画出满意的圆形后,开始绘制一系列椭圆:起始接近圆形宽度,随后逐步压扁、变窄。(教师示范)

视频与活动: 每位初学者都应练习的素描训练(画得更准的圆形与椭圆)
活动2: 在纸上练习绘制不同曲率程度的椭圆(对应不同视平线高度)。先在纸张中央画一条水平线,再于其上下分别添加椭圆。这些椭圆应体现不同程度的“扁平感”——即椭圆的宽窄变化(此为教师口语化表述)。离地平线(视平线)越远,椭圆越趋近于完整圆形。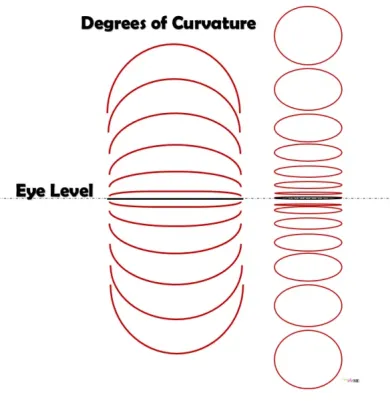
- 绘制圆柱体及圆柱形物体: 绘制圆柱体时,先画顶部椭圆,再画底部椭圆,用轻线起稿以便修改;接着画出两侧边线。若转动纸张更易画出直线,可灵活调整。(教师示范)
- 活动1: 用直线与椭圆练习绘制普通圆柱体。(如铝罐、品客薯片罐等)
- 活动2: PVC管限时速写。每位学生分配一段PVC管;确保提供多种样式管道,并从不同视点摆放。给予4分钟时间,要求学生直接观察并绘制;随后轮换座位继续练习。
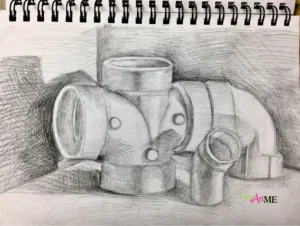
- 速写本作业:PVC管:选取3–5个PVC管接头配件,组合成富有趣味性的构图,并完成素描。使用绘图铅笔添加明暗——重点关注明度变化。明暗表现须包含“明暗五要素”。媒介: 绘图铅笔
- [
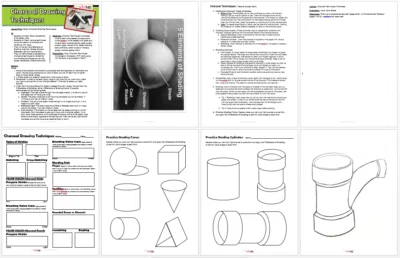
## Charcoal Drawing Techniques Lesson Plan & Worksheet
$2.75](https://createartwithme.com/shop/lesson-plans-worksheets/art-technique-lesson-plans-and-worksheets/drawing-lessons-worksheets-pdf/charcoal-drawing-techniques-lesson-plan-worksheet/)加入购物车
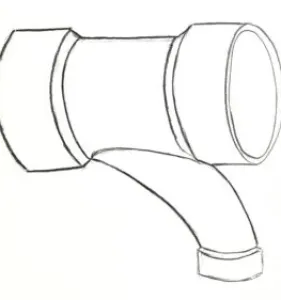
我们还曾在一张仿制纸(bogus paper)上,临摹我绘制的一幅简单PVC管炭笔画,进行炭笔技法练习。
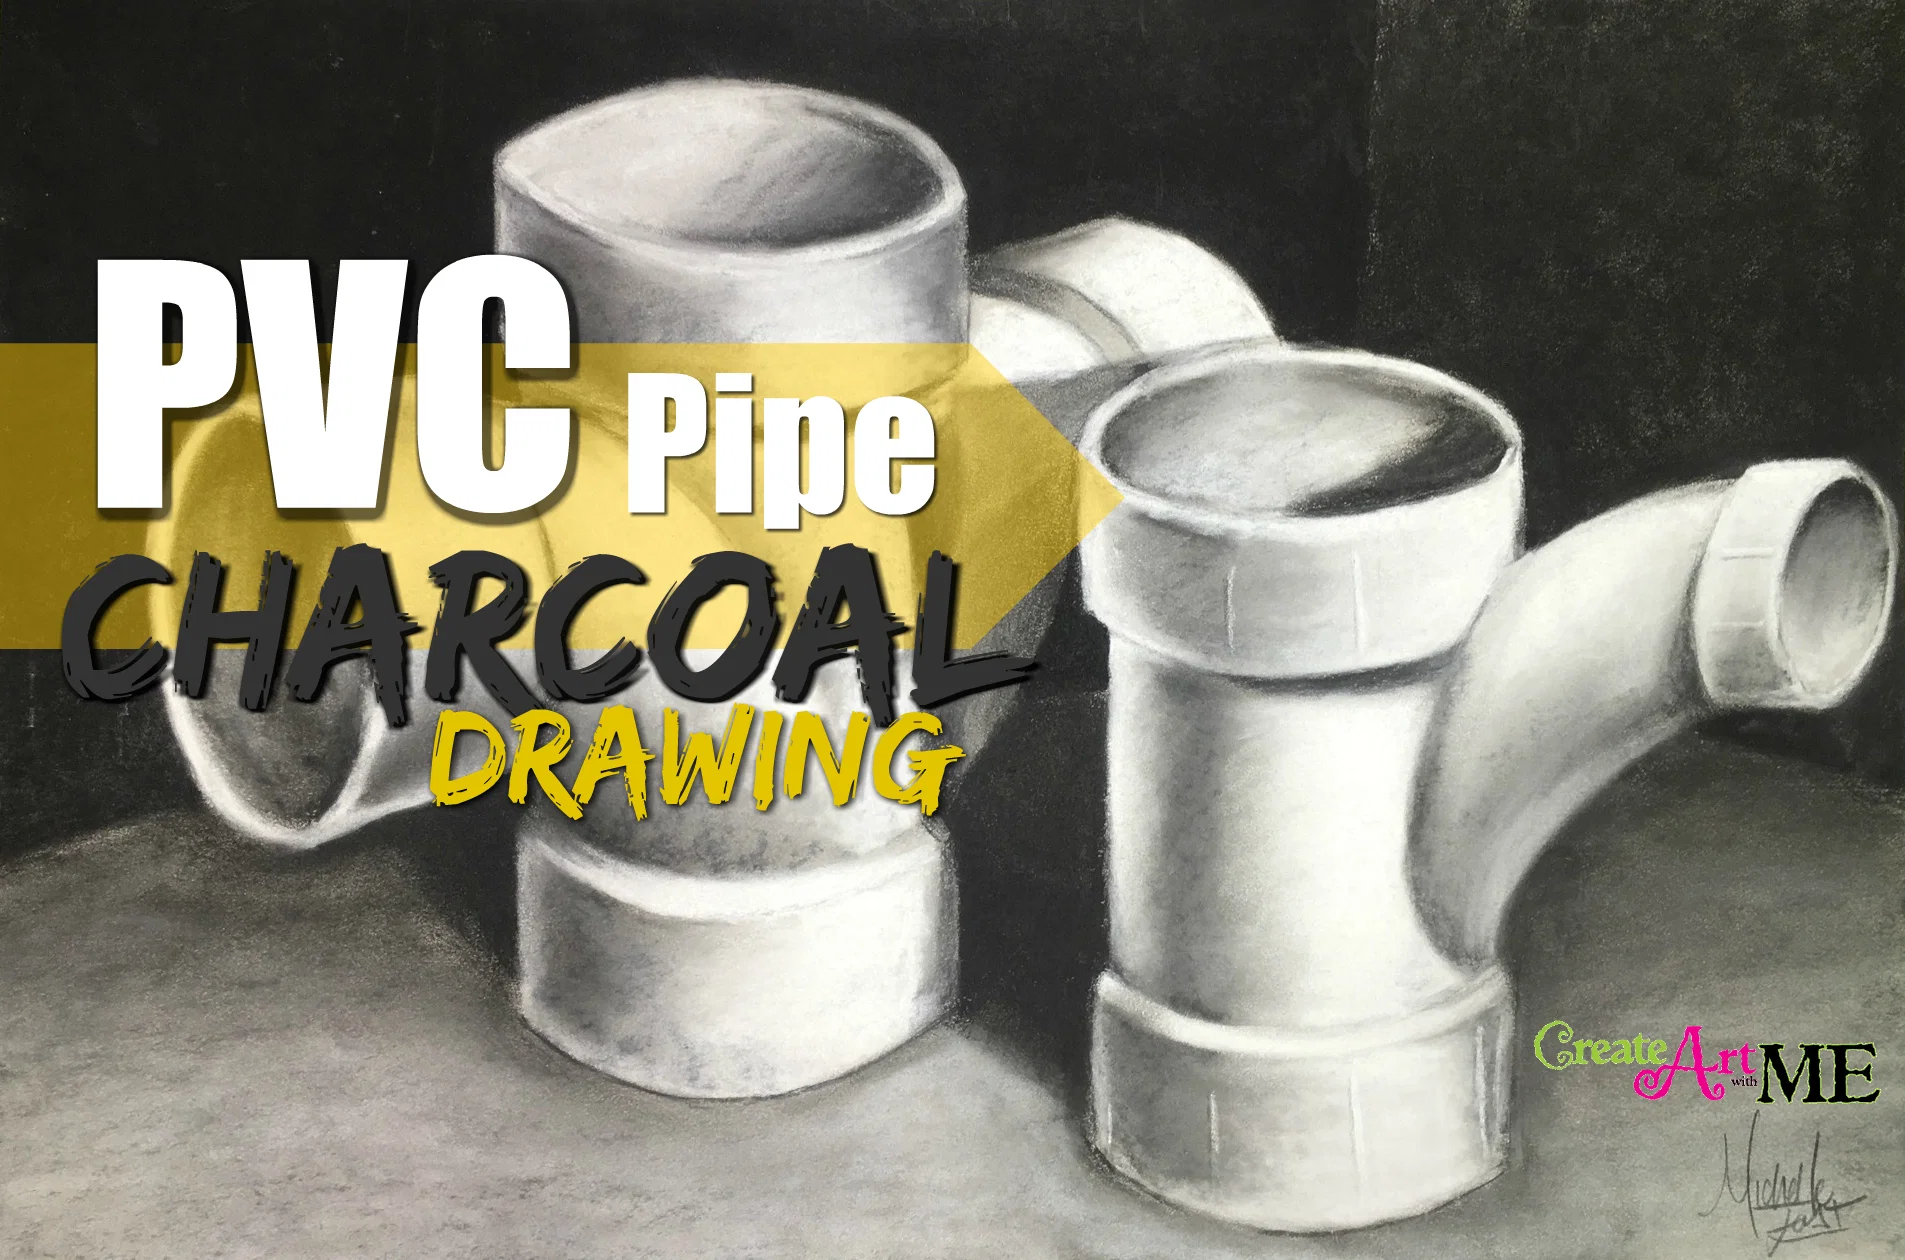
项目:PVC管炭笔素描
项目目标: 运用3根PVC管(部分可组合构成单一形态),创作一幅准确且富有趣味性的构图;以完整明暗表现完成绘制,充分体现“明暗五要素”,呈现硬阴影与软阴影,并体现“隐现边缘”(lost/found edges);中间调应保留有色纸本身的底色,仅用黑色与白色炭笔表现其余明度层次。
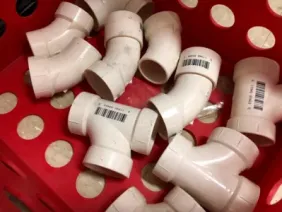 材料: 直径1¾英寸的PVC管若干(长度与连接件各异;建议涂抹少量凡士林,便于拆卸)、萨金特艺术无毒方形压缩炭笔(纯黑,3/8 × 2-3/8 英寸,12支装)
 , 德温特炭笔(黑白双色,4支装,型号39000)
 、擦笔/卷纸笔、12×18英寸纸张(*仿制纸/有色纸/粉彩纸或素描纸)


项目说明:
- 每组安排 4–6 名学生。让他们挑选 3–7 段 PVC 管材,组合成一个富有表现力的构图;部分管材可相互连接,形成整体结构。最终构图中须包含三段 PVC 管。
- 学生先用绘图铅笔轻描 PVC 管的构图。
- 在静物上放置一盏聚光灯。
- 用完整的明度阶调完成素描渲染:作品须体现明暗五大要素,呈现硬阴影与软阴影,并表现“隐现边缘”(即边缘线的虚实变化)。
-
PVC 管仅使用黑色与白色炭笔铅笔(更易控制);背景仅使用炭笔条。
-
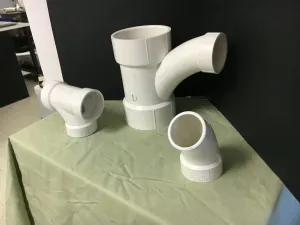
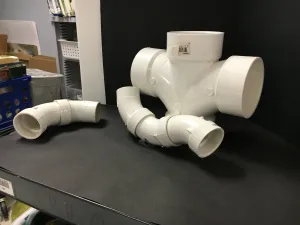
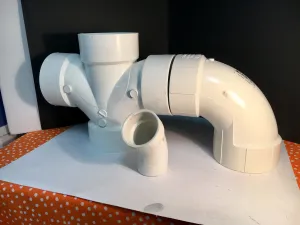
六年级美术学生作品示例:
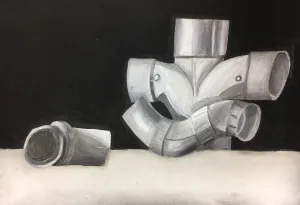
: 纳塔莉亚(Natalia)
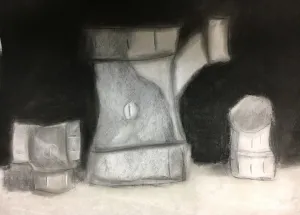
: 格温(Gwyen)
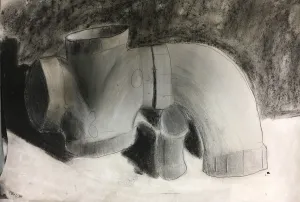
: 拉尔森(Larson)
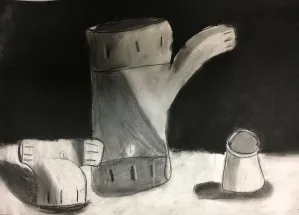
: 格雷厄姆(Graham)
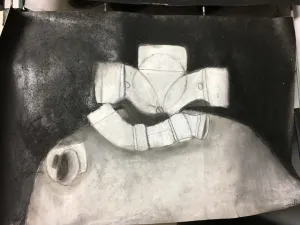
: 泰丝(Tess)
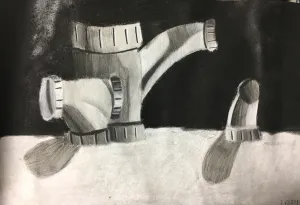
: 利齐(Lizzy)
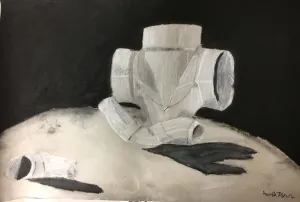
: 大卫(David)
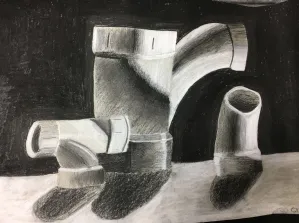
: 克里斯蒂娜(Christina)
拓展观察性素描技能课程:
若您选用本教案或转载其中文字内容及图片,请务必附上原文链接至我的博客:Create Art with ME。所有图像与文字版权均属米歇尔·C·伊斯(Michelle C. East)所有——Create Art with ME
PVC Pipe Charcoal Drawing
Original: https://createartwithme.com/pvc-pipe-charcoal-drawing/
Date: 2016-10-02
Author: Michelle East
Categories: 6th Grade, Art Lessons, Charcoal Lessons, Drawing Lessons, Elementary Art, Elements of Art Lessons, Featured, HS Art, MS Art, Still Life
Tags: circles in perspective, creative still life, Draw ellipses and circles, Drawing Curved Lines, Drawing Cylinders & Cylindrical Objects, Drawing Ellipses, drawing observation skil, Ideas for still life drawings, observational drawing skills, Point of view, PVC Pipe Drawing, still life composition, teaching drawing
Grades: 6th + Up Grade
Objectives: Students will review drawing angles of lines, curved lines, and ellipses by using fluid motion of swinging from the shoulder and elbow, proportion & point of view. Analyze angles of objects and the slants of the contour edges by using the sighting techniques. They will learn how to construct a cylinder and use directional lines to draw PVC pipes accurately. They will use a pencil to check proportions and compare proportions of various PVC pipes within the still life composition.
Delivery/Activity: Degrees of Curvature
Delivery/Demonstration will be intermixed with activity.
- Review Point of View–How does YOUR point of view affect objects-cylinders & spheres *Show Examples, discuss visible changes. Circles change into ellipses when our point of view of the object changes. If we look directly down at a cylinder, a can, we will see a full circle. As we lower our position to one side, the opening of the ellipses becomes more and more narrow until we cannot see inside the cylinder any longer. At eye level, the ellipse appears to be a straight line (at eye level).
- Drawing Curved Lines:
- Activity 1: Sketching curved lines from different points of view. *Remember to draw loosely from your shoulder and elbow (very little from the wrist). Draw a horizontal line in the middle of your paper. On the left side of the paper draw curved lines (at least 6) starting at the horizon line only slightly curved and getting more and more curved the further they are away from that line. Do the same thing above the horizontal line. (Teacher Demo)
- Drawing Ellipses: Draw some circles-Swing your arm from the elbow & mostly the shoulder. Allow your movements to be free & loose. Begin making a circle-go round & round until you get it right. Remember to draw lightly! After you have a good circle begin making a series of ellipses beginning almost the width of a circle and progressively squashing to become thinner. (Teacher Demo)
Video & Activity: A Drawing Exercise Every Beginner Artists Should Do (Draw Better Circles & Ellipses)
Activity 2: Practice drawing different ellipses of degrees of curvatures (at different eye levels) on your paper. Start with a horizontal line in the middle of the paper then add ellipses above and below the line. The ellipses should show different degrees of “squishiness” -how narrow or wide the ellipses is (my term). They will eventually become a full circle the further they are away from the horizon line (eye-level).
- Drawing Cylinders & Cylindrical Objects To draw a cylinder, start with top ellipse, then the bottom ellipse, draw lightly so you can erase lines. Then draw the side lines. Turn your paper if it makes it easier to draw the straight lines. (Teacher Demo)
- Activity 1: Practice drawing plain cylinders with lines & ellipses. (Aluminum cans, Pringles Chips Cans, etc)
- Activity 2: Timed sketches of PVC pipes. Set up one pipe section per student; make sure to have different styles of pipes and place them from different points of view. Give them 4 minutes to draw the pipes from direct observation. Rotate around to different seats.
- Sketchbook Assignment: PVC Pipes: Choose 3-5 PVC pipe joint connectors and arrange them in an interesting composition. Draw the PVC pipe composition. Use drawing pencils to add shading-pay close attention to value changes. Shading should include the “5 Elements of Shading”. Medium: Drawing Pencils
- [
## Charcoal Drawing Techniques Lesson Plan & Worksheet
$2.75](https://createartwithme.com/shop/lesson-plans-worksheets/art-technique-lesson-plans-and-worksheets/drawing-lessons-worksheets-pdf/charcoal-drawing-techniques-lesson-plan-worksheet/)Add to cart
We also practiced charcoal on a simple PVC pipe drawing I did & copied onto bogus paper.
Project: PVC Pipe Charcoal Drawing
Project Objectives: Create an accurate and interesting composition using 3 PVC pipes (some can be combined to create one form). Render the drawing with full shading exemplifying the 5 Elements of Shading, show hard and soft shadows and lost/found edges. Mid-tones should remain the color of toned paper, use black and white charcoal to render the remaining values.
Supplies: 1 3/4″ PVC Pipes with various lengths & connections (apply a little petroleum jelly so they will come apart easily), Sargent Art Non-Toxic Square Compressed Charcoal Pastel, 3/8 X 2-3/8 in, Pure Black, Pack of 12, Derwent Charcoal Pencils (Black and White), Pack, 4 Count (39000), blending stubs/tortillions, 12×18″ Paper (*Bogus/toned, pastel or drawing)
Project Instructions:
- Place 4-6 students in a group. Have them choose 3-7 pieces of PVC pipe to arrange into an interesting composition. Some pieces can be connected to become one piece. The goal is to have three PVC pipes for the final composition.
- Student light draw the composition of PVC Pipes with drawing pencils first.
- Place a spot light on the still life.
- Render the drawing with a FULL rand of values: Drawings should exemplify the 5 Elements of Shading, show hard and soft shadows and lost/found edges.
-
Use black and white charcoal pencils for the PVC pipes (easier to control) and charcoal sticks for the background only.
-
6th Grade Art Student Examples:
: Natalia
: Gwyen
: Larson
: Graham
: Tess
: Lizzy
: David
: Christina
Additional Observational Drawing Skills Lessons:
If you choose to use this lesson or to repost it (written info or photos), please link it back to my blog. Create Art with ME. All images and text are © Michelle C. East – Create Art with ME


 材料: 直径1¾英寸的PVC管若干(长度与连接件各异;建议涂抹少量凡士林,便于拆卸)、萨金特艺术无毒方形压缩炭笔(纯黑,3/8 × 2-3/8 英寸,12支装)


