陶土精灵小屋与矮人之家(镶嵌玻璃珠)
原文链接:https://createartwithme.com/clay-fairy-house-and-gnome-homes-with-glass-beads/
日期: 2018-05-25
作者: 米歇尔·伊斯特(Michelle East)
分类: 六年级、美术课、陶艺课、泥板成型陶艺课、精选课程、高中美术、初中美术、雕塑课
标签: 蓝色玻璃珠、陶瓷精灵小屋、陶艺课、陶土精灵小屋、陶艺课、精灵小屋、玻璃珠、玻璃珠入窑烧制、玻璃珠模拟水体、玻璃材质表现水体、矮人之家、玛雅可釉料(Mayco glaze)、初中美术课、初中陶艺课、泥板成型
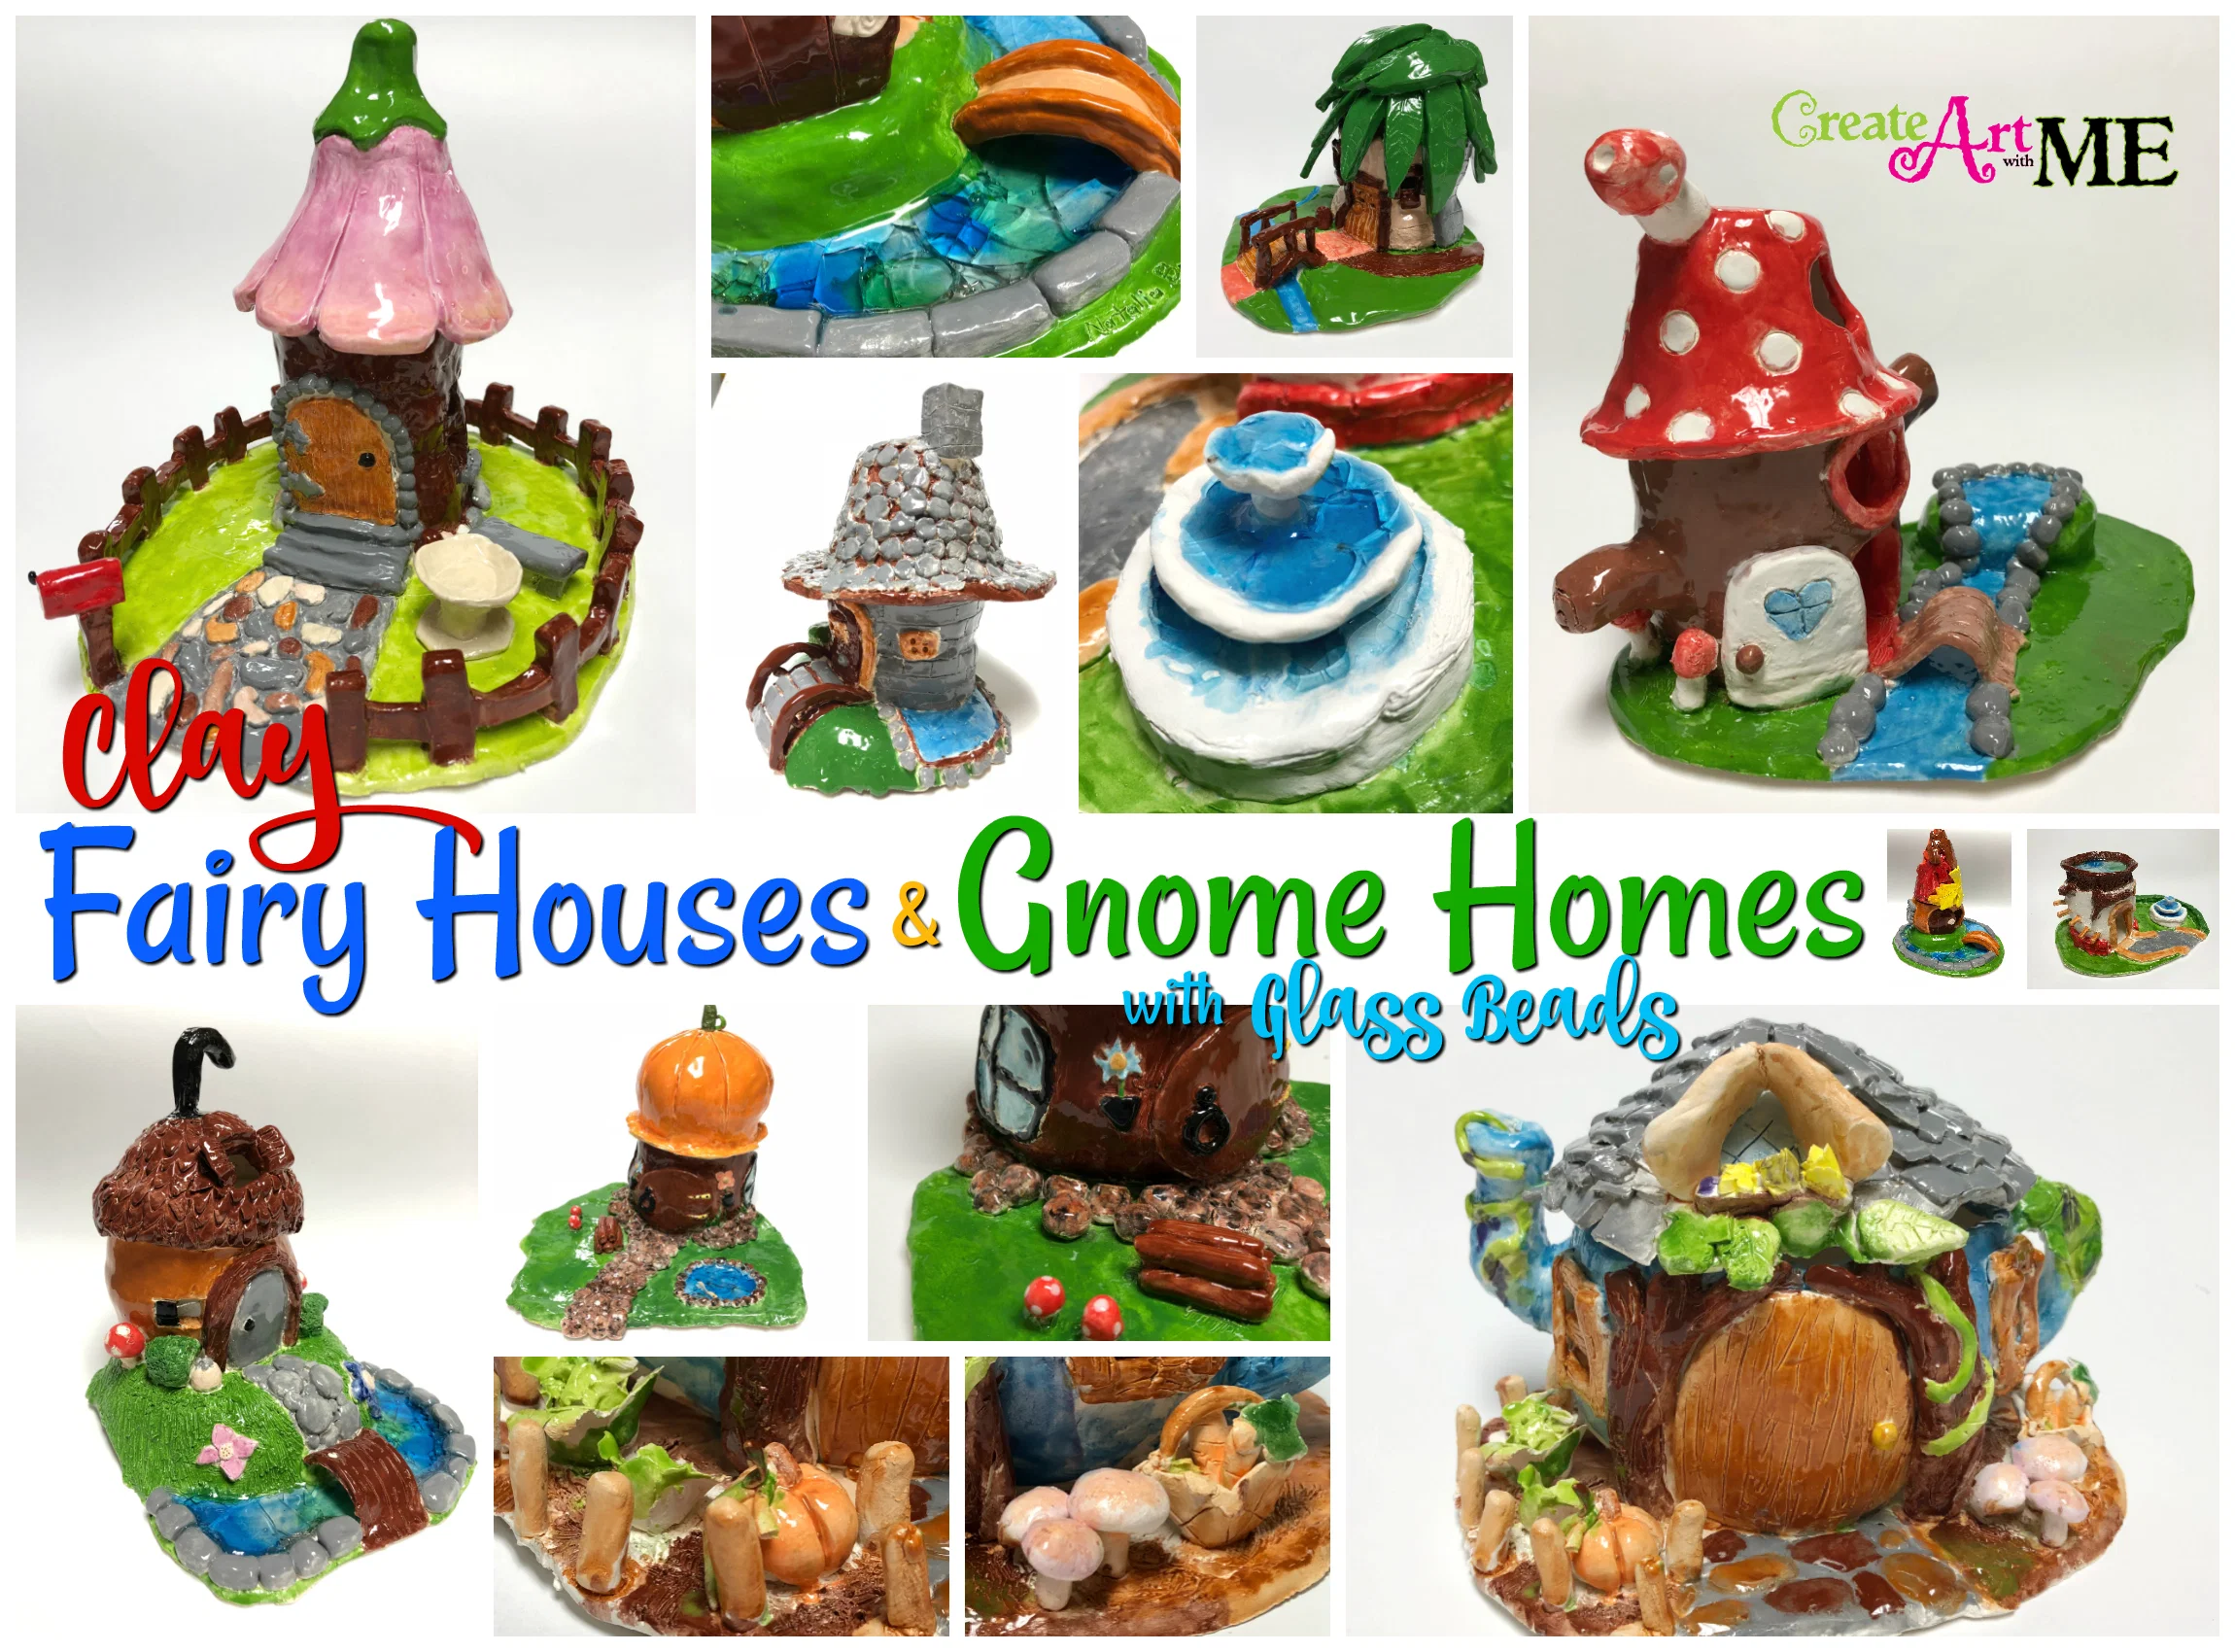
陶土“精灵小屋”多年来一直是我初中美术课的教学内容之一;但今年,我希望将课程难度提升至更高层次,并进一步拓展学生的陶土手工塑形能力!为此,我们在原有作业要求基础上新增了两项核心任务:作品必须配有底座(可为平面或山坡状),且须包含某种水景元素(如喷泉、池塘、鸟浴盆等)。我们沿用此前带护城河与玻璃珠的陶土城堡项目中的做法,将玻璃珠嵌入封闭式结构的水景部位。
教学目标:
- 学生能够准确解释本课所涉及的陶艺专业词汇。
- 学生将学习泥板成型及手工塑形技法。
- 学生将运用泥板与手工塑形技法,独立创作一座体现良好工艺水准的原创陶土小屋。
- 学生需至少绘制两幅构思草图,分别呈现小屋主体、底座及水景的设计方案。
- 学生需通过在结构密闭的水景部位嵌入玻璃珠,营造出逼真的水体视觉效果。
所需材料: 萨克斯低温湿润赤陶土(Sax Low Fire Moist Earthenware Clay)、用于卷制泥板的小圆柱体(我们使用饮水杯,亦可用裁短的纸巾筒)、陶艺雕刻工具套装——Sculpt Pro 15件套陶艺与雕塑工具组 、覆有帆布并固定于胶合板上的工作面板、玛雅可描边釉料(Mayco Stroke & Coat Glazes)——2盎司套装 或 品脱套装A 或 B


课前准备: 将陶土揉捏成大小如葡萄柚的团块;或从整块陶土上切下厚约1.5英寸的片材,再将其一分为二——其中一块用于制作小屋主体,另一块切至厚约1/2英寸作为底座;每位学生需准备两份(小屋与底座各一份),另备若干备用坯料。
授课内容:
陶艺技法与术语:
- 手工塑形(Hand-building): 仅依靠双手及手持陶艺工具塑造器皿的方法
- 泥板(Slab): 将陶土擀压成薄片状后,再塑造成各种形状或立体结构
- 捏塑(Pinch): 将一只手的拇指插入陶土中心,同时以拇指内压、手指外捏的方式,边缓慢旋转陶土边扩大其内部空腔
- 盘筑(Coil): 通过搓制陶土长条并以“刮擦+泥浆粘接法”(slip & score method)逐圈叠加,构建陶瓷造型
- 刮擦+泥浆粘接法(Scratch and slip)(教师示范): 连接两块陶土时,先用针状工具在待接合面反复刮擦数次,再于两面均匀涂抹少量泥浆或清水,随后压合。注意不可过度湿润陶土,以免导致坯体过软、发黏。此步骤至关重要——因泥板干燥过程中易收缩分离,导致部件开裂或脱落;若需增强接合强度,可额外搓制极细泥条,嵌入墙体交接处内侧。
- 减法式与加法式技法示范: 教师演示如何切割门窗开口
陶土干湿阶段:
- 湿态/可塑态(Wet or plastic): 含水量极高,柔软易塑形(易塌陷变形)
- 皮革硬态(Leather hard): 表面微湿但已具一定硬度(墙体可直立不塌),适合雕刻(减法式技法),亦可继续以刮擦+泥浆法添加新部件
- 素坯态/骨干态(Green-ware or Bone dry): 水分完全蒸发,质地脆硬,弯曲即断
- 素烧坯(Bisque-ware)(首次烧成): 如石质般坚硬
- 釉烧坯(Glaze-ware)(施釉后二次烧成): 施釉后的高温烧制成品
圆柱形小屋的泥板成型法(视频教程即将上线!)
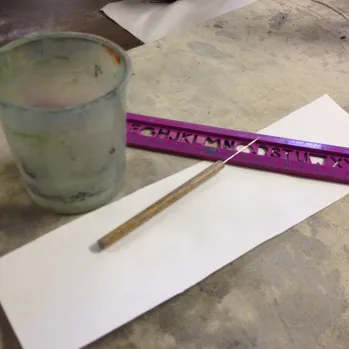
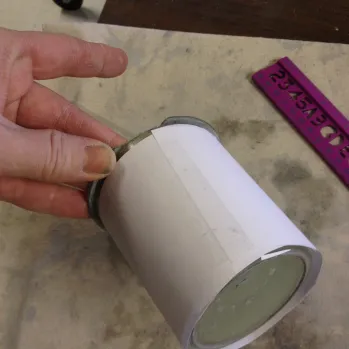
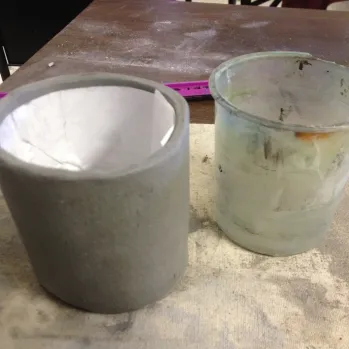
- 裁取一张纸,高度与所用圆柱体(如水杯)一致;将纸张粘贴于圆柱体表面。
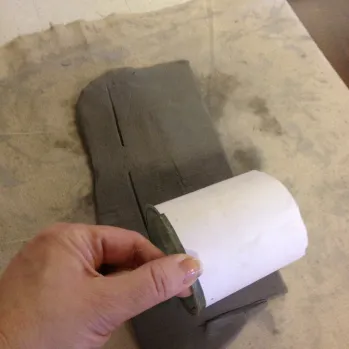
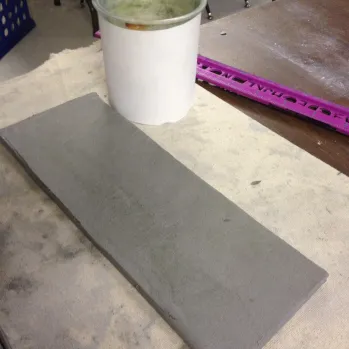
- 使用1/4英寸厚度的限位条,擀压出一张泥板,长度略大于圆柱体周长。
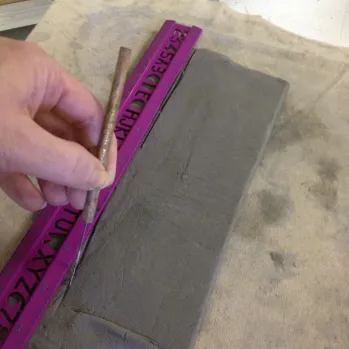
- 切割泥板,并将其卷裹于圆柱体上;预留约1/2英寸重叠部分,修去多余泥料。
- 对重叠边缘进行刮擦并涂泥浆,再压合粘牢。
- 使用塑形工具将接缝处抹平、压实。
- 小心取下泥坯,再用塑形工具将内侧接缝抹平、压实。
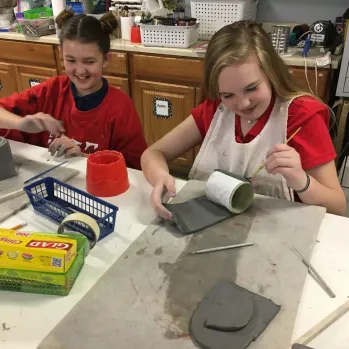
学生创作过程:
塑造小屋
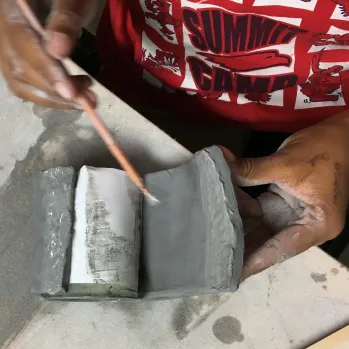
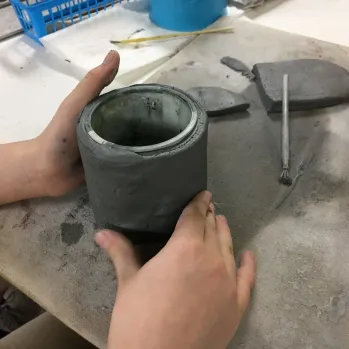
你可以将童话小屋保持基本的圆柱形,也可以将其塑造成圆润的造型。若要塑造圆润造型,请将圆柱体侧放于掌心。用沾湿的手指轻柔地在小屋内壁揉擦塑形。从内部施加更大压力,可使侧壁向外鼓起,形成圆润结构。操作时务必小心——确保陶泥既不过湿也不过薄! 若使用滚筒或模板片添加肌理,则需在裁剪出模板前,先将肌理压印到泥板上。你也可以在小屋组装完成后,再添加手绘肌理或简单的压印肌理。
门窗与底座
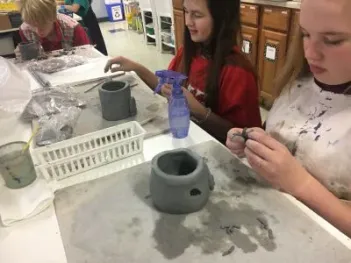
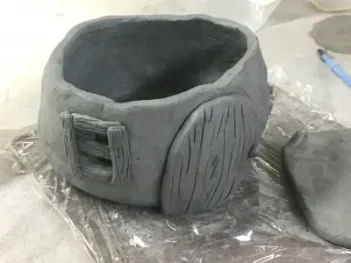
完成小屋理想造型后,即可开始添加门窗。方法与我们制作陶泥城堡时相同。视频教程:带护城河与玻璃珠的陶泥泥板城堡——第四部分:为城堡添加门、窗及窗饰
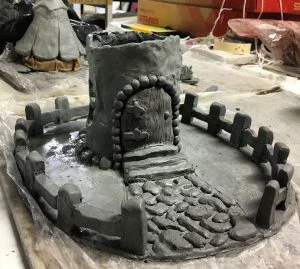
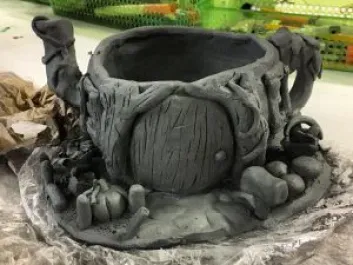
底座可设计为平坦式,亦可设计为山坡式。
平坦式底座: 擀开一块大于小屋尺寸的泥板。确定小屋在底座上的位置后,刮擦并涂泥浆,将小屋粘接到底座上。
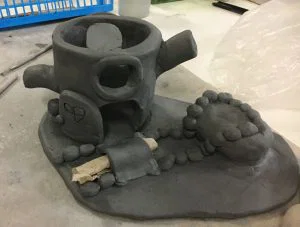
山坡式底座: 擀开一块大于小屋尺寸的泥板。取一只塑料碗,并在碗面铺一层纸巾或保鲜膜,以防粘连! 将泥板覆于碗上,轻轻按压,直至其贴合碗的弧度成型。确定小屋在底座上的位置后,刮擦并涂泥浆,将小屋粘接到底座上。请在底座下垫着碗,静置干燥至少1天。
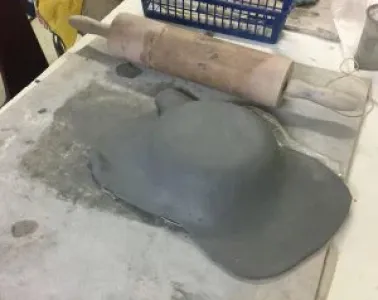
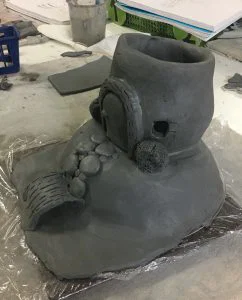
添加装饰元素(围栏、小径、植被、池塘与水景)
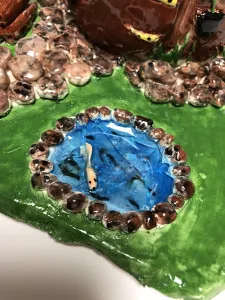
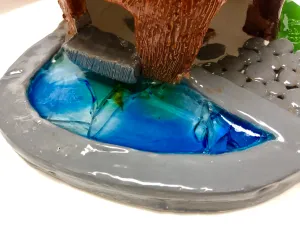
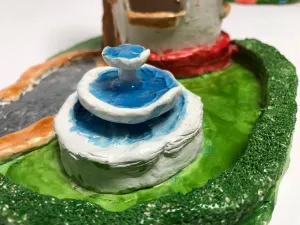
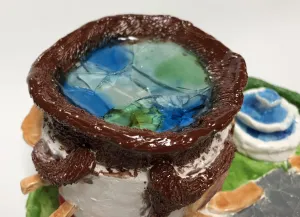
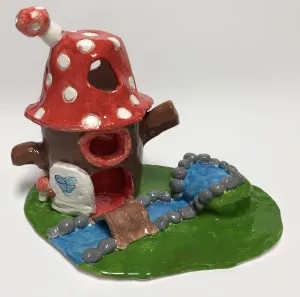
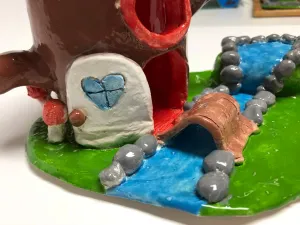
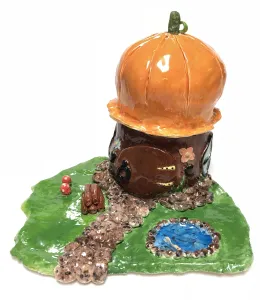
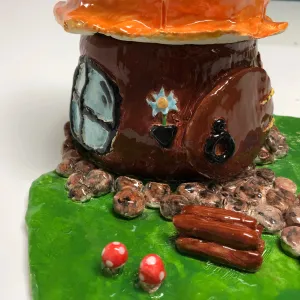
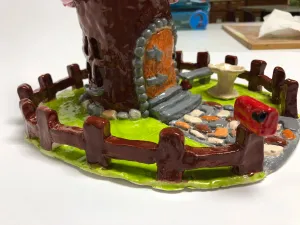
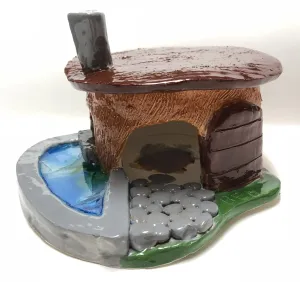
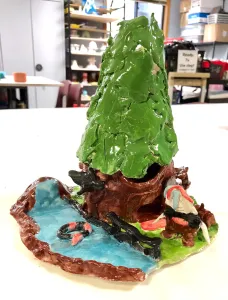
通过添加围栏、桥梁、草地、小径、石块、灌木、树干与花朵等特色细节,完成整件作品。你还可以在设计中加入某种水景元素,例如溪流、池塘、喷泉或护城河。若想用玻璃珠模拟水面效果,则必须构建一个密闭坚实的结构来盛装玻璃珠,以确保烧制熔融时不会泄漏。换言之,结构不得存在任何缝隙或空隙,须将玻璃珠牢固包裹其中。
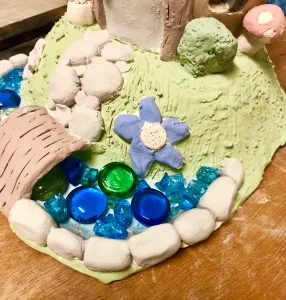
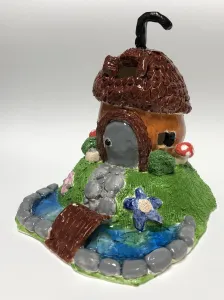
全部完成后,在作品底部或小屋侧面刻上你的姓名,并置于窑房标有你姓名与今日日期的托板上晾干。底座下的碗需保留1天。随后用保鲜膜松散包裹,继续阴干2–3天;之后取下保鲜膜,再彻底阴干5–10天,直至所有水分完全蒸发。
上釉与玻璃珠
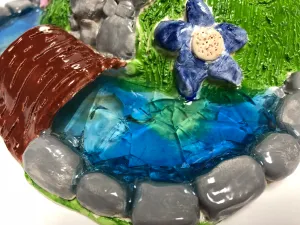
将小屋及底座(底部除外)全部上釉。水景部分请选用水彩蓝色(浅蓝或深蓝)、蓝绿色釉料。若你已构建出可盛装玻璃珠的水景结构,我将在入窑前为你添加玻璃珠。
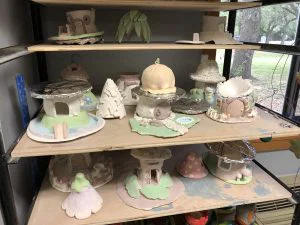
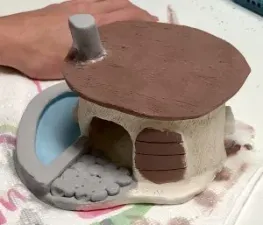
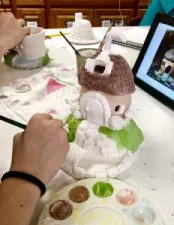
完成作品
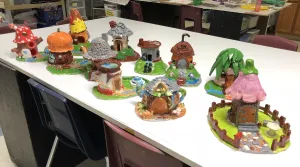
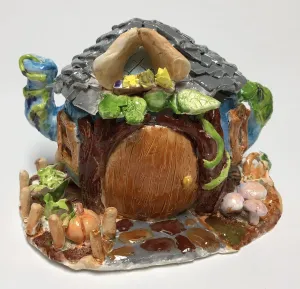
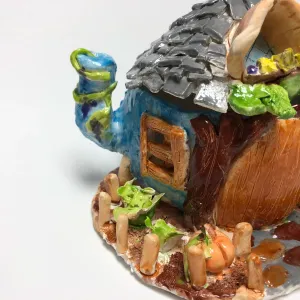
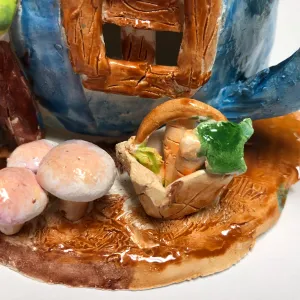
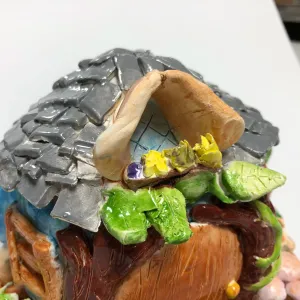
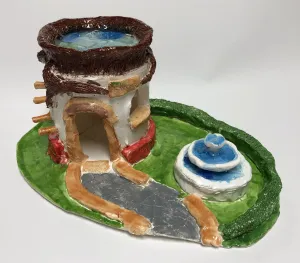


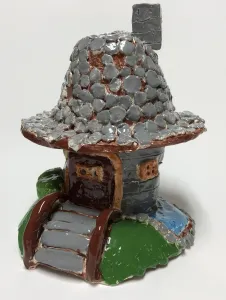
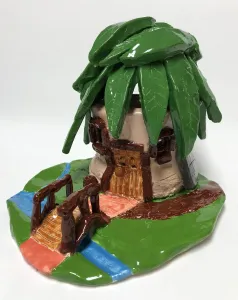
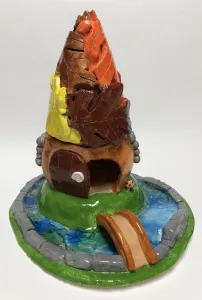
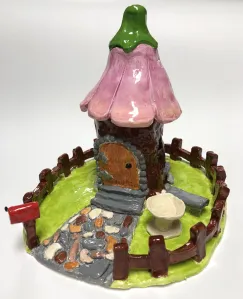
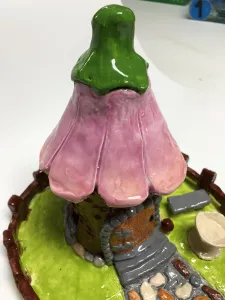
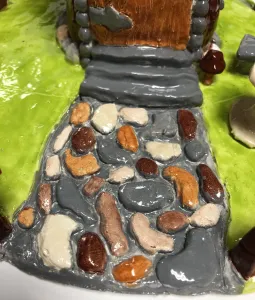
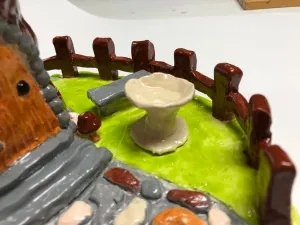



*亚马逊联盟链接——我仅推荐自己实际使用且真心喜爱的产品!
如你选择使用本博客中的任何内容(图片、照片或文字),请务必回链至与我一起创作艺术!
Clay Fairy House and Gnome Homes with Glass Beads
Original: https://createartwithme.com/clay-fairy-house-and-gnome-homes-with-glass-beads/
Date: 2018-05-25
Author: Michelle East
Categories: 6th Grade, Art Lessons, Ceramics Lessons, Ceramics Slab Construction Lessons, Featured, HS Art, MS Art, Sculpture Lessons
Tags: blue glass beads, ceramic fairy house, ceramic lesson, clay fairy house, Clay Lesson, fairy houses, glass bead, glass beads in kiln, glass beads melt for water, glass for water, gnome homes, mayco glaze, middle school art lesson, ms art clay, Slab Construction
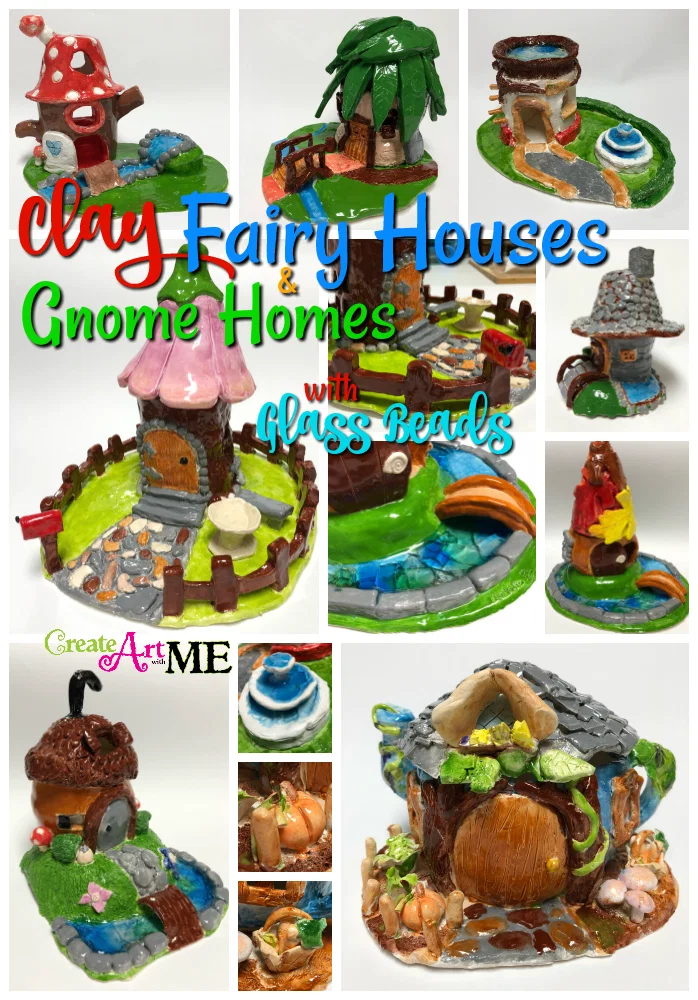
Ceramic fairy houses have been part of my middle school art lesson plans for many years, but this year I wanted to kick it up to a higher level and stretch their clay hand-building skills! To do that we added a couple major components to the existing requirements of the project: it must have a base 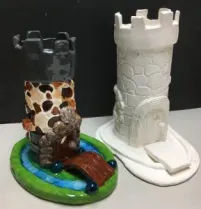 (flat or on a hill) and it had some type of water feature (fountain, pond, birdbath, etc). We added glass beads into the closed structured water features like we did with our Clay Castles with Moat and Glass Beads project.
Objectives:
- Students will be able to define the given clay vocabulary.
- Students will learn slab construction and hand building techniques.
- Students will create an original clay house demonstrating good craftsmanship using slab and hand-building techniques.
- Students will draw at least two preparatory sketches of ideas for the house, base, and water feature.
- Students will give the appearance of water by adding glass beads to water features that are structured to hold the beads.
Supplies: Sax Low Fire Moist Earthenware Clay, small cylinder to roll slab onto for house (we used our water cups, but you could use paper towels rolls that were cut down), ceramic sculpting supplies-Sculpt Pro 15 Piece Pottery and Sculpting Art Tool Set, Masonite panels covered in canvas & secured, Mayco Stroke & Coat Glazes-(2oz set) or Pint Set A or B
Preparation:Wedge the clay into large grapefruit-size balls OR slice clay from block 1.5″ thick then cut in half for the house and a 1/2″ thick for base, two per child for the base and the house (plus a few extra).
Delivery:
Ceramic Techniques & Vocabulary:
- Hand-building: building pots using the only the hands and hand-held clay tools
- Slab: clay is rolled into thin sheets or slabs and then formed into shapes or forms.
- Pinch: shaping clay by inserting the thumb of one hand into the clay and lightly pinching/ pressing with the thumb on the inside and fingers on the outside while slowly turning the clay to enlarge the center opening of the clay.
- Coil: creating ceramic forms by rolling out coils of clay and joining them together by the slip & score method.
- Scratch and slip: (DEMO) To attach two pieces of clay, scratch the surfaces to be joined several times with a needle tool and apply a small amount of slip or water on both sides. Press the surfaces together. Be sure not to over-wet the clay, which will cause it to become too soft and slimy. This is important to do because as slabs dry they tend to pull apart and pieces could pop apart or off. To make an even stronger bond, roll a very thin coil of clay and push it inside the joints where the walls meet.
- Demo Subtractive and Additive methods. Demonstrate how to cut windows & doors
Stages of Dryness
- Wet or plastic: very wet and mold-able or shape-able (will slump over)
- Leather hard: wet but slightly stiff (a wall can stand up with out slumping), can be carved into (subtractive technique) and clay can still be added on with score and slip method
- Green-ware or Bone dry: all moisture is dried out, will break if you try to bend it
- Bisque-ware (first firing): stone hard
- Glaze-ware (second firing with glaze): firing with glazes
Cylinder House Slab Construction: (Video Tutorial coming soon!)
- Cut a piece of paper the height of the cup (or whatever you are using as a base shape). Tape the paper onto the cup.
- Roll out a slab using 1/4″ slats that is slightly longer than the length of the cup.
- Cut the slab and roll it onto the cup. Allow about 1/2″ overlap and trim the excess clay.
- Score and slip the clay together.
- Use modeling tools to smooth the joint together.
- Remove the clay from the cup and use the modeling tools to smooth the inside joint together.
Students Working:
Shaping the House
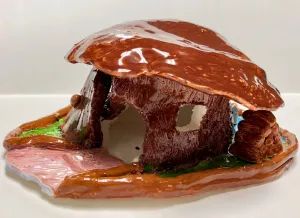
You can either leave the fairy house in the basic cylinder shape or you can give it a rounded shape. To give the house a rounded shape, place the cylinder so the side is resting in the palm of your hand. GENTLY rub the inside of the house with wet fingers to shape it. Putting more pressure from the inside will bulge out the side and create the rounded structure. Do this carefully-make sure you don’t get your clay too wet or too thin! If you are applying texture from a roller or sheet, you need to apply it to slab before cutting out templates. You can add drawn texture or simple imprinted texture after it has been constructed.
Doors, Windows and Base
After you have the desired shape of the house, start to add windows and doors. Follow the same method as we did on the clay castles. Video Tutorial: Clay Slab Castle with Moat and Glass Beads- Part Four: Add Door, Windows, and Window Extras to Castle
The base can either be flat or on a hill.
For a flat base, roll out a slab larger than your house. Figure out where you want your house to be and score and slip it to attach it to the base.
For a base with a hill, roll out a slab larger than your house. Get a plastic bowl and place a paper towel or a piece of plastic wrap on top of it so it doesn’t stick! Lay the slab on the bowl and gently press it down until it molds to the bowl form. Figure out where you want your house to be and score and slip it to attach it to the base. Keep the bowl under the base until 1 day after you let it start to dry out.
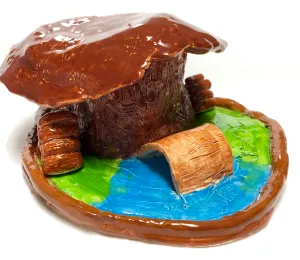
Finish the piece by adding extra special elements like fences, bridges, grass, paths, stones, bushes, logs, and flowers. You also can add some type of water feature to the design. It can be a stream, pond, fountain, or moat. If you want to use the glass beads to look like water you MUST form a solid enclosed structure that will hold the beads so that when they melt they will not leak out. In other words, there can be no gaps or spaces so that the beads are held securely in the structure.
When completely finished, scratch your name into the piece (on the base or the side of the house) & set on a bat labeled with your name & today’s date in Kiln room to dry. Leave bowls under bases for 1 day of drying. Loosely wrap plastic wrap around it to dry for 2-3 days. Take plastic wrap off and finish drying for 5-10 days until ALL moisture it out.
Glaze and Glass Beads
Completely glaze the house and base (except the bottom). For water features, apply a water color-blue (light or dark), blue-green. If you constructed a water feature to hold beads, I will add the glass beads before placing in the kiln.
Finished Pieces
*Amazon Affiliate Links- I only link products I use and love!
If you choose to use ANY part of this blog (graphic, pictures or written text), please link back to Create Art with ME!


