陶艺泥板天使挂饰课
原文链接:https://createartwithme.com/ceramic-slab-angel-ornaments-clay-lesson/
日期: 2017年11月8日
作者: 米歇尔·伊斯(Michelle East)
分类: 二年级、三年级、四年级、五年级、课后美术与美术夏令营、美术课程、陶艺课程、泥板成型陶艺课程、小学美术、精选内容、幼儿园至一年级、雕塑课程、肌理
标签: 课后美术班、天使挂饰、陶瓷天使挂饰、陶瓷工艺、泥板天使挂饰、陶艺课、刮擦加泥浆技法
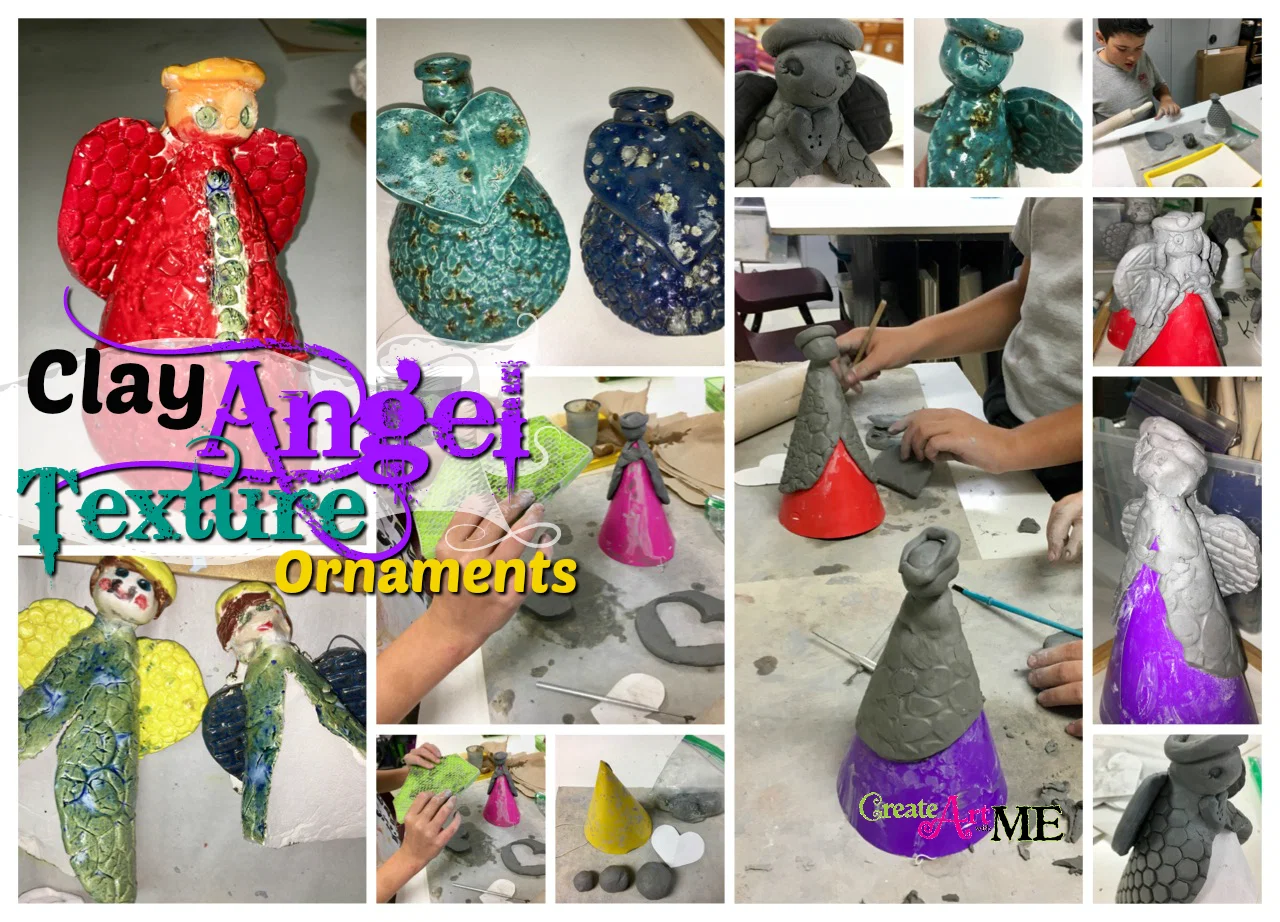
我的课后美术班(学前班至五年级)创作了这些可爱的天使挂饰,灵感源自凯伦·露西德(Karen Lucid)的陶艺天使挂饰。请将全部功劳归于凯伦·露西德!
材料: 生日派对纸帽或坚固圆锥体(高度至少4英寸)、每位学生三团陶土(直径分别为3英寸、1.5英寸与3/4英寸)、约3英寸宽的硬纸板心形模板、釉料、肌理压印板、蕾丝餐巾布或其他可在陶土上压印肌理的物品
*本项目也可使用“克雷奥拉模型橡皮泥”(Crayola Model Magic)或风干陶土制作,完成后以丙烯颜料上色。
教学目标:
- 学生将运用泥板成型法与添加法创作一件陶艺雕塑。
- 学生将学习如何为陶土泥板添加肌理。
- 圣经融合内容:
- 天使们为耶稣降生而赞美上帝(《路加福音》2:13–14 http://bible.knowing-jesus.com/Luke/2/13:“忽然,有一大队天兵同那天使赞美神说:‘在至高之处荣耀归与神!在地上平安归与他所喜悦的人!’”)
- 上帝命令天使看顾我们(《诗篇》91:11 https://www.biblegateway.com/passage/?search=Psalm+91:11&version=NIV:“因他要为你吩咐他的使者,在你行的一切道路上保护你。”)
教学过程:
- 形状是二维的,而形体是三维的。
- 雕塑是三维形体,具有高度、宽度与深度。
- 独立式雕塑(或称“环视式雕塑”)四周皆为空间,通常可从各个角度完整观看。
- 展示参考图片——即我们将创作的挂饰范例(取自凯伦的Pinterest主页)。
- https://www.pinterest.com/pin/445012006908418244/
- https://www.pinterest.com/pin/445012006909032440/
- 陶瓷工艺流程: 制作陶艺作品 → 完全阴干5–7天(直至“素坯干”状态)→ 窑烧(素烧)→ 施釉 → 再次窑烧(釉烧)
- 陶艺词汇:
- 泥板(Slab): 用手捏塑方式,将擀开的扁平陶土片作为墙体,构建陶艺形体。
- 泥浆(Slip): 呈泥浆状的液态陶土,用于粘接两块陶土。
- 刮擦(Score): 在陶土表面刻划纹路,以便粘接两块陶土。
- 刮擦加泥浆技法(Score and Slip Technique): 教师示范 “刮擦加泥浆”指将两块陶土粘合的一种方法。务必始终采用此法;否则,烧制时部件极易脱落。
- 首先,刮擦陶土:即在待粘合的两个表面刻划出纹路。
- 接着,施加泥浆:即用泥浆(泥状陶土)湿润表面,将其当作胶水使用。
- 然后,按压 两块陶土使其贴合。
- 最后,抹平 接缝处。
操作步骤
教师引导式示范: 教师将演示陶土擀平、添加肌理、刮擦加泥浆技法、用心形模板描画并裁剪“心形”的全过程。
- 给每位学生分发三团陶土(直径分别为3英寸、1.5英寸与3/4英寸)。
-
用最大一团陶土制作天使身体:将其擀成泥板,厚度不超过小拇指粗细;滚动时变换方向,有助于形成圆形。可选:在陶土两侧各放置一根¼英寸厚的木质漆刷柄(木条),以确保擀出的泥板厚薄均匀。
-
添加肌理:使用各类肌理压印板或蕾丝餐巾布等工具,在泥板表面压印肌理。小贴士:向肌理工具喷洒“帕姆”(Pam)不粘油,防止其粘连陶土;将肌理工具覆于泥板之上,用小型滚筒轻压,使肌理印入陶土——注意切勿压得过深。
-
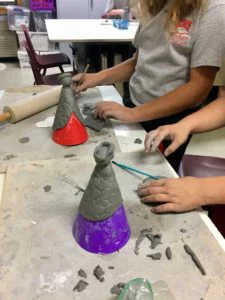
将泥板包裹于圆锥体(生日帽)之上,并在顶部刮擦加泥浆固定。(可选:另取一团陶土捏成心形或圆形,按压于此处——可遮盖泥板接合痕迹。)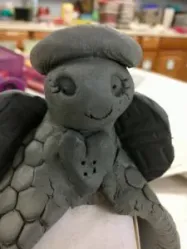
- 将最小一团陶土搓成球状,制成头部。
- 可添加面部、头发、光环等细节(可能需额外提供陶土);用刮擦加泥浆法将头部粘接到身体上。
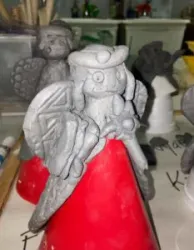
- 用硬纸板制作一个心形模板,用于描画并裁剪天使翅膀;心形尺寸约为3英寸。
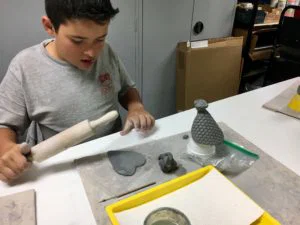
- 将中等大小陶土团擀成圆形泥板(厚度不超过小拇指粗细)。
- 使用针具或回形针描画并裁剪出心形。
- 接着,对心形进行刮擦加泥浆处理,并将其粘贴至身体背面。
- 在心形正面添加肌理。
- 在作品背面写上学生姓名与年份。
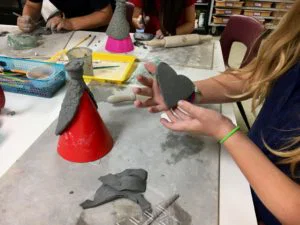
- 用吸管在颈部后方戳一个孔,以便烧成后穿入绳子或丝带悬挂挂饰。
- 让作品阴干5–7天,直至完全“素坯干”。
- 素烧
- 施釉
- 釉烧
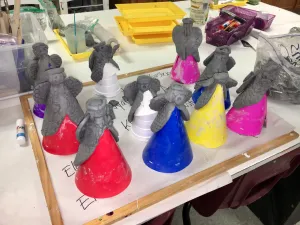
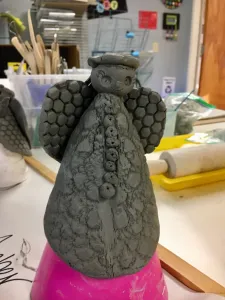
学生作品范例
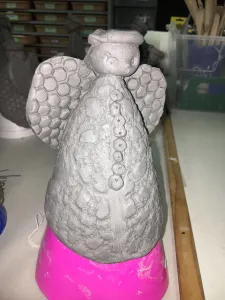
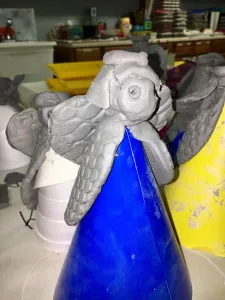
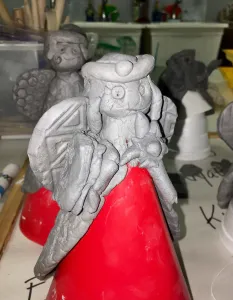
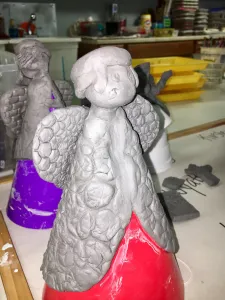
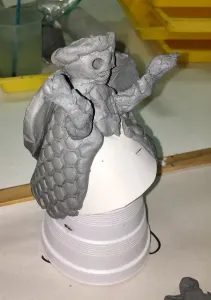
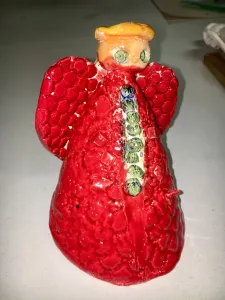
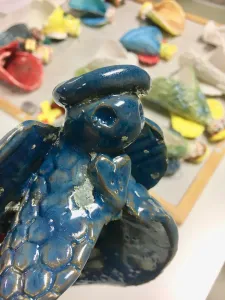
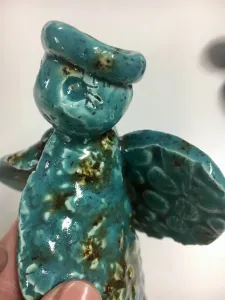
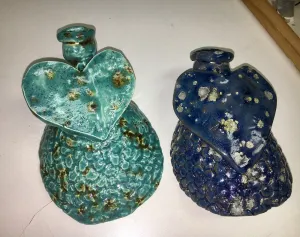
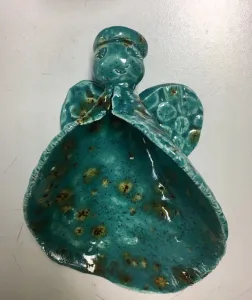
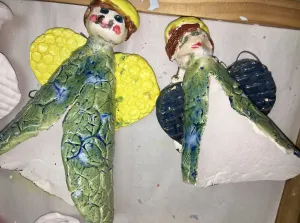
若您选用本教案的任何部分(文字、图示或照片),请务必附上原文链接回溯至Create Art with ME!
Ceramic Slab Angel Ornaments Clay Lesson
Original: https://createartwithme.com/ceramic-slab-angel-ornaments-clay-lesson/
Date: 2017-11-08
Author: Michelle East
Categories: 2nd Grade, 3rd Grade, 4th Grade, 5th Grade, After School Art & Art Camp, Art Lessons, Ceramics Lessons, Ceramics Slab Construction Lessons, Elementary Art, Featured, K-1st Grade, Sculpture Lessons, Texture
Tags: after school art class, Angel Ornaments, Ceramic Angel Ornaments, Ceramic process, Ceramic Slab Angel Ornaments, Clay Lesson, Score and Slip Technique
My after school art class (prek-5th grade) created these adorable angel ornaments inspired by Pottery Angel Ornaments by Karen LucidPlease give all credit to Karen Lucid!
Supplies: birthday party hats or sturdy cones at least 4″ in height, 3 balls of earthen-ware clay (3″, 1.5″ & 3/4″ in diameter)/student, heart template out of card stock about 3″ wide, glazes, texture rubbing plates, doilies or other objects to imprint into the clay
*This project could be done with Crayola Model Magic or Air Dry Clay then painted with acrylic paints.
Objectives:
Delivery:
- Shapes are 2D & Forms are 3D.
- Sculptures are 3D forms. They have height, width and depth.
- Freestanding sculpture or sculptures in the round have empty space all around them and Freestanding sculptures can usually be seen all the way around them.
- View artwork examples of reference pictures for the ornament we will create (from Karen’s Pinterest Page).
- https://www.pinterest.com/pin/445012006908418244/
- https://www.pinterest.com/pin/445012006909032440/
- Ceramic process: build ceramic artwork, let dry completely for 5-7 days (until Bone dry), fire in kiln (Bisque-ware), glaze with ceramic glazes, fire again (Glaze Firing)
- Ceramics Vocabulary:
- Slab: Creating a ceramic form by hand-building walls using flat rolled-out pieces of clay.
- Slip: muddy, liquid clay used to attach two pieces
- Score: to make marks on the clay to attach two pieces
- Score and Slip Technique: Teacher DEMO Score and slip refers to a method of joining two pieces of clay together. It is very important to always score and slip. If you do not, the pieces will likely pop apart when they are fired.
- First, score the clay; this means that you make scratches in the surfaces that will be sticking together.
- Then you slip it; that is you wet the surface with some slip (muddy clay), using it like glue.
- Next, you press the two pieces together.
- Smooth the seams
Instructions
Teacher Guided Demo: The teacher will demonstrate the process of rolling out the clay then adding the texture, score and slip techniques, tracing the heart template, and cutting out the “heart”.
- Give each student 3 balls of clay (3″, 1.5″ & 3/4″ in diameter).
- Create the body of the angel by rolling out the largest ball of clay into a slab-no thicker than their pinky finger. Change the direction of the rolling to help form a circle. Optional: Used ¼” wooden paint sticks (slats) on either side of the clay to ensure the clay when rolled out is not too thin or too thick.
- Texture-use various texture plates or doilies to imprint texture to the slab. TIP: Spray the textures with “Pam” non-stick spray so they won’t stick to the clay. Lay the texture on top of slab and use a rolling pint to press the texture onto the clay. Be careful not to press too deep into the slab.
- Wrap the slab around the cone (birthday hat), slip and score it at the top. (Optional: add a clay shape like a heart or circle & Press on to this area-it will help hide the area where the clay was pressed together.)
- Roll the smallest clay into a ball to form the head.
- Add any extra features like a face, hair, halo-may need to provide extra clay for these items. Slip & score the head onto the body.
- Create a heart template out of card stock to trace and trim out the angel wings. The heart should be about 3″.
- Roll out mid-size clay to a circle (no thicker than pinky finger).
- Use a needle tool or a paperclip to trace and trim heart.
- Next, score and slip the heart to the back of the body.
- Add TEXTURE to the front of the heart.
- Write name and year on back.
- Use a straw to add a hole into the back of the neck, so that after firing a rope or ribbon can be added to hang the ornament.
- Let the pieces dry 5-7 days until bone dry.
- Bisque-ware Fire
- Glaze
- Glaze fire
Student Examples
If you choose to use any part of this lesson (written, graphic or photo), please link back to Create Art with ME!


