金属丝人物雕塑
原文链接:https://thatartteacher.com/2022/12/10/wire-figure-sculpture/
日期: 2022-12-10
作者: Sierra Machado
分类: 长课时教案、雕塑
标签: 美术教育、精选内容、高中金属丝课程、如何制作平衡的金属丝雕塑、如何制作具动态感的金属丝人偶、如何制作金属丝人物、如何制作金属丝人物雕塑、如何制作金属丝雕塑、如何制作金属丝人物雕塑(人形)、金属丝雕塑分步教程、人体解剖雕塑、人体比例人物雕塑、Sierra Machado 美术频道、人物雕塑分步教程、That Art Teacher(那位美术教师)、金属丝人物雕塑、美术课金属丝雕塑、初学者金属丝雕塑
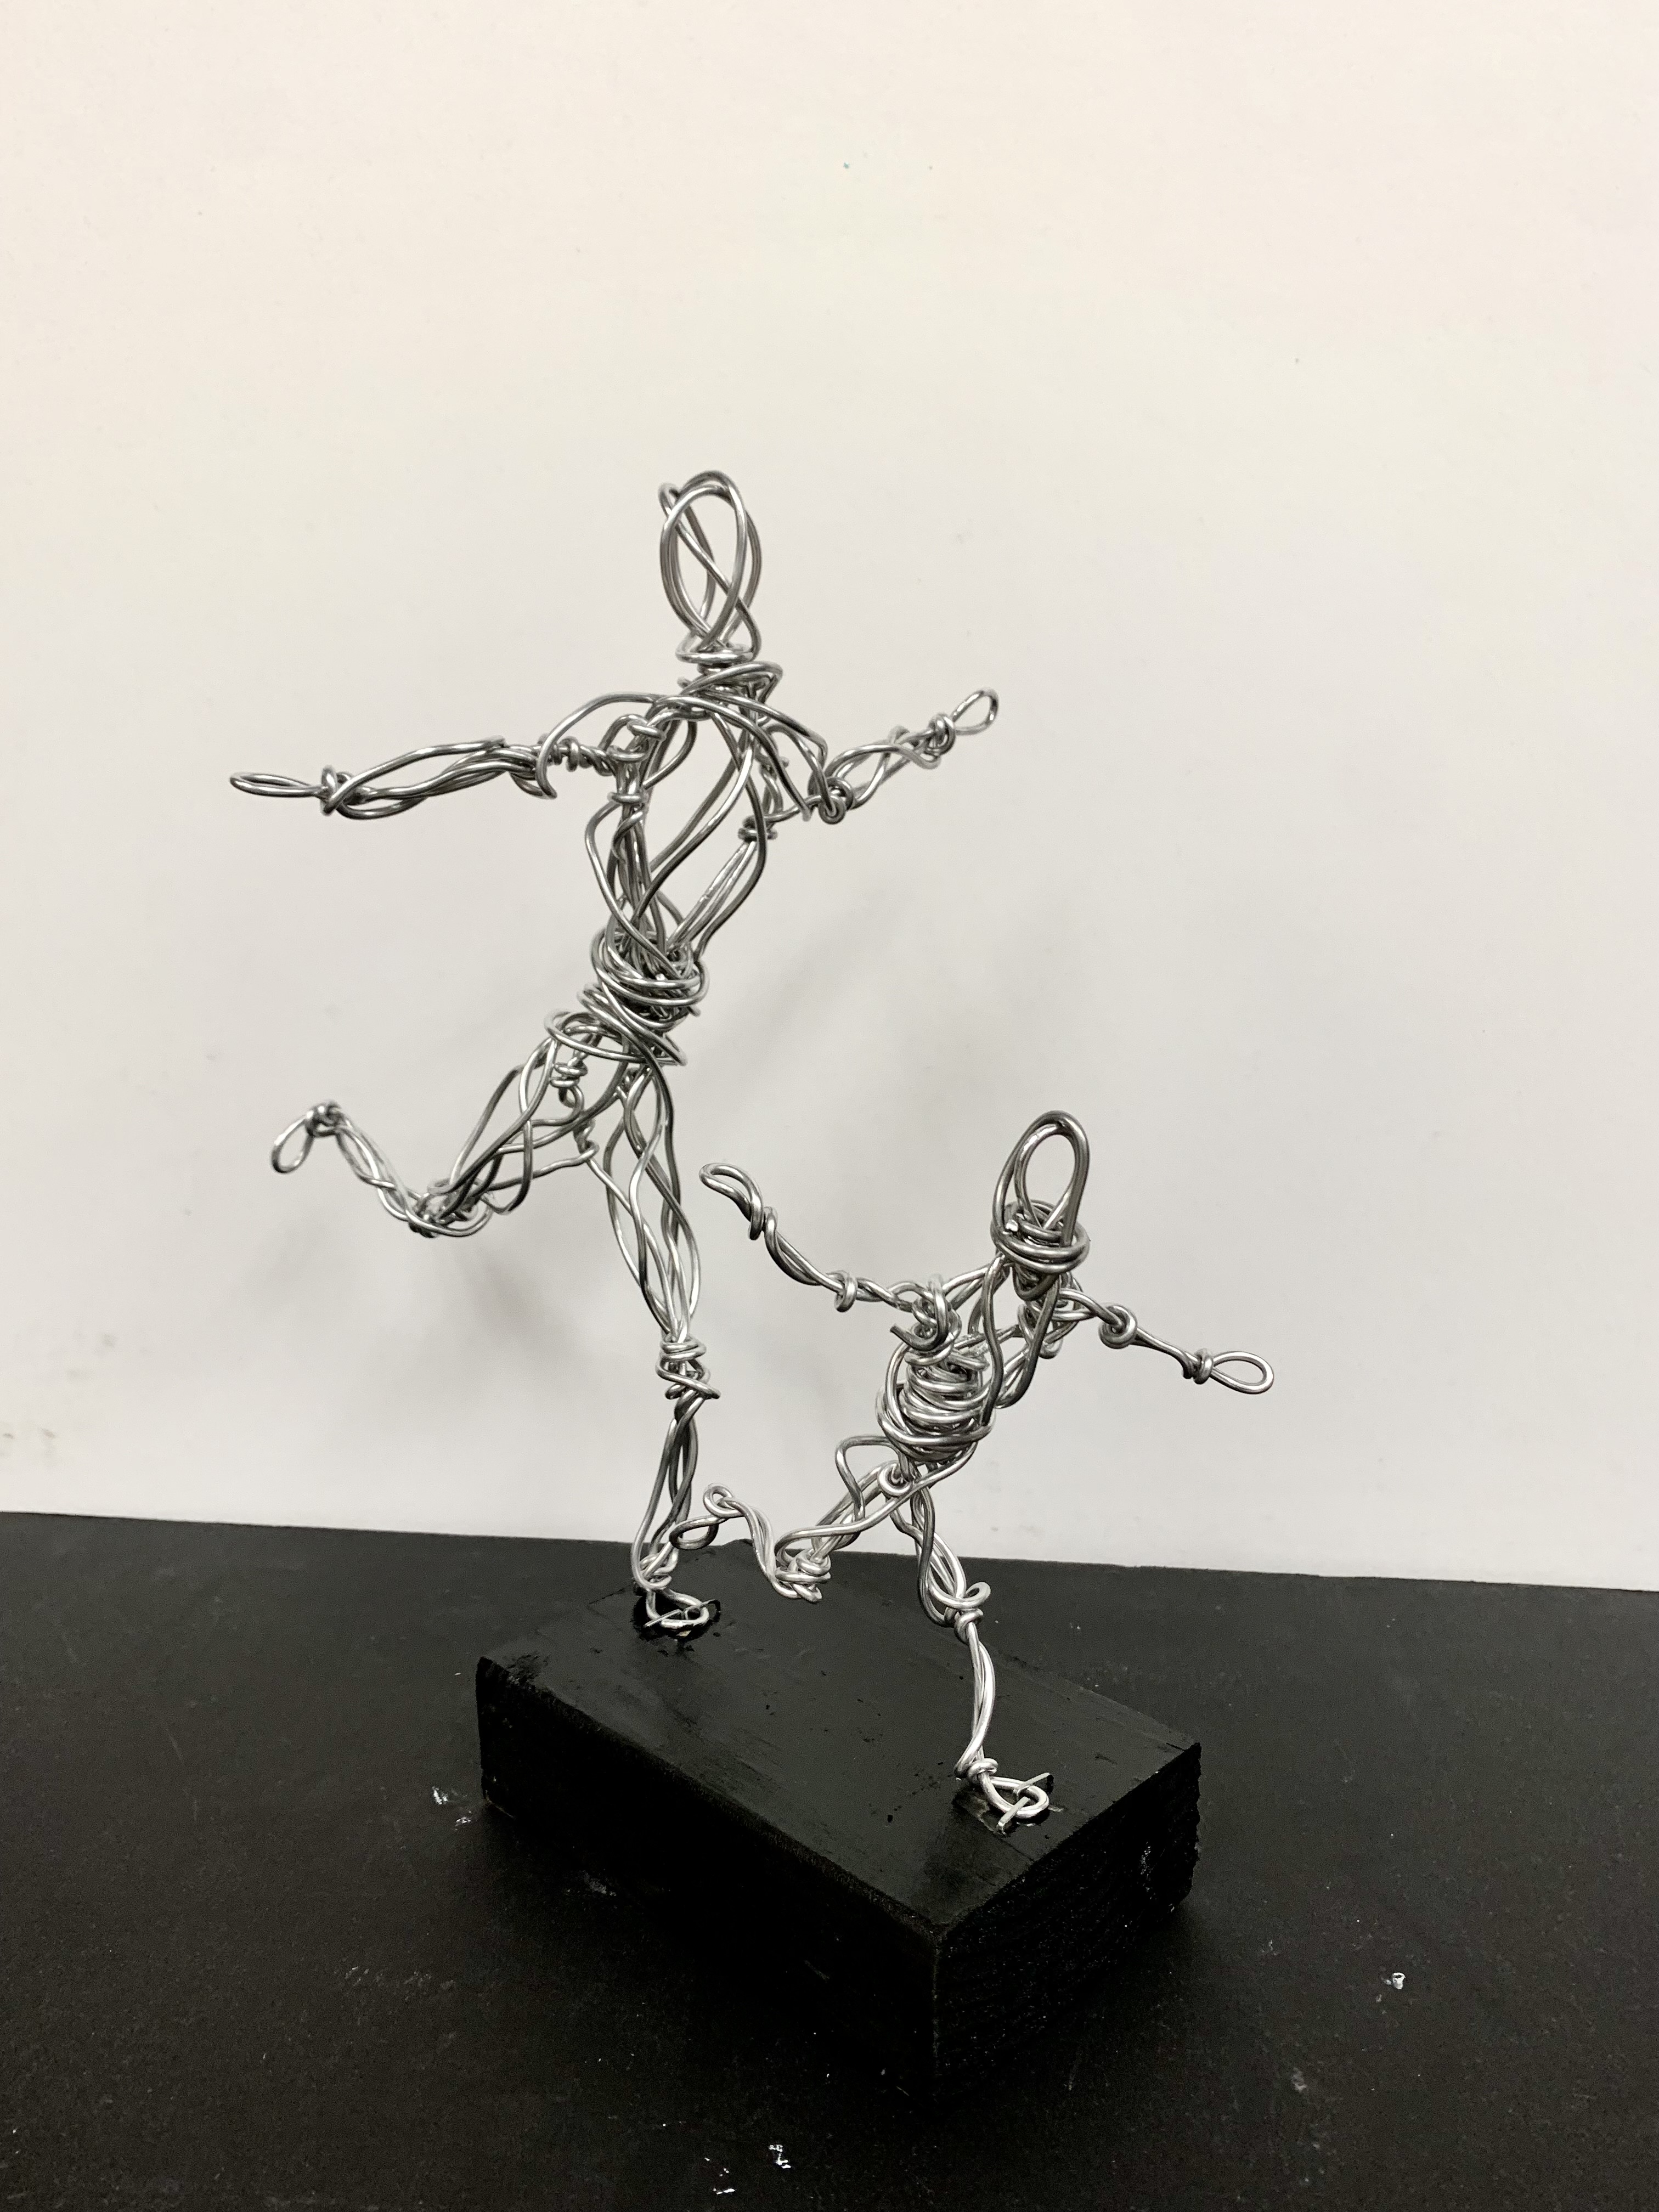
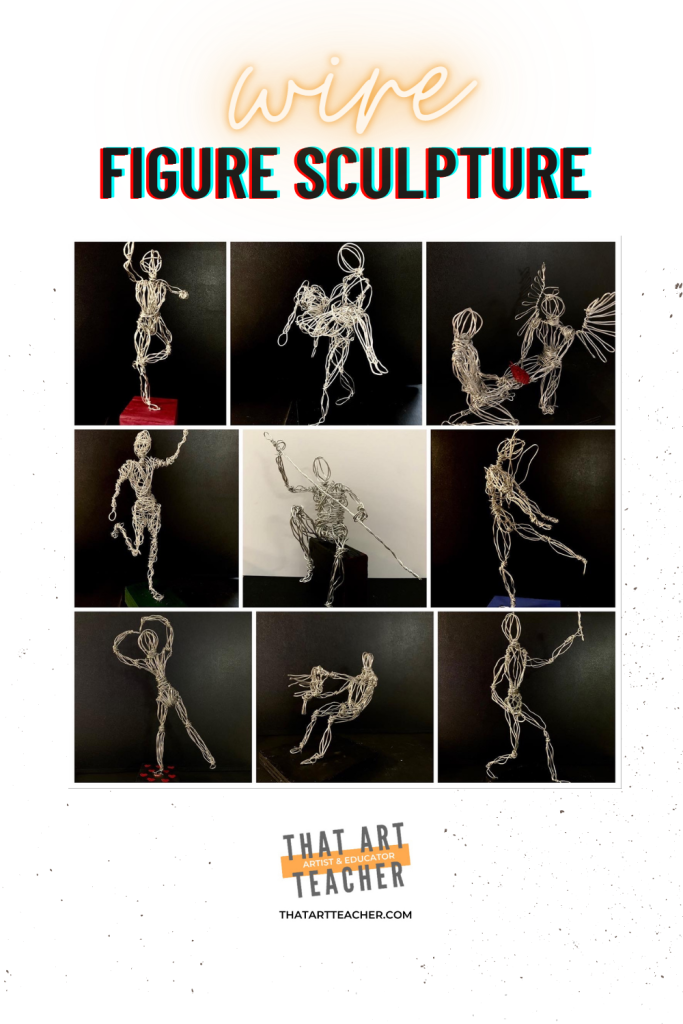
这堂金属丝人物雕塑课是我有史以来最钟爱的课程之一。它富有趣味性、富有挑战性,同时为学生提供了充分表达个人创意的空间。可关联的艺术家资源极为丰富;而以人体为创作主题,更引导学生深入思考“何以为人”。
你是否也像我一样注意力持续时间较短?这段简短视频将在35秒内为你呈现该技法的核心要点。
这个完整教学视频将全程演示本金属丝人物雕塑课的所有步骤。视频已适配课堂教学与Canvas平台,我的学生常在创作过程中反复观看,以回顾操作要点。
金属丝雕塑所需材料
选用合适的金属丝能让创作过程更加愉悦。我已附上我在Blick美术用品网站最常订购的金属丝链接。尖嘴钳可让操作略为轻松,但我本人多数情况下并不使用。我通常用一把重型剪刀,为每位学生一次性裁剪约一码长(双臂完全伸展的长度)的金属丝。若裁剪过长,学生在缠绕身体各部位时极易感到挫败。他们普遍发现:在关键部位随时添加新金属丝,远比仅用一两根超长金属丝更易掌控。

***本文含我真心喜爱并实际用于课堂的推荐产品之联盟链接。若您通过这些链接购买商品,我可能获得佣金,且不会向您额外收取任何费用。感谢您支持这位公立学校教师的副业,让我得以持续提供免费教学资源。
我习惯使用手持式订书机,将金属丝雕塑固定于底座上。订书钉能确保作品稳固、重心平衡,而经涂装后的木制底座外观也格外精致。我校设有木工坊,边角料极易获取。紧急情况下我也曾使用厚泡沫板或聚苯乙烯泡沫板,但木料始终是我的首选。
理解人体比例
本单元伊始,我们首先探讨人体比例与解剖结构。依据学生年级与能力水平,我会安排他们参照图例绘制人体,或在素描本中临摹参考图像。该草图将作为后续雕塑的指导依据;而在绘制或临摹过程中,我们同步讲解人体解剖的关键要点。网络上有大量免费的人体比例与解剖图示资源。此处我不再附上我惯用的图例——因其并非原创,而我近来又过于忙碌(或懒惰),尚未制作专属版本!
姿态与动态
在完成上述比例讨论后,我还会引入现场速写练习。当然,具体实施仍取决于课时安排,以及课程性质是入门级三维设计课,还是进阶雕塑课。另一可行方案是让学生在素描本中临摹姿态速写,以此激活大脑对身体运动方式的理解,并体会动态如何传达情绪。
金属丝人物雕塑家灵感来源
我倾向以“核心问题”法开展教学,常引导学生围绕问题“身为21世纪的青年人是何种体验?”展开创作构思。我们共同赏析Elizabeth Catlett、Alexander Calder与Alberto Giacometti的雕塑作品,并探讨其艺术风格如何受所处时代影响。我近期发现了艺术家Barbara Lich,极欣赏她以金属丝构建人物、巧妙占据空间的手法。Leslie Dill亦是极具启发性的艺术家,其作品蕴含的深层意义更便于开展跨学科教学。以人体为题材的雕塑家不胜枚举,而学生每每乐于迎接“精准呈现人体形态”这一挑战。
开始雕塑吧!
这份免费插图指南将逐部分拆解人体构造,对希望自主创作、曾缺席课堂讲解或在教师示范环节遇到困难的学生尤为实用。
Wire-Figure-Illustrated-Steps-1免费下载!
学生初次接触金属丝雕塑时难免紧张,尤其当对象是辨识度极高的人体时。因此我们统一起步,我借助心爱的Elmo实物投影仪进行分步示范。十年前,在拥有这台“人生挚爱”之前,我常手持自己的金属丝雕塑满教室走动,宛如游戏节目的气氛带动者。我们从头部开始:缠绕2–3圈,塑成椭圆形。每位学生的成果自然略有差异,但我力求引导大家保持相近尺度。
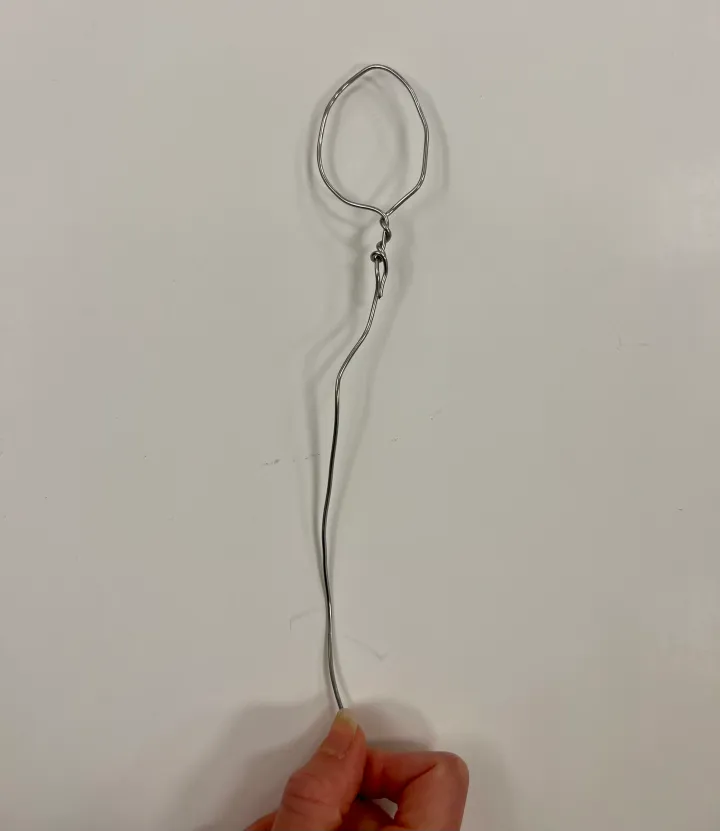
接下来是躯干。我们参照比例指南,将躯干长度塑约为头部长度的两倍,整体呈三角形。务必牢固缠绕金属丝2–3圈,打紧结。若缠绕松动,躯干将难以维持形态。
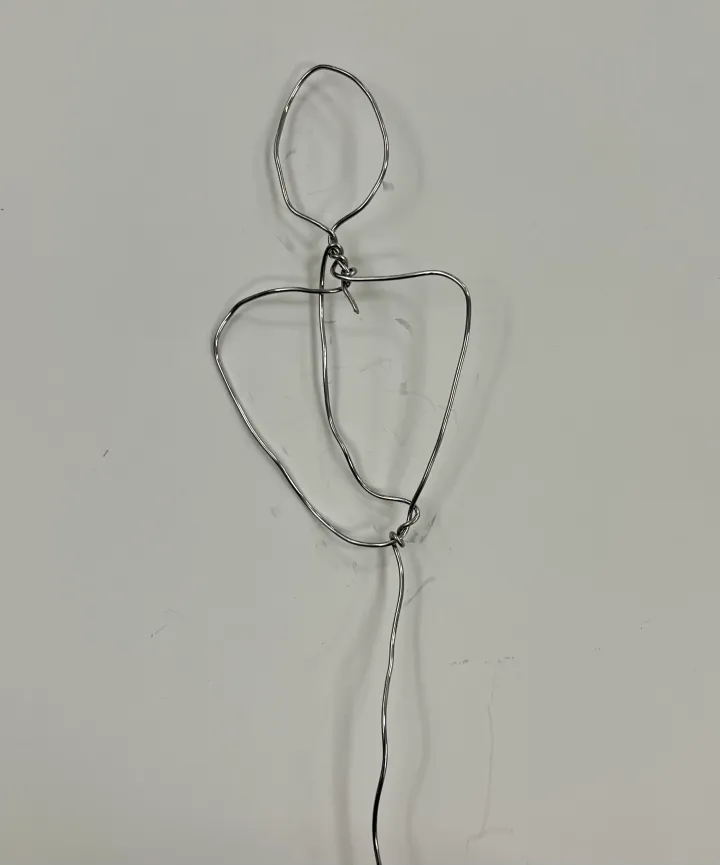
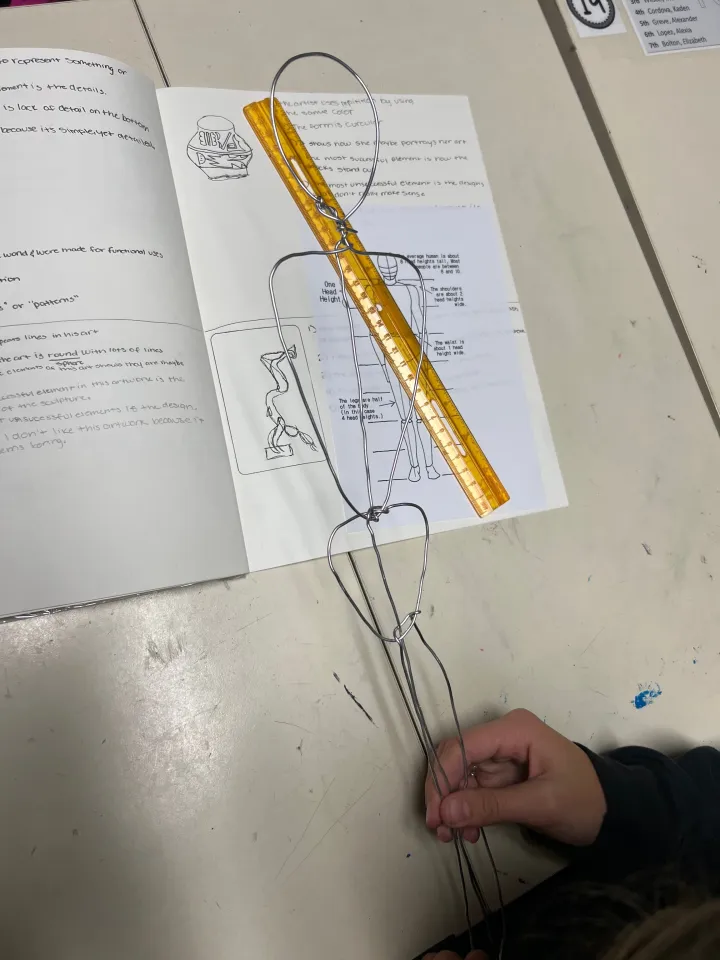
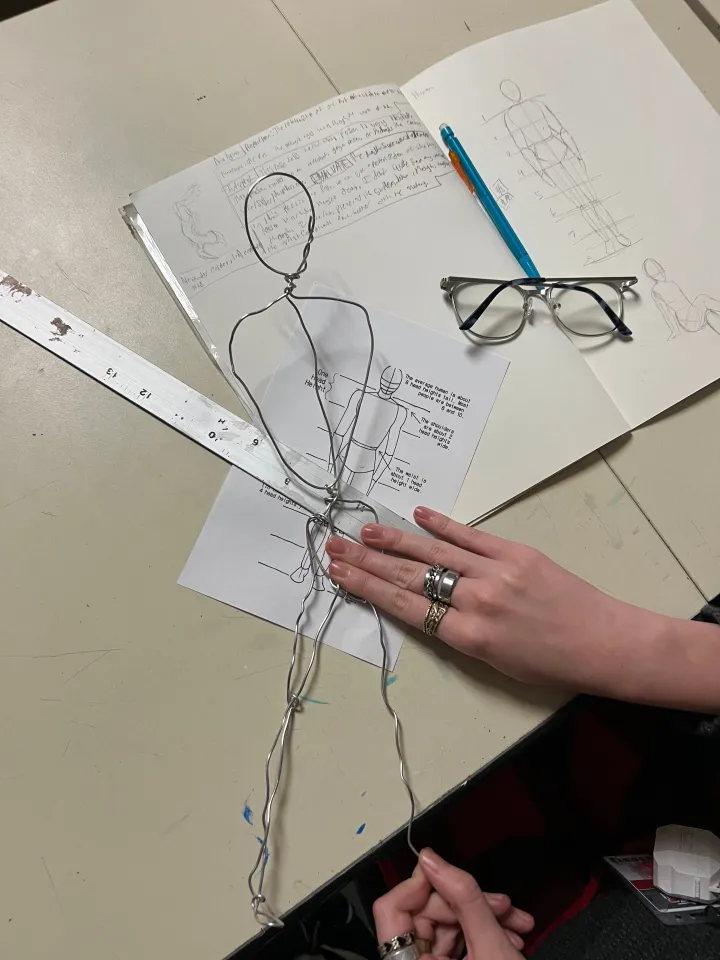
接下来是骨盆带,这个词组大概是我这辈子最不喜欢的组合了。我把它称作“蝙蝠侠比基尼”,因为这总能引得学生发笑,也立刻在他们脑中形成一个视觉形象。我们谈论的其实是腹股沟和臀部区域;以自信又幽默的方式率先切入这个话题,能抢在青少年大脑自行浮想联翩之前掌控课堂对话的节奏。这一区域,学生一旦向下画到腿部,就容易出问题。它同样呈三角形,但尺寸只有躯干的一半,长度与头部一致,比例也需大致相当。
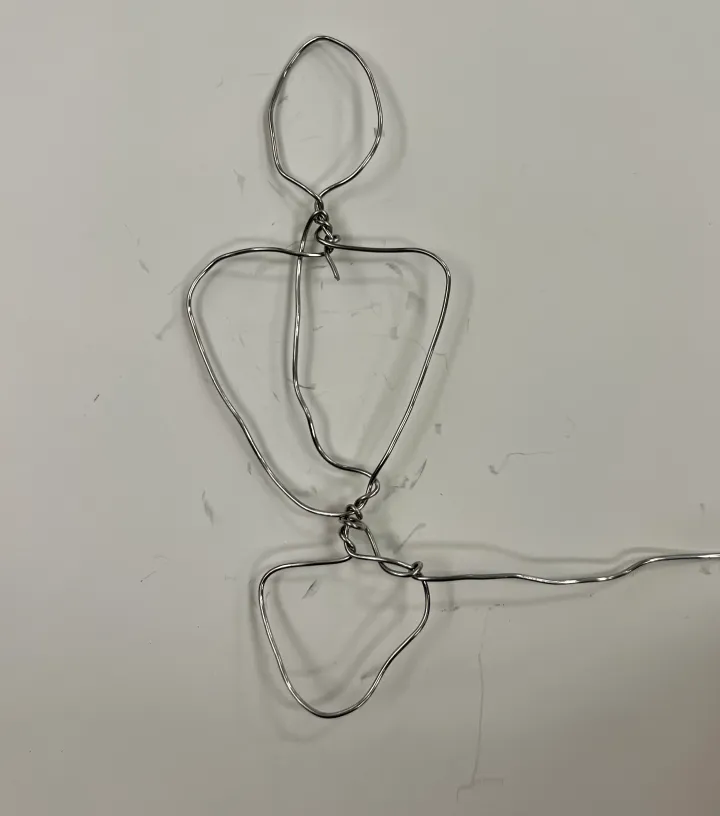
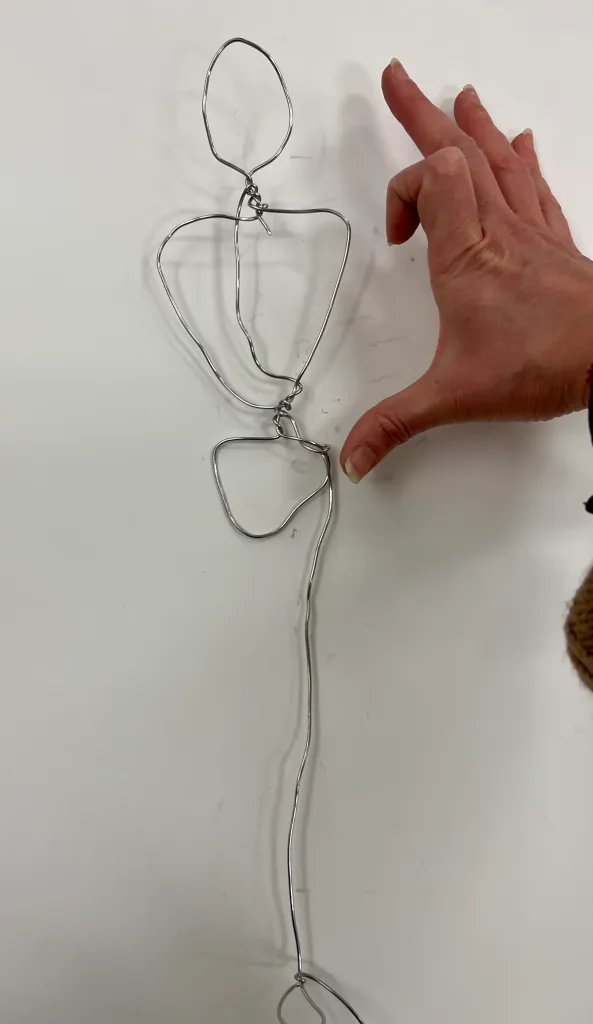
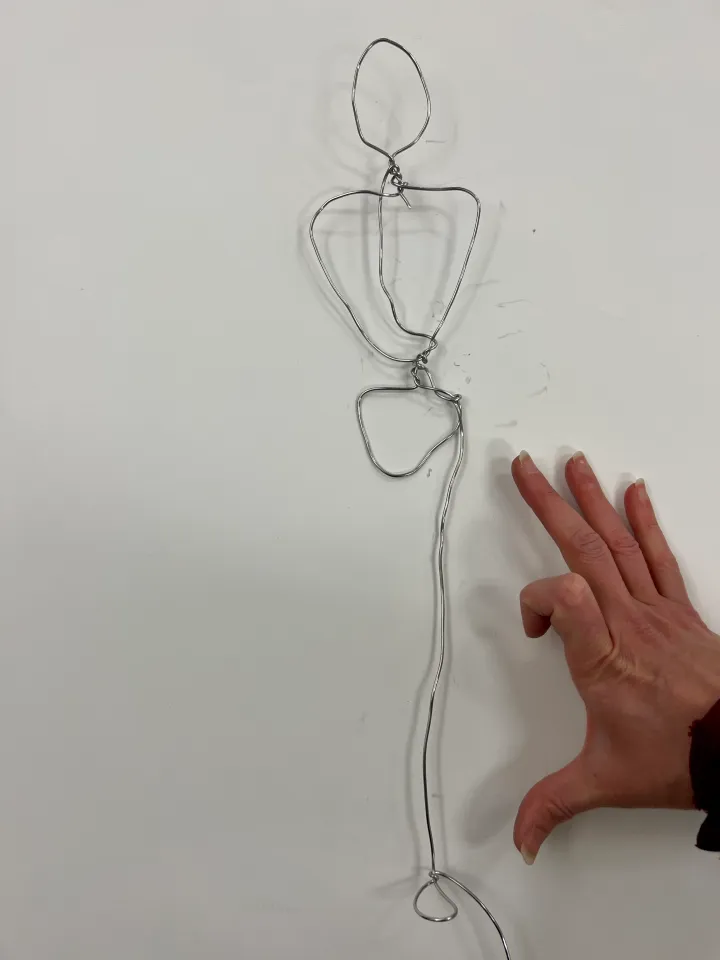
上半身完成后,便开始逐条塑造腿部。我通常从三角形顶点向下延伸,或从髋部向下延伸至脚部。我们拿出直尺,测量从头顶到“蝙蝠侠比基尼”三角形宽部(即髋部)的距离。信不信由你——而许多学生确实不信——髋部到脚底的长度恰好等于人体总长的一半。乍看之下,双腿竟占身体如此大比例,的确令人惊讶;但事实就是如此。
这是雕塑中一个关键的比例节点,我会逐一进行目视核查。学生常把腿部做得过短。此时我会问:“你量过了吗?”并反复强调:务必在进入下一步前确认长度。若之后才发现错误、不得不拆开铁丝重来,那可真够受的!我自己就经历过无数次铁丝失败。
比例核查
有时,即便已演示并让学生对照素描本中的比例指南自查,仍有学生怀疑该比例,最终仍将腿部做短。有人会说:“我的雕塑是坐着的,所以腿自然更短。”这恰恰是个绝佳契机,引出关于人体骨架的讨论:无论身体处于何种姿态,骨骼结构本身绝不会改变。
这也是探讨人类自我施加的身体标准的良机。我们会讨论“健全身体”的含义,以及个体之间比例差异的合理性。我成长于一位残障父亲的家庭;目睹父亲以轮椅代步时自称为“无效者”(in-valid,他为自己创造的词),让我对身体敏感性格外警觉。探索畸形、残障及对自身身体的接纳,是我个人艺术创作中极为重要的主题。我希望学生能质疑何为“正常”,并意识到自己的身体如何在现实世界中行动与存在。
倘若我已演示、讲解,而学生仍在此问题上卡住,我通常只说一句“好”,便继续推进。学生最好的学习方式,正是亲自动手、并在实践中犯错。当他们看到其他人的雕塑呈现出准确的骨骼框架,而自己的作品却略显失衡时,往往终将自行领悟(只是时间早晚的问题)。
腿部长度确定后,我们在末端绕出一个小环作为脚部,并在踝关节处缠绕2–3圈。接着,依据比例指南,找到腿部中点位置,同样缠绕2–3圈,塑出膝关节。最后,将腿部铁丝连接至骨盆带——可接在三角形中心顶点处,具体取决于腿部铁丝的起始位置。此处应较粗壮,以呈现大腿形态。有时学生仅从三角形顶点出发,单侧完成整条腿的塑造。我称之为“单腿综合征”,必须在制作另一条腿前予以调整。
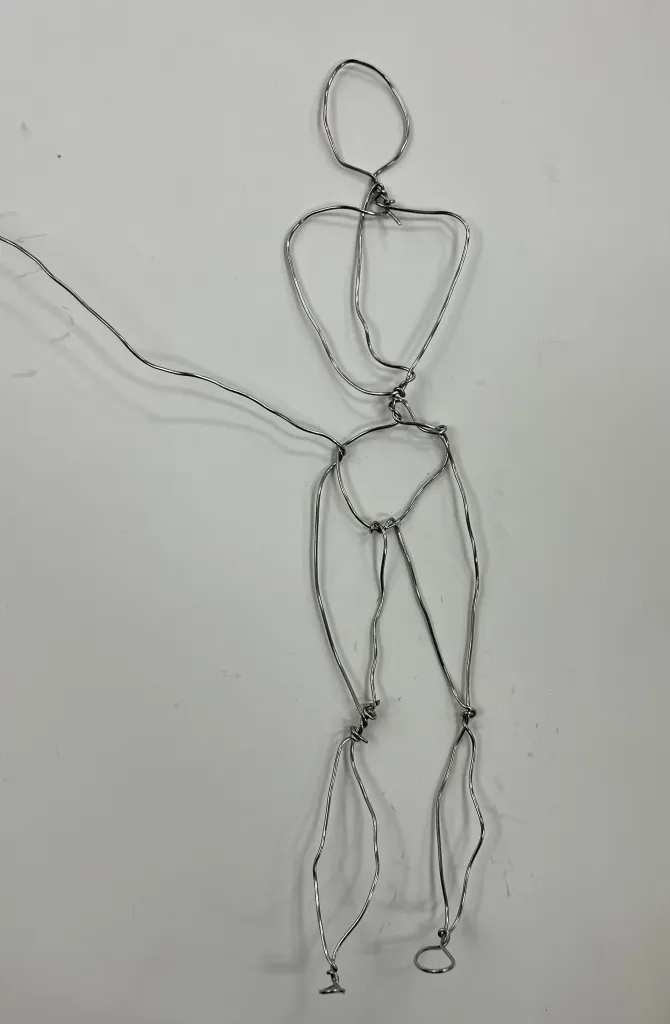
这对学生而言是个令人满足的阶段,因为他们常能让雕塑真正立于双脚之上(你懂我双关的意思吧)。依据铁丝末端位置,我们再反向穿过腰部与躯干,塑造双臂。我建议在每个关键节点处都绕出线圈。此时需提醒学生:待骨架完成后,我们将为其添加肌肉体积,因此这一步实为该过程的开端。我们通常在腰部绕圈,并在颈部或构成躯干的大三角形一侧绕圈。
此时我还须提醒学生:切勿在同一部位反复过度缠绕铁丝。例如,若始终在颈部绕圈,颈部便会显得异常粗壮。平衡至关重要!
随后我们再次经由骨盆与躯干反向穿行,绕圈塑出肩部与手臂。将铁丝穿过三角形一侧的宽部,并将手部线圈绕至大腿中部。
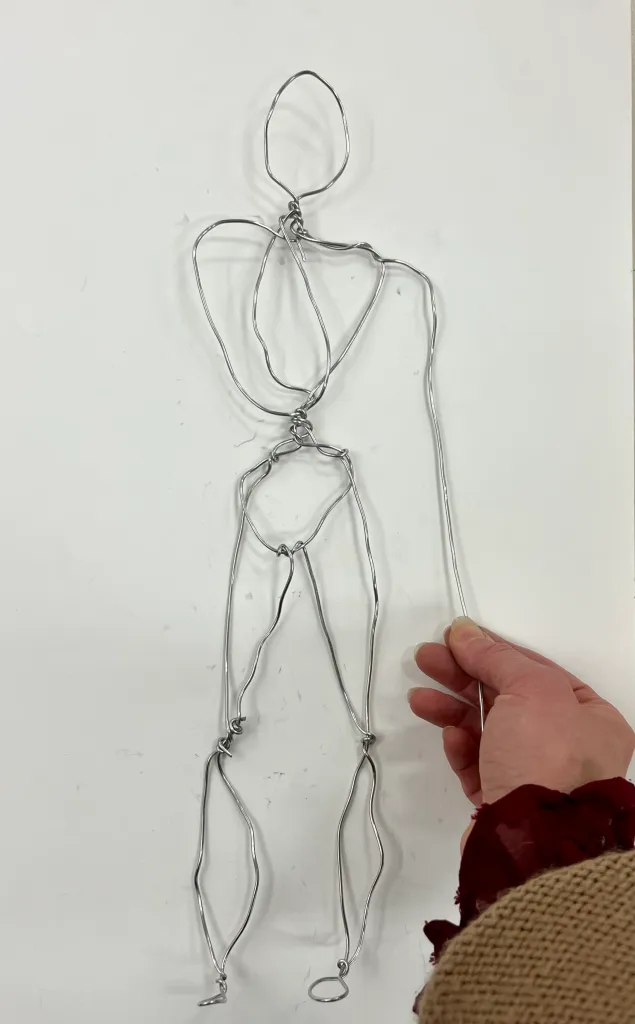
在腿部中点绕一圈,再连接至三角形上、略低于肩部的位置。你可根据希望雕塑呈现的肌肉发达程度,决定增加或减少缠绕量。
添加形体与肌肉结构
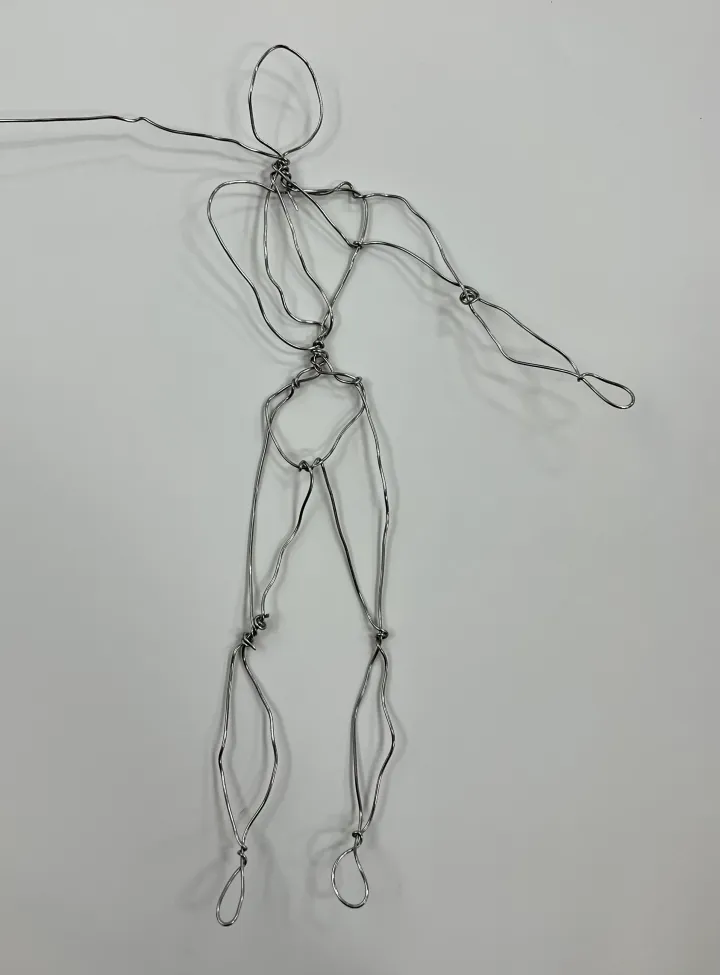
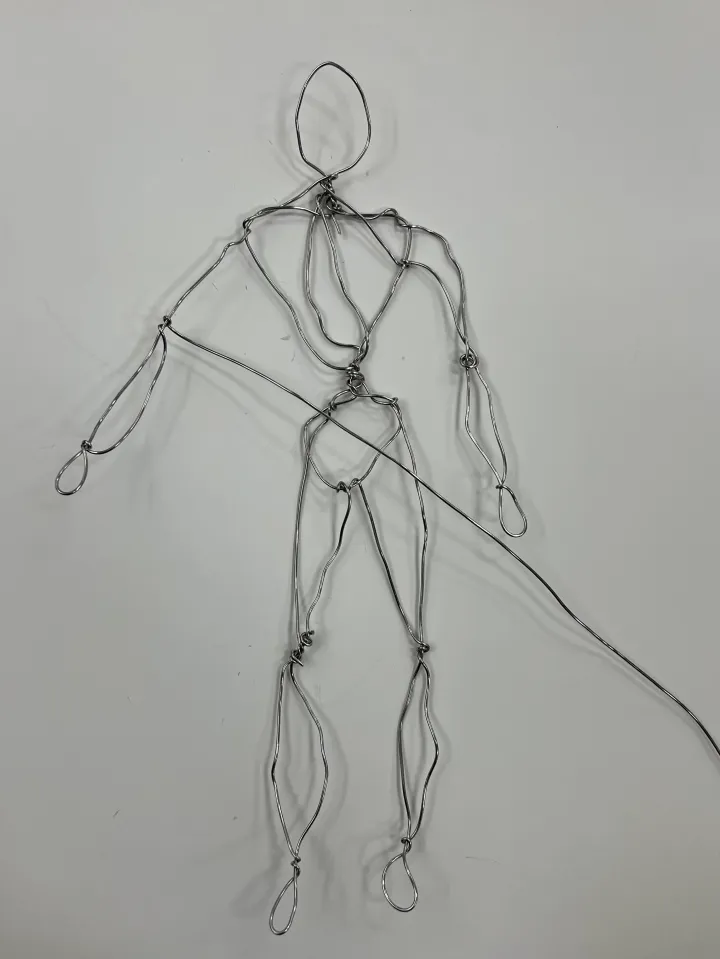
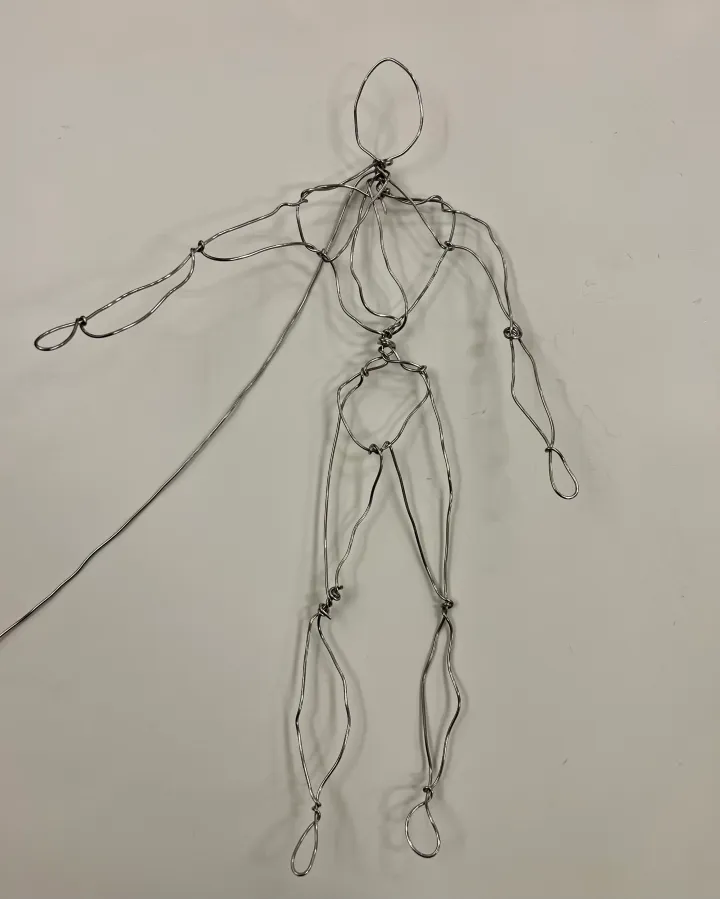
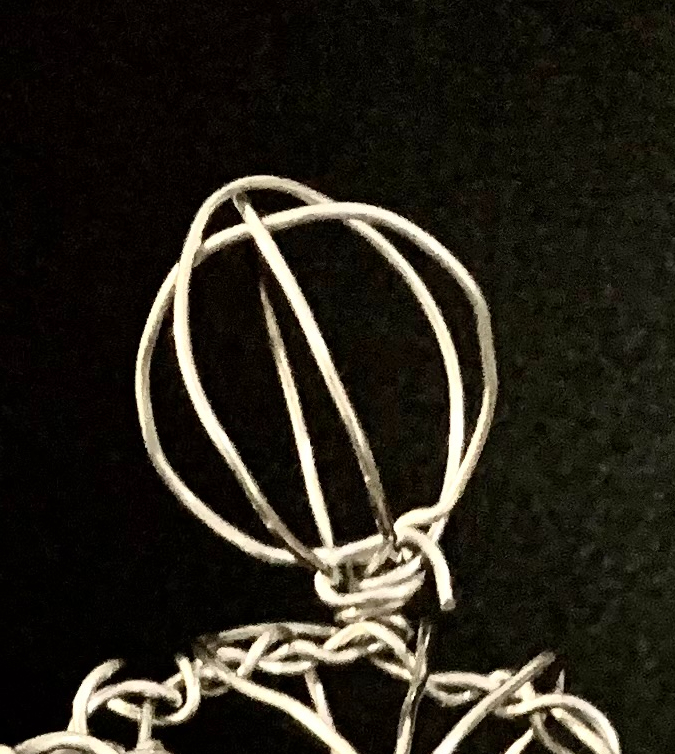
完成基本骨骼轮廓后,我们通过在各身体部位连续绕制铁丝,进一步构建三维形体。我告诉学生:沿身体移动时,每个关节处绕制一至两圈即可。我个人认为,躯干是最易入手之处;头部稍显棘手,我提示学生:它应类似打蛋器或沙滩球。我个人偏爱较长的纵向绕圈,而非极紧的环形线圈,但各人喜好不同。有些学生仅在每个身体部位绕两至三圈纵向线圈,有些则会多加几圈——这取决于个人风格与偏好。
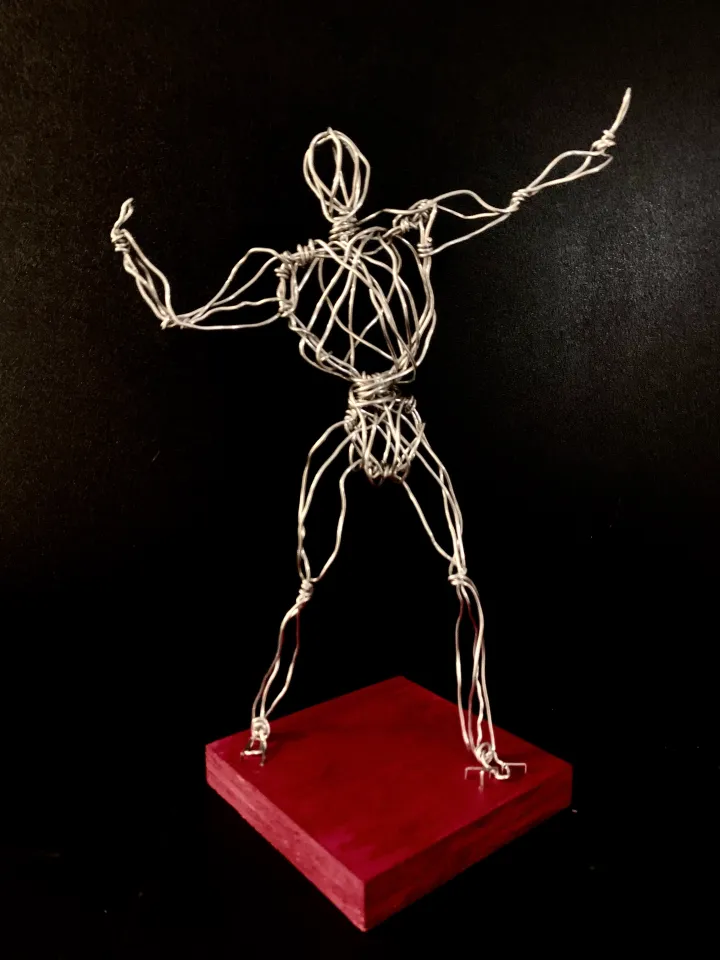
此时,学生已对材料更为熟悉,大多能独立作业。正如任何其他技法一样,有的学生飞速完成步骤,有的则茫然凝视铁丝,仿佛面对一门陌生语言。(毕竟对多数学生而言,视觉艺术本就是如此,对吧?)
我尚未为此步骤制作图解指南,原因嘛……是懒?还是拖延?我将进行现场示范,并播放我的详细视频教程中约10分35秒处的片段。


当学生的雕塑逐渐呈现出更强的三维感时,我们便重新回到关于“表现力”的讨论。此时,我们已欣赏过众多不同风格的人物雕塑家作品,并借助本文开头所列艺术家的相关内容,在每日艺术史热身环节中探讨了各类主题。
芭芭拉-利查(Barbara-Licha)免费下载!
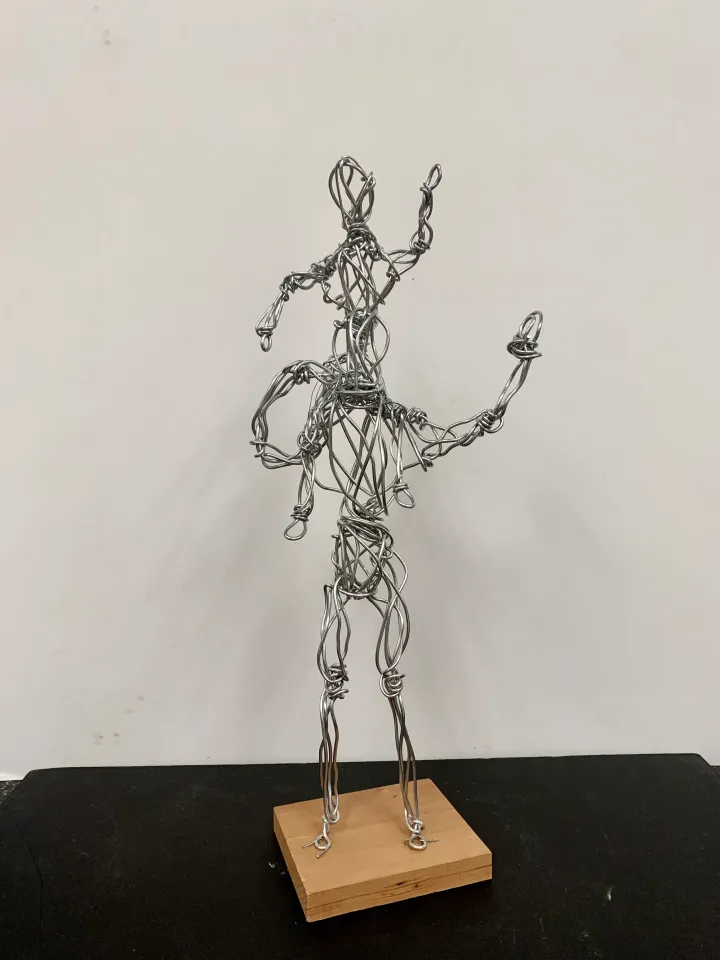
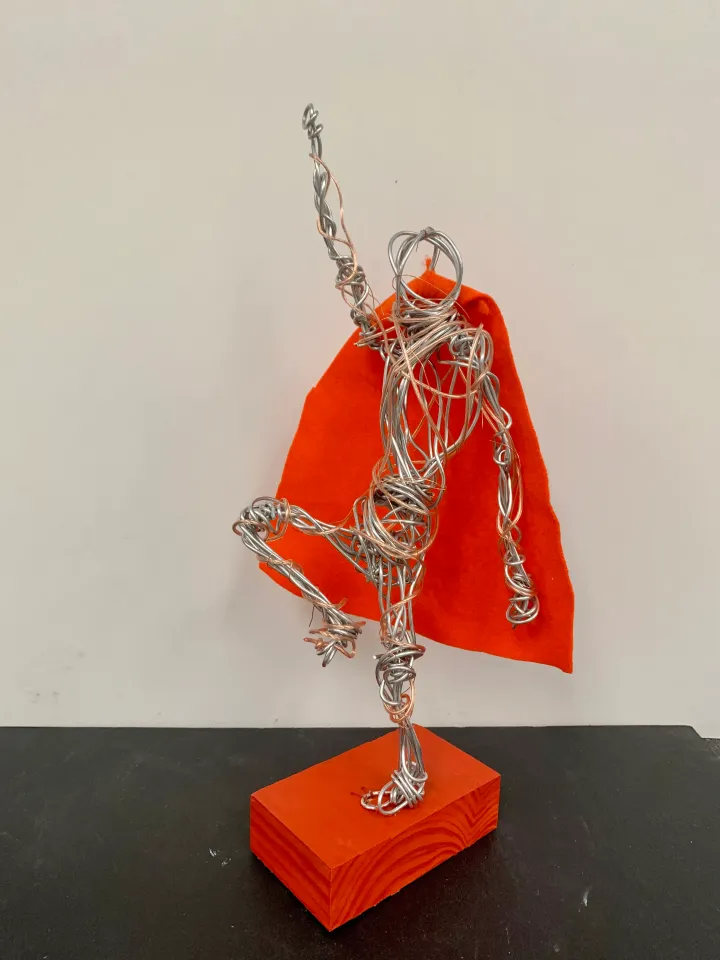
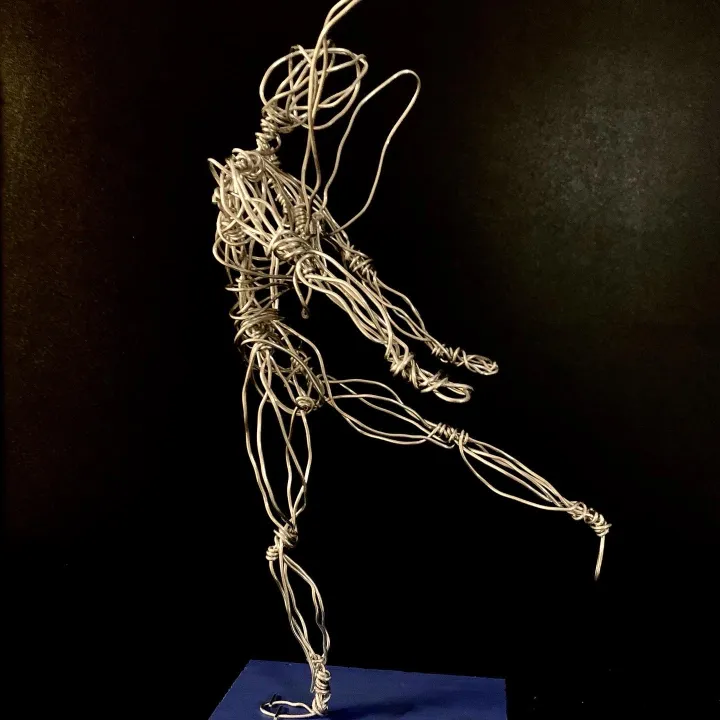
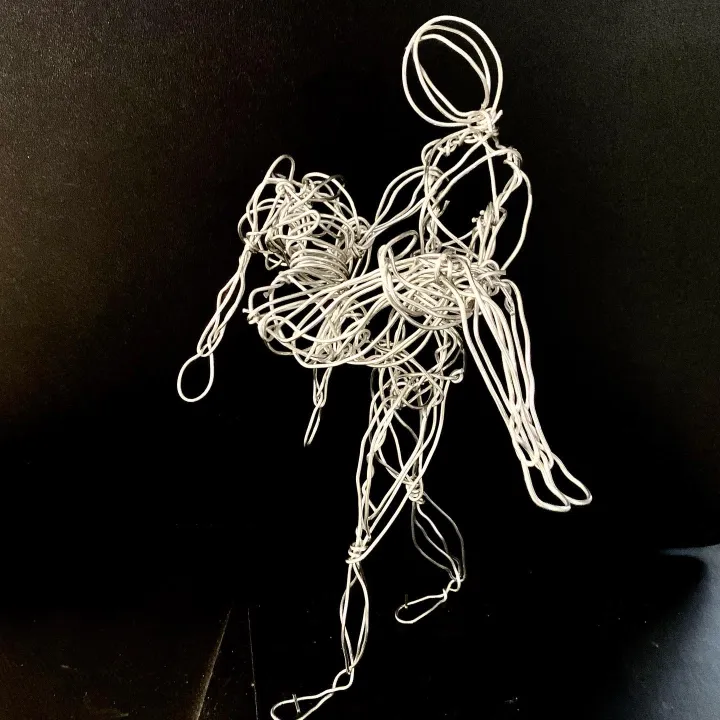
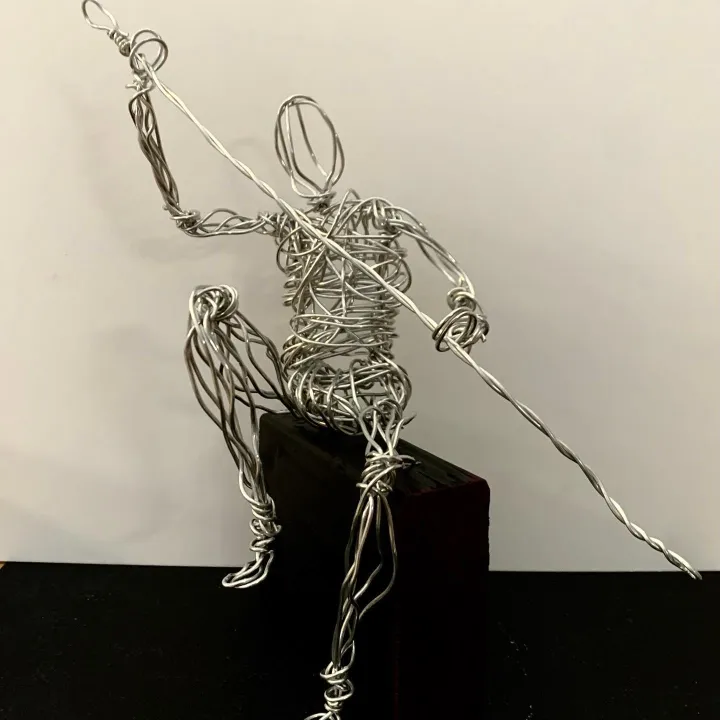
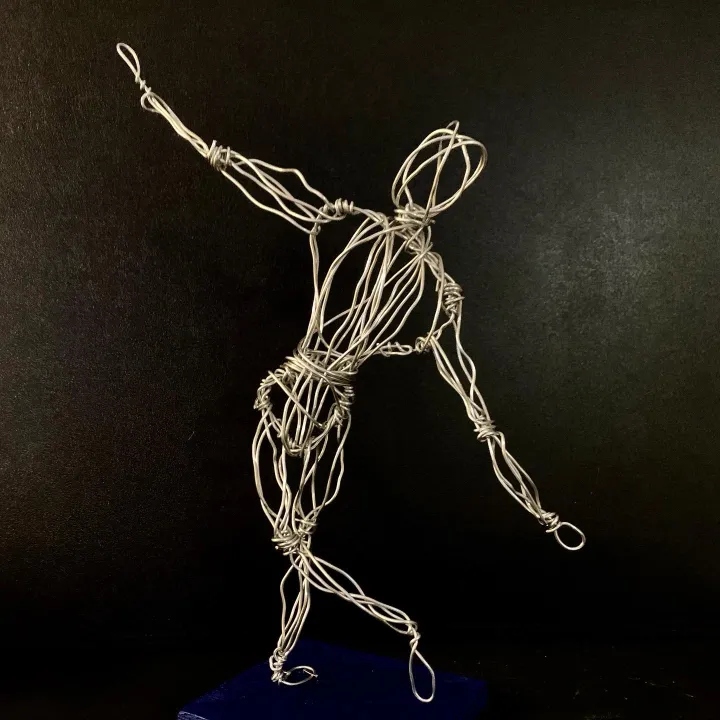
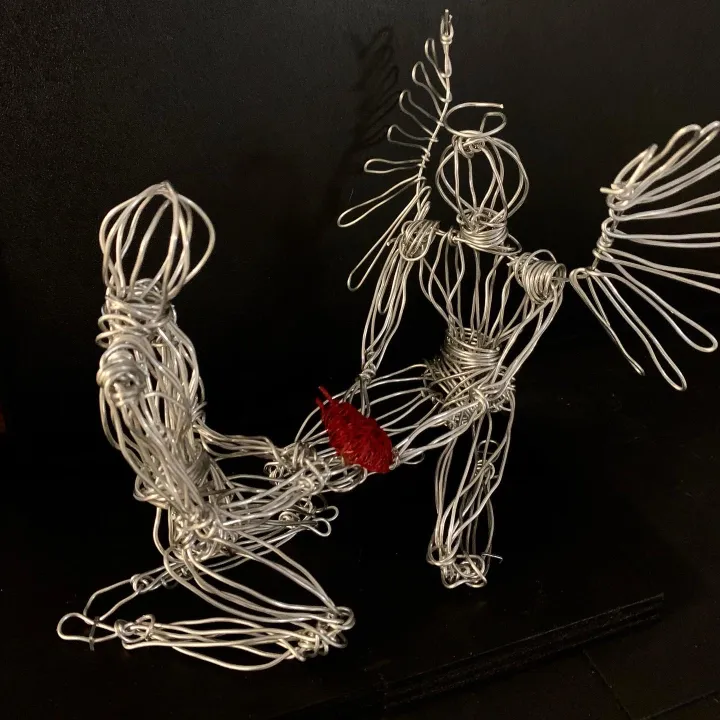
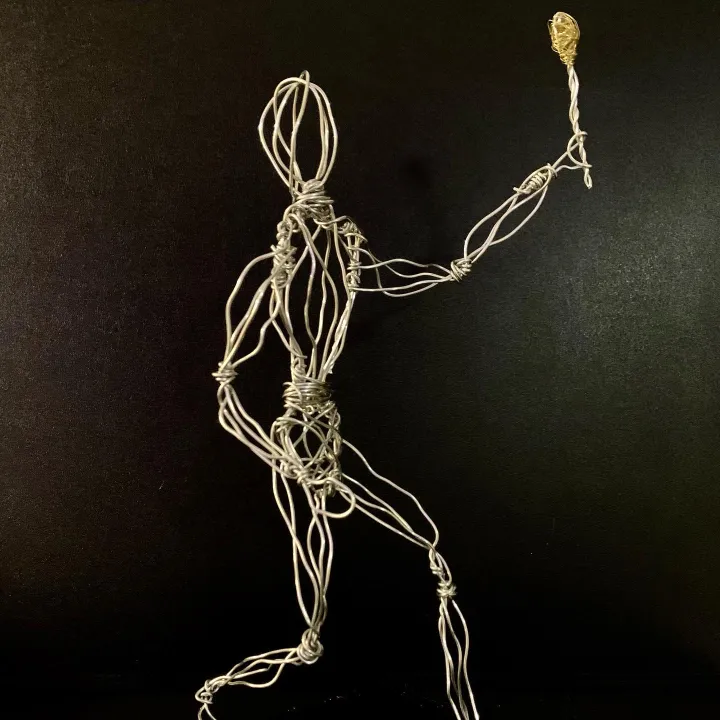
看着学生探索自身经历,并运用人体来传达情绪与氛围,真是妙趣横生。他们的金属丝雕塑极易弯曲调整至多种姿态,从而帮助他们选出最能有力呈现构思的造型。
这段关于罗丹《思想者》的短视频,是引导学生思考如何通过人体表达情感的绝佳切入点。

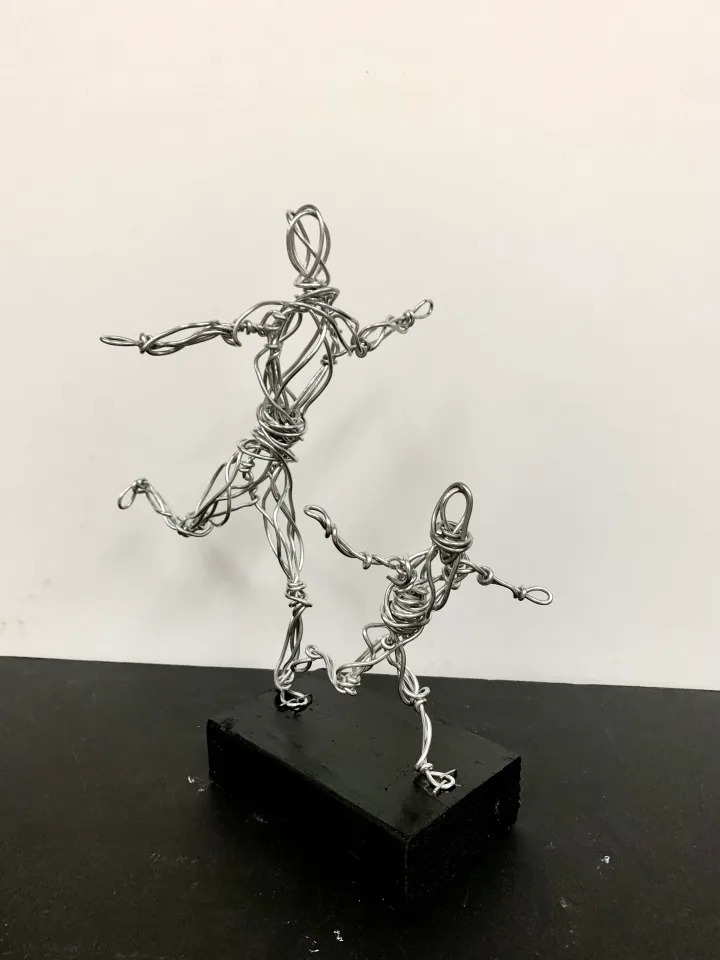
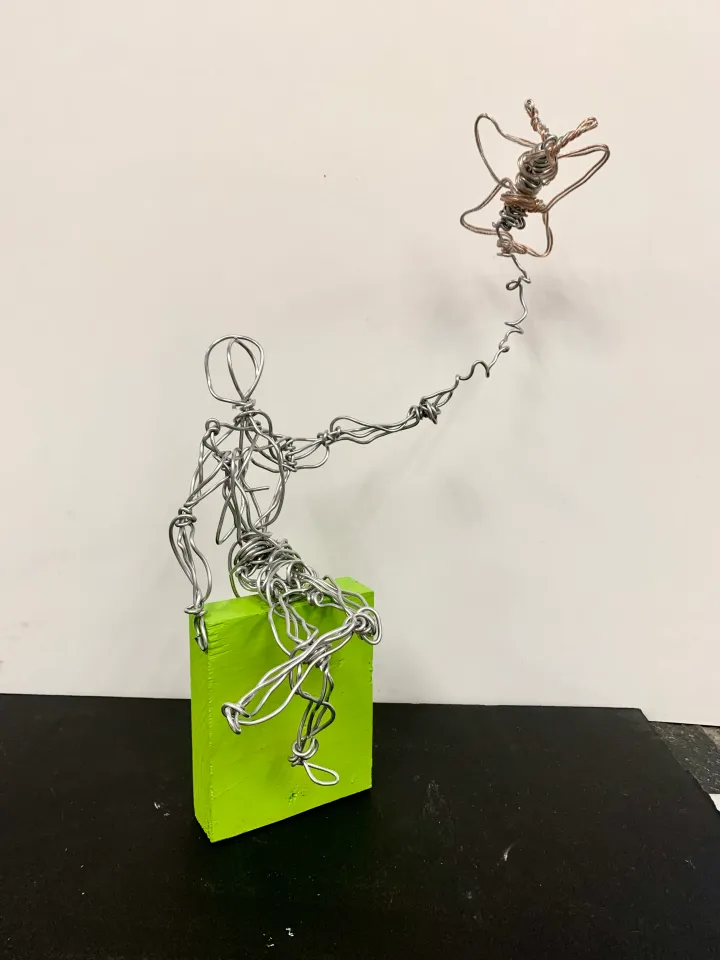
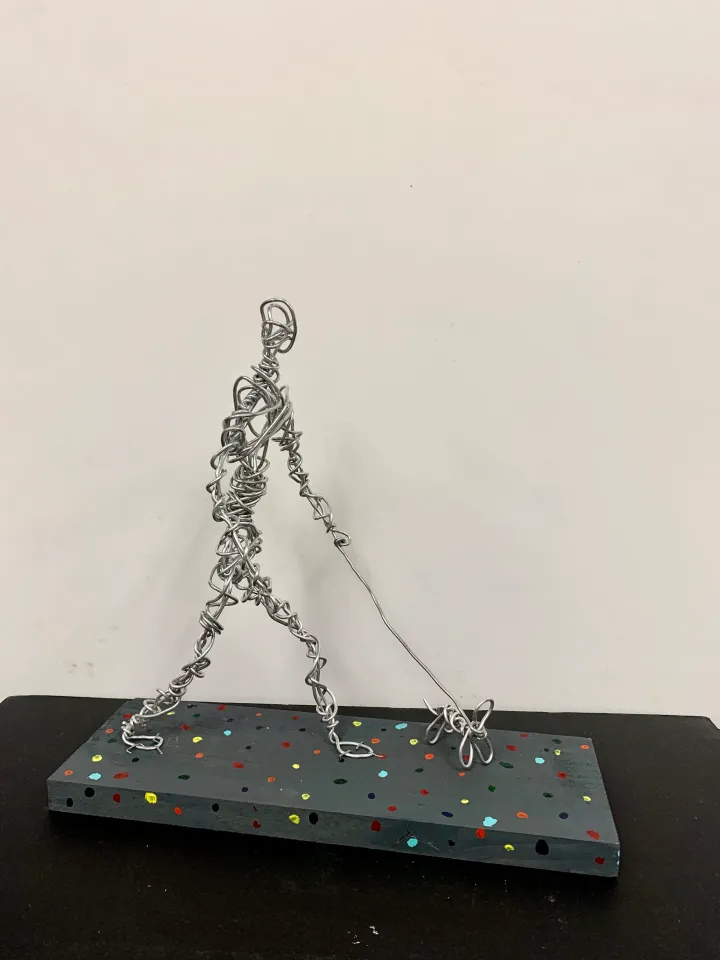
选定姿态后,我们取出订书机,开始将雕塑固定于木质底座上。我喜欢让学生先为底座上色,再预留少量颜料用于修饰订书钉——既不让其过于突兀,也不使其完全融入金属丝之中。这一刻尤为有趣:雕塑最终成形,且达到完整平衡。
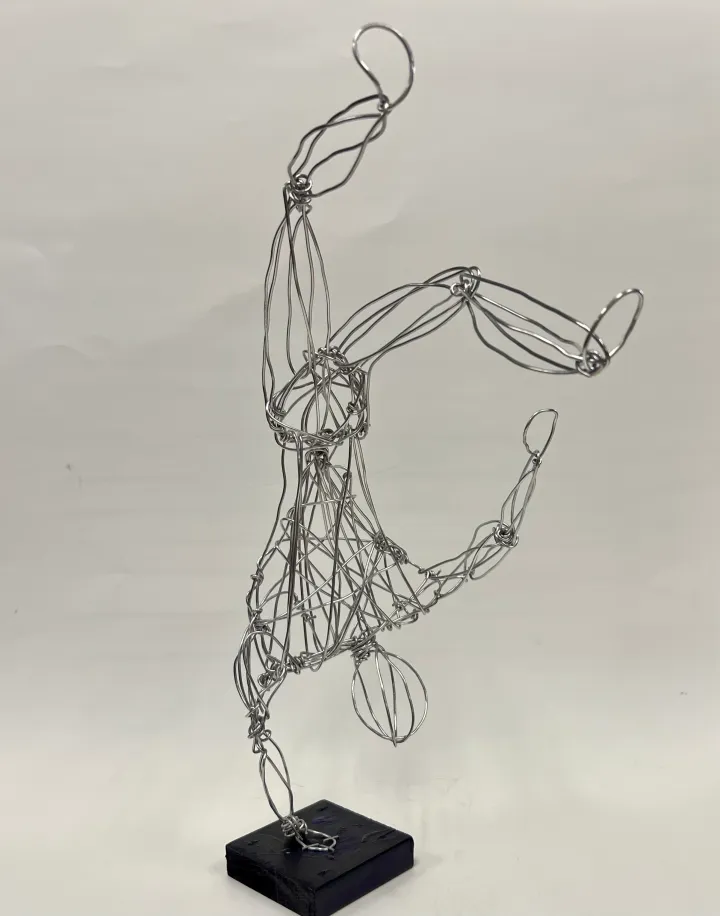
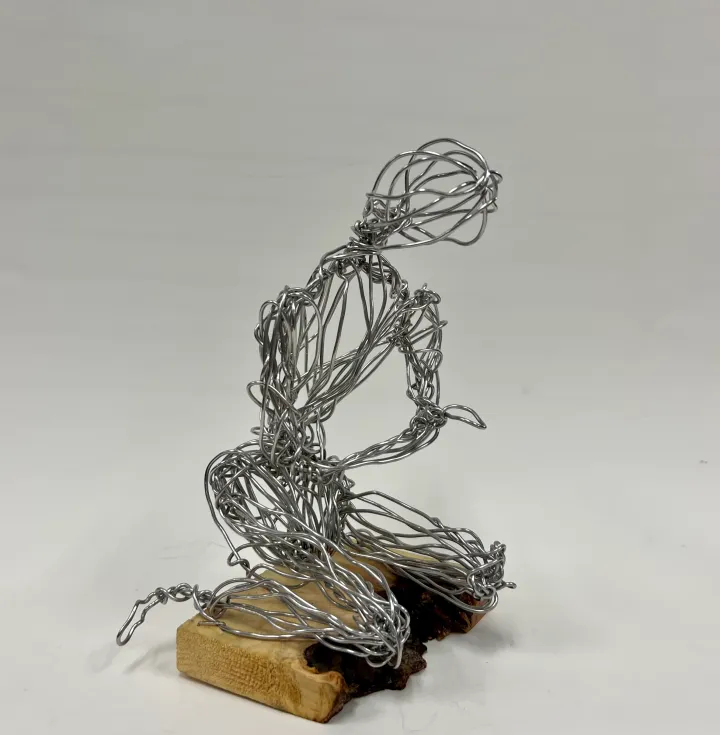
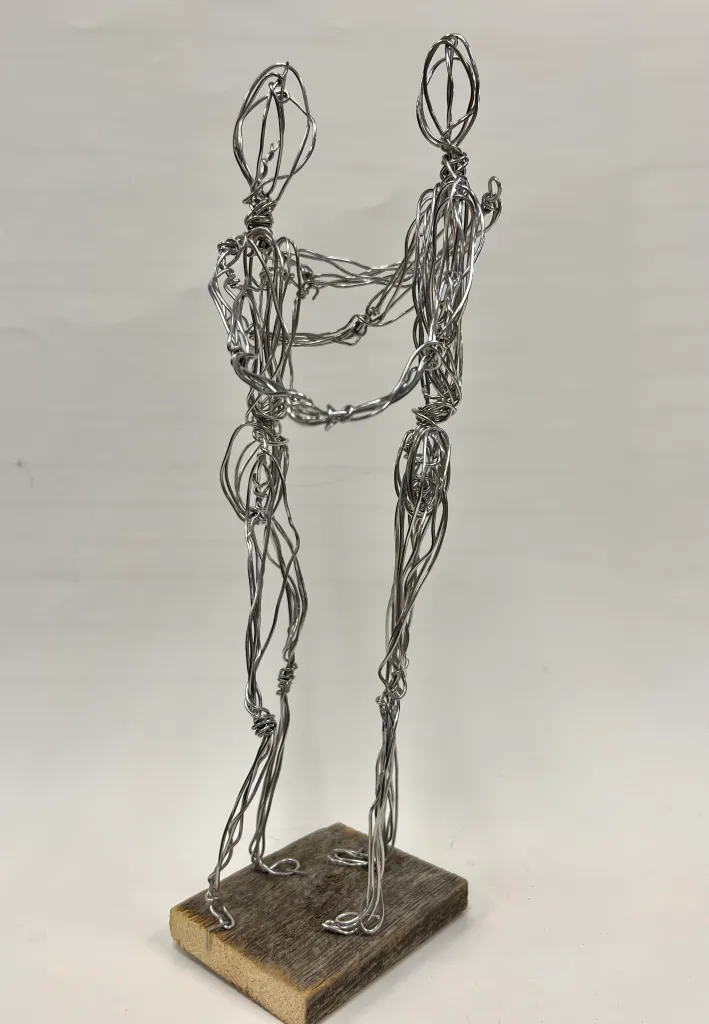
以下是我最近用于本作业的评分量规。它并非尽善尽美,但有助于学生明确学习目标,也契合我校学区的评分规范。
金属丝人物雕塑评分量规(Wire-Figure-Sculpture-Rubric)免费下载!
这项作业在多方面颇具挑战性,但却是我所有雕塑课程中成果最显著的一课。与金属丝“搏斗”本身就不易,理解并准确运用典型的人体比例亦非易事;而对年轻艺术家而言,最初尝试表达个人体验也可能颇为棘手。然而我发现,学生总能迎难而上,随着创作深入,其个性化的艺术表达亦随之蓬勃绽放。


订阅,以免错过任何一篇推送。
立即订阅!

作者:西耶拉·马查多(Sierra Machado)
2021年11月19日

作者:西耶拉·马查多(Sierra Machado)
2021年11月11日
作者:西耶拉·马查多(Sierra Machado)
2021年7月29日
Original: https://thatartteacher.com/2022/12/10/wire-figure-sculpture/
Date: 2022-12-10
Author: Sierra Machado
Categories: long form lesson plan, sculpture
Tags: art education, featured, high school wire lesson, how to make a balanced wire sculpture, how to make a wire action figure, how to make a wire figure, how to make a wire figure sculpture, how to make a wire sculpture, how to make a wire sculpture person, how to make a wire sculpture step by step, human anatomy sculpting, human proportion figure sculpture, sierra machado art channel, step by step figure sculpture, that art teacher, wire figure sculpture, wire sculpting for art class, wire sculpting for beginners
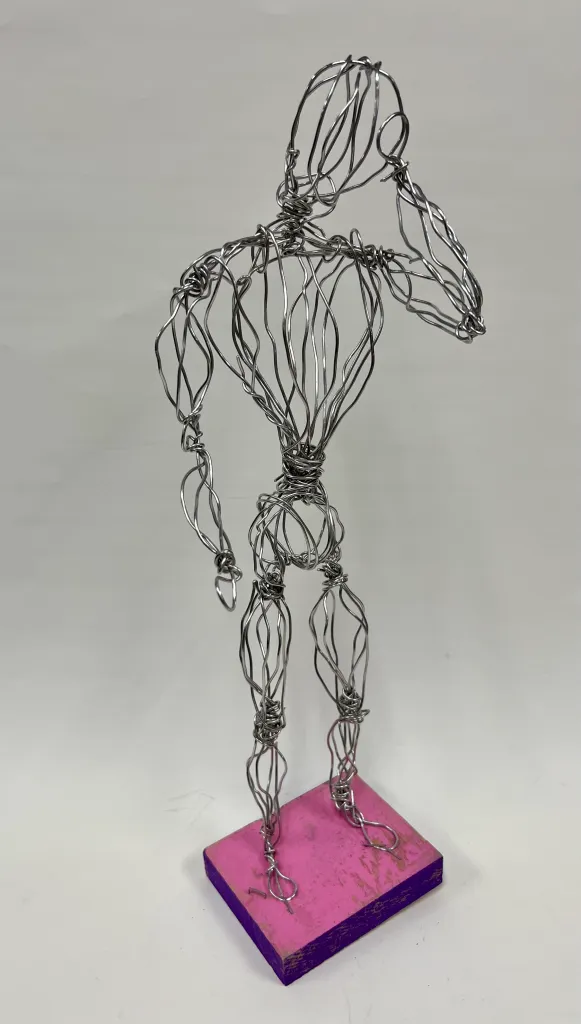
This wire figure sculpture lesson is one of my favorite lessons of all time. It is engaging, challenging, and allows for students to explore personal expression. The artist connections are endless, and using the human body as a subject allows students to explore what it means to be human.
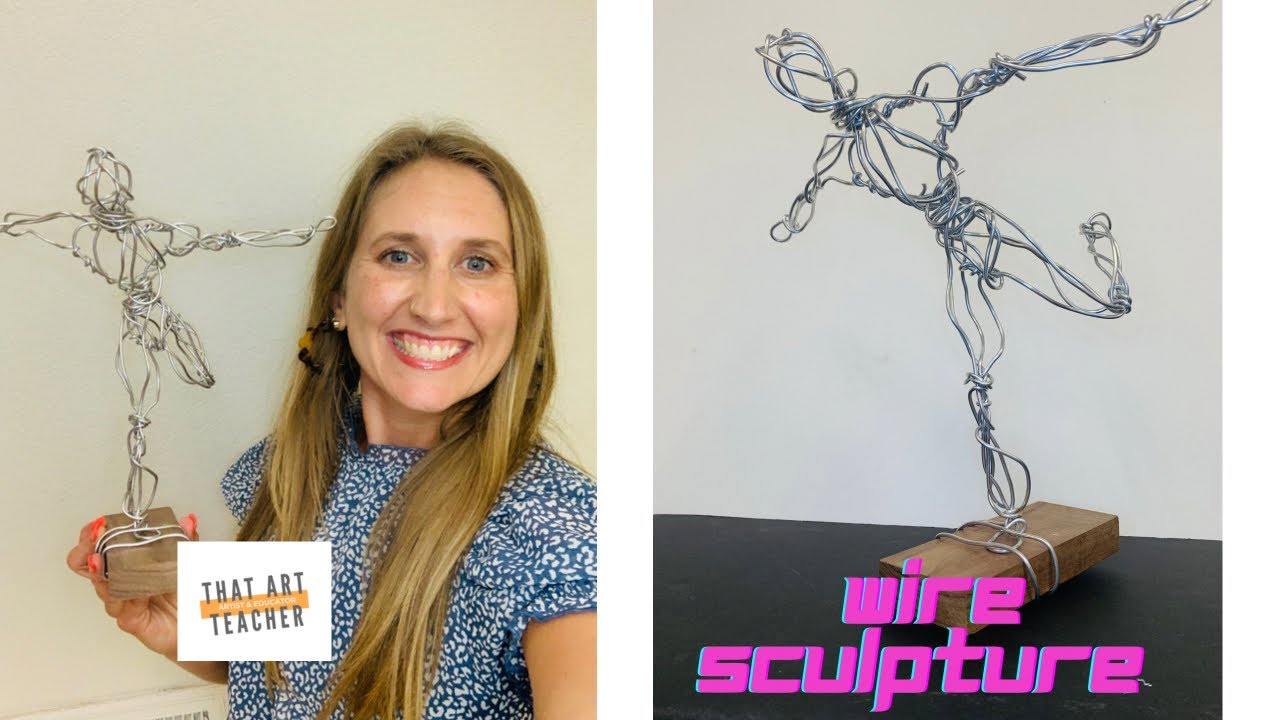
Do you have a short attention span like me? This quick video will give you a 35 second snapshot of this technique.
This full length tutorial will walk you through everything we do for this wire figure sculpture. It is classroom and Canvas ready, and my students use it frequently to review steps as they work.
Materials for Wire Sculpting
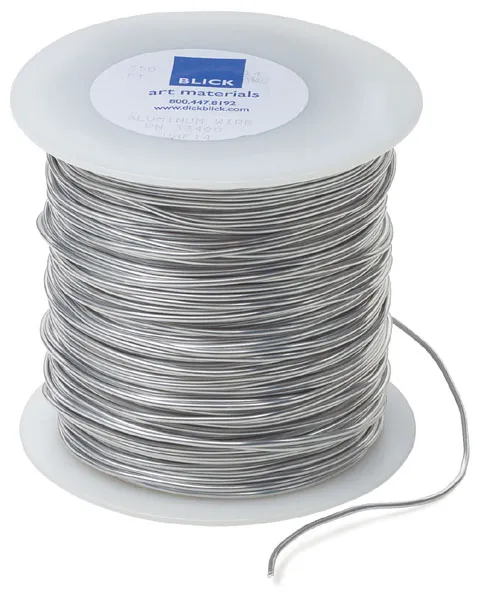
Buying the right wire will make the creating process more enjoyable. I have added a link to my favorite wire that I order from Blick Art materials. Pliers can make life a little easier, but I tend to mostly work without them. I cut the wire about a yard (both of your arms outstretched) for students to use at a time with just a heavy duty pair of scissors. If you cut too long of a piece, it can be really frustrating for students to wrap around their body parts. They seem to find it easier to just add more wire at key points instead of using one or two really long pieces.
***This post contains affiliate links to products I truly love and use in my classroom. If you use these links to buy something I may earn a commission at no additional cost to you. Thank you for supporting this public school teacher’s side hustle so I can continue to provide free content.
I like to use a hand held staple gun to attach the wire sculptures to the base. The staples make it secure and balanced and I love how finished the painted wood looks. I have a woodshop at my school and scraps are easy to come by. I have also used thick foam board and styrofoam in a pinch, but wood is my preference
Understanding Proportion
We start this unit by discussing human proportion and anatomy. Depending on the grade and ability level of the class, I will either have them draw the human body using references or we will trace a reference image in our sketchbooks. This will be used as a guide as they sculpt and as we draw/trace we discuss the key aspects of human anatomy. There are tons of guides and visuals on the internet for free. I am not going to add the one I’ve been using because it is not my original material and I have been too busy/lazy to make one of my own!
Gesture and Movement
I have also incorporated live gesture drawing after the previous proportion discussion. Again, it just depends on time constraints and whether it is an intro 3D Design course or a more advanced sculpture class. Another option is to have students copy gestures sketches in their sketchbook to get their brains thinking about how the human body moves and how that can express emotion.
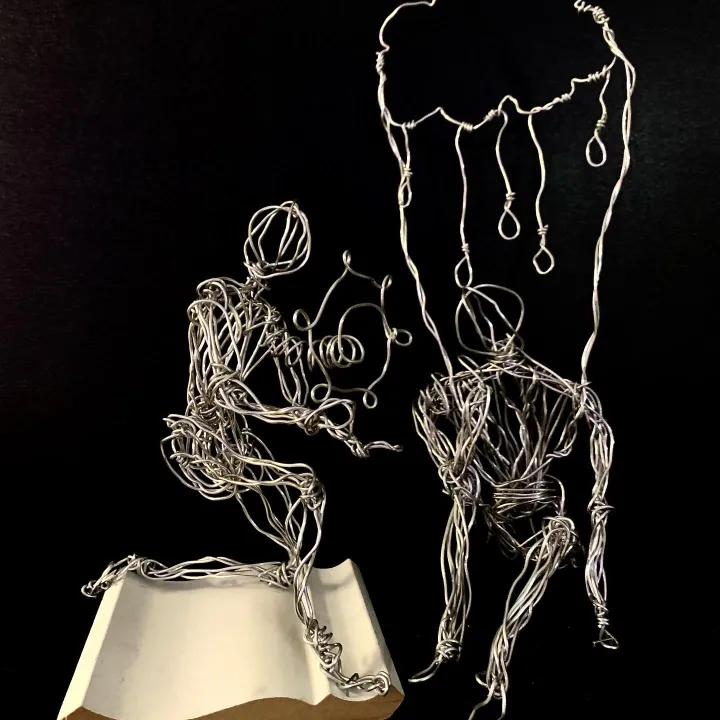
I like to teach using essential questions, and I will often ask my students to explore the question “What is it like to be a young person in the 21st century?” as inspiration for their sculptures. We look at sculptures by Elizabeth Catlett, Alexander Calder and Alberto Giacometti and discuss how their artwork is influenced by the time period in which it was created. I recently discovered artist Barbara Licha and I love how her wire figure sculptures occupy space with wire. Leslie Dill is another artist that is super inspirational and the meaning behind her work makes wonderful cross curricular connections. There are unlimited artists that sculpt the human figure and students always appreciate the challenge of representing the human form.
Time to Sculpt!
This free illustrated guide will help break down each part of the body. It is really helpful for students who want to work more independently, missed instruction or struggled during the live demo.
Wire-Figure-Illustrated-Steps-1free Download!
Students can feel a little nervous about wire sculpting, especially when creating something as recognizable as the human figure. We start out together and I demonstrate step by step using my beloved Elmo document camera. Ten years ago, before I had the love of my life, I would walk around the room holding up my wire sculpture like a game show hype girl. We start with the head and wrap 2-3 times creating an oval. Every student will be slightly different, but I try to get them to work on a similar scale.
Next is the torso. We reference our proportion guide and sculpt about twice the length of the head creating a triangle. It is important to loop wire securely two to three times to create a tight knot. If the wire slides around too much the body will lose it’s form.
Next is the pelvic girdle, which may be my least favorite word combination of all time. I call it the Batman Bikini because it gets a laugh from my students and immediately puts a visual in their head. We are talking about the crotch and the butt, so coming at it confidently with humor before the teenage mind gets there first puts me in control of the conversation. This area students tend to struggle with once we move down to the legs. It is a triangle just like the torso, but half the size. It needs to be the same length and approximate scale as the head.
Now that the upper body is complete, it is time to work down one leg at a time. I either travel from the point of the triangle down or the hip down to the foot. We get out rulers and measure from the top of our head to the hip (wide part of the triangle) of the Batman Bikini. Believe it or not, and many students do not, the hip to the foot is half of our bodies. It seems wild that our legs make up so much of our frame, but here we are.
This is a key proportion point in the sculpture and I make sure to visually check each one. Students will often make their legs much shorter. I will ask “Did you measure?” and I emphasize the importance of checking the length before moving on to the next step. It is really frustrating to unwrap wire and backtrack, trust me! I’ve had many personal wire fails.
Proportion Checks
Sometimes students will doubt the proportion to the point of making their legs too short even after demonstrating and checking their proportion guides in their sketchbooks. Some will say “Well, my sculpture is sitting down so the legs are shorter.” Which is a great segue to discussing how your skeleton won’t change no matter what position your body is in.
This is also a great opportunity to discuss body standards humans have imposed on ourselves. We discuss what it means to be able bodied and how proportion can vary from person to person. I grew up with a disabled parent, and watching my dad navigate the world as an “in-valid” (this is the term he coined for himself when he had to use a wheelchair) made me hyper aware of body sensitivities. Exploring deformity, disability and acceptance of our bodies is a huge theme in my personal art. I want students to be able to challenge what we accept as normal and be aware of how our own bodies navigate in the world.
If I have demonstrated and discussed and a student still is stuck on the topic, I will just say “Okay” and move on. The best way for students to learn is to do it themselves and make mistakes. If they see everyone else’s sculpture resembling an accurate skeletal frame and theirs looks a little off, they will usually come to the realization on their own (eventually).
After the length of the leg is measured, we make a small loop to create a foot and wrap it around the ankle 2-3 times. Next we travel to the halfway point of the leg, using our proportion guides, and loop 2-3 times to create the knee. Finally we attach to the pelvic girdle at either the point of the triangle in the center. It depends on where your wire started the leg. It should be thick and resemble a thigh. Sometimes students have just one leg starting and finishing at the point of the triangle. This is what I call uni-leg syndrome and will need to be adjusted before creating the other leg.
This is a satisfying part for students, because they can often make their sculpture stand on it’s on two feet (see what I did there). Depending on where the wire ends, we travel back through the waist and torso to create the arms. I recommend looping wire at each key point. It is important to remind students that after we make the skeleton we will bulk them up with muscle mass so this is beginning this process. We usually loop around the waist and either the neck or one side of the large triangle that makes the torso.
I have to remind students at this point not to overwrap their wire around the same areas. For example if you always wrap around the neck, the neck will become overly bulky. Balance is key!
We then move back through the pelvis and torso and loop to create the shoulder and arms. We loop our wire through the wide part of one side of the triangle and loop the hand around mid thigh.
Loop once at the halfway point and then connect to the triangle a little lower than the shoulder. You can create more or less bulk depending on how muscular you want your sculpture to look.
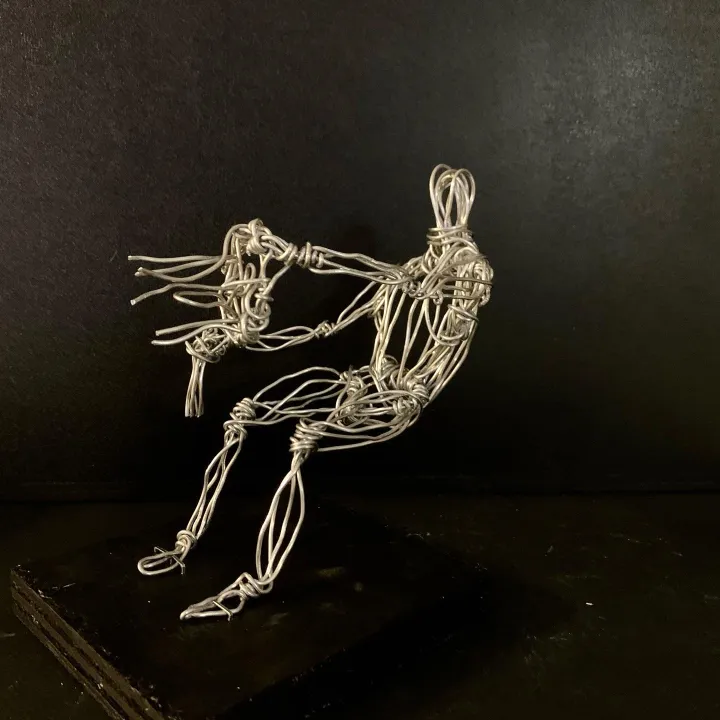
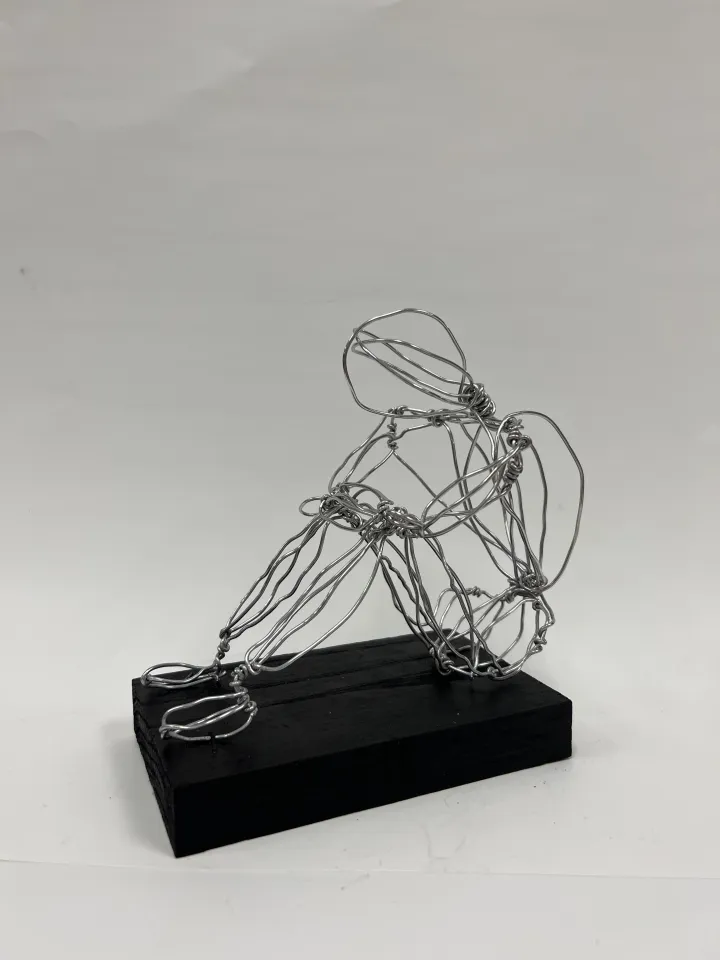
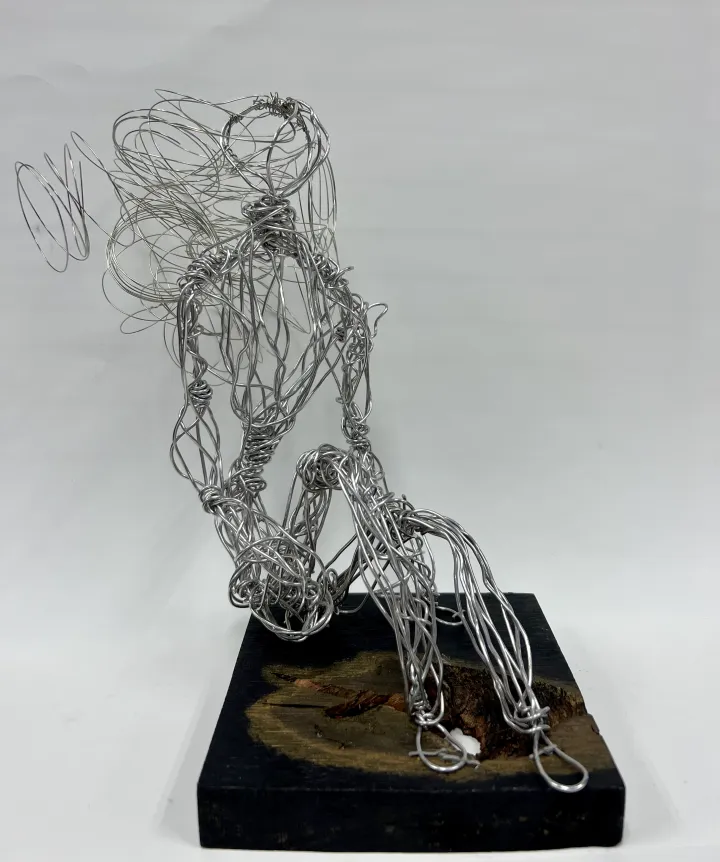
After you have your basic skeletal outline, we move on to creating 3D form by looping a series of wire to each body part. I tell students to loop once or twice to each joint as they move around the body. I personally think the torso is the easiest place to start. The head is a little tricky, I tell students it should resemble a whisk or a beach ball. I prefer the look of longer vertical loops instead of really tight circular coils, but to each their own. Some students just two or three vertical loops to each body part and some add a bit more. It depends on their personal style and preference
At this point, students are much more comfortable with the material and work independently. Just like with any other technique, some students whiz through the steps and others stare blankly at their wire as if it’s a foreign language. (Which visual art is for most students, right?)
I have not made an illustrated guide for this step yet because….laziness? Procrastination? I will do a live demo and also show clips of my detailed video tutorial around the 10:35 minute mark.
Once their sculptures start becoming more 3D, we return to the discussion of expression. We have looked at many different figure sculptors at this point and have discussed themes through daily art history warm-ups using the artists listed in the beginning of this post.
Barbara-Lichafree Download!
It is so fun to watch students explore their own experiences and use the human body to portray emotion and mood. Their wire sculptures are so easy to move into multiple positions so they can decide which conveys their idea the strongest.
This short video about Rodin’s The Thinker is a great prompt to get students thinking about expression through the human body.
Once the pose is decided, we get out the staple gun and start attaching to our wooden bases. I like for students to paint their bases first, and we reserve a little paint to touch up staples so they don’t stand out or blend in with the wire. This is such a fun moment to see their sculpture fully formed and fully balanced.
Here is the latest rubric I’ve used for this assignment. It’s not perfect, but it helps students understand their objectives and it fits my district’s grading practices.
Wire-Figure-Sculpture-Rubricfree Download!
This is a tough assignment in many ways, but it has one of my best outcomes out of all of my sculpture lessons. Fighting with wire can be challenging as is understanding and applying typical human proportion. Expressing personal experience can be tricky for young artists at first, but I find that students rise to the occasion and their personal expression blossoms as they work.
Subscribe so you never miss a post.
Subscribe!
by Sierra Machado
November 19, 2021
by Sierra Machado
November 11, 2021
by Sierra Machado
July 29, 2021