记忆主题油印版画创作
原文链接:https://thatartteacher.com/2023/05/12/memory-linocut-artwork/
日期: 2023-05-12
作者: Sierra Machado
分类: 长篇教案
标签: 美术教育、木刻版画、详尽教案、精选内容、精选内容、免费高中美术教案、高中美术、高中版画课、如何进行油印版画、油印版画、油印版画分步教学、油印版画作品、油印版画、初学者油印版画、油印版画分步教程、记忆主题油印版画、版画课、高中版画教案、版画分步教学、That Art Teacher
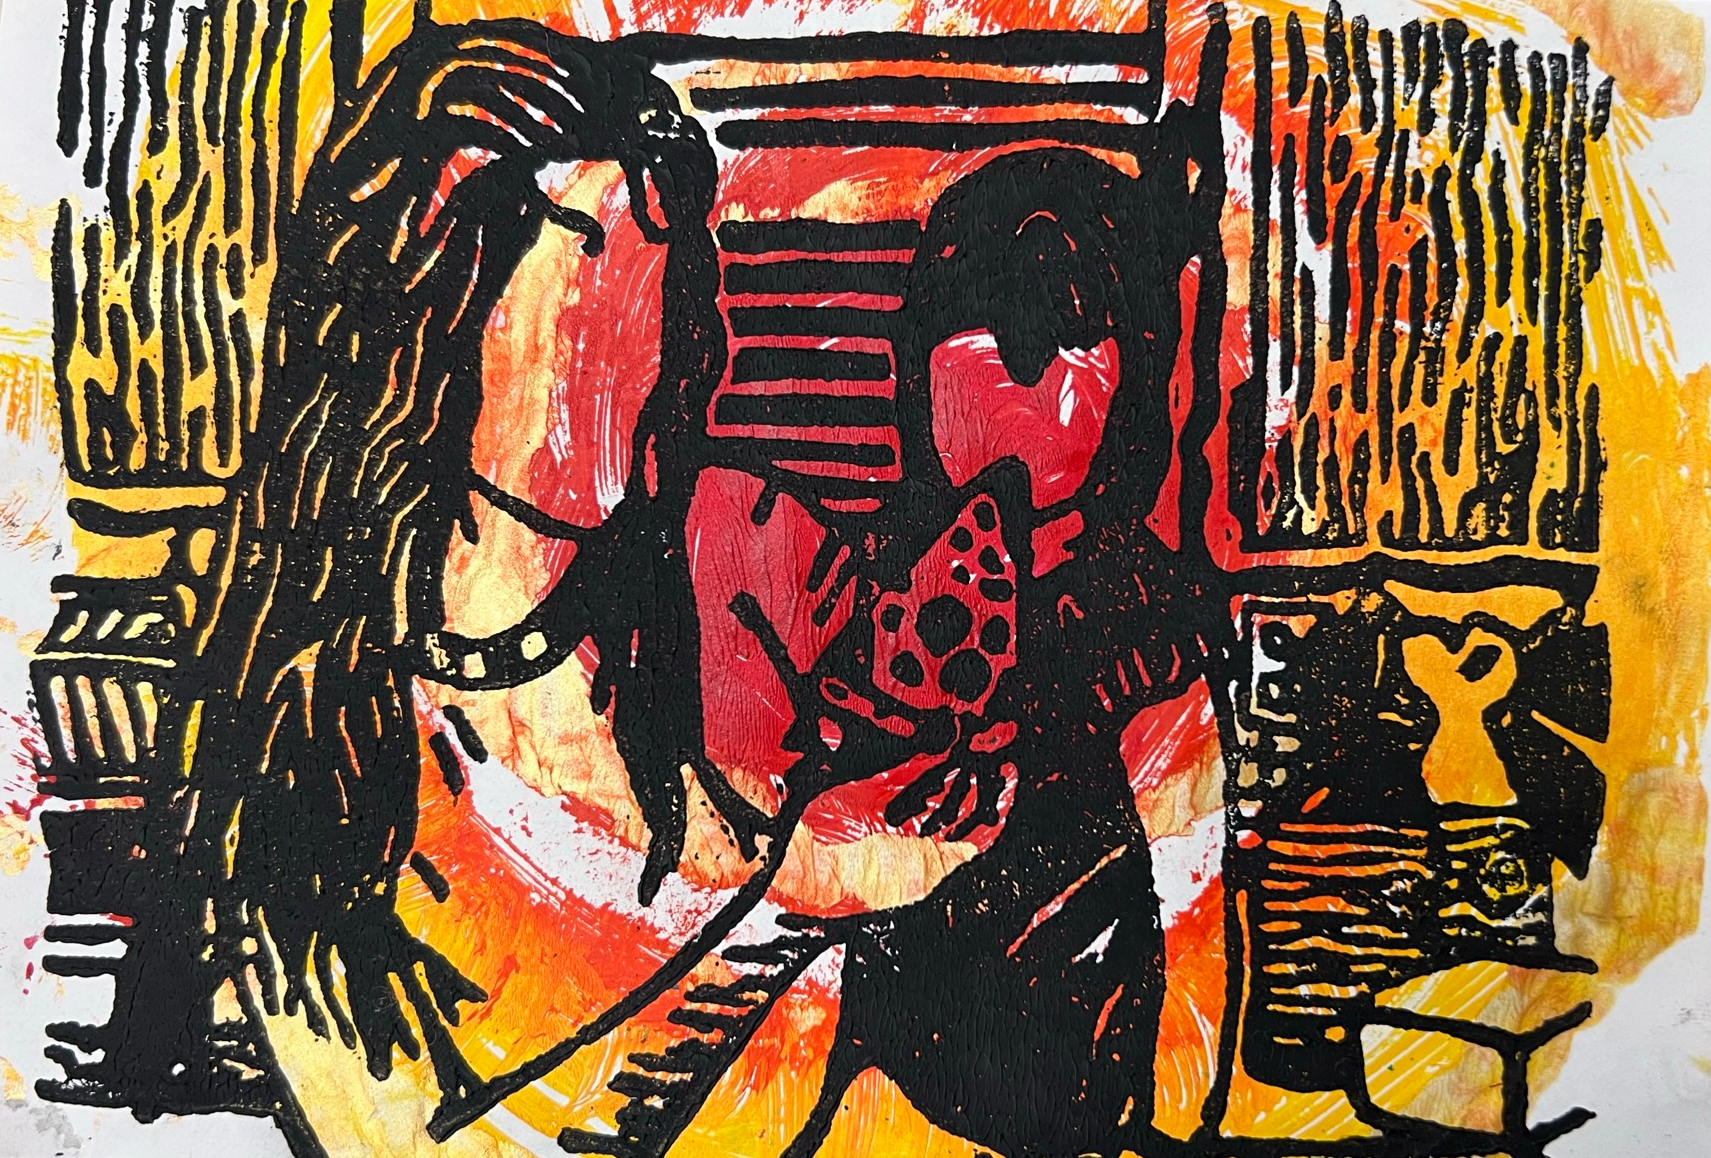
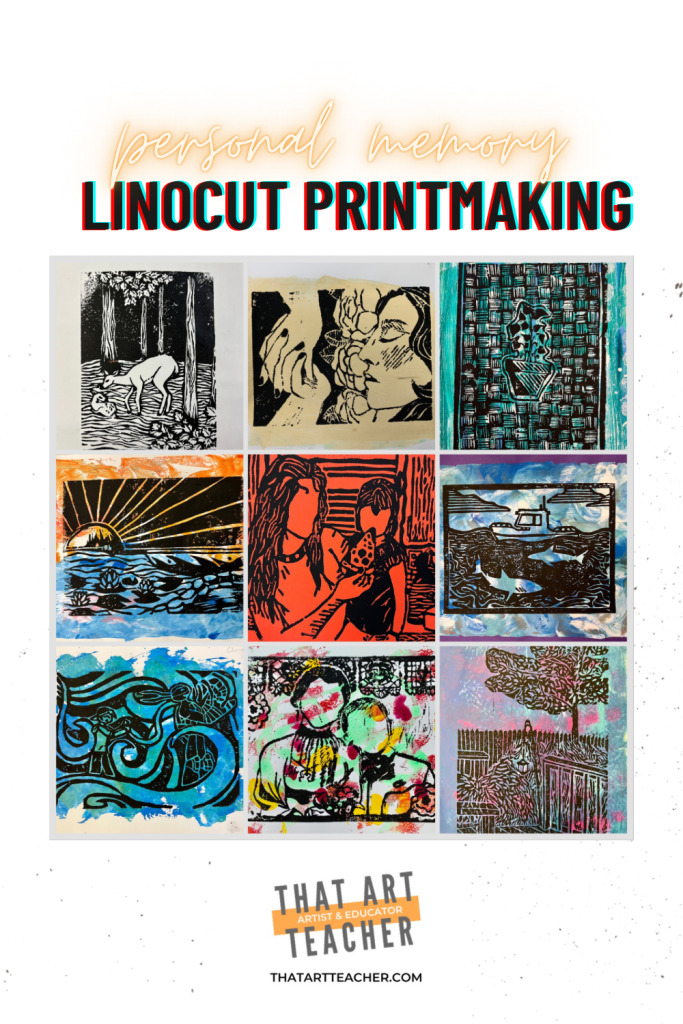
油印版画是一种极富趣味的方式,可用于探索线条、形状与个性表达。学生(绝大多数)都非常喜爱这种动手实践的过程,以及揭起印痕时那种“魔法般”的惊喜感。雕刻过程中的身体参与感,能持续吸引学生投入;而最终成果往往令人惊艳又意外。本记忆主题油印版画创作,不仅效果出色,更有助于学生练习运用个人艺术语言。
油印版画所需材料
***本说明中包含我本人在课堂上真实使用且真心推荐产品的联盟链接。若您通过这些链接购买商品,我可能获得佣金,且不会向您额外收取任何费用。#副业
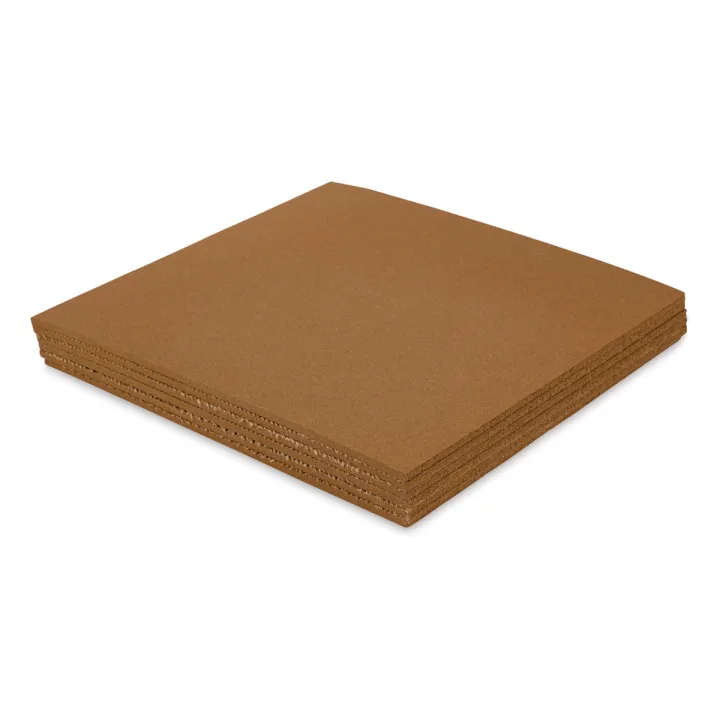

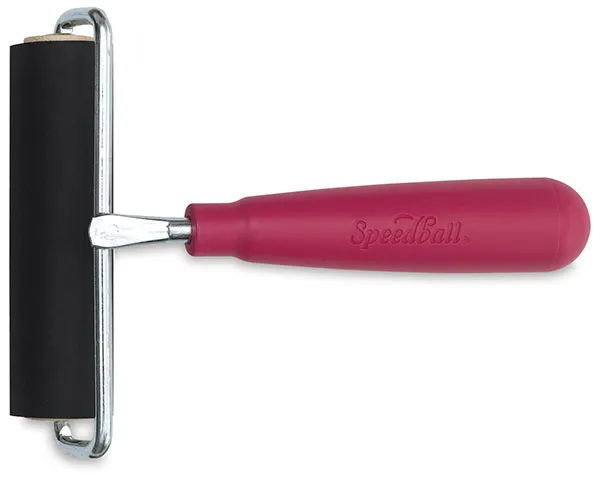

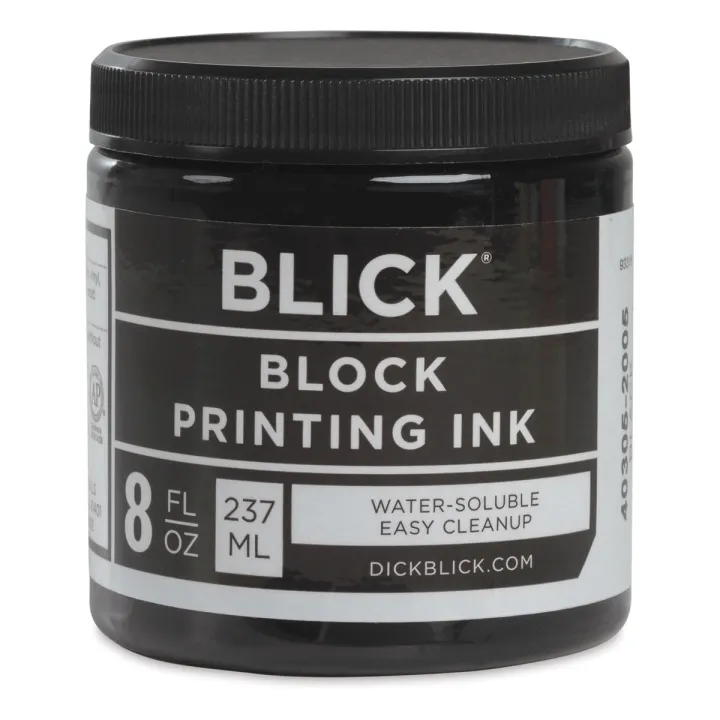
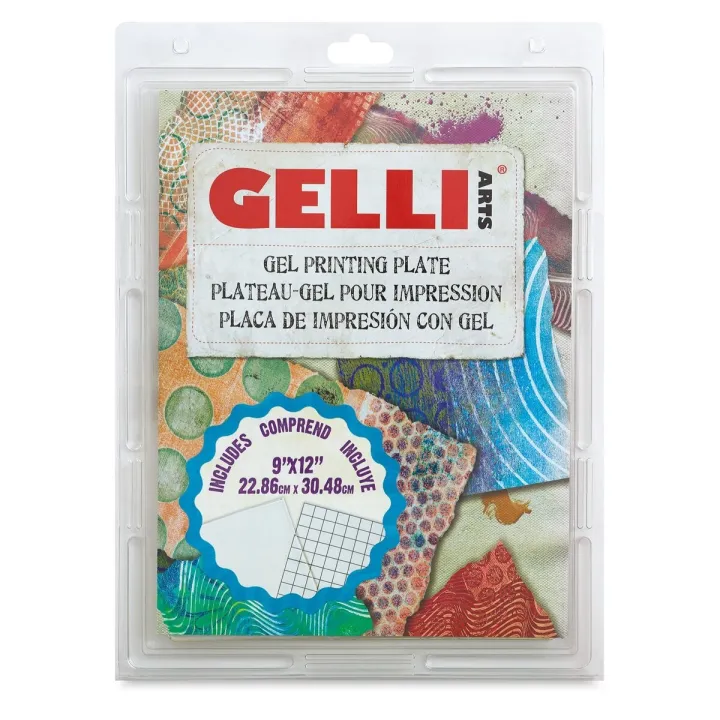
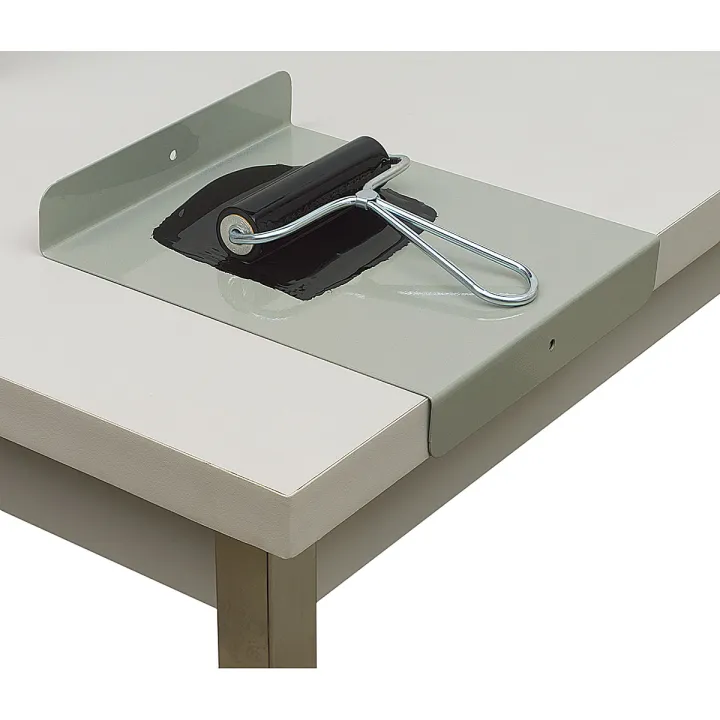

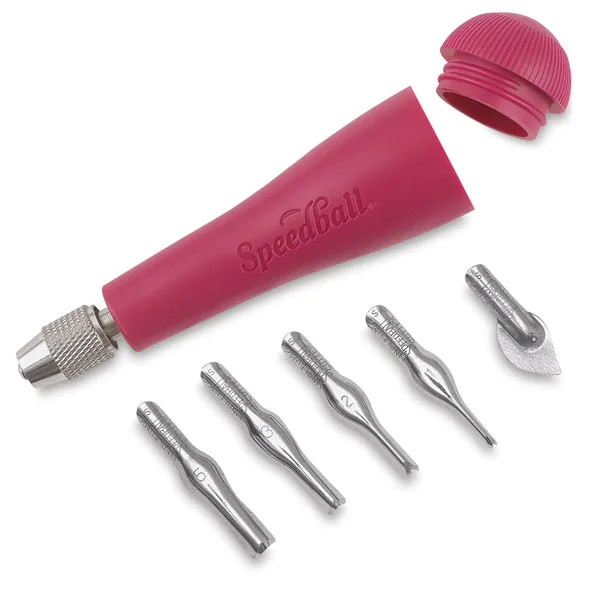

我更倾向选用Blick Wondercut油印版材。上世纪90年代末至21世纪初我在美术课上使用的灰黑色油印板,如今已“不堪大用”(此处双关:既指材质不佳,也谐音“cut it”)。这款材料在我学生的实践中表现非常出色。我也喜欢Blick品牌的版画油墨,且更偏好罐装而非挤压式包装——后者初用虽方便,但我感觉会浪费少量油墨;若搭配调色刀使用,罐装油墨的用量则更经久耐用。至于应采购多少油墨?别问我!我总是在用完前就告罄了,所以请务必多备些!
小型练习油印版画
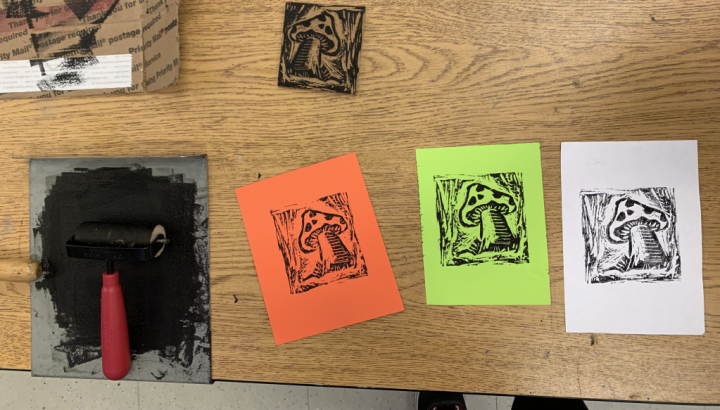
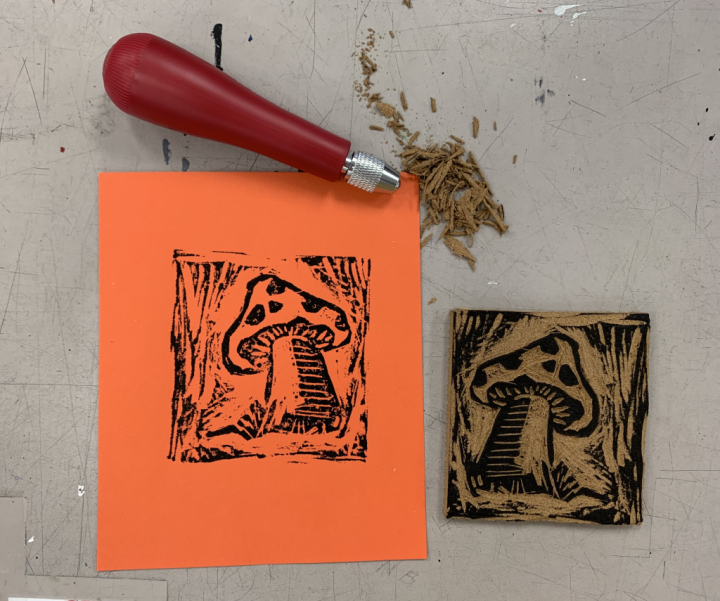
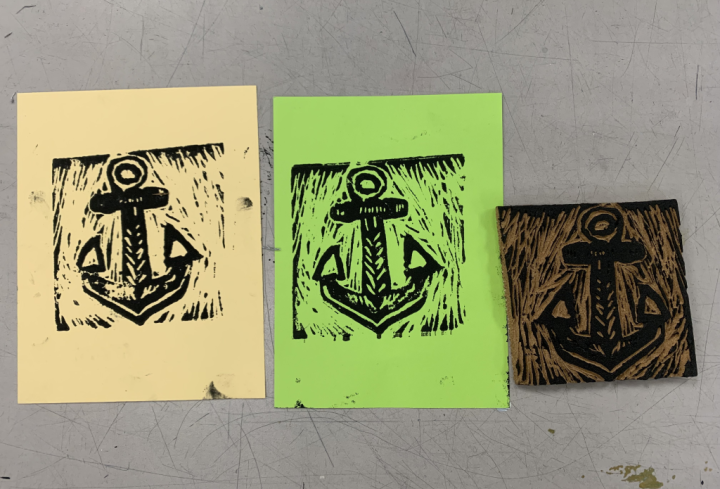
学生首先制作一幅小型练习版画。我会打印出基础剪贴画图像供学生选择。所选图像需具备清晰的轮廓、丰富的线条变化,以及明确的黑白区域。我不会将这些范例整理成PDF分享——因当初搜集时并未严格遵循版权规范。
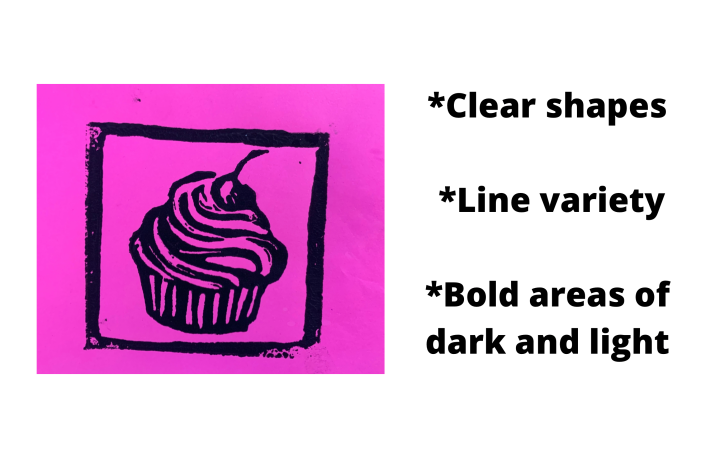
我常在谷歌搜索类似“蘑菇剪贴画 黑白”等关键词,以获取轮廓清晰的图像。请思考当下学生最热衷绘制的主题,并为他们提供打印好的手绘图样,形式可参考纹身图样集(flash sheet)。2023年我的课堂中,凯蒂猫(Hello Kitty)、超级马里奥蘑菇、蛇类、基础花卉及船锚等图案广受欢迎。
此项练习不仅帮助学生掌握雕刻技法,更引导他们理解:怎样的设计才最契合版画材料特性。我们通常在绘画单元之后开展本课,对学生而言,理解这一概念颇具挑战性。“减法式”创作(即通过去除材料形成图像)始终难度更高;而依赖线条与形状构建画面的设计能力,亦是多数学生亟待训练的核心技能。
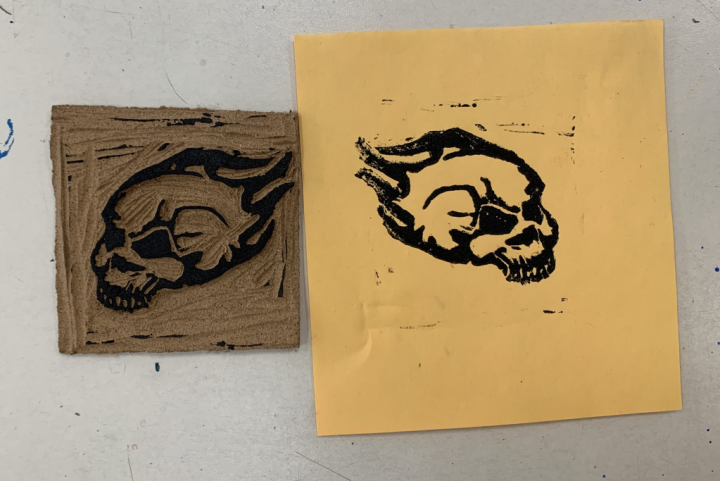
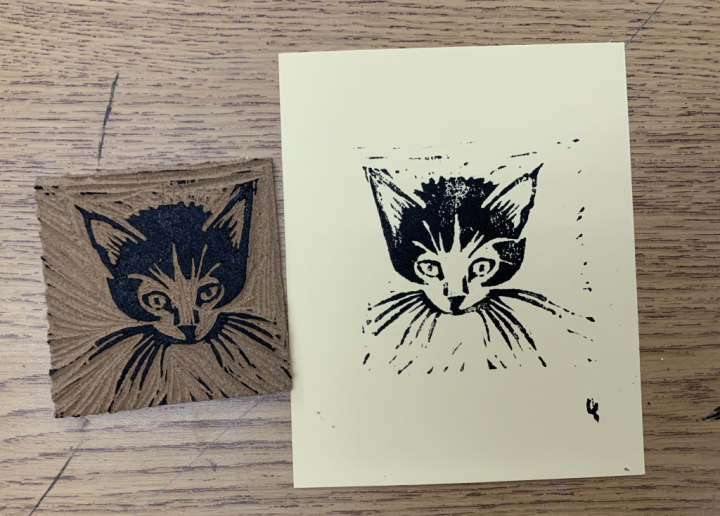
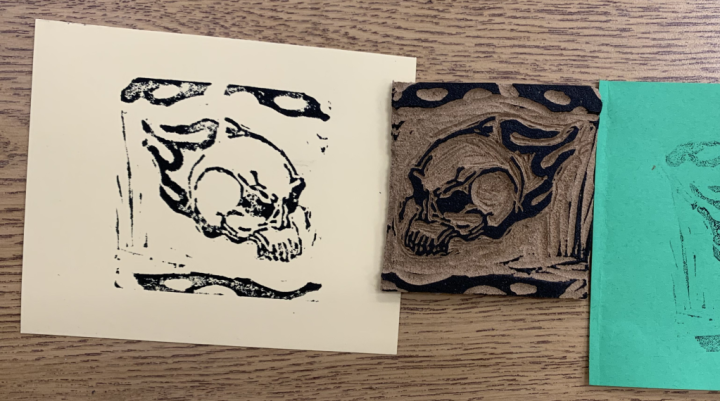
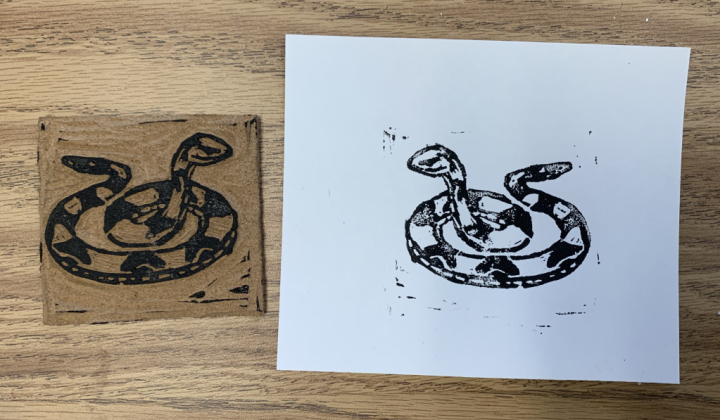
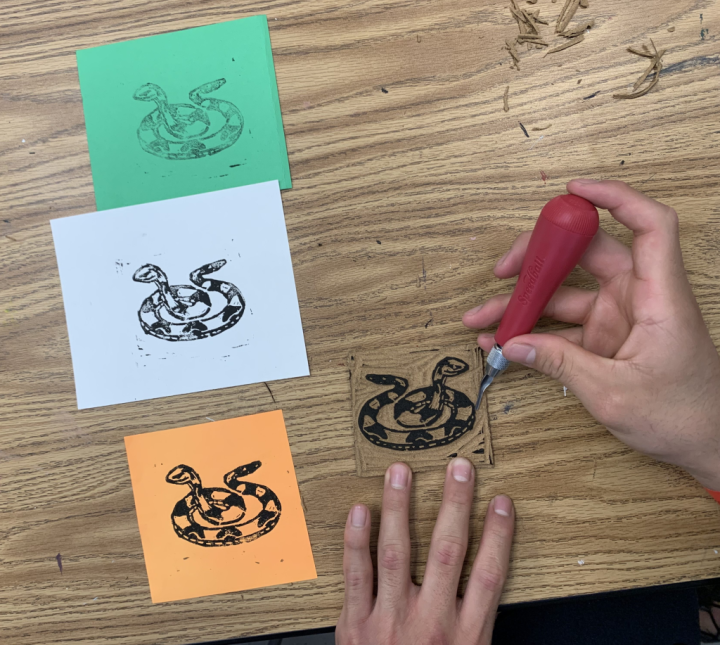
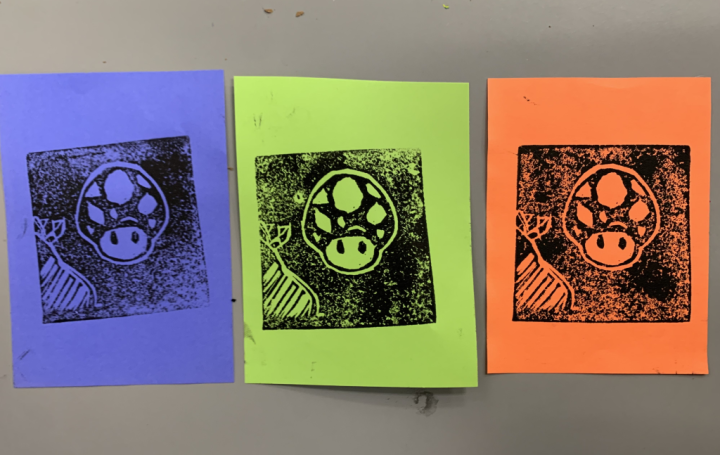
学生从我精心筛选的“图样集”中选定图像后,使用石墨转印纸与钢笔完成转印。随后,我们用记号笔(Sharpie)描摹所有线条。我对这一步要求极为严格,会明确告知学生:凡希望印出黑色(或所用油墨颜色)的区域,必须全部涂满黑色。我反复提醒:所有构思工作都应在雕刻前完成;一旦刻刀介入,失误的代价将显著升高。
这也是让学生直观感受“镜像反转”效果的绝佳方式。我口头讲解再多,也不及亲身体验来得深刻。当然,仍会有学生未将文字反向书写——正因如此,我们才坚持先用铅笔在油印板上勾勒设计,再发放正式版材。
我总会亲自演示油印刻刀的使用方法,因为更换刀片是常见操作,而我绝不想参与其中!我们会将整把刻刀完全拆解,逐一观察各部件结构及其协同原理。借助实物展台(document camera),我向学生示范如何安装单枚刀片,并强调每次仅可露出一枚刀片。接着,我要求每位学生依次更换并安装全部刀片——抱歉,但这是必须的。
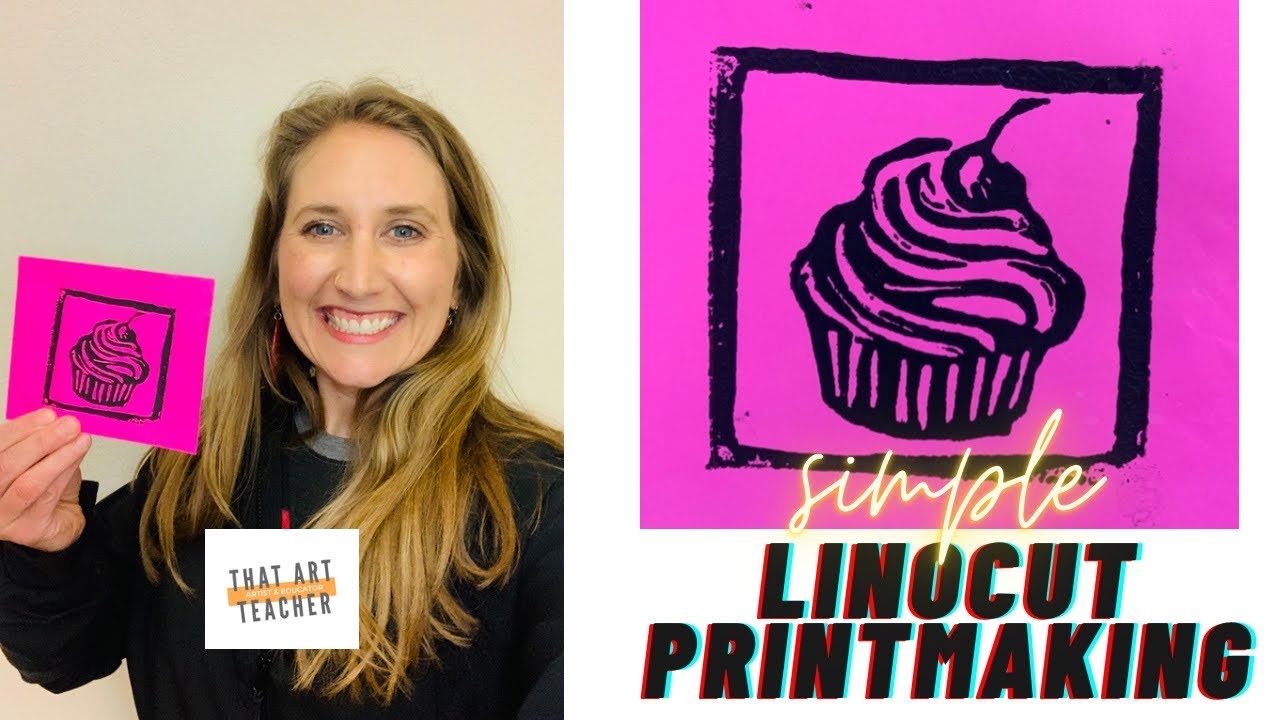
此教程非常适合向学生播放,助其预知最终成品效果。它对复习巩固、缺勤学生补课,以及精准聚焦实操演示中易被忽略的细节环节,均十分有效。欢迎各位教师在自己的课堂中直接使用。
随后,学生开始练习雕刻,从最大号刀片及背景区域入手。重要且精细的细节务必留到最后雕刻——尽管跃跃欲试想立刻刻画那些有趣的线条。我们使用工作台夹具(bench hook,这个词念起来实在拗口),并重点强调:雕刻方向必须始终背离身体。将手置于油印板顶部以固定版材看似自然,实则最为危险!我曾有学生因刻刀划伤而需缝针,因此每学期我都会戏剧化地重述这个故事。学生偶尔仍会划伤自己,但在我的严肃警示与分步演示后,他们通常能默默取个创可贴自行处理,无需我介入。
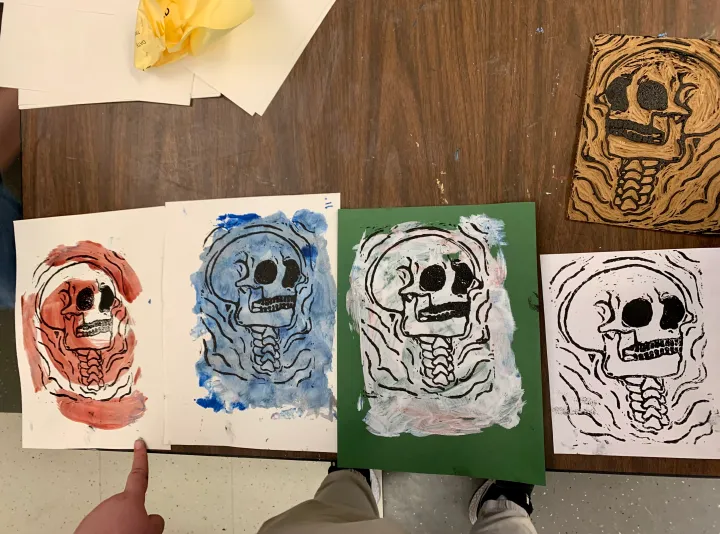
学生完成雕刻后,便前往版画印刷区进行印制。这是整个流程中最富乐趣的环节,亦是学生真正掌握技法的关键阶段。你可口头提醒他们尽量贴近已刻线条雕刻,但没有任何说教比得上一张方块感强烈、形貌怪异、与原图毫无相似之处的失败印品带来的震撼。这有力地强化了一个认知:记号笔线条仅作辅助参考;唯有专注细节,印品才能准确呈现设计意图。
“这不是草图,而是最终定稿”。
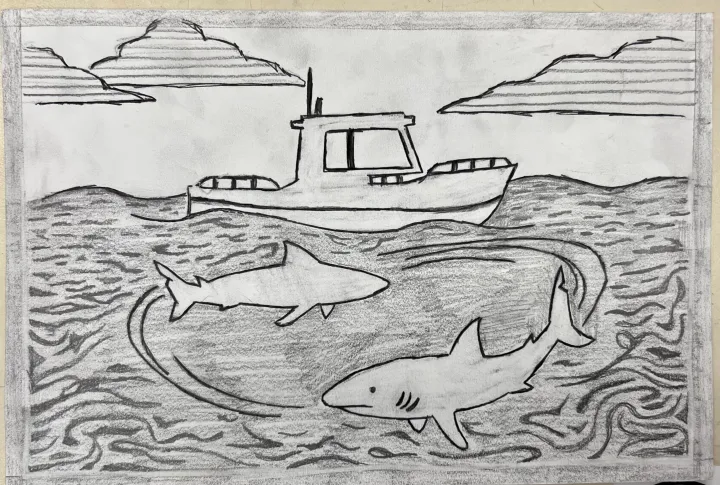
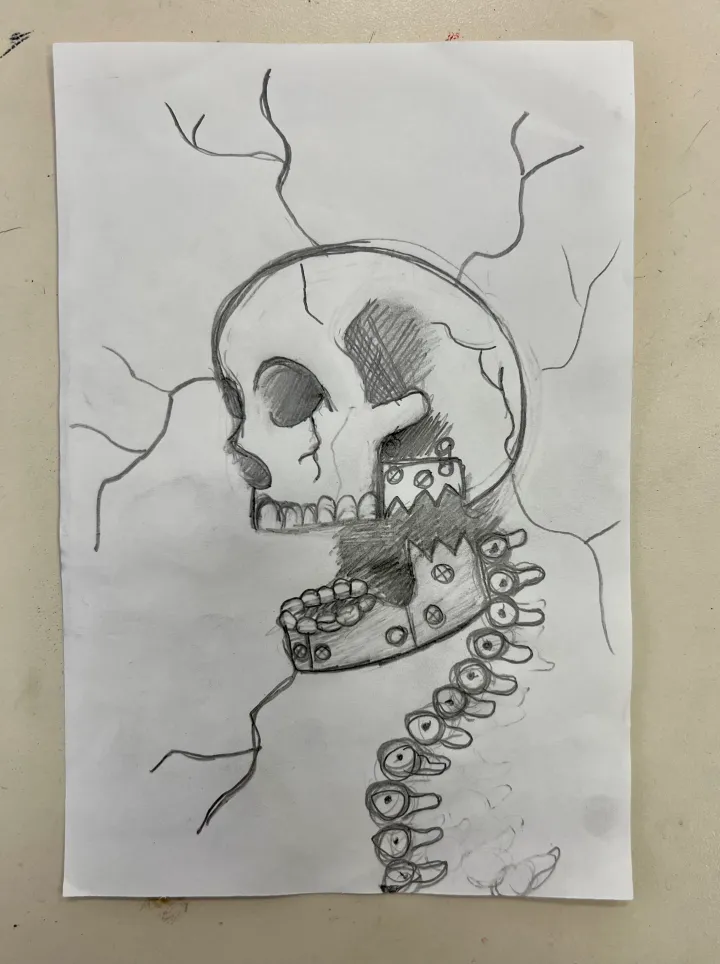
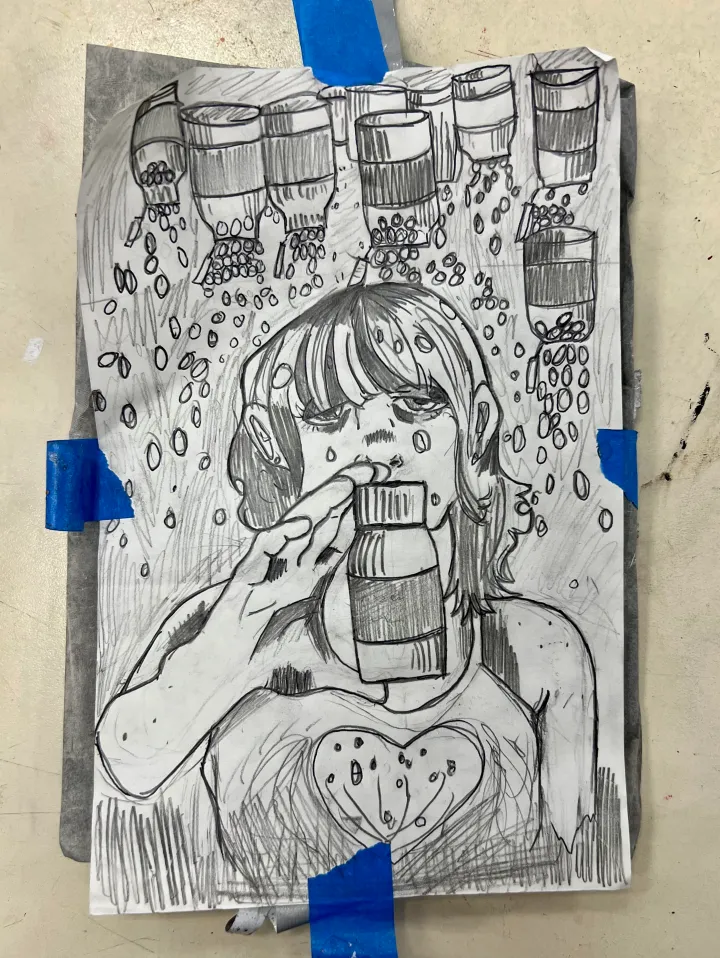
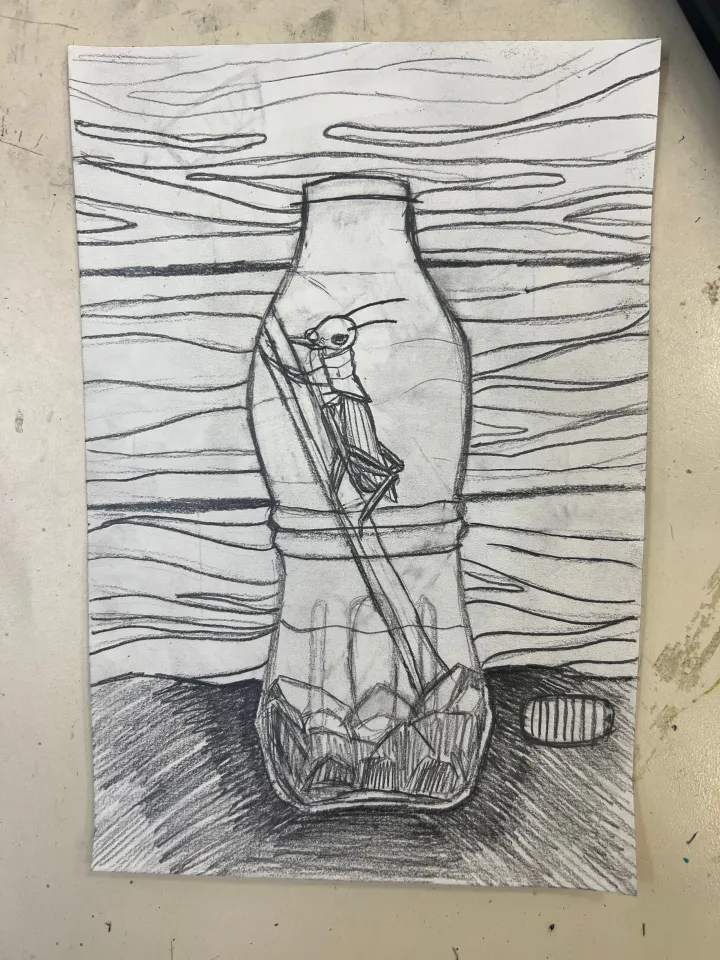
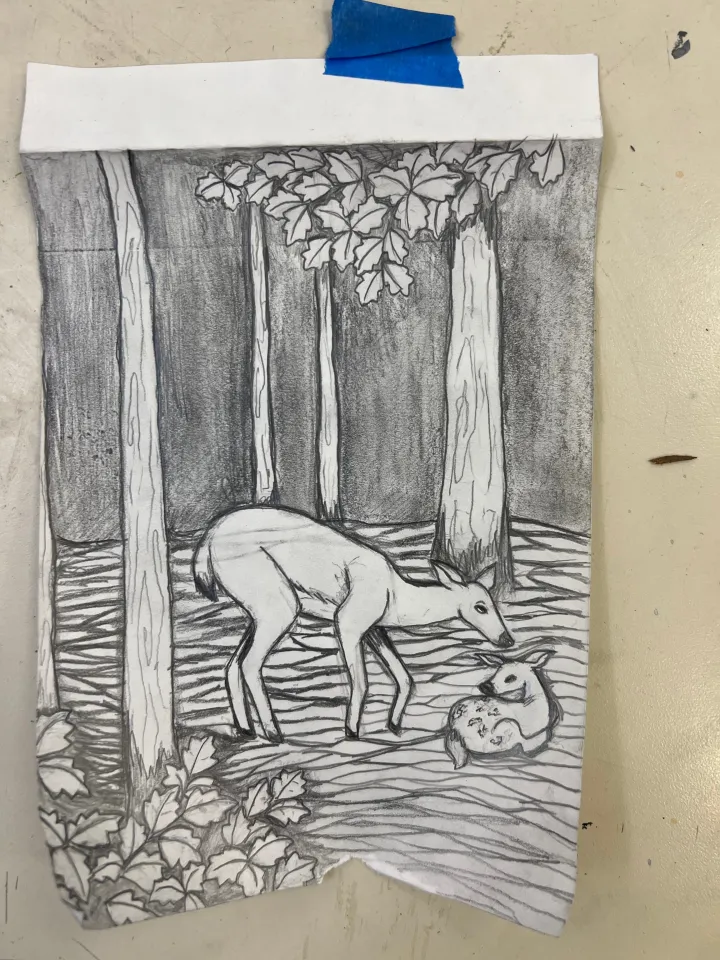
本单元最难的部分绝对是设计环节。油印版画是一种极富表现力的技法,可供选择的主题与创作题材极为丰富。我教过许多版画课程,但最近几年,我让学生们围绕个人记忆展开创作。我们通常在学年尾声开展这一课业,这有助于推动学生探索自身想法,并思考如何将其有效传达出来。若统一布置相同主题(如肖像、建筑、植物静物、风景等),教学会轻松得多;但本课程是大学先修课程(AP)的前置必修课,我希望学生能尝试表达个人思想,并自主选择主题与构图。
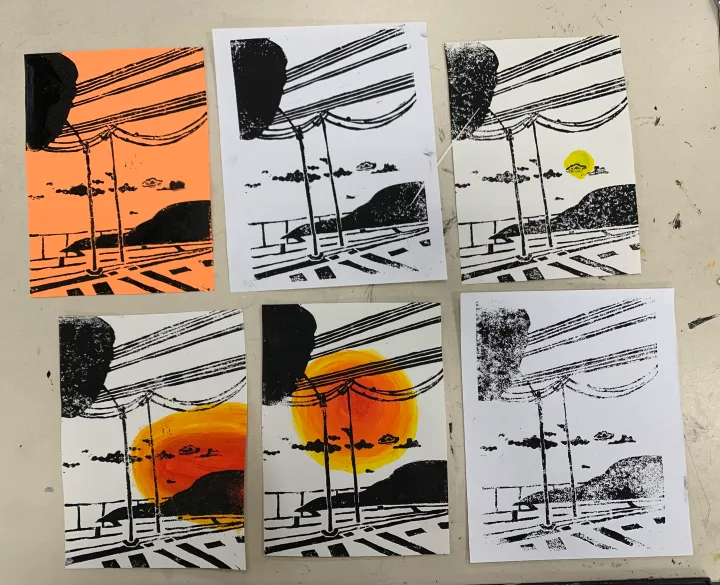
学生探索的个人主题包括家庭回忆、宠物、旅行、假期以及亲人离世等。许多学生聚焦于人生重要节点,例如初学驾驶、初恋萌动、高中毕业等。所选记忆未必宏大——不少学生描绘与朋友的趣事、童年最爱的电影或电子游戏。
学生难免失败:设计方案可能笨拙难懂,构图法则也常被迅速遗忘。要帮助四个班级、每班三十余名学生有效传达个人想法,实属挑战。然而,当一幅幅版画最终呈现时,一切付出都值得。
我能描摹吗?
“这不是草图,而是最终设计稿。”我在学生用铅笔绘制设计稿时反复强调这句话。我要求他们用铅笔为所有将印成黑色的区域全部涂满明暗/排线,以便我快速审阅整体设计。倘若学生需依赖想象才能辨识细节,则必须以铅笔明确涂出明暗/排线。我不愿在脑中自行反转图像(例如:“此处实际应为黑色,只是我没涂明暗/排线”)。本单元有个实用技巧:允许学生描摹。若您教授的是美术I或美术II课程,何不让学生描摹复杂图像呢?
举例而言,我校许多高中生对首次拥有汽车或皮卡怀有美好记忆#Oklahoma。若某位学生因绘画紧张而畏难,为何还要他徒手绘制卡车?他手机里明明存着卡车照片!一位学生描摹了卡车轮廓,再添加背景元素,这成为他整个学年第一件(也是唯一一件)真正引以为豪的作品。此前所有作业他均完成艰难,因其绘画能力与自信心均十分薄弱。当他看到自己的卡车形象被永久定格于艺术作品中时,脸上绽放的笑容无价珍贵。就连那些平日不喜美术的同学也围拢过来,由衷赞叹其版画效果之佳。我珍视这样的时刻!
待我的审核通过后,学生即采用与练习版画完全相同的技法转印设计稿。此时我对雕刻环节的介入大幅减少,因学生的实践经验与自信心已显著提升。若学生希望提前预览版画效果,可用记号笔涂抹整块油印板,观察油墨附着区域——这能让他们直观了解成品样貌。
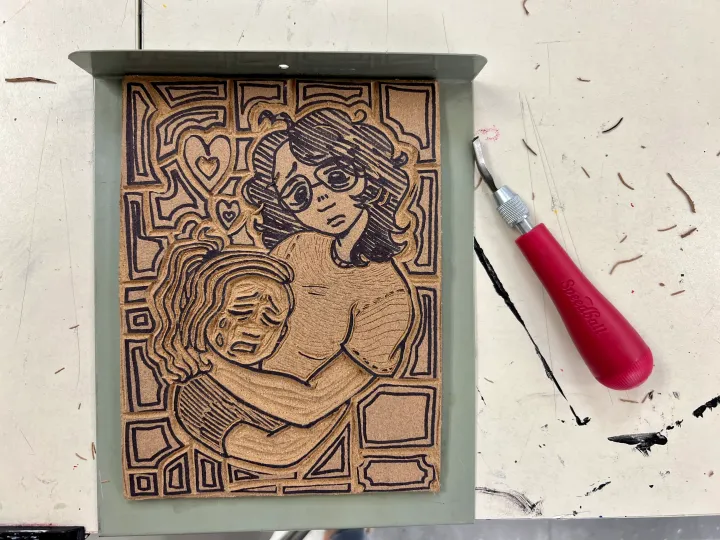
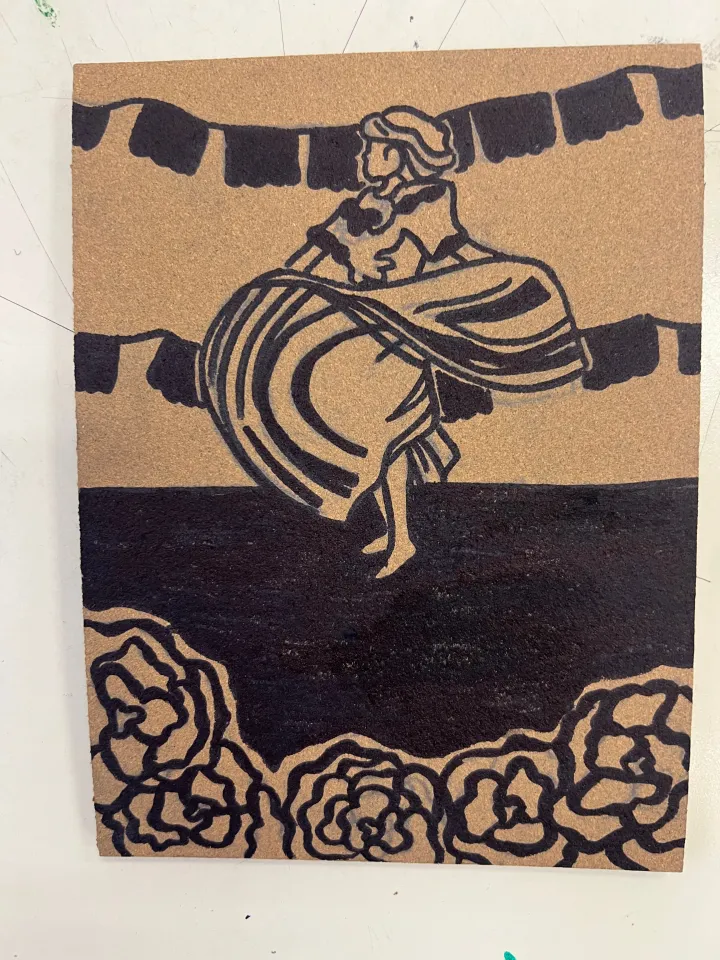
本教程融合版画技法与个人记忆主题,欢迎直接用于您的课堂教学!
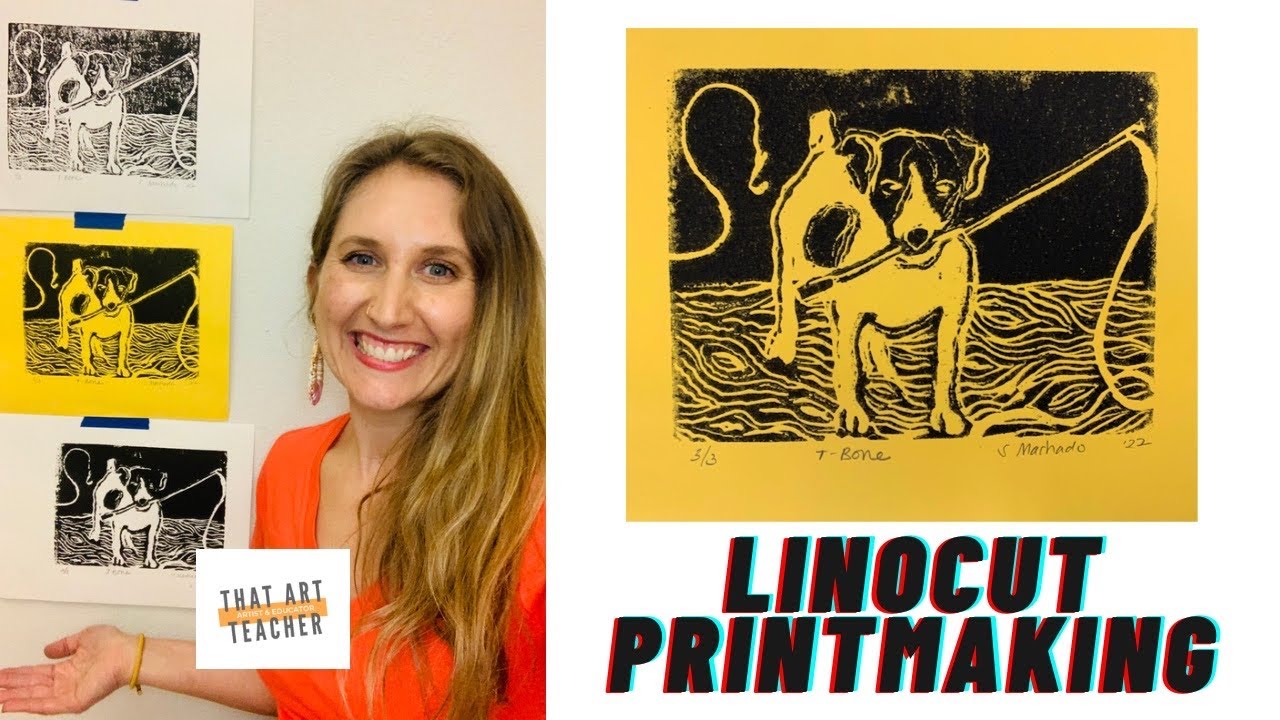
设计过程耗时远超实际雕刻环节。学生一旦进入印刷阶段,便先在白纸上试印。若对设计效果满意,他们即可尽情印刷:选用彩色纸张,并搭配此前雕刻期间分组制作的吉利版(Gelli Plate)背景。
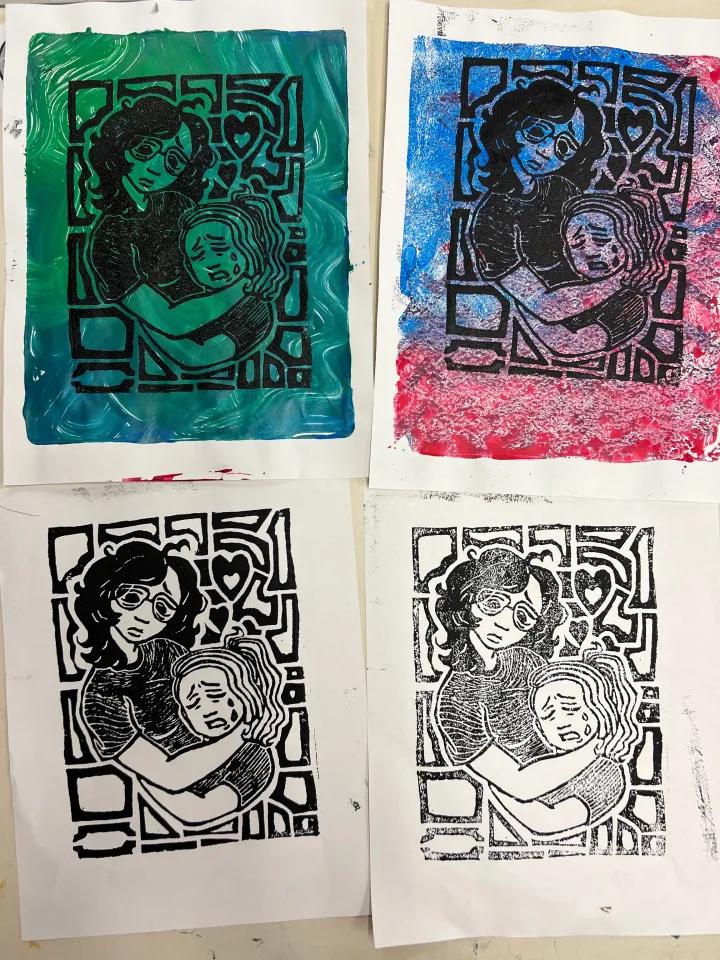
吉利版(Gelli Plate)版画
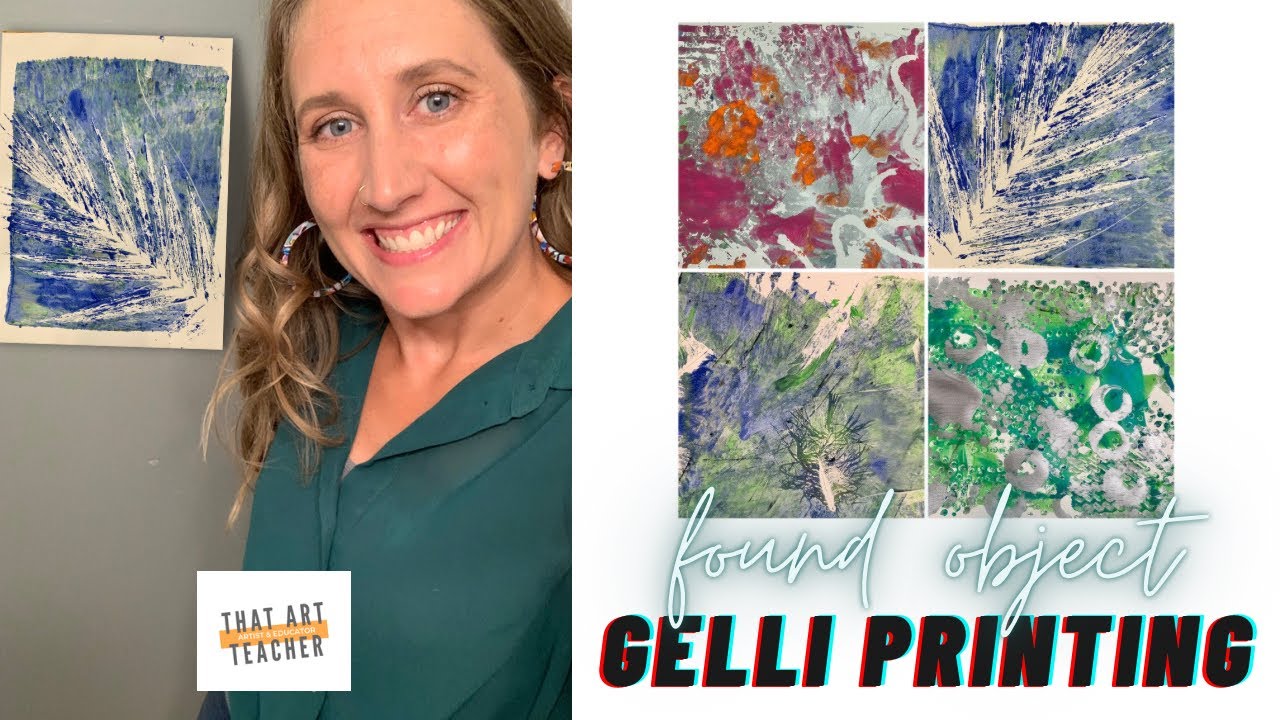
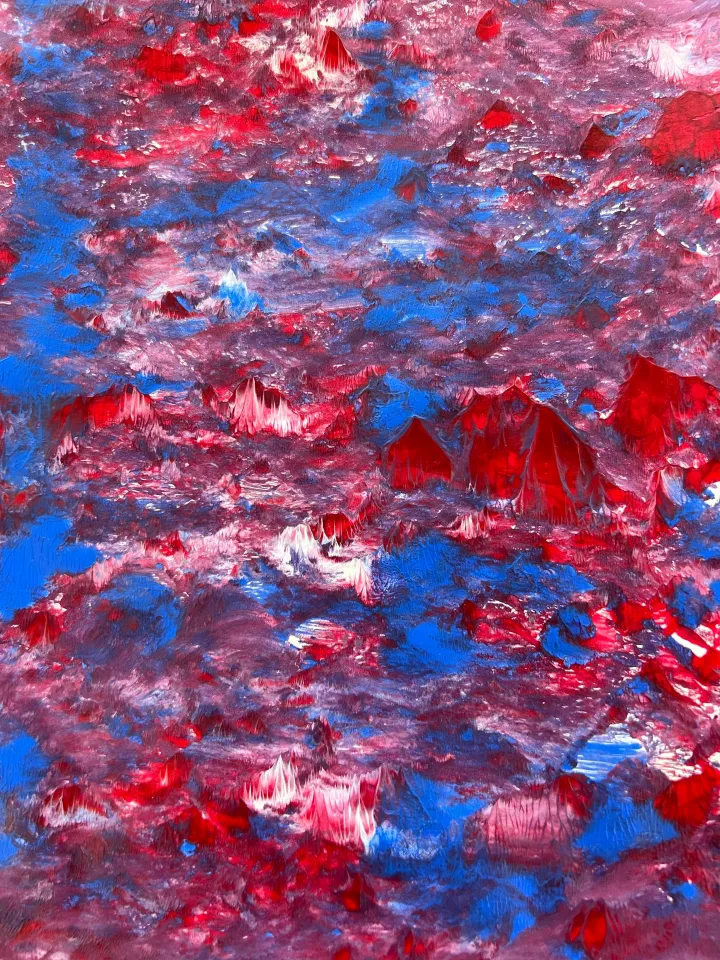
我钟爱以丙烯颜料创作缤纷背景,为版画增添层次。黑白版画自有其简约之美,但学生可借此技法探索色彩与肌理,从而深化记忆内涵。我鼓励学生制作5至10种背景,反复思考其如何强化作品主旨。有时效果略显混乱,但这些背景往往能极大提升最终成品的表现力。
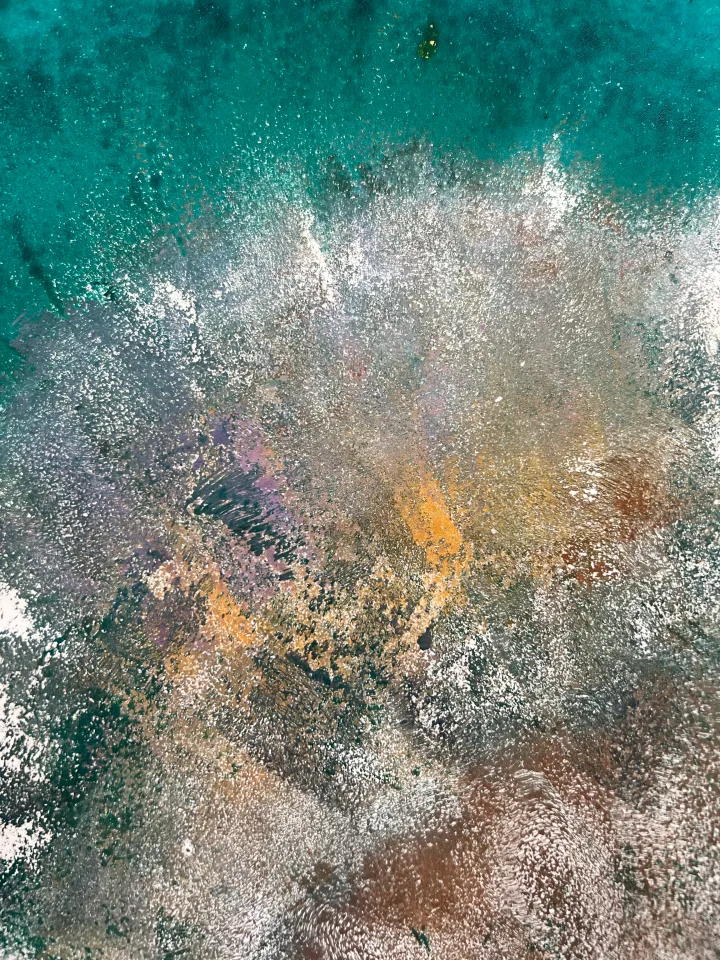
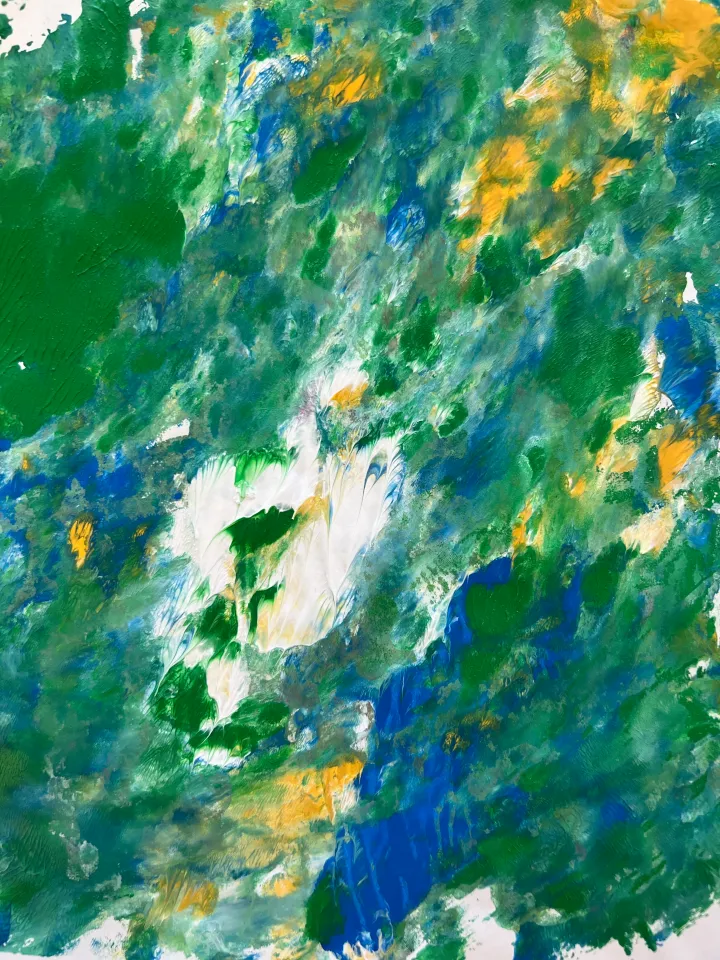
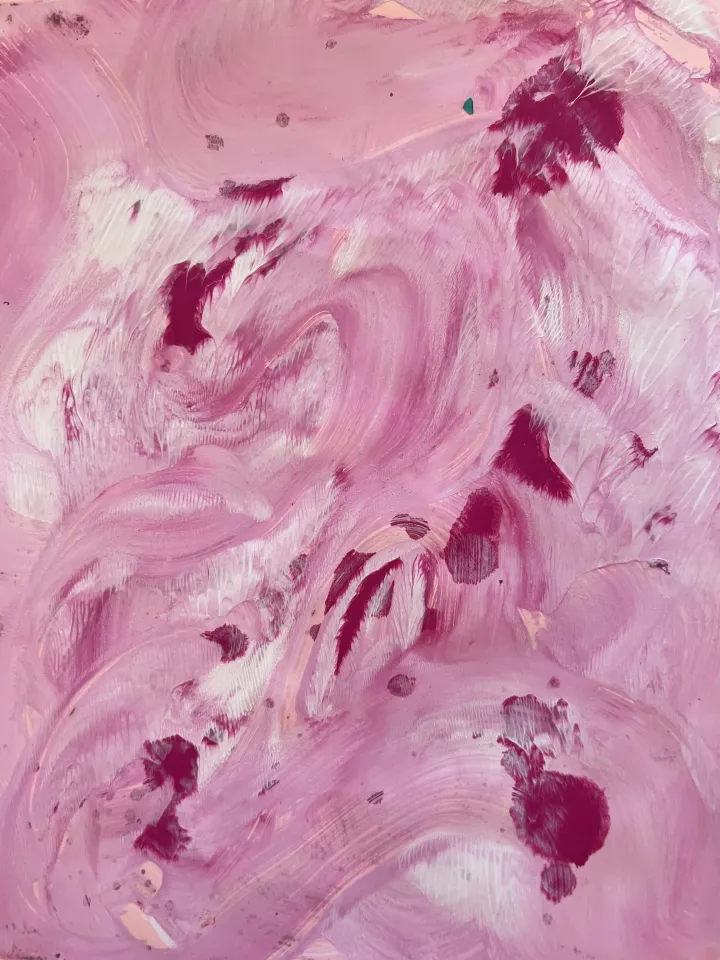
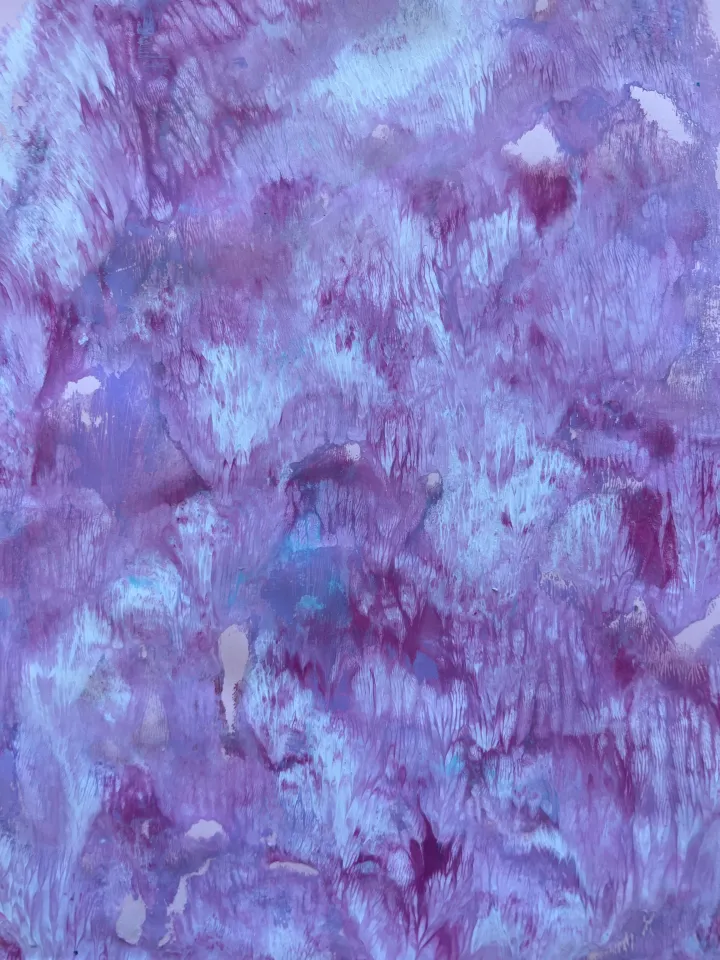
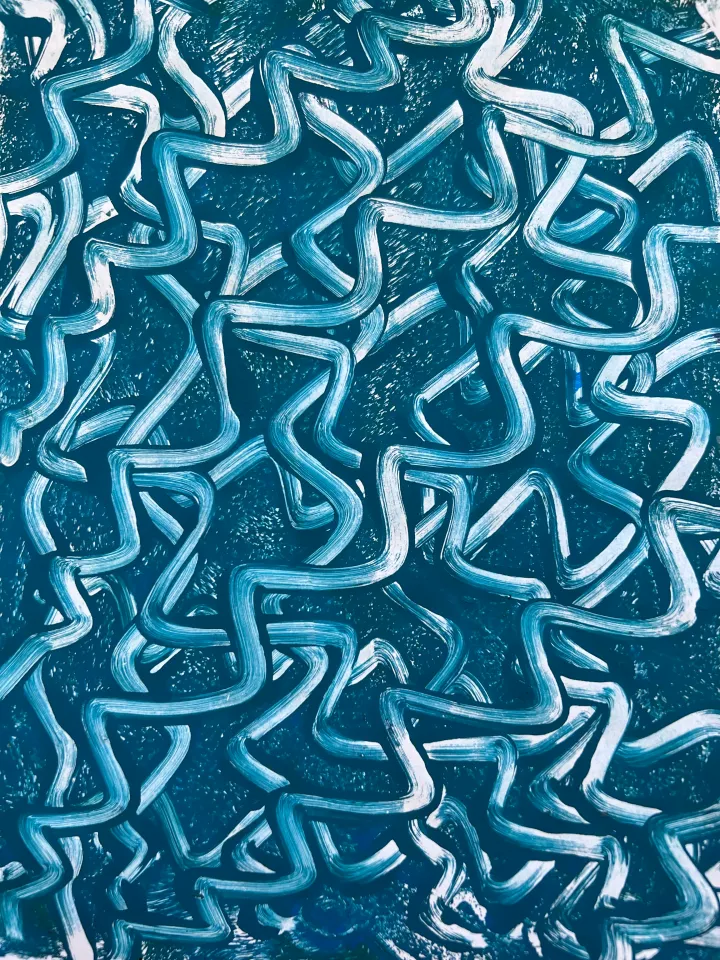
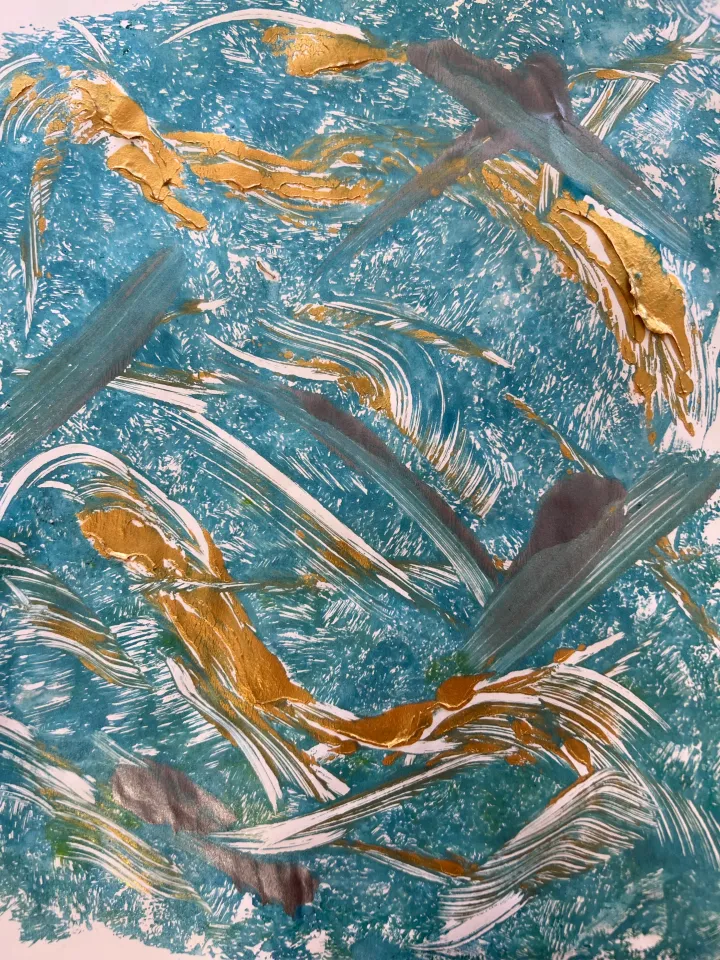
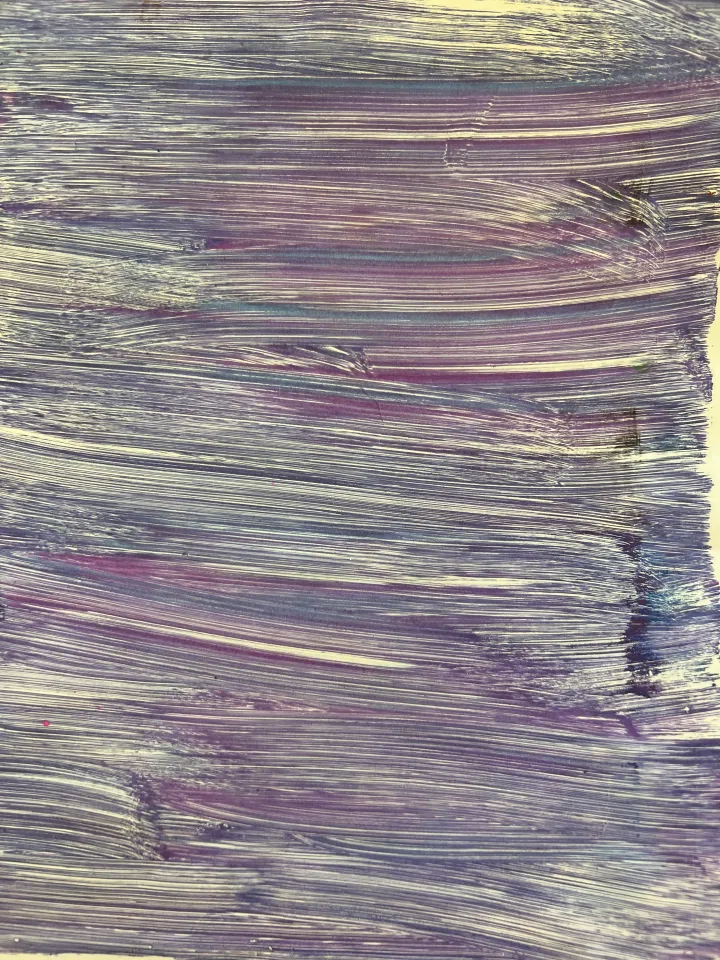
若学生对印刷效果不满意,可洗去油墨,待油印板晾干后,重新雕刻修正问题部位。我要求学生提交以下三类中各自最满意的一幅作品:
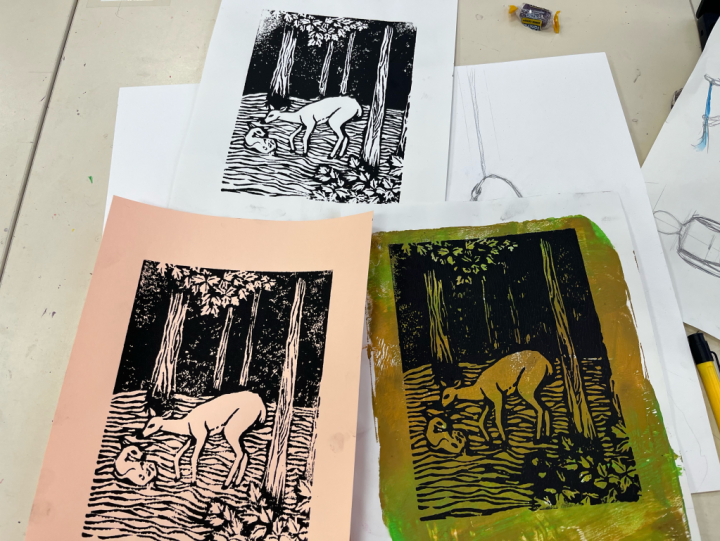
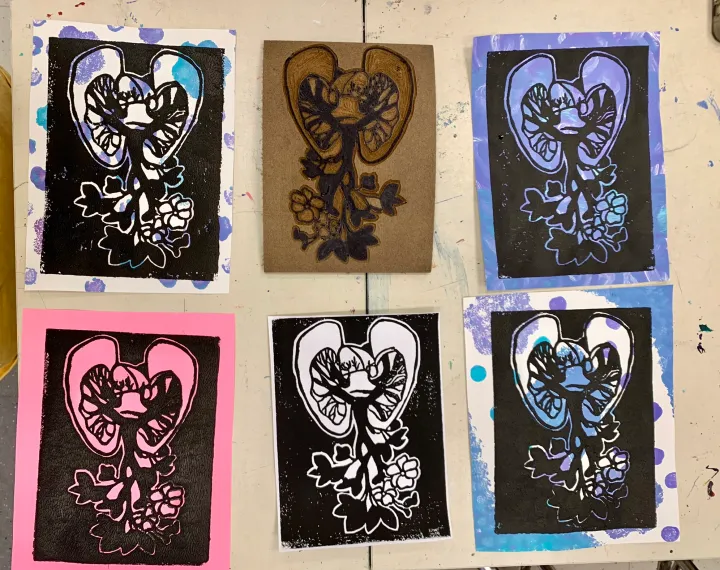
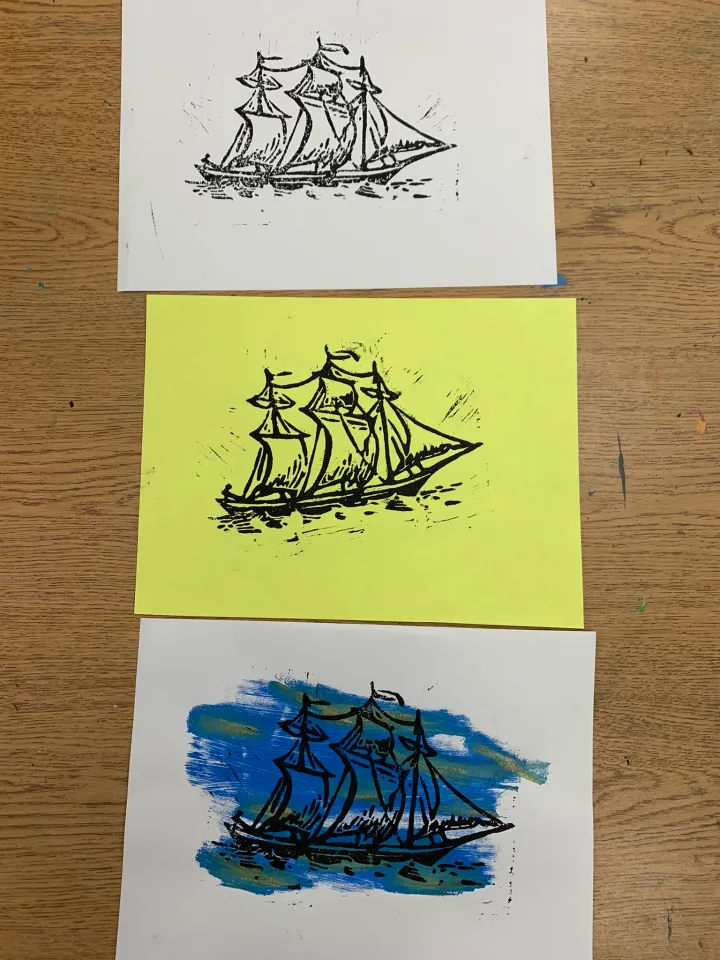
- 白纸印刷
- 单色印刷
- 吉利版(Gelli Plate)背景印刷
通常需四天印刷时间,全班学生方能全部完成。此举亦缓解了我有限的晾干架空间压力——部分学生单节课即印制十幅甚至更多作品。学生需从中精选三幅最佳作品,上传至Canvas平台。若您尚未尝试在Canvas上使用评分量规(rubric)进行评分,请务必一试!您只需点击各评分项,系统即自动汇总总分。所有照片均在线上传,您无需触碰任何沾染油墨或细菌的艺术实物。我强烈推荐此法!
完成的记忆主题油印版画
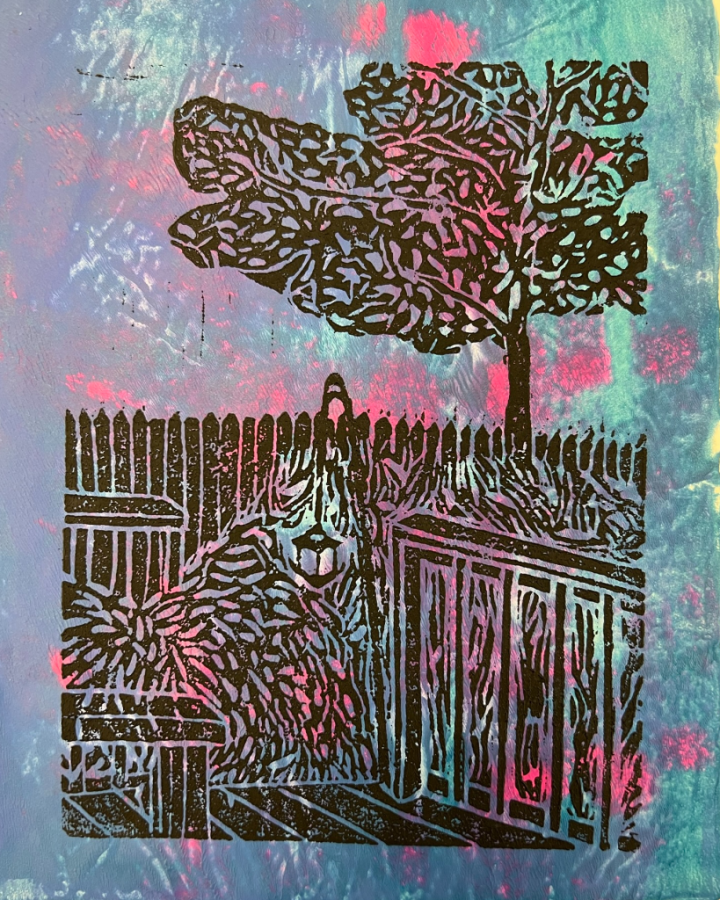
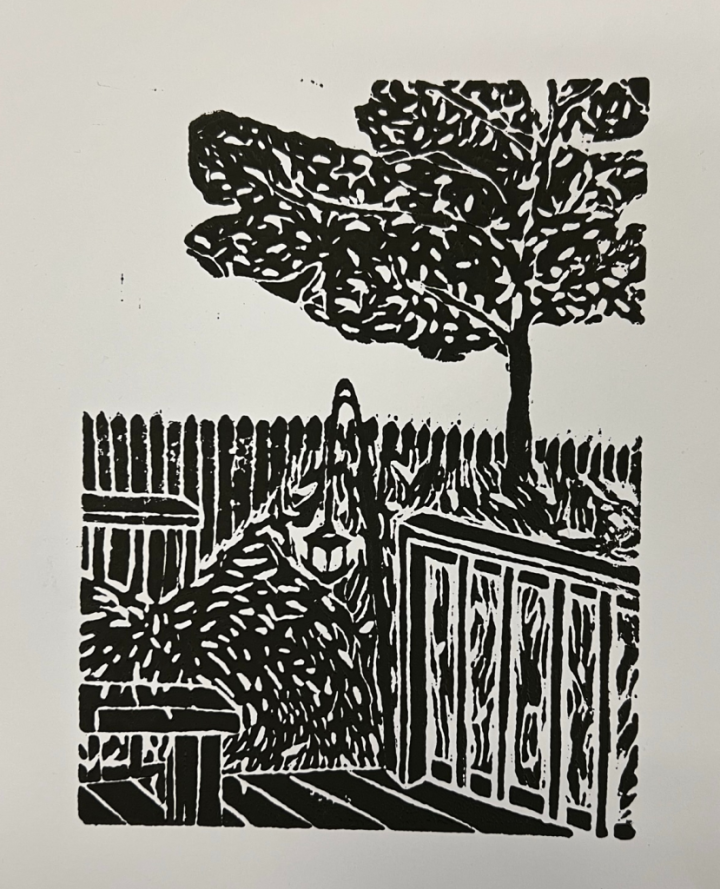
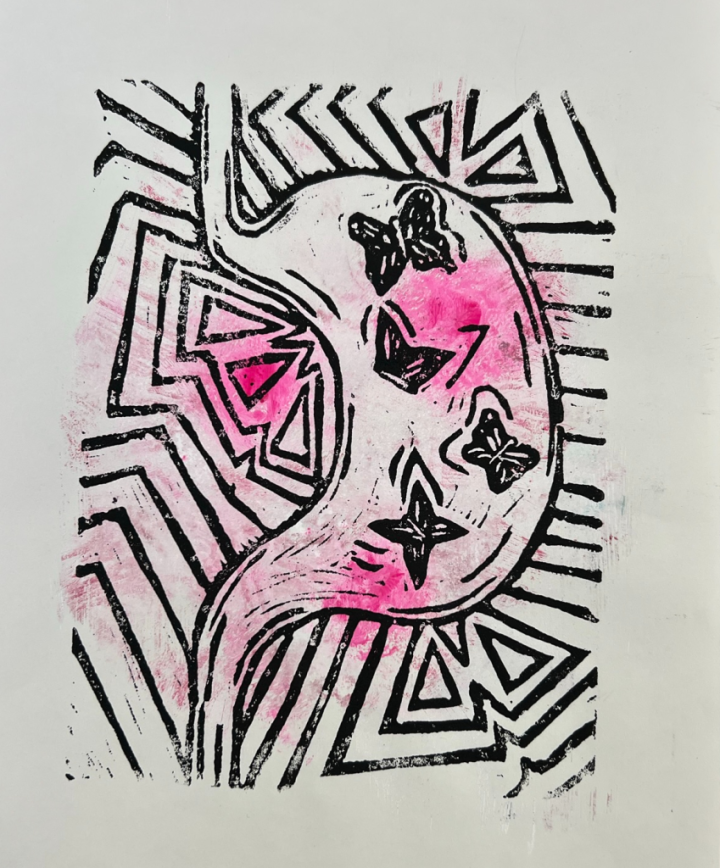
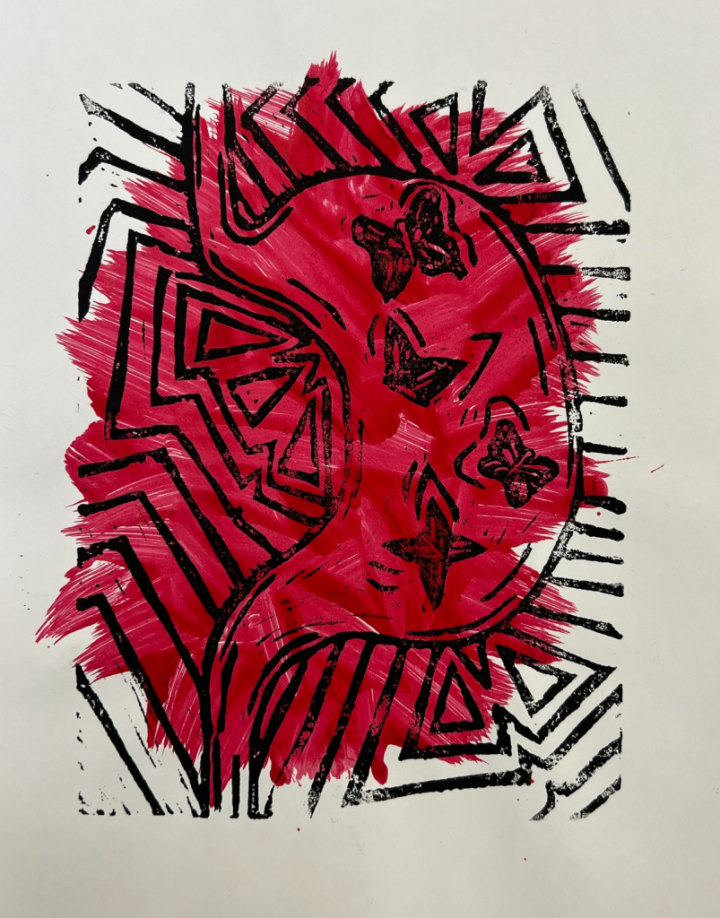
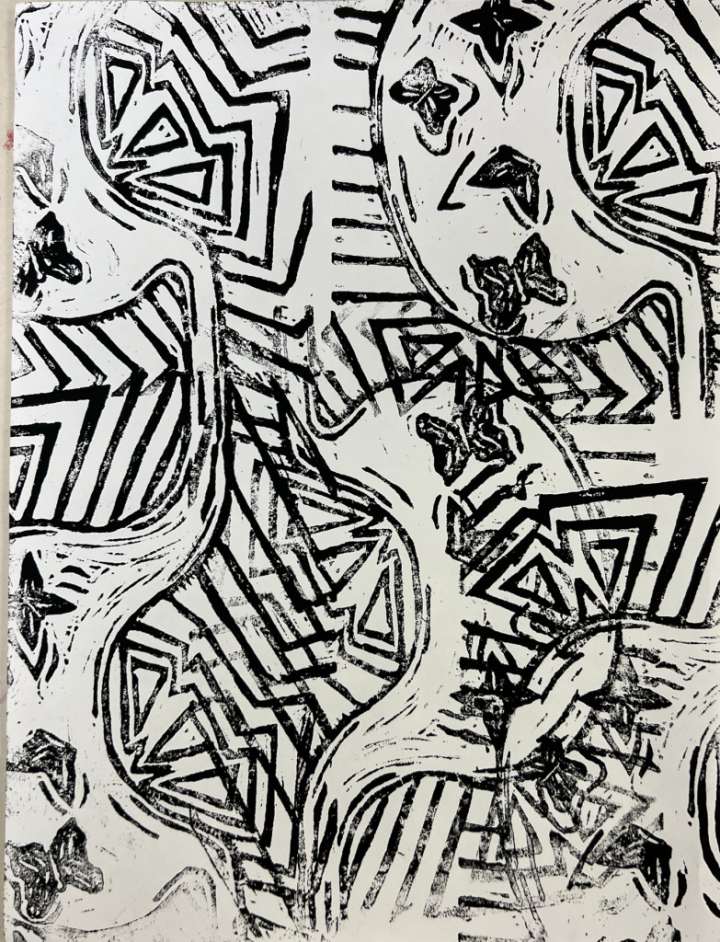
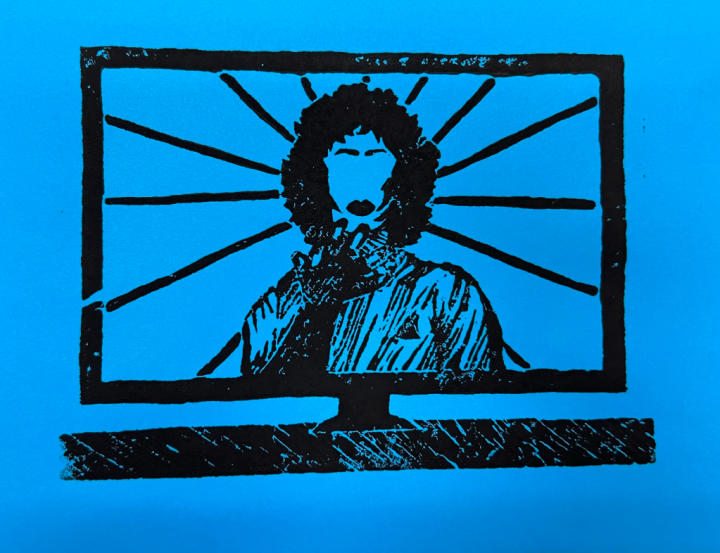
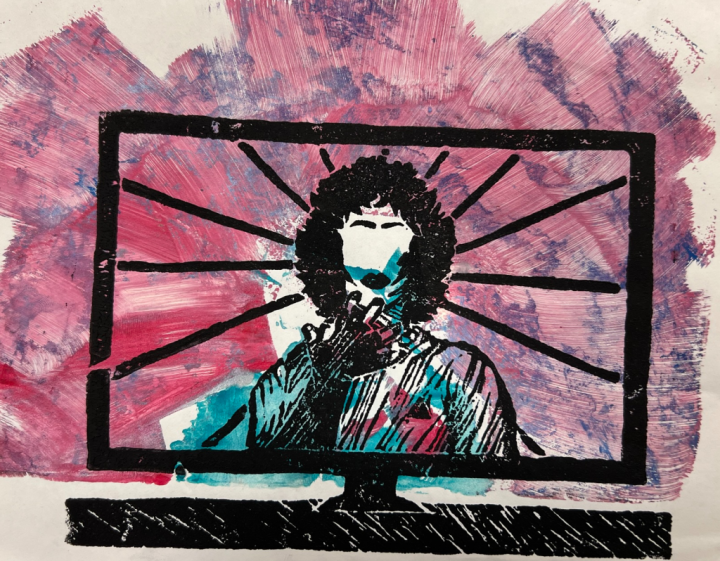
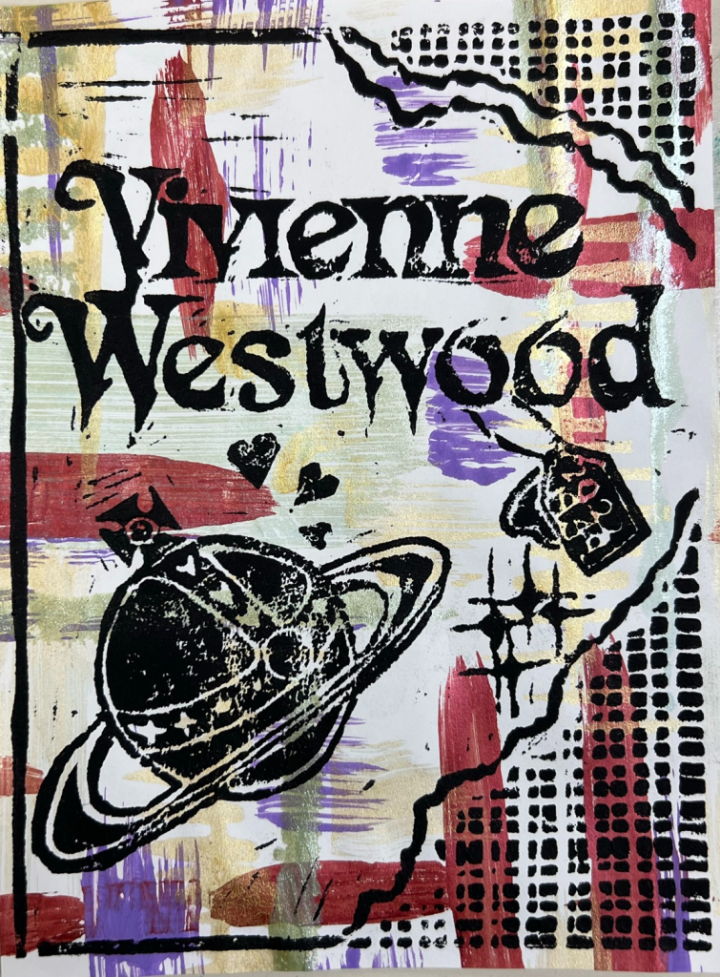
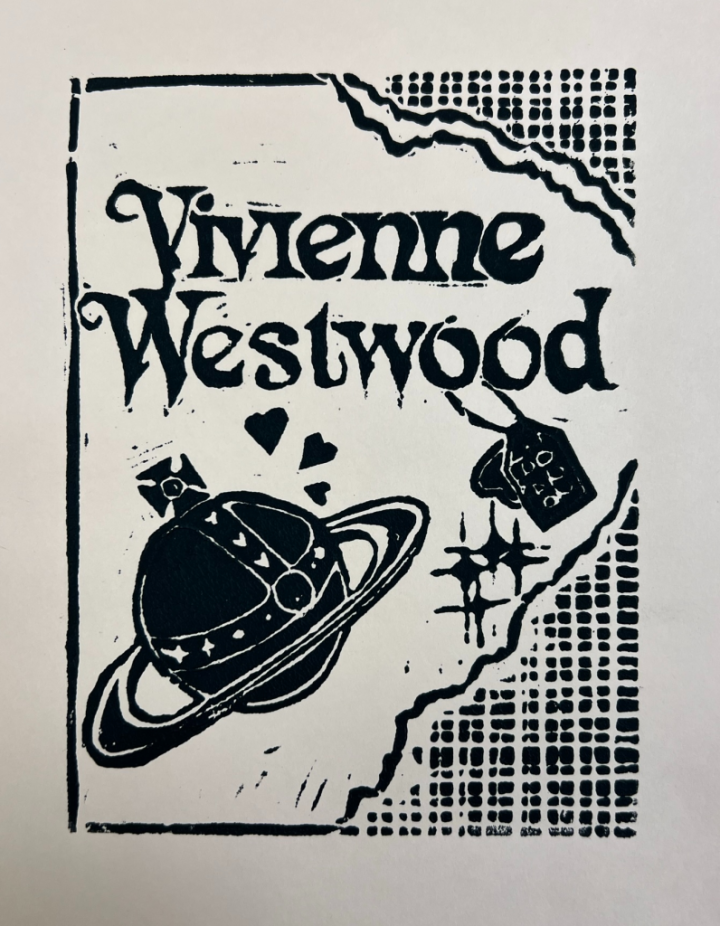
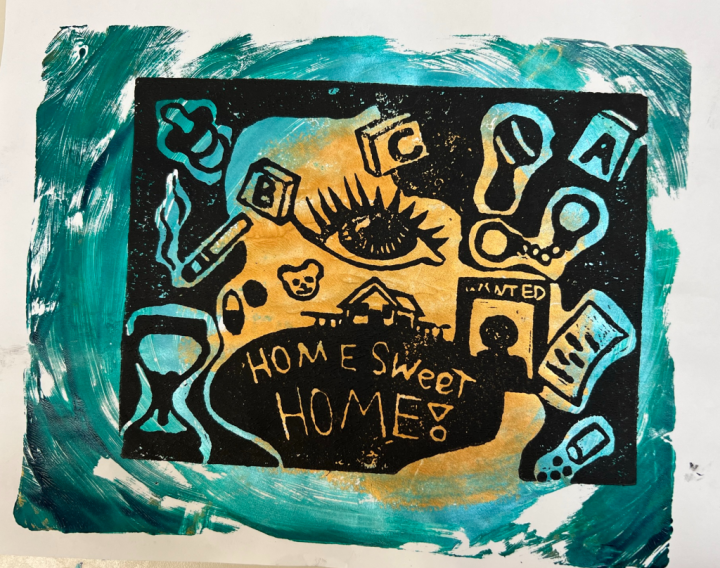
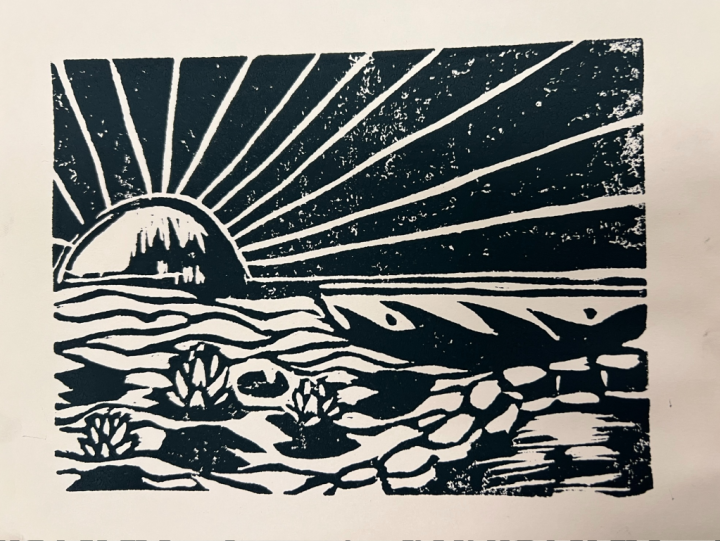
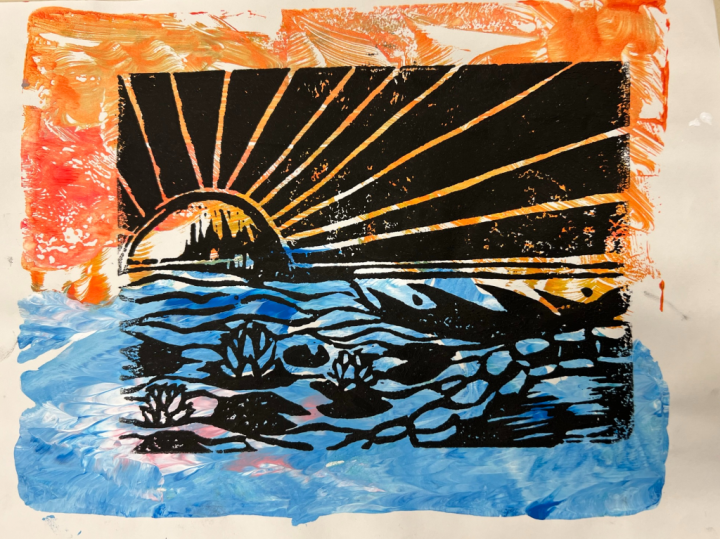
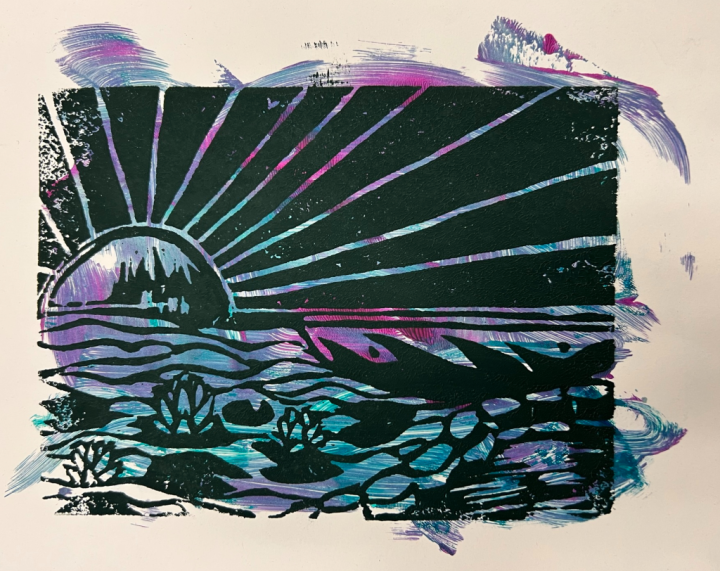
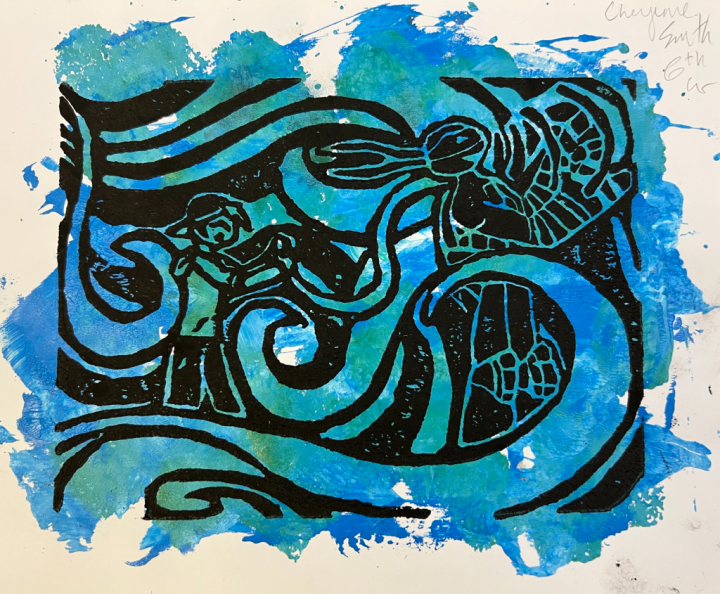
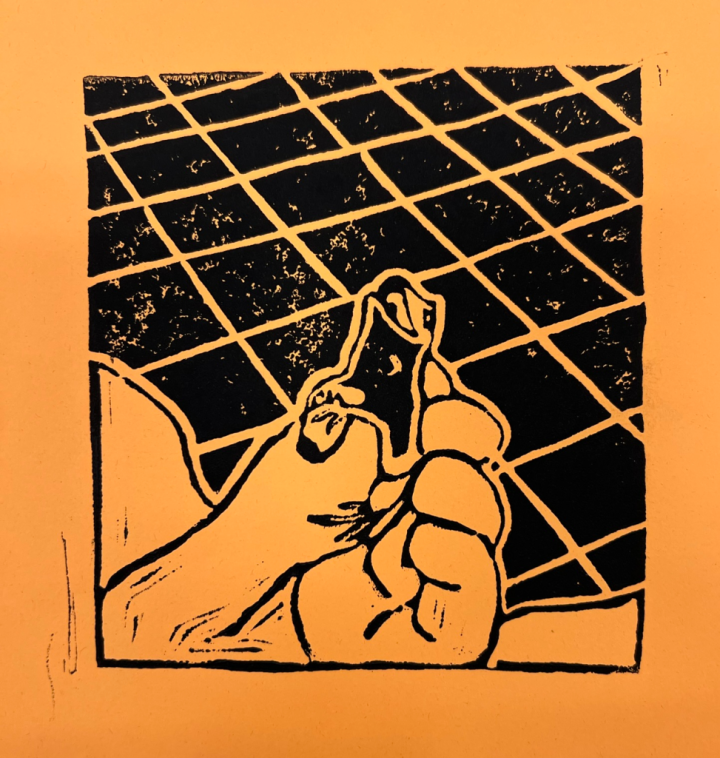
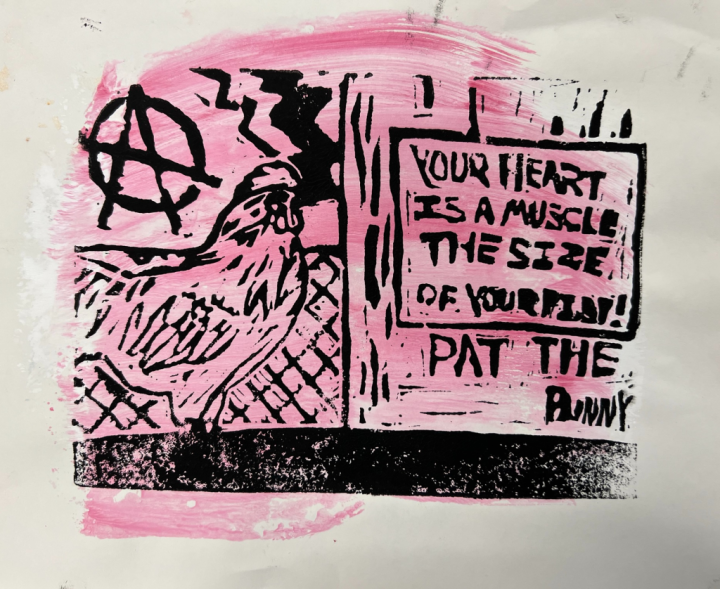
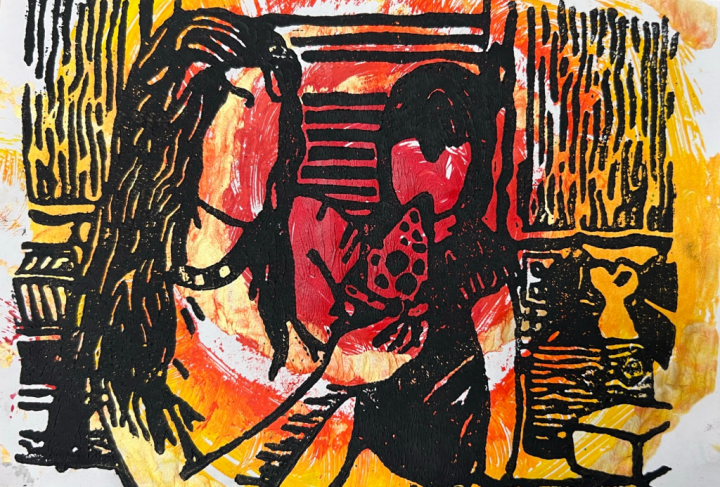
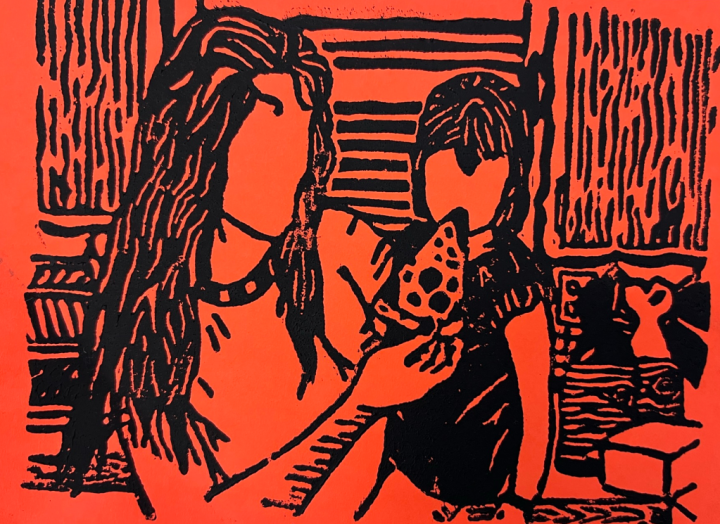
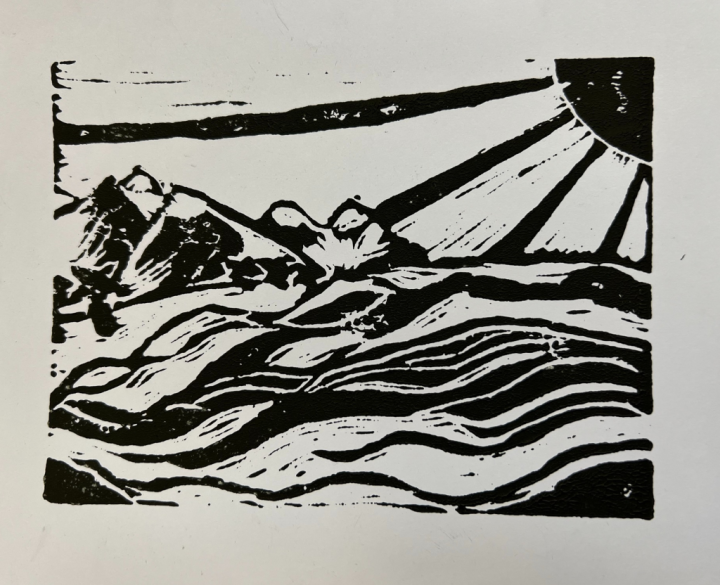
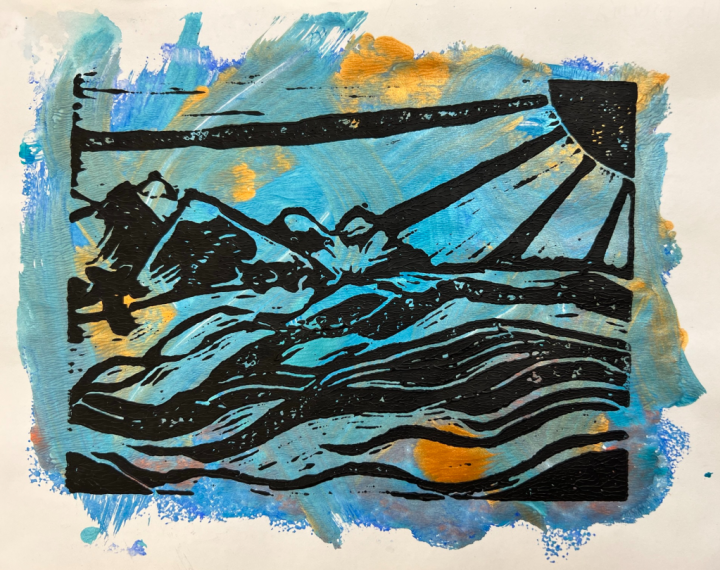
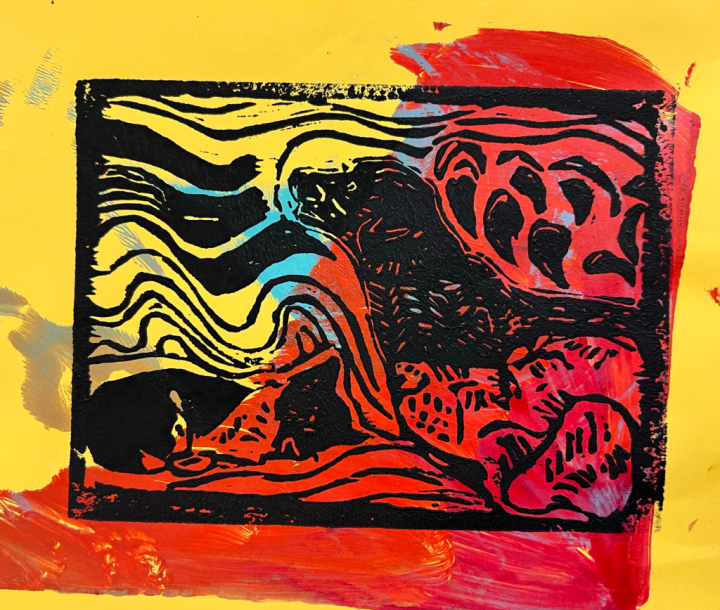
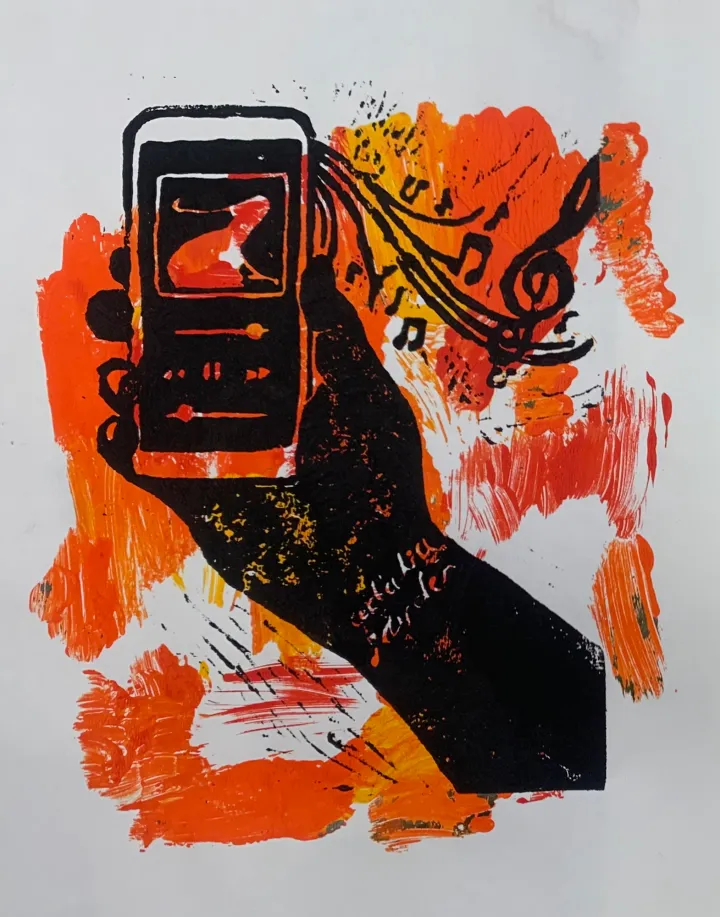
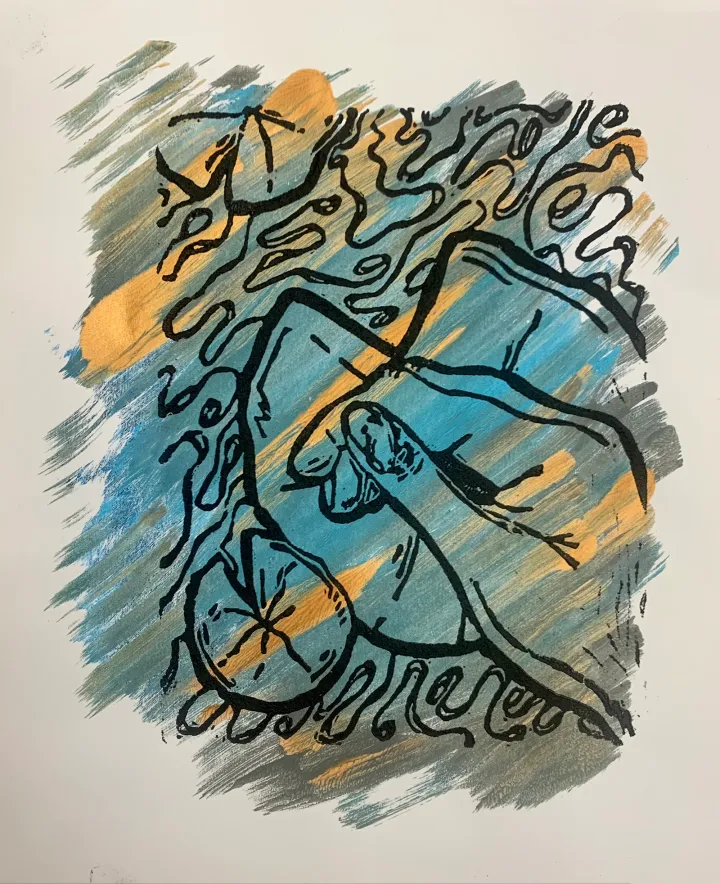
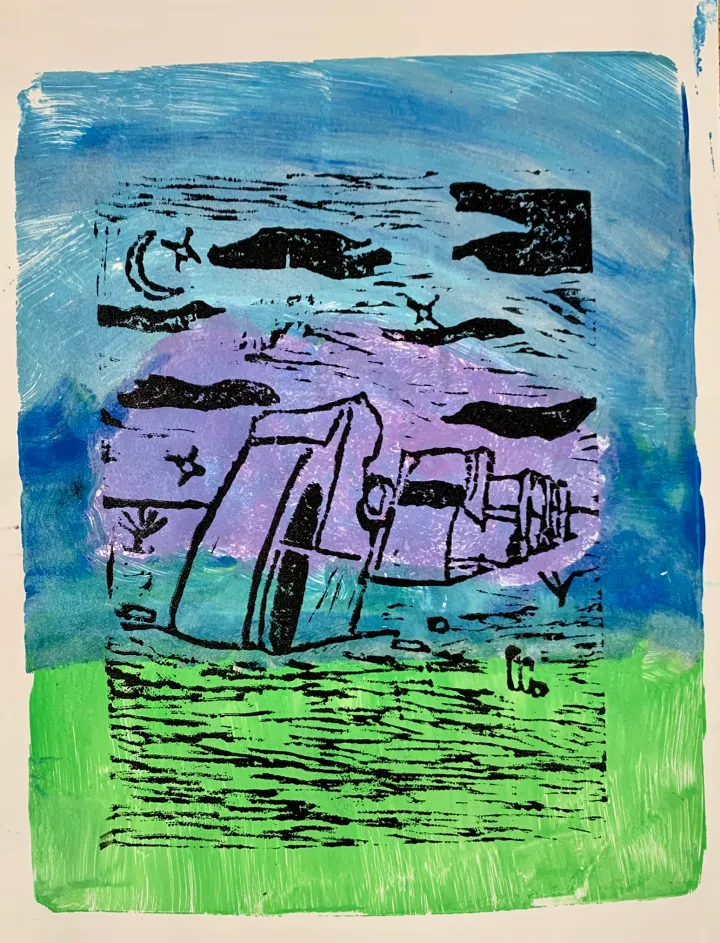
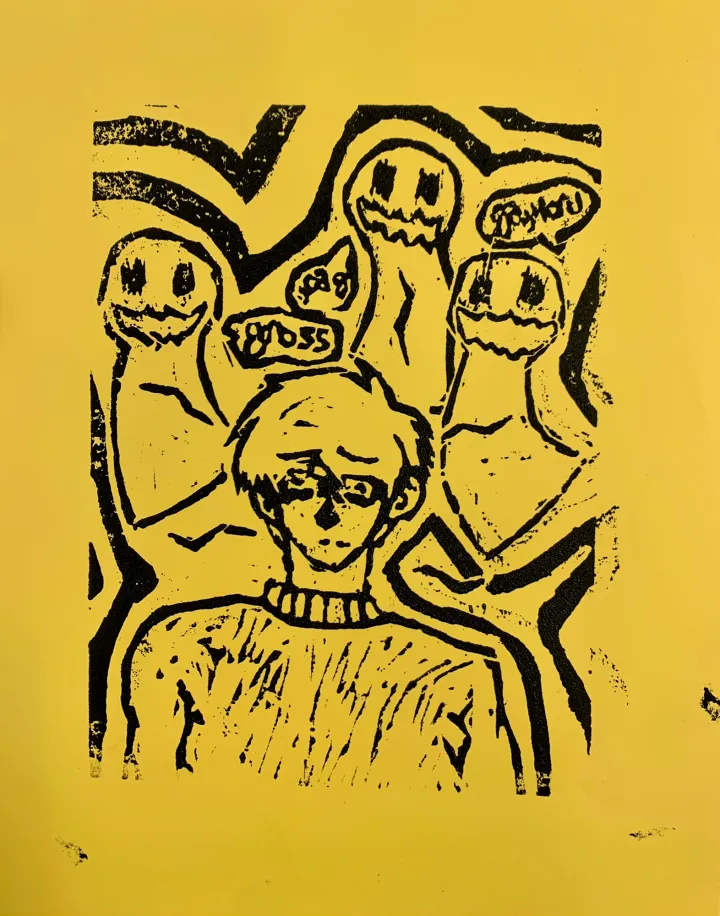
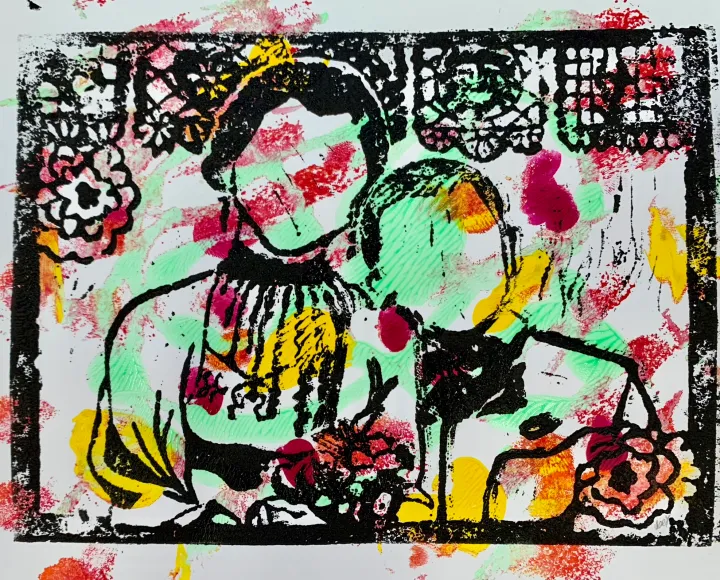
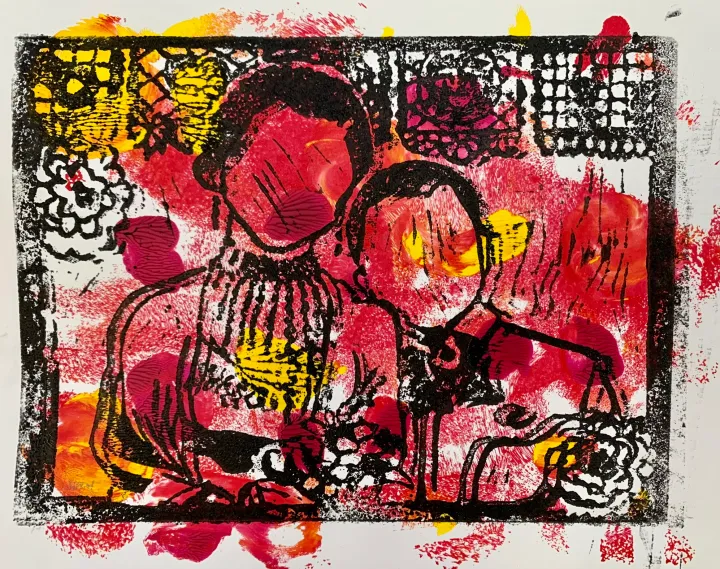
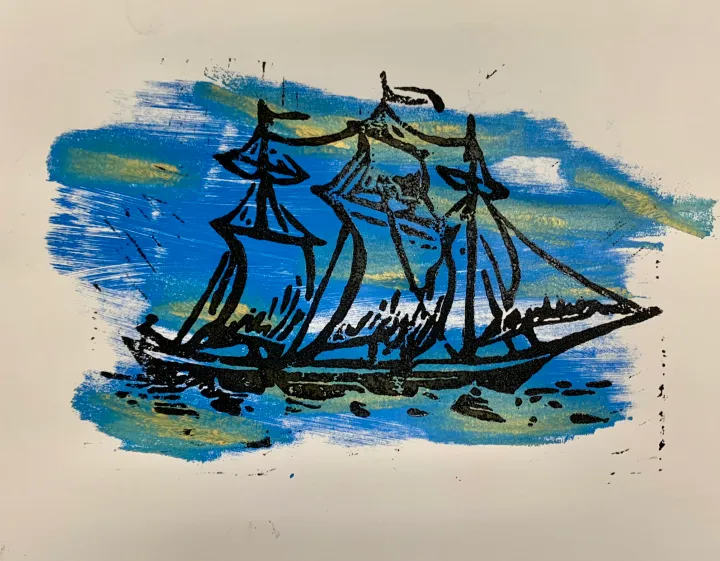
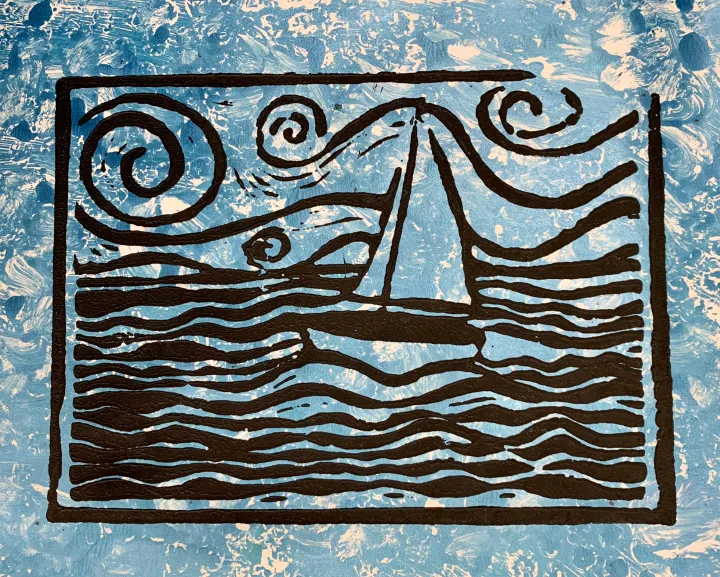
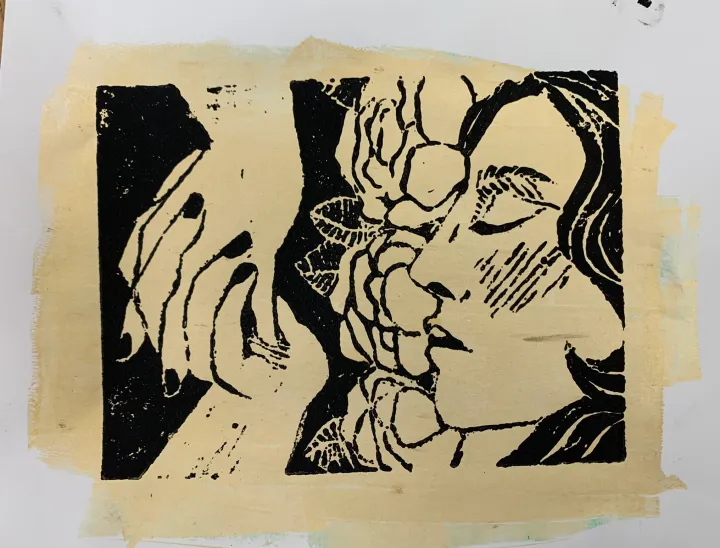
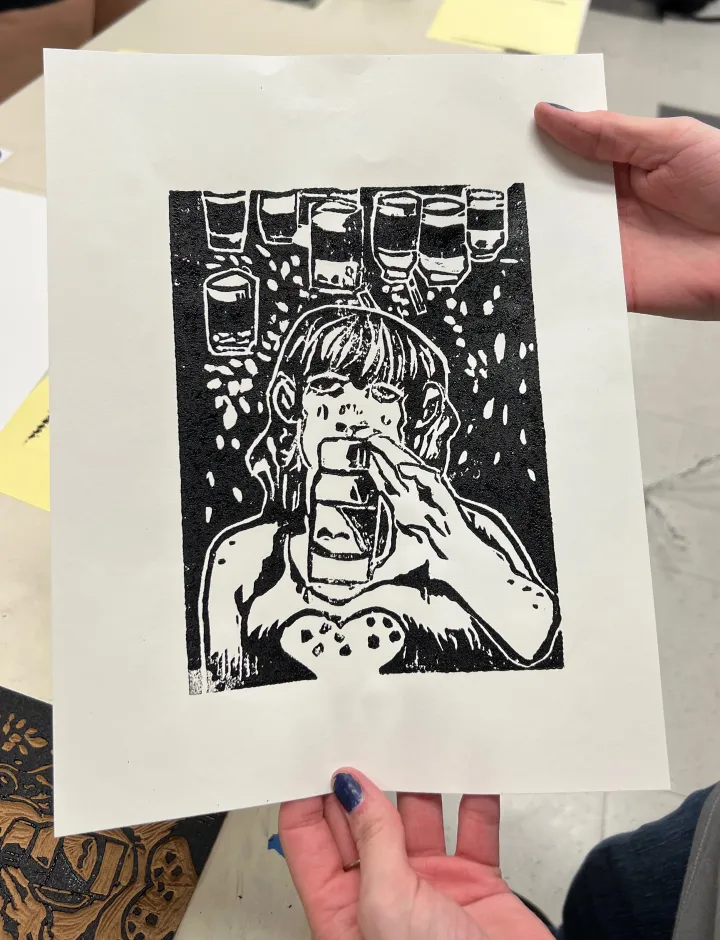
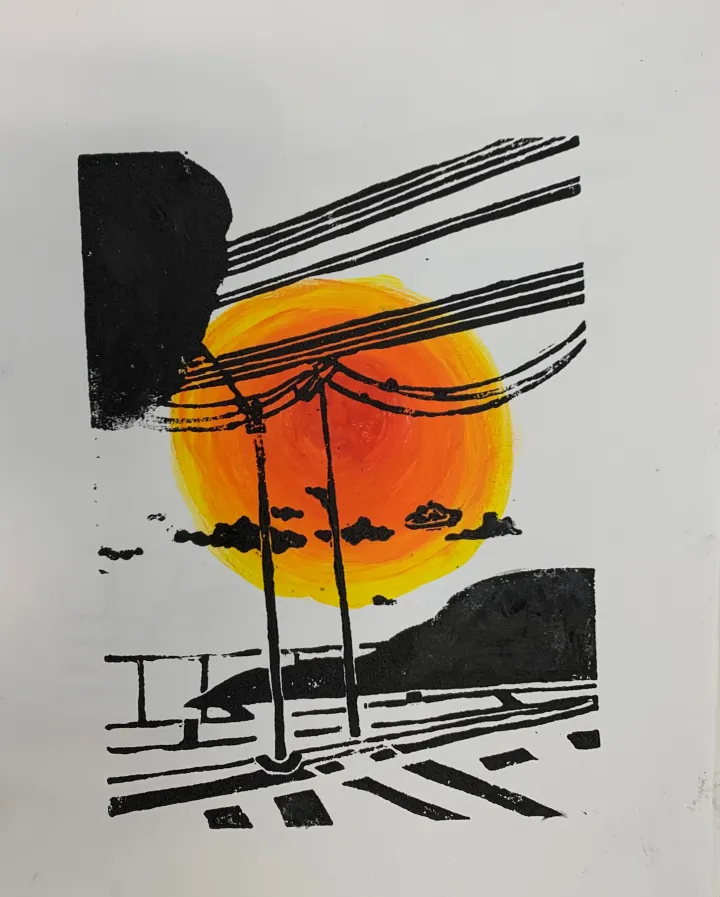
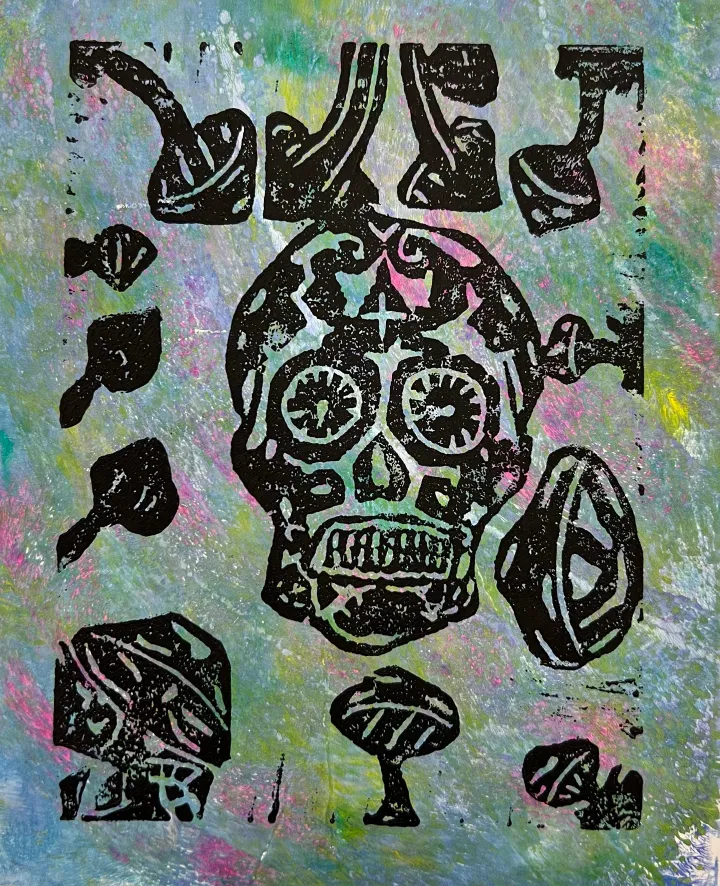
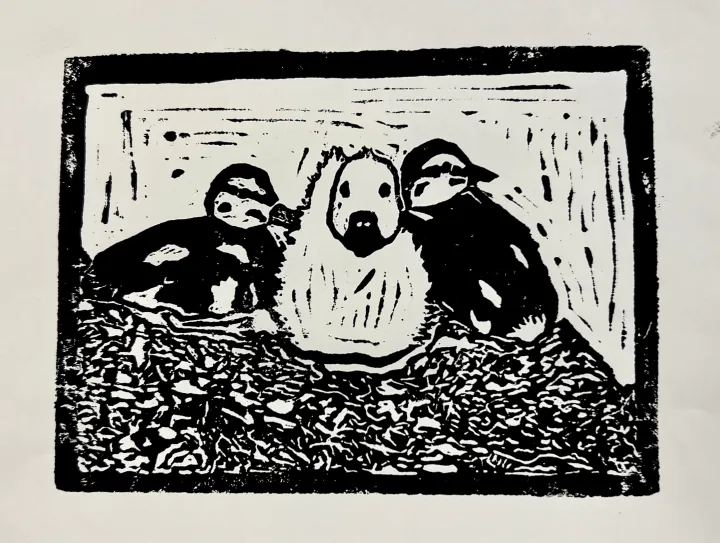
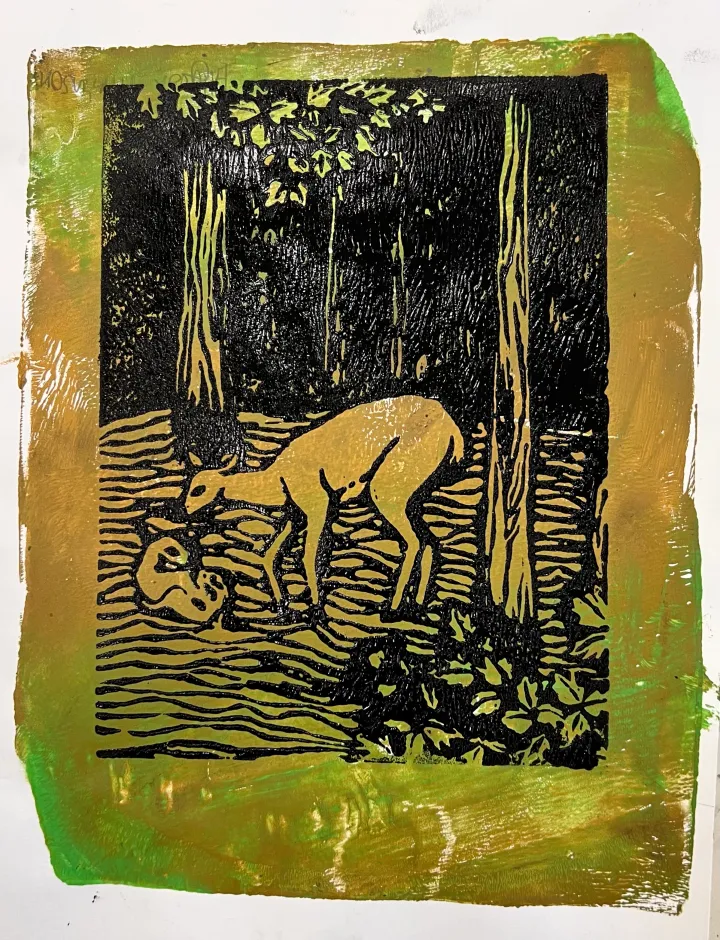
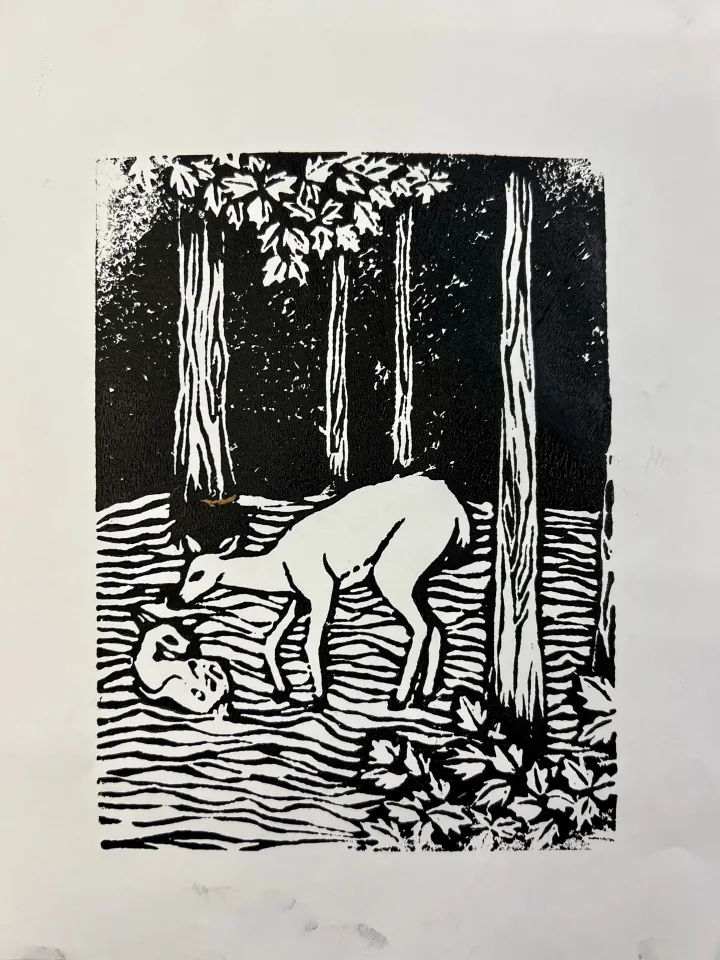
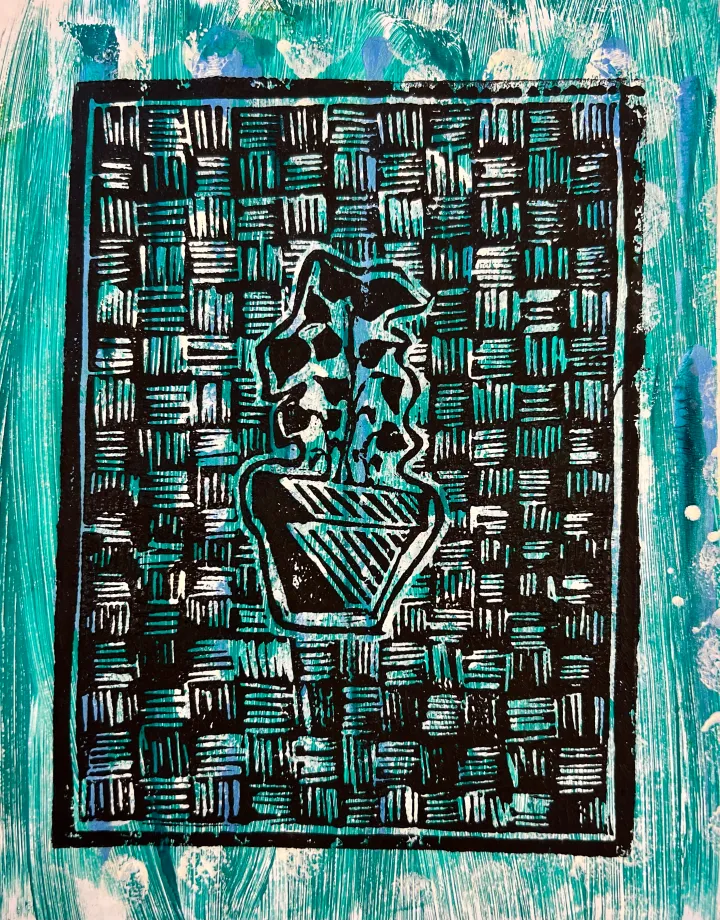
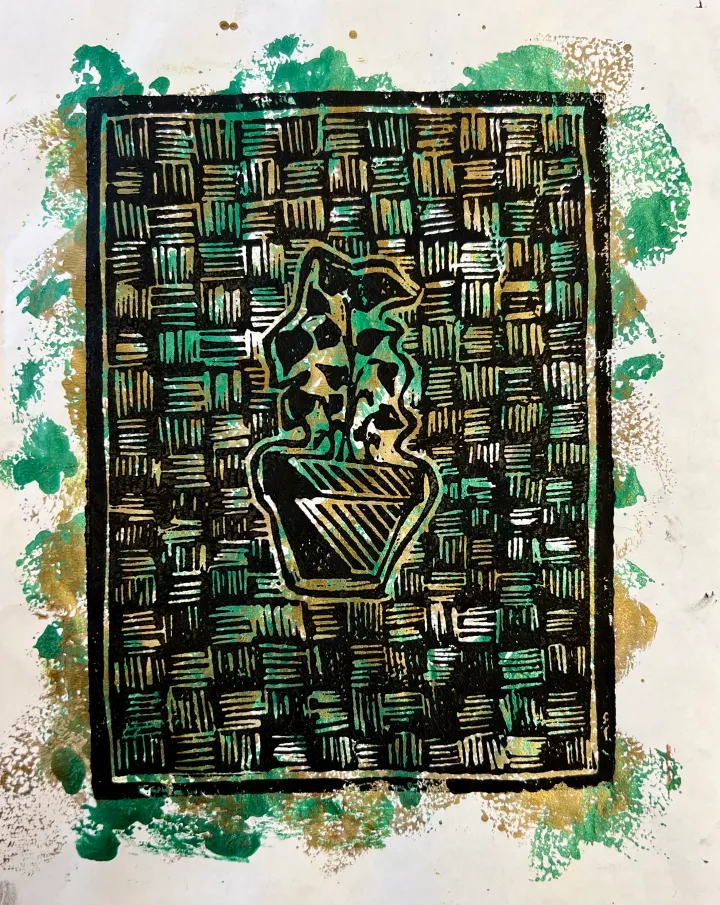
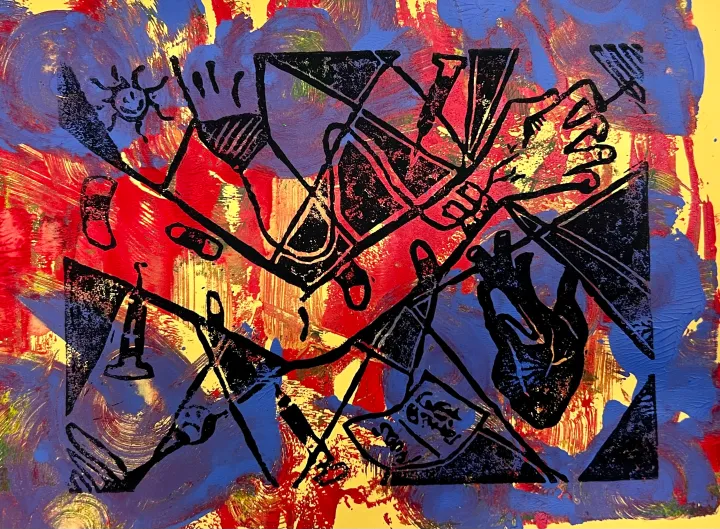
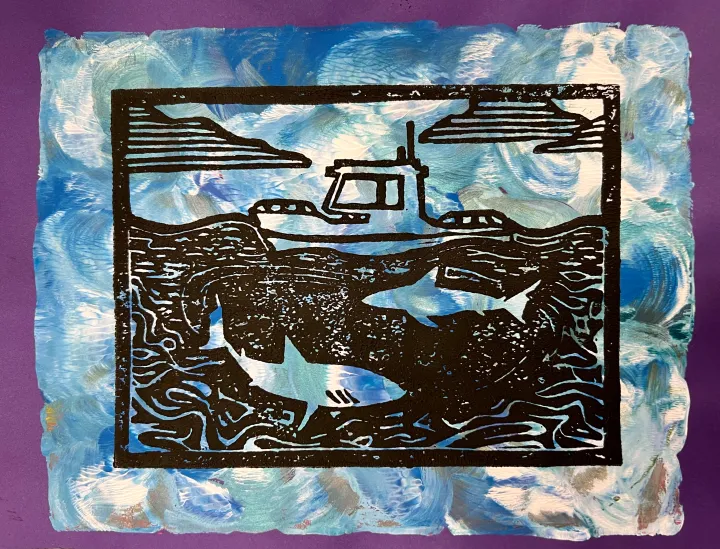
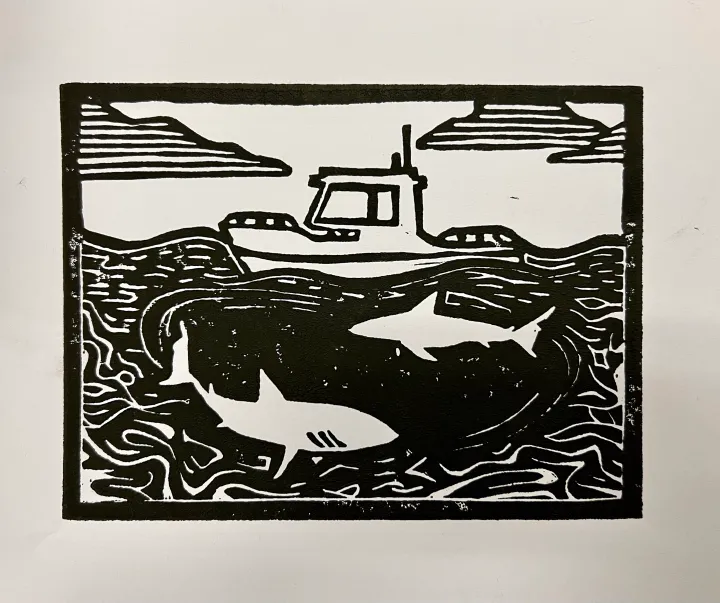
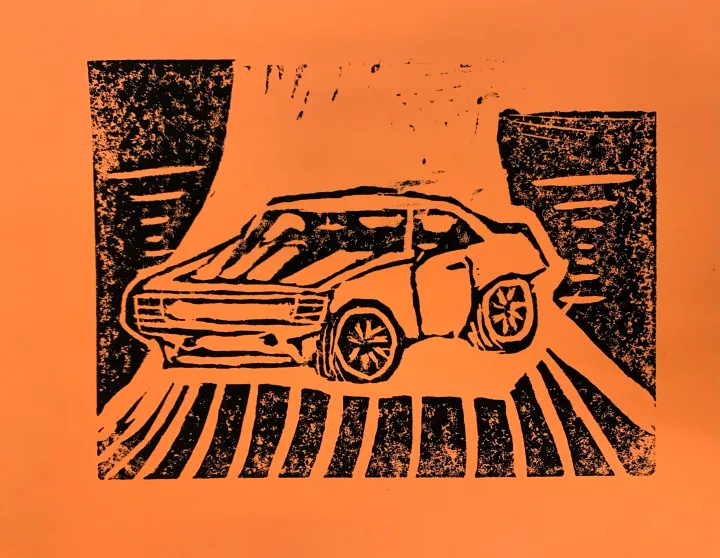
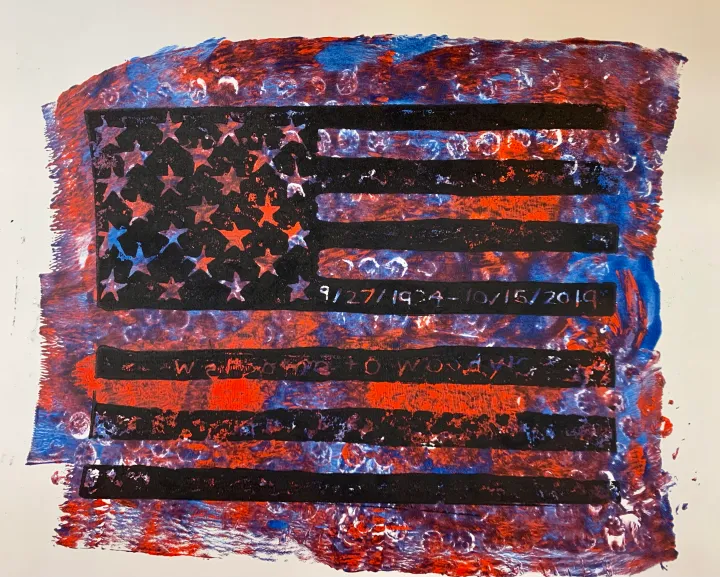
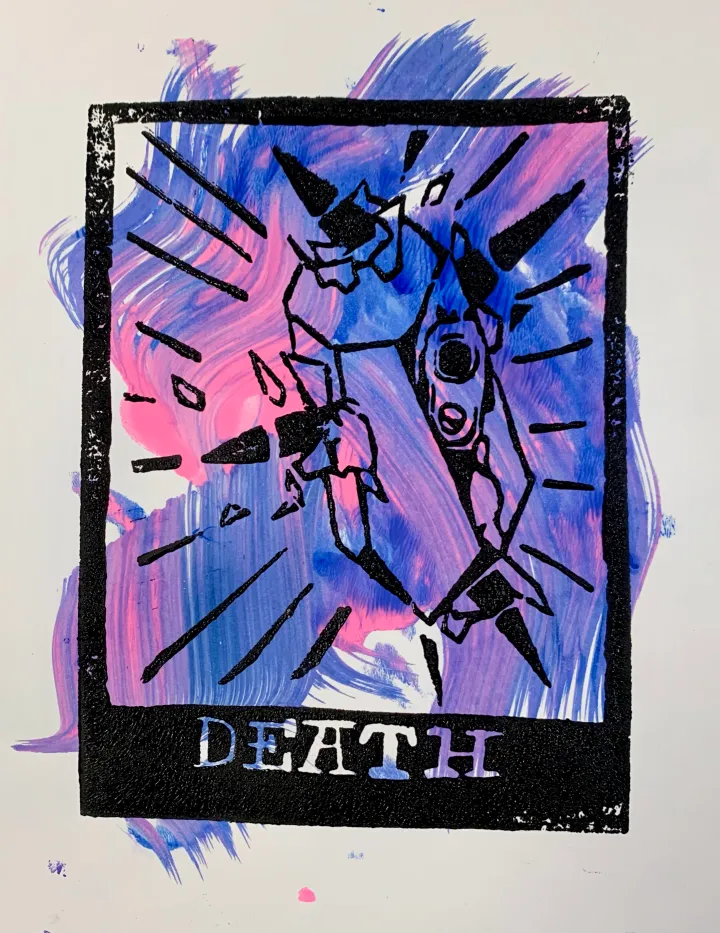
我始终惊叹于学生在细节处理、个性表达及创作热情上所展现的专注与投入。虽每单元结束我皆如此感叹,但本课或许真乃我最钟爱的教学设计。
钟爱版画?
请参阅此款适用多学段的泡沫塑料版画课程。
泡沫塑料版画美术课
订阅以确保不错过任何新帖!
立即订阅!

作者:Sierra Machado
2022年11月29日

作者:Sierra Machado
2022年11月23日
作者:Sierra Machado
2022年10月20日
Memory Linocut Printmaking Artwork
Original: https://thatartteacher.com/2023/05/12/memory-linocut-artwork/
Date: 2023-05-12
Author: Sierra Machado
Categories: long form lesson plan
Tags: art education, block printmaking, detailed lesson plans, featured, feautured, free lesson plans for high school, high school art, high school printmaking lesson, how to do linoleum printmaking, linocut printmaking, linocut printmaking step by step, linocut prints, linoleum printmaking, linoleum printmaking for beginners, linoleum printmaking step by step, linoleum printmaking tutorial, memory linocut artwork, printmaking lesson, printmaking lesson plans high school, printmaking step by step, that art teacher
Linocuts are such a fun way to explore line, shape and personal expression. Students (mostly) love the hands-on process and the magic of pulling prints. The physicality of carving keeps students engaged and the final results are often a beautiful surprise. This memory linocut artwork provides great results and helps student practice using their personal voice.
Materials for Linocuts
***This description contains affiliate links to products I truly love and use in my classroom. If you use these links to buy something I may earn a commission at no additional cost to you. #sidehustle
I prefer to use Blick Wondercut. The battleship gray linoleum I used in my late 90’s and early 2000’s art classes just doesn’t cut it (get it?) anymore. This has worked really well for my students. I also like the Blick block printing ink, and I prefer the jar to the squeeze container. The squeeze tube is convenient at first, but I feel like I waste a little ink. If you get a palette knife the jar seems to last longer. As far as how much ink to purchase, don’t ask me! I always run out, so stock up!
Practice Mini Linocuts
Students start by creating a small practice linocut. I print out basic clip art images for students to choose from. I pick images that demonstrated clear shapes, line variety and clear areas of black and white. I will not share these examples as a PDF, because I threw copyright to the wind when collecting them.
I google things like “Mushroom clip art black and white” to find clear images. Think about what your students are really into drawing right now and give them printed handouts to choose from, similar to a tattoo flash sheet. Hello Kitty, Mario mushrooms, snakes, basic flowers, and anchors were all popular choices in my 2023 classroom.
This practice print not only helps students understand the technique of cutting, but also how to create a design that works best with the materials. We usually do this unit right after painting, and it can be very challenging for students to wrap their heads around the concept. Subtractive is always more challenging and creating a design that relies heavily on line work and shape is a skill that most students need practice exploring.
Students transfer their chosen (from my curated “flash sheet”) using graphite transfer paper and a pen. We then trace our lines with Sharpie. I am very picky about this and tell students to add black to every single area they want to be black (or whatever color ink you are using). I remind students that all the brain work should be done now, because once there is a cutter involved, mistakes have much higher consequences.
This is also a great way for students to see first hand that their designs will be mirror imaged. I can say it, but actually experiencing it makes the concept connect to their brains. There will still be students that write words out not in reverse, but that’s why we do our designs in pencil before they ever get their linoleum.
I always give a lino cutter demo because changing the blade is a common occurrence, and I want NO PART IN IT! We take the whole lino cutter apart and look at all of the parts and how they work together. Under a document camera I show them how to put in one of the blades, making sure there is only one blade out at a time. Then I make them change and put on every.single.blade. Sorry not sorry.
This tutorial is great to show students so they understand their end result. It works really well for review, absent students and to pin point certain parts of the process that live-demoing may miss. Feel free to use this in your own classroom.
We then practice carving, starting with the largest blade and the background area. You should always save small and important details for last, although it is tempting to jump right to the fun lines. We use bench hooks (which is a nightmare saying out loud) and discuss the importance of cutting away from yourself. It feels counterintuitive to not put your hand at the top of the linoleum to steady it, but that is the WORST place to put your hand. I have had a student need stitches from a lino cutter, so I dramatically tell that story every semester. Students will still sometimes cut themselves, but after my stern talk and step by step demonstration they usually silently get a bandaid without me being a part of the situation.
Once students are finished with their carving, they head to the printmaking station to print. This is such a fun part of the process and allows for students to really get the technique. You can tell them to carve closer to their carved lines, but nothing tells them more than a blocky and weird print that looks nothing like their image. This helps reinforce that the Sharpie is only there for a guideline, and that the only way a print will look correct is with attention to detail.
“It’s not a sketch, it is a final design”.
The absolute hardest part of this unit is the design. Linocuts are an amazing technique with so many options for prompts and subject matter. I have taught many printmaking lessons, but latelyI have had my students explore a personal memory. We do this lesson towards the end of the school year and this helps push students to explore their own ideas and problem solve how to communicate them. It would be so much easier to all give them the same subject matter (portraits, architecture, plant still life, landscapes…) but this class is a prerequisite for AP. I want students to try to express their own ideas and select subject matter and composition.
Students explore personal themes such as family memories, pets, travel, vacations and loss of family members. Many students explore right of passages like learning to drive, falling in love, and graduating high school. The memory does not have to be huge, many students explore funny memories with friends and childhood favorite movies or gaming.
Students will fail. Designs will be clunky, hard to understand and the rules of composition will quickly be forgotten. It is a challenge to help four sections with 35+ students a pop communicate personal ideas effectively. Once those prints start coming, it’s worth it.
Can I trace?
“It’s not a sketch, it is a final design.” I say this over, and over and OVER while students draw their design in pencil. I require they shade EVERYTHING that will be black with a pencil so I can quickly see their design. If they have to use their imagination to see their details, they need to commit to shading it in pencil. I do not want to reverse their images in my head (“this will actually be black, I just didn’t shade it in”. A nice trick with this unit is to let students trace. If you are teaching and Art I or Art II course, why not let them trace complicated images?
For example, many of my high school students have positive memories of getting their first car or truck #Oklahoma. If I have a nervous drawer, why would I have them hand draw their truck when they have a photograph of it on their iPhone? One student traced his truck, added background elements and it was the first (and only) artwork he was actually proud of. He struggled with every assignment prior because his drawing skills and confidence were very low. Seeing his face when his truck was memorialized in his art was priceless. His non-art loving friends stood around him and congratulated how well his prints turned out. I LIVE FOR THESE MOMENTS!
Once designs are approved by me, students transfer them using the exact same technique as their practice prints. I am way less involved with their carving this time around because their experience and confidence levels have significantly increased. If students are curious to see how their prints look before printing, you can use a marker to color over the linoleum and see what the ink catches. This gives students a really good idea of what their prints should look like.
This tutorial explores printmaking and personal memory. Feel free to use it in your classroom!
The design process takes so much longer than the actual carving. Once students are ready to print, they start with a test print on white paper. If they are happy with their designs, they print their hearts out using colorful paper and Gelli Plate backgrounds we created in small groups while they were carving.
Gelli Plate Printmaking
I love using acrylic paint to create colorful backgrounds for prints. There is a simple beauty in a black and white print, but students can use this technique to explore color and texture that enhances their memory. I encourage students to make 5-10 backgrounds reflecting on how it can enhance the meaning behind their artwork. Sometimes it’s a hot mess, but the backgrounds can really enhance their finished product.
If they are not happy with their prints, they wash off the ink, let the linoleum dry and carve out any of the issues. I give students a requirement to turn in their best three prints of these categories:
- White Paper
- Solid Color
- Gelli Plate Background
It usually takes four days of printing before all students are finished. This also helps with my limited drying rack space since some students print ten or more prints in a class period. I have students pick their best three and upload those images to Canvas. If you haven’t tried grading with a rubric on Canvas, DO IT! You can click each category and it automatically adds their grade. The photographs are uploaded so you never have to touch messy or germy art. I highly recommend it!
Finished Memory Linocuts
I am always so impressed with the attention to detail, personal expression and gusto students have for the process. I feel like I say this at the end of every unit, but this might just be my favorite lesson.
Love printmaking?
Check out this Styrofoam printmaking lesson, adaptable for many grade levels.
Styrofoam Printmaking Art Lesson
Subscribe so you never miss a post!
Subscribe!
by Sierra Machado
November 29, 2022
by Sierra Machado
November 23, 2022
by Sierra Machado
October 20, 2022