富有表现力的陶土肖像课
原文链接:https://thatartteacher.com/2023/01/21/expressive-clay-portrait-lesson/
日期: 2023-01-21
作者: Sierra Machado
分类: 长篇教案
标签: 美术教育、陶艺、高中陶艺教案、高中陶土艺术课、陶土课创意、初中陶土课、陶土面具艺术教案、陶土面具教程、简易陶土教程、详尽陶土教案、富有表现力的陶土肖像、精选内容、高中陶土课、高中陶土课程、如何制作陶土肖像雕塑、如何用陶土制作面具、如何制作富有表现力的陶土肖像、如何制作陶土肖像、如何用陶土塑造人脸、如何用陶土塑造面部特征、分步陶土面具制作、分步陶土面具教程、That Art Teacher
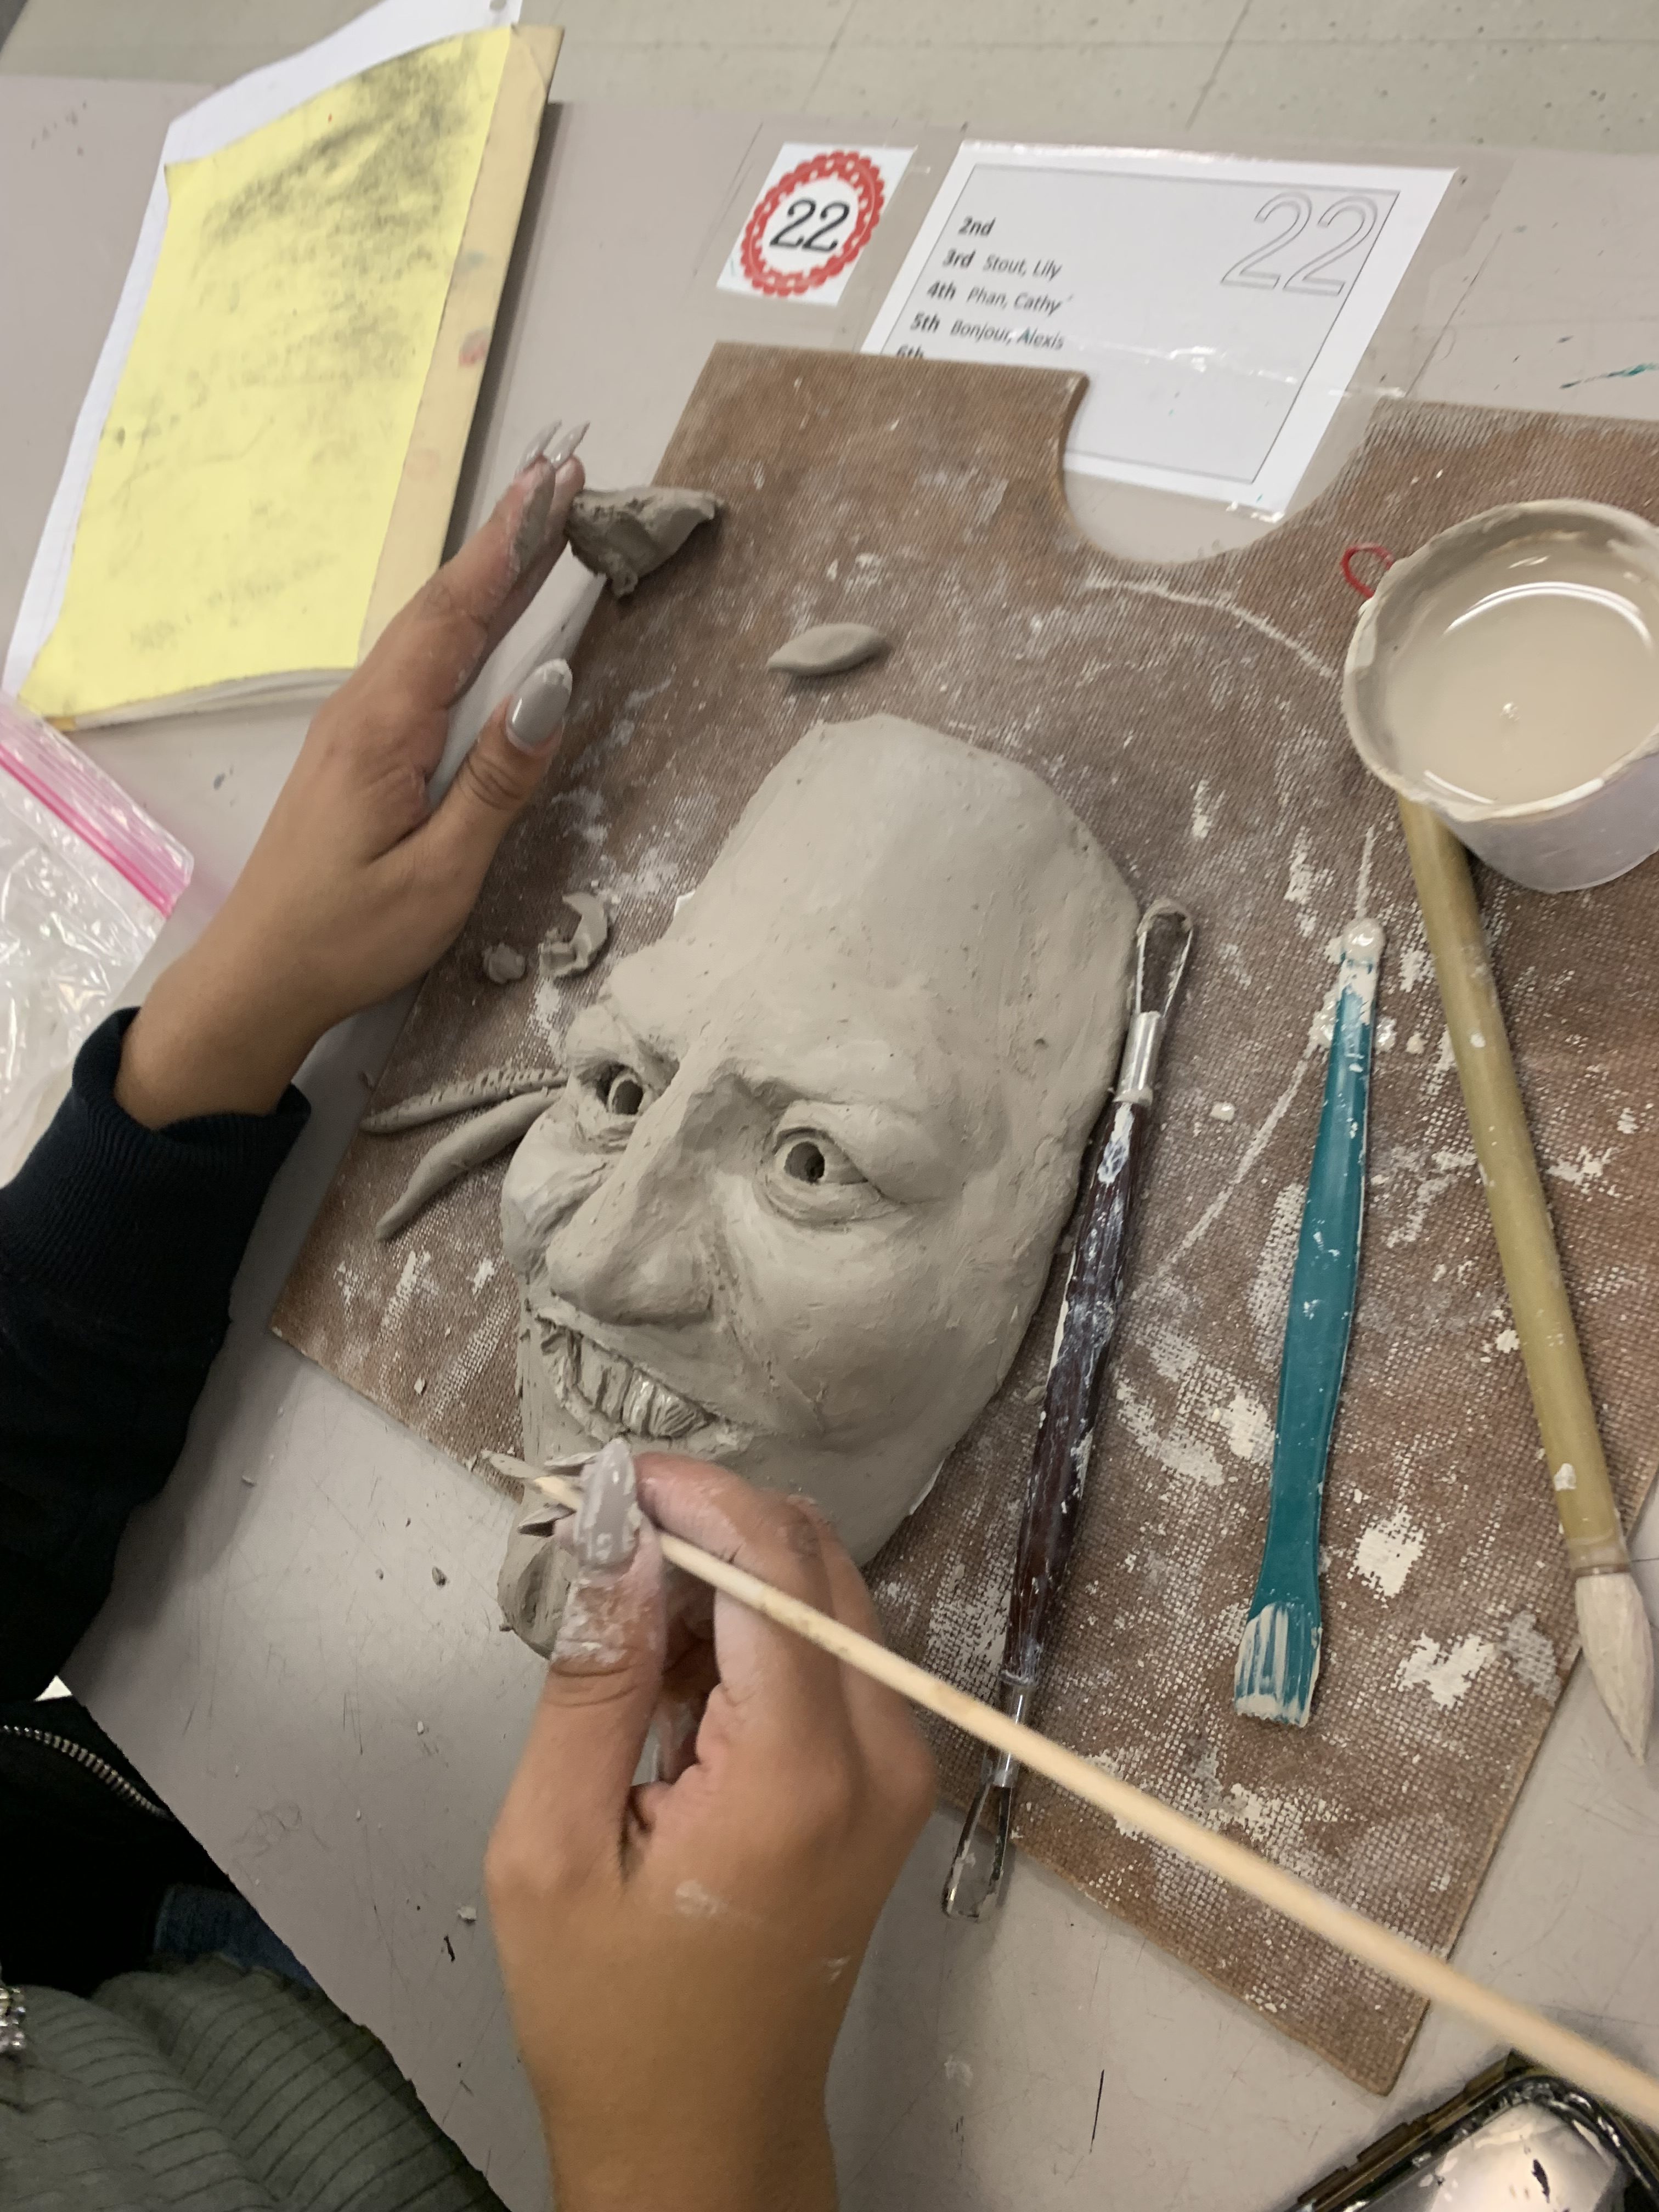
若您正在寻找一项出色的中学陶艺作业,那么这堂富有表现力的陶土肖像课便是我最钟爱的课程!学生既能学习陶土基础技法,又能探索表情变化与面部结构。本课延展方向丰富,可供参考的艺术家众多。同时,它也是一项成本低廉的课程,每位学生所需陶土量极少。
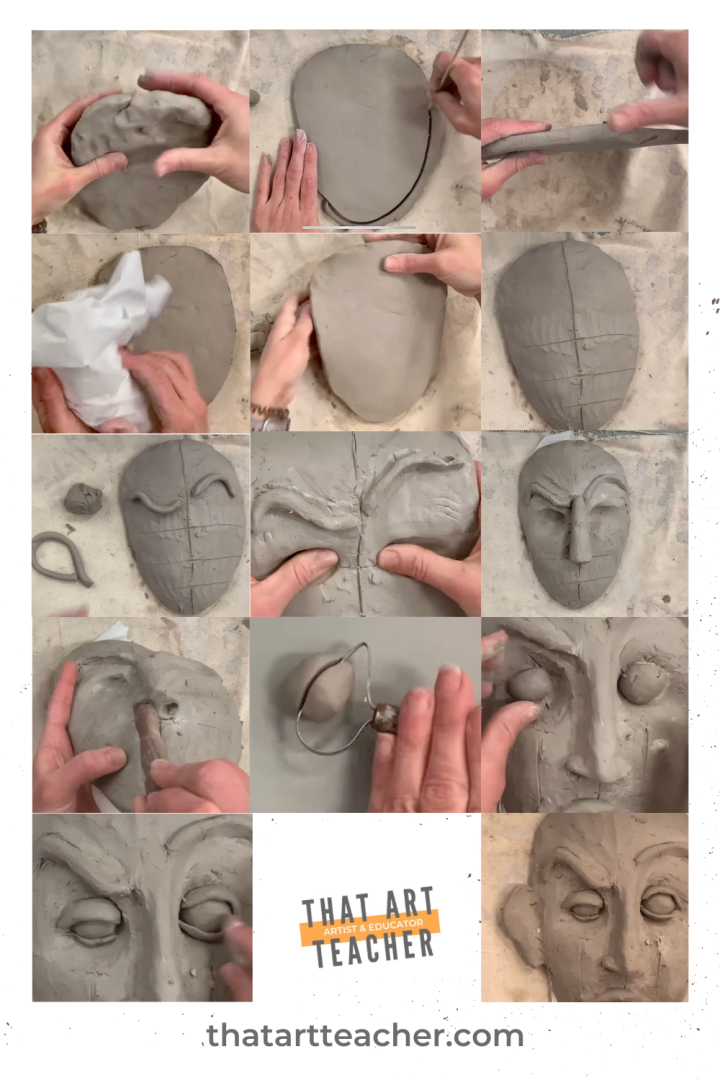
您是否和我一样注意力持续时间较短?以下是制作陶土肖像或面具各步骤的快速概览:
若您更习惯通过视频学习,这段详细视频将向您和学生演示如何逐一塑造面部特征,并添加表面肌理。它非常适合用于复习步骤,也为学生提供整个制作流程的直观概览。我将其作为补充教学材料使用;当学生需要额外帮助或复习时,它还能支持学生更独立地开展创作。
经课堂实践检验的教学指南:
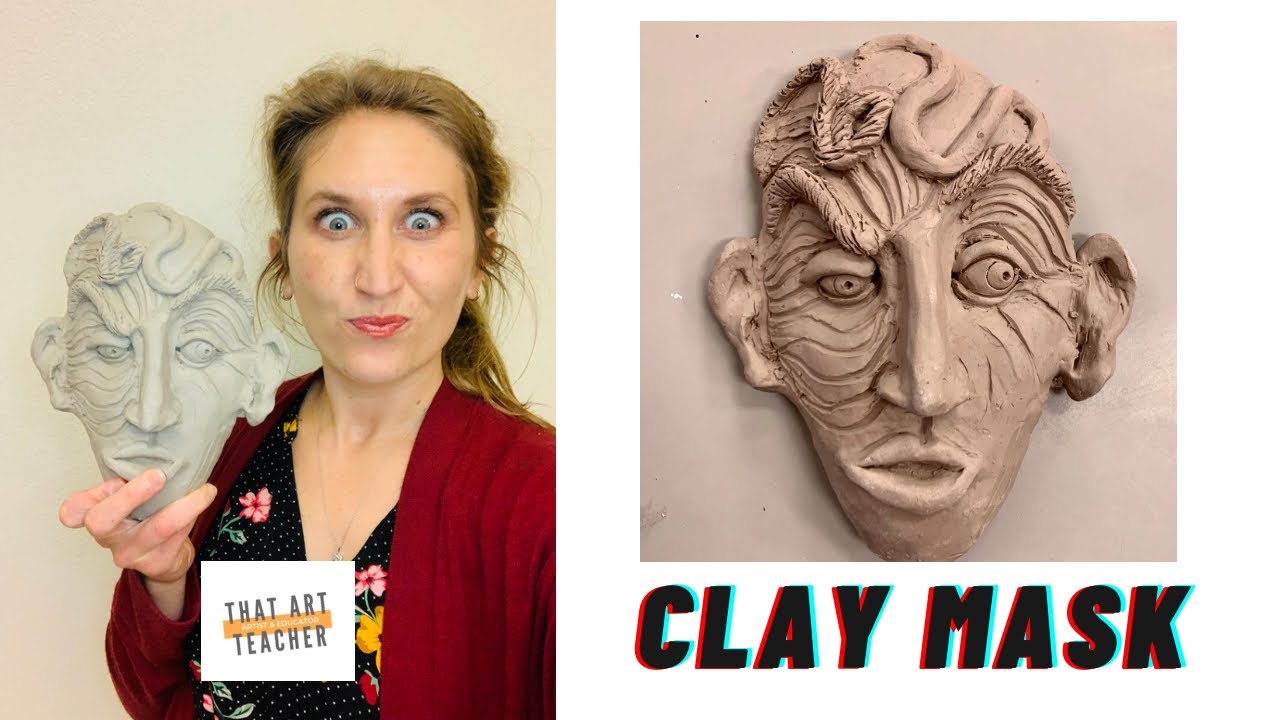
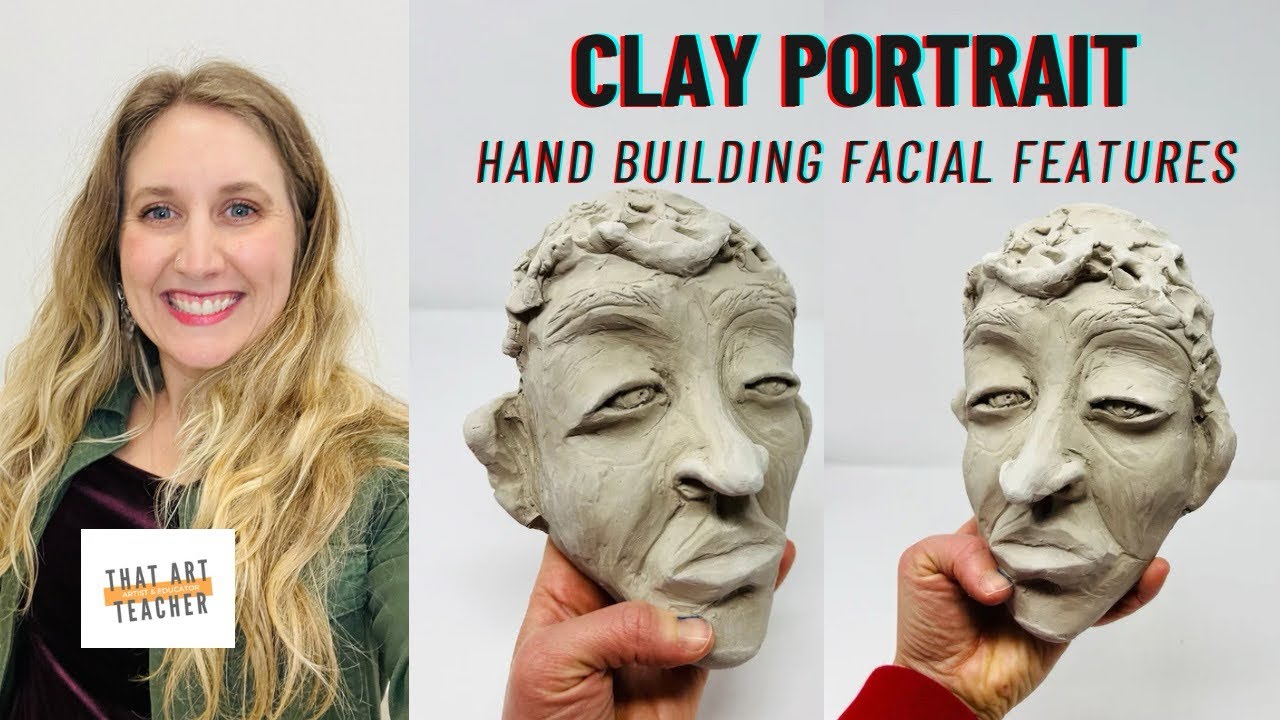
这是无需擀面杖制作陶土面具的更新版教程。本教程还将展示如何徒手塑造每一处面部特征。
所需材料
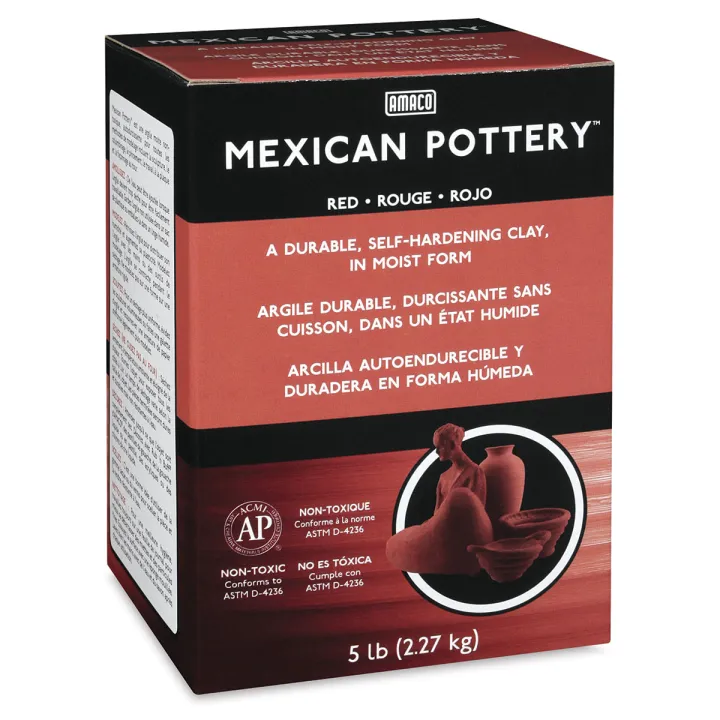
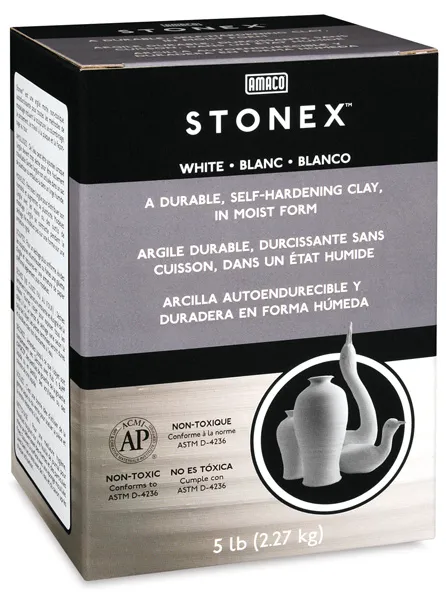
采购陶土可能令人倍感压力:运费可能很高,可选品牌又五花八门。我钟爱Amaco与Laguna品牌;最近还因价格优势购入了另一品牌,实际使用效果同样出色。
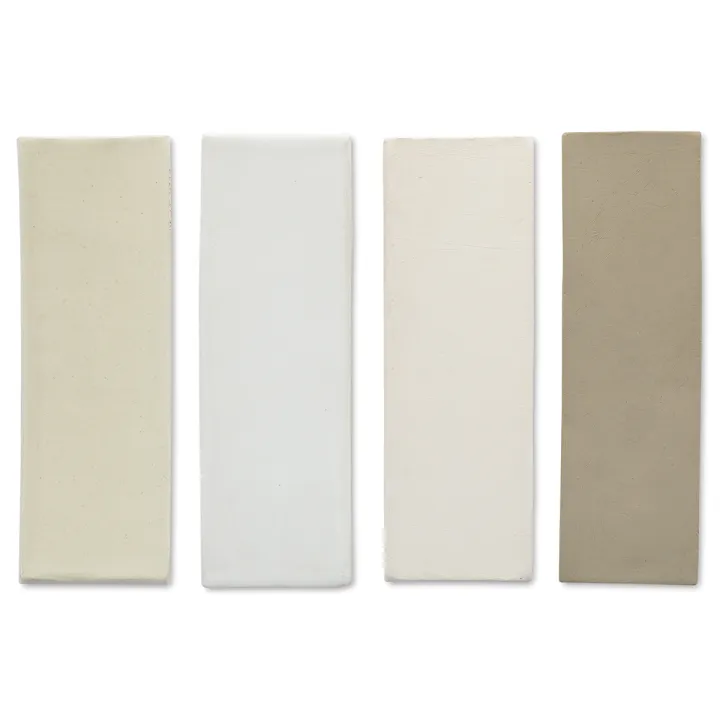

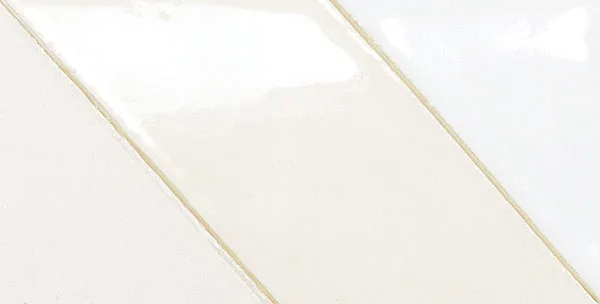

若您没有电窑,也无需担忧!我格外喜爱这项作业,因为它同样适用于风干陶土。这种陶土的手感几乎与烧成陶土无异,且完全符合课堂教学要求。


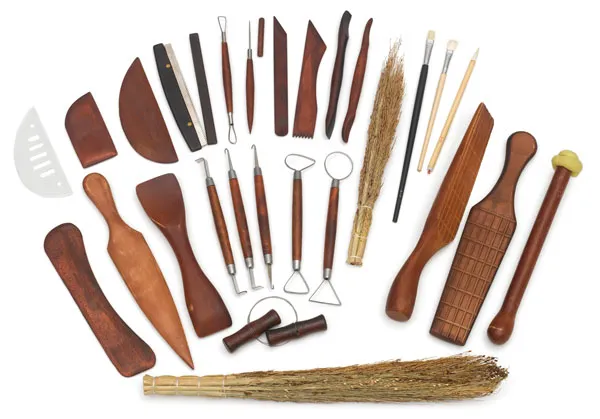
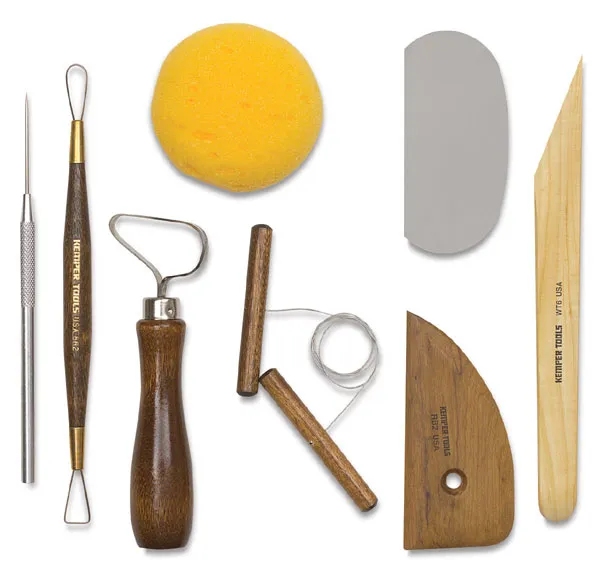
木质工具是我最偏爱的工具,只要学校预算允许,我便会大量采购。竹制木签是针形工具的理想替代品——尤其当班级人数较多或存在信任问题时。市面上品牌众多,但Richeson与Kemper两个品牌耐用性最佳。


***本文含若干我真心喜爱并运用于课堂的推荐产品联盟链接。若您通过这些链接购买商品,我可能获得佣金,而您无需承担任何额外费用。
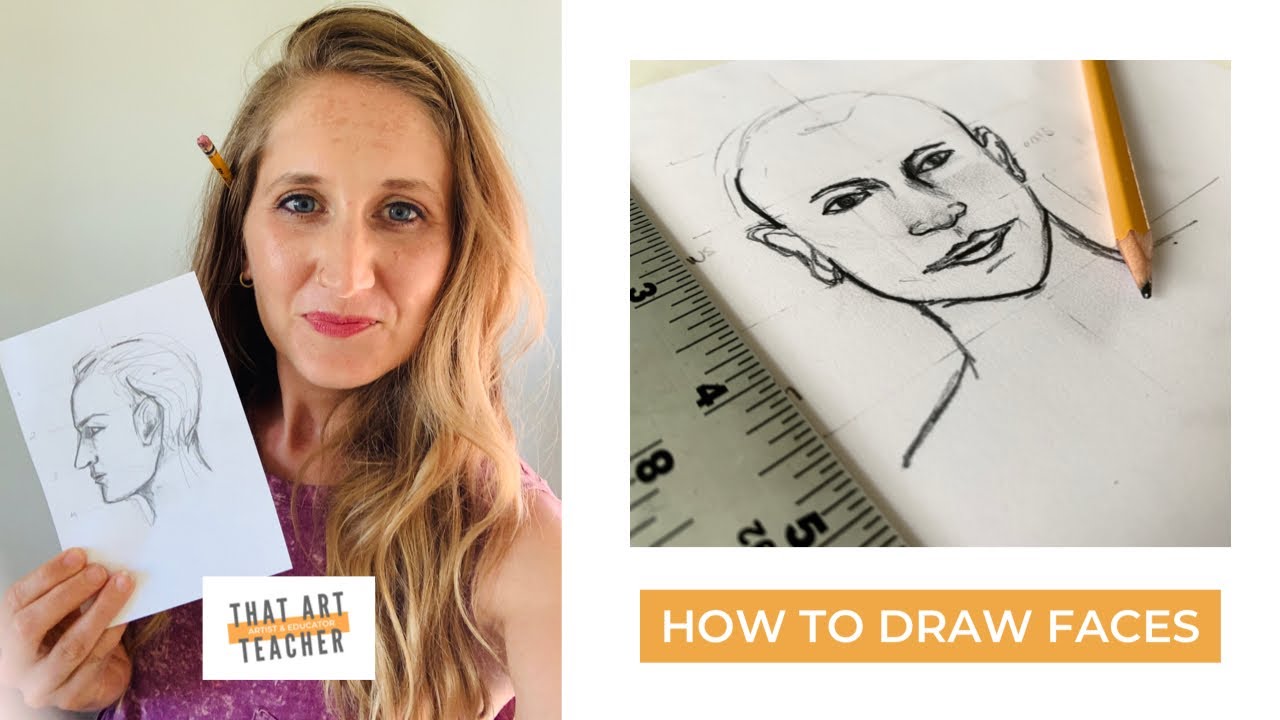
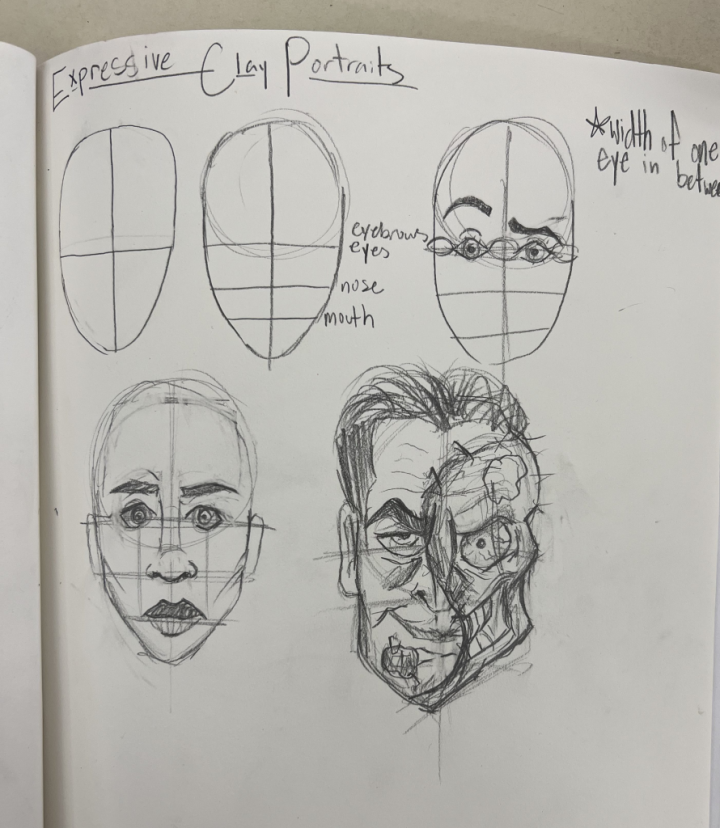
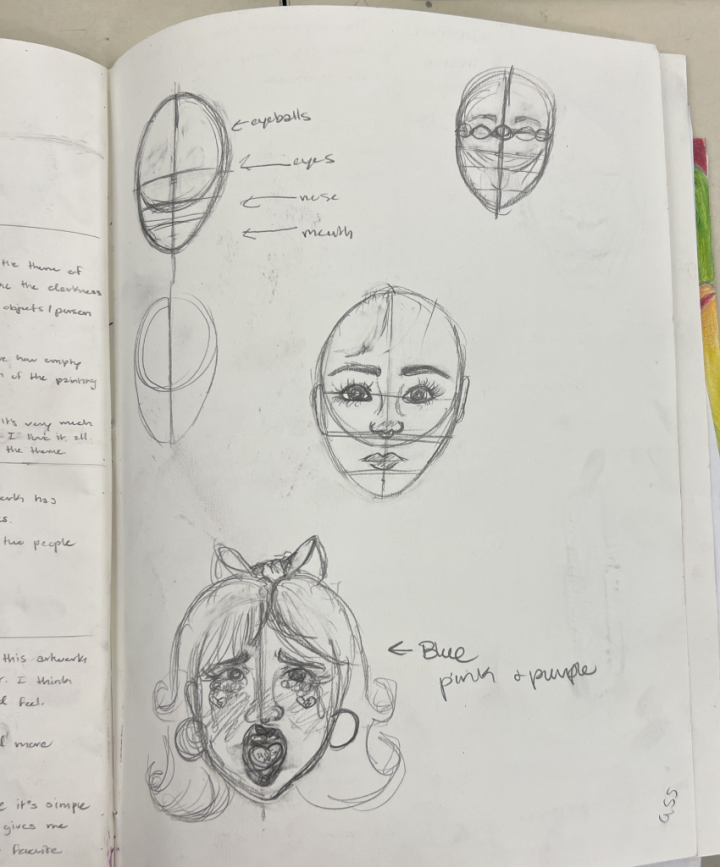
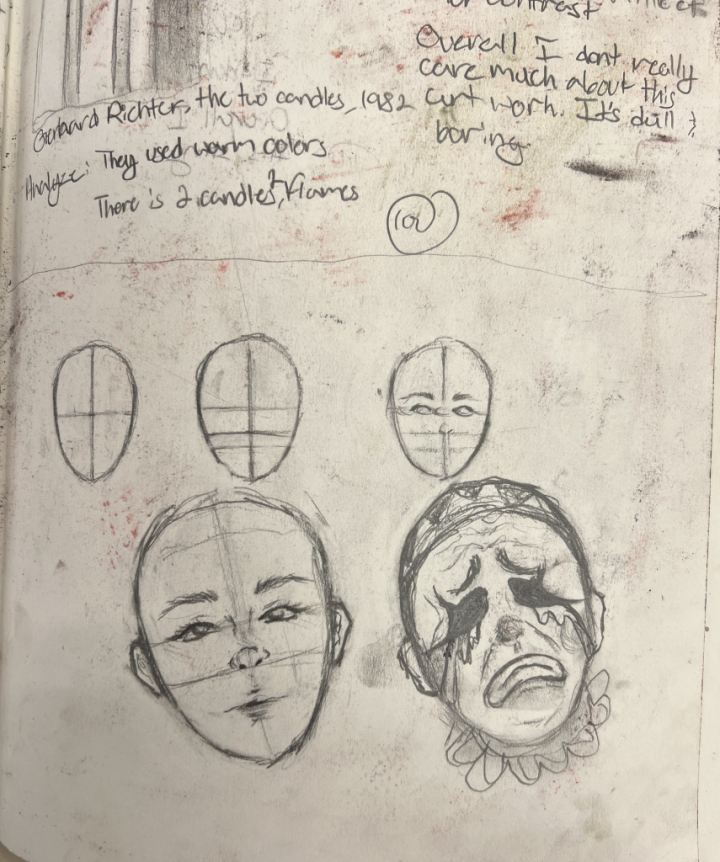
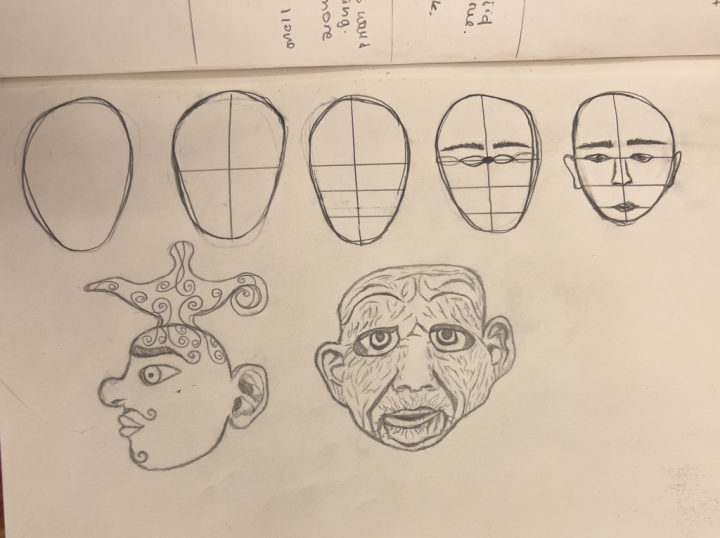
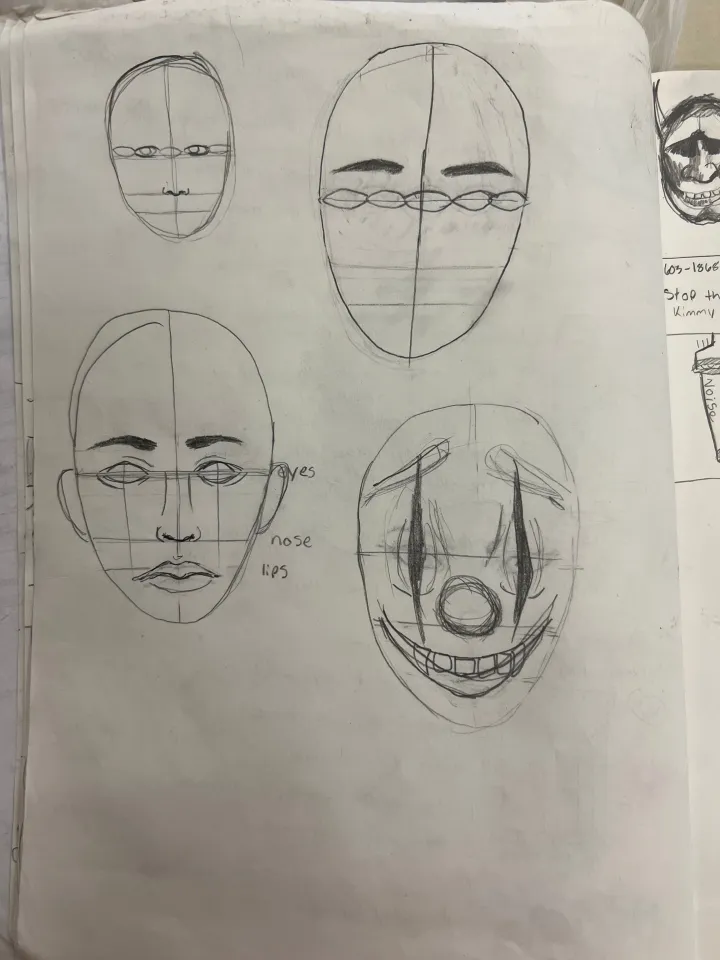
我通常以准确绘制人类面部比例的素描开启本单元教学。我们会借助一份我在网上找到的免费PDF资源进行引导式绘画练习。由于该文件并非本人原创,此处不附下载链接。您可搜索“面部比例指南”,从中挑选最合您心意的图示向学生展示。
这段视频也将深入讲解面部比例的基础知识。
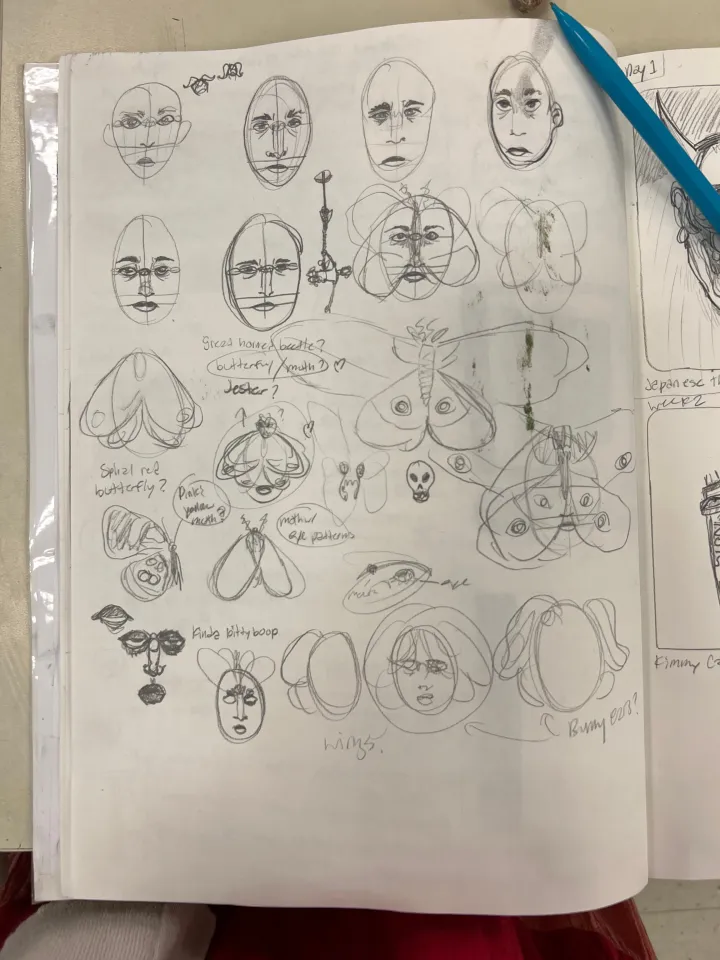
完成引导式绘画后,学生将在课堂剩余时间自由构思并绘制自己的创意草图。他们可对表情进行夸张或变形处理,并融合人类、动物及幻想元素。这是一种趣味十足、开放性强的肖像探索方式。您也可为课程设定更具体的主题或概念,但我通常鼓励学生自主构思,同时强调表情表达的重要性。
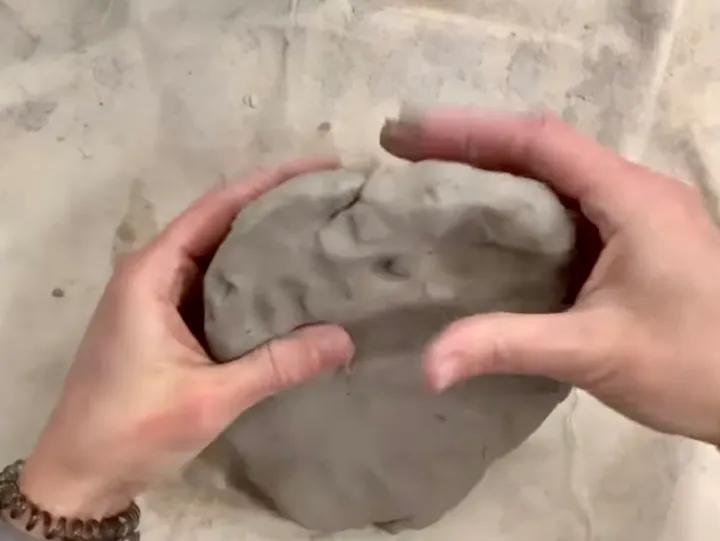
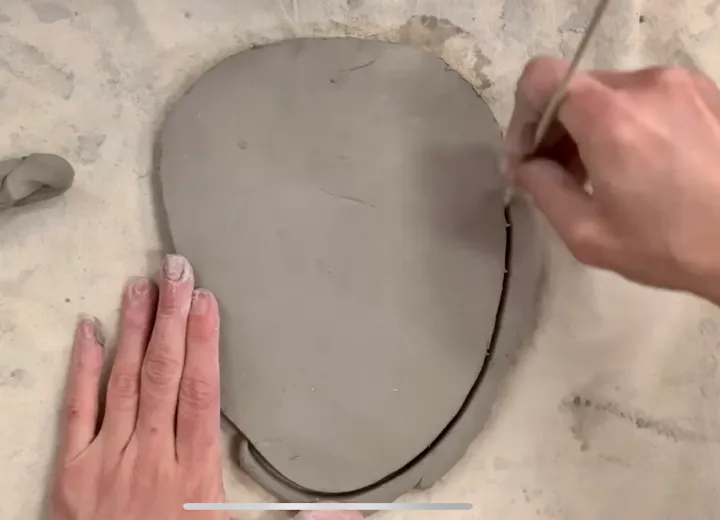
我们首先取一团陶土,揉捏成汉堡肉饼状的椭圆形。待其基本呈椭圆且厚度大致均匀后,再用擀面杖反复擀压数次,使整体厚薄一致。有时学生会轻敲桌面或掌心,以塑出理想形态。部分学生则偏好使用针形工具或木签切割出头部轮廓。
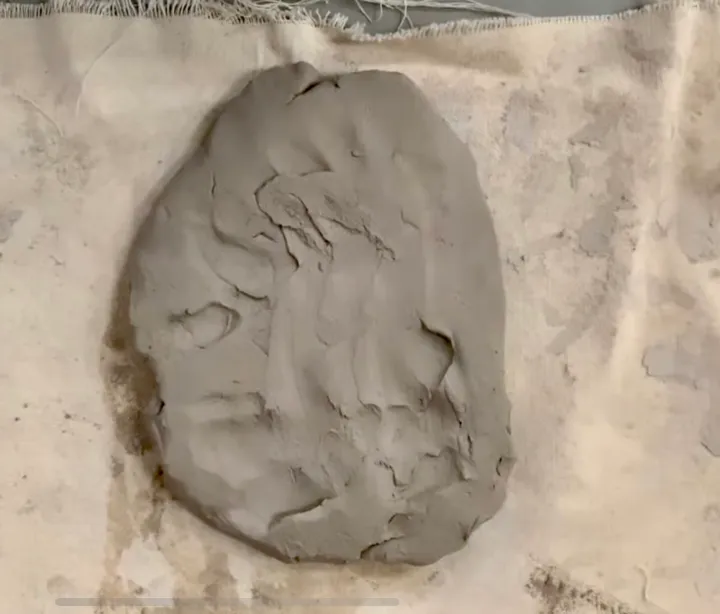
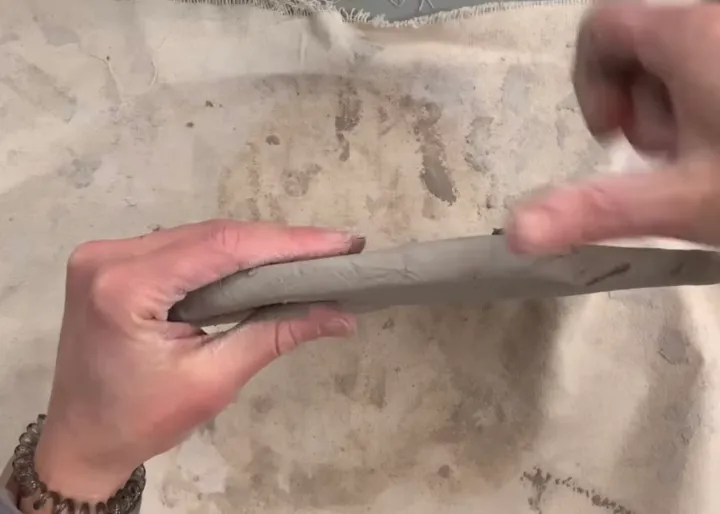
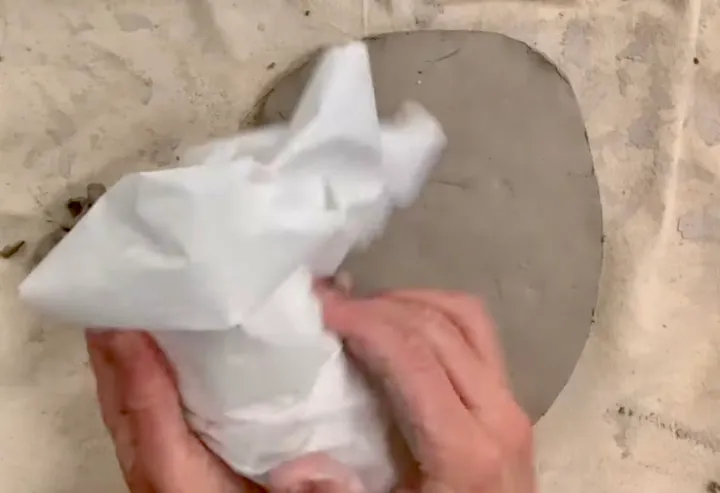
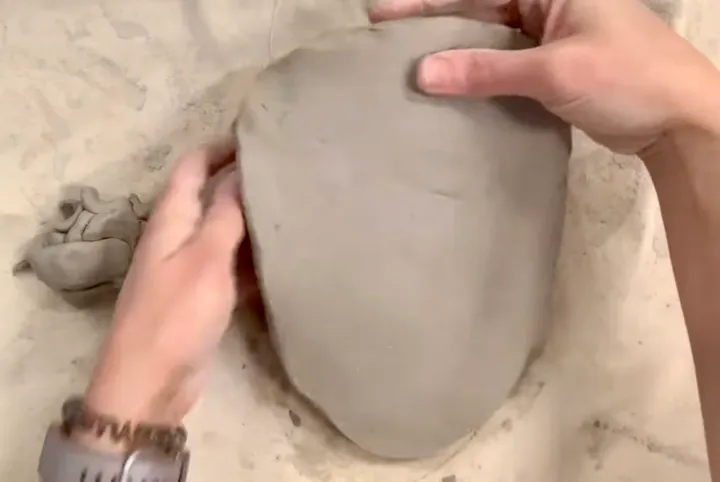
接着,我们用纸巾包裹陶土,使其边缘圆润,从而增强三维立体效果。随后在陶土表面轻轻勾勒面部比例辅助线,帮助学生明确各面部特征的粘贴位置。我鼓励学生打破常规,但务必先画出准确比例,再进行变形处理。
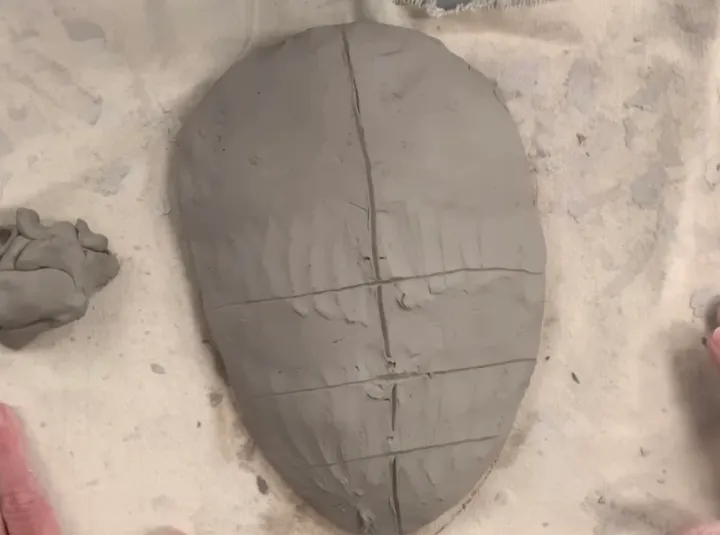
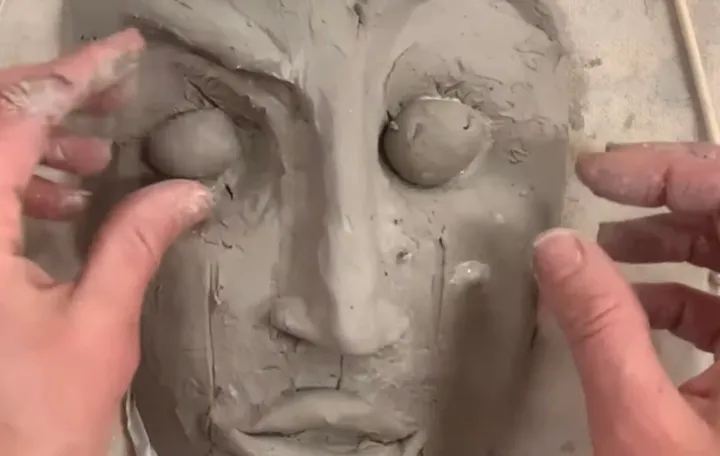
对学生而言,最令人生畏的步骤是按压陶土以塑造眼窝。我们会集体操作,我也会巡视教室,重点关注胆怯的学生。此步骤必须在第一或第二节课堂内完成,以免陶土进入皮革硬状态后难以塑形。
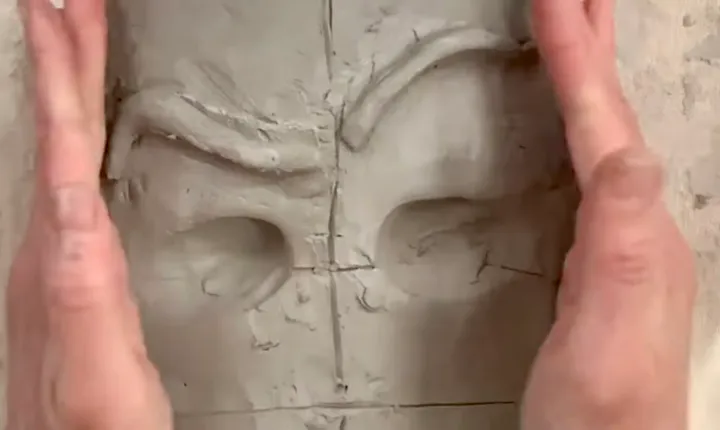
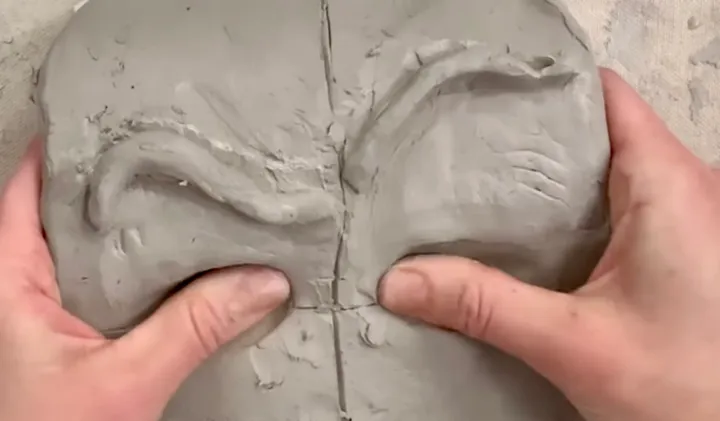
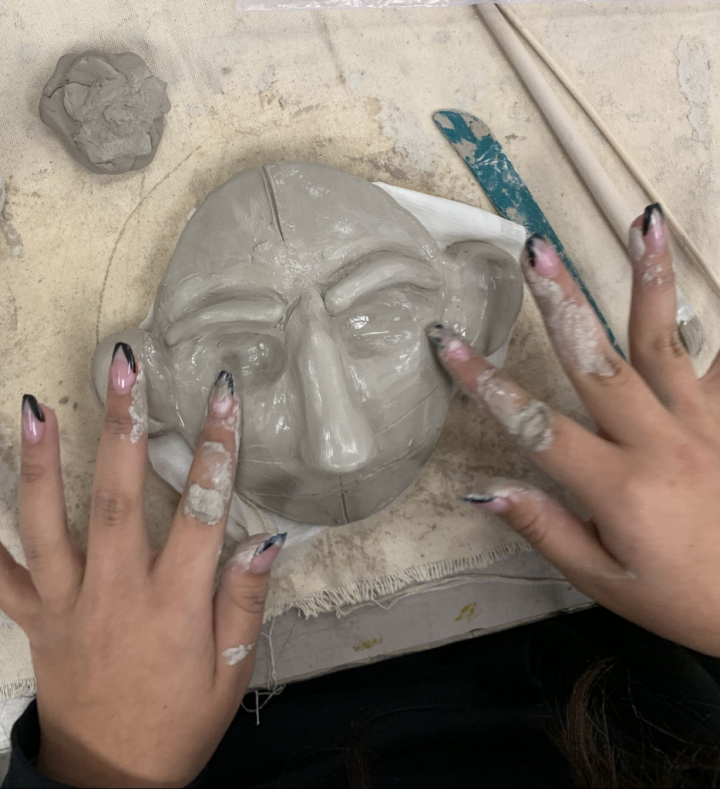
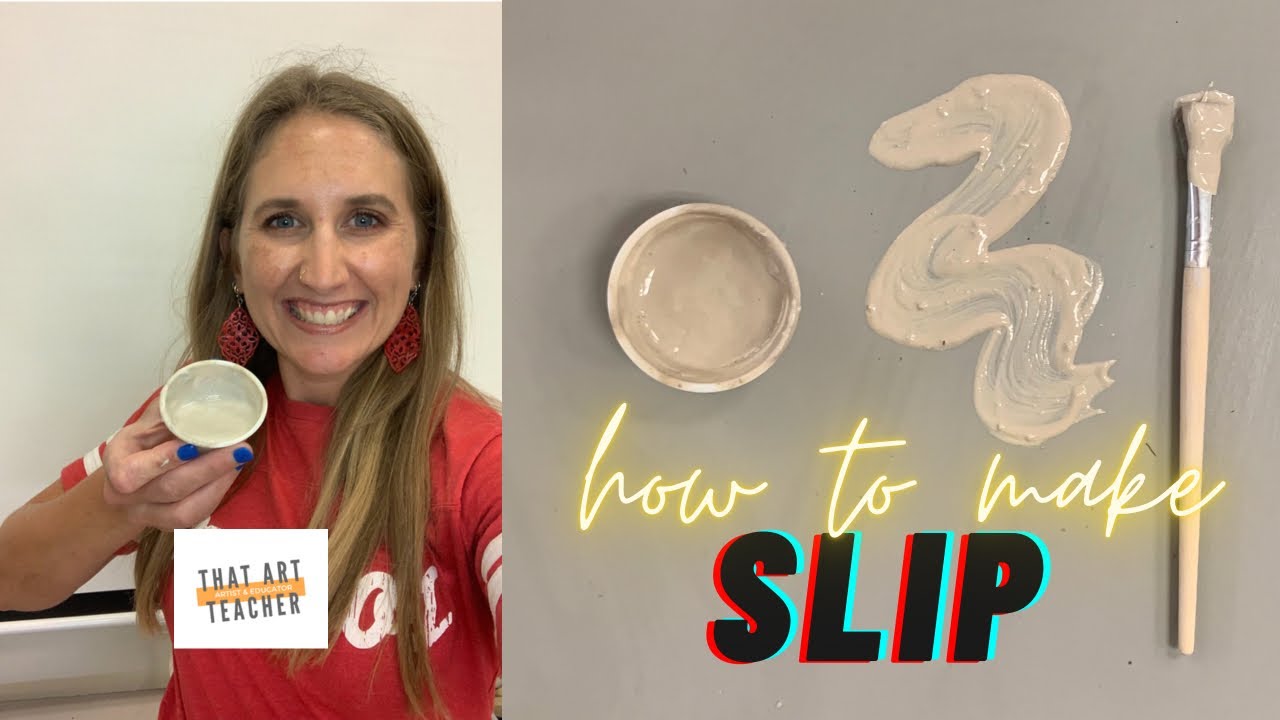
眉毛是最易塑造的面部特征之一,我常以此为起点。学生先搓出细小泥条,随后我严格指导其“刻痕—泥浆—粘合”技法。我甚至会亲手揭下已粘贴的面部特征,检查刻痕是否到位。我倾向使用泥浆而非清水,并以画笔蘸取涂抹。
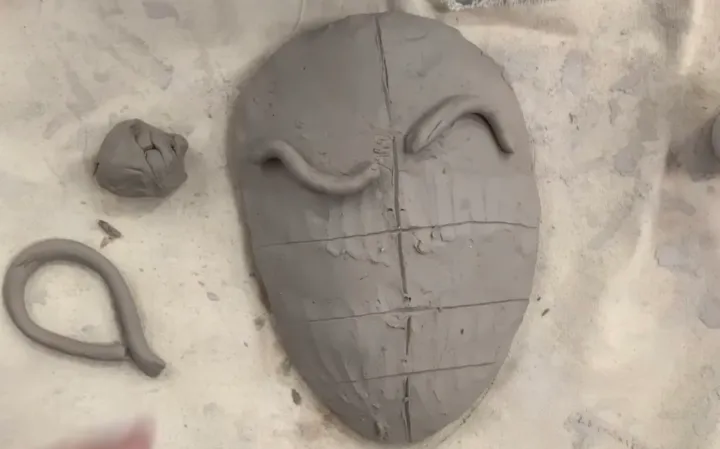
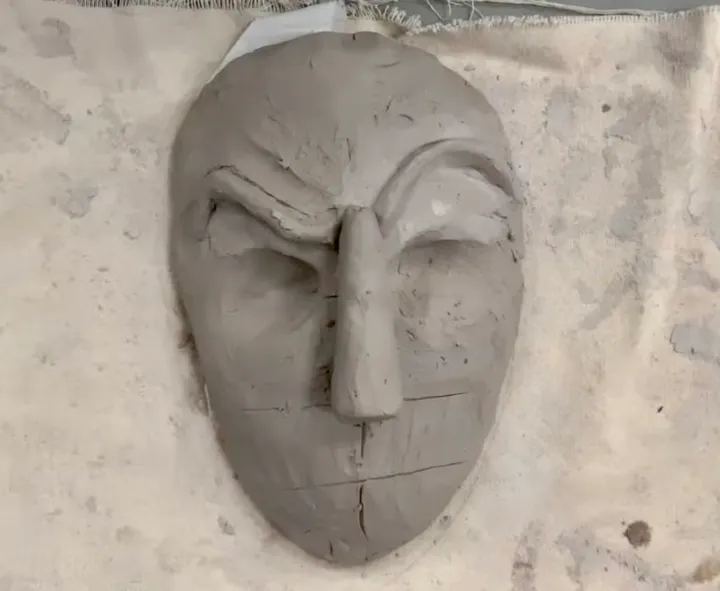
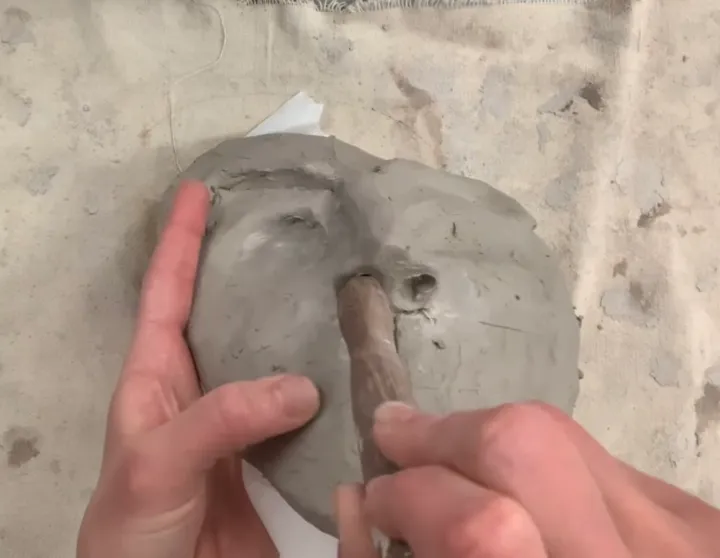
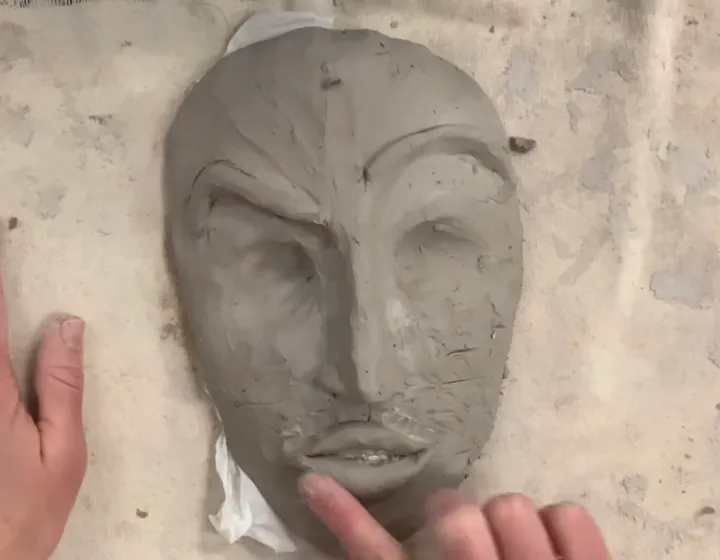
目前我执教45分钟一节的课程,习惯每天示范一种面部特征,以便学生专注练习面部某一部位。一旦学生掌握要领,课程节奏便十分顺畅。我还会在中间穿插若干“创意与精修日”,给予学生更多自主创作时间。
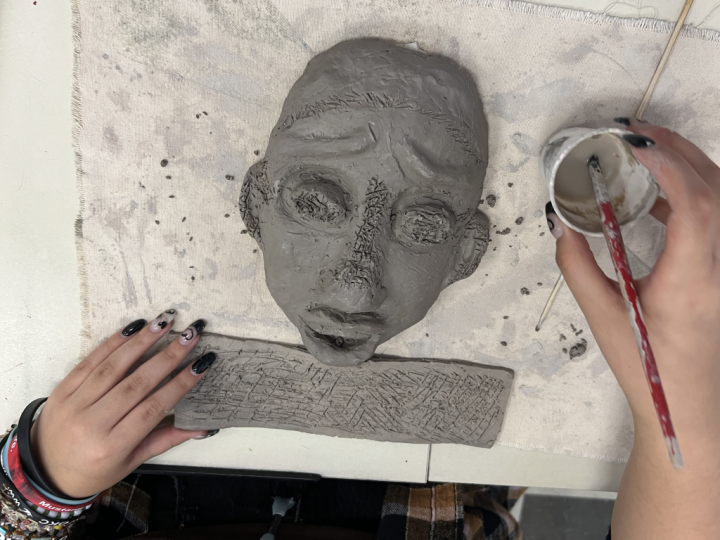
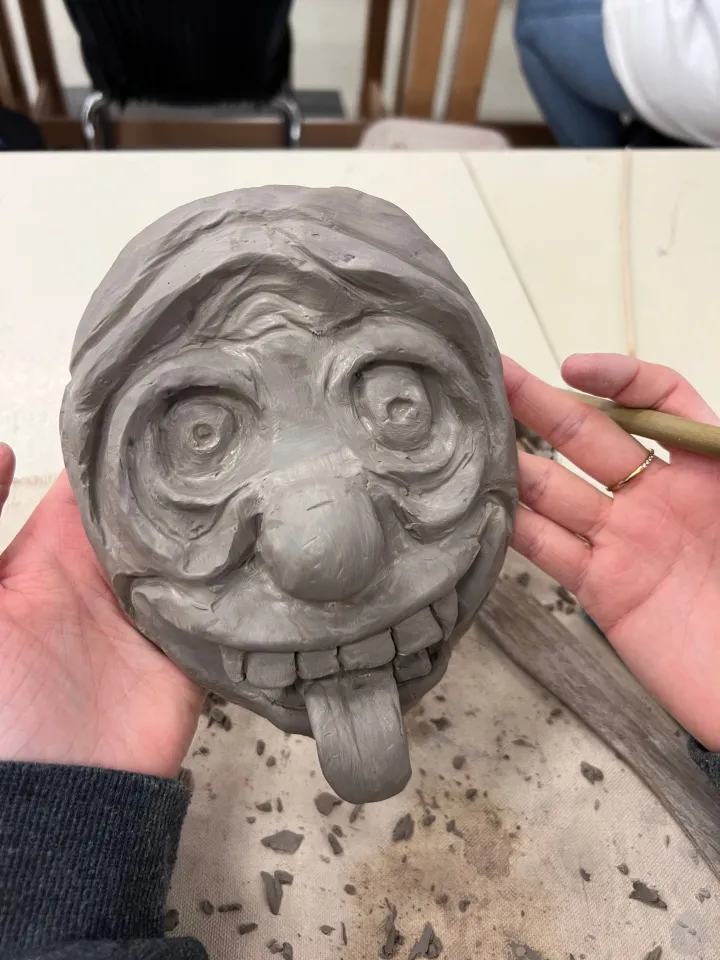
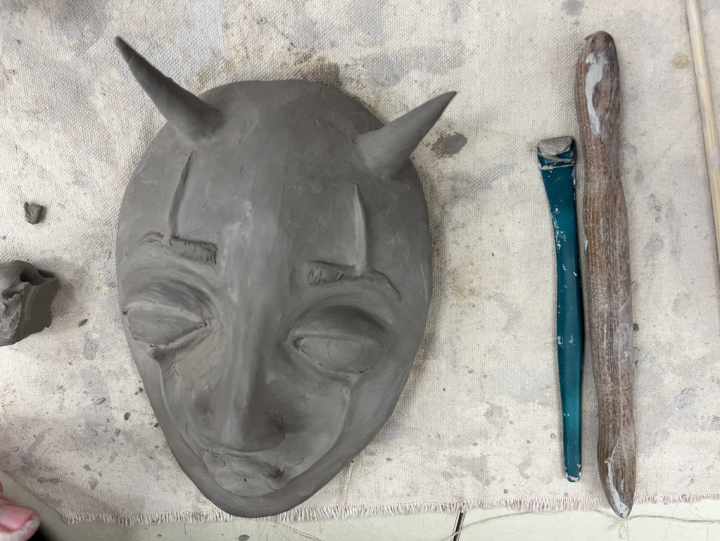
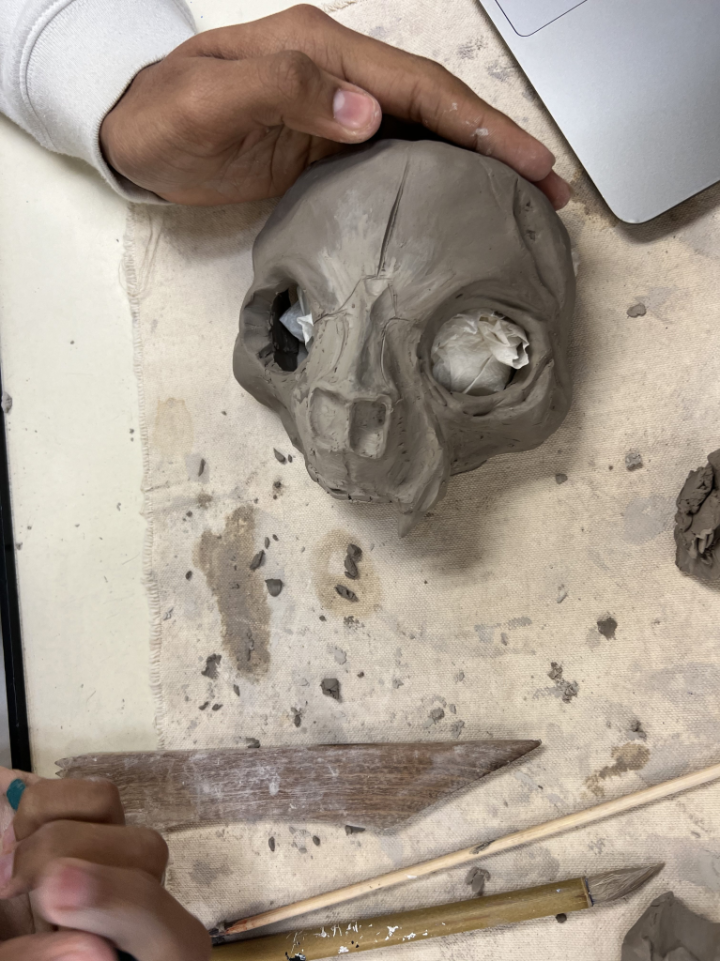
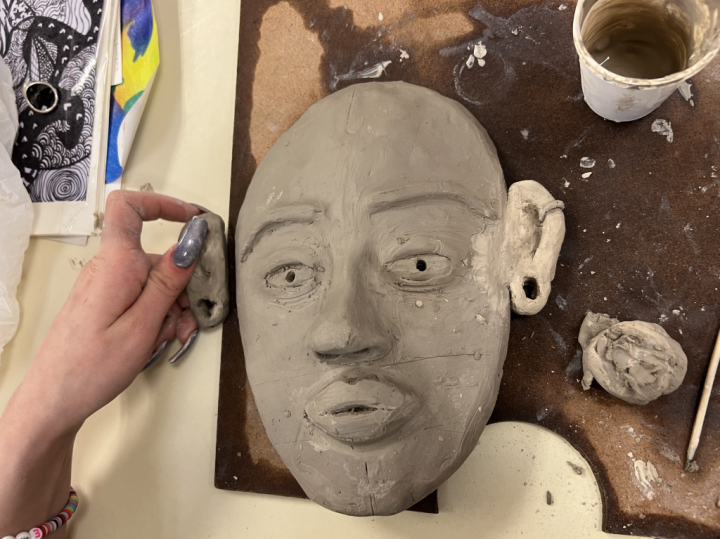
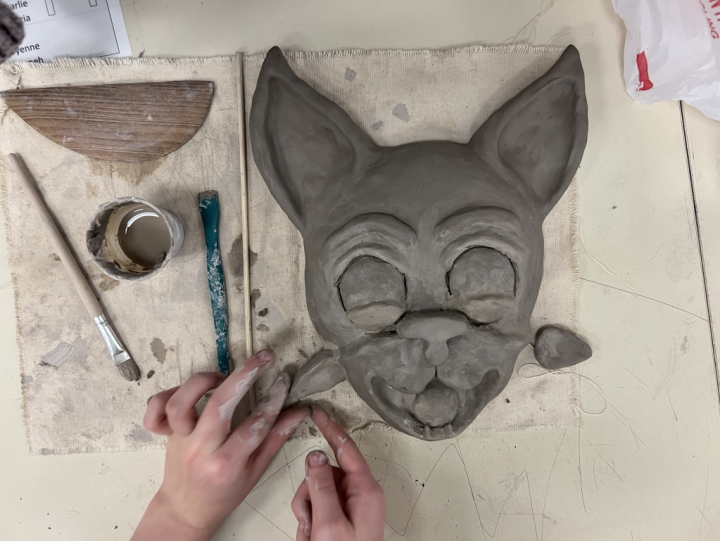
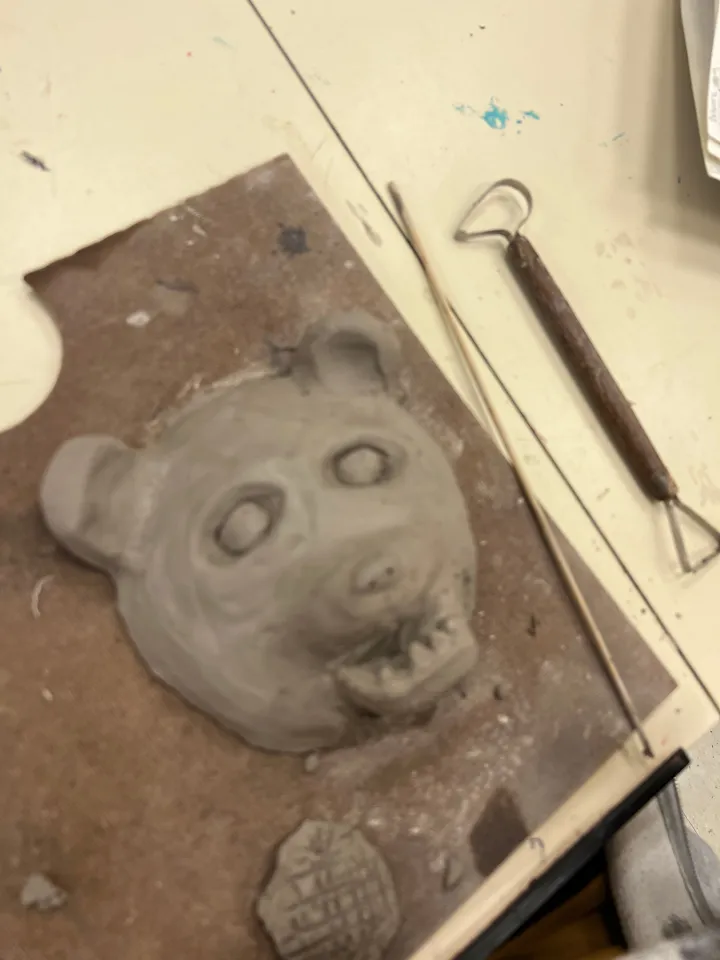
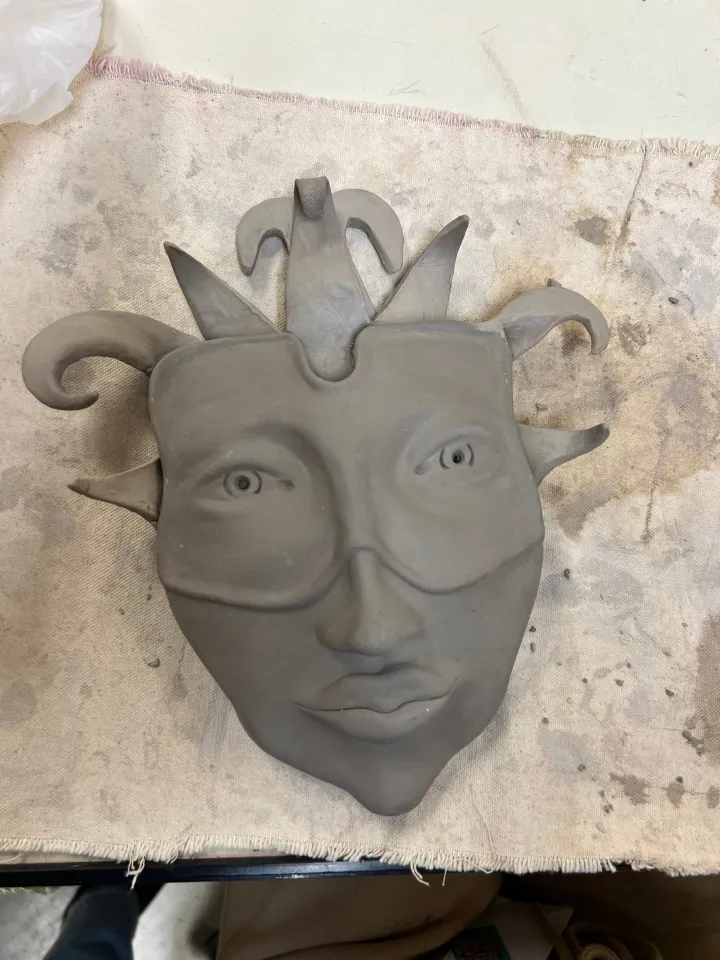
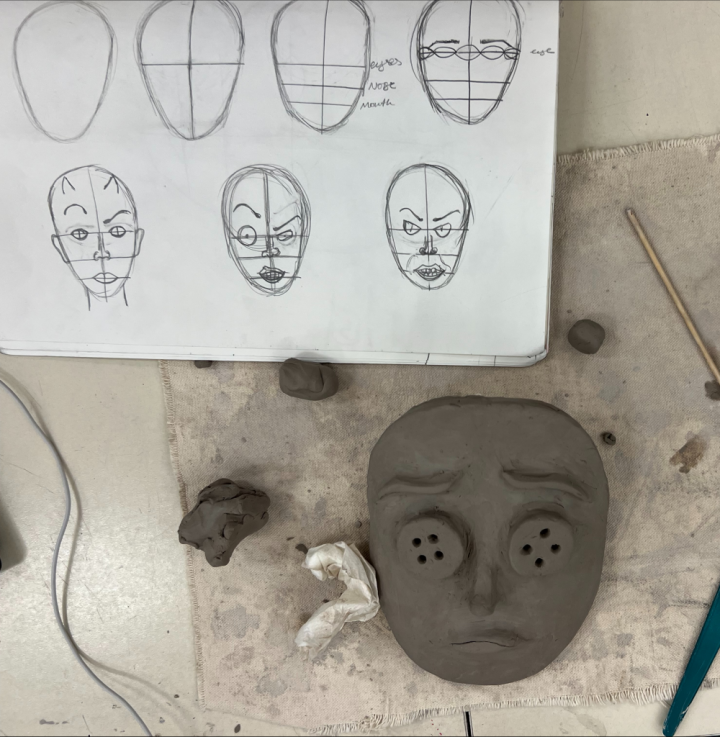
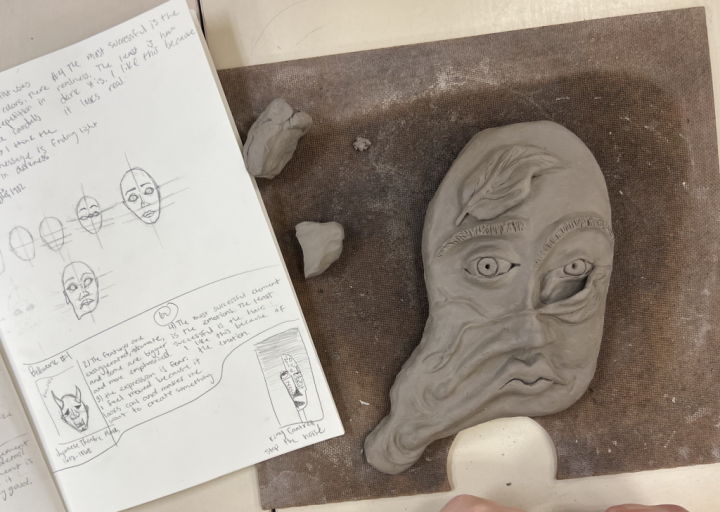
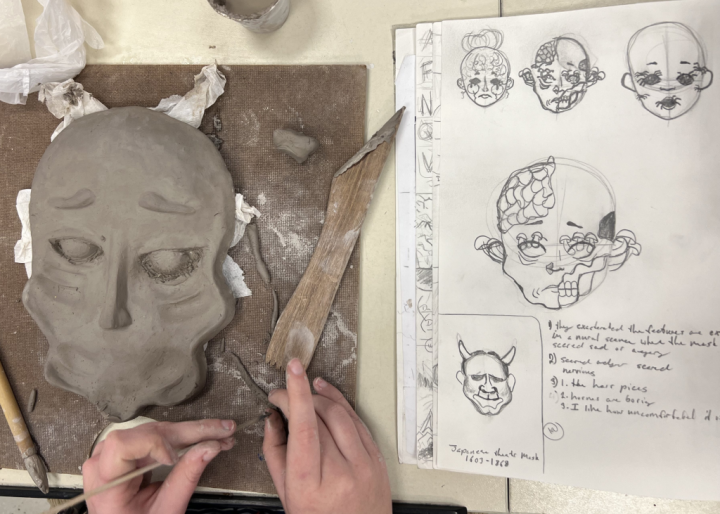
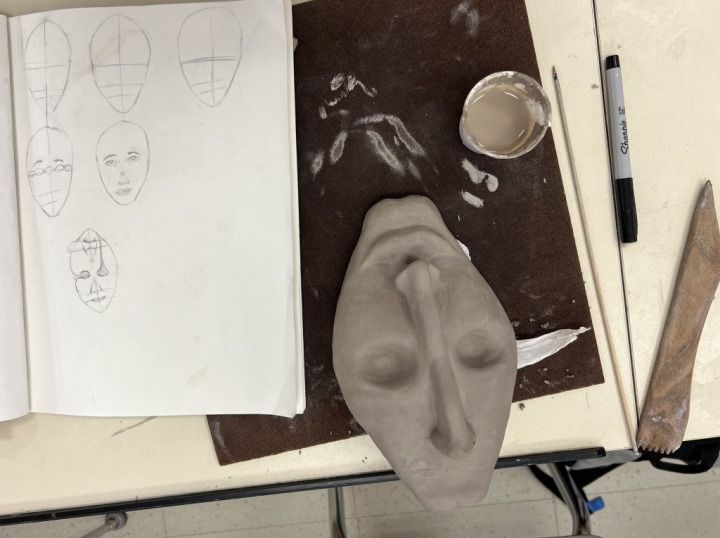
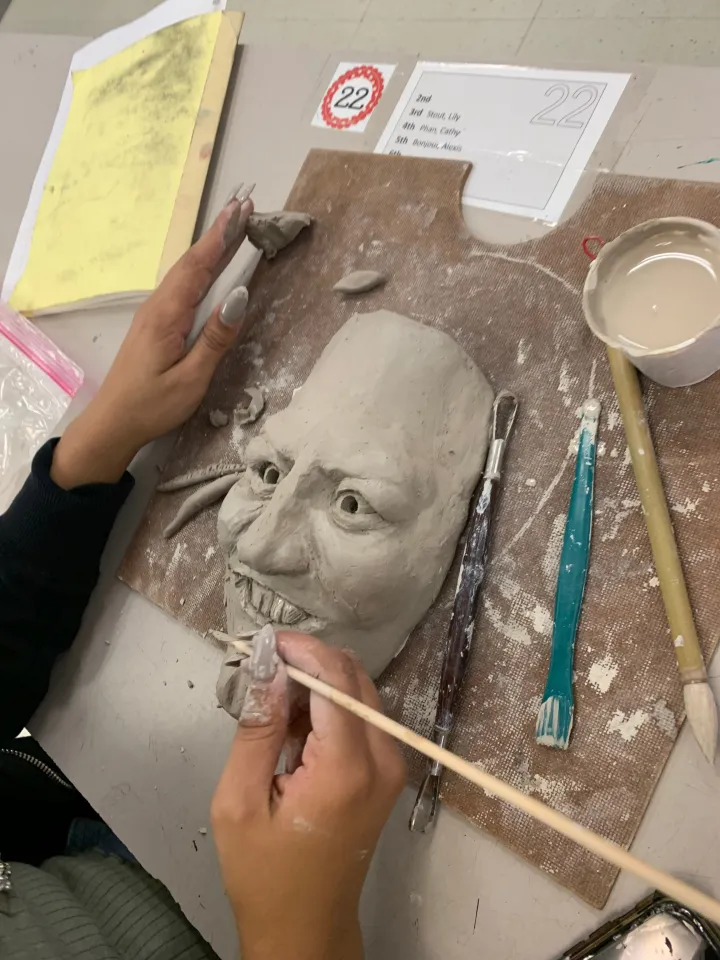
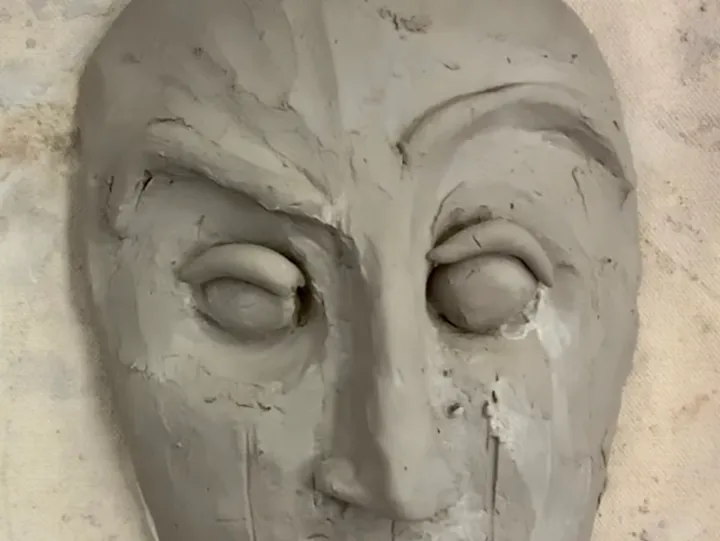
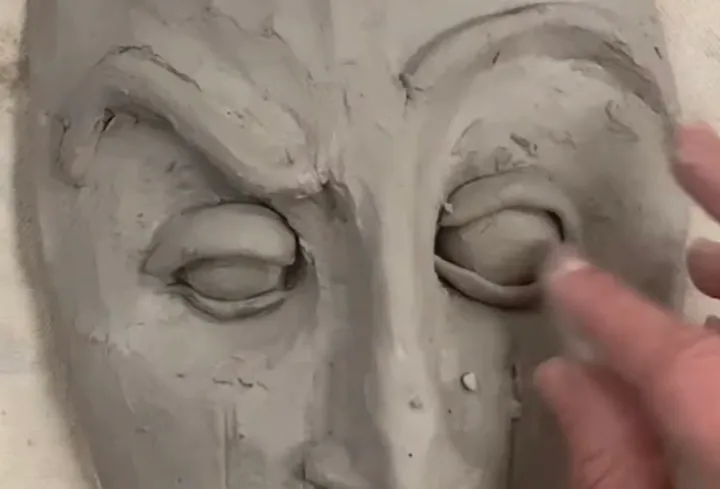
眼睛是最具挑战性的面部特征,难点仅在于粘贴微小的眼睑颇为费时。当学生开始制作眼睛与嘴巴时,我尤为强调表情探索的重要性。我们会赏析多位以人面为灵感的艺术家作品,学生们也乐于设计属于自己的独特造型。
美术史关联
学生们特别喜欢观赏日本戏剧面具。这些面具表情丰富,工艺精湛。尽管它们并非陶土制成,但学生仍能深切感受到面部特征的立体塑造效果。我们每天开展基于费尔德曼艺术批评法(Feldman’s Method of Art Criticism)的美术史热身活动,以激发课堂讨论与分析。
日本戏剧面具免费下载
金米·坎特雷尔(Kimmy Cantrell)是一位当代陶艺家,其作品与更写实的日本面具形成鲜明对比,趣味十足。他的艺术风格活泼、抽象,有助于学生放松心态,摆脱对塑造“完美”面孔的执念。
金米·坎特雷尔免费下载!
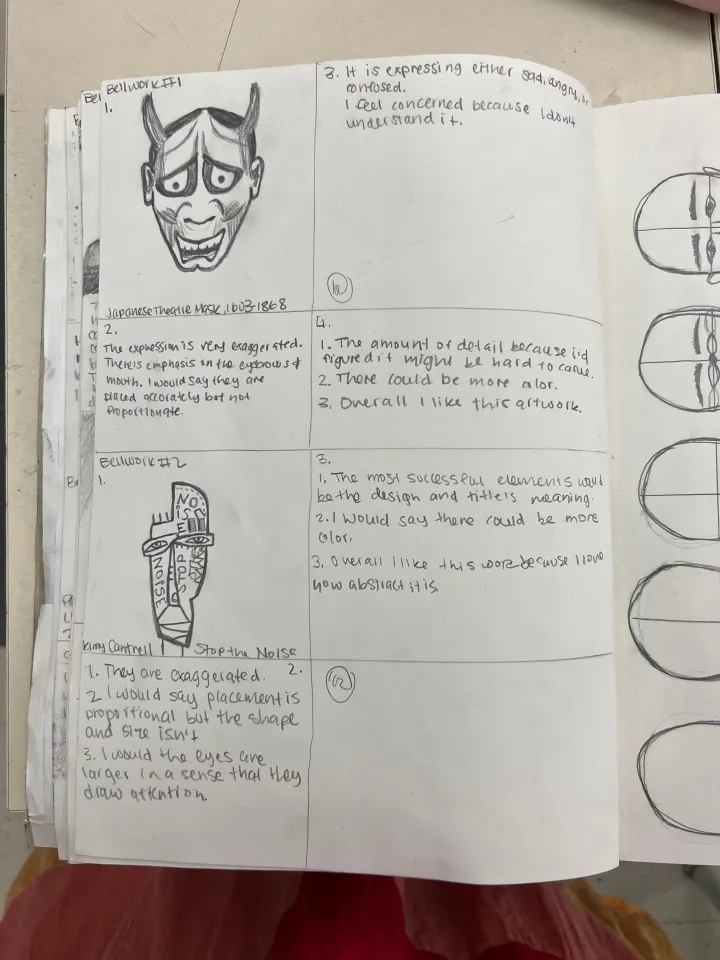
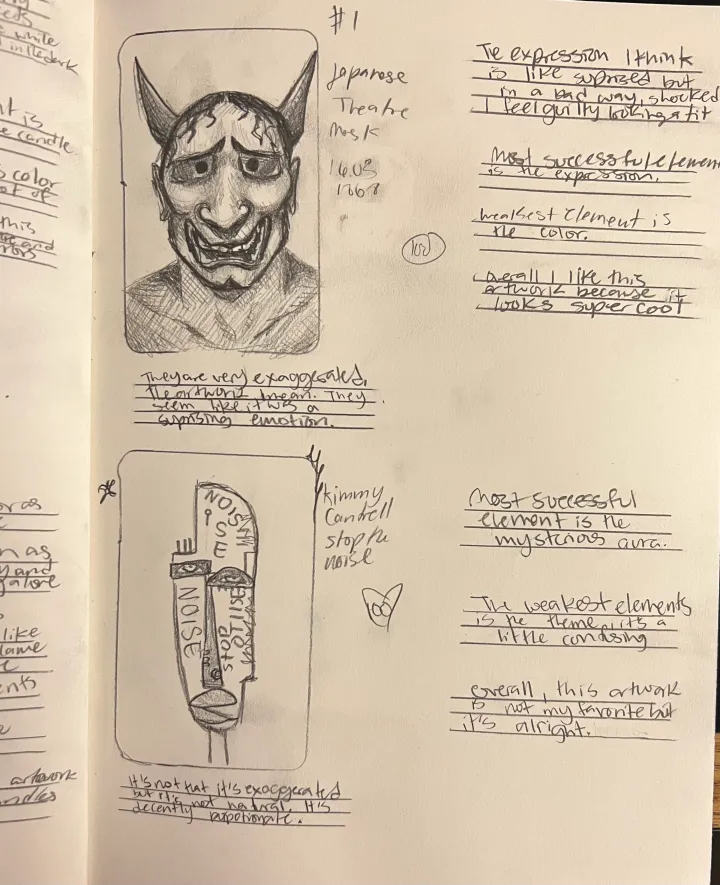
这些热身活动是全面覆盖国家及州级课程标准的绝佳方式,也是极佳的周度形成性评价素材。你或许会听到学生抱怨美术课要写作,但学生所接触的艺术家数量却显著增加,其艺术批评能力与专业美术术语的恰当运用能力也随之提升。再说了,若我仅因青少年的抱怨就改变教学内容,那恐怕什么都教不完了。🙂
展示方案
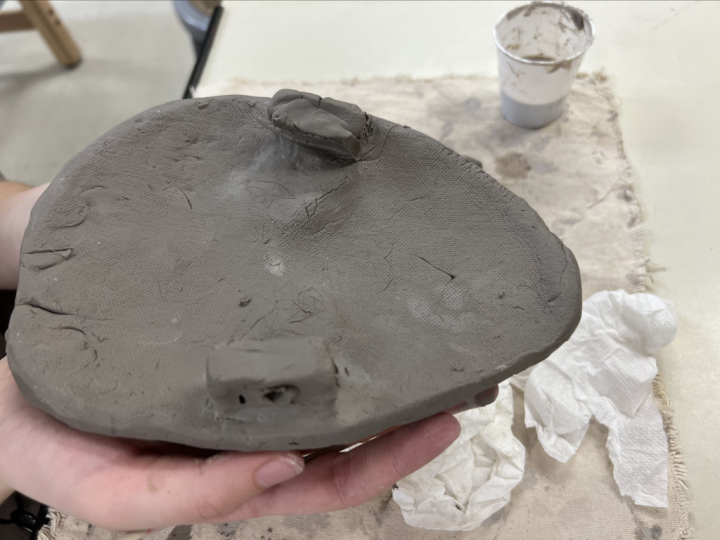
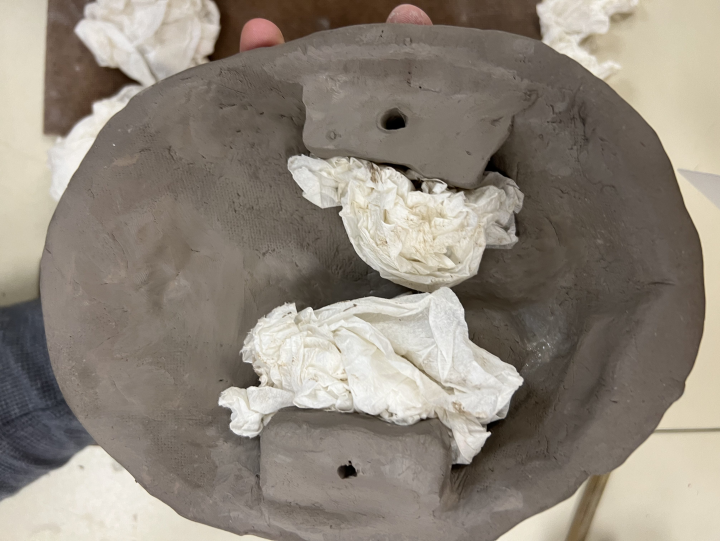
我从阿玛科(Amaco)网站学到一个实用小技巧:在陶坯上附着两个带孔的陶土小片,待出窑后穿入金属丝。这样学生就能将作品垂直悬挂在墙上展示,而非仅平置于桌面。我亦曾将作品粘贴于涂绘过的木板上悬挂展出。部分桌面式画架也可使用,关键在于其稳固程度。
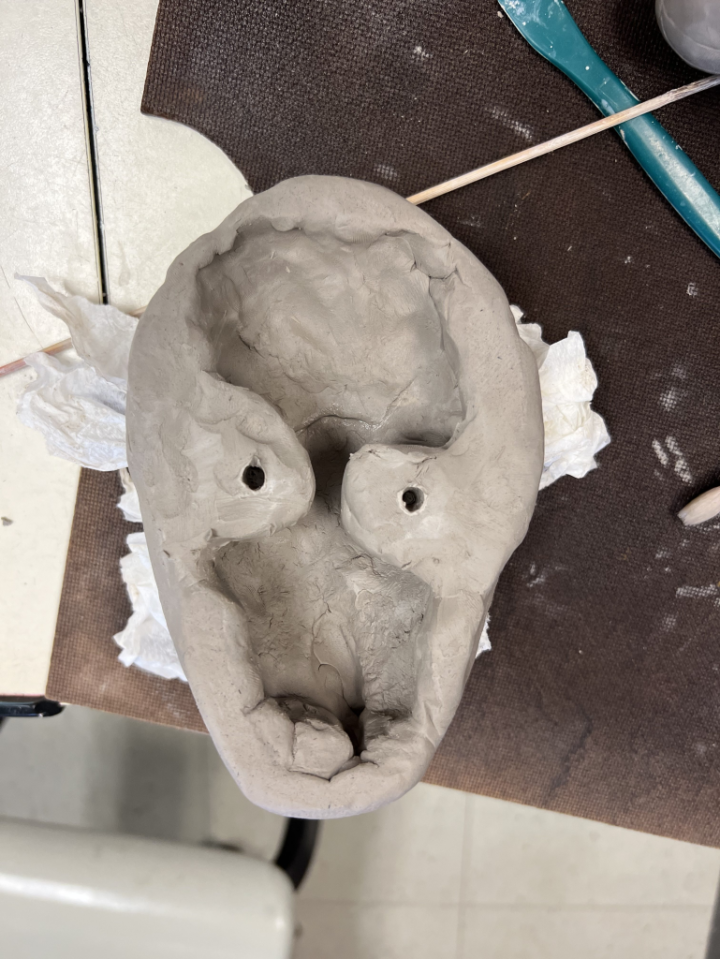
表情陶艺面具·学生作品
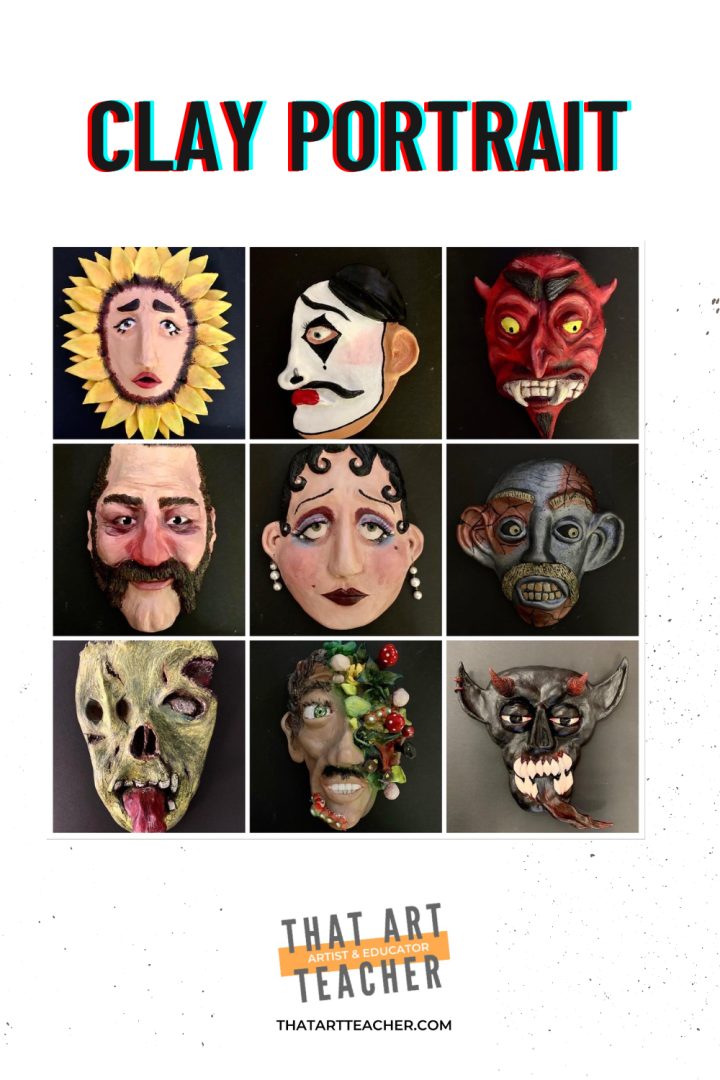
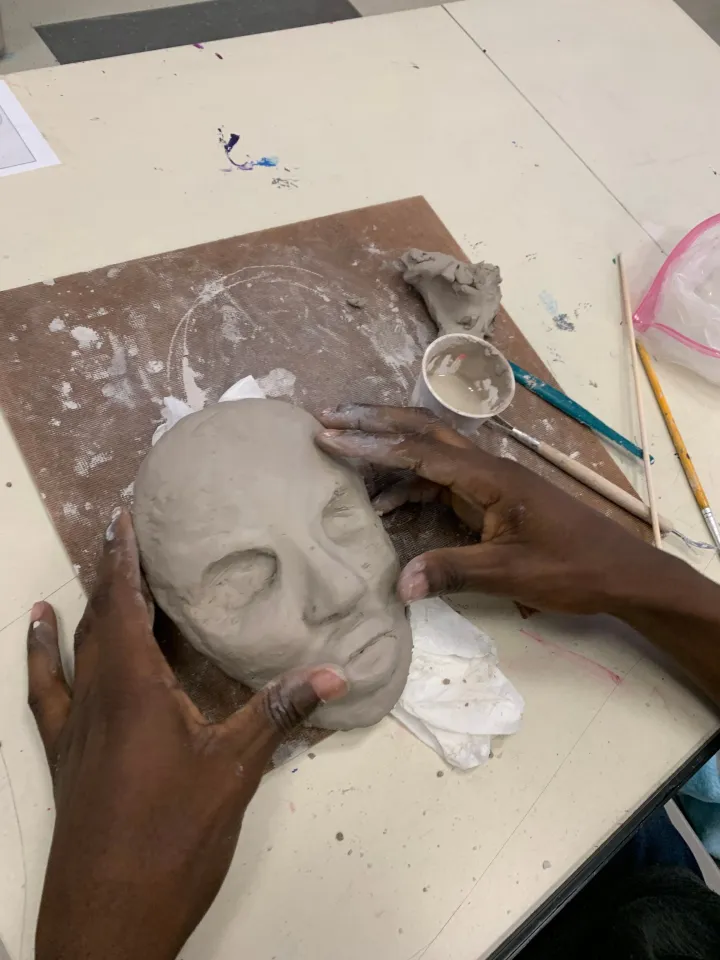
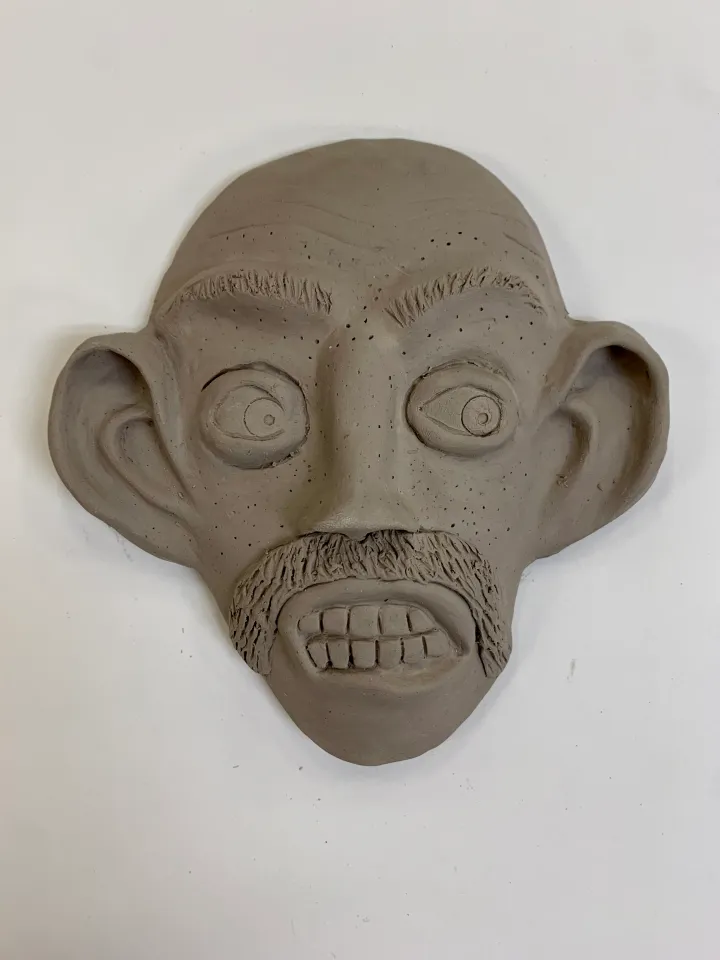
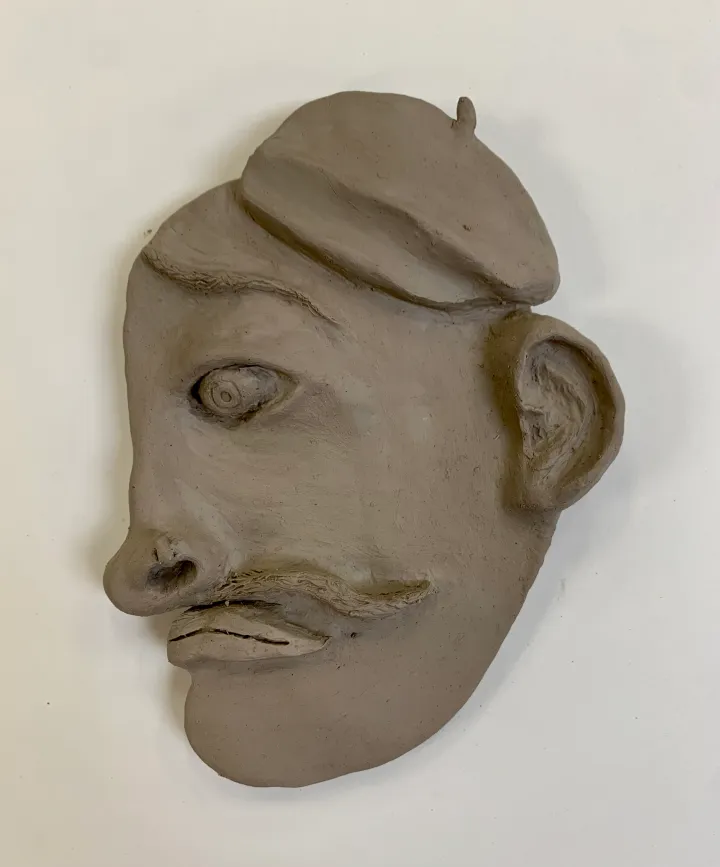
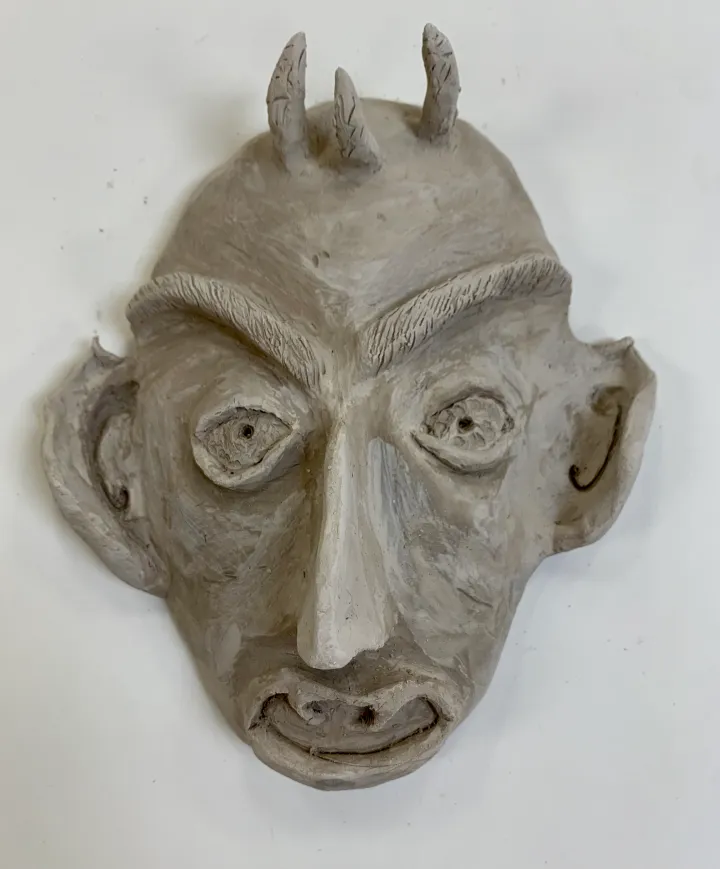
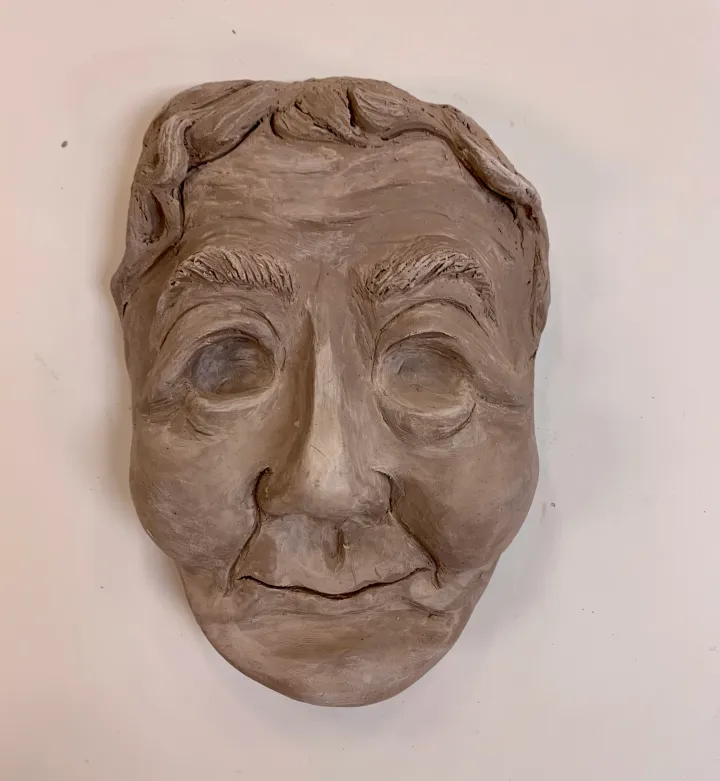
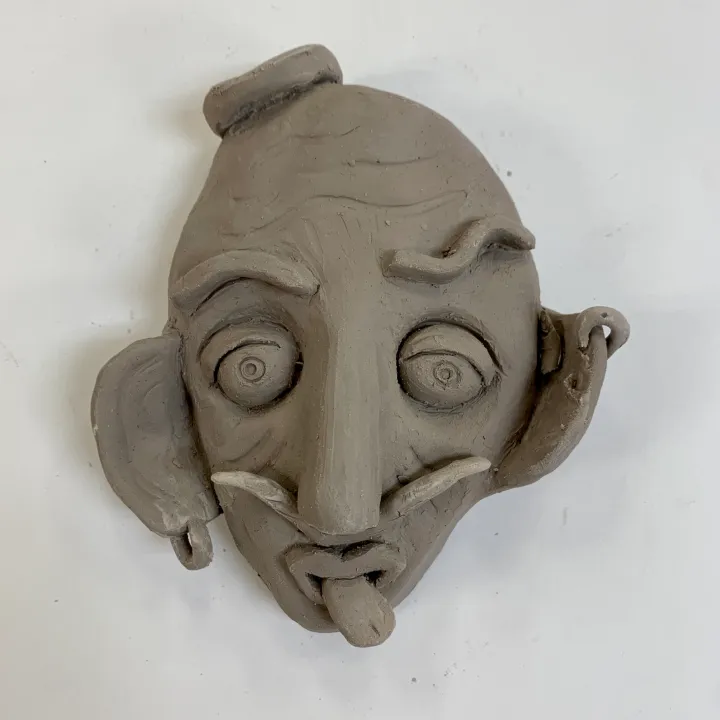
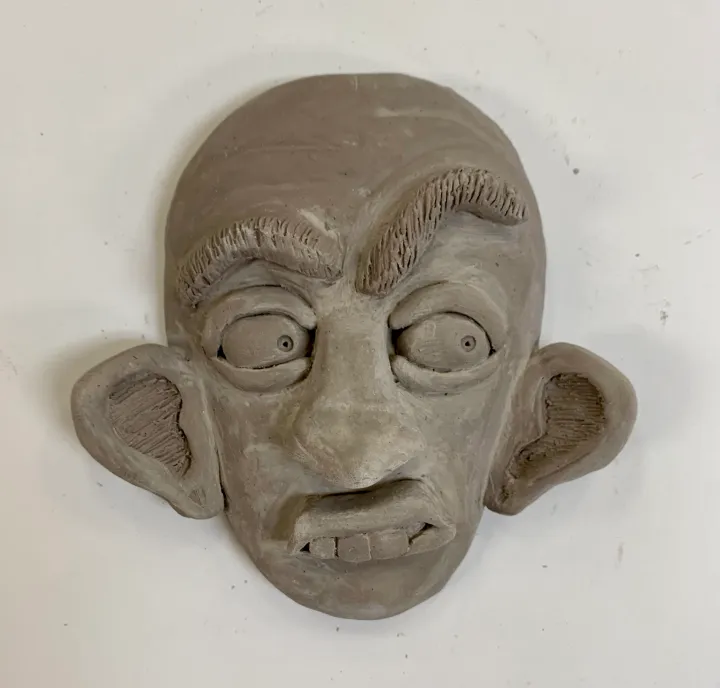
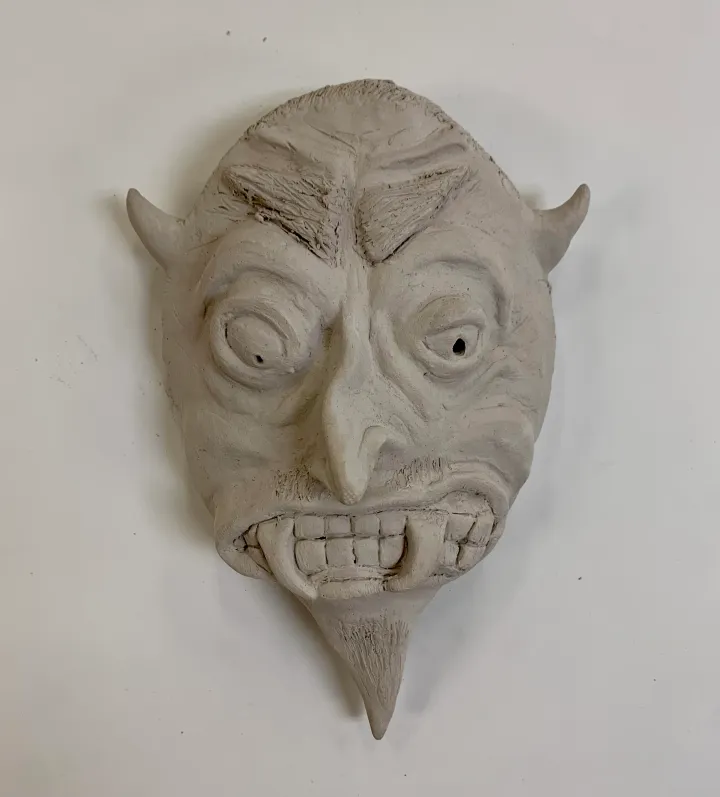
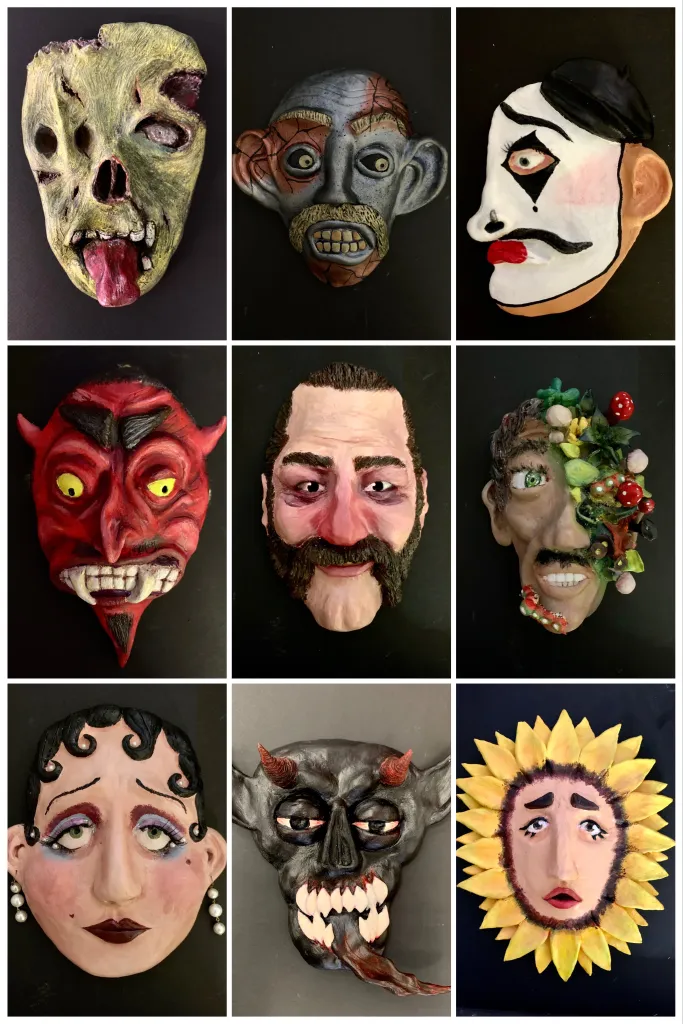
以下是我学生们的作品。我超爱其中展现的创意、表现力与表面处理手法的多样性!学生非常喜爱这项作业,而我也从未对此感到厌倦。
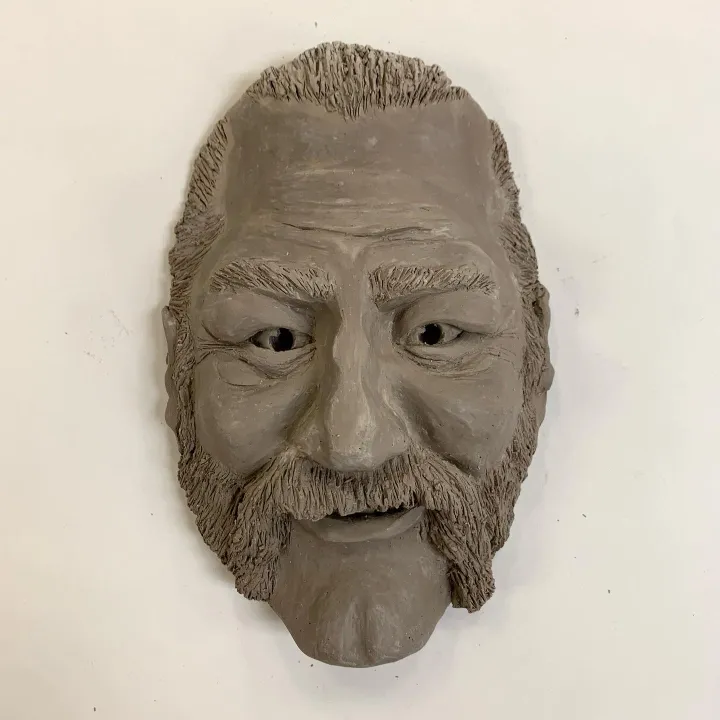
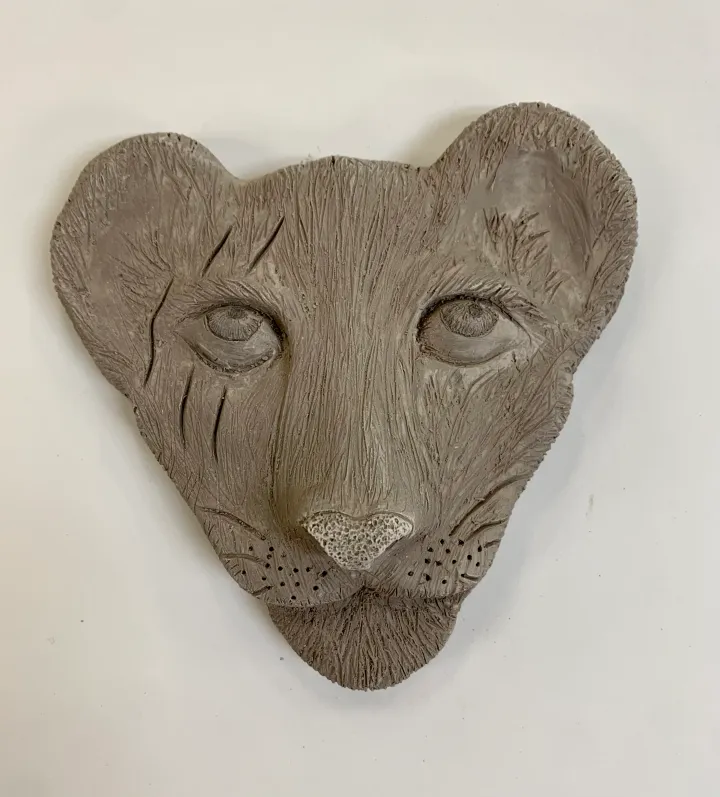
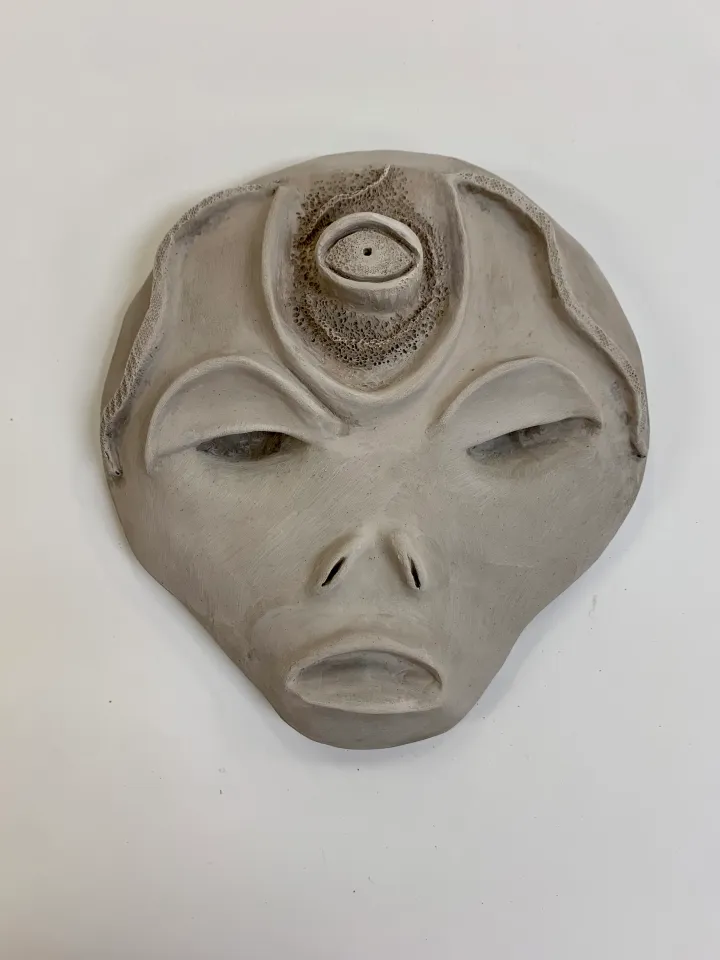
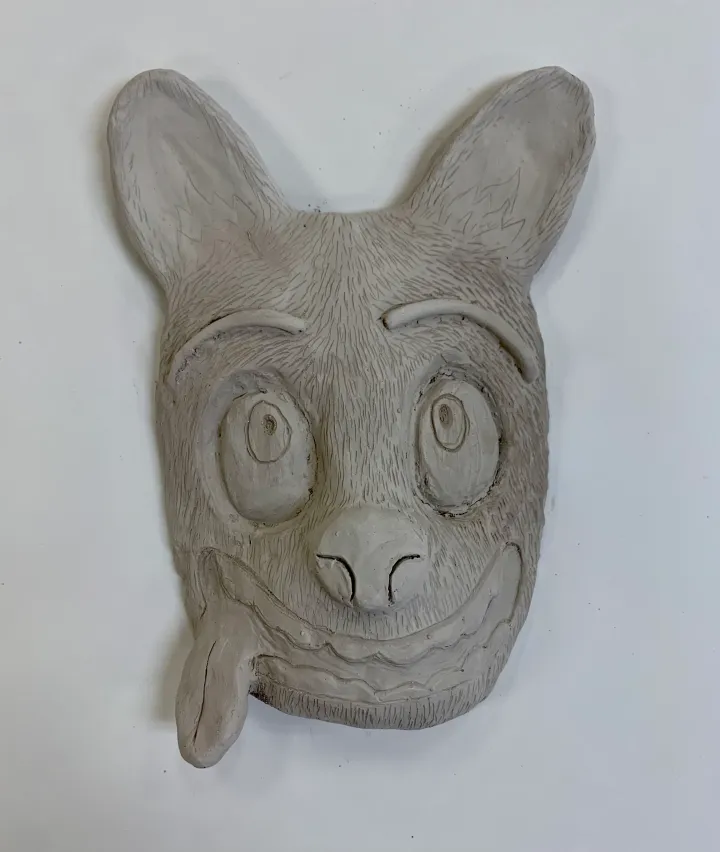
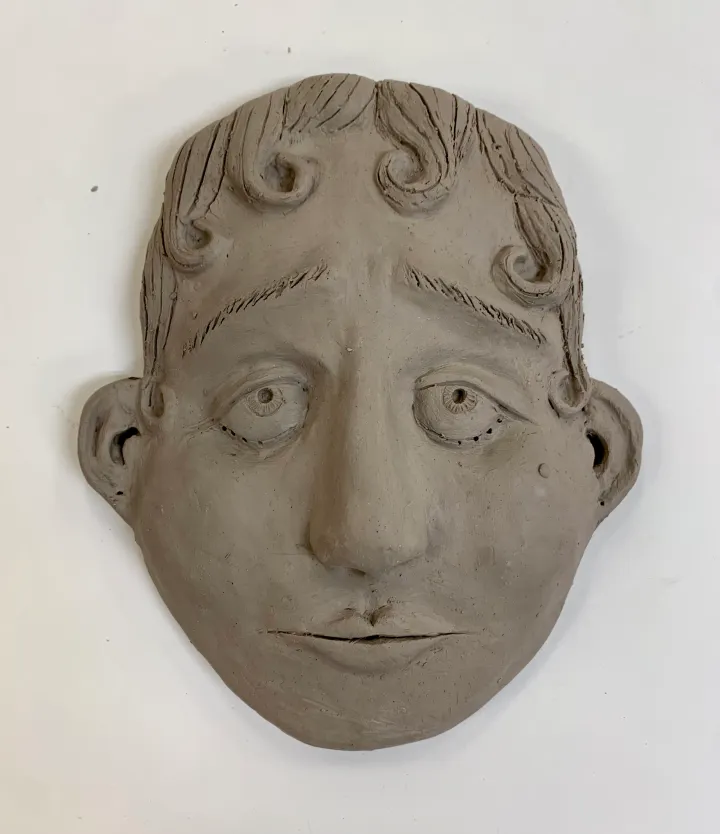
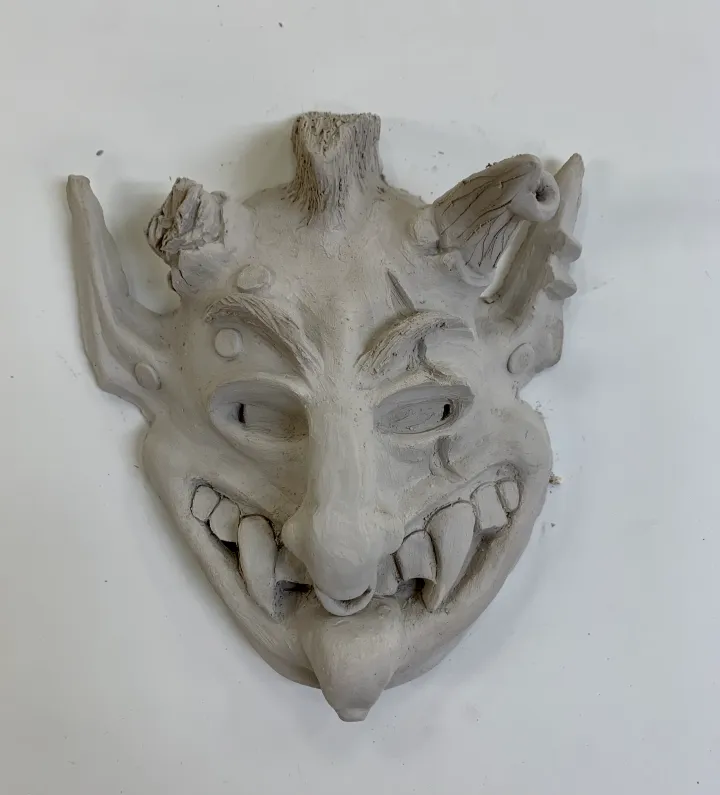
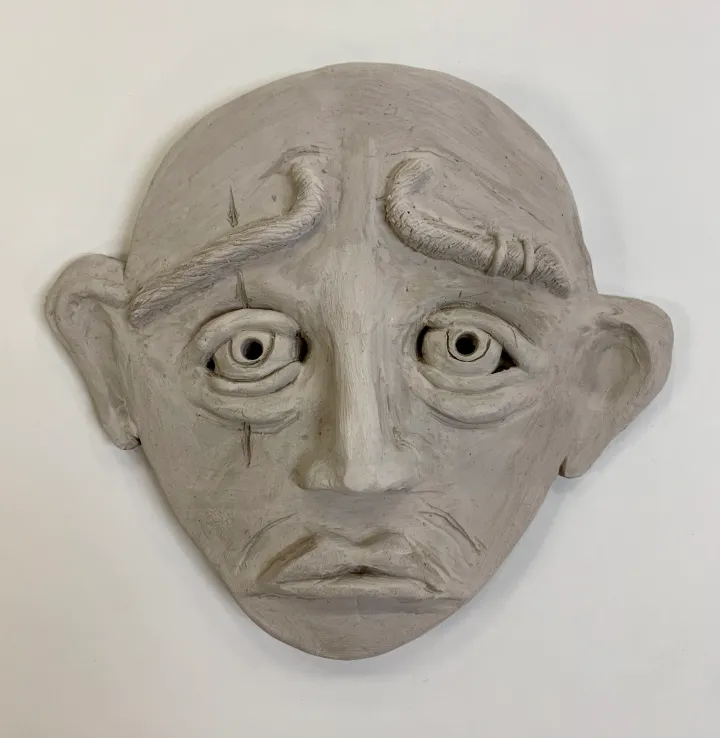
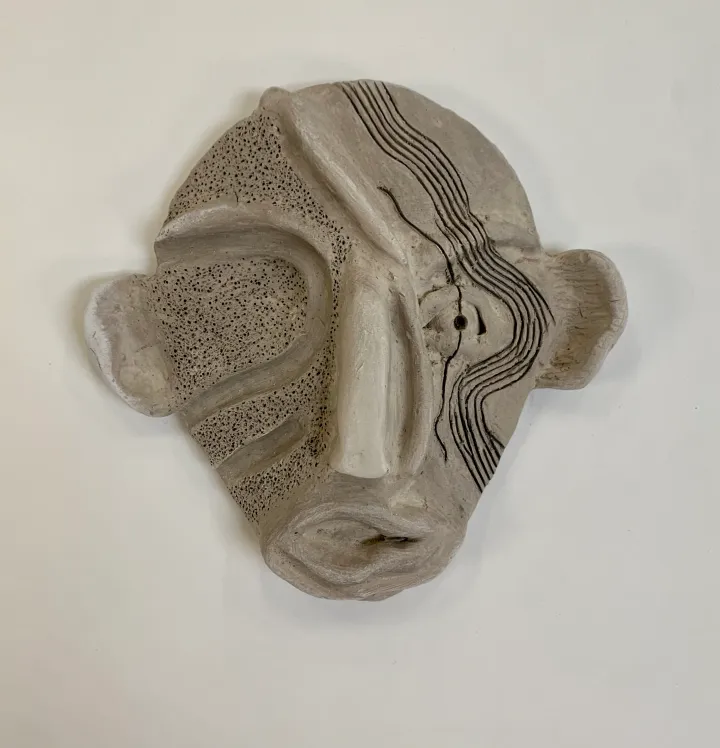
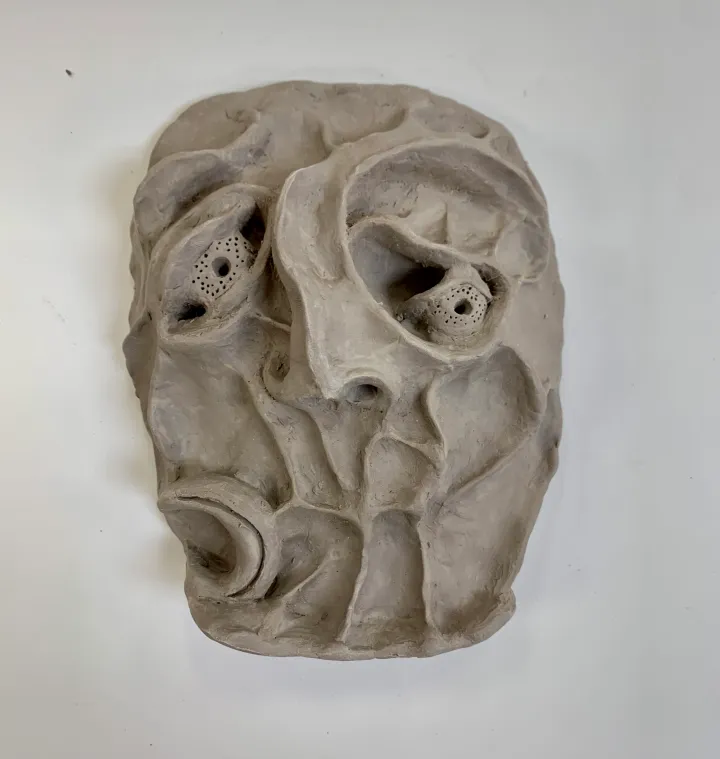
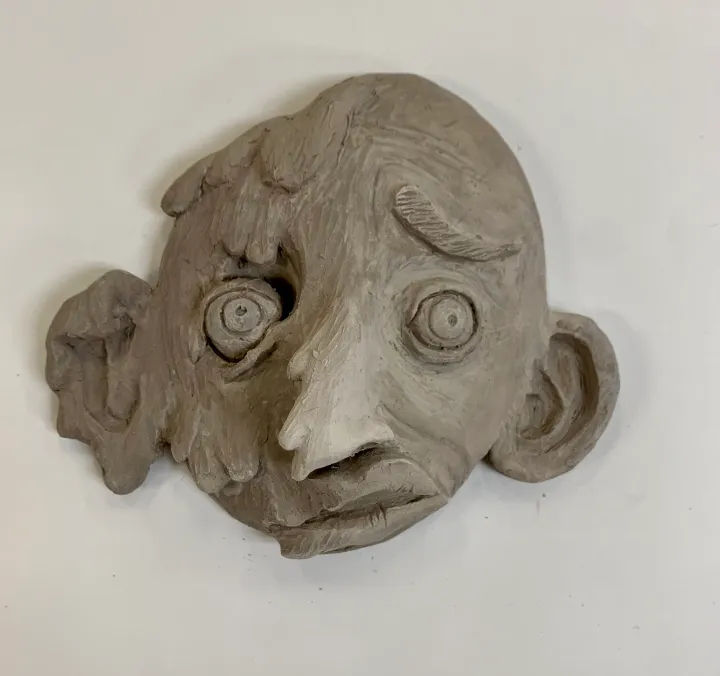
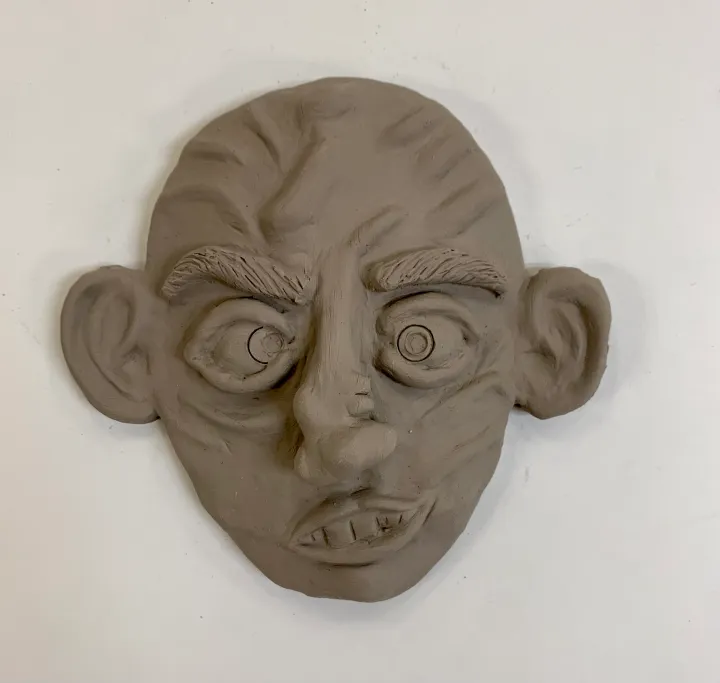
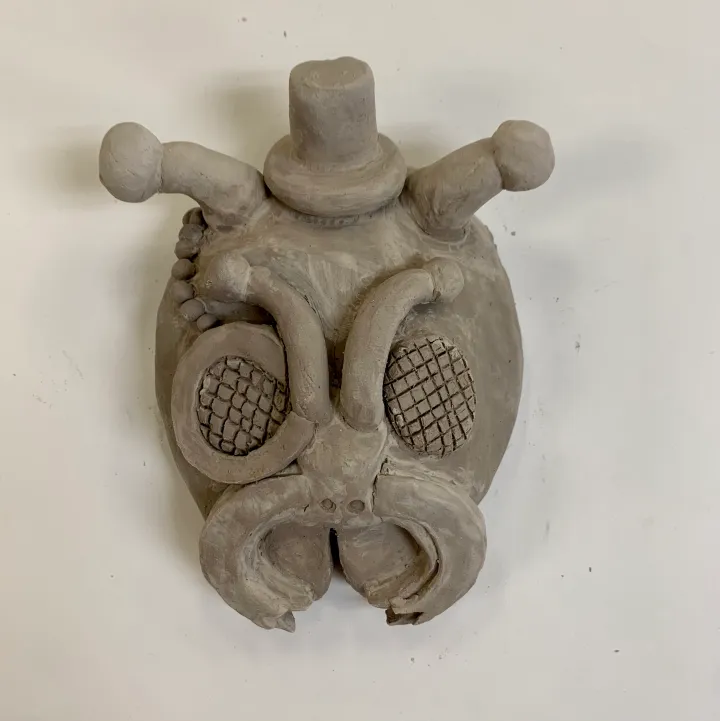
上釉还是绘画?
此项目适用的上釉与冷加工技法极为丰富。我们通常选用丙烯颜料作画——因班级规模达40人,而釉料成本过高。在陶坯阴干等待入窑期间(我比较较真,要求至少阴干两周),我们会同步开展色彩理论丙烯绘画课。此举有助于最终成果的成功呈现,因为所有学生在陶塑肖像入窑前,已积累了大量绘画实践经验。
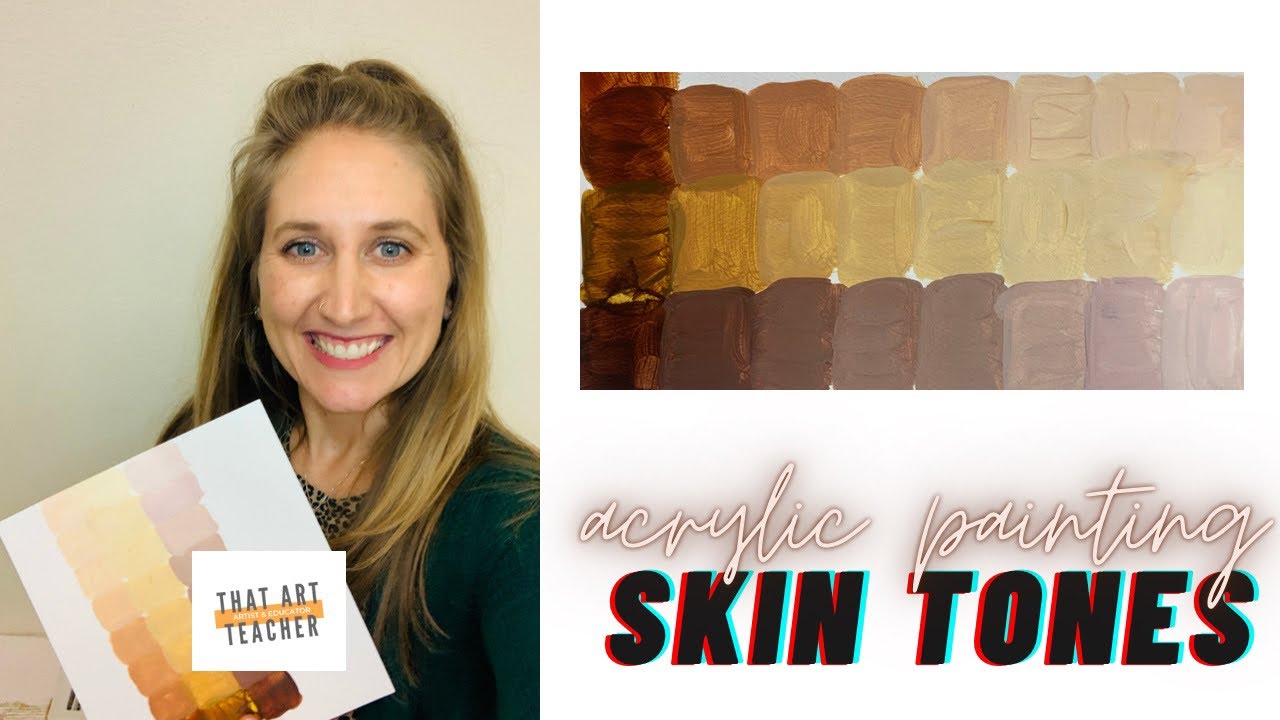
本视频帮助学生尝试调配中性色,从而实现理想肤色效果。
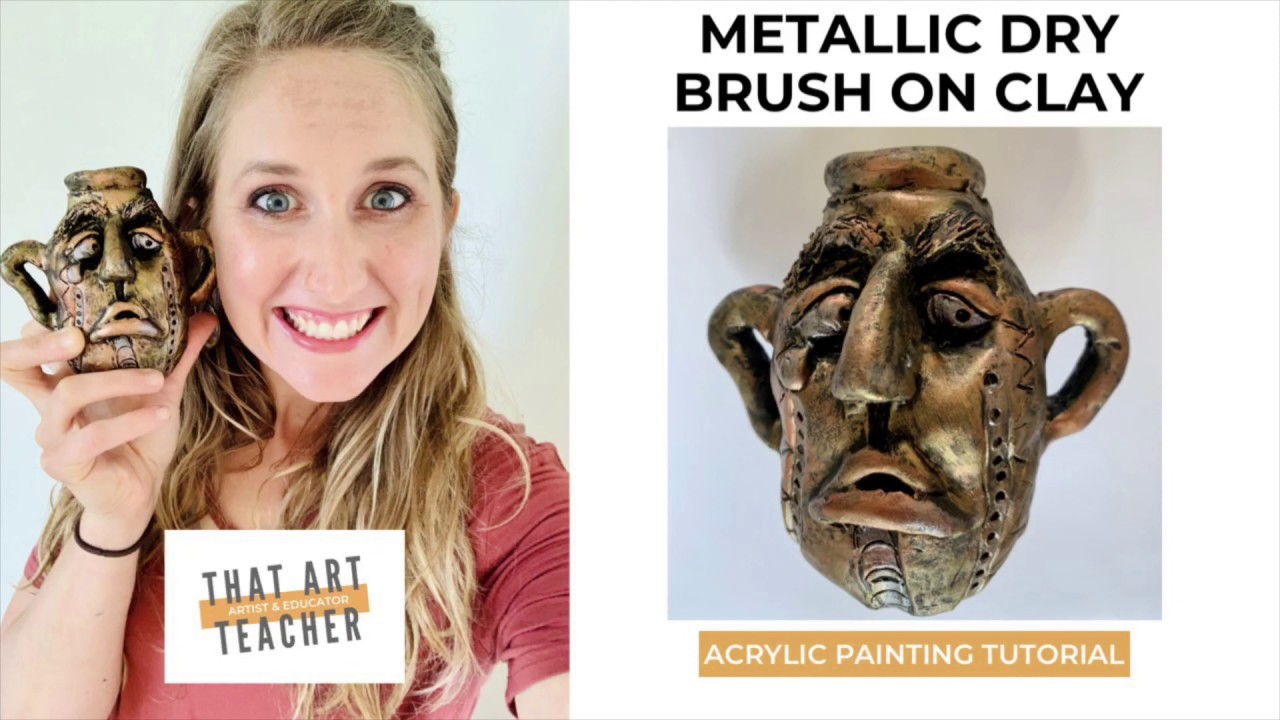
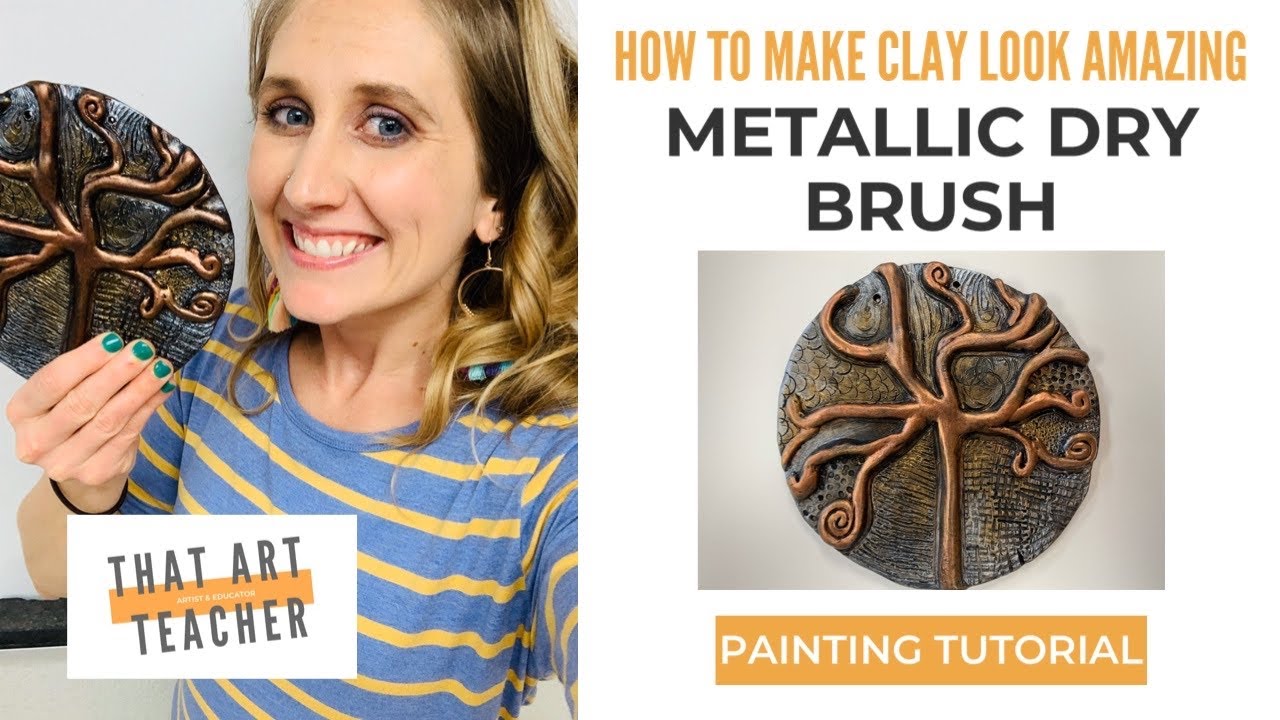
一种万无一失的方法是采用金属色干刷工艺。该技法可显著提升陶艺作品质感,且无论学生能力高低,成功率均达100%。
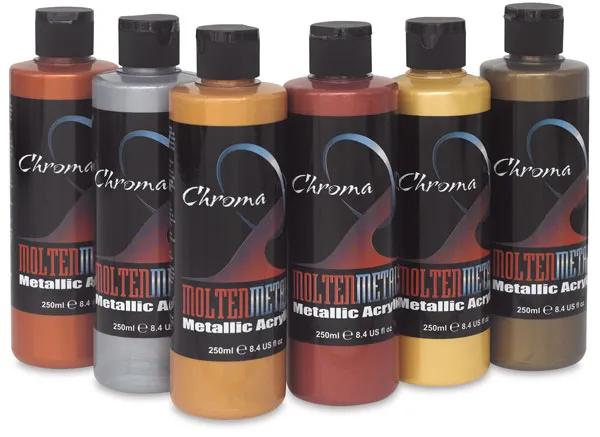

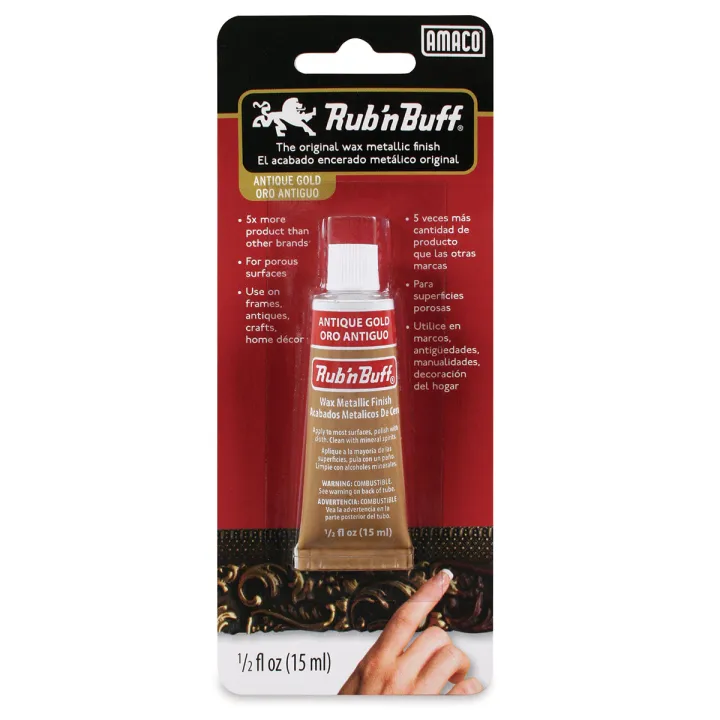
克罗马熔融金属色(Chroma Molten Metals)从未让我失望。我在众多不同艺术创作中都使用过这款产品。若您追求更高品质效果,那么鲁布恩巴夫(Rub ‘n Buff)系列(没错,当学生看到这产品名时,您得准备好迎接他们略带惊讶的目光)堪称惊艳之选。该产品为油性材质,气味较浓,但用量极少即可达到理想效果,成品令人叹为观止。
订阅,以免错过任何更新。
订阅!
您最钟爱的陶艺课是什么?期待您的分享!

作者:西耶拉·马查多
2022年2月23日

作者:西耶拉·马查多
2022年1月13日
作者:西耶拉·马查多
2021年12月7日
Expressive Clay Portrait Lesson
Original: https://thatartteacher.com/2023/01/21/expressive-clay-portrait-lesson/
Date: 2023-01-21
Author: Sierra Machado
Categories: long form lesson plan
Tags: art education, ceramics, ceramics lesson plans for high school, clay art lessons for high school, clay lesson ideas, clay lessons for middle school, clay mask art lesson plan, clay mask tutorial, clay tutorial easy, detailed clay lesson plan, expressive clay portrait, featured, high school clay lesson, high school clay lessons, how to make a clay portrait sculpture, how to make a mask out of clay, how to make an expressive clay portrait, how to make clay portrait, how to sculpt a face with clay, how to sculpt facial features in clay, step by step clay mask, step by step clay mask tutorial, that art teacher
If you are looking for a great secondary clay artwork, this expressive clay portrait lesson is my all time favorite! Students get to learn the basics of clay while exploring expression and facial features. There are so many directions to take and tons of artists to inspire your students. It is also a cost effective lesson that does not require much clay per student.
Do you have a short attention span like me? Here is a quick snapshot of each step to create a clay portrait or mask:
If you are more of a video person, this detailed video will show you and your students how to sculpt each facial features and add surface texture. It is great for reviewing steps and to give students a visual overview of the process. I use this as supplemental instruction, but it allows students to work more independently if they need extra help or review.
Classroom Tested Tutorial:
This is a updated version of creating a clay mask without a rolling pin. This tutorial will also show how to hand sculpt each facial feature .
Materials
Purchasing clay can be a stressful experience. The shipping costs can really add up and there are so many options to choose from. I love Amaco and Laguna, and I recently purchased this other brand because of the price, and it has also been excellent.
If you do not have a kiln, do not fear! I love this assignment because you can also do it with air dry clay. This clay feels almost exactly like kiln fired clay with classroom approved results.
Wooden tools are my favorite and I stock up whenever my school budget allows. Bamboo wooden skewers are a great alternative to needle tools when your class sizes or trust issues limit you. There are many brands to choose from, but Richeson and Kemper seem to hold up the best.
***This post contains affiliate links to products I truly love and use in my classroom. If you use these links to buy something I may earn a commission at no additional cost to you.
I like to start this unit sketching accurate human facial proportions. We do some guided drawing using a free PDF resource I found online. Since it is not my work, I won’t attach that file here. Google “facial proportion guidelines” and show your students the ones that you like the most.
This video will also break down the basics of facial proportions.
After our guided drawing, students spend the rest of class sketching their own ideas. They can distort or exaggerate facial expressions and fuse together human, animal and fantasy ideas. This is such a fun and open ended way for students to explore portraits. You can be more specific with theme or concept, but I usually let students explore their own ideas while emphasizing expression.
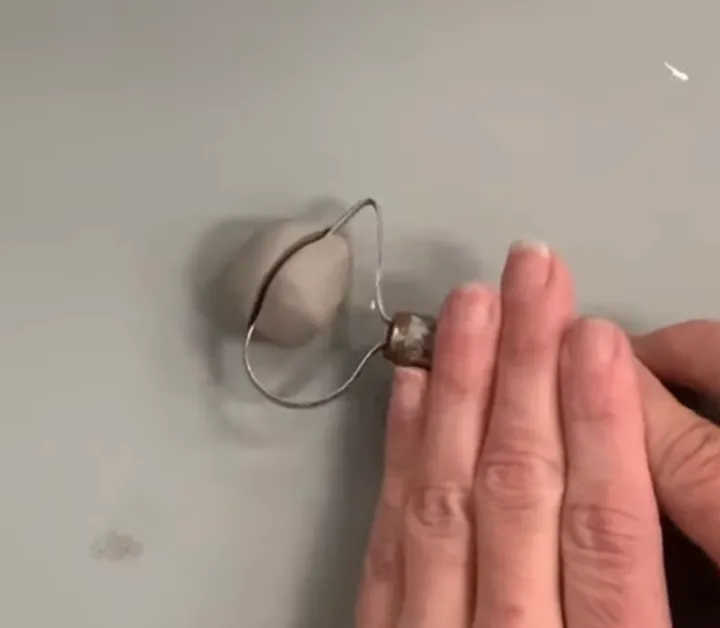
We start by wedging a handful of clay into a hamburger patty style oval. Once the shape is somewhat oval and somewhat equal in thickness, we use the rolling pin a couple times to even everything out. Sometimes students can tap it on the table or the palm of their hand to create their desired form. Some prefer to use a needle tool or wooden skewer to cut out the shape of their head.
We then use paper towels to round out the clay and create a more 3-dimensional effect. We lightly sketch facial proportion guidelines on the clay so students get an idea of where each facial feature will be attached. I encourage students to think outside the box, but to sketch accurate proportions first before distorting them.
The scariest part for students is pushing in the clay to create eye sockets. We do this together and I walk around the room to check on timid students. It is important to do this during the first or second class period, before the clay starts to become more leather hard.
Eye brows are an easy feature and I often start with them. We roll little coils and then I aggressively supervise their score, slip and blend technique. I have been known to pull off facial features to check for score marks. I like to use slip instead of just water and we apply it with a paintbrush.
Currently, I teach 45 minute class periods and I like to demonstrate a facial feature per day so students can focus and practice on one part of the face. Once students get the hang of things it’s a great flow. I like to include a few buffer days in between that I call “creativity and refinement days” to give students more independent work time.
The eyes are the trickiest facial feature, but only because attaching the tiny little eyelids can be tedious. Once students are working on the eyes and mouth I really emphasize the importance of playing around with expression. We look at a variety of artists that use the human face for inspiration and students love coming up with their own designs.
Art History Connections
Students love looking at Japanese theatre masks. They are so expressive and are impressively crafted. Even though they aren’t made out of clay students really connect to how the facial features are sculpted. We do daily Art History warm-ups based on the Feldman’s Method of Art Criticism so spark classroom discussion and analysis.
Japanese-Theatre-Maskfree Download
Kimmy Cantrell is a contemporary ceramicist that is really fun to contrast with the more naturalistic Japanese masks. His artwork is fun, abstract and allows students to relax about making a “perfect” face.
Kimmy-Cantrellfree Download!
These warm-ups are such a great way to hit all of the national and state standards and are great weekly formative assessment grades. You will hear complaints about writing in art class, but the number of artists students are introduced too dramatically increases. So does their art criticism skills and appropriate use of art vocabulary. And hey, if I changed what I taught based on teenager complaints we would not get much done. 🙂
Display Options
A good tip I learned from the Amaco website is to attach two clay tabs with holes so that you can attach wire after it comes out of the kiln. This helps students display their work vertically on the wall instead of just sitting flat on a table. I also have glued these to painted boards and hung those for display. Some table top easels will work too, it just depends on how sturdy they are.
Expressive Clay Mask Student Work
Here are some of my students’ work. I LOVE the creativity, expression and surface treatment variety. Students love this assignment and I never get bored with it.
Glazing or Painting?
There are so many great glazing and cold finish techniques for this. We usually do acrylic paint because I have class sizes of 40 and glazes are so expensive. While the clay dries out for the kiln (I am crazy so I do a two week minimum) we move on to our color theory acrylic painting lesson. This helps the end result be successful because all students have tons of painting experience leading up to their clay portrait being fired.
This video helps my students play around with mixing neutrals so they can achieve their desired skin tone.
A fool proof method is doing a metallic dry brush finish. This elevates clay and it guaranteed to be 100% successful no matter the ability level of the student.
The Chroma Molten Metals have never let me down. I use this product on SO many different artworks. If you are looking for a higher end result, these Rub ‘n Buff (yes, be prepared for side eyes when your students see this product name) are amazing. They are oil based and do have a strong smell, but a little goes a long way and the results are stunning.
Subscribe so you never miss a post.
Subscribe!
What are your favorite clay lessons? I’d love to hear from you!
by Sierra Machado
February 23, 2022
by Sierra Machado
January 13, 2022
by Sierra Machado
December 7, 2021

