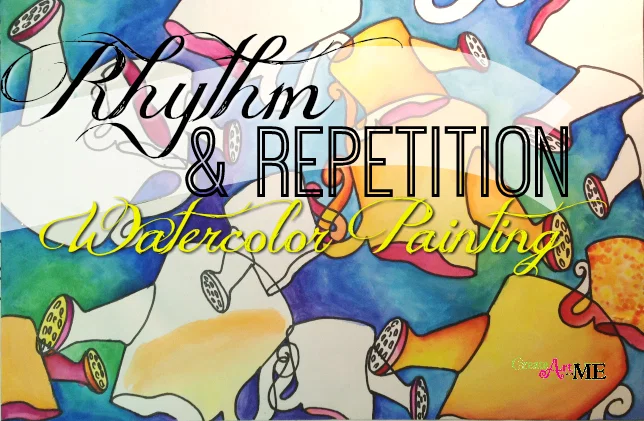
节奏与重复绘画美术课
原文链接:https://createartwithme.com/rhythm-repetition-painting/
日期: 2017年6月20日
作者: 米歇尔·伊斯特(Michelle East)
分类: 六年级、美术课、色彩对比、精选内容、初中美术、美术原理课、节奏与图案课、水彩课
标签: 艺术作品中的运动感、名为“节奏”的美术原理、重复、节奏、节奏与重复绘画、艺术中的节奏、视觉节奏、视觉律动
适用年级: 四至八年级
本节关于节奏与重复的美术课灵感源自桑迪·布鲁克(Sandy Brooke)所著《爱上素描》(Hooked on Drawing)一书第32–34页的练习。我的七至八年级美术班完成了这一课题。需特别说明的是:学生不得直接描摹实物制作模板,而须观察实物后在纸板上徒手绘制。我课堂上的规则是——除非描摹的是你自己画的原图,否则一律禁止描摹!
教学目标:
- 学生将理解艺术家运用视觉节奏,在作品中营造运动感;
- 学生将通过创作一幅原创作品,展现如何借助美术元素(如线条、形状、色彩等)的重复来实现视觉节奏,从而体现对该原理的掌握。
所需材料:
已裁切好的海报板(8.5×11英寸)、12×18英寸、90磅及以上克重的水彩纸、水彩颜料
教学流程:
- 导入: 音乐中的节奏——请学生举例说明音乐中的节奏(例如敲击桌面)。视觉节奏最易通过与听觉节奏类比来理解。音乐与美术中的节奏存在诸多共通点:音乐中音符(即“节拍”)的重复,对应美术中色彩或形状(即美术元素)的重复;音乐中音符模式的重复,对应美术中美术元素的重复构成图案。二者均能激发感官体验——音乐诉诸听觉,美术诉诸视觉。同时,节奏在音乐与美术中均能营造秩序感或可预期性。
- 什么是视觉节奏? 一种视觉上的律动或节拍。它是设计原理之一,指通过美术元素有规律地重复,以产生视觉上的运动感与节奏感。通常依靠精心安排的重复性组件实现,引导观者视线快速跳跃或流畅滑移于各组件之间。
- 节奏(rhythm)一词源于希腊语 rhymthmos,意为“有度的流动”,后传入拉丁语为 rhythmus,意为“时间中的运动”。该词最早进入英语时用于文学领域,指诗歌中格律化的押韵;至18世纪晚期,英语使用者开始用 rhythm 描述音乐中节拍的重复,同期亦开始用于描述视觉元素的重复。
- 如何实现视觉节奏? 通过重复美术元素(如线条、形状、色彩等)来实现。
课堂活动:节奏与重复绘画
- 任选一件物品作为描绘对象。
- 在一张海报板上,以两种不同尺寸(彼此不接触)勾勒出该物品的轮廓线,并沿轮廓线剪下两件模板。
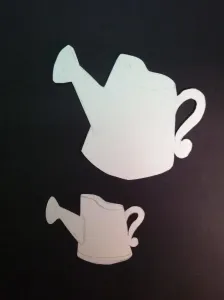
- 利用这两件“模板”,在一张12×18英寸水彩纸上反复描绘该物品12–15次。图形之间可相互交叠。
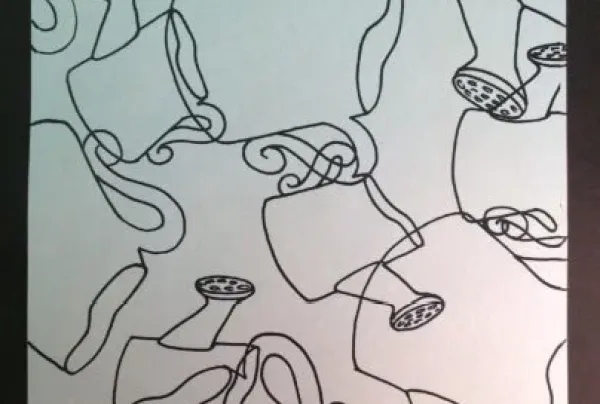
- 用记号笔(Sharpie)勾勒全部轮廓线,并为每个物品添加细节。
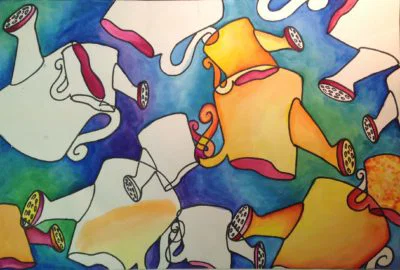
- 用水彩颜料作画:背景涂冷色,物品涂暖色。每次遇到新图形时,必须更换颜色或明度。
- 本课题的变体方案:
- 黑白物品配彩色背景;
- 物品上绘制禅绕画(Zentangle),背景涂色;
- 背景绘制禅绕画,物品涂色;
- 选定一件物品保持黑白,其余全部着色(以达成强调效果)。
本文由米歇尔·C·伊斯特(Michelle C. East)于2017年撰写(版权所有)。若您选用本课教案(文字或图片),敬请回链至本博客 Create Art with ME!
Rhythm and Repetition Painting Art Lesson
Original: https://createartwithme.com/rhythm-repetition-painting/
Date: 2017-06-20
Author: Michelle East
Categories: 6th Grade, Art Lessons, Color Contrast, Featured, MS Art, Principles of Art Lessons, Rhythm & Pattern Lessons, Watercolor Lessons
Tags: feeling of movement in a piece of art, principle of art called rhythm, repetition, rhythm, Rhythm and Repetition Painting, rhythm in art, visual rhythm, visual tempo
Grades: 4-8th
This art lesson on rhythm and repetition was inspired by an exercise in the book “Hooked on Drawing” by Sandy Brooke (pages 32-34). My 7-8th grade art class did this project. It is important to note here that they could not trace the actual object to create a stencil, they had to look at the object and draw it onto cardboard. The rule in my class is that you can not trace unless it is YOUR drawing!
OBJECTIVES:
- Student will learn that artist use visual rhythm to create a feeling of movement in a piece of art.
- They will demonstrate understand of visual rhythm by creating an original piece of art that shows rhythm being achieved through the repetition of the elements of art.
SUPPLIES:
Pre-cut Poster board (8.5×11″), 12×18″ 90lb+ paper, watercolors
DELIVERY:
- Introduction: Music rhythm-have students give an example of rhythm in music (tapping on the table). Visual rhythm may be best understood by relating it to rhythm in sound. There are parallels between rhythm in music and art: repetition of notes (a “beat”) in music or a color or shape (the elements) in art-patterns of notes or the elements repeated. There is also an arousing of the senses in both-hearing in music and sight in art. Through both art and music a feeling of order or predictability is created through rhythm.
- What is visual rhythm? A visual tempo or beat. The principle of design that refers to a regular repetition of elements of art to produce the look and feel of movement. It is often achieved through the careful placement of repeated components which invite the viewer’s eye to jump rapidly or glide smoothly from one to the next.
- Rhythm originated in the Greek word rhymthmos, meaning measured flow, which they passed into Latin as rhythmus, meaning movement in time. Its first uses in English were literary, in reference to themetrical rhyming of verses. English speakers began to use rhythm concerning repetition of musical beats in the late 18th century, and about visual elements in the same period.
- How is visual rhythm achieved: Rhythm is achieved through the repetition of the elements of art (line, shape, color, etc.)
ACTIVITY: Rhythm and Repetition Painting
- Choose one object to draw.
- On a sheet of poster board draw an outline of your object in 2 different sizes (not touching each other). Cut the pieces out.
- Use the “stencils” of your object to draw the object repeatedly 12-15 times on a sheet of 12×18” watercolor paper. Overlap the shapes.
- Outline all lines in sharpie. Add details to all the objects.
- Use watercolors to paint background cool colors & objects warm colors. Change color or value every time you encounter a new shape.
- Variations on Project:
- Black & white objects against a color background
- Zentangles on the objects color background
- Zentangle background and color objects
- Choose one object to be in black & white, the rest is all in color (to create Emphasis)
This post was written by Michelle C. East 2017 (All rights reserved). If you choose to use any of this lesson (written or photos), please link back to this blog Create Art with ME!**


