艺术节与家庭艺术之夜
原文链接:https://createartwithme.com/art-festival-and-family-art-night/
日期: 2018年4月9日
作者: 米歇尔·伊斯(Michelle East)
分类: 二年级、三年级、四年级、五年级、六年级、艺术节、美术课、家庭艺术之夜、精选内容、高中美术、幼儿园至一年级、初中美术
标签: 美术活动、美术活动、艺术之夜、艺术之夜创意、艺术之夜资源、艺术之夜站点、艺术之夜小贴士、艺术站点、合作创作、家庭艺术之夜、小组创作、主办家庭艺术之夜、艺术之夜实用建议
增设家庭艺术之夜
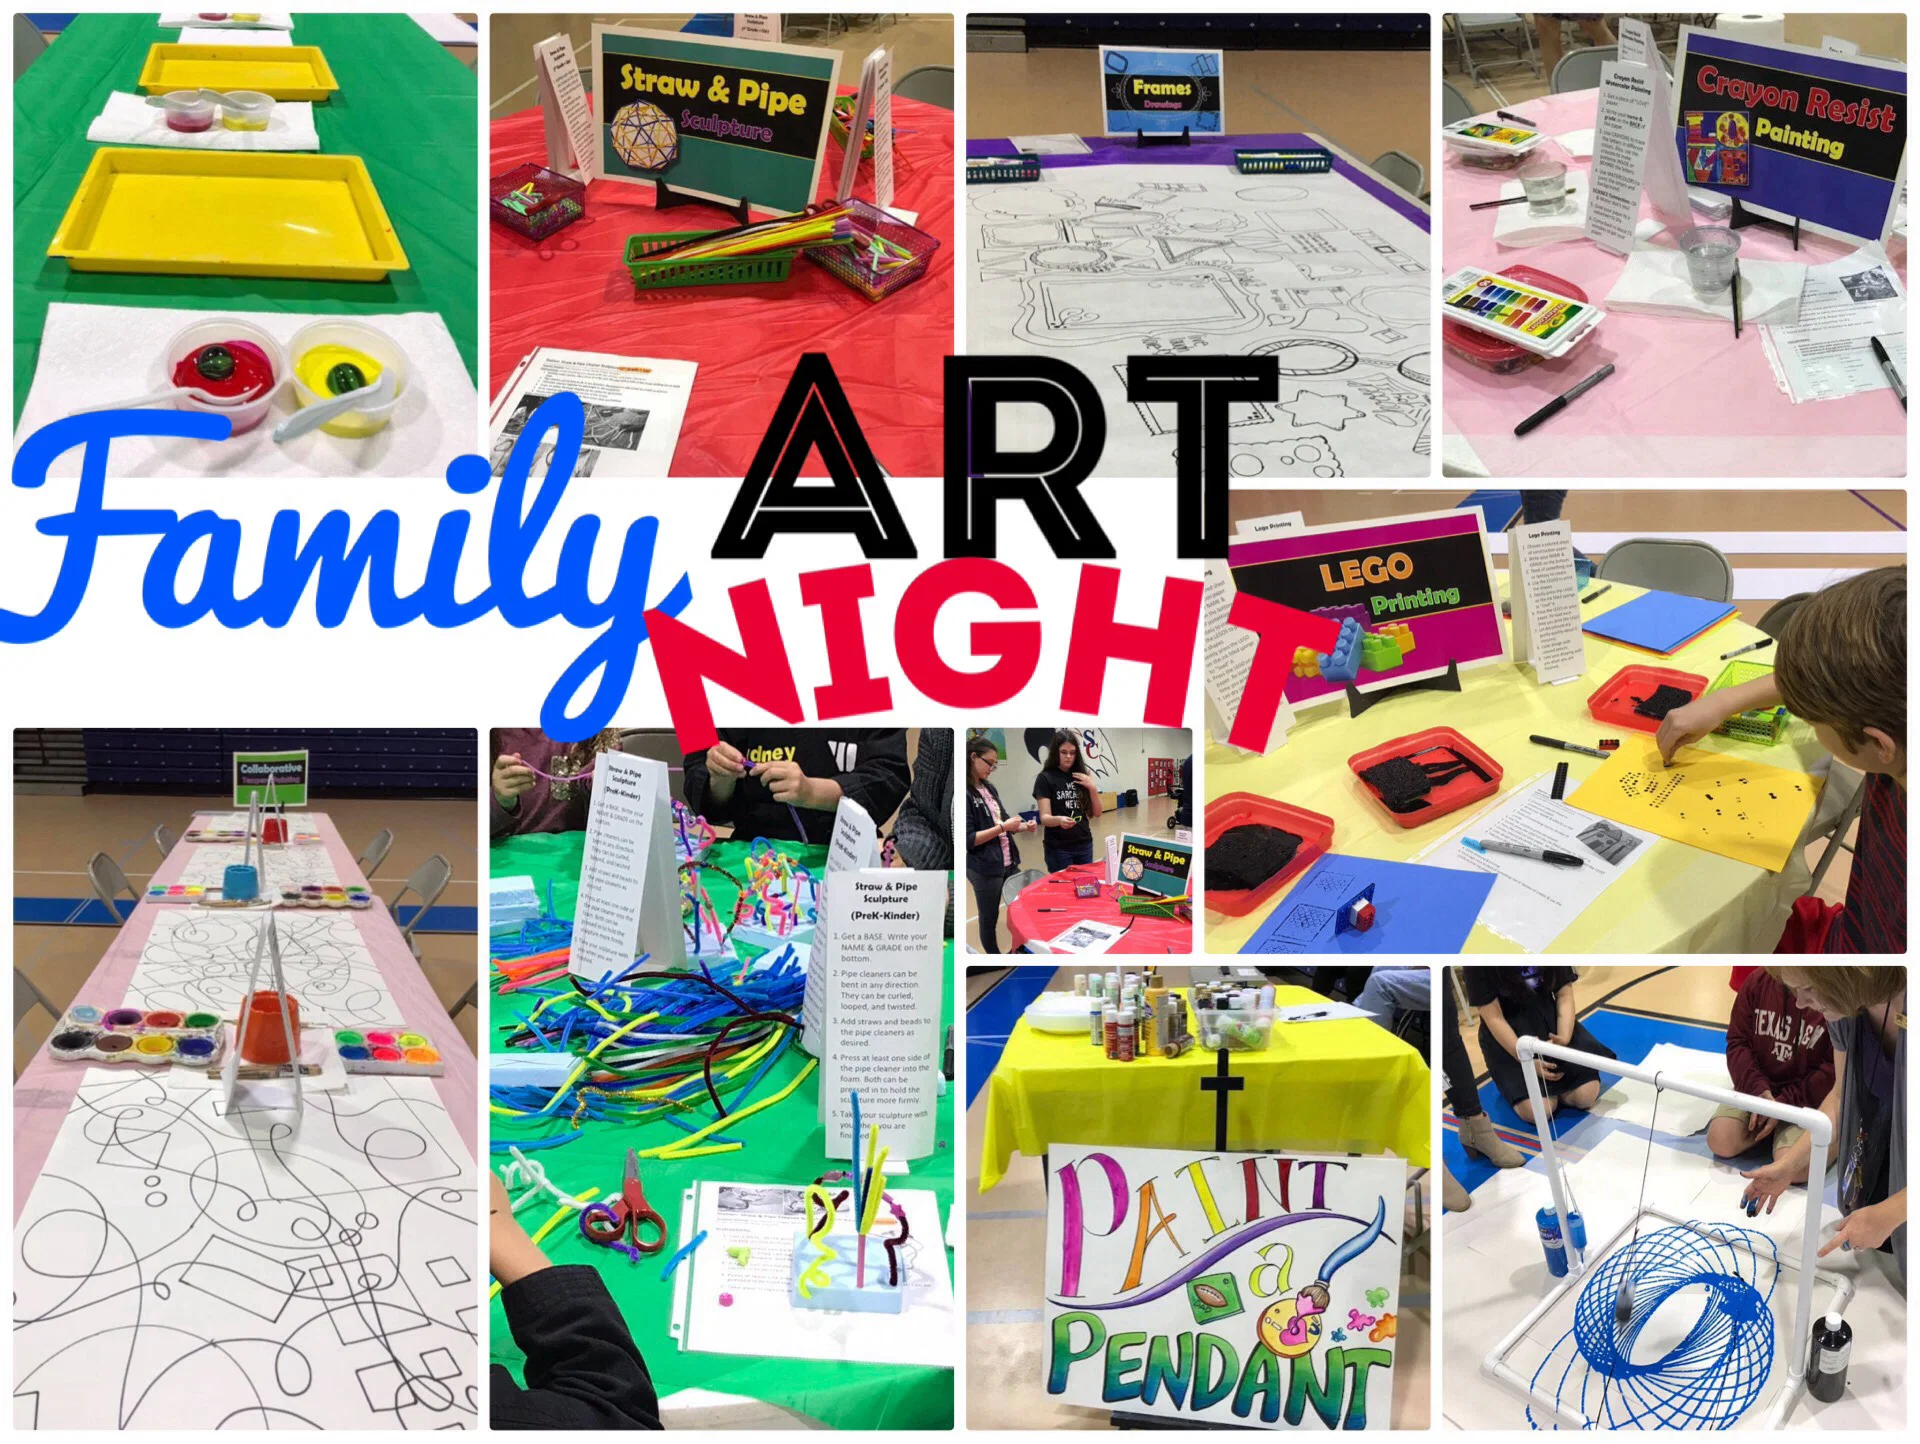
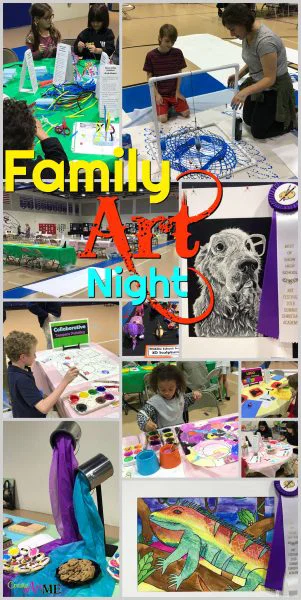
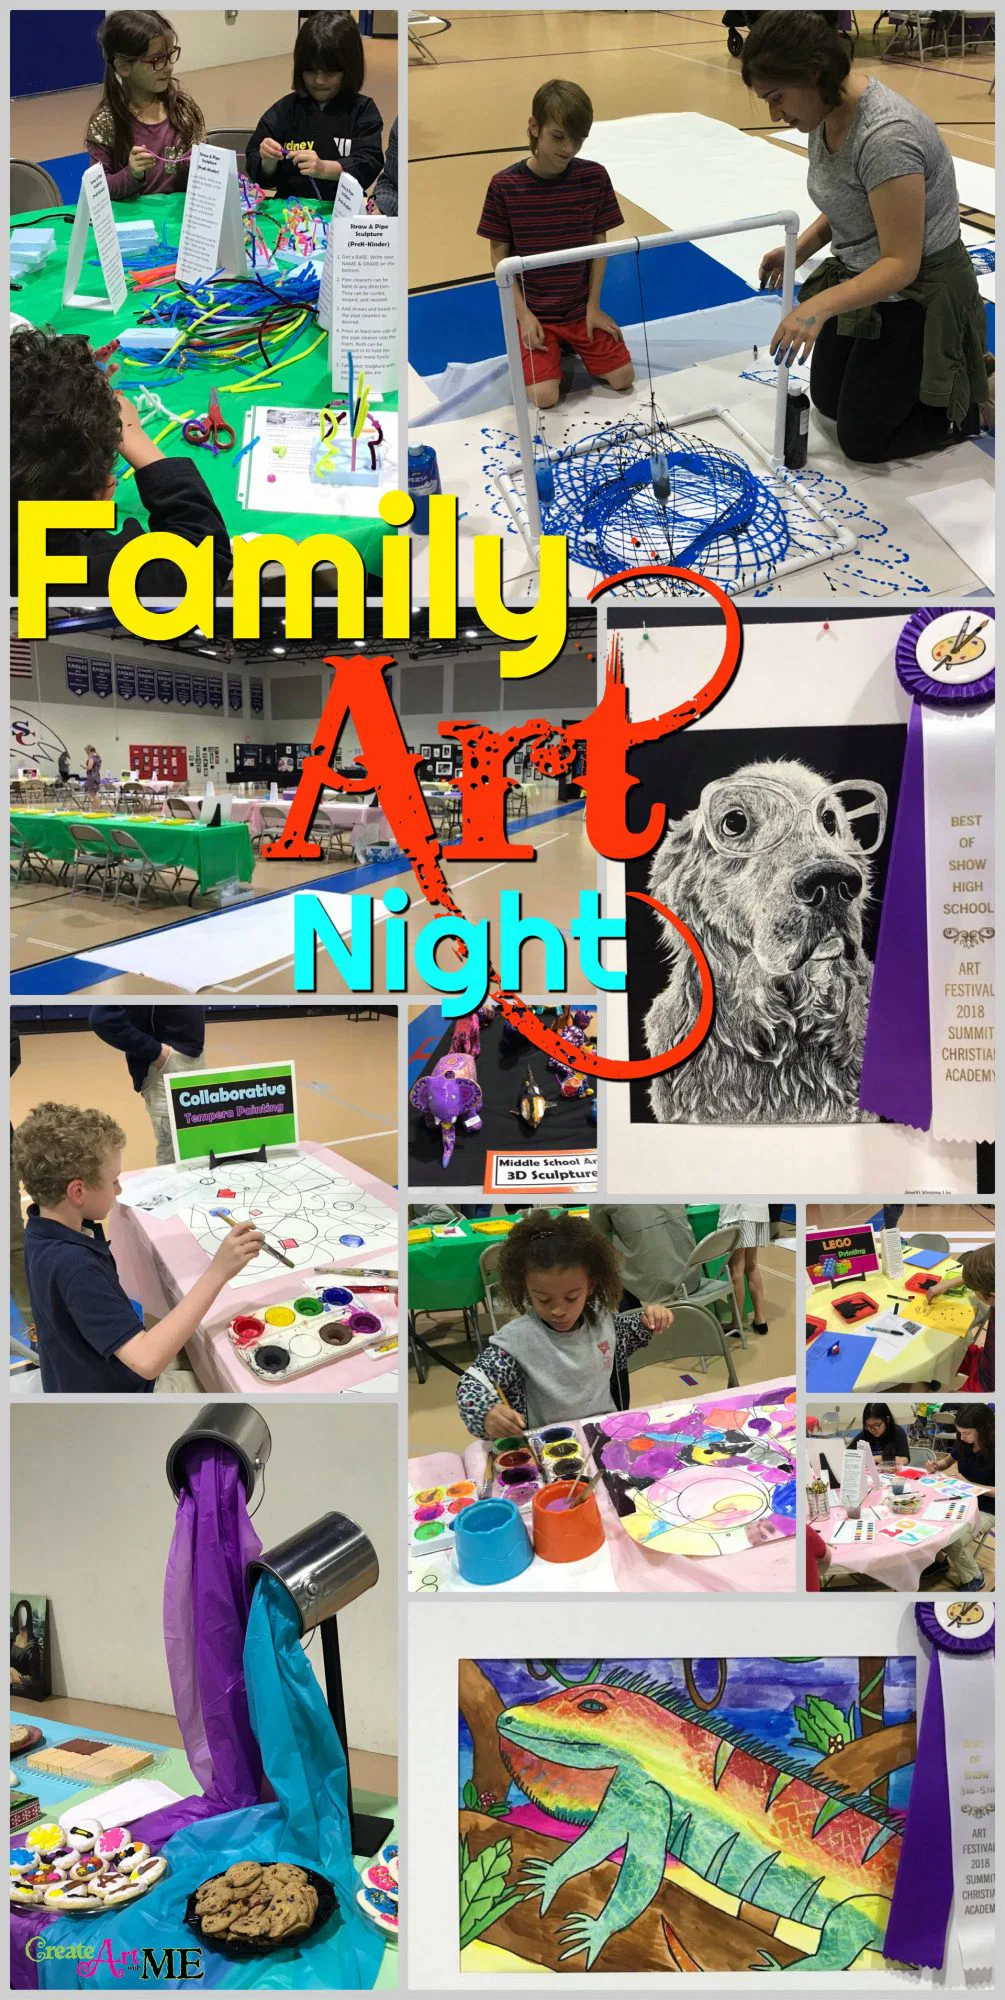
今年,除了一年一度的艺术节(涵盖学前班至十二年级的美术展览与竞赛)外,我决定增设一场家庭艺术之夜。我的目标是提升参与人数,并通过富有趣味性的美术活动推广我校美术组。任务圆满完成! 我们共设置了11个艺术站点,其中仅有一项需付费([彩绘吊坠义卖活动](http://createartwithme.com/paint-a-pendant-fundraiser-idea/)),其余全部免费。家长和校方均给予了热烈响应!筹备家庭艺术之夜工作量巨大,前期规划耗时颇多,但每一分努力都绝对值得。
为顺利启动,我深入调研并借鉴了其他成功举办过家庭艺术之夜的同行经验! 我在Pinterest平台的收藏板[艺术节创意集](https://www.pinterest.com/micheast/art-festival-ideas)上疯狂收集灵感——此处汇聚了大量优质点子。以下仅列举网络上部分精彩资源:
- Deep Space Sparkle 提供了详尽的[活动指南](https://www.deepspacesparkle.com/family-art-nights-ame-043/),涵盖艺术之夜的组织策略,以及配有分步说明的精美展板设计;
- Mrs. Knight’s Smartest Artists —— [史上最棒的美术之夜](http://dolvinartknight.blogspot.com/2014/05/best-fine-arts-night-ever.html?m=1)!推出了创意十足的艺术站点,例如“涂鸦缝纫站”与“再生怪兽站”。[那位小学美术老师](http://ms-artteacher.blogspot.com/2014/01/family-art-night.html)则提供了清晰的场地布局图及活动操作指南;
- 沙里·卡特(Shari Carter)在其文章《如何主办家庭艺术之夜》([How to Host a Family Art Night](https://www.scholastic.com/teachers/blog-posts/shari-carter/2017/How-to-Host-a-Family-Art-Night/))中指出:“成功的关键在于 提前充分通知,以及为教师及其美术助教提供 明确清晰的指引。”
本文将分享我们举办家庭艺术之夜的具体做法,并附上免费资源与实践所得的实用小贴士,助您更顺畅地开展活动。
家庭艺术之夜筹备工作
场地选择
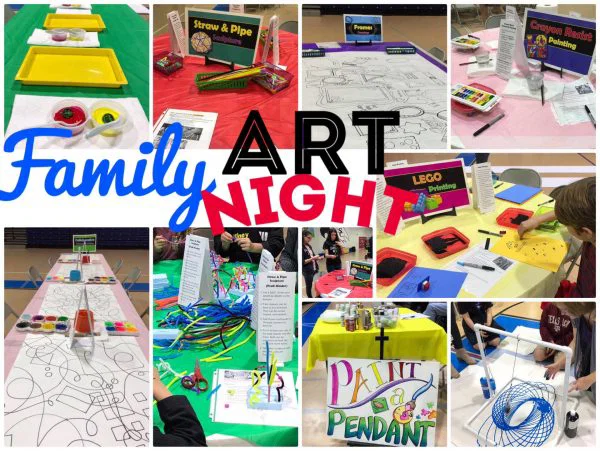
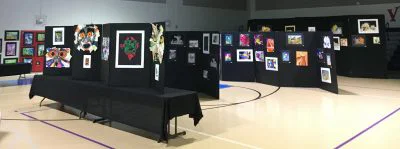
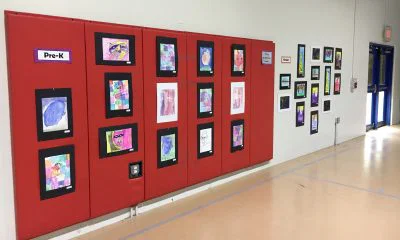
空间——鉴于我校艺术节向来人气旺盛,我们预估本次家庭艺术之夜也将迎来大批参与者,因此需要比往年更充裕的场地。您必须预留充足空间,以满足人员流动(避免拥挤感)、设置桌椅、开展创作活动,以及晾干已完成的作品(可铺于地面或悬挂展示)!
学年初(没错,就是这么早!),我即与校体育主任及后勤主管沟通,申请使用体育馆,并请其协调避开我们所需使用的两天(含布展、活动当日及撤展)。此举早在学年初便落实到位,有助于增进部门间良好关系,体现出我们对其场地的尊重,以及愿以积极协作方式共同支持学校各项课程建设的诚意!
尽早招募志愿者
创建一个线上[SignUp Genius](http://www.signupgenius.com/)报名页面,明确列出各类志愿服务岗位。虽初期设置稍费时间,但效果极佳!该页面将在活动前约三周发送给家长与学生。我校学生与家长自学期初起便已知晓此项活动。
我校六至十二年级学生须参加艺术节,且该项活动计入课程成绩。过去数年,我要求他们在当晚完成两份书面评述作业:一份针对低年级学生作品,一份针对高年级学生作品。而今年,凡报名担任某艺术站点志愿者的学生,则可免交上述书面评述。多数站点每轮30分钟安排两名助手;绘画类站点每轮仅需一名助手。若无如此众多的志愿者鼎力相助,本次活动绝难成功举办!
宣传推广
我们约提前一个月启动宣传,在校园各处张贴大幅海报,并通过学校官网、面向美术选修课学生及其家长的电子邮件、校级与小学部教师每周通讯等渠道广而告之。若您计划将此活动拓展为社区级项目,还可考虑联系本地广播电台与报纸进行报道。明年,我还计划在校内各处增设庭院指示牌。
标识牌与桌面操作指南
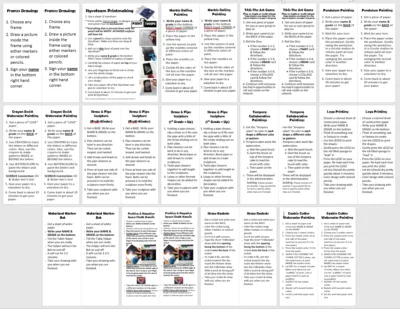
我采用对开纸尺寸(ledger size)制作各站点桌牌,并委托Office Max以110磅光面铜版纸打印。同时,我在每个站点准备了3–4份桌面操作指南,置于桌上供参与者随时查阅——确保说明文字始终位于操作者正前方。我将这些指南粘贴于泡沫板上,再将泡沫板裁切成2英寸宽条,弯折成三角棱柱形立牌;每块立牌可同时展示两张操作指南。
免费下载桌面操作指南:[艺术站点桌牌——2020家庭艺术之夜](http://createartwithme.com/wp-content/uploads/2018/04/Table-Tents-for-Stations-Family-Art-Night2020.pdf)
免费下载 Ledger 尺寸(11×17 英寸)的站点标识牌:Family Art Night – Station Signs 2020
我在本地办公用品店打印,每张约 1.10 美元。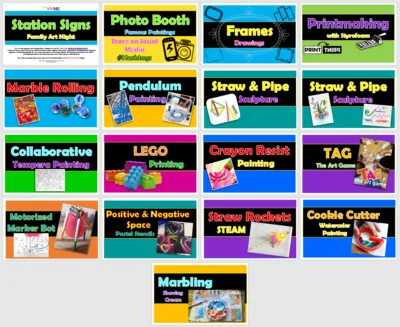
免费下载 Ledger 尺寸(11×17 英寸)的站点标识牌:Family Art Night – Station Signs Compressed
我在本地办公用品店打印,每张约 1.10 美元。
艺术活动站点
小贴士:
- 将站点数量控制在 5–8 个,并为参与者预留更充足的活动空间。不必强求提供大量活动项目——仅选择最契合您预算、场地、资源(含志愿者)的几项即可。
- 控制使用水性媒材的站点数量。这类站点需要更多晾干空间,且需更多志愿者协助!
- 控制劳动强度大或操作极为复杂的站点。此类站点需更多助手与专业指导才能顺利运行。请牢记 KISS 原则(Keep It Simple, Silly!——越简单越好!)
- 每个站点须在多处张贴清晰明了的操作说明。
- 为志愿者印制带图示(我正为明年完善此项)的操作指南。
1. 名画主题拍照亭
所需材料: 泡沫板(印有著名肖像画并挖出头部轮廓孔洞)、标有话题标签(#hashtags)的指示牌
我的合作教师 Rebecca 仅用一天就完成了这些绘画——她太厉害了!!
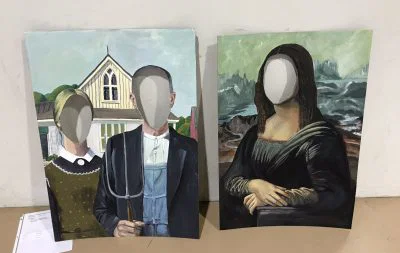
志愿者职责:
• 主动为参与者拍摄照片;
• 提醒他们若在社交媒体分享,务必添加相应话题标签!
2. 带画框的素描桌
http://thomaselementaryart.blogspot.com/2014/04/art-show-2014-is-in-books.html 所需材料: 记号笔、彩铅、白色牛皮纸、预先在牛皮纸上绘制多种画框
我六年级的学生制作了两卷画框。本次只用掉一卷,因此还剩一卷留待明年使用。
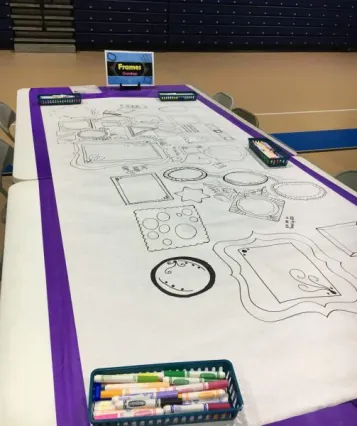
操作说明:
1. 任选最多三款画框;
2. 在所选画框内用记号笔或彩铅作画;
3. 在画面右下角或画框旁签写姓名。
3. 蛋彩协作绘画
所需材料: 海报纸板、[蛋彩颜料块托盘](https://amzn.to/2Ec2fbI)、水杯、画笔、纸张、预先在海报板上绘制非具象图案
我六年级的学生制作了六块绘有非具象图案的海报板。本次仅使用三块,因此还剩三块留待明年使用。
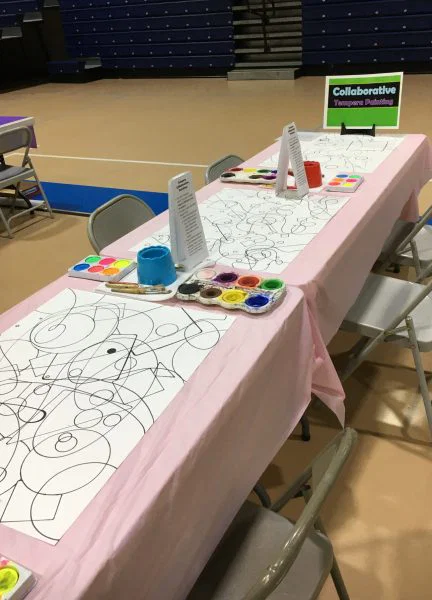
志愿者职责:
- 按需更换清水并清洗画笔;
- 当海报板画满后,及时更换为新设计的板面。
4. 苯乙烯泡沫版版画
所需材料: 3×4 英寸 [苯乙烯泡沫印刷版](https://amzn.to/2IndQah)(已裁切)、5×7 英寸纸张、油墨或蛋彩颜料、胶辊、有机玻璃板
http://printkat.blogspot.com/2011/04/styrofoam-printmaking-tutorial.html
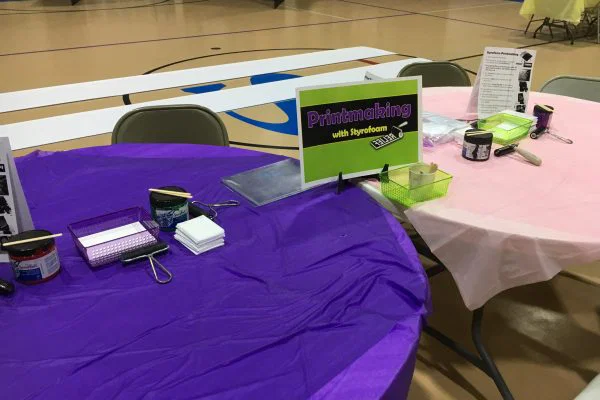
操作说明:
**印出图像为镜像,因此所有图案及文字均须反向绘制!
**用铅笔按压凹陷的部分将呈白色;所有凸起表面将着墨。
1. 用铅笔在苯乙烯泡沫板上绘制图案;
2. 用胶辊将薄层颜料均匀滚涂于泡沫板表面;
3. 在纸张右下角写明姓名与年级;
4. 将纸张小心覆盖于已上墨的图案之上;
5. 用指尖沿整个图案以打圈方式用力揉擦;
6. 轻掀纸张一角检查印制效果;
7. 取下纸张交予志愿者晾干;
8. 约 15 分钟后返回领取成品印画及泡沫版。
志愿者职责:
• 提醒参与者在纸上写明姓名;
• 提醒他们印出图像为镜像——文字必须反向书写(参见示例图);
• 若参与者难以均匀滚墨,应协助操作;墨量过多会填满刻痕!
• 活动结束时清洗有机玻璃板与胶辊;
• 提醒参与者带走自己的泡沫版与印画。
5. 弹珠滚动绘画
所需材料: 至少 [9×12 英寸塑料托盘](https://amzn.to/2pWqdDo)、[弹珠](https://amzn.to/2GZTggB)(推荐“射手”尺寸)、可选:带纹理/尖刺的球体、蛋彩颜料、勺子、6×9 英寸纸张
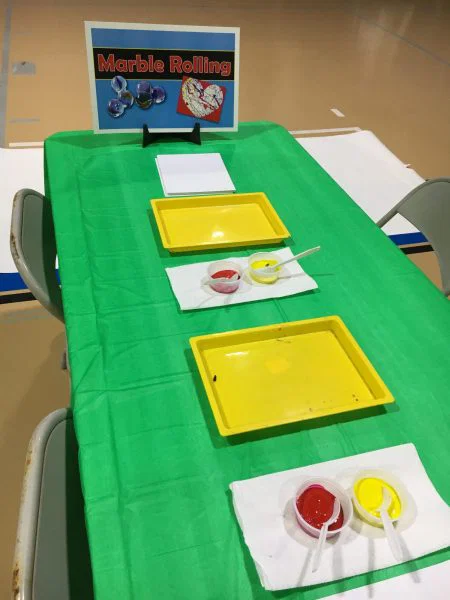
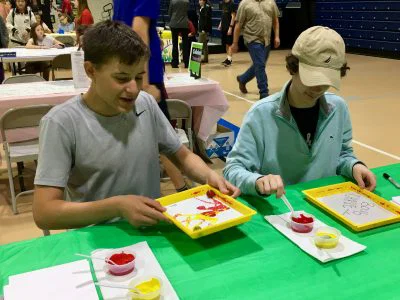
操作说明:
1. 在纸张右下角写明姓名与年级;
2. 将纸张放入黄色托盘;
3. 用勺子取沾有不同颜色颜料的弹珠;
4. 将弹珠置于纸面上;
5. 轻轻倾斜托盘边缘,使弹珠在纸面自由滚动;
6. 将纸张交予志愿者晾干;
7. 约 15 分钟后返回领取成品纸张。
志愿者职责:
• 按需补充颜料容器;
• 提醒学生弹珠须留在学校。
• 活动结束时清洗弹珠与托盘。
6. 摆锤绘画
http://teachertomsblog.blogspot.com/2010/04/pendulum-painting.html
所需材料: PVC 管支架(2 英尺 × 2 英尺 × 3 英尺)、稀释蛋彩颜料(水:颜料 = 2:1)、2 个 [透明塑料瓶旋盖](https://amzn.to/2GpLa3Y)、12×18 英寸或 18×24 英寸 90 磅纸、塑料浴帘(铺于站点下方)、大量旧报纸(亦铺于站点下方)、纸巾
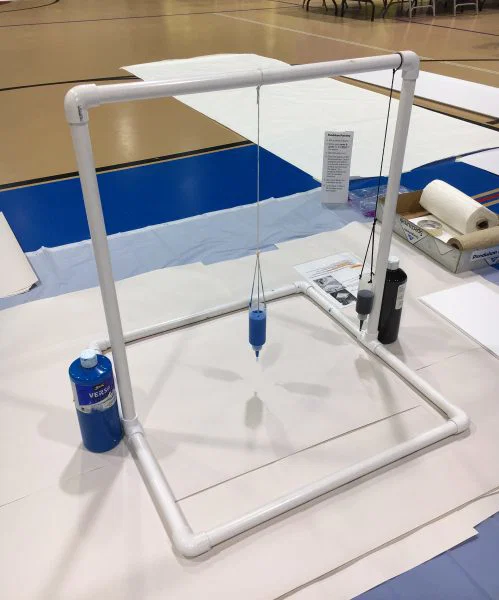
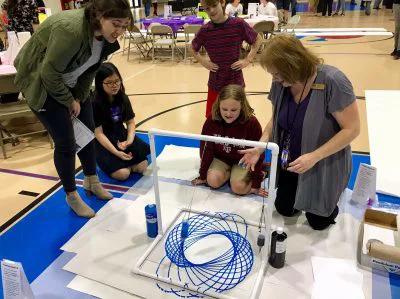
操作指南:
- 取一张纸。
- 在纸的背面写上你的姓名和年级。
- 等待轮到你。
- 将纸放在摆锤下方。轻轻摆动摆锤,使颜料均匀洒满整张纸。尝试用第二种颜色朝另一方向摆动。
- 将你的纸交给志愿者晾干。
- 约30分钟后回来取回你的作品。
志愿者须知:
• 务必确认学生已在纸的背面写好姓名和年级,再开始活动。
• ****用手指按住瓶口,保持瓶盖关闭,直到学生准备就绪、即将摆动瓶子时再松开。
• ****等待下一位学生时,请务必盖紧瓶盖!
• *提醒学生以轻柔的圆周运动摆动瓶子。
• 用瓶中颜料为瓶子补液,仅加至¾满!(该颜料已用水稀释)。
•活动结束时:丢弃所有新闻纸,将剩余颜料倒回原瓶。
7. 吸管与毛根雕塑(学前班–幼儿园)
Pickebums 3D泡沫毛根雕塑 和 AuntPeaches 毛根皇冠
所需材料: 毛根, 彩色吸管, 串珠, 泡沫底座(由隔热泡沫板切割而成),可选弯曲吸管
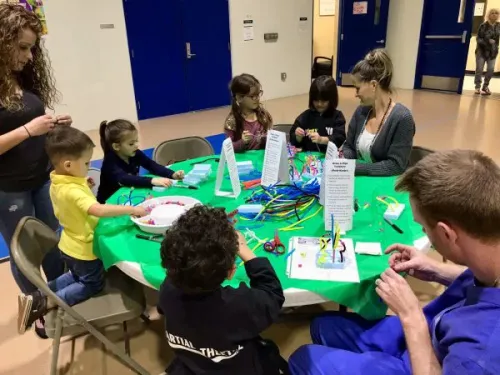
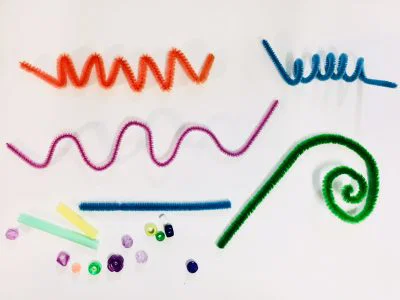
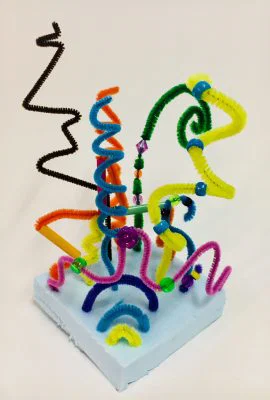
操作指南:
- 取一个底座,在底部写上你的姓名和年级。
- 毛根可朝任意方向弯折——可卷曲、呈之字形、绕圈或扭转。
- 按个人喜好,在毛根上穿入吸管与串珠。
- 至少将毛根一侧压入泡沫底座;两侧均可压入,使雕塑更稳固。
- 完成后请随身带走你的雕塑作品。
8. 吸管与毛根雕塑(一年级及以上)
Naturalmath 玩出力量
所需材料: 毛根、吸管、可弯曲吸管
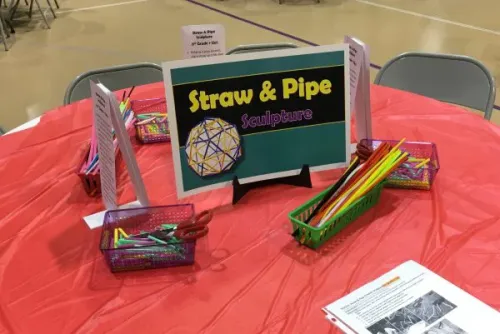
操作指南:
• 手持一根毛根,将一根吸管套入毛根,两端各露出少许。
• 毛根可朝任意方向弯折;通过弯折毛根或添加吸管来构建雕塑。
• 将多根毛根拧在一起,可延长雕塑结构。
• 可添加环形或其他造型作为装饰。
• 用记号笔(Sharpie)在其中一根吸管上写明姓名/年级。
• 完成后请随身带走你的雕塑作品。
志愿者须知:
• 务必确认学生已在吸管上写好姓名和年级,再开始活动。
• 示范毛根的弯折与拧合方法,并演示如何通过拧合连接毛根。
•提醒学生完成作品后随身带走。
9. 乐高拓印
所需材料: 各种尺寸的乐高积木, 薄海绵, 黑色蛋彩颜料(略作稀释,并加入少量印度墨水以加深色调),盛放海绵的塑料托盘/容器,各色建筑纸(卡纸)
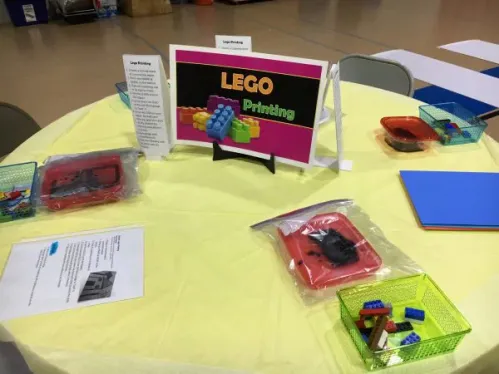 操作指南:
- 选择一张彩色建筑纸。
- 在纸的底部写上你的姓名和年级。
- 构思一个真实或幻想中的形象。
- 利用乐高积木进行拓印,呈现所需形状。
- 将乐高积木轻轻按压在浸染颜料的海绵上,完成“上墨”。
- 将乐高积木按压在纸上印出图案;每次拓印前均需重新上墨。
- 静置晾干(约5分钟即可干透)。
- 用彩铅为设计上色。
- 完成后请随身带走你的画作。
志愿者须知:
• 务必确认学生已在吸管上写好姓名和年级,再开始活动。
• 示范毛根的弯折与拧合方法,并演示如何通过拧合连接毛根。
•提醒学生完成作品后随身带走。
10. 蜡笔防染水彩画
所需材料: 蜡笔、水彩、9×9英寸、90磅及以上厚度纸张、水杯、水彩画笔
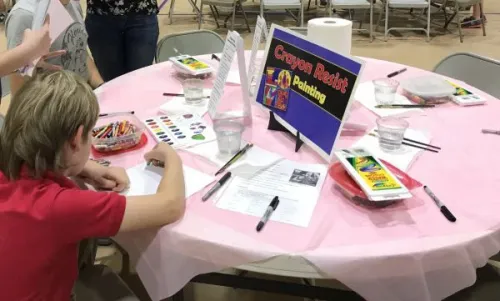
操作指南:
1. 取一张印有“LOVE”字样的卡纸(卡纸上已印好“LOVE”字样)。
2. 在纸的背面写上你的姓名和年级。
3. 用蜡笔以不同颜色描摹字母轮廓。
4. 在字母内部或字母背后用蜡笔绘制图案。
5. 用水彩为字母及背景上色。
科学小知识:油性与水性物质互不相溶!
6. 将你的纸交给志愿者晾干。
7. 约15分钟后回来取回你的作品。
志愿者须知:
• 提醒学生用蜡笔用力涂绘(但勿用力过猛致蜡笔折断)。
• 防染效果在颜料较稀时最佳!
• 画笔若过脏,请及时清洗。
• 频繁从餐饮区水槽取用干净清水。
11. TAG艺术游戏
所需材料: 油画棒, 记号笔, 水彩, 纸巾纸(或其他拼贴用纸), 12×18英寸、90磅及以上厚度纸张, 固体胶棒, 水杯, 水彩画笔
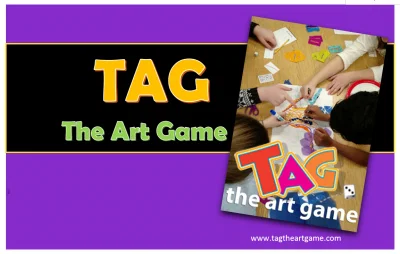
TAG艺术游戏——可单人或多人参与(非常适合家庭共同体验!)
*本说明根据原游戏说明书为本次活动特别调整。
- 为你自己或小组取一张纸作为创作画纸。
- 在纸的背面写上你(们)的姓名。
- 掷骰子:
• 若掷出数字1–2,抽取一张绘画卡并按指示操作;
• 若掷出数字3–4,抽取一张涂绘卡并按指示操作;
• 若掷出数字5–6,抽取一张拼贴卡并按指示操作。
- 持续进行,直至每位参与者均有4次掷骰与创作机会。
12. 绘制吊坠
**付费项目,每件5美元(筹款活动)
所需材料:素烧吊坠, 丙烯工艺颜料, 画笔, 水杯, 纸巾, 毛线/细绳
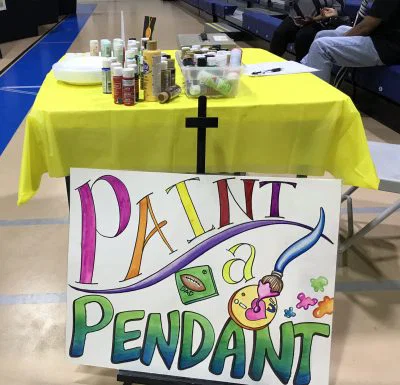
参看如何举办一场 绘制吊坠义卖活动
13. 电动记号笔机器人(STEAM课程)
操作步骤:
- 取一张白纸。
- 在纸张底部写上你的姓名与年级。
- 准备就绪后,告知桌边助教。
- 助教会为你开启和关闭机器人。
- 机器人将运行1.5分钟。
- 完成后,请带走你的画作。
14. 吸管火箭
- 领取一枚火箭模板,并在背面写上你的姓名。
- 使用记号笔或彩铅为火箭上色。
- 用剪刀沿轮廓剪下火箭。
- 将短款“奶昔吸管”开口朝向火箭底部,用胶带粘贴在火箭背面。
- 发射时,将火箭对准天空;把细吸管插入奶昔吸管中,再用力、快速地向细吸管内吹气。
- 完成后,请带走你的火箭与吸管。
值得吗?
你大概已看出,这场活动之夜节奏非常紧凑!要确保活动顺利进行,需要大量前期规划与众多志愿者投入——但最终,它将为美术课程带来巨大的推动力!
本文含亚马逊联盟推广链接——仅推荐本人实际使用且喜爱的产品!
本文作者:Michelle C. East(版权所有 © 2018)。如您选用本课例中的任何内容(文字或图片),请务必回链至本博客 Create Art with ME!
Art Festival and Family Art Night
Original: https://createartwithme.com/art-festival-and-family-art-night/
Date: 2018-04-09
Author: Michelle East
Categories: 2nd Grade, 3rd Grade, 4th Grade, 5th Grade, 6th Grade, Art Festival, Art Lessons, Family Art Night, Featured, HS Art, K-1st Grade, MS Art
Tags: art activities, art event, Art Night, art night ideas, art night resources, art night stations, art night tips, Art Stations, collaborative art, Family Art Night, group art, Host a Family Art Night, tips for art night
Adding Family Art Night
This year, in addition to our annual Art Festival (PreK-12 Art show & competition), I decided to add a Family Art Night. My goal was to increase attendance and promote our art department with engaging art activities. Mission Success! We provided 11 art stations that were all free except one (Paint a Pendant Fundraiser). We had a wonderful response from families and the administration! Adding in the Family Art Night was A LOT of work and took A LOT of planning, but TOTALLY worth every effort.
To get started, I researched and learned from those who have done successful Family Art Nights! I have been pinning like crazy on my Pinterest board Art Festival Ideas-lots of great ideas collected here. These are just a couple to the wonderful resources on the web!
- Deep Space Sparkle has great resources on hosting an art night including fantastic display boards with step by step instructions.
- Mrs. Knight’s Smartest Artists-Best Fine Arts Night ever! has creative stations like a “graffiti stitching station” and “recycled monsters”. That Little Art Teacher had a great layout and instructions for her art night.
- Shari Carter says in her article How to Host a Family Art Night, “The key to success is plenty of advance notice and clear instructions for the teachers and their art helpers.“
In this post, I will share with you how we did our Family Art Night with free resources and tips we learned to make it run more smoothly.
Preparation for Family Art Night
Location
SPACE-We anticipated a large crowd since we normally have a great turnout for our Art Festival. We would need even more space to include the Family Art Night. You need plenty of room for people movement (so people don’t feel crowded), tables with seating seating, creating artwork, and drying artwork (on the floor or hanging up)!
At the beginning of the school year (YES that early!), I spoke with our athletic director & facilities manager about using the gym and not planning any other events or practices in the gym for the two days we would need to set up, have the event, and tear down. Setting this up EARLY in the year makes for good relations between the departments. It shows you respect their space and desire to work with them in a positive manner-we want to honor all the programs at our schools!
Enlist Volunteers Early
Set up an online SignUp Genius event with specific volunteer opportunities. It takes a while to set it up, but its totally worth it! This is sent out to parents and students about 3 weeks prior to the event. My students and parents are aware of the event from the beginning of school.
My 6th-12 grade students are required to attend the art festival. It is for a grade. For the last several years, I have had them do two written critique worksheets that night-one for an elementary student and one for a secondary student. This year if they signed up for a volunteer spot at a station they did not have to do the written critique. We had two helpers at most stations for 30 minute time slots. Drawing stations only needed one helper per time slot. We could not have done this event without so many helpers!
We started promotion for the event about a month out with large signs all over campus, school website, emails to art elective students parents and students, newsletters-school and elementary teachers weekly newsletters. If you are making this a community event, then consider promoting on local radio stations and newspapers. Next year, I will also be making yard signs to put up around campus.
Signs & Table Instructions
I made table station signs on ledger size paper and had them printed at Office Max on 110lb glossy paper. I also made 3-4 table instructions at every station to display on the tables. This put the instructions directly in front of people as worked. I mounted them on foamboard that I cut into 2″ strips that formed triangular shape. I could put 2 table instruction sheets on each display.
Download the Table Instructions for FREE: Table Tents for Stations – Family Art Night 2020
Download the Ledger size (11×17″) Station Signs for FREE: Family Art Night – Station Signs 2020
I printed them at a local office supply store for about $1.10 each.
Download the Ledger size (11×17″) Station Signs for FREE: Family Art Night – Station Signs Compressed
I printed them at a local office supply store for about $1.10 each.
Art Stations
TIPS:
- Limit the number of stations to 5-8 and add more space for people to work. Don’t kill yourself trying to provide tons of activities. Choose only the ones that will work best with your budget, space and resources (including volunteers).
- Limit the wet media stations. You will need more space to dry the artwork and have more volunteers to help!
- Limit labor intensive or super complex stations. These require more helpers and expertise to run them. Remember KISS (Keep It Simple Silly)!
- Have clearly written instructions in multiple locations at every station.
- Print out instructions for volunteers preferably with pictures of processes (I am working on this for next year).
1. Photo Booth of Famous Paintings
Supplies Needed: Foam Board with famous portrait paintings and holes cut out for heads, Sign with #hashtags
My co-teacher Rebecca painted these in ONE day-she is AMAZING!!
VOLUNTEERS:
• Offer to take the pictures for people.
• Remind them to hashtag# if sharing on social media!
2. Drawing Table with Frames
http://thomaselementaryart.blogspot.com/2014/04/art-show-2014-is-in-books.html Supplies Needed: Markers, colored pencils, white butcher paper, pre-draw various frames on butcher paper
My 6th grade students made two rolls of frames. We only used one, so I have some for next year.
Instructions:
1. Choose any frame (up to 3 frames).
2. Draw a picture inside the frame using either markers or colored pencils.
3. Sign your name in the bottom right hand corner or by the frame.
3. Tempera Collaborative Paintings
Supplies Needed: Poster Boards, Tempera Cake Trays, Water Cups, Paint Brushes, Paper, pre-draw non-objective designs on poster board
My 6th grade students made 6 poster boards with non-objective designs. We only used 3, so I have some for next year.
VOLUNTEERS:
- Get clean water and wash paint brushes as needed
- Replace poster board with fresh design when it is full
4. Styrofoam Printmaking
Supplies Needed: 3×4″ Styrofoam printing plates (cut), 5×7″ paper, ink or tempera paint, brayers, plexiglass
http://printkat.blogspot.com/2011/04/styrofoam-printmaking-tutorial.html
Instructions:
**Prints will be mirror image, so designs and words must be backwards!
**Everything that is pressed down with the pencil will be WHITE. All RAISED surfaces will have ink.
1. Use a pencil to draw a picture onto the Styrofoam.
2. Roll out a thin layer of paint over the Styrofoam.
3. Write your name & grade in the bottom RIGHT hand CORNER of a piece of paper.
4. Carefully lay a piece of paper on top of your inked design.
5. Use your fingertips to firmly rub in circles over the whole design.
6. Lift a small portion of the paper to check your design.
7. Take your paper off of the Styrofoam and give to volunteer to dry.
8. Come back in about 15 minutes to get your print & Styrofoam.
VOLUNTEERS:
• Remind people to write names on paper.
• Remind them the design will come out MIRROR image from the plate. WORDS must be written BACKWARDS (see example image).
• Help roll ink out if they are having a hard time. Too much ink will fill in the grooves!
• Wash plexiglass and brayers at the end of the event
• Remind them to take their plate and print home.
5. Marble Rolling Painting
Supplies Needed: minimum 9×12″ plastic trays, marbles (I prefer the “shooter” size) optional: texture/spike balls, tempera paint, spoons, 6×9″ paper
Instructions:
- Write your name & grade in the bottom RIGHT-hand CORNER of a piece of paper.
- Place the paper in the yellow tray.
- Use the spoons to pick up the marbles covered in different colors of paint.
- Place the marbles on the paper.
- Gently tilt the sides of the box so the marbles roll all over the paper.
- Give your paper to a volunteer to dry.
- Come back in about 15 minutes to get your paper.
VOLUNTEERS:
• Refill paint containers as needed.
• Remind students that the marbles stay at school.
•Wash marbles and trays at end of the event
6. Pendulum Painting
http://teachertomsblog.blogspot.com/2010/04/pendulum-painting.html
Supplies Needed: PVC Pipe frame (2’x2’x3′), Watered down tempera paint (2 to 1), 2 Clear Plastic Bottle Twist Top Cap, 12×18″ or 18×24″ 90lb. paper, Plastic shower curtain to go under the station, LOTS of newsprint to also go under the station, paper towels
Instructions:
- Get a piece of paper.
- Write your name & grade on the BACK of the paper.
- Wait for your turn.
- Place the paper under the pendulum. Gently swing the pendulum to release paint all over the paper. Try swinging the second color in another direction.
- Give your paper to a volunteer to dry.
- Come back in about 30 minutes to get your paper.
VOLUNTEERS:
• Make sure they have NAME & GRADE written on the BACK of the paper before starting.
• ****Hold your finger over the bottle opening to keep it closed until the student is ready to swing the bottle.
• ****Put the cap on while waiting for the next person’s turn!
• *Tell them to swing it GENTLY in circular motion.
• Refill the bottle of paint with the paint in the bottles. ONLY fill it ¾ full! (This paint has been diluted with water).
•At end of the event: throw way all newsprint, put paint back in the bottles
7. Straw & Pipe Sculpture (PreK-Kinder)
Pickebums 3D Foam Pipe Cleaner Sculptures and AuntPeaches Pipe Cleaner Crowns
Supplies Needed: Pipe cleaners, colorful straws, beads, styrofoam bases (Cut up insulation foam sheets), bendy straws optional
Instructions:
- Get a BASE. Write your NAME & GRADE on the bottom.
- Pipe cleaners can be bent in any direction. They can be curled, zig-zagged, looped, and twisted.
- Add straws and beads to the pipe cleaners as desired.
- Press at least one side of the pipe cleaner into the foam. Both can be pressed in to hold the sculpture more firmly.
- Take your sculpture with you when you are finished.
8. Straw & Pipe Sculpture (1st + Up)
Naturalmath Play Power
Supplies Needed: Pipe cleaners, straws, bendy straws
Instructions:
• Holding a pipe cleaner, slip a straw so it fits over the pipe with a little of the straw sticking out on both sides.
• Pipe cleaners can be bent to do in any direction. Bend pipes or add straws to create sculptures.
• Twist pipe cleaners together to add length to the sculptures.
• Loops or other formed shapes can be added for decoration.
• Write name/grade with Sharpie on one of the straws.
• People will take the sculpture with them when they are finished.
VOLUNTEERS:
• Make sure they have NAME & GRADE written on a straw before starting.
• Demonstrate how to bend and twist pipe cleaners. also how to attach by twisting pipe cleaner together.
•Remind them to take sculpture with them.
Supplies Needed: Legos of Various sizes, thin sponges, black tempera paint (slightly diluted & added a small amount of India Ink to make it darker), plastic trays/containers for sponges, construction paper- various colors
Instructions:
- Choose a colored sheet of construction paper.
- Write your NAME & GRADE on the bottom.
- Think of something real or fantasy to create.
- Use the LEGOS to print the shapes.
- Gently press the LEGO on the ink filled sponge to “load” it.
- Press the LEGO on your paper. Re-load each time you print the LEGO
- Let dry (should dry pretty quickly-about 5 minutes).
- Color design with colored pencils.
- Take your drawing with you when you are finished.
VOLUNTEERS:
• Make sure they have NAME & GRADE written on a straw before starting.
• Demonstrate how to bend and twist pipe cleaners. also how to attach by twisting pipe cleaner together.
•Remind them to take sculpture with them.
10. Crayon Resist Painting
Supplies Needed: Crayons, Watercolors, 9×9” 90lb+ paper, water cups, paint brushes
Instructions:
1. Get a piece of “LOVE” paper. Cardstock with LOVE printed on it.
2. Write your name & grade on the BACK of the paper.
3. Use CRAYONS to trace the letters in different colors.
4. Use the crayons to make patterns INSIDE or BEHIND the letters.
5. Use WATERCOLORS to paint the letters and background.
SCIENCE Connection: Oil & Water don’t mix!
6. Give your paper to a volunteer to dry.
7. Come back in about 15 minutes to get your paper.
VOLUNTEERS:
• Remind students to press firmly with crayons (but not so hard they break).
• Resist works best with watery paint!
• Clean brushes if they get too dirty.
• Get clean water OFTEN from the concession stand sink.
11. TAG The Art Game
Supplies Needed: Oil Pastels, markers, Watercolors, Tissue paper (or other collage papers), 12×18” 90lb+ paper, glue sticks, water cups, paint brushes
TAG-The Art Game– Play as single or multi-player (great family activity!)
*these directions are altered from the original directions included in the game for this special night.
- Get one piece of paper for you or your group to play on.
- Write your name (s) on the BACK of the paper.
- Roll the Dice:
• If the number is 1-2, choose a PAINT card & follow the directions.
• If the number is 3-4, choose a DRAW card & follow the directions.
• If the number is 5-6, choose a COLLAGE card & follow the directions.
- Continue until everyone has had 4 opportunities to roll and create on the artwork.
12. Paint a Pendant
**PAID Activity $5 each (Fundraiser)
Supplies Needed: Bisque Pendants, Acrylic Craft paint, brushes, water cups, paper towels, yarn/string
See how to host a Paint A Pendant Fundraiser
13. Motorized Marker Bots (STEAM)
Website:
- Get a sheet of white paper.
- Write your NAME & GRADE on the bottom.
- Tell the Table Helper when you are ready.
- The Helper will turn the Bot on and off.
- It will run for 1.5 minutes.
- Take your drawing with you when you are finished.
14. Straw Rockets
- Get a rocket and write your name on the BACK.
- Color the rocket using either markers or colored pencils.
- Cut it out with scissors.
- Tape the short “milkshake” straw with the opening facing the bottom of the rocket onto the back of the rocket.
- To make it fly, aim the rocket towards the sky. Insert the thinner straw into the milkshake straw. With a quick & strong puff of air blow into the straw.
- Take your rocket & straw with you when you are finished
Was it Worth it?
As you can hopefully see, this night is VERY busy! It takes A LOT of planning and A LOT of volunteers to make it run smoothly, but it ends up being an incredible boost for the art program!
This post contains Amazon Affiliate Links-only share products I use and love!
This post was written by Michelle C. East (All rights reserved 2018). If you choose to use any of this lesson (written or photos), please link back to this blog Create Art with ME!

