关于窑炉烧制,你需要了解的一切
原文链接:https://thatartteacher.com/2020/02/07/how-to-fire-and-load-a-kiln-that-art-teacher/
日期: 2020-02-07
作者: Sierra Machado
分类: 课堂管理
标签: 美术课、美术教育、美术教师、素烧、陶艺、陶泥、陶泥教程、小学美术、精选文章、第一年教美术、釉料、施釉、高中美术、如何烧制窑炉、如何给陶泥施釉、如何装窑、如何使用窑炉、窑炉、窑炉教程、初中美术、制陶、美术教学、那位美术教师
烧制窑炉既令人兴奋,又让人胆战心惊。消防车警笛呼啸、浓烟滚滚的画面足以让你彻夜难眠。我会把学校烧掉吗?一百件学生作品会不会炸成碎片?大学陶艺课怎么就没教过我这个!?
本文汇总了我的经验与分步指导,专为教室环境下的窑炉烧制而写。若您更偏好视频形式,请观看我的YouTube视频,其中包含全部内容,还有我为素烧装窑过程制作的延时影像。
你并不孤单。
首先要记住:你并非孤军奋战。一位聪明能干的电工安装了你的窑炉,并确保所有电气部件均符合规范;一名受过良好培训的学区员工布置了你的窑炉室与通风系统;一家资质认证的公司制造了你的窑炉——同类产品已生产数千台,且多数公司都提供优质的客户服务支持。如果你像我一样幸运,所在学区还有多位美术教师可为你提供支持。别犹豫,随时打电话、发短信或发邮件向同行美术教师请教或倾诉(此处插入一个关于窑炉通风的冷笑话……)。
窑炉操作最佳实践
在深入细节之前,先列出我的窑炉操作最佳实践。这些小贴士将助你大幅减轻压力:
- 缓慢装窑。 每当我急于在计划烧制当天匆忙装窑,至少会损坏一件作品。试着向十二岁的孩子解释这事吧……
- 务必试烧!务必试烧!务必试烧! 无论是新釉料还是新窑炉,都先用一件示范作品进行测试,确保你能向满怀期待的小艺术家们保证最终效果。
- 切勿在无人看管时烧窑! 并务必拔掉电源插头!
- 务必等作品彻底干燥后再烧制。 切勿催促干燥过程!建议学期初就开设陶泥单元,为整个流程预留充足时间。
陶泥为何会在窑炉中爆炸?
导致窑炉内陶泥爆炸的两大主因是水分和气泡。
陶泥中残留的水分受热后转化为水蒸气,从而引发陶泥爆裂或开裂。 陶泥需充分干燥,而大件作品所需时间更长。一年中的时节、气候、湿度以及教室或工作空间的空气流通状况,都会影响干燥时间。将作品置于风扇前可加速干燥,但也可能导致开裂或损伤——因为小件干得更快。从器物底部伸出的部分(如把手)会更快变干,因而变得极为脆弱。我最推荐的做法是精心规划时间。最糟糕的情况莫过于未给学生陶泥作品留足干燥时间,结果烧制时接连发生多起爆炸。当然,我绝非亲身经历过这种事……
我通常预留整整一周用于干燥。成品应置于开放式置物架上,而非密闭橱柜内。若制作的是瓷砖或浮雕等扁平作品,则切勿叠放——陶泥相互接触会延长湿气滞留时间。每件扁平作品单独平铺于硬纸板或报纸上,有助于其均匀、快速干燥。
若陶泥内部存有封闭气泡,同样会导致爆炸。 练泥是排除所有气泡的最佳方法。许多品牌陶泥出厂时已充分练制,气泡极少。但回收再利用陶泥时,你须亲自完成练泥工序,使其恢复理想状态。这需要时间与上肢力量,同时也是学生协助超负荷运转的美术教师时,一项极佳的实践技能。
每次处理小块陶泥,是确保无气泡残留的最佳方式。指导学生用手掌揉捏小件作品(如泥条、捏塑罐),即可有效排气。这需要练习,因为学生常过度揉捏,致使陶泥过早变干、难以塑形。若作品约手掌大小,据我经验,揉捏两至三次即足够;对捏塑罐,我则会在进入下一步前逐一检查是否存有气泡。若罐壁过厚,我会用手进一步调整,直至确认窑炉内不会“引爆手榴弹”。
装窑
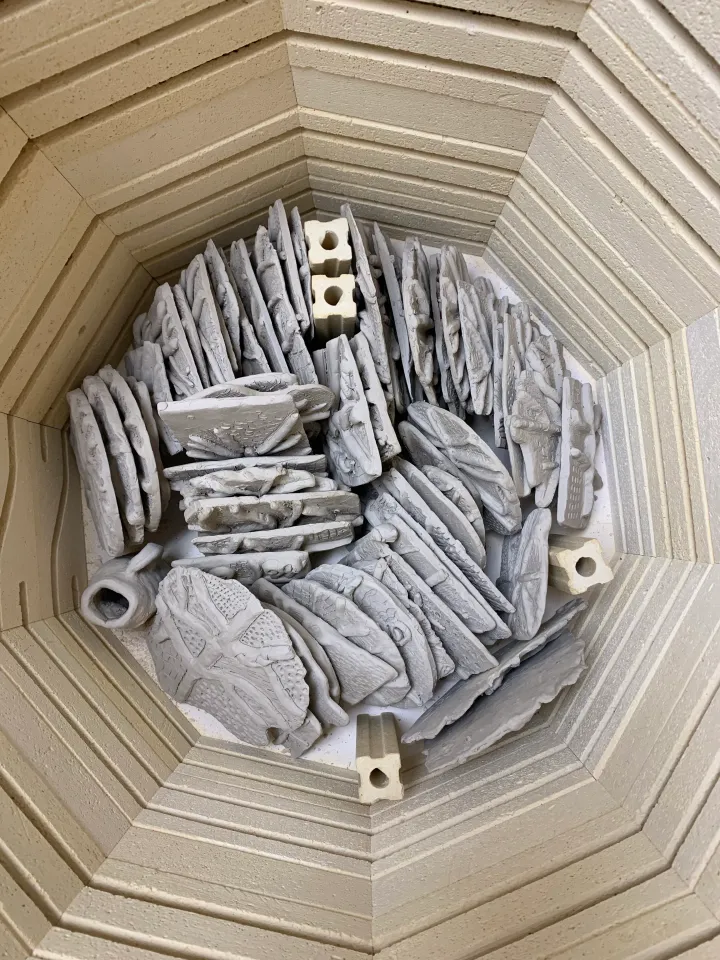
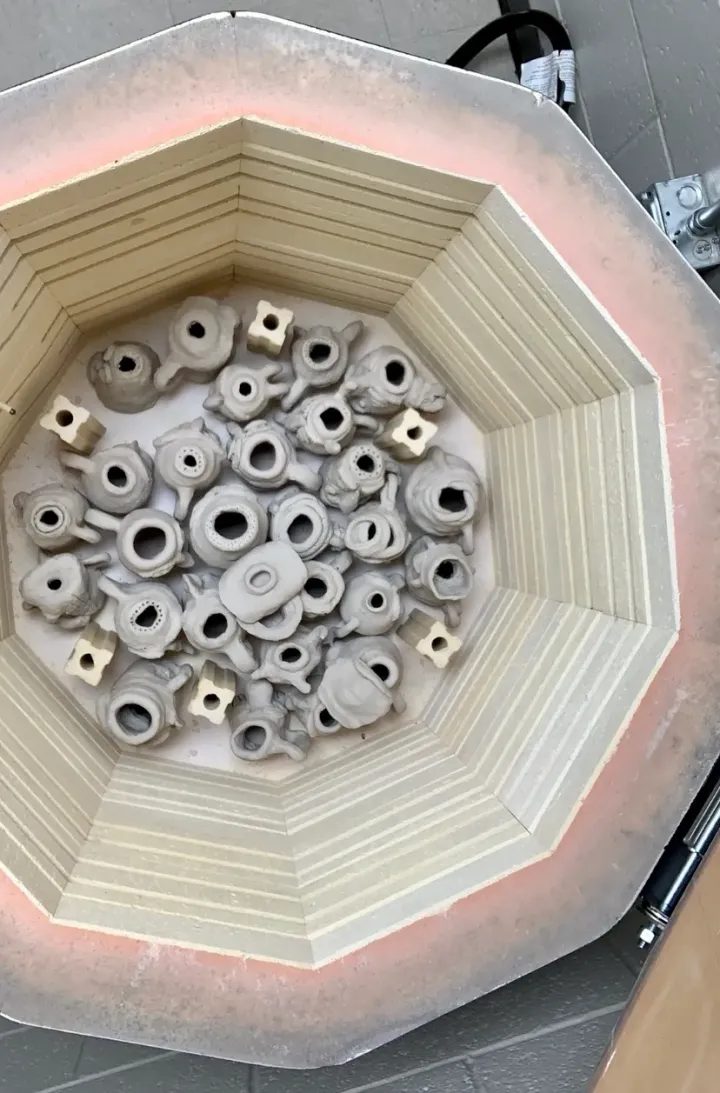
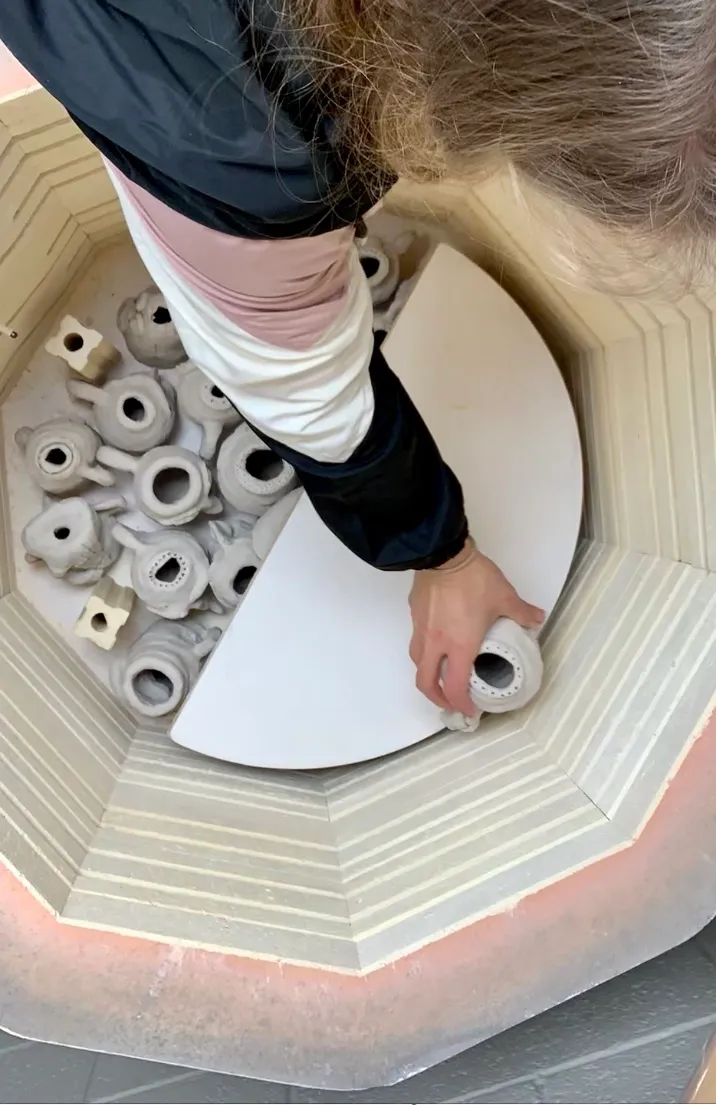
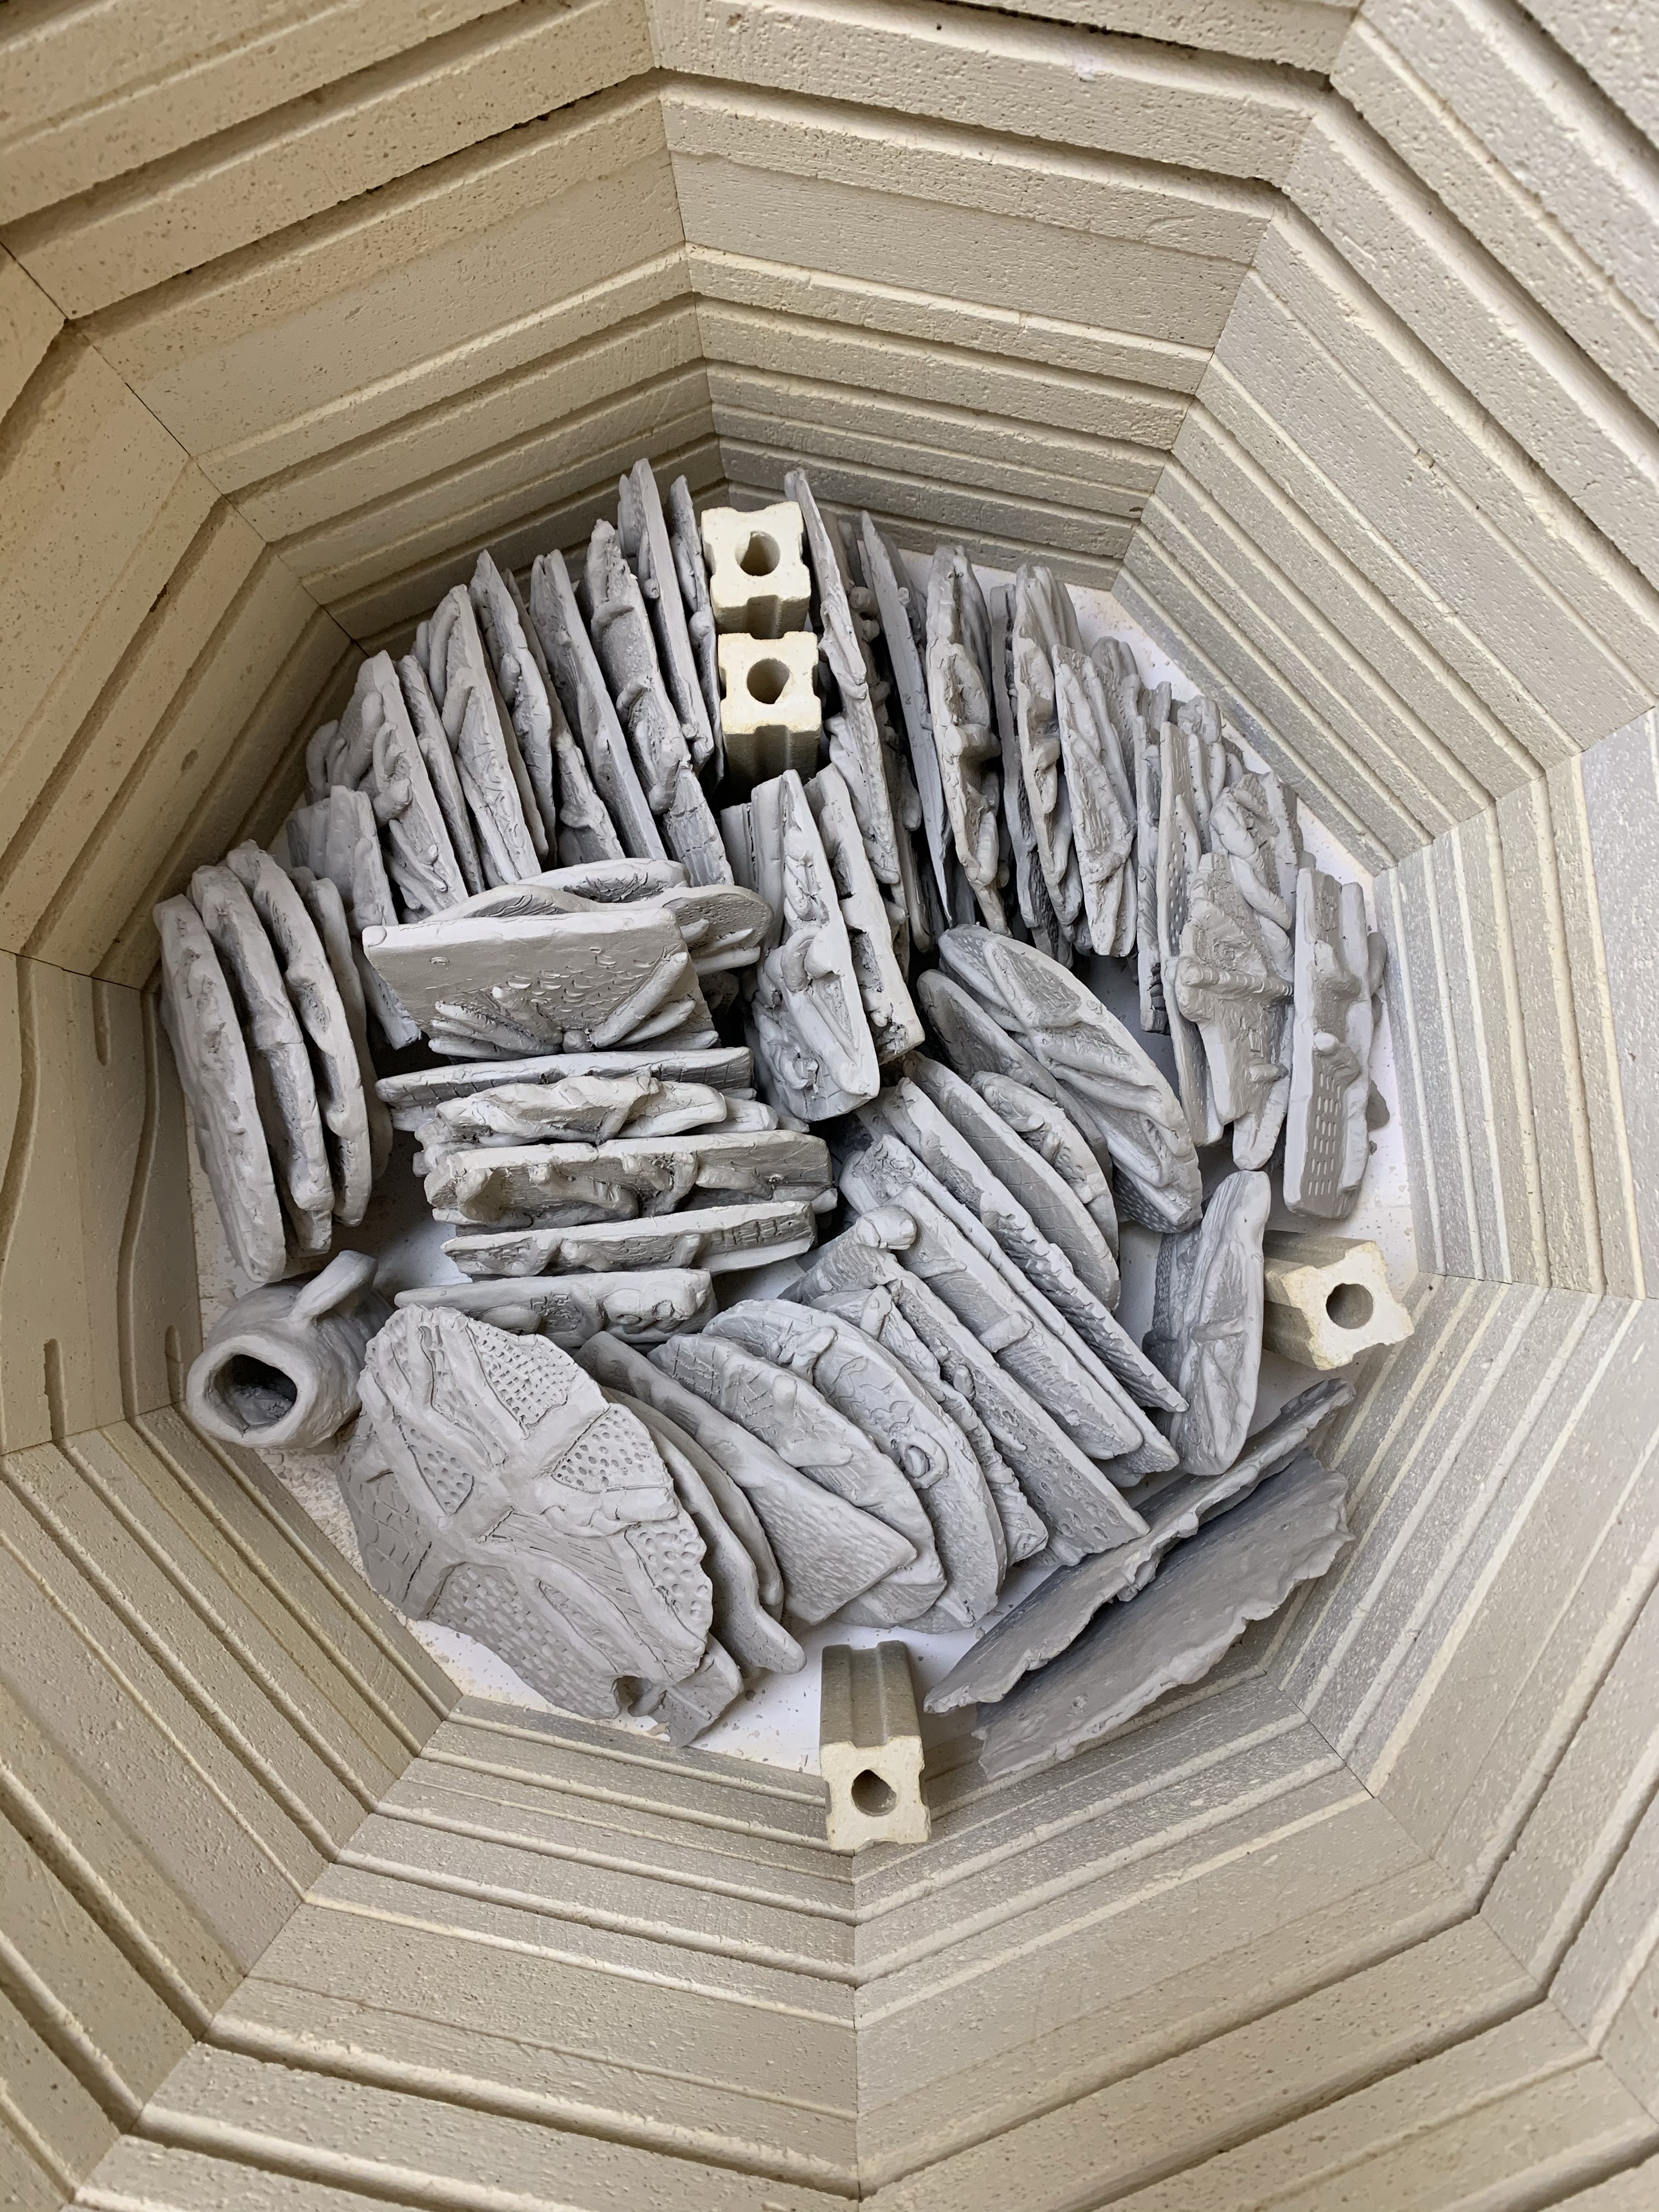
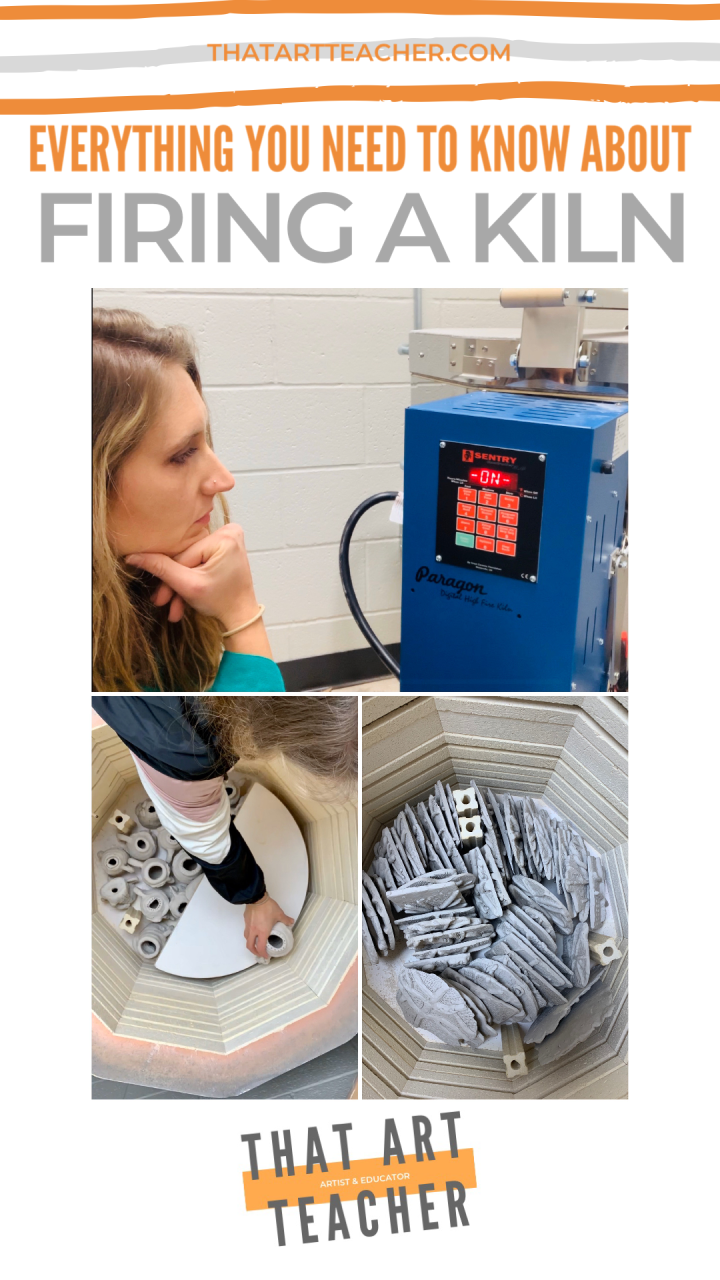
待陶泥作品全部完成,便可开始装窑! 素烧阶段(即未烧制的生坯)允许陶泥彼此轻触,但陶泥与窑壁之间须保留约一英寸(2.5厘米)间隙,以保护加热元件。
装窑如同解谜游戏或玩俄罗斯方块,讲究策略与精细操作——可惜这两项恰非我所长。我习惯提前一天装窑。我的窑炉在快档下约七小时即可升至锥号05(约1900华氏度)。我到校后启动烧制程序,到当天最后一节课时,窑炉便已发出完成提示音。
点击此处观看我的窑炉装窑延时影像!

首次烧制窑炉时,锥形测温锥(cone)与温度设定可能让人倍感压力。你的窑炉应配有说明书,其中会注明每个锥号对应的温度与时间。如果你并非所在学校的第一任美术教师,那么这本说明书很可能已遗失在你那堆满教具的储物柜“纳尼亚”深处。大多数窑炉厂商(如Skutt和Amaco)均在其官网上提供电子版说明书。在谷歌中搜索“kiln cone chart”(窑炉锥号对照表),即可获得大量资源——当然,也附带一堆令人望而生畏的数字。
部分老款窑炉需使用实体测温锥,才能获得最精确的温度读数。
我要做一个尴尬的坦白:在我整个大学学习阶段及执教生涯中,我从未用过一次实体测温锥。
你们中有些人或许正暗自评判我,另一些人则可能松了一口气。我始终使用电窑。作为一名缺乏耐心的千禧一代(唉……),既然窑炉能直接以数字形式实时显示准确温度,我又何必费神去摆弄那个古怪的小锥子呢?我绝不会向我所认识的那些严肃又硬核的陶艺家承认这一点。(除非他们正在读这篇文章……)我只是信奉“化繁为简”。毕竟,在我那间如龙卷风肆虐般的公立学校美术教室里,事情已经够复杂的了。
素烧(Bisque Firing)
素烧是陶泥作品的首次烧制,此时未烧制的湿坯(greenware)将转化为陶瓷。陶泥必须100%彻底干燥后方可入窑烧制。这一状态称为“骨干”(bone dry),顾名思义,即陶泥干透如骨。
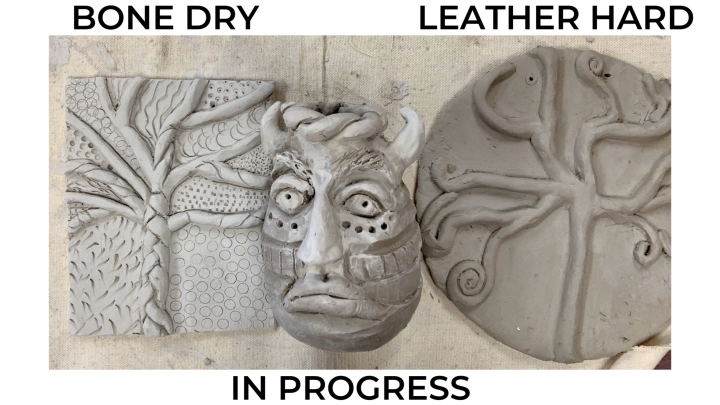
若陶泥摸起来仍觉冰凉,则尚未达到入窑标准。若使用白色陶泥,“骨干”状态下的泥坯几乎通体呈白色;其色泽须均匀浅淡,不可像上图“制作中”示例那样斑驳不均。
特别厚实的陶泥干燥耗时更长。我常对学生强调“拇指法则”:厚度超过拇指宽度的陶泥作品十分危险!其内部极易残留难以察觉的水分。
待陶泥完全“骨干”后,便可开始烧窑!我所有作品均采用05锥低温烧成。我也曾成功尝试04锥烧成——温度略高一些。幸运的是,在美术教育领域,窑炉烧制无需过于复杂。除非你专精于陶艺教学,否则你大概率只会进行低温烧成,且素烧与施釉烧成均采用同一低温制度。我早年曾在一所艺术特色高中(加油,骑士们!!!)任教,仅因特殊项目——需使陶艺作品经受户外马赛克壁画的风吹日晒——才两度进行高温烧成。
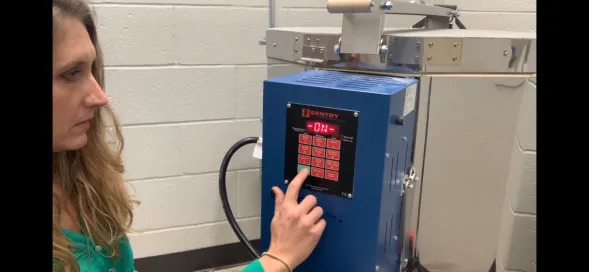
每台窑炉各不相同,但基本操作流程一致。
点击观看完整流程!
- 接通窑炉电源
- 按下“Cone”键,选择所需锥号(注意:05锥与5锥截然不同!)
- 按住“0”键(我总是按0)
- 预热(不,我想立刻开始!)
- 选择升温速度(我一直选用“快速”,但“中速”更稳妥)
- 按“启动”——此时当前温度开始闪烁,窑炉发出咔嗒声,表明加热圈已开始升温
- 关闭窑盖,静候!
当数字式窑炉升至预设温度时,会通过蜂鸣或报警音提示完成。我的窑炉随后会闪显峰值温度,这是判断是否烧成不足(mis-fired)的关键依据。我曾遇窑炉故障,仅升至1000–1200华氏度(约538–649摄氏度)。此时陶泥未能转化为素坯,无法施釉。唉!
窑炉自动断电后,请先读取温度记录,再拔掉电源。切勿打开窑盖! 加热圈仍处于炽热发红状态,直视极伤眼睛;此外,冷空气骤然涌入亦可能导致陶坯炸裂。因此务必提前规划——建议至少等待一整夜后再开启窑炉卸载作品。你可将窑盖撑开约一英寸(2.5厘米)缝隙,以加快冷却。但我从不启用此功能,因为我只在早晨装窑,傍晚离校前完成烧制。
施釉烧成(Glaze Firing)

施釉烧成装窑有若干关键区别。 釉料易流淌,从而损坏窑炉。使用窑炉涂层(kiln wash)与星形支钉(star stilts)可有效保护窑炉本体及窑具(如窑板与支撑支钉),避免永久性损伤。根据作品类型,你可酌情允许或禁止学生为作品底部施釉。若允许施釉,请务必使用星形支钉,以防釉面与窑板接触——否则釉料将永久粘连于窑板之上!
釉料由玻璃质颗粒等多种成分构成,经高温熔融后形成坚硬、光亮的玻璃质表面。若两件施釉作品相互触碰,它们将永远粘连在一起。此时可用旋转工具(Dremel)或玻璃切割机尝试分离,但施釉作品表面将再难恢复原貌。
施釉烧成的时间安排尤为关键,因通常需分多窑次装载,方能确保所有作品互不接触。就我为大规模课堂采购的常规釉料而言,两次烧成均采用05锥已获良好效果。若你身为专业陶艺教师,则可能尝试高温烧成及珠光釉(luster glazes)等工艺——但请务必选用适配高温烧成的陶泥!
同窑混烧施釉作品与素坯作品确有可能。若某学生缺课,仅需补烧一两件素坯,我有时会将其加入施釉窑次中。
警示:一旦素坯在窑内炸裂,细小碎片将永久嵌入所有施釉作品表面——场面惨不忍睹! 最佳做法仍是分窑烧成;但为了拖延症发作,我时常做出此类无奈又糟糕的决定。
如需完整施釉教程,请观看下方视频:点击观看我的教学视频

施釉仅是众多表面装饰技法之一。若时间紧迫或预算有限,以下两种技法无需二次入窑,可供参考:
该技法在陶泥表面效果惊艳! 学生普遍认为它显著提升了作品质感,使其看上去格外昂贵。
有趣、多彩且富有活力。 没错,我指的可不是我自己。

使用电窑时,你最大的疑问或担忧是什么?
你有哪些最佳操作实践?
订阅
欢迎在评论区告诉我!
更多陶艺教程:
如何制作泥板
肌理瓷砖

陶艺基础:手捏成型
人脸陶罐

Everything You Need to Know About Firing a Kiln
Original: https://thatartteacher.com/2020/02/07/how-to-fire-and-load-a-kiln-that-art-teacher/
Date: 2020-02-07
Author: Sierra Machado
Categories: classroom management
Tags: art class, art education, art teacher, bisque, ceramics, clay, clay tutorial, elementary art, featured, first year teaching art, glaze, glazing, high school art, how to fire a kiln, how to glaze clay, how to load a kiln, how to use a kiln, kiln, kiln tutorial, middle school art, pottery, teaching art, that art teacher
Firing a kiln can be an exciting and terrifying experience. The vision of fire truck sirens and billowy smoke is enough to keep you awake at night. Will I burn down the school? Will one hundred student artworks explode into smithereens? Why did they not teach me how to do this in my college ceramics class!?
This post is a compilation of my advice and step-by-step guidance on firing a kiln in a classroom setting. If you prefer a video format, check out my YouTube video here that has all of this information as well as me time lapse loading for a bisque fire.
You are not alone.
The first thing to remember is that you are not in this alone. A smart and capable electrician installed your kiln and made sure all the electrical components were up to code. A well-trained district employee set up your kiln room and ventilation. A verified company manufactured your kiln, along with thousands others, and most companies have a great customer support programs. If you are lucky like I am, you also have the support of several other art teachers in your district. Don’t be afraid to call, text or email a buddy art teacher for advice or venting (insert kiln ventilation joke here….).
Kiln Best Practices
Before we jump into the nitty-gritty, here is a list of my kiln best practices. These tips will save you from a lot of stress.
- Load you kiln slowly. Anytime I rush to load a kiln the same day I plan on firing it I break at least one piece. Try explaining that to a twelve year old…
- Test fire, test fire, test fire! Whether it’s new glazes or a new kiln, try it out with one of your demo pieces to make sure you can vouch for the results to your audience of eager artists.
- NEVER fire kiln when you are not there. And keep it unplugged!
- Wait to fire pieces until they are truly ready. Don’t rush the drying! Teach your clay unit early in the semester so you have appropriate time for the process.
Why Does Clay Explode in the Kiln?
The two main culprits of kiln explosions are moisture and air pockets.
Trapped moisture in clay heats up and causes steam, which causes clay to explode and crack. Clay needs ample time to dry and larger pieces take longer. Time of year, climate, humidity and air flow in your classroom or work space all affect dry time. Setting pieces in front of a fan will help, but can also lead to cracking and damage because smaller pieces dry faster. Pieces of clay that stick off the base (think handles) will dry quicker and will become very fragile. My best advice is plan your timing carefully. There is nothing worse than not leaving proper time for your students’ clay pieces to dry and having several explosions when fired. Not that I know this from experience…
I like to allow a full week for dry time. Keep finished pieces on open shelves and not in closed cabinets. If you are making flat pieces like tiles or relief sculptures, don’t stack them. They will retain moisture longer if clay is touching clay. Laying each piece on a piece of cardboard or newspaper will help flat pieces dry evenly and quicker.
Clay will also explode if there is a trapped pocket of air inside the clay body. Wedging clay is the best practice for ensuring all air pockets have been released. Many clay brands are great at having clay wedged and without many air pockets. When recycling your clay, you are responsible for wedging it into proper form. This takes time, and upper body strength, and it’s a great skill for students to pick up while helping out their over worked art teacher.
Working with small pieces at a time is the best way to ensure there are no air pockets. Have students wedge in the palm of their hand for small pieces like coils and pinch pots. This does take practice because students have the tendency to overwork their clay until it dries and is hard to work with. If the pieces are hand sized, two to three squeezes does the trick in my experience. For pinch pots I do check each one for air pockets before we move on to the next step. If it’s too thick I can work around with my hands until I feel comfortable there won’t be any grenades going off in my kiln.
Loading A Kiln
Once clay pieces are finished, it is time to load the kiln! Greenware (or unfired clay) can touch in the bisque firing, however you need to leave about a one-inch space between the kiln walls and the clay pieces itself. This will ensure heating coils are protected.
Loading a kiln is a lot like working a puzzle or playing tetris. It takes strategy and careful movements. Which unfortunately, are not two of my strengths. I load the kiln the day before I plan to fire it. On the fast setting my kiln fires at Cone 05, or about 1,900 degrees, in seven hours. I press start when I arrive to work and by the last class of the day it is beeping that it’s finished.
Click here to watch me time-lapse load my kiln!
When firing a kiln for the first time, cones and temperatures can be really stressful. Your kiln should have a manual that describes the temperature and time for each cone. If you are not the first art teacher at your school the manual may be lost in the Narnia of your supply closet. Most kiln companies like Skutt and Amaco have digital manuals on their websites. A google search of “kiln cone chart” will give you pleeeeenty of resources with a bunch of scary numbers.
Some older kiln models require you to use an actual cone to get the most accurate temperature reading. I am going to make an embarrassing confession: I have not once ever in my years of college education or in my own classroom used an actual cone.
Some of you may be judging me, others may be relieved. I have always used an electric kiln. I am an impatient Millennial (ugh). Why bother with a weird little cone when my kiln will be flashing the actual numbers for me digitally? I would never admit this to the serious and hardcore potters that I know. (Unless they are reading this…) I just believe in keeping things simple. Things are complicated enough in my tornado-of-a-public-school-classroom.
Bisque Firing
A bisque fire is the first firing of your clay pieces. It is when greenware clay transforms into ceramics. Clay must be 1,000,000,000% dry before it can be fired. This is called “bone dry”, and as the name implies, describes clay that is dry as a bone.
If your clay feels cold to the touch it is not kiln ready. If using white clay, bone dry clay will be almost all white. It needs to be all the same light color and not splotchy like in the “in progress” example above.
Clay that is extra thick will take longer to dry. I always use “the rule of thumb” with my students. Clay pieces that are larger then the width of your thumb are dangerous! There may be trapped moisture inside that is hard to detect.
Once clay pieces are bone dry, it is time to fire the kiln! I low fire all of my pieces at Cone 05. I have also had the same success firing to Cone 04 which is a slightly higher temperature. Luckily, in the art education world, firing a kiln does not have to be super complicated. Unless you are highly specialized in ceramics, you will probably only ever do a low fire for both glazing and bisque. I taught at a magnet high school for the arts (Go Cavaliers!!!) in my former life, and only did a high firing a couple times for a special project which required the ceramic pieces to withstand the elements in an outdoor mosaic mural.
Every kiln is different, but the basics are the same.
Watch the full process here!
- Plug in the kiln
- Press “Cone” and select your number. (Remember, Cone 05 is very different than Cone 5!)
- Hold (I always press 0)
- Preheat (Nope, wanna start right away!)
- Speed (I have been using fast, but medium is a safer speed.)
- Start….then the current temperature will start to blink and the kiln will start making a clicking to indicate the coils are heating up.
- Close the lid and wait!
When your digital kiln has reached the programmed temperature it will alert you by beeping or making some sort of alarm. My kiln will then flash the peak temperature, which is key to knowing if your kiln mis-fired or not. I have had a kiln break and reach only 1,000-1,200 degrees. The clay pieces had not transformed to bisque and could not be glazed. Ugh.
When the kiln shuts off read your temperatures and then it is safe to unplug. DO NOT OPEN IT! The coils will still be glowing and dangerous for your eyes. Also, the sudden rush of cold air can cause clay pieces to break. Planning is key, so allow for a night to pass before opening up your kiln to unload it. You can prop it open an inch or so to allow for a quicker cool down. I never use this feature of my kiln because I only fire it from morning to when I’m leaving for the evening.
Glaze Firing
Loading pieces for a glaze firing has a few key differences. Glazes can trail and ruin your kiln. Using a kiln wash and star stilts should help protect your kiln and kiln furniture (shelves and support stilts) from permanent damage. Depending on the piece, you may or may not encourage students to glaze the bottom of their artwork. If they do, make sure you use star stilts to prevent contact with your kiln. They will be stuck to your kiln shelves forever otherwise!
Glazes are made with glass particles, among other ingredients, that when heated become a hard, shiny glassy surface. If two glazed pieces are touching, they will touch forever. A Dremel tool or a glass saw might help solve the problem, but your glazed pieces will never be the same.
Timing is key with a glaze firing because it usually takes more than one load to fit all the pieces without touching. I have had great success doing both firings at Cone 05 with the type of glazes I purchase for mass classroom use. If you are a more specialized ceramics teacher you may end up playing around with high fire and luster glazes. Just make sure you purchase clay that is suitable for high fire temperatures!
It is possible to fire both glazed pieces and bisque ware in the same load. If I have an absent student and need to fire just a piece or two of bisque ware I have been known to add it to a glaze load. CAUTION: If it explodes there will be tiny fragments of bisque STUCK ALL OVER THE GLAZED PIECES- and it ain’t pretty! It’s best to do them separately, but I make desperate bad decisions all the time in the name of procrastination.
For a full tutorial on glazing, check out my video below:
Glazing is just one of many surface decoration options. If you are short on time or budget, here are two other techniques that don’t require a second firing of your kiln.
This technique looks AMAZING on clay. Students feel like it elevates their pieces and makes them look really expensive.
Fun, colorful and vibrant. And no, I’m not talking about myself.
What are your biggest questions or fears using a kiln?
What are your best practices?
Subscribe
Let me know in the comments!
More Clay Tutorials:
How to Make a Slab
Textured Tiles
Pottery Basics: Hand Building
Face Jugs