陶土头像艺术课
原文链接:https://thatartteacher.com/2023/03/03/clay-bust-art-lesson/
日期: 2023-03-03
作者: Sierra Machado
分类: 长篇教案
标签: 高级陶艺课、高级陶土课、美术教育、陶艺、陶土头像、陶土头像艺术课、陶土教案、陶土教程、精选内容、具象陶艺课、高中美术、高中美术课、高中陶土课、如何制作陶土头像、如何在陶土上塑造面部特征、如何塑造人体形态、微型陶土头像雕塑、减法式陶土头像、减法式陶土头像技法、那位美术老师
本节陶土头像艺术课是学生探索具象艺术、个性表达及多种手塑技法的绝佳方式。
你是否也和我一样注意力持续时间较短?这段简短视频将为你完整演示全部步骤。
该视频教程可直接用于课堂教学,将向你和你的学生清晰展示本节陶土头像艺术课的每一步骤。它非常适合课堂复习、提前演示步骤,或供学生自主学习使用。
我们首先进行素描与头脑风暴。每节课均以美术史热身活动(我称之为“课前练习”,因为——事实就是如此)开始,而学生此前已开始观察各类陶土头像作品。
若你对我的每日美术史热身活动感兴趣,可参阅这篇详细博文:
美术史热身活动
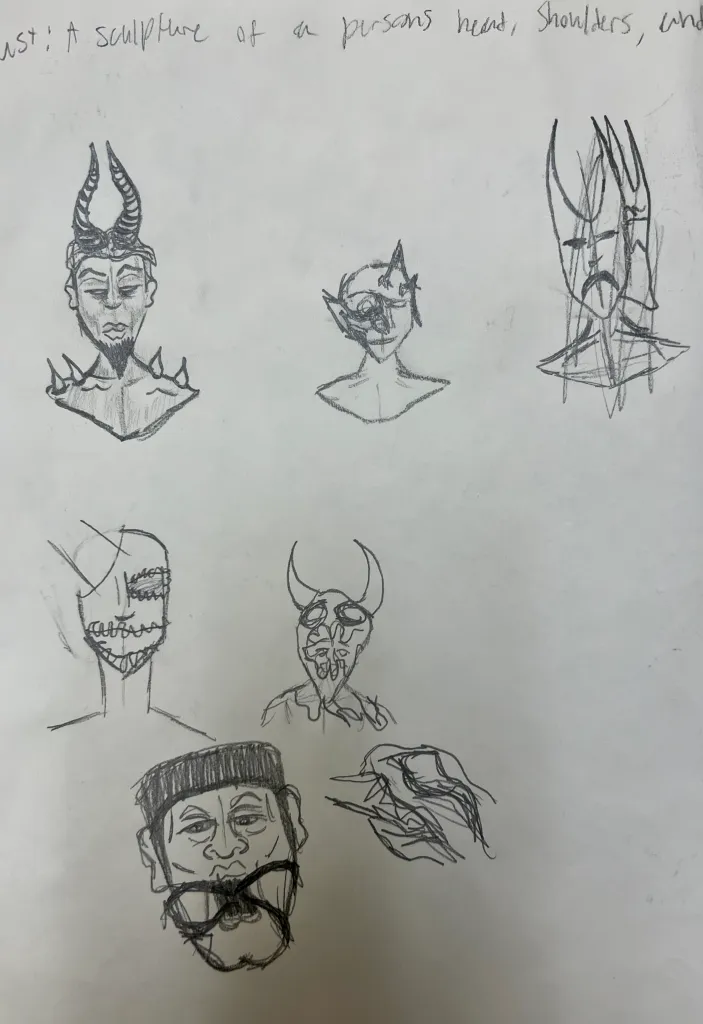
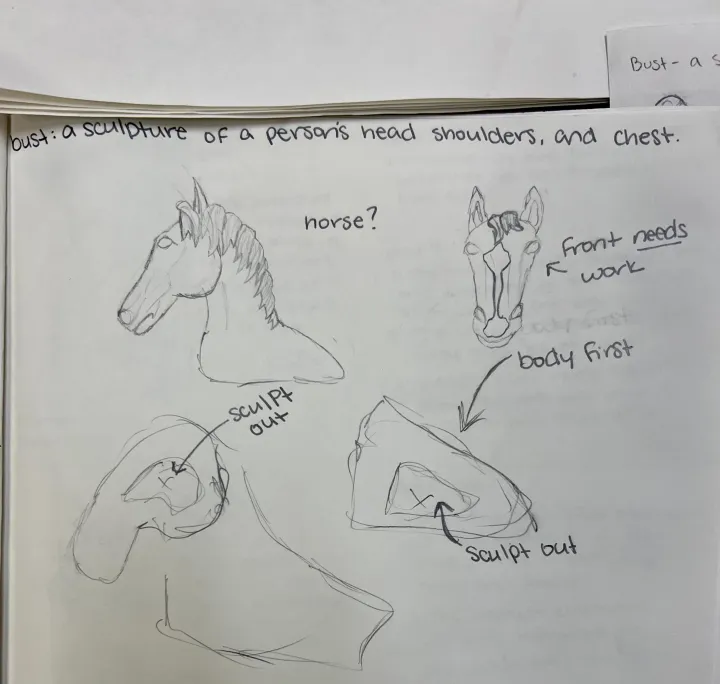
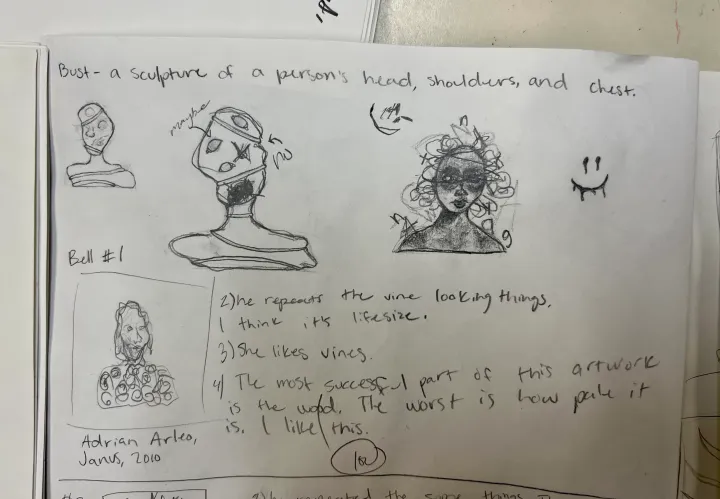
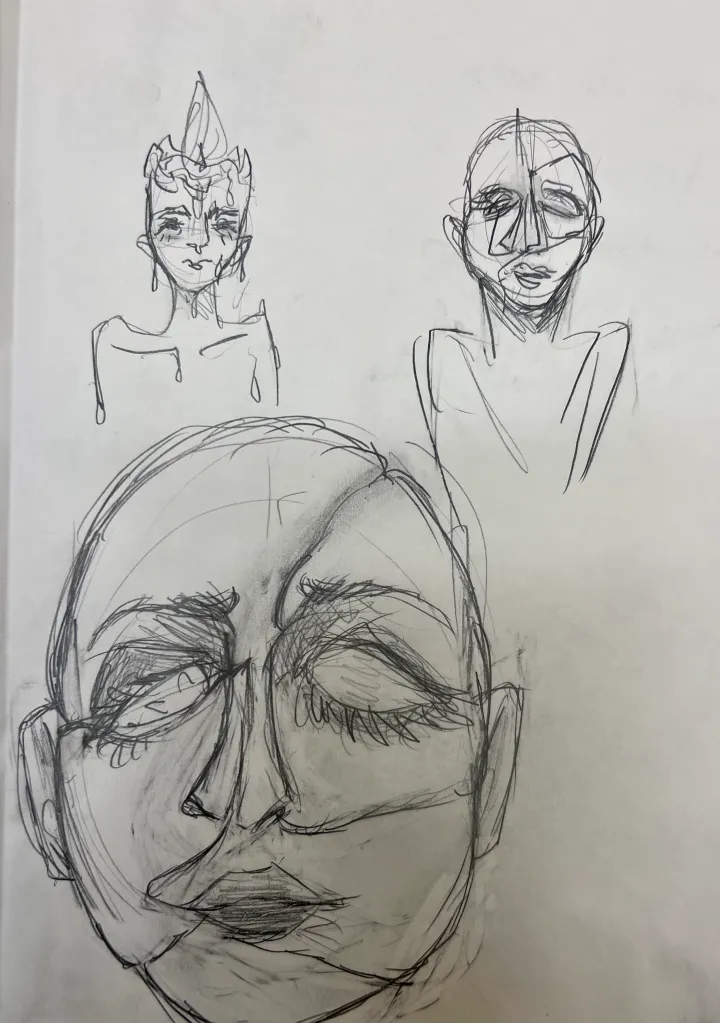
本次我未给学生设定特定主题,但以往曾尝试过。例如,我曾指导一组学生创作自画像,结果他们对此表现出的犹豫程度远超我的预期;另一组高阶学生则围绕某项人权议题展开调研,并以此为主题创作头像作品——这组学生是我所带的国际文凭课程(IB)毕业班学生,项目还包含大量文字写作任务。
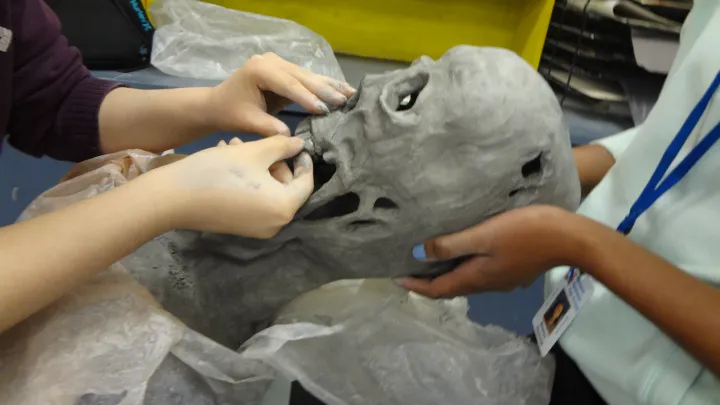
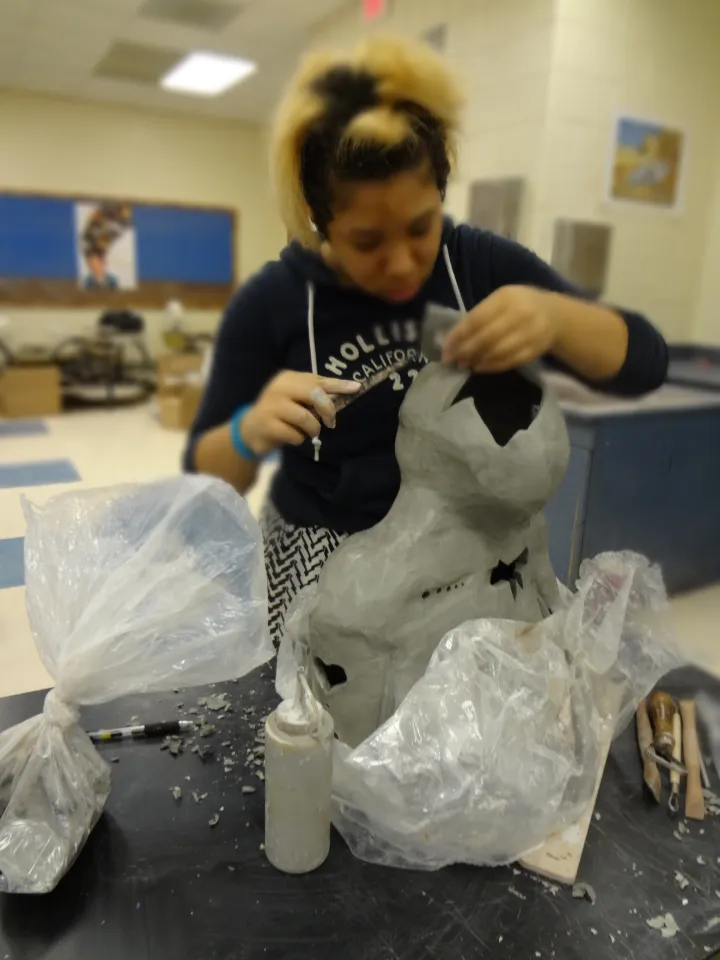
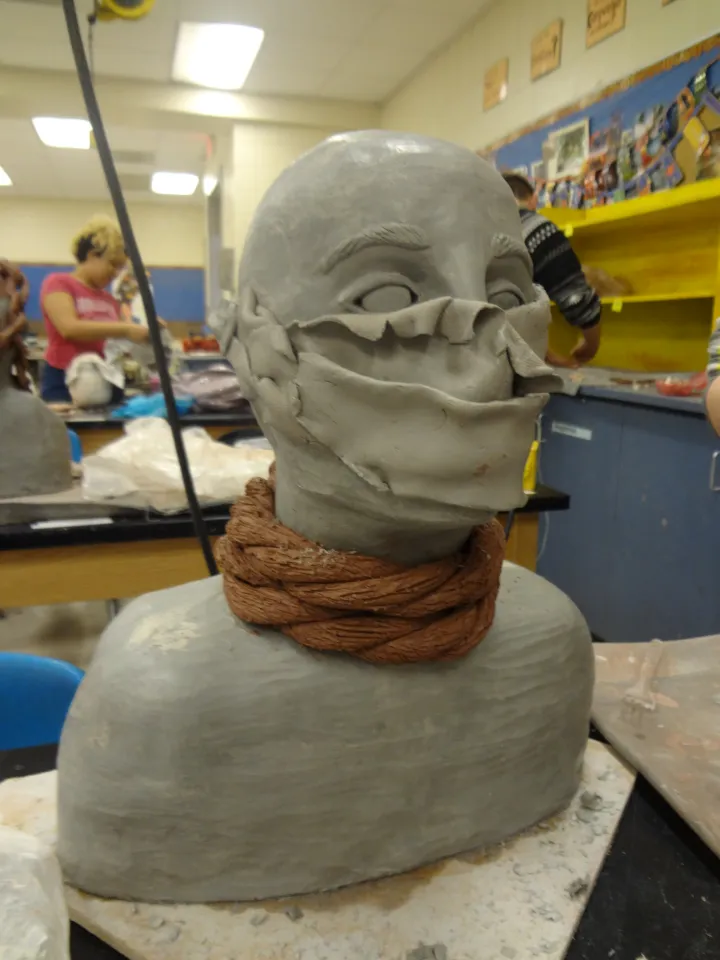
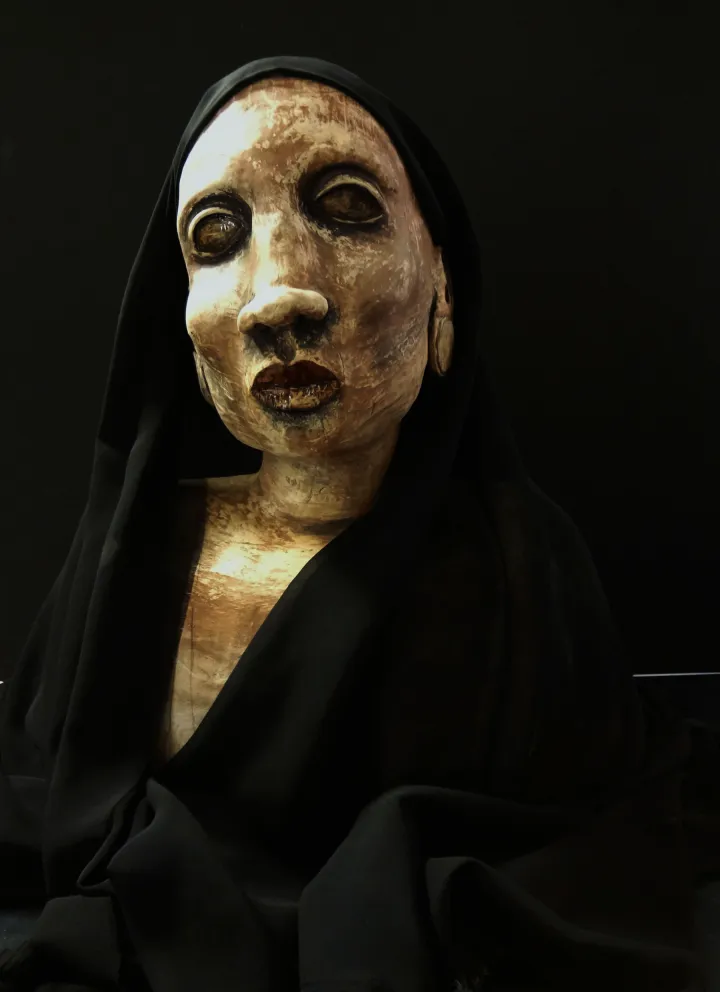
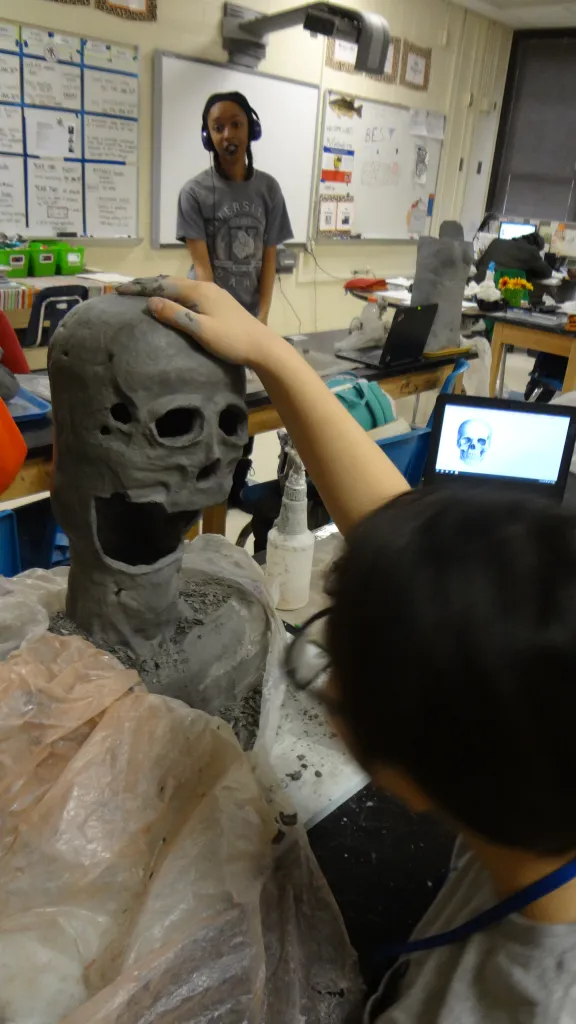
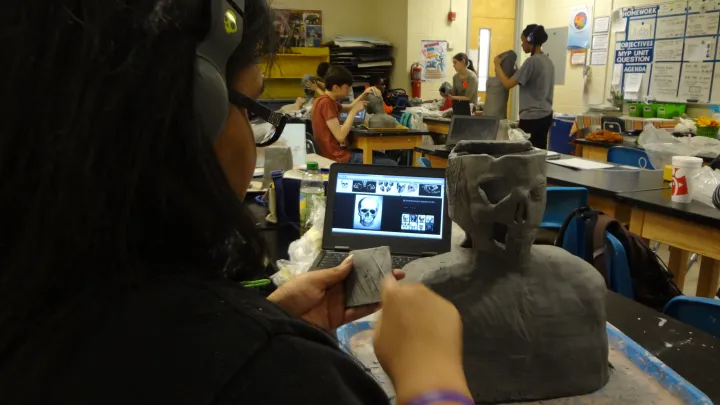
最近,我为《雕塑II》课程教授了立体头像创作。该班级学生能力水平与学习动力参差不齐,因此我尝试采用更开放式的命题方式,重点讲授正确的手塑技法,并鼓励学生开展个性化创意探索。与任何课堂情境相同,部分学生表现突出,而另一些学生则难以起步。
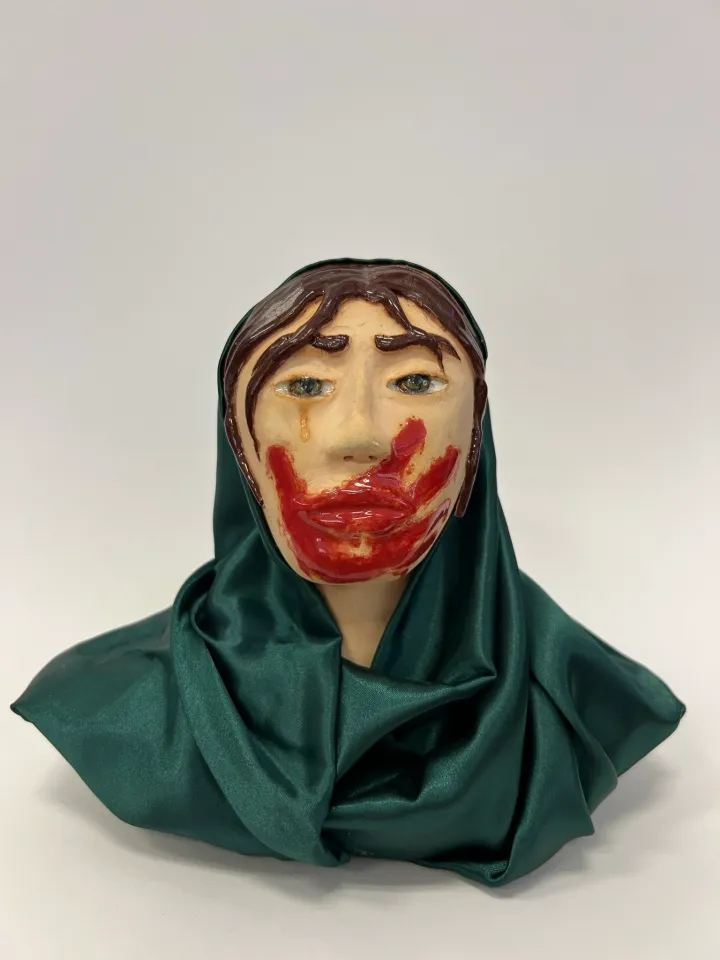
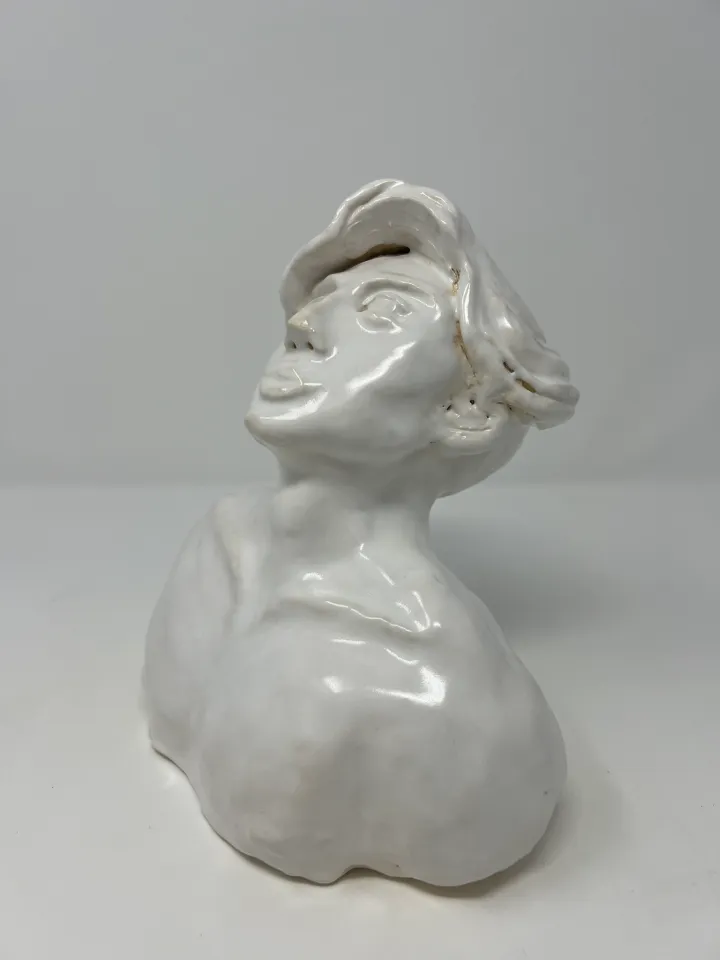
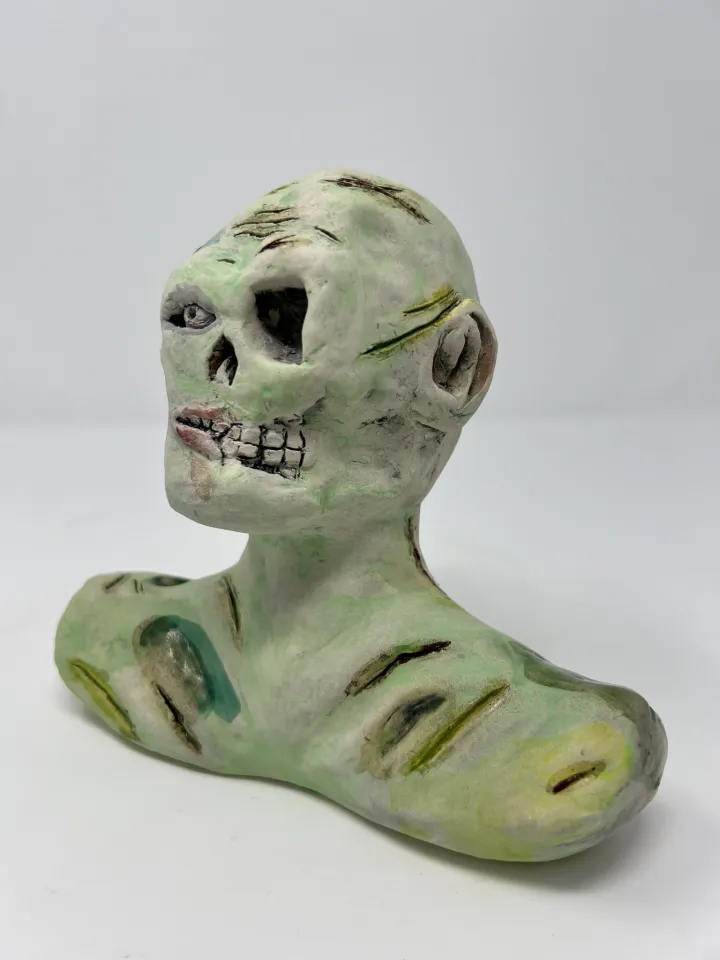
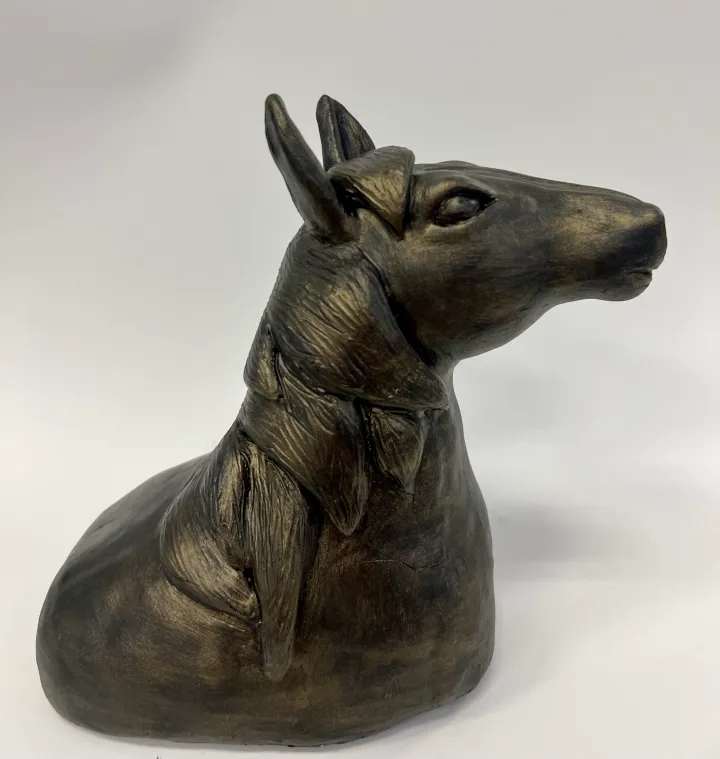
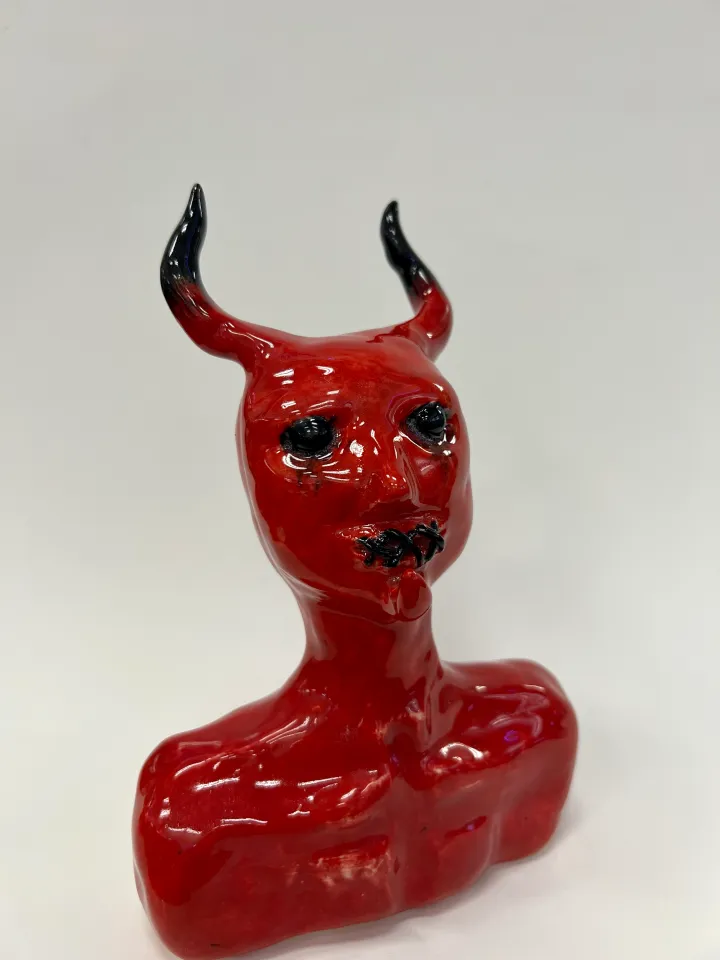
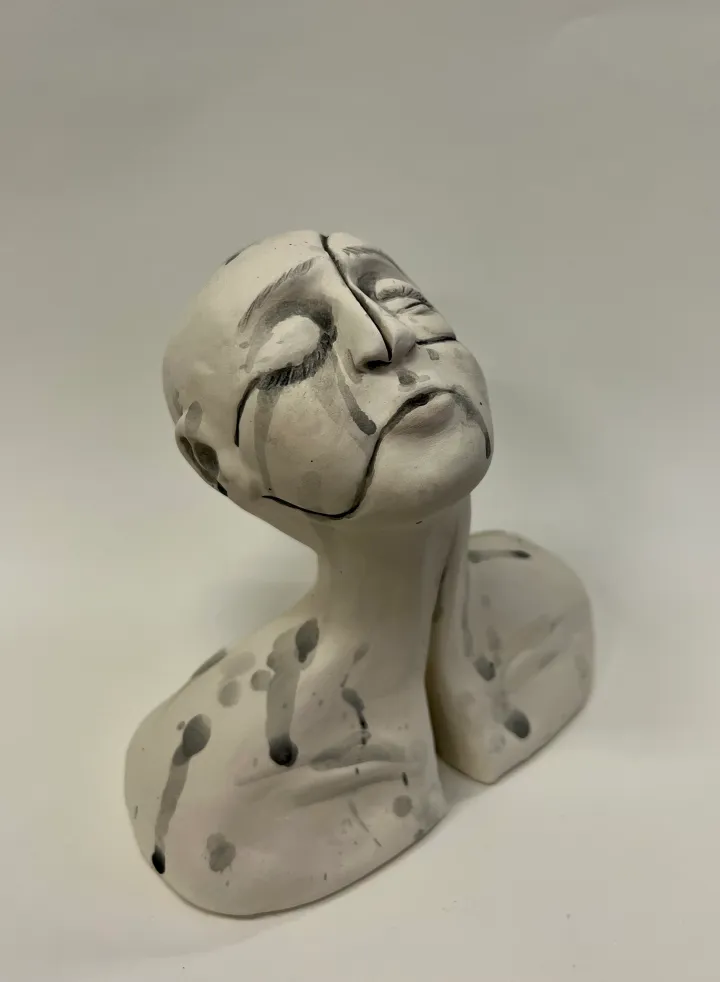
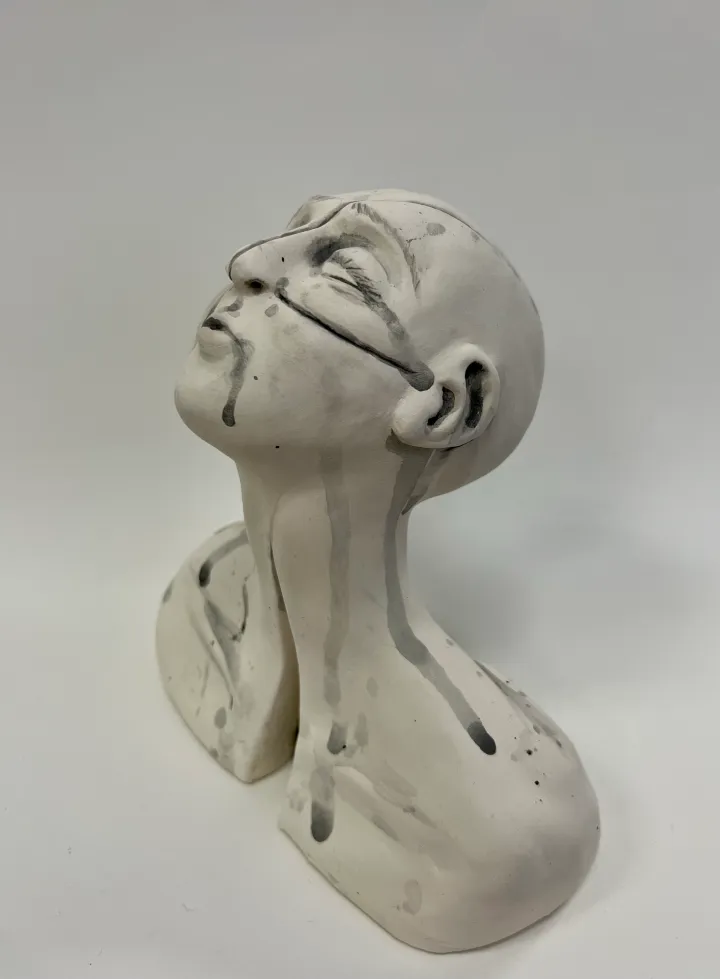
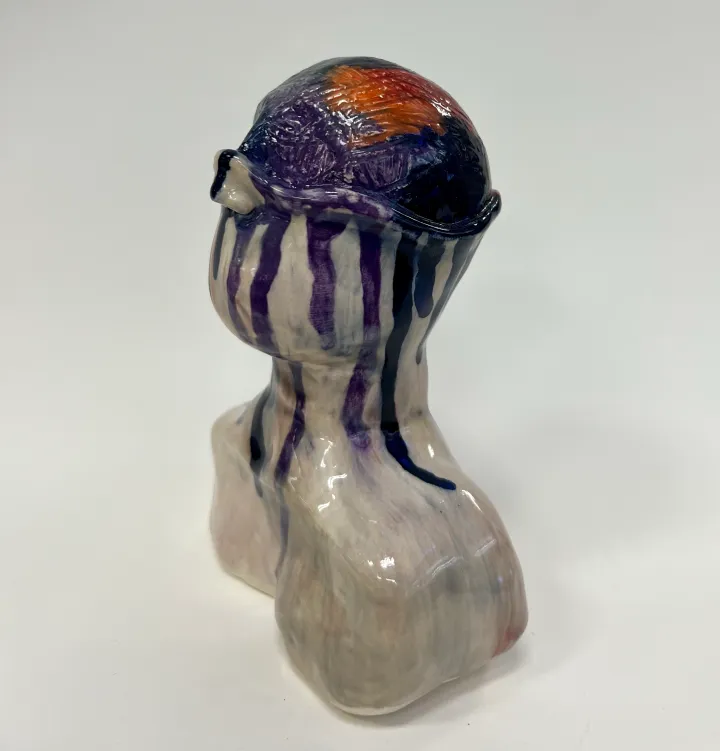
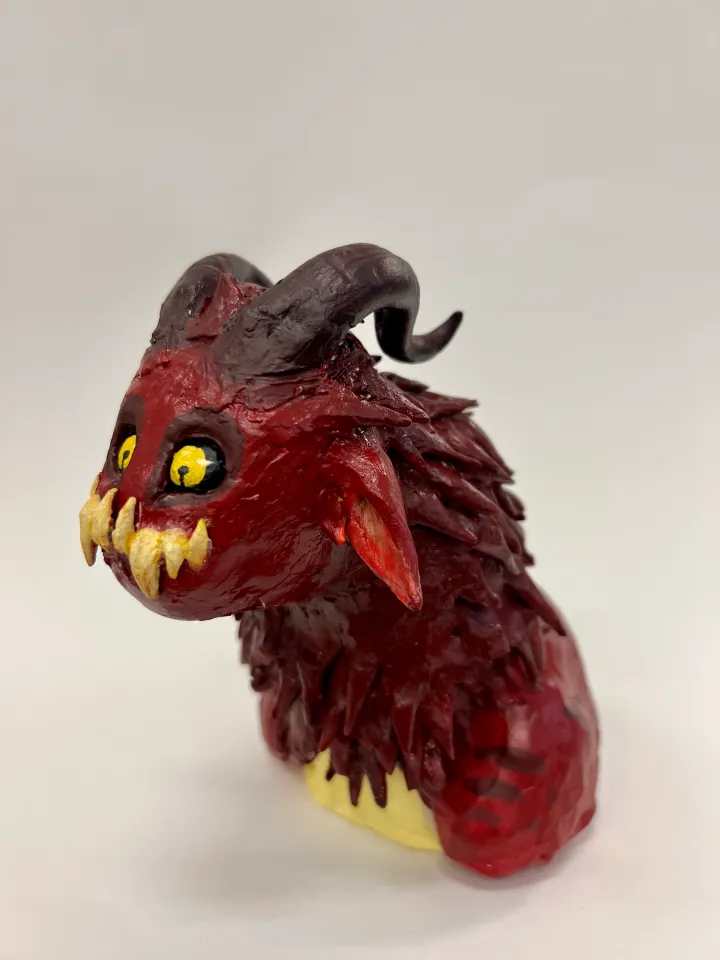
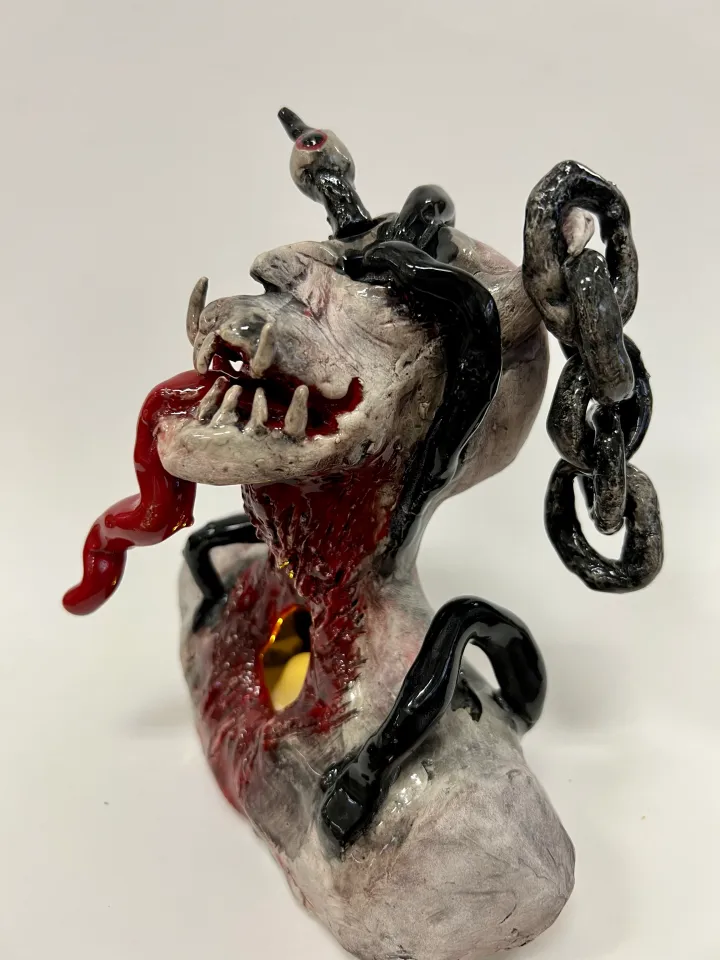
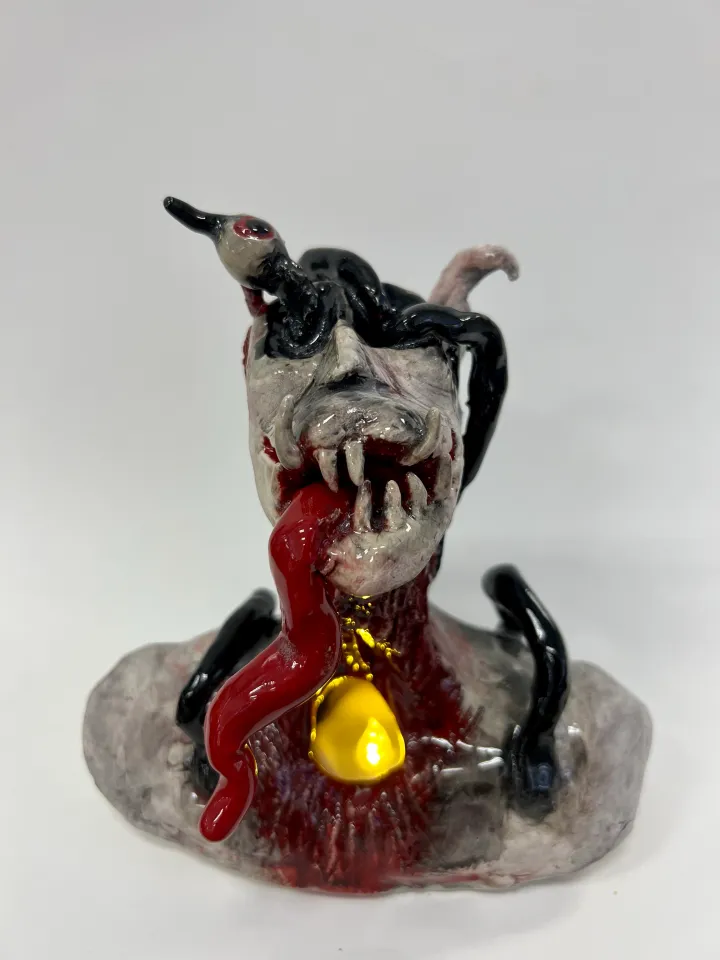
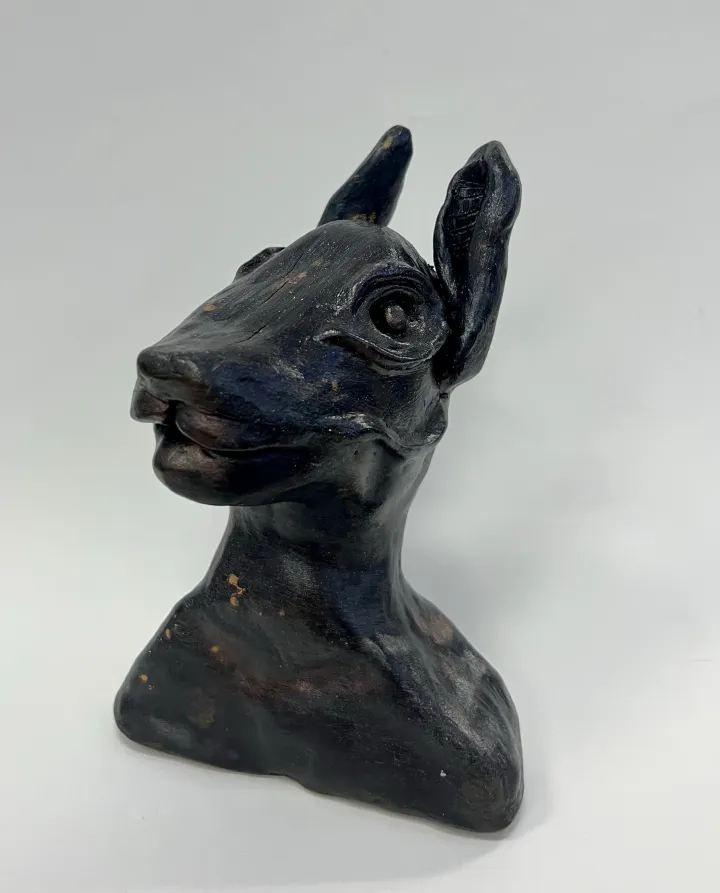
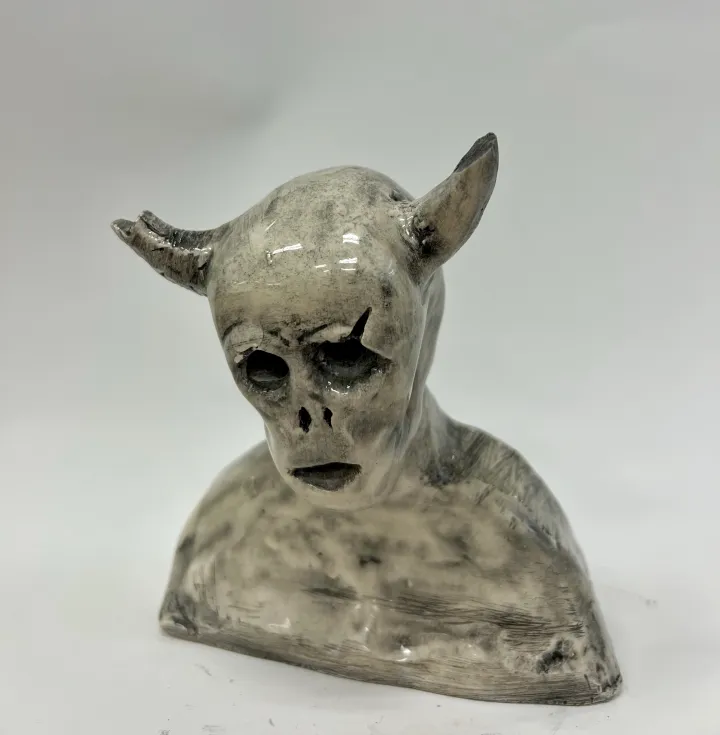
完成素描并观摩多种范例后,我们先制作两个基础形体。本课我曾采用两种不同教法:最初几次授课时,我们用泥板与泥条构建陶土形体;而此次则采用减法式技法。我本人高度倾向减法式方法,且学生成功率显著更高。当然,干燥时间控制、小部件易损及断裂等问题依然存在;但总体而言,学生对该技法的信心大幅提升。
学生首先用一大块实心陶土制作肩部/躯干形体,重点把握整体尺寸与轮廓——大块陶土使操作极为便捷,仿佛形体“自动成形”!完成后,该部件单独装袋封存,使其缓慢初步干燥,再进入后续掏空雕刻环节。
下一课时,我们另取一块陶土制作颈部与头部。颈部亦可作为第三部件单独添加,或直接融入躯干形体中,视个人偏好而定。由于头部造型更具挑战性,学生略显紧张。我手边恰好备有若干塑料人头模型(懂的都懂),并配合学生Chromebook设备调出的参考图片共同使用。
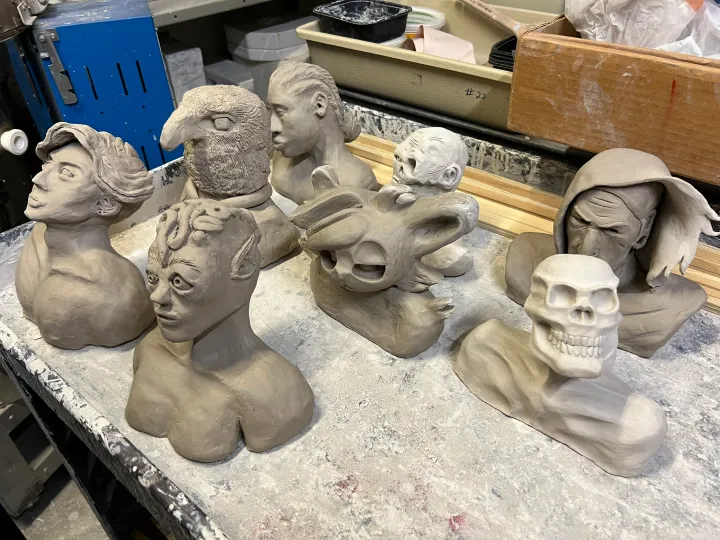
部分学生并未采用人体形象,我则鼓励他们尽可能多地调取其动物/机器人/其他题材的骨骼结构多角度图示。我们不断旋转陶土坯体,从各个视角观察并调整各部位位置关系。许多学生追求写实风格,也有不少学生选择非写实路径。该作业初看极具挑战性,但抽象化与简化处理同样能产生极富美感的效果。
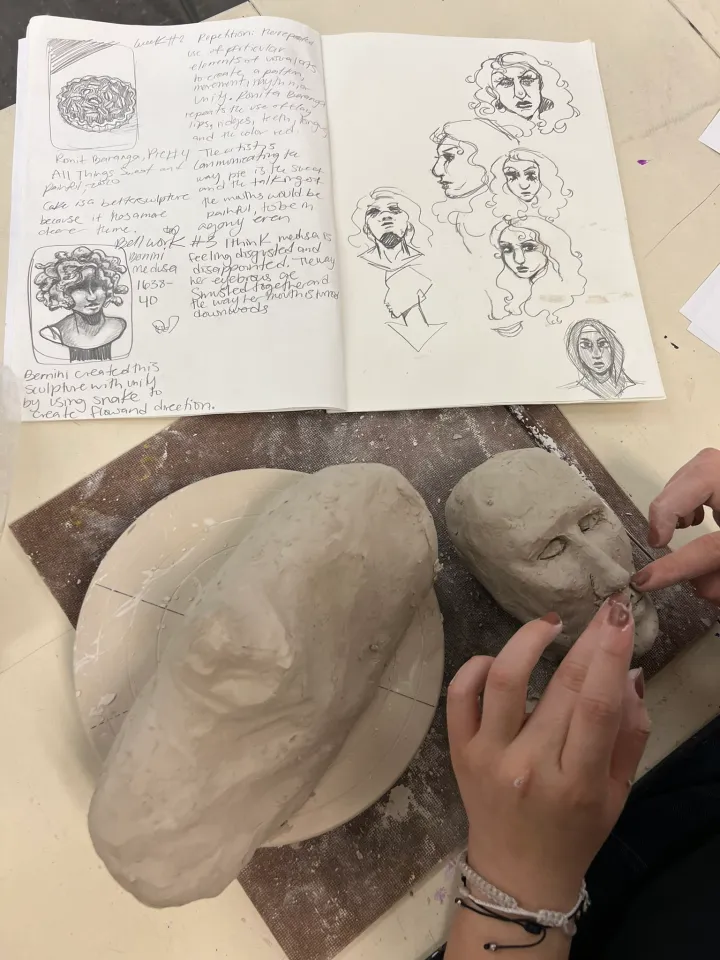
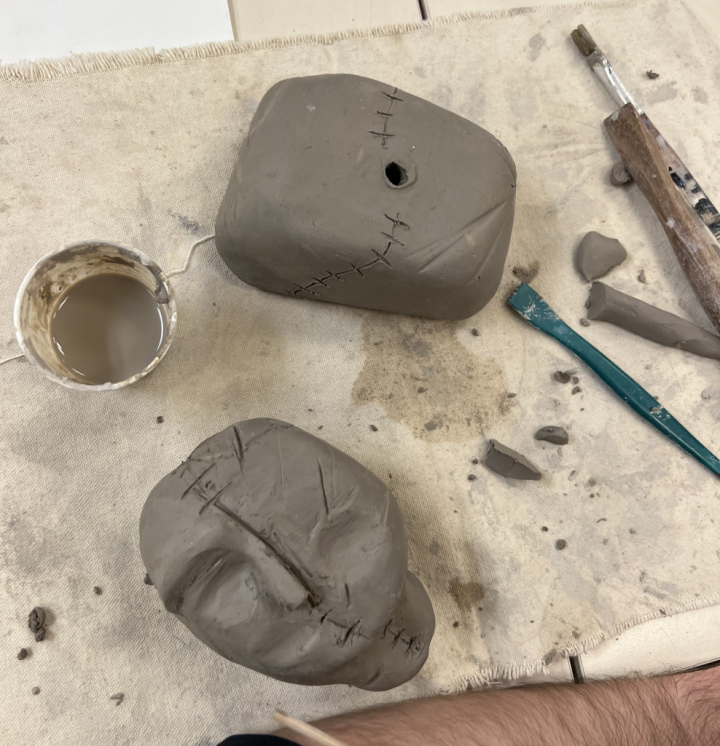
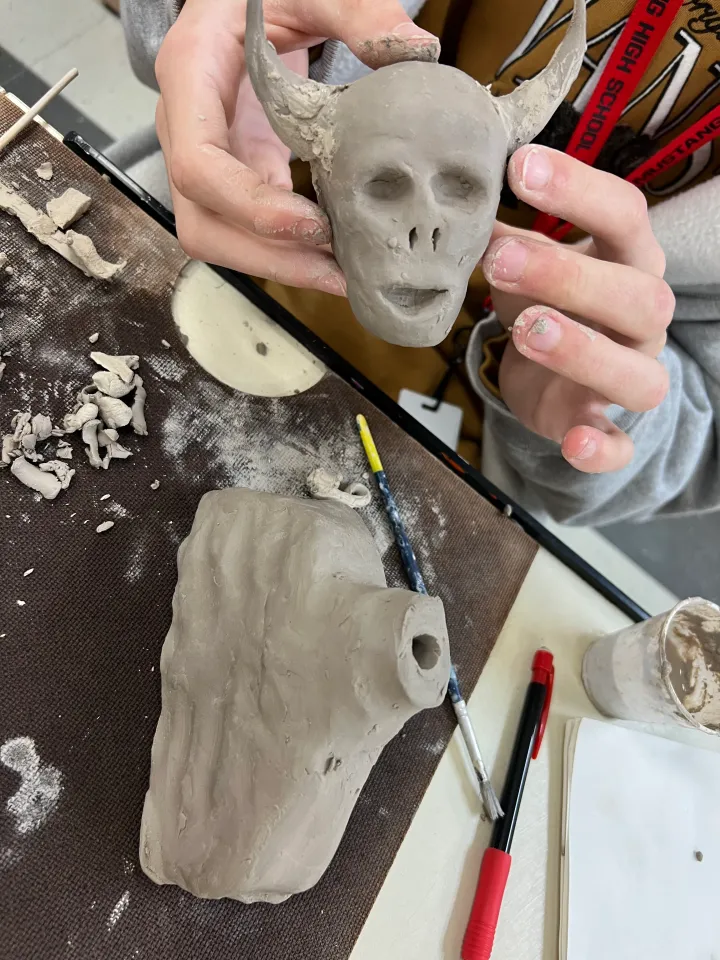
头部同样单独装袋保存,学生通常于第二课时集中处理。待陶土稍干(介于可塑状态与皮革硬状态之间)后,我们即开始掏空雕刻。此步骤书面描述较为困难,且因人而异:若陶土过软,掏空后无法自支撑;若过于干燥,则质地脆弱,后续添加新鲜陶土制作面部细节时易出问题。如存疑虑,可先行掏空,但暂缓拼接两部分。我建议大多数学生在头部尚未与肩部连接前,即开始添加面部特征。
我常手持金属丝切割工具走近学生,宣布“现在该把你们的头切开啦!”——整个过程竟透着一丝病态的满足感。待每件作品被精准剖为两半后,学生便挖除内部多余陶土,仅保留约0.5–0.75英寸厚的壁体。此时头部形体让我联想到挖取魔鬼蛋的蛋黄。我倾向于让学生保留稍厚的陶土壁体:厚壁仅需更长干燥时间,而薄壁则易导致结构脆弱。
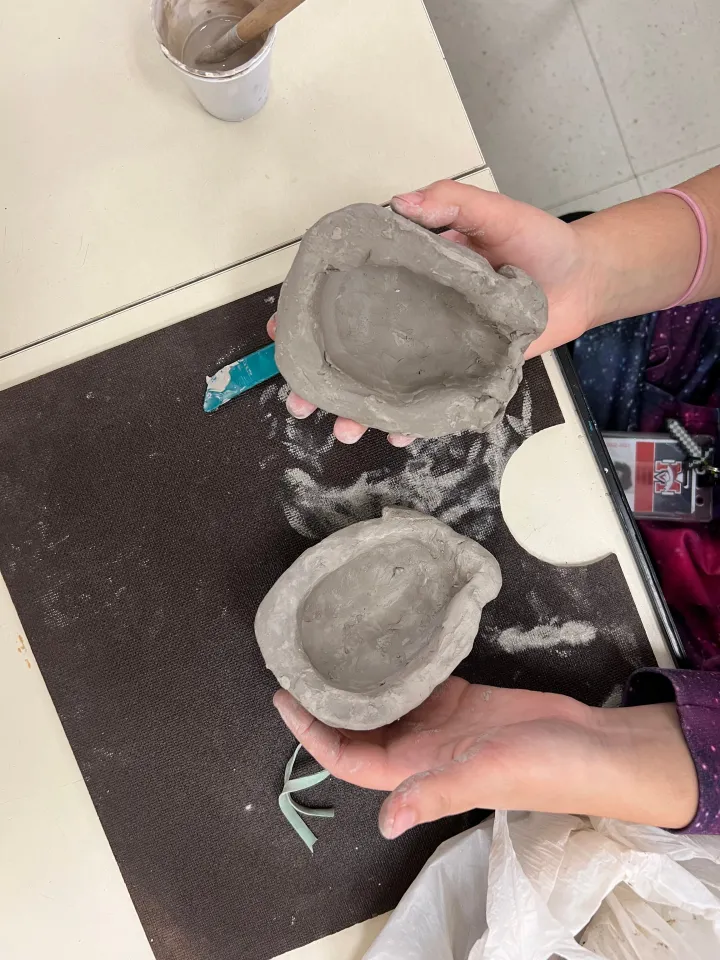
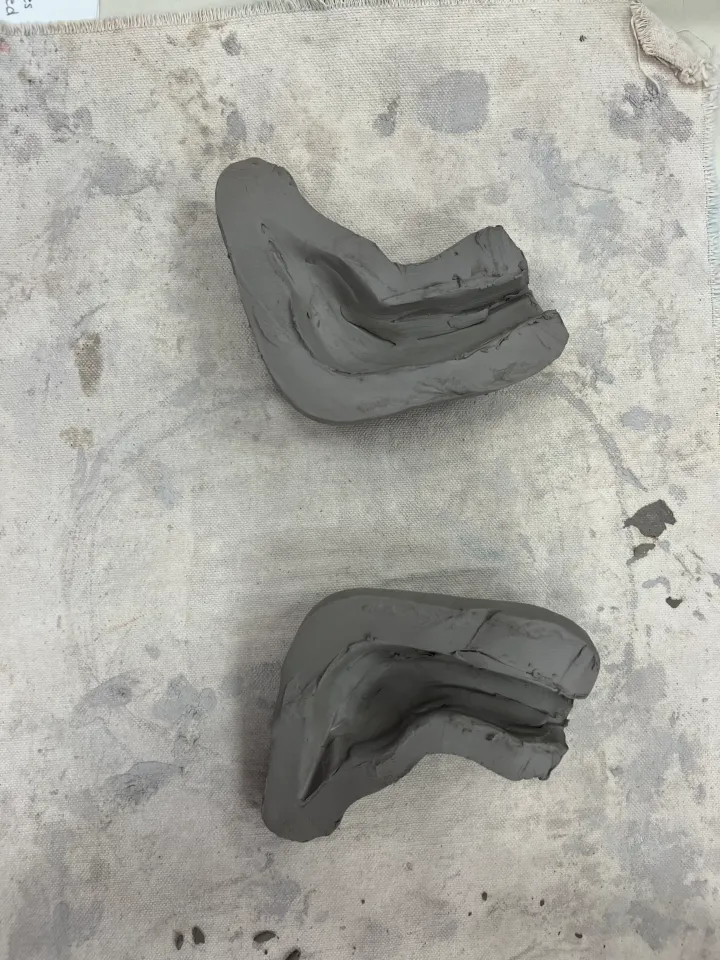
在我逐一检查每半件作品(毕竟我有点强迫症)后,学生进行刻痕、抹泥浆及揉合拼接。躯干、颈部至头部之间必须留有贯通的大型气孔;若未预留足够气流通道,烧制时窑内可能因空气受困引发问题。此外,我在头像拼接复原后,又于头部及肩部区域隐蔽处额外戳出若干小气孔——原理与捏塑空心陶铃或其它中空陶艺品时戳气孔一致。
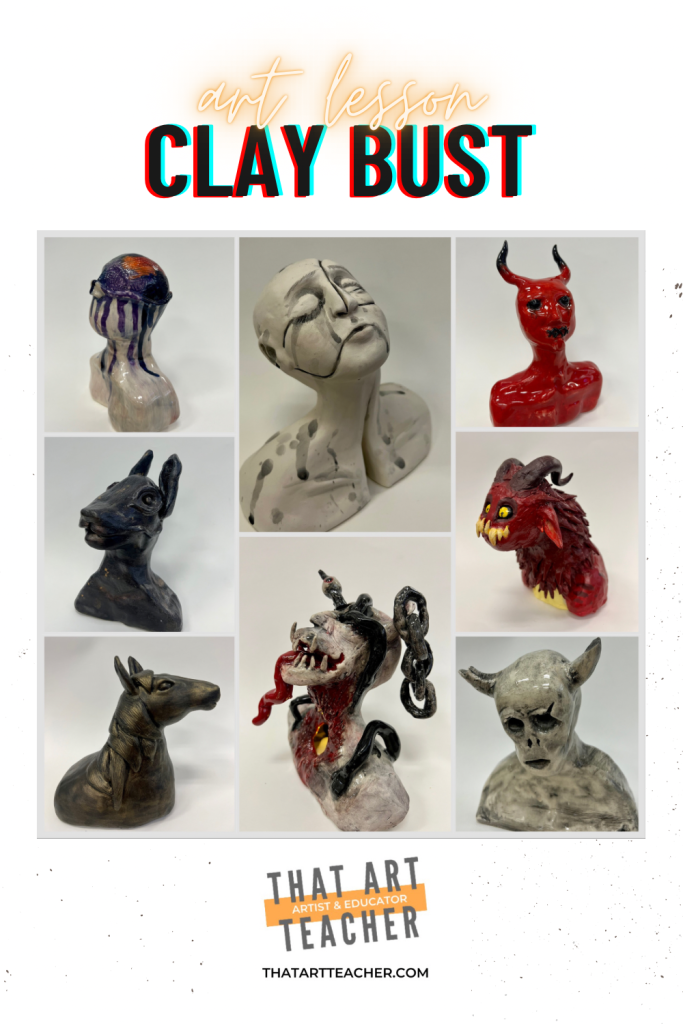
当主体结构基本成型后,即可着手刻画所有细节、肌理及个性化创意元素。这一阶段趣味十足,而我的学生们总能以天马行空的创意令我惊叹不已。
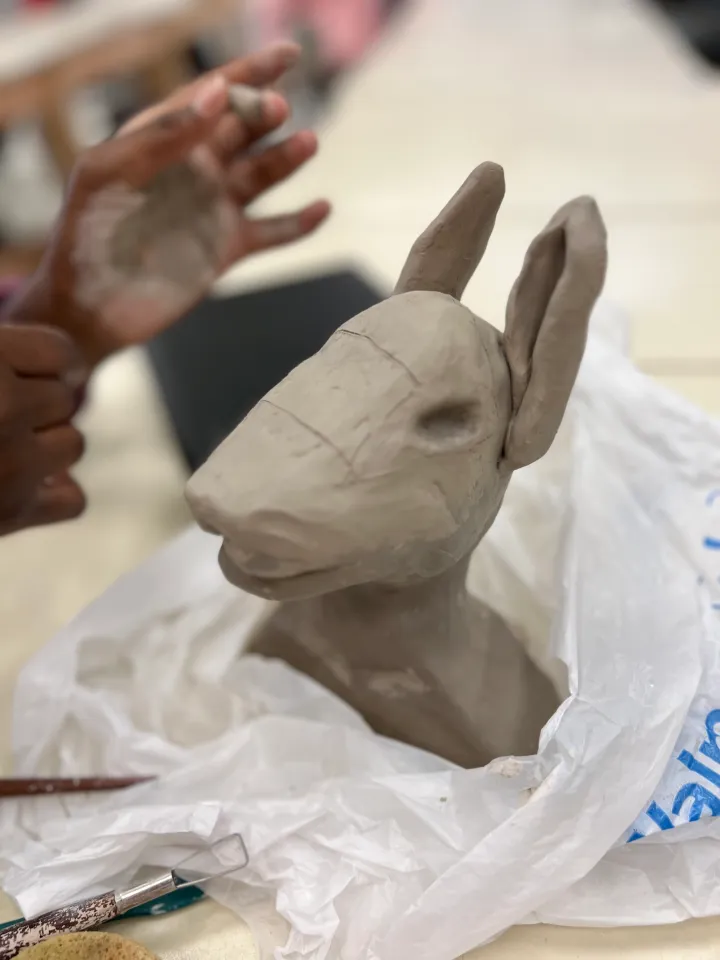
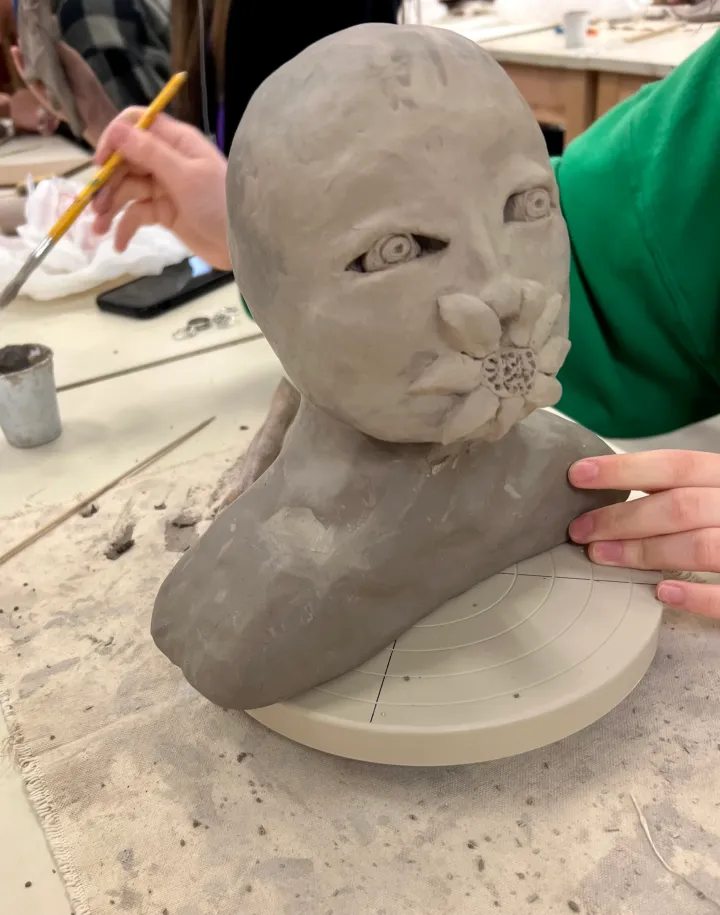
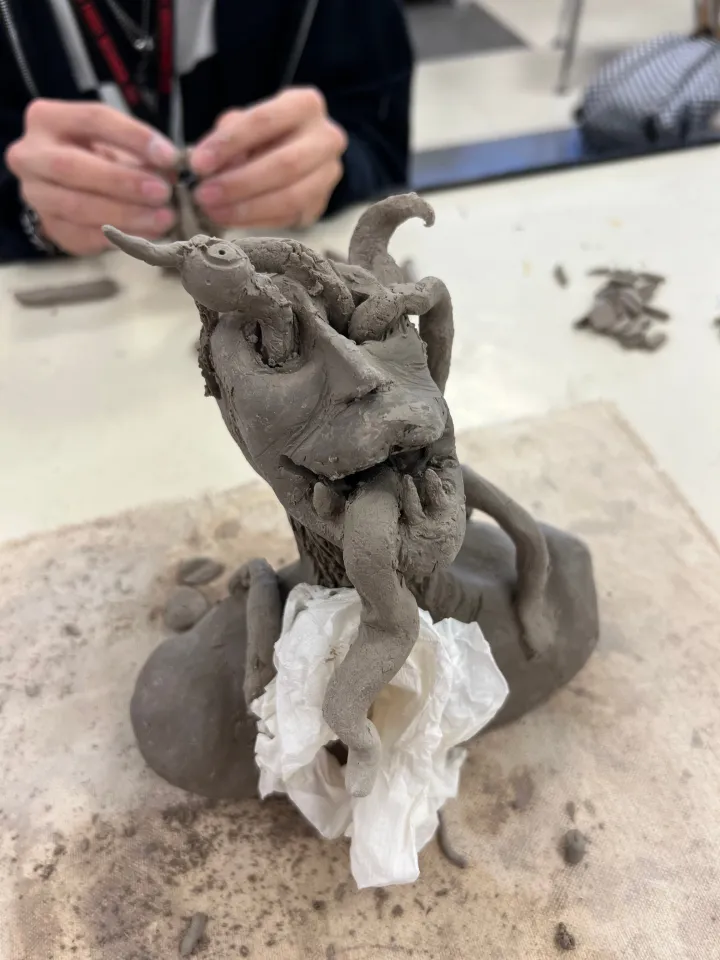
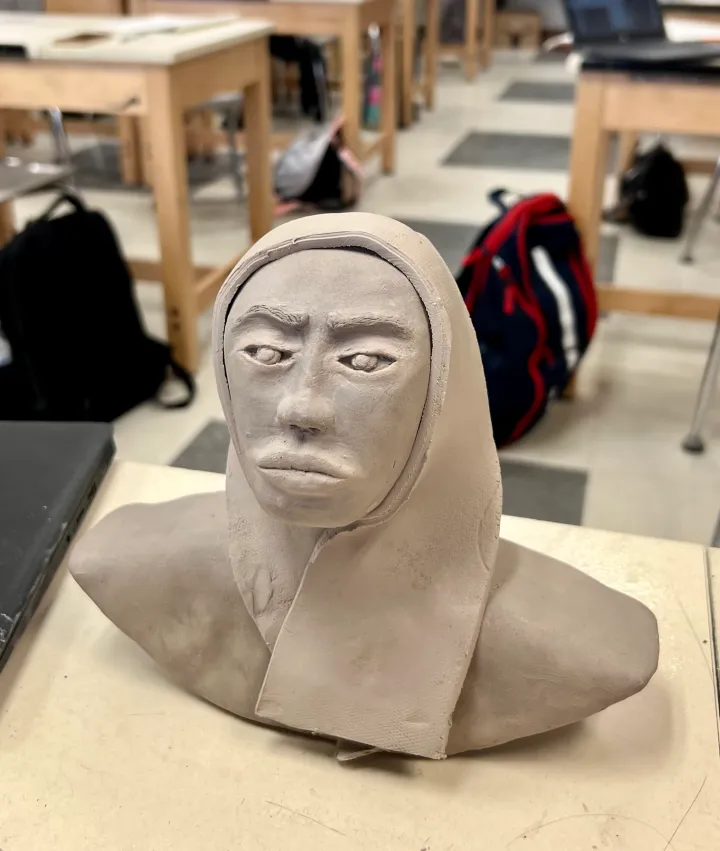
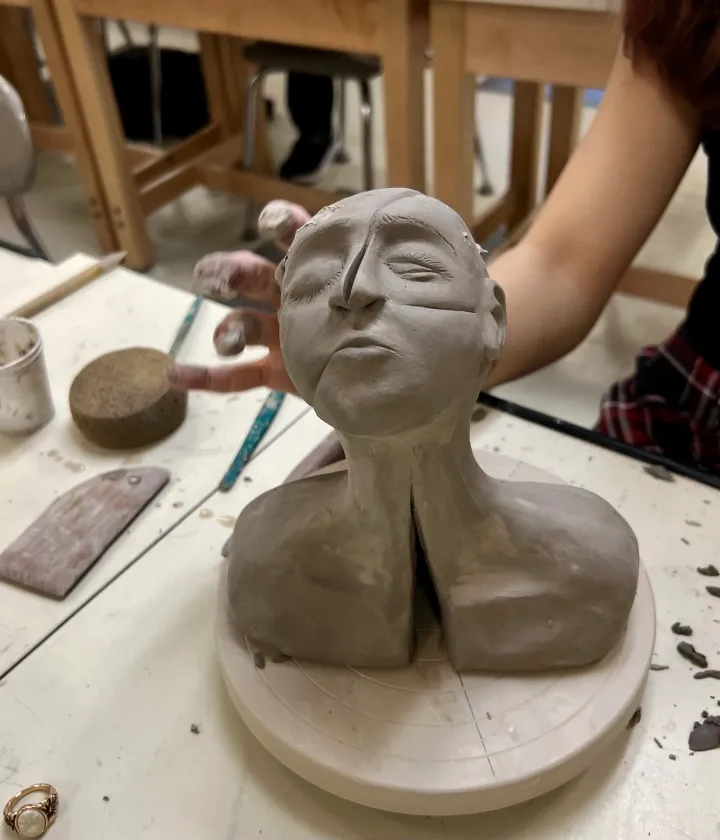
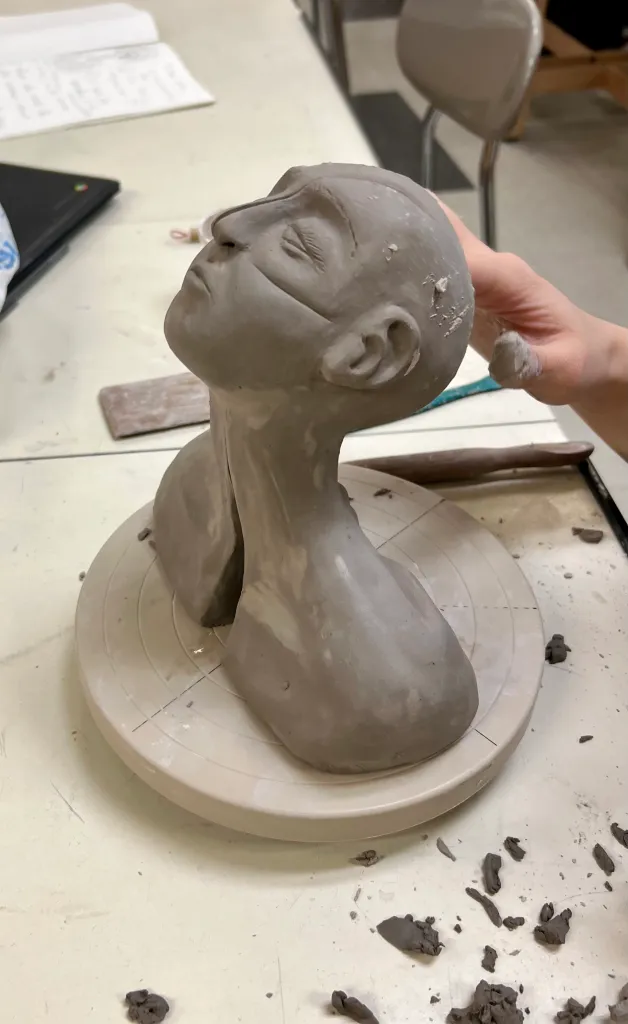
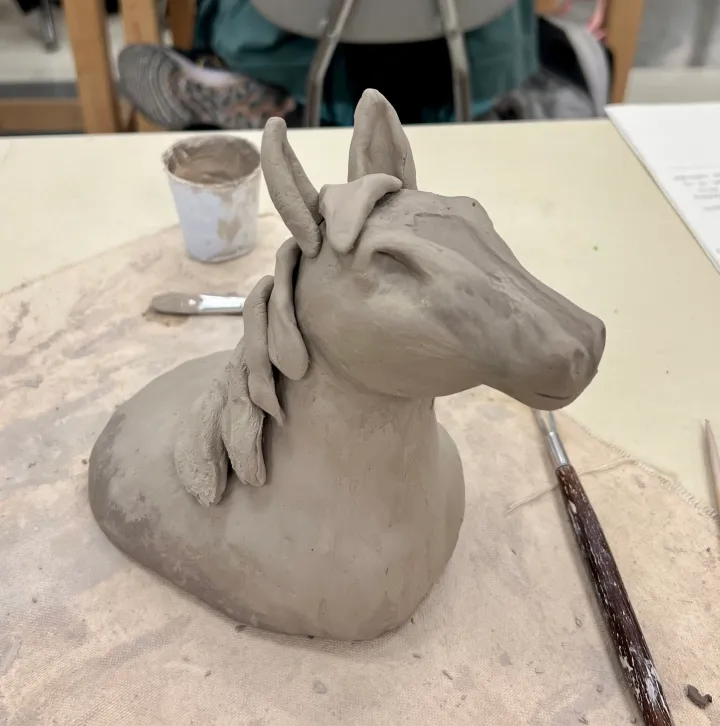
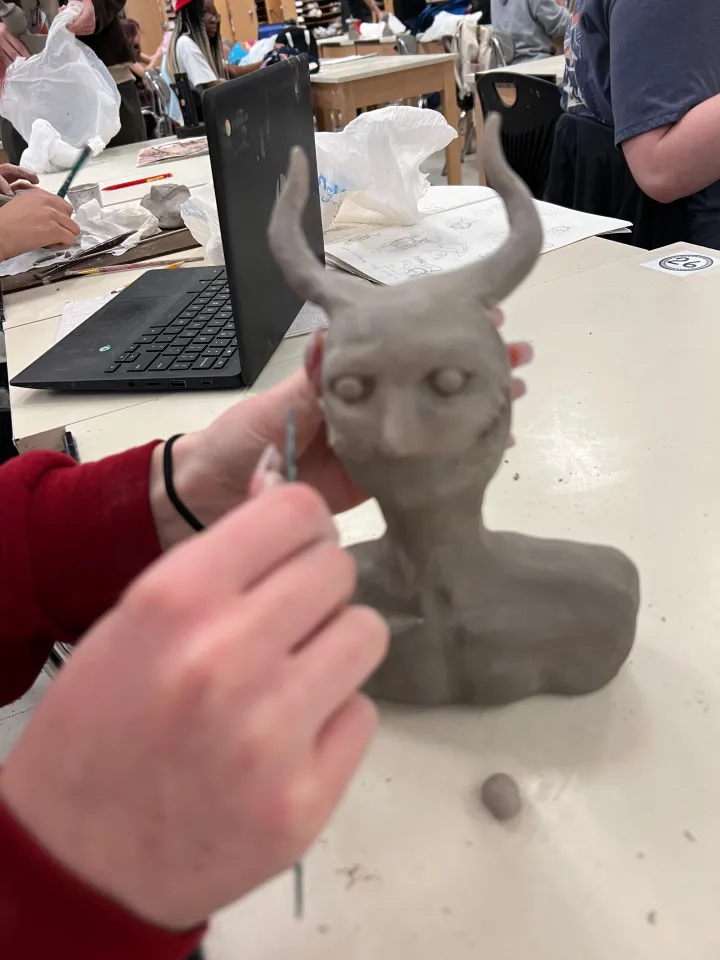
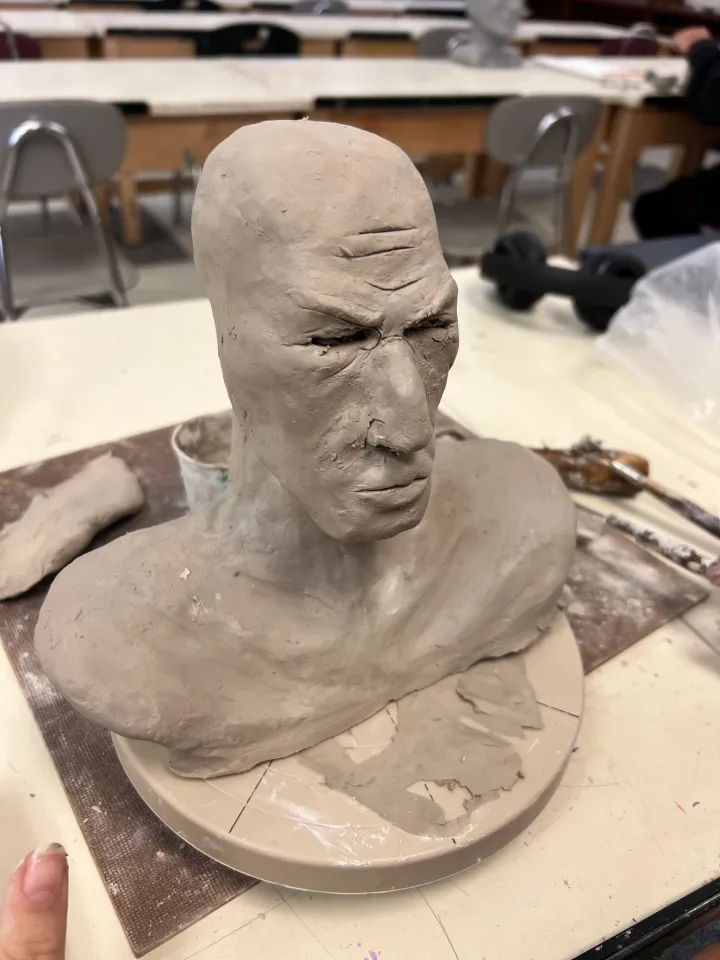
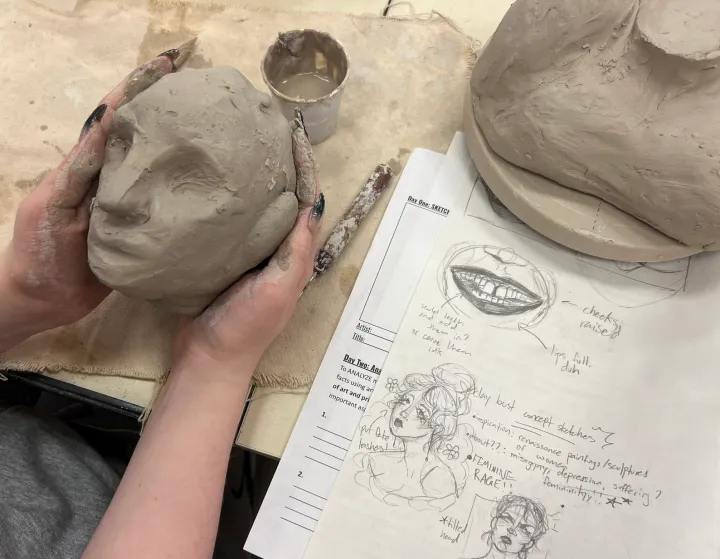
干燥时间对这件陶艺作品的成功至关重要。人们普遍误以为陶土中气泡会导致窑烧爆炸,但事实上,99.99% 的爆炸是由陶土内部残留水分所致。当窑温升高时,水分转化为蒸汽,而蒸汽在试图逸出时便会引发陶土爆裂。我对任何陶艺作品——无论尺寸多小——都坚持至少一周的干燥期;本次作业则预留了整整两周。许多学生制作体量较小的作品,但我仍不愿冒险。
另一个极为有效的技巧是启用窑炉的预热功能。我习惯在素烧过程中加入四小时预热阶段——绝非夸大其词,此法百试百灵。预热阶段将温度恒定维持在200华氏度(约93摄氏度),使水分得以充分排出,避免后续升温至沸点温度时突发问题。这一做法堪称变革性突破。
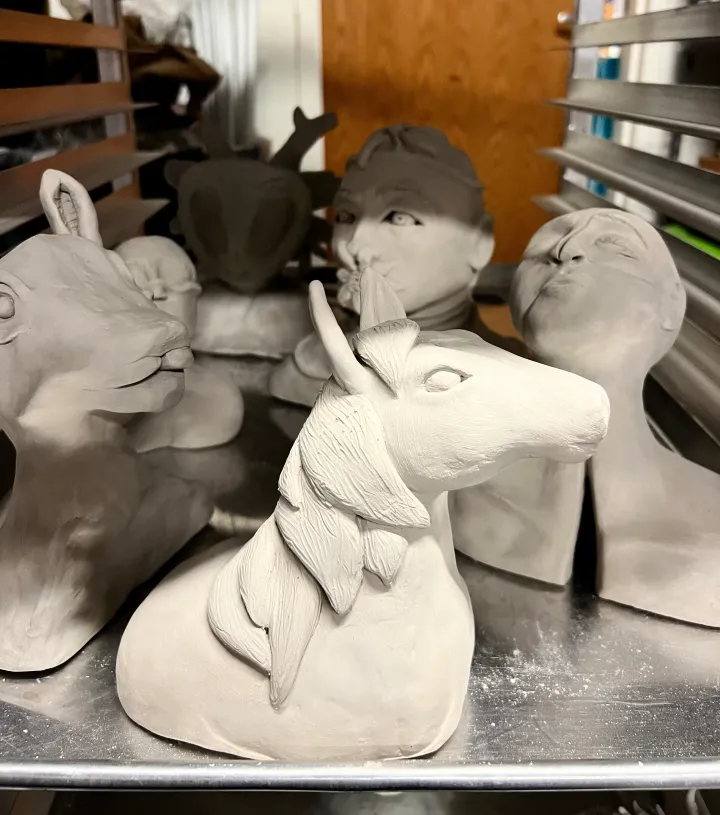
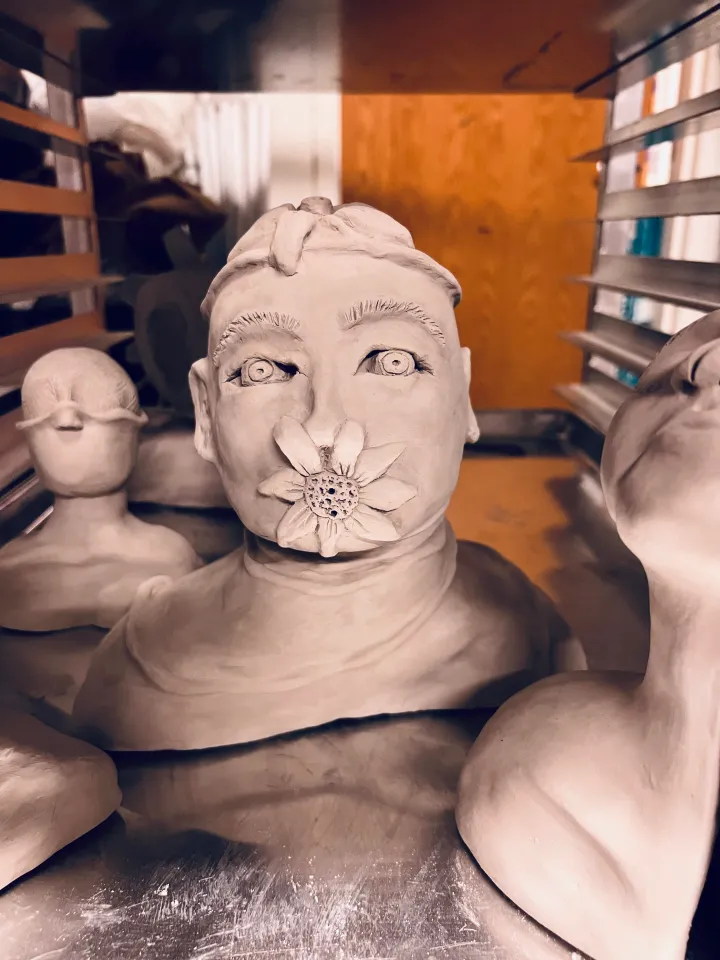
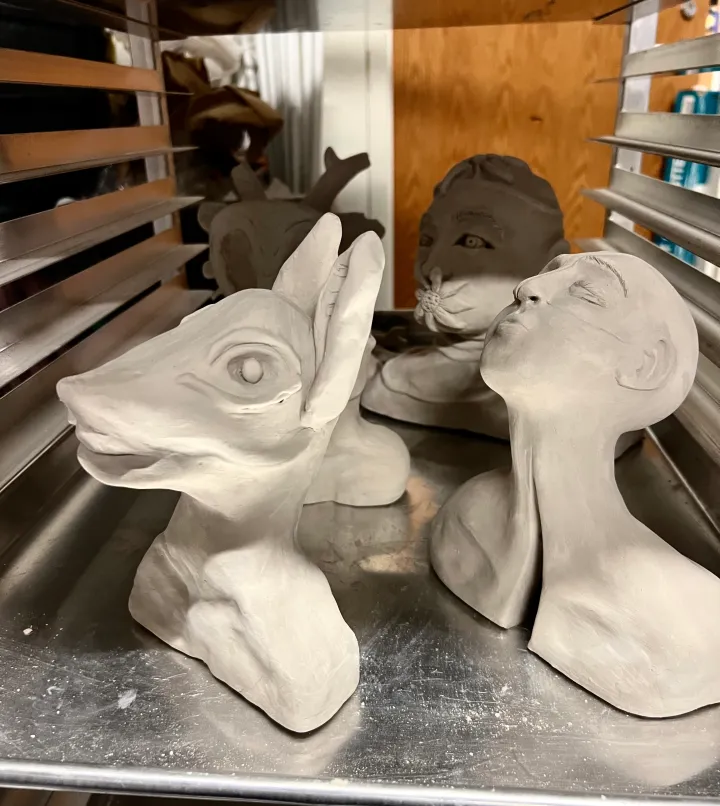
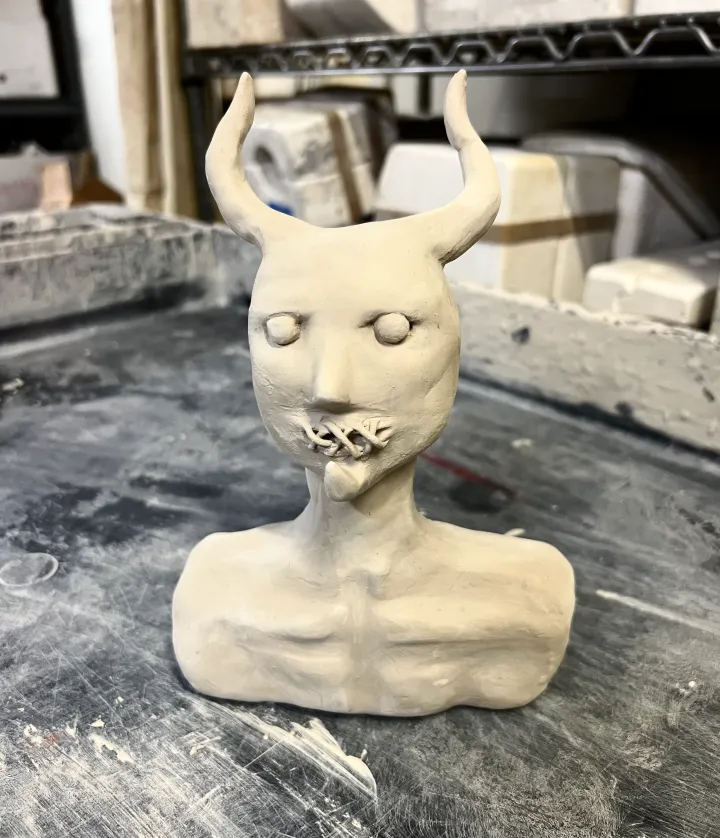
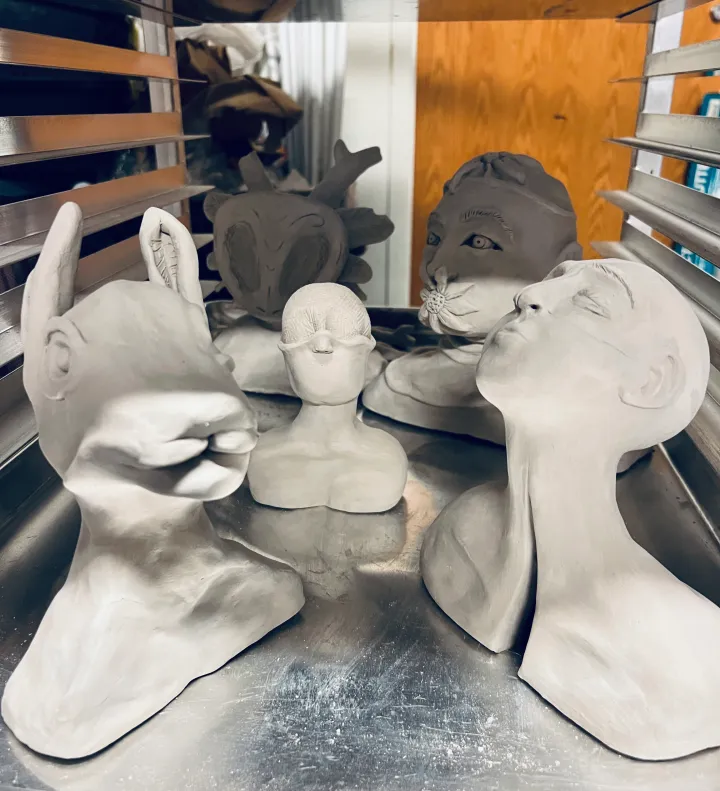
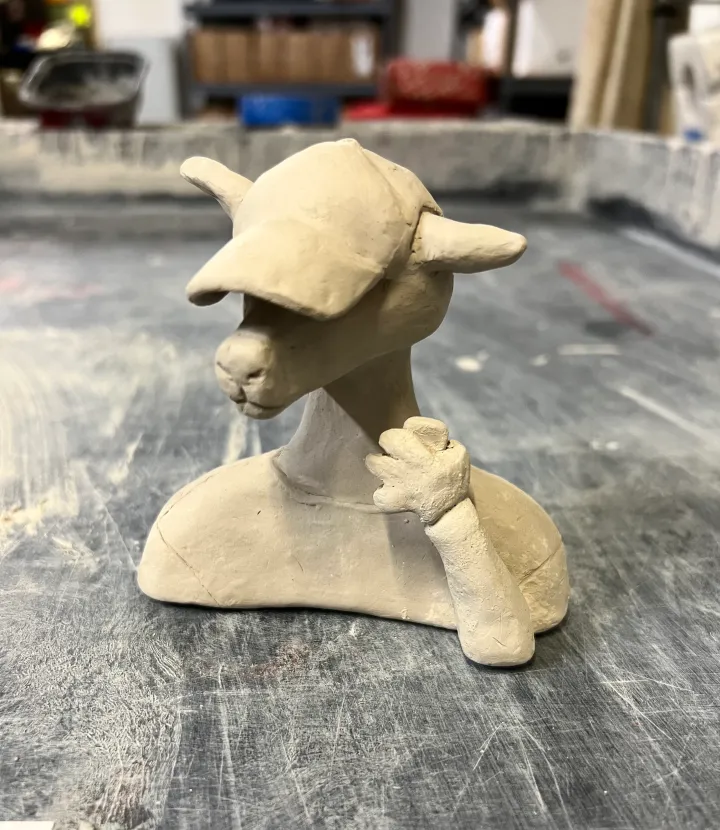
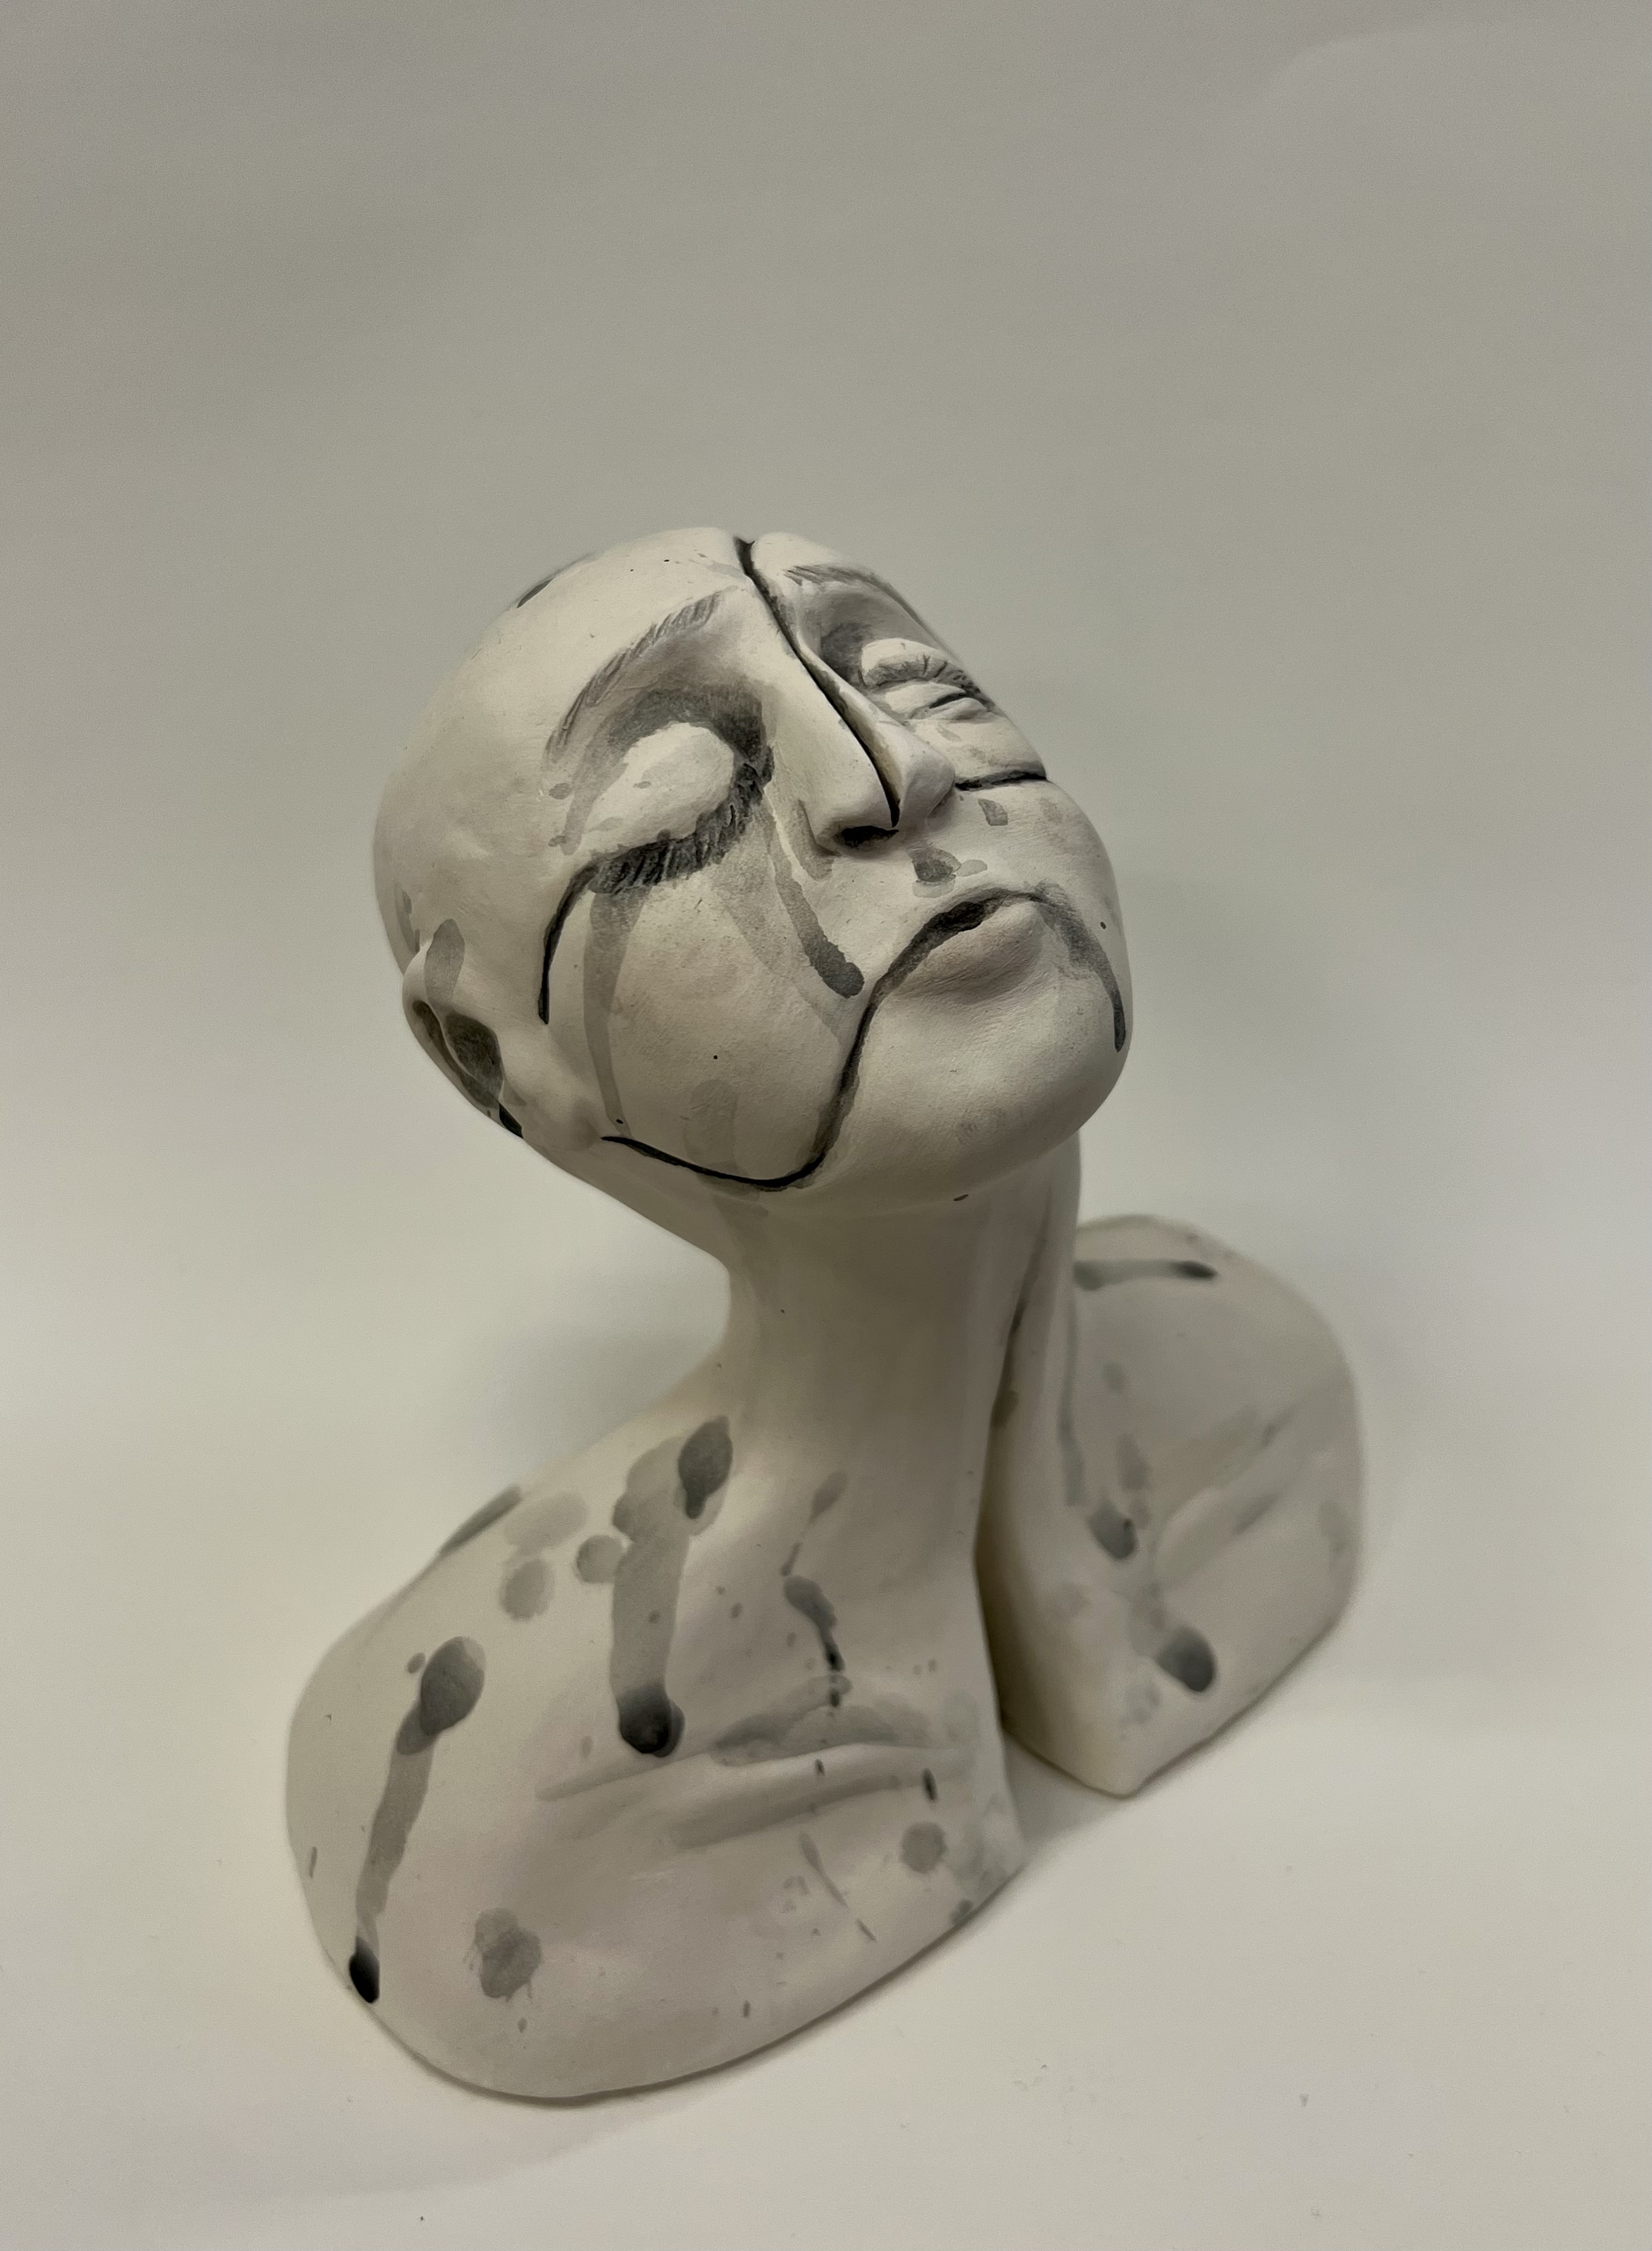
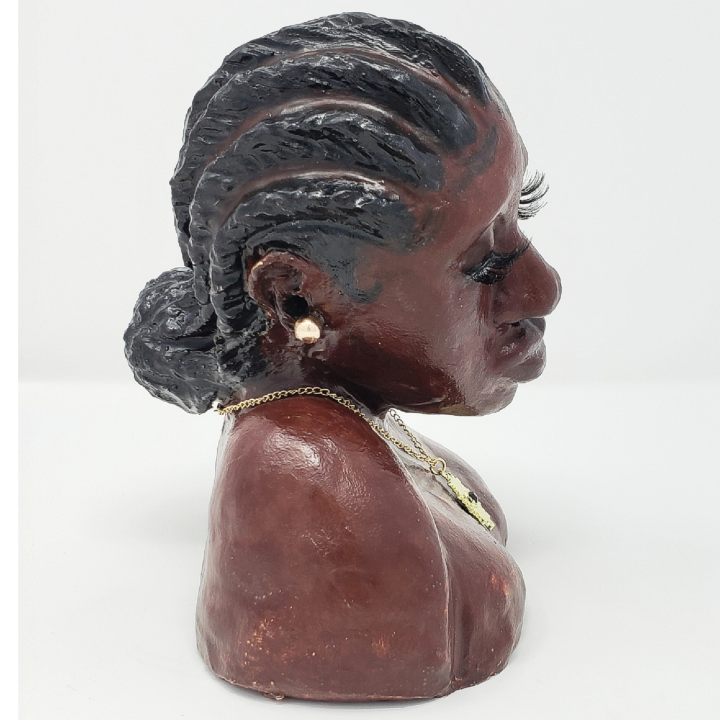
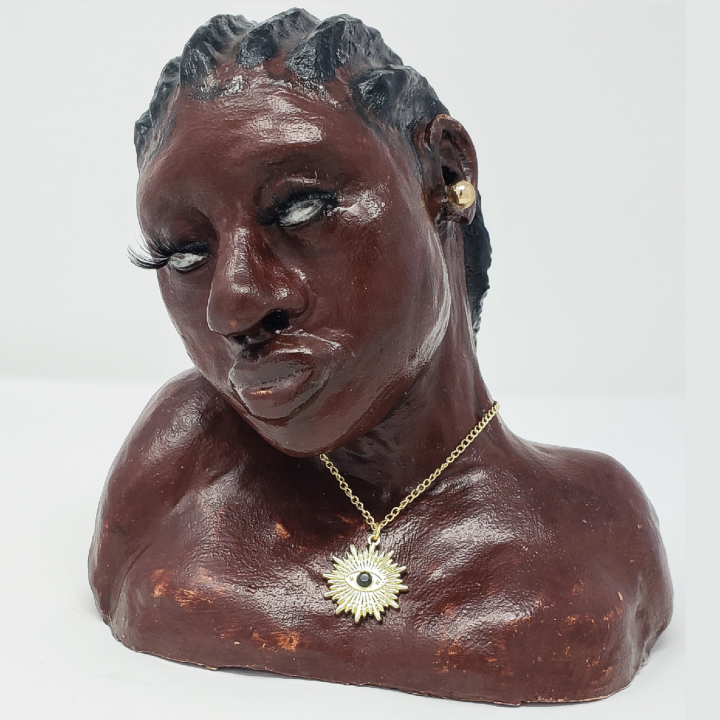
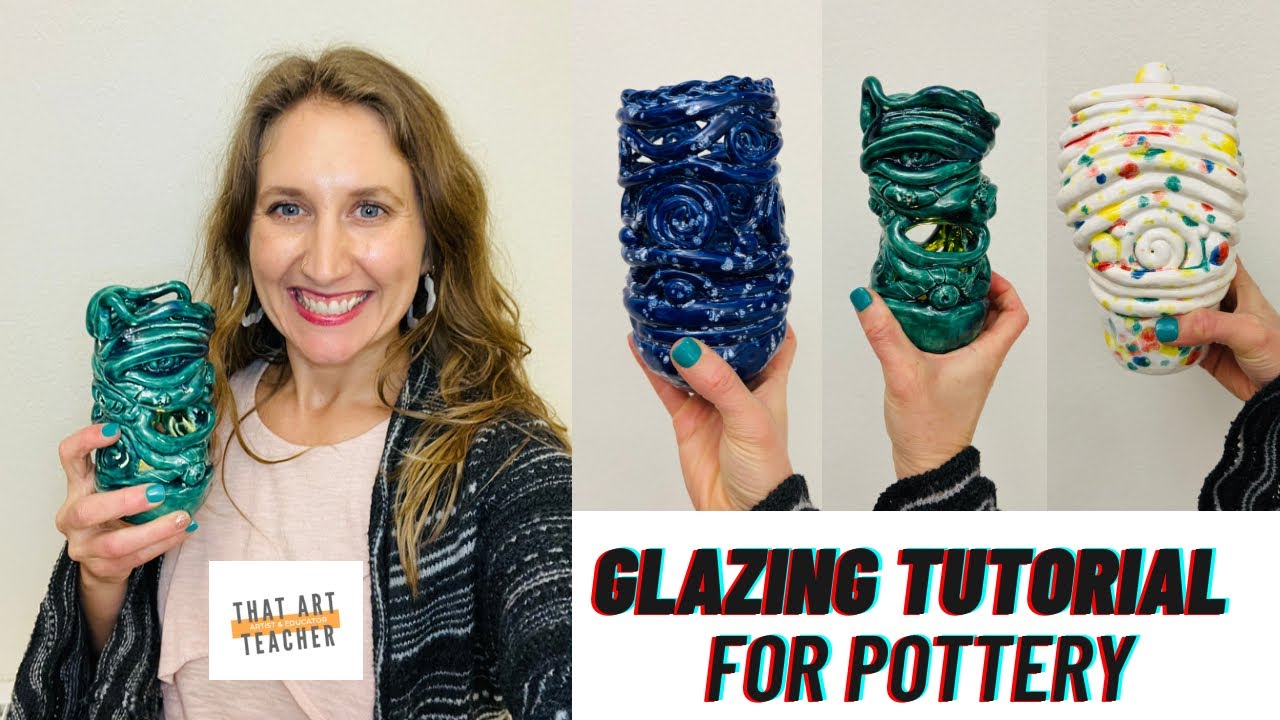
作品出窑后,学生可在表面处理上自由探索多种路径。若班级规模较小,我尤为鼓励学生尝试釉下彩。我备有几套高端釉下彩水彩颜料,效果惊艳非凡。
釉下彩与施釉

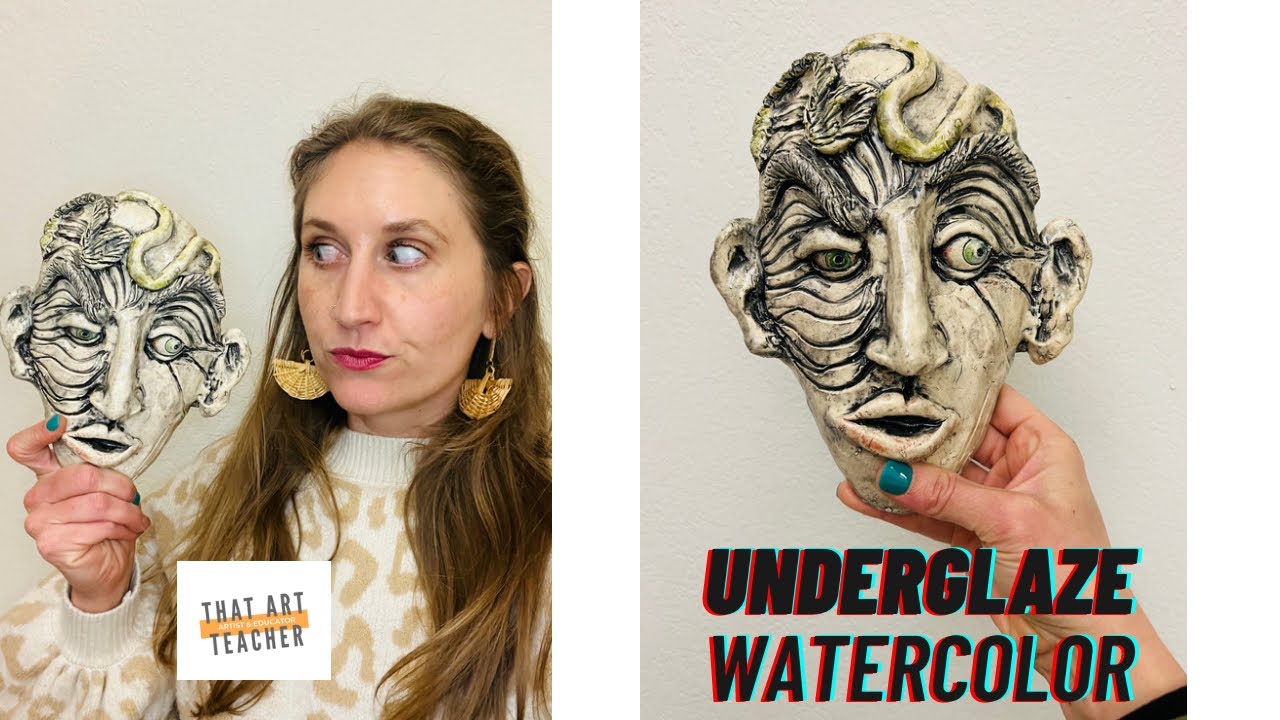
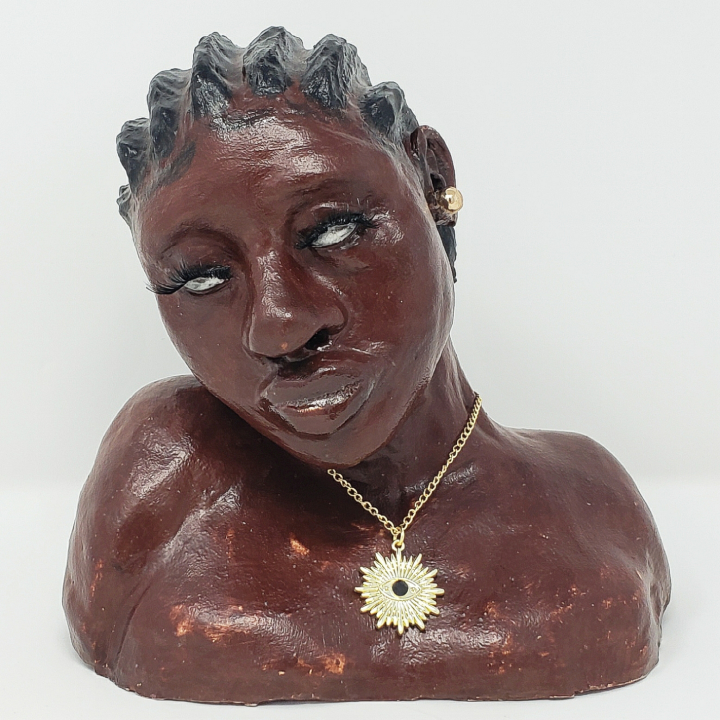
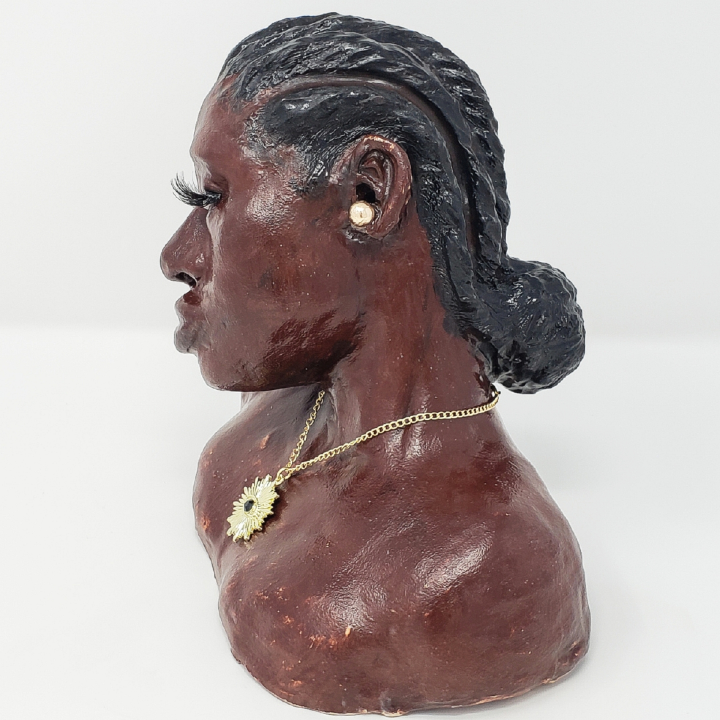
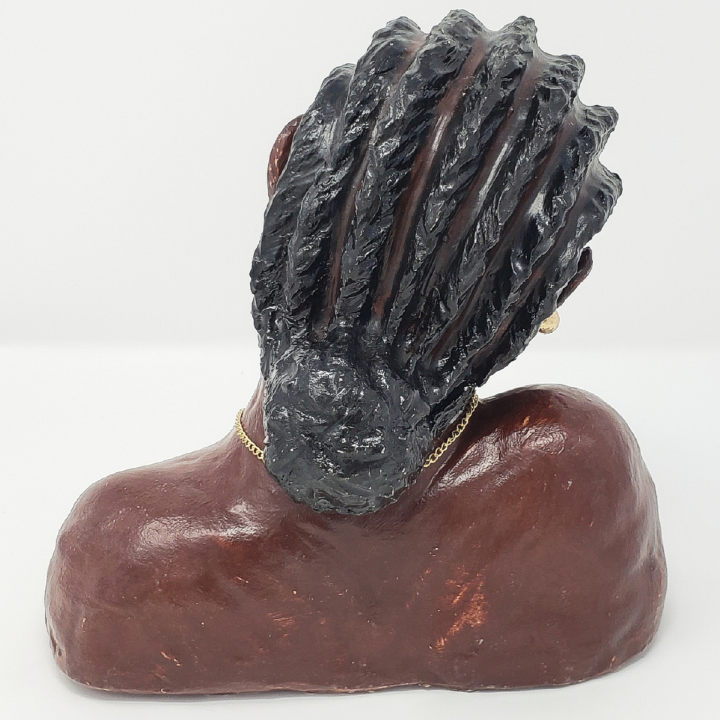
Amaco 釉下彩与水彩釉下彩
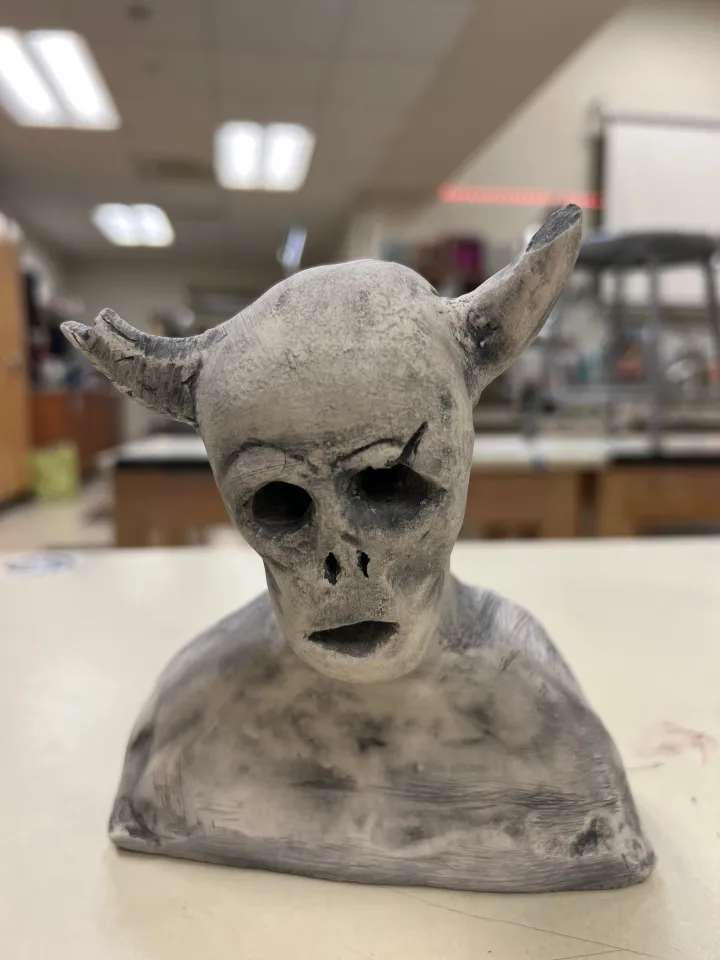
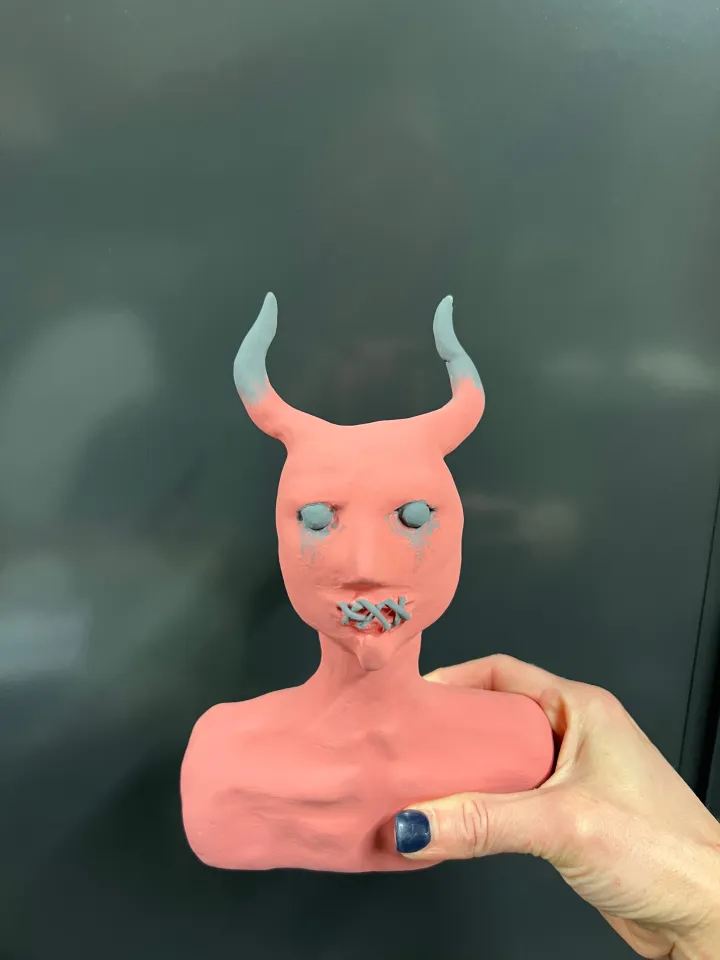
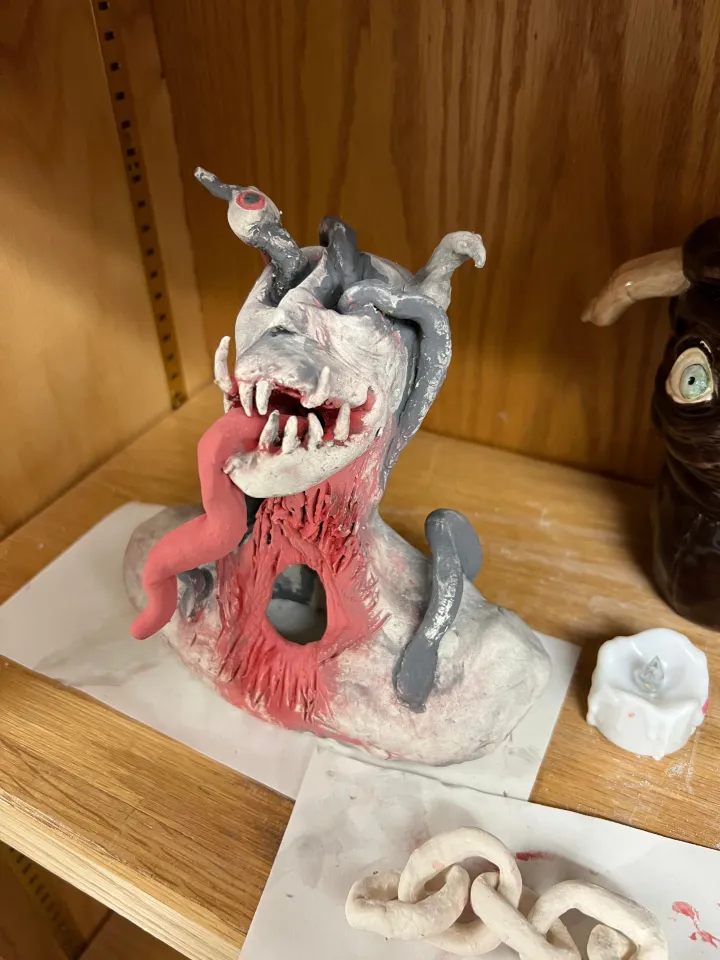
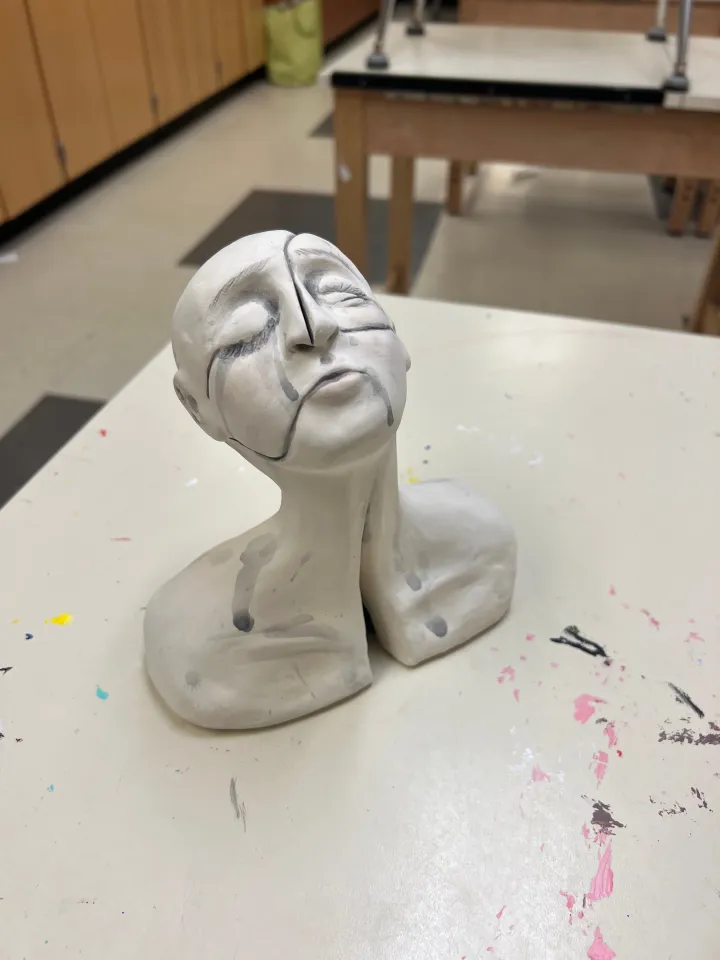
若学生追求更简洁、更非写实的效果,亮光釉或Crystallex釉亦是极佳选择。
冷处理与丙烯绘画
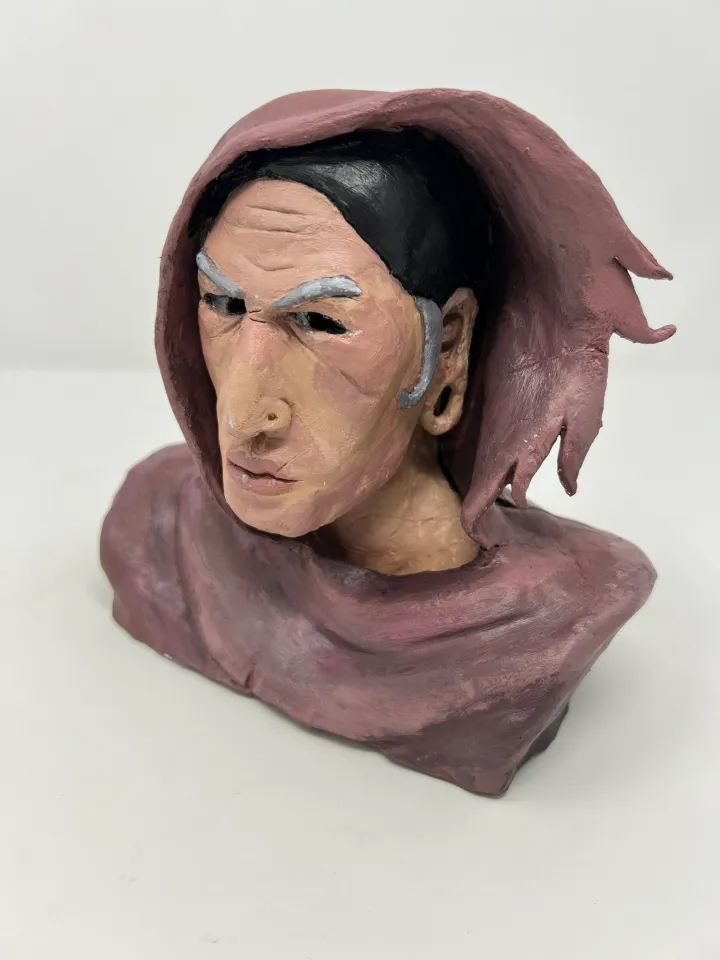
有时施釉并非最佳方案,尤其当作品在素烧阶段已出现瑕疵时。此时,谨慎地运用丙烯颜料作画,往往能成为理想替代方案——当然,这取决于学生的实际绘画能力。

此外还有诸多冷处理方式:
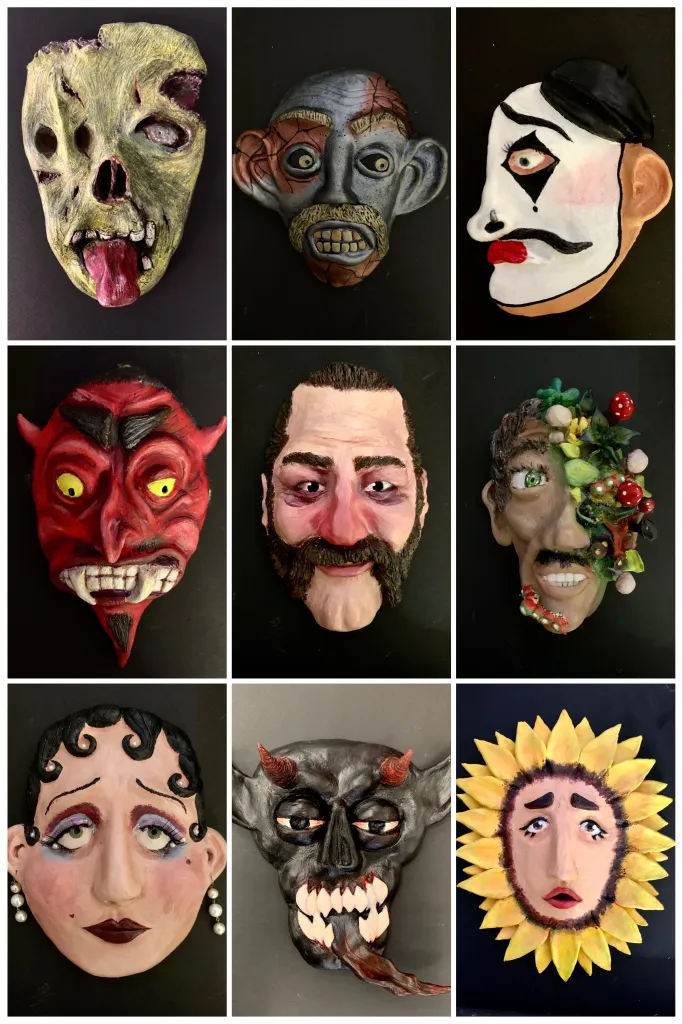
表现性陶土肖像课
我班上不少学生绘画功底扎实,能将丙烯颜料在陶土表面呈现得极为出色。然而,若技法欠妥,丙烯绘于陶土之上极易显得拙劣。因此,我始终会综合评估学生的技能水平。若您需要一种零失败率的方案,可先用黑色丙烯颜料通体涂覆雕塑,待干透后再以干刷技法叠加金属色颜料——此法每次效果皆令人惊艳,甚至可大幅提升最基础雕塑的视觉表现力。
订阅,以免错过任何一篇推送:
订阅
您最钟爱的陶艺课程是什么?非常期待您的分享!
提交表单。
Clay Bust Art Lesson
Original: https://thatartteacher.com/2023/03/03/clay-bust-art-lesson/
Date: 2023-03-03
Author: Sierra Machado
Categories: long form lesson plan
Tags: advanced ceramics lesson, advanced clay lesson, art education, ceramics, clay bust, Clay bust art lesson, clay lesson plan, clay tutorial, featured, figurative clay lesson, high school art, high school art lessons, high school clay lesson, how to make a clay bust, how to sculpt facial features on clay, how to sculpt the human form, mini clay bust sculpture, subtractive clay bust, subtractive clay bust technique, that art teacher
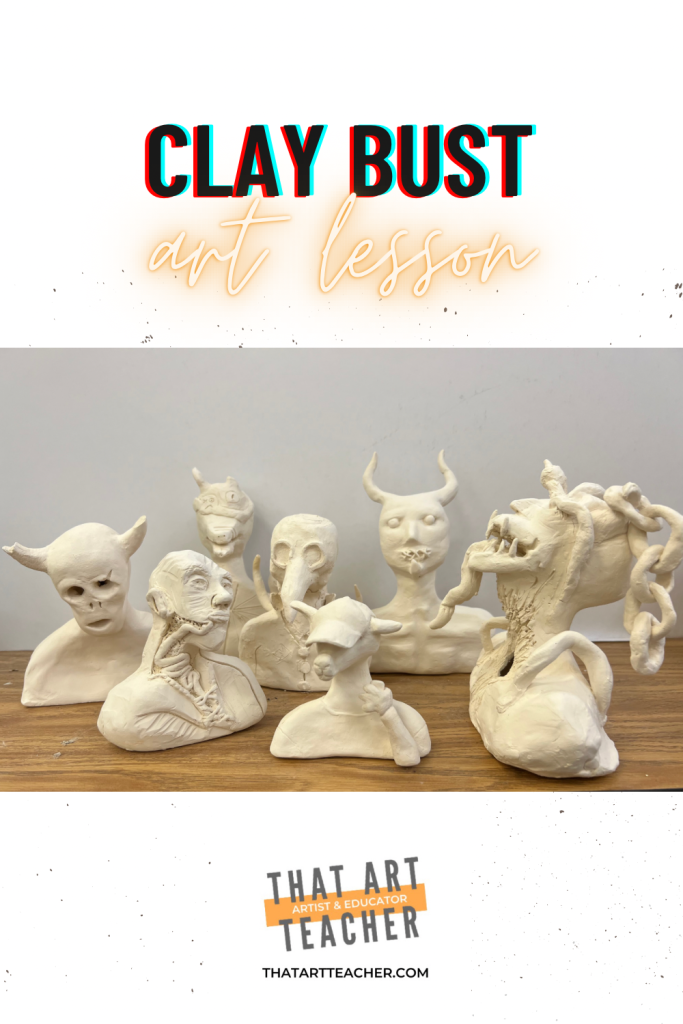
This clay bust art lesson is a fantastic way for students to explore figurative art, personal expression and a variety of handbuilding techniques.
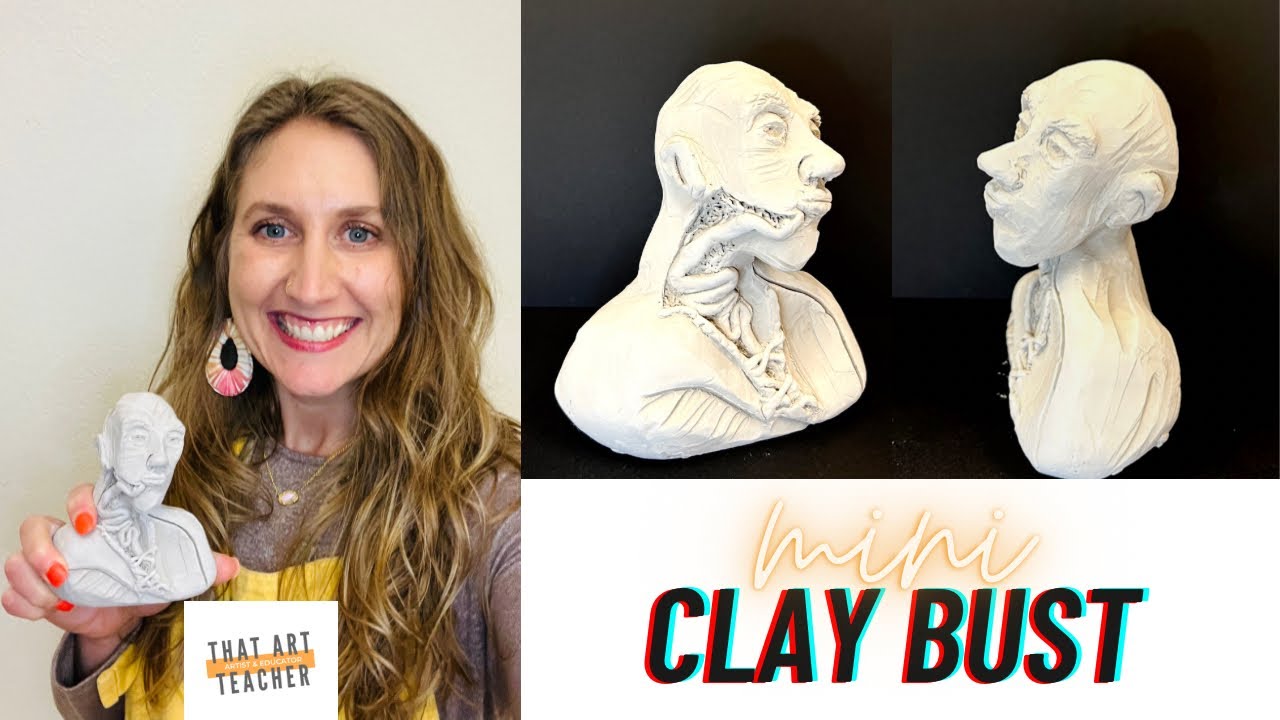
Do you have a short attention span like me? This quick video will show you all the steps.
This video tutorial is classroom ready and will show you and your students every step of this clay bust art lesson. It’s great for review, showing steps in advance or students to use independently.
We started with sketching and brainstorming. Class always starts with art history warm-ups (I call it bellwork because #itiswhatitis) and students had already started looking at clay busts.
If you are interested in my daily art history warm-ups, here is a detailed blog post:
Art History Warm-Ups
I did not give students a theme this time, but I have before. I have had one group of students create self portraits, which they were more hesitant about than I would have guessed. Another group of advanced students researched a human rights issue and created busts exploring that theme. This was my senior International Baccalaureate students and there was a large writing portion that went along with it.
More recently, I taught sculptural busts to my Sculpture II class. This particular group has a mixed bag of ability levels and motivation and I experimented with being more open ended with their prompt. I relied on teaching the correct hand building techniques and encouraged their own personal creative exploration. As with any class setting, some students soared and others had trouble leaving the ground.
After sketching and looking at a variety of examples, we began by creating two basic forms. I have taught this lesson two different ways. The first few times I taught it, we worked with slabs and coils to construct our clay forms. This time around we used a subtractive technique. I highly prefer the subtractive method and the student success rate was much higher. Of course there are always issues with dry time, small pieces and things breaking; but overall students had much more confidence with this technique.
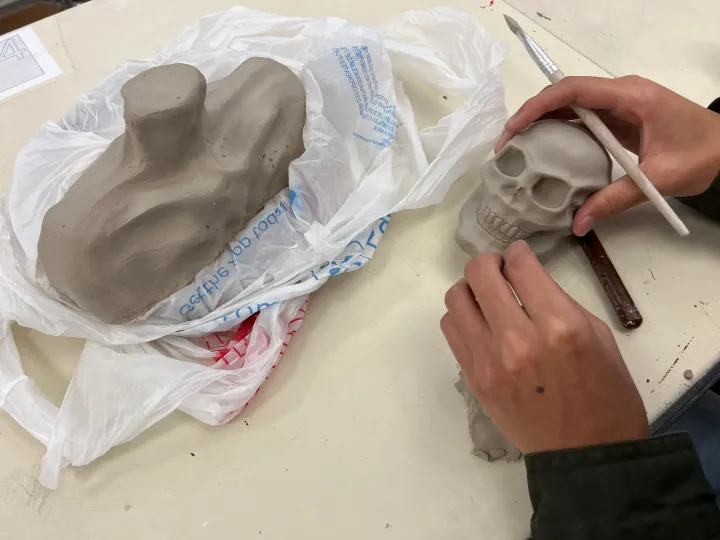
Students created their shoulder/torso form first by using a large block of solid clay. Students focusing on creating the overall size and shape and the block of clay made it very user friendly. They almost seemed to make themselves! This was wrapped up in a separate bag and stored to slowly dry a little before we carved it out.
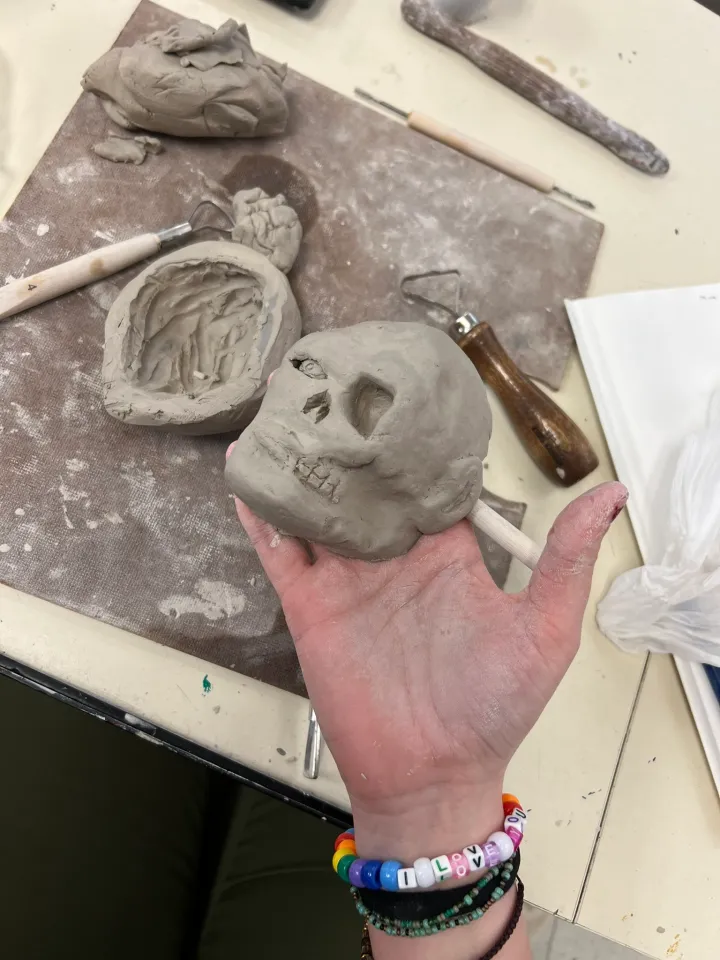
The next class period, we got a second hunk of clay and created the neck and head. The neck can also be added as a third piece or as part of the torso. It depends on personal preference. Students were a little more stressed since a head is more challenging to form. I randomly have plastic human heads lying around (IYKYK) and we used that as references along with images pulled up on their Chromebooks.
Some students were not using human forms, and I encouraged them to have as many angles pulled up as possible of the skeleton of their animal/robot/whatever. We rotated the clay to view it from all angles and played with placement. Many students were committed to realism and many were not. This assignment can seem intensely challenging at first, but abstraction and simplification can also yield beautiful results.
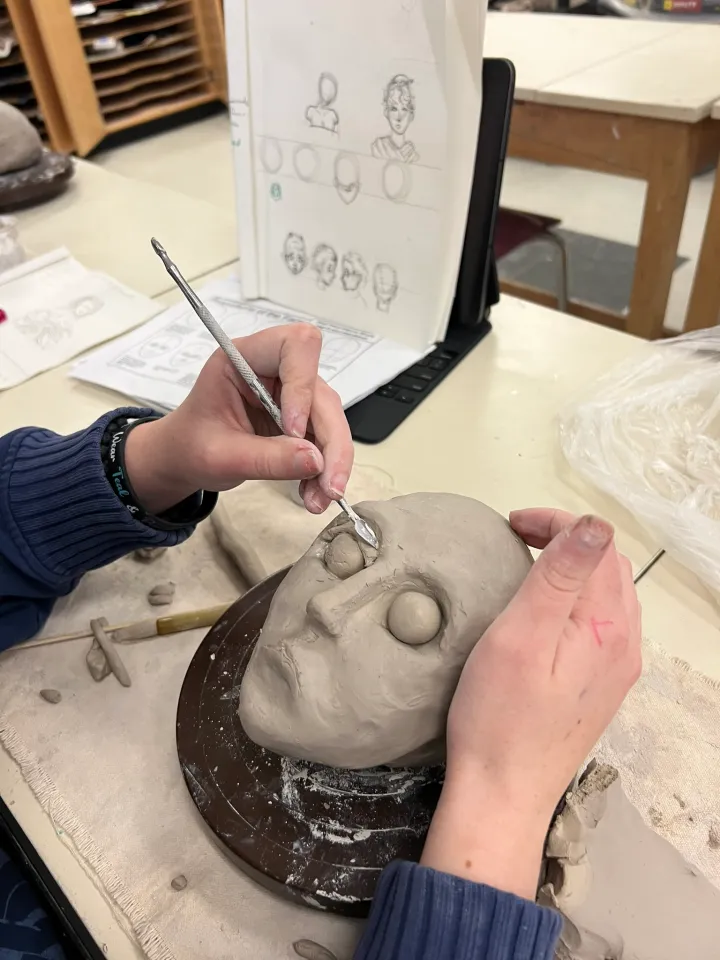
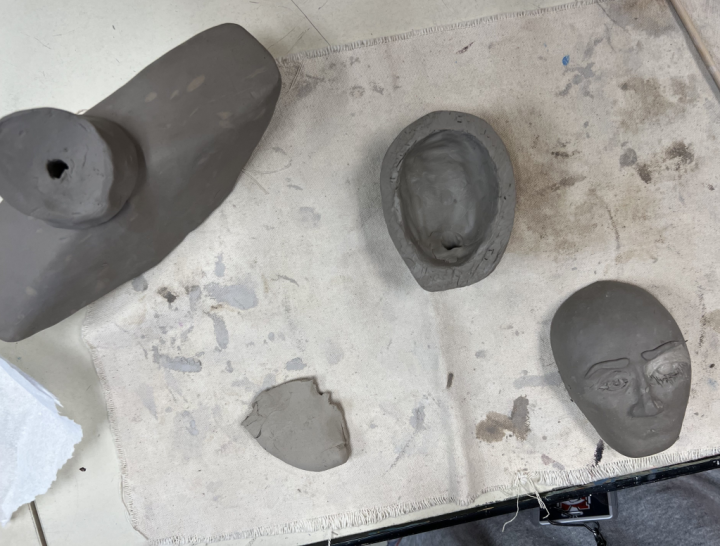
The head was also wrapped up in a separate bag and students typically worked on this in a second class period. Once clay dried a little (somewhere between workable and before leather hard) we began carving them out. This is hard to explain in writing and will vary from student to student. If the clay is too plastic, it won’t support itself once carved out. If clay is too dry it becomes fragile and problematic when adding all the fresh clay facial details. When in doubt, carve the clay to hollow it out but wait to attach the two pieces. I encouraged most students to begin adding facial features before the head was attached to the shoulders.
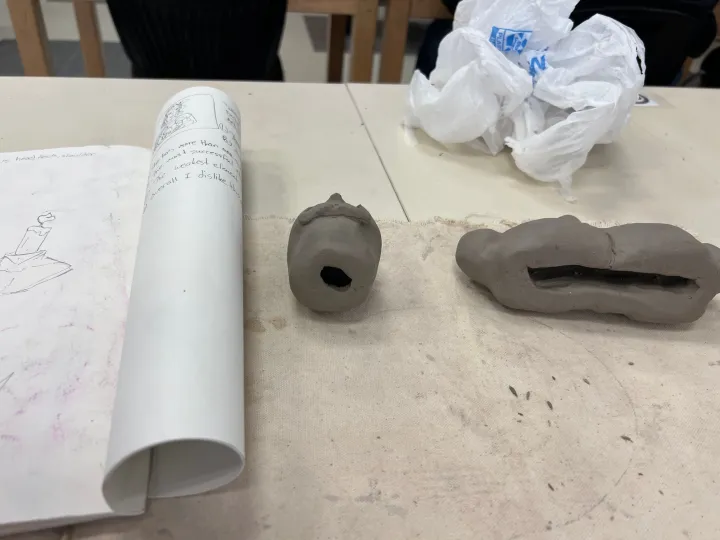
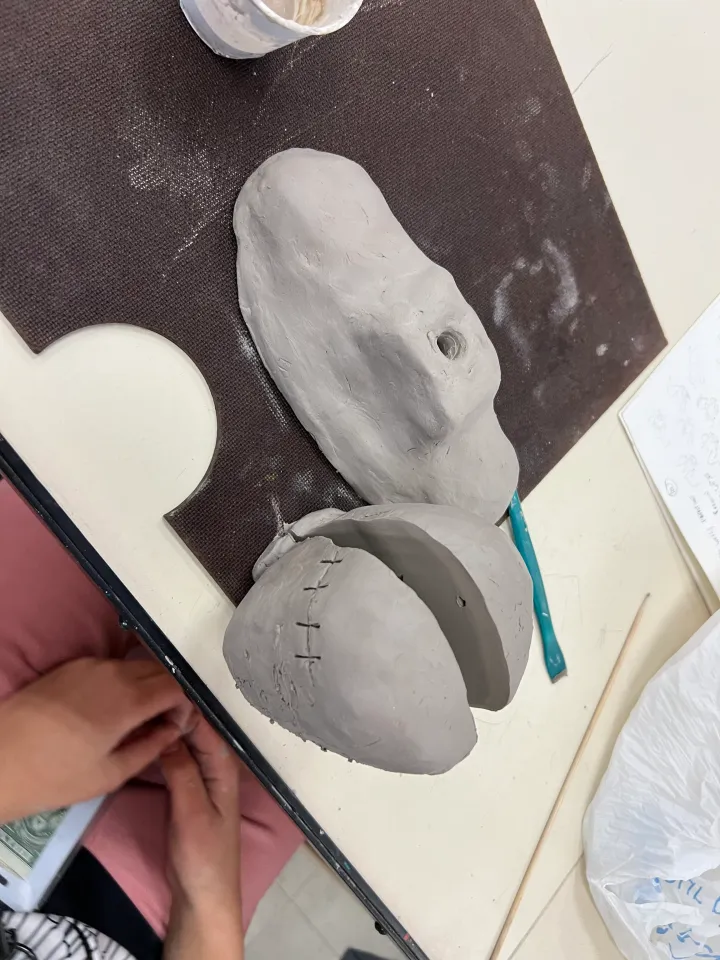
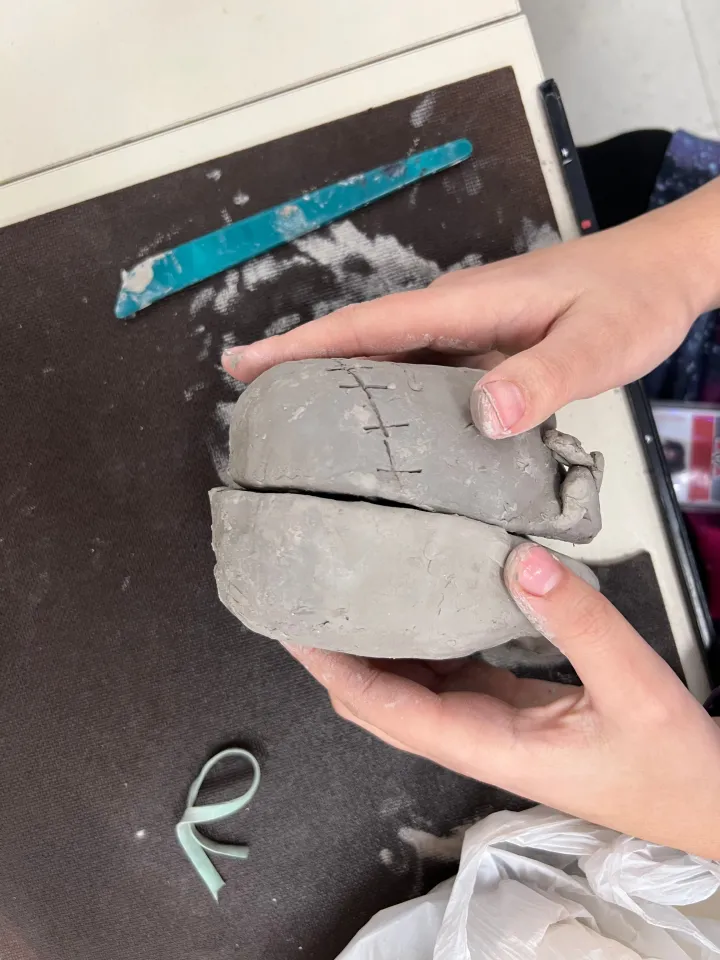
I love coming up to students with my wire tool and declaring it was time for me to cut their heads in half. There was something morbidly satisfying about the entire experience. Once each piece was cut in half, they scooped out the extra clay leaving about a .5-.75 of an inch wall. The head reminded me of scooping out the yolk of a deviled egg. I like students to leave the clay walls a little more on the thick side. Thicker clay just needs more time to dry, but thin clay can cause weak construction.
Once I checked each and every half, because I am obsessive, students scored, slipped and blended the pieces back together. There needs to be a large air hole connecting the torso, through the neck and to the head. If you do not allow air flow there may be an issue with trapped air when it’s fired in the kiln. I also discreetly poked a few air holes in the head as well as the shoulder area once it is attached back together. This is a similar concept to poking an air hole on a pinch pot rattle or any other hollow clay form.
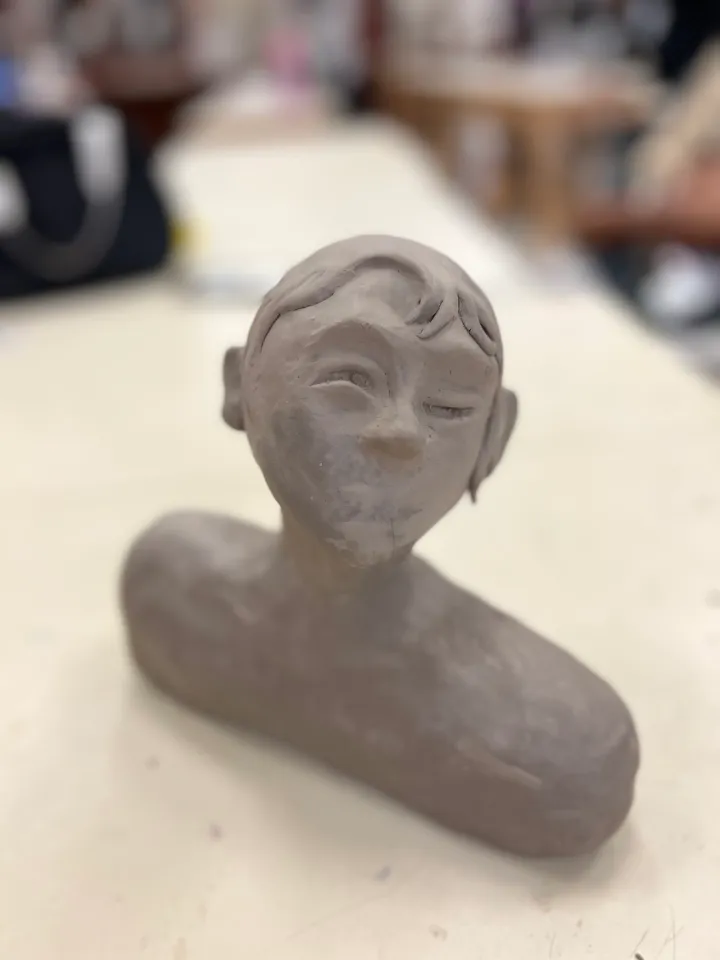
Once the major construction is underway, it is time to work on all the details, textures and creative details. This part is so much fun and my students always amaze me at how outside the box they can be.
Dry time is exceedingly important to the success of this artwork. There is a myth that air bubbles in clay cause explosions, but it is 99.99% caused by moisture being trapped in the clay body. As the temperature of the kiln rises, the moisture becomes steam and the clay will explode as the moisture tries to escape. I do a one week MINIMUM dry time on any clay piece, no matter how small. For these, I set aside two weeks. Many students worked small, but I did not want to chance it.
Another amazing trick is to use your kiln’s preheat setting. I like to add a four hour preheat to my bisque firing and I kid you not, it works 100% of the time. The preheat holds the temperature at 200 degrees and the moisture works itself out before it raises to a boiling pot temperature. Game changer.
Once the pieces are out of the kiln, there are so many directions students can take for surface treatment. If it is a small class, I love for students to experiment with underglazes. I have some expensive underglaze watercolor sets that yield amazing results.
Underglaze and Glazing
Amaco Underglazes and Watercolor Underglazes
Gloss or Crystallex glazes are also a great choice, if the students want more simplified and less realistic results.
Cold Finish and Acrylic Painting
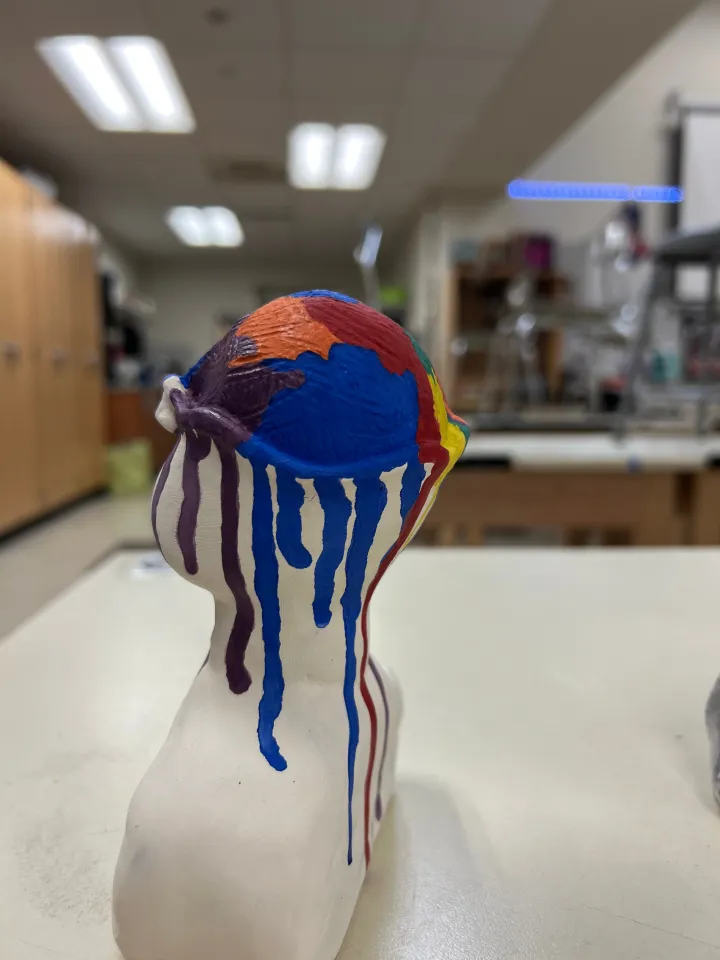
Sometimes glazing isn’t the best option, especially if an artwork has issues during the bisque firing. A careful application of acrylic paint can sometimes be a great option, depending on the skill level of your students.
There are also many cold finish options:
Expressive Clay Portrait Lesson
Many of my students are talented painters and make acrylic paint look amazing on clay. However, acrylic paint on clay can easily look awful. So I always take in account the skill level of the student. If you are looking for a fail proof option, paint the sculpture with black acrylic paint and then dry brush metallic paint after it dries. It looks amazing every time and can elevate even the most basic sculptures.
Subscribe so you never miss a post:
Subscribe
What are your favorite clay lessons? I’d love to hear from you!
Submit a form.