奥阿哈卡动物雕塑——石膏绷带法或纸浆塑形法
原文链接:https://createartwithme.com/oaxacan-animal-sculptures-plaster-wrap-paper-mache/
日期: 2018-04-02
作者: 米歇尔·伊斯
分类: 六年级、奥阿哈卡动物阿莱布里赫雕塑、美术课、文化主题美术课、精选内容、民间美术课、高中美术、初中美术、节奏与图案课、雕塑课
标签: 阿莱布里赫、阿莱布里赫历史、阿莱布里赫教案、内骨架、制作内骨架、奥阿哈卡、奥阿哈卡动物雕塑、奥阿哈卡动物雕塑教案、奥阿哈卡木雕、石膏奥阿哈卡动物雕塑、石膏绷带法、雕塑内骨架、金属丝内骨架
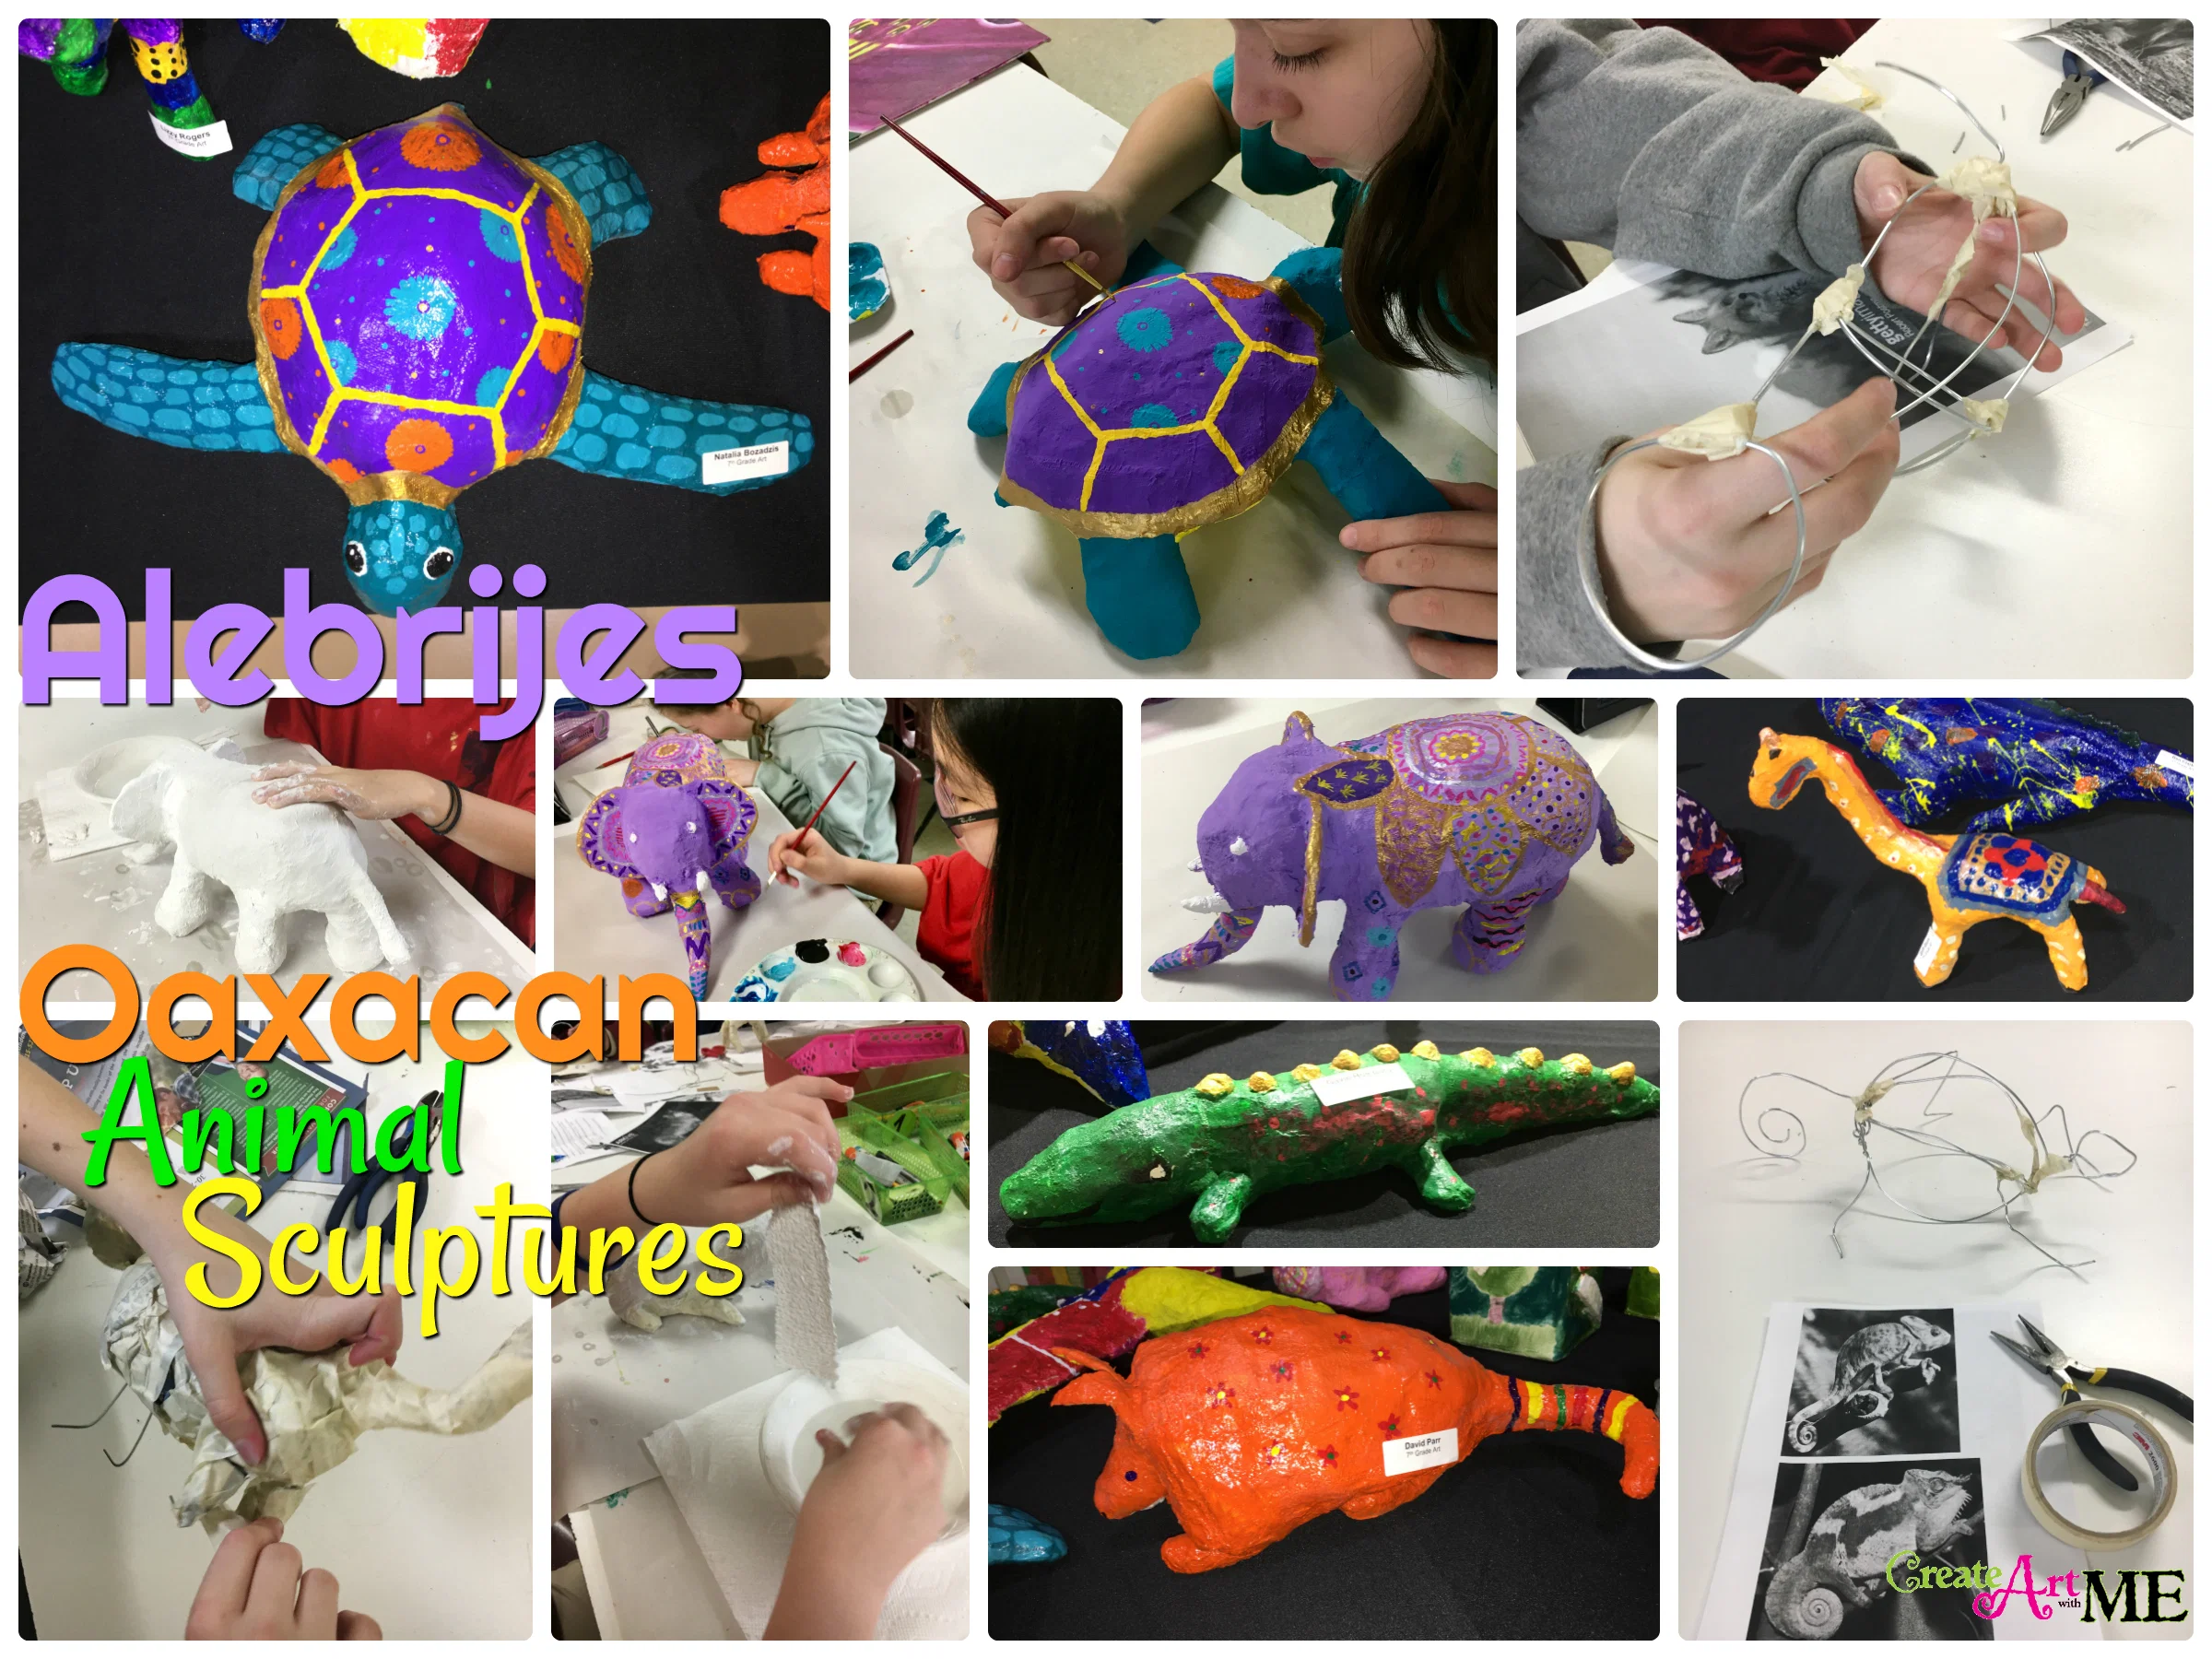
我所教的七年级美术课刚刚完成了这些奥阿哈卡动物雕塑。以下是本项目的实施过程……
教学目标:
• 提升学生对南美民间艺术形式“阿莱布里赫”的认知;
• 通过观察墨西哥瓦哈卡州地区的雕塑,增进对其他文化的理解与欣赏;
• 理解传统中男性与女性在阿莱布里赫创作中的不同角色;
• 运用图案实现视觉节奏;
• 掌握使用石膏绷带进行三维造型的正确技法;
• 掌握利用内骨架构建三维形态的恰当方法。
所需材料:
奥阿哈卡动物木雕范例(阿莱布里赫雕塑)
面向高年级学生: 镀锌金属丝、旧报纸或电话簿纸张、或锡箔纸、遮蔽胶带、石膏绷带(班级套装)或纸浆塑形配方、丙烯颜料(工艺颜料)或蛋彩颜料(Tempera Paint)
面向低年级学生: 模型魔力橡皮泥(Model Magic)、绘画用蛋彩颜料或丙烯颜料、画笔、记号笔


附注:文中含联盟推广链接——仅推荐本人实际使用且喜爱的产品!
教学内容:
- 瓦哈卡(Oaxaca),发音为 wa-HAH-ka,是墨西哥面积最大的州之一,其民间艺术与传统亦最为丰富。奥阿哈卡彩绘木雕已成为备受珍视的民间美术形式。
- 这些木雕由居住在墨西哥南部瓦哈卡山谷地区的萨波特克印第安人创作。
- 萨波特克印第安人的木雕技艺与艺术造诣举世闻名,历经数百代传承锤炼。每件木雕均取材于柯帕尔树(或柯皮约树) 的木材,手工雕刻而成;再经手工打磨,并以明快鲜活的图案手绘上色。传统上,男性负责雕刻造型(采用减法式雕塑技法),而女性则用极细的画笔,有时甚至借助松针等天然材料进行彩绘。
- 这类立体雕刻作品被称为阿莱布里赫(Alebrijes)。
- 据维基百科:“阿莱布里赫”(西班牙语发音:[aleˈβɾixes])指色彩浓烈、造型奇幻的墨西哥民间美术雕塑。最早的阿莱布里赫及其名称皆源于佩德罗·利纳雷斯(Pedro Linares)。20世纪30年代,他在病中梦见这些生物,康复后便开始用硬纸板与纸浆塑形再现梦中所见。
- 利纳雷斯原籍瓦哈卡州圣安东尼奥阿拉索拉(San Antonio Arrazola),返乡探亲时曾向当地展示其设计。而瓦哈卡山谷地区本就拥有悠久的动物及其他题材木雕传统;利纳雷斯的设计很快被融入当地以柯帕尔木为原料的雕刻实践中。这一融合创新由阿拉索拉本地人曼努埃尔·希门尼斯(Manuel Jiménez)率先推动。
- 奥阿哈卡彩绘木雕由居住在瓦哈卡山谷的萨波特克印第安人创作。
- 萨波特克印第安人的木雕技艺与艺术造诣举世闻名,历经数百代传承锤炼。
- 每件木雕均取材于柯帕尔树(或柯皮约树) 的木材,手工雕刻而成。
- 柯帕尔木是一种质地柔软、色泽均匀的木材,易于雕刻。
- “柯皮约”(copalillo)是生长于瓦哈卡温暖地区的树种。
- 传统上,男性负责雕刻造型(采用减法式雕塑技法)。
- 艺术家先用砍刀进行初步切割,确定动物的基本尺寸与轮廓,再换用小刀与凿子等工具精细修整形态。
- 女性负责彩绘,使用极细的画笔,有时还借助松针等天然材料。
- 每件作品均经手工打磨,并以明快鲜活的纹样(图案) 手绘上色。
- 视觉节奏 通过重复运用美术元素而形成。
- 内骨架 是雕塑的“骨架”,通常以金属丝构成框架,再覆以报纸、铝箔或黏土以塑造体积感。
 参考资料: http://www.oaxacafinecarvings.com/index.html
 图书:米格尔与神奇的阿莱布里赫(迪士尼/皮克斯《寻梦环游记》)平装本
项目:瓦哈卡动物雕塑——阿莱布里赫斯
作业要求: 创作一个充满奇趣的生物造型,灵感源自墨西哥瓦哈卡州木雕艺术。你的“生物”需以金属丝与锡箔纸(或废报纸加胶带)制作内部骨架(支撑结构),再用石膏绷带包裹塑形,最后涂上一层丙烯底色,并用颜料与记号笔绘制最终图案(纹样)。
尺寸要求: 生物主体高度或宽度不得超过14英寸(若添加翅膀或角等延伸结构,可略大);亦可更小,但最小不得低于8英寸。
制作步骤:
草图设计
- 研习瓦哈卡动物雕塑范例。观察其中所表现的不同动物种类、身体形态,以及所用色彩与图案。
- 针对你选定的动物开展资料调研,搜集该动物正面与侧面两个不同视角的参考图片。
- 在速写本中绘制你构思的动物或生物的正面与侧面草图(共2幅)。思考将来上色时拟采用的色彩与图案,并在速写本中多画几款备选图案方案。
- 确定最终造型后,思考并列出制作所需的各种部件。
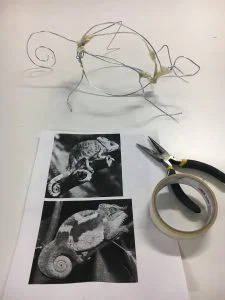
制作骨架(支撑结构)
- 首先搭建生物的骨架。
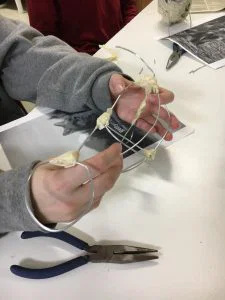
- 制作骨架:用金属丝与废报纸塑造出身体、四肢与头部的基本形态。先用金属丝搭出基本框架,再以废报纸、电话簿纸张或铝箔围绕金属丝塑出体积感。用美纹纸胶带固定各连接处,或直接用铝箔包裹接合部位,防止关节松动。
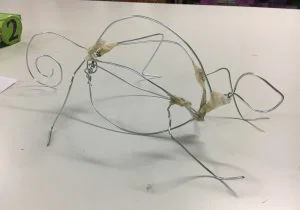
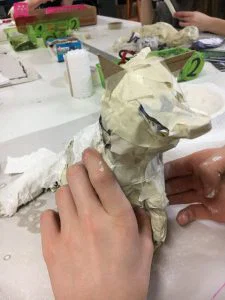
- 用美纹纸胶带将整个雕塑表面缠绕包裹一遍。
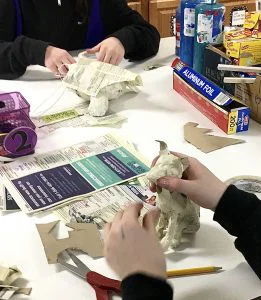
- 待基本形态完成后,用灰板纸或硬纸板添加鼻子、耳朵、尖刺等细节部件。眼睛可用揉紧的小纸团或其他小型“现成物”制作。如需加入奇幻元素(例如角、背部或尾巴上的尖刺等),请在此阶段完成。
上石膏层
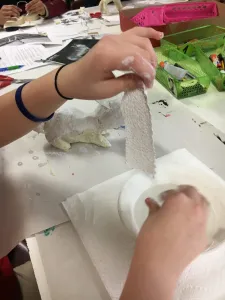
- 将石膏绷带剪成2–3英寸长的条状。浸入温水中,再用手指捋平。用两层石膏绷带均匀包裹雕塑表面。
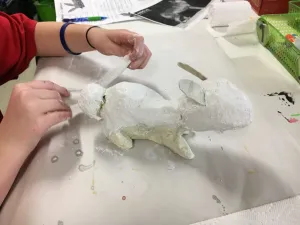
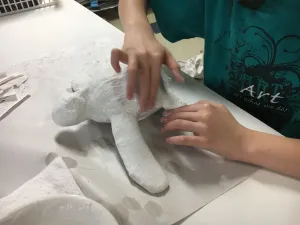
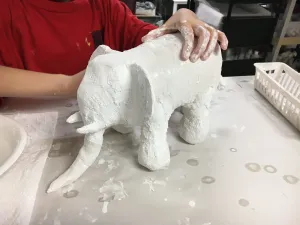
- 石膏层必须固化并彻底干燥,时间不少于24小时。
绘制雕塑
- 用丙烯颜料为你的动物或生物上色。(可使用蛋彩颜料,但需额外涂覆一层透明保护漆)
-
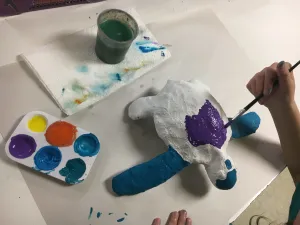
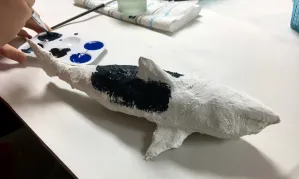
选定一种主色,为整只动物涂上底色。先涂底色,全部使用丙烯颜料。为加快干燥以便尽快绘制图案,可用冷风档吹风机辅助干燥。(务必设为冷风档——热风会与颜料中的塑料成分发生反应,反而延缓干燥,甚至导致颜料分层或起泡。)
-
待第一遍颜料完全干透后,即可开始添加鲜艳夺目的图案。尽情发挥想象力,设计独一无二的纹样。细小的黑色线条细节可用记号笔绘制。
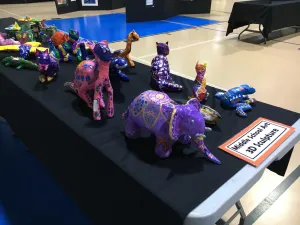
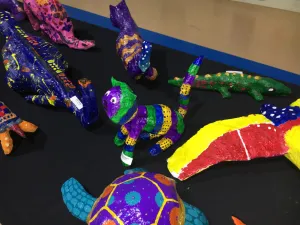
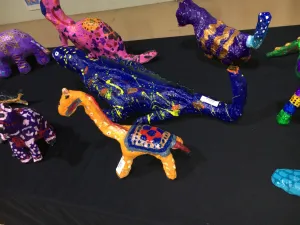
学生作品
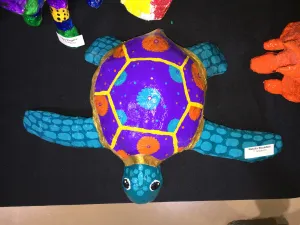
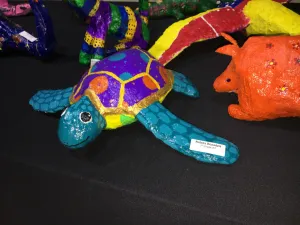
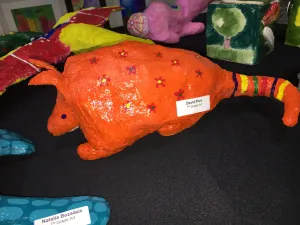
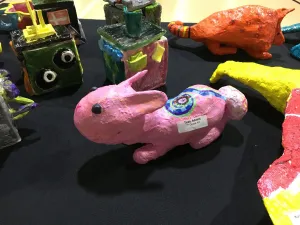
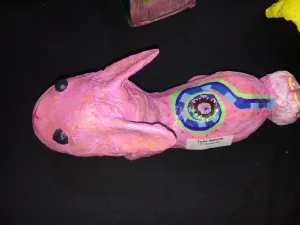
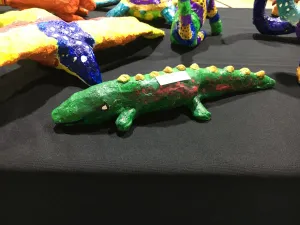
*亚马逊联盟链接——所有推荐产品均为本人实际使用且真心喜爱!
若您选用本博客中任何内容(图像、照片或文字),请务必注明原始出处并回链至Create Art with ME!
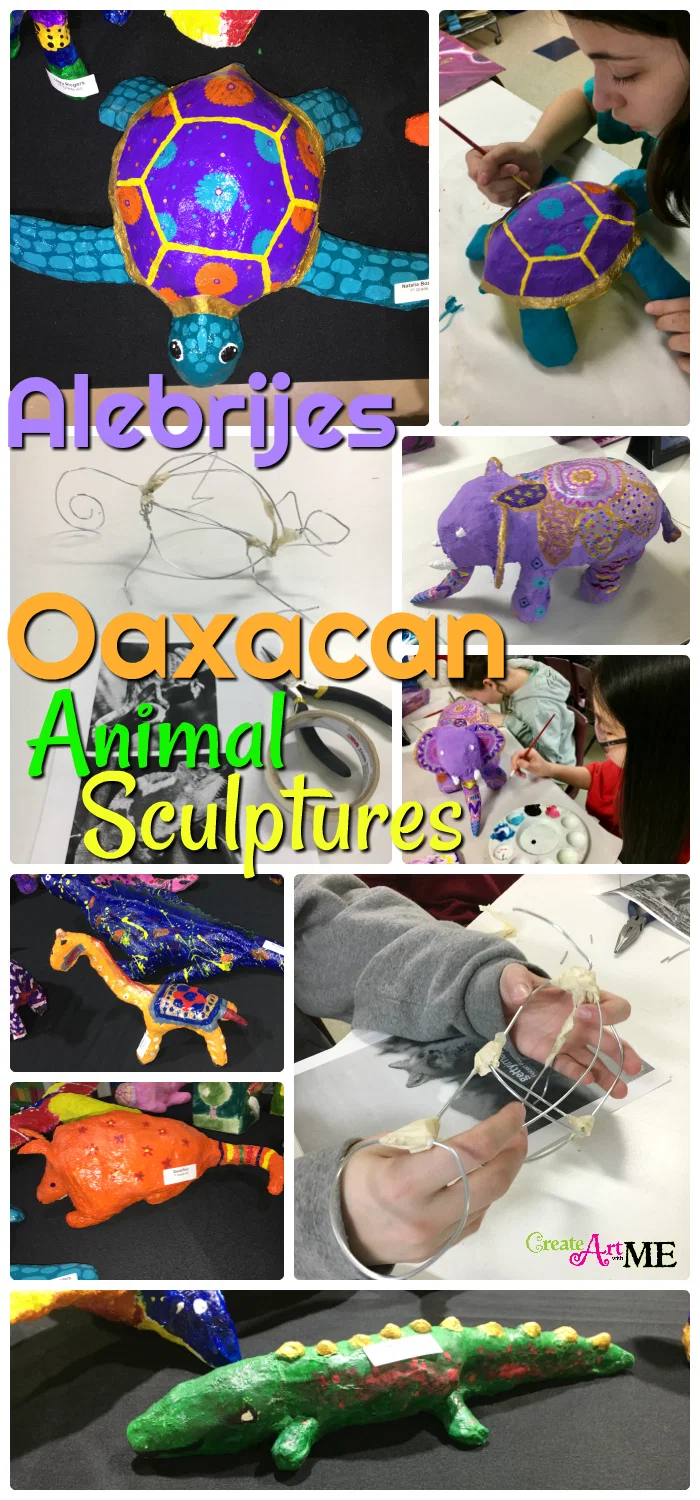
Oaxacan Animal Sculptures – Plaster Wrap or Paper Mache
Original: https://createartwithme.com/oaxacan-animal-sculptures-plaster-wrap-paper-mache/
Date: 2018-04-02
Author: Michelle East
Categories: 6th Grade, Alebrijes Oaxacan Animal Sculpture, Art Lessons, Cultural Art Lessons, Featured, Folk Art Lessons, HS Art, MS Art, Rhythm & Pattern Lessons, Sculpture Lessons
Tags: Alebrijes, Alebrijes history, Alebrijes lesson plan, armature, building an armature, Oaxacan, Oaxacan Animal Sculpture, Oaxacan Animal Sculpture lesson plan, Oaxacan Wood carvings, plaster Oaxacan Animal Sculpture, Plaster wrap, sculpture armature, wire armature
My 7th grade art class just finished making these Oaxacan Animal Sculptures. Here is how we did the project…
Objectives:
• Increase students’ awareness of South American art forms called alebrijes.
• Gain appreciation for other cultures through observing sculptures of the Oaxaca, Mexico region.
• Understand the traditional gender’s role in creating alebrijes.
• Apply the use of visual rhythm through pattern.
• Demonstrate proper techniques for sculpting 3D art forms with plaster wrap.
• Demonstrate appropriate use of an armature to create 3D form.
Materials Needed:
Examples of Oaxacan animal carvings Alebrijes Sculptures
For Older students: Galenized Wire, newspaper or phone book papers or tin foil, Masking tape, Plaster gauze (class pack) or paper mache recipes, Acrylic Paint (Craft paint) or Tempera Paint
For Younger students: Model Magic, To Paint: Tempera or Acrylic Paints, Paint Brushes, Markers
Affiliate links-I only recommend products I use and love!
Delivery:
- Oaxaca, pronounced wa-HAH-ka, is one of Mexico’s largest states and its folk art and traditions are among the richest. Oaxacan painted wood carvings have become a prized folk art.
- They are created by the Zapotec Indians who live in the Oaxaca Valley, located in the southern part of Mexico.
- The wood carving techniques and artistic capacity of the Zapotec Indians are legendary, honed over hundreds of generations. Each of the wooden sculptures are hand-carved from the wood of the Copal (or Copillo) tree. Each piece is hand-sanded and painted in bright and exciting motifs. Traditionally the men carve the forms, and the women paint them using very tiny paint brushes and sometimes-organic material such a pine needles.
- These sculptural carvings are called Alebrijes.
- From Wikipedia: Alebrijes (Spanish pronunciation: [aleˈβɾixes]) are brightly colored Mexican folk art sculptures of fantastical creatures. The first alebrijes, along with use of the term, originated with Pedro Linares. After dreaming the creatures while sick in the 1930s, he began to create what he saw in cardboard and papier mache.
- Linares was originally from San Antonio Arrazola, Oaxaca, and on family visits, demonstrated his designs there. The Oaxaca valley area already had a history of carving animal and other types of figures from wood, and Linares’ designs were adapted to the carving of a local wood called copal. This adaptation was pioneered by Arrazola native Manuel Jiménez.
- Oaxacan painted wood carvings are created by the Zapotec Indians who live in the Oaxaca Valley.
- The wood carving techniques and artistic capacity of the Zapotec Indians are legendary, honed over hundreds of generations.
- Each of the wooden sculptures are hand-carved from the wood of the Copal (or Copillo) tree.
- It is a soft wood with uniform color. The soft wood is easier to carve.
- The “copalillo” is a tree that grows in warm regions of Oaxaca.
- Traditionally the men carve the forms (using subtractive sculpting techniques).
- Artists use machetes for the initial cuts to form the basic size & shape of the animal, then move to smaller tools (knives & chisels) to refine the shape.
- The women paint them using very tiny paint brushes and sometimes-organic material such a pine needles.
- Each piece is hand-sanded and painted in bright and exciting motifs (patterns).
- Visual Rhythm is created by repeating the elements of art.
- An armature is the skeleton of your sculpture. It usually has a wire frame and then is covered in newspaper, aluminum foil or clay to give volume.
Resource: http://www.oaxacafinecarvings.com/index.html
Book: Miguel and the Amazing Alebrijes (Disney/Pixar Coco) Paperback
Project: Oaxacan Animal Sculpture- Alebrijes
Assignment: Create a whimsical creature based on the Oaxacan Wood carvings. Your “creature” will have an armature (base) made from wire and foil or newspaper and masking tape. It will be covered with plaster wrap then painted a base coat of acrylic paint and finish designs (patterns) using paint and sharpies.
Size: The main body of your creature should be no more than 14” height or width (or larger if wings or horns are added), can be smaller but minimum of 8″.
Instructions:
Sketches
- Study examples of Oaxacan animal sculptures. Observe the different types of animals, body styles, the colors and patterns used.
- Research your animal & find 2 different points of view of the animal-front & side.
- In your sketchbook, draw a draft of how your animal or creature will look from the front and the side (2 drawings). Think about colors and patterns you might use when you paint it. Draw a few ideas of patterns you might use in your sketchbook.
- Once you have decided on your animal or creature, think about the different parts you will need to make it.
Armature
- Start by building an armature of the creature.
- Make an Armature: using wire & newspaper form the basic shape of the body, legs & head. Start by creating an armature of wire first, then give volume to the sculpture by forming the body around the wire with newspaper, phone book paper or aluminum foil. Tape with masking tape or wrap them with aluminum foil so the joints so they don’t move (as much).
- Wrap the sculpture in masking tape.
- After you have the basic shape, add features like noses, ears, spikes, etc. out of chip board or cardboard. Eyes can be small wads of paper or other small “found objects”. If you would like to add whimsical elements such as a horn, spikes on the back or tail, etc. do it at this time.
Plaster
- Cut plaster gauze into 2-3 inch strips. Dip gauze in warm water & use your fingers to smooth it out. Plaster wrap the sculpture with 2 coats of plaster gauze.
2. Plaster must cure and dry for at least 24 hours.
Painting the Sculpture
- Paint your animal or creature with ACRYLIC paint. (Tempera can be used, but will require a clear coat sealant)
-
Choose a color to paint the entire animal. Paint base colors first with acrylics. To speed the drying process so you can begin painting your patterns, use a blow dryer set to cool to dry. (It is important to set it to cool, as the heat will actually react with the plastic in the paint and it will not dry as fast and may separate or bubble).
2. Once the first layer of paint is dry, you can now start to add your brightly colored patterns to the animal. Have fun and use your imagination to come up with unique patterns. Use a sharpie for small black line details.
Student Artwork
*Amazon Affiliate Links- I only link products I use and love!
If you choose to use ANY part of this blog (graphic, pictures or written text), please link back to Create Art with ME!


