玻璃器物与灯泡:白色炭笔素描课
原文链接:https://createartwithme.com/glass-objects-and-light-bulb-white-charcoal-drawing-lesson/
日期: 2018-11-13
作者: 米歇尔·伊斯特(Michelle East)
分类: AP 工作室艺术(高中高阶美术)、美术课程、炭笔课程、素描课程、精选内容、玻璃器物、高中美术、静物
标签: 炭笔灯泡素描、炭笔技法、曲率等级、画玻璃、画灯泡、观察能力训练、椭圆、玻璃炭笔画、玻璃是透明的、玻璃器物静物、玻璃静物、如何画玻璃器物、如何画对称物体、折射素描、泡沫塑料杯炭笔静物、泡沫塑料杯素描、泡沫塑料静物、泡沫塑料静物素描、玻璃器物素描技巧、白色炭笔素描、黑纸白炭笔画
向高中生教授观察能力素描,是任何美术课程中至关重要的环节!我始终在寻找新颖、有趣又具挑战性的素描对象!过去几年里,我陆续收集了一批玻璃灯泡——尤其是透明款——用于本学年高中一年级与二年级班级的教学项目。多年来我一直讲授玻璃器物静物素描课,曾一度暂停,今年受湖诺曼高中(Lake Norman High School)蒂芙尼·福克斯(Tiffany Fox)老师的启发,决定重新引入该课题。
想关注一位超棒的美术教师吗?快去 Instagram 关注 mrs_tfox湖诺曼高中 吧!她学生的作品令人惊叹,本人也显然是一位极为出色的教师!
所需材料: 玻璃静物(透明与不透明灯泡,多种造型;花瓶、高脚杯、水晶器皿等)、白色 与 黑色 炭笔、黑色绘图纸、擦笔、发胶或定画液*


教学目标:
• 学生将学习“曲率等级”这一观察能力素描技法,即观察线条弯曲程度的方法。
• 学生将通过肩部与肘部联动的流畅摆动动作,练习绘制直线、圆形与椭圆。
• 学生将运用对称性、球体、椭圆、视点及线条角度等知识,完成一幅小型静物素描。
• 学生将学习炭笔技法,并以完整明暗关系完成画面表现。
如何绘制对称物体
对称轴线(或中心轴线): 一条假想的直线,将物体中心一分为二,形成左右镜像的两半。物体两侧沿此线可能存在细微差异,但总体上保持一致。
如何绘制玻璃器物
- 折射 是玻璃因压缩、弯曲或盛装液体而产生的视觉畸变现象。
- 透过盛有水(或其他液体)的玻璃容器所看到的物体,也会因折射而发生视觉畸变。
- 折射会使图像在视觉上扭曲、弯曲、扭转、变形、明度改变,或产生远近错觉(看似更远或更近)。
- 将玻璃器物视为简单形体与线条来观察与表现。复习观察能力素描技能:曲率等级(参见泡沫塑料杯课程)。
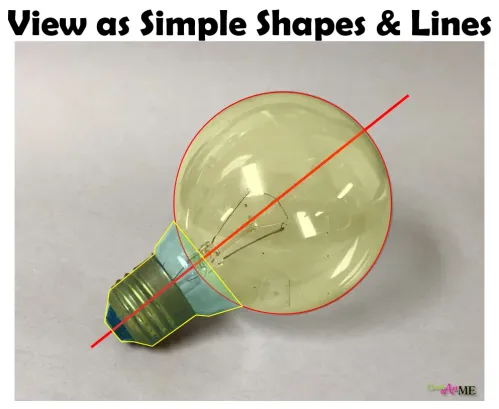
- 先用极轻的笔触,在纸上勾勒出玻璃器物的外轮廓。
- 缓慢而细致地添加细节,注意寻找其中的图案、线条与形状。
- 细致观察玻璃背面细节所发生的畸变现象。
- 明度 指色彩或物体的明暗程度。需以完整的明度范围进行画面表现。使用黑色炭笔在黑纸上加深暗部。
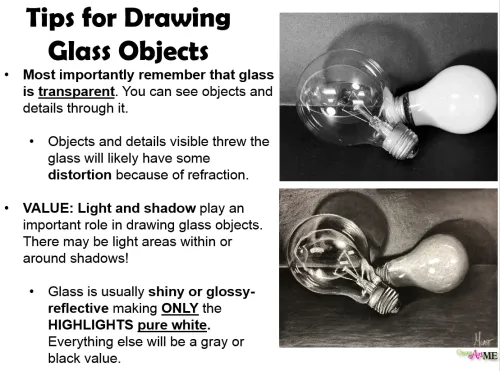
- 玻璃器物素描小贴士:
- 最重要的是牢记:玻璃是透明的。你能透过它看见其后的物体与细节。
- 透过玻璃可见的物体与细节,往往因折射而产生畸变。
- 明度: 光与影在玻璃器物素描中起关键作用。阴影内部或周围也可能出现亮部!
- 玻璃通常具有光亮或反光表面,因此仅有高光部分为纯白色,其余所有区域均表现为灰色或黑色明度。
课堂活动: 在速写本上绘制对称物体与灯泡
项目
玻璃器物黑纸素描视频: https://www.youtube.com/watch?v=p9LtX9i9H4g
项目目标: 准确描绘玻璃器物,并有效运用媒介表现其表面质感、明度与空间深度。
高中美术 1 与 2 项目:
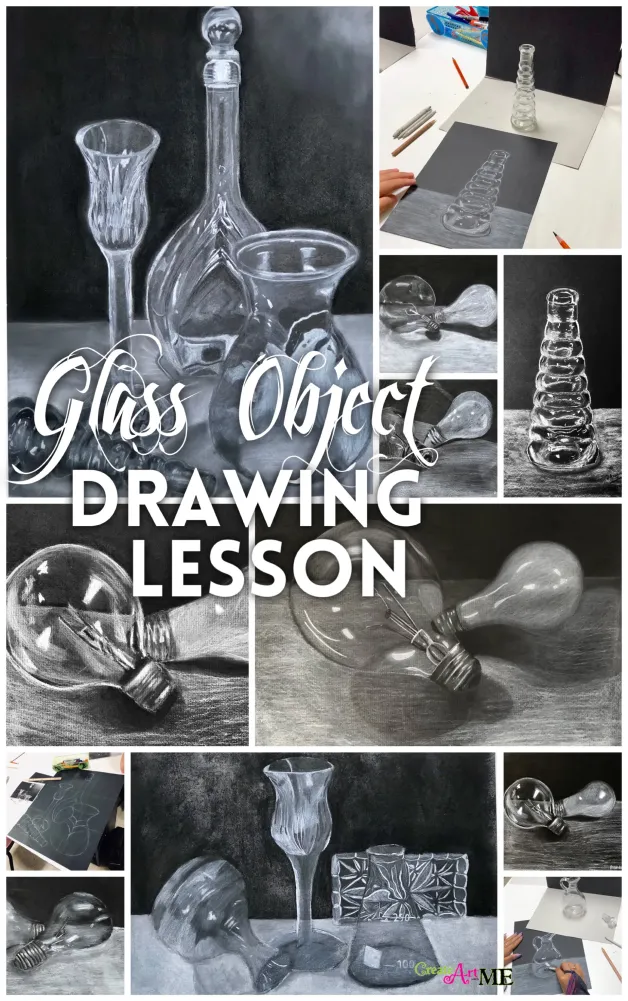
灯泡:黑纸白炭笔素描
灯泡黑纸白炭笔画
操作步骤:
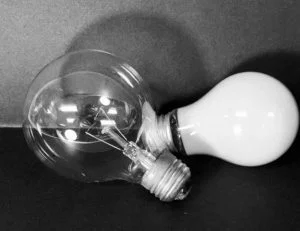
- 让学生自行布置并拍摄灯泡静物照片;添加聚光灯以增强明度对比。
-
用铅笔或白色炭笔在黑纸上轻轻勾勒静物轮廓。
-
运用白色与黑色炭笔,以明度变化表现物体表面质感、高光、阴影,并营造空间深度。
-
用黑色炭笔为背景上色,加深黑纸的黑色。
- 喷一层薄薄的发胶或定画液。
黑纸白炭笔灯泡素描
高中美术3级与4级课程项目:
玻璃器物静物——黑纸白炭笔素描
玻璃器物静物——白炭笔素描
操作步骤:
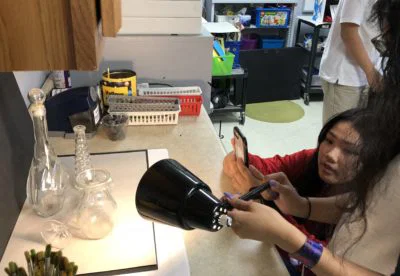
- 让学生自主选择并摆放一组含4–6件器物的玻璃器物静物。
- 用铅笔或白炭笔在黑纸上轻轻勾勒静物轮廓。*可选步骤:指导学生打格构图——尤其适用于放大绘制时。
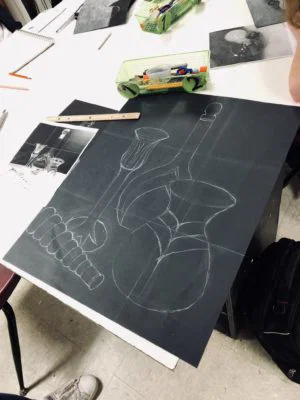
- 运用白色与黑色炭笔进行深入刻画,通过明度表现物体表面质感、高光、阴影,并营造空间深度。
- 用黑色炭笔为背景上色,加深黑纸的黑色。
- 喷一层薄薄的发胶或定画液。
本文版权归 Michelle C. East(Create Art with ME)所有。若您引用本文任何部分(文字、照片或图示),请务必附上原文博客链接:Create Art with ME。*本文含亚马逊联盟推广链接。所有推荐产品均为本人实际使用且真心喜爱!
Glass Objects and Light Bulb White Charcoal Drawing Lesson
Original: https://createartwithme.com/glass-objects-and-light-bulb-white-charcoal-drawing-lesson/
Date: 2018-11-13
Author: Michelle East
Categories: AP Studio Art (Advanced HS Art), Art Lessons, Charcoal Lessons, Drawing Lessons, Featured, Glass Objects, HS Art, Still Life
Tags: charcoal light bulb drawing, charcoal techniques, Degrees of Curvature, draw glass, draw light bulb, drawing observational skills, ellipses, glass charcoal, glass is transparent, glass object still life, glass still life, How to Draw Glass Objects, How to Draw Symmetrical Objects, refraction drawing, Styrofoam Cup Charcoal Drawing Still Life, Styrofoam Cups drawing, styrofoam still life, Styrofoam still life drawing, Tips for Drawing Glass Objects, white charcoal drawing, White Charcoal on Black Paper Drawing
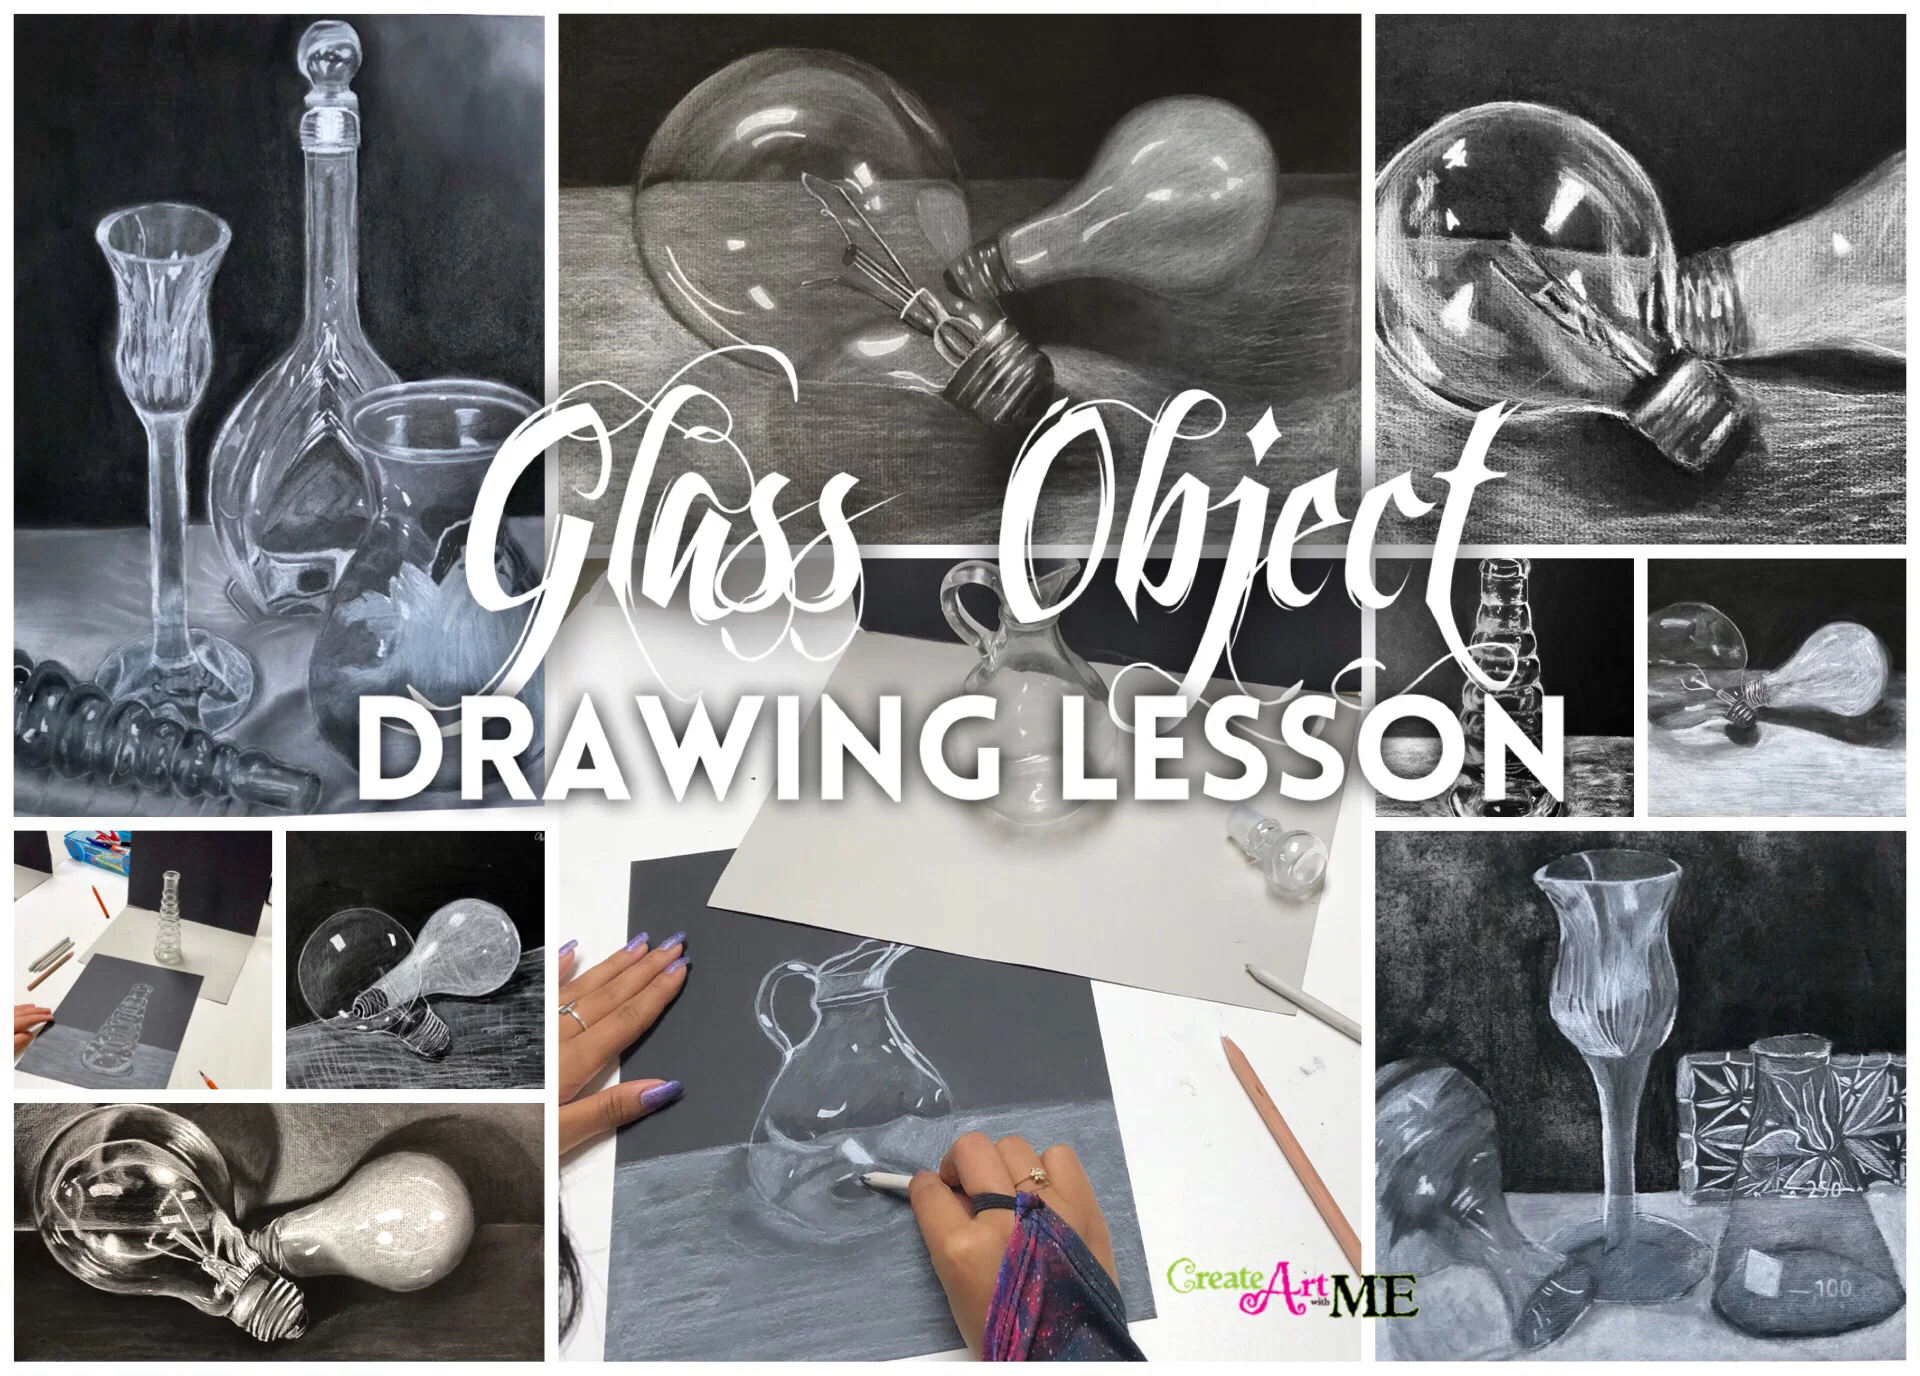
Teaching observational drawing skills to high school students is a VITAL part of any art curriculum! I am always looking for new interesting and challenging objects for them to draw! Over the last couple of years I have been collecting glass light bulbs, specially clear ones, for the project with my HS 1 & 2 class. I had taught the glass object still life drawing for many years and decided to take a break from it, and was inspired by Mrs Tiffany Fox at Lake Norman High School to bring it back this year.
Want an incredible art teacher to follow on Instagram? You need to follow mrs_tfoxLake Norman High School! She has AMAZING artwork from her students and is obviously an incredible teacher!!
Supplies: glass still life objects (clear and opaque light bulbs in various shapes, vases, goblets, crystal), white and black charcoal pencils, black drawing paper, blending stubs, hair spray or fixative *
Objectives:
• The student will learn the observational drawing technique of observing the “Degrees of Curvature” of line.
• They will learn to draw lines, circles and ellipses by using fluid motion of swinging from the shoulder and elbow.
• They will apply knowledge of symmetry, spheres, ellipses, point of view, and angles of line and apply it to a small still life drawing.
• Students will learn charcoal techniques and render the drawings with full shading.
How to Draw Symmetrical Objects
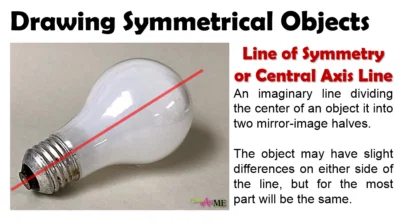
Line of Symmetry or Central Axis Line: An imaginary line dividing the center of an object it into two mirror-image halves. The object may have slight differences on either side of the line, but for the most part will be the same.
How to Draw Glass Objects
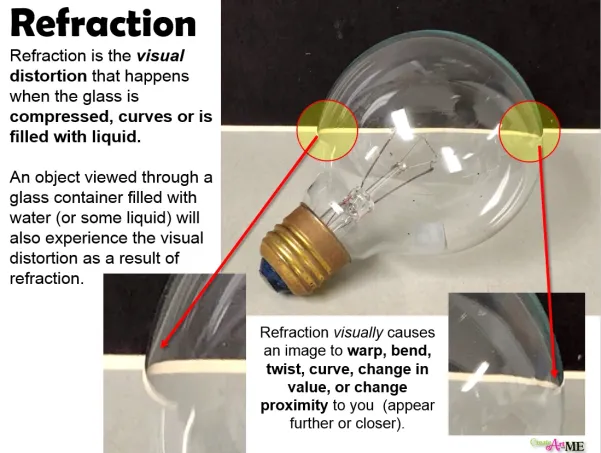
- Refraction is the visual distortion that happens when the glass is compressed, curves or is filled with liquid.
- An object viewed through a glass container filled with water (or some liquid) will also experience the visual distortion as a result of refraction.
- Refraction visually causes an image to warp, bend, twist, curve, change in value, or change proximity to you (appear further or closer).
- View as glass objects as simple shapes & lines. Review observational drawing skills: degrees of curvature (See Styrofoam Cup Lesson).
- Draw the outline of the glass object on a piece of paper very LIGHTLY first.
- Draw in the details slowly and carefully looking for patterns, lines and shapes.
- Carefully observe distortion that happens to the details on the back side of the glass.
- Value is the lightness or darkness of a color or object. Render the drawing with a full range of values. Use the black charcoal pencils to darken the black paper.
- Tips for Drawing Glass Objects:
- Most importantly remember that glass is transparent. You can see objects and details through it.
- Objects and details visible through the glass will likely have some distortion because of refraction.
- VALUE: Light and shadow play an important role in drawing glass objects. There may be light areas within or around shadows!
- Glass is usually shiny or glossy-reflective making ONLY the HIGHLIGHTS pure white. Everything else will be a gray or black value.
Activity: Sketchbook Drawing of symmetrical objects and light bulbs
Projects
Video of Glass on Black Paper: https://www.youtube.com/watch?v=p9LtX9i9H4g
Project Objective: Accurately draw the glass objects and effectively use the medium to show surface quality, value, and depth.
HS Art 1 & 2 Project:
Light Bulb White Charcoal on Black Paper Drawing
Light bulb white charcoal on black paper drawing
Instructions:
- Have students set up and photograph their own light bulb still life. Add a spotlight to give more value contrast.
- Lightly draw the still life onto black paper with either a pencil or white charcoal pencil.
- Use the white and black charcoal pencils to render the drawing with value showing surface quality, highlights, shadows, and to create depth.
- Add black charcoal to background to darken the black paper.
- Coat with a light coat of hairspray or fixative.
Light bulb white charcoal on black paper drawing
HS Art 3 & 4 Project:
Glass Object Still Life White Charcoal on Black Paper DrawingGlass Object Still Life White CHarcoal drawing
Instructions:
- Have students choose and arrange their own glass object still life with 4-6 objects.
- Lightly draw the still life onto black paper with either a pencil or white charcoal pencil. *Optional-have students grid the drawing-especially if it is an enlarged drawing.
- Use the white and black charcoal pencils to render the drawing with value showing surface quality, highlights, shadows, and to create depth.
- Add black charcoal to background to darken the black paper.
- Coat with a light coat of hairspray or fixative.
This post is © Michelle C. East – Create Art with ME. If you choose to reference ANY part of this post (written word, photo or graphic), please link back to my blog Create Art with ME. *Amazon Affiliate Links were used in this post. I ONLY link products I use and love!


