现成品集合雕塑
原文链接:https://thatartteacher.com/2022/09/30/found-object-assemblage-sculpture/
日期: 2022-09-30
作者: Sierra Machado
分类: 美术教育、长课时教案、雕塑
标签: 美术远程教学资源、美术教育、远程教学美术课、集合艺术教案、集合艺术教程、利用回收材料制作集合雕塑、纸板美术课、纸板雕塑技法、纸板雕塑教程、远程教学课程、简易纸板雕塑、简易雕塑课、精选内容、现成品艺术课、现成品集合艺术课、现成品雕塑、Louise Nevelson 艺术课、受 Louise Nevelson 启发的艺术创作、初中集合艺术课、初中纸板雕塑、初中现成品艺术课、雕塑教程、那位美术老师
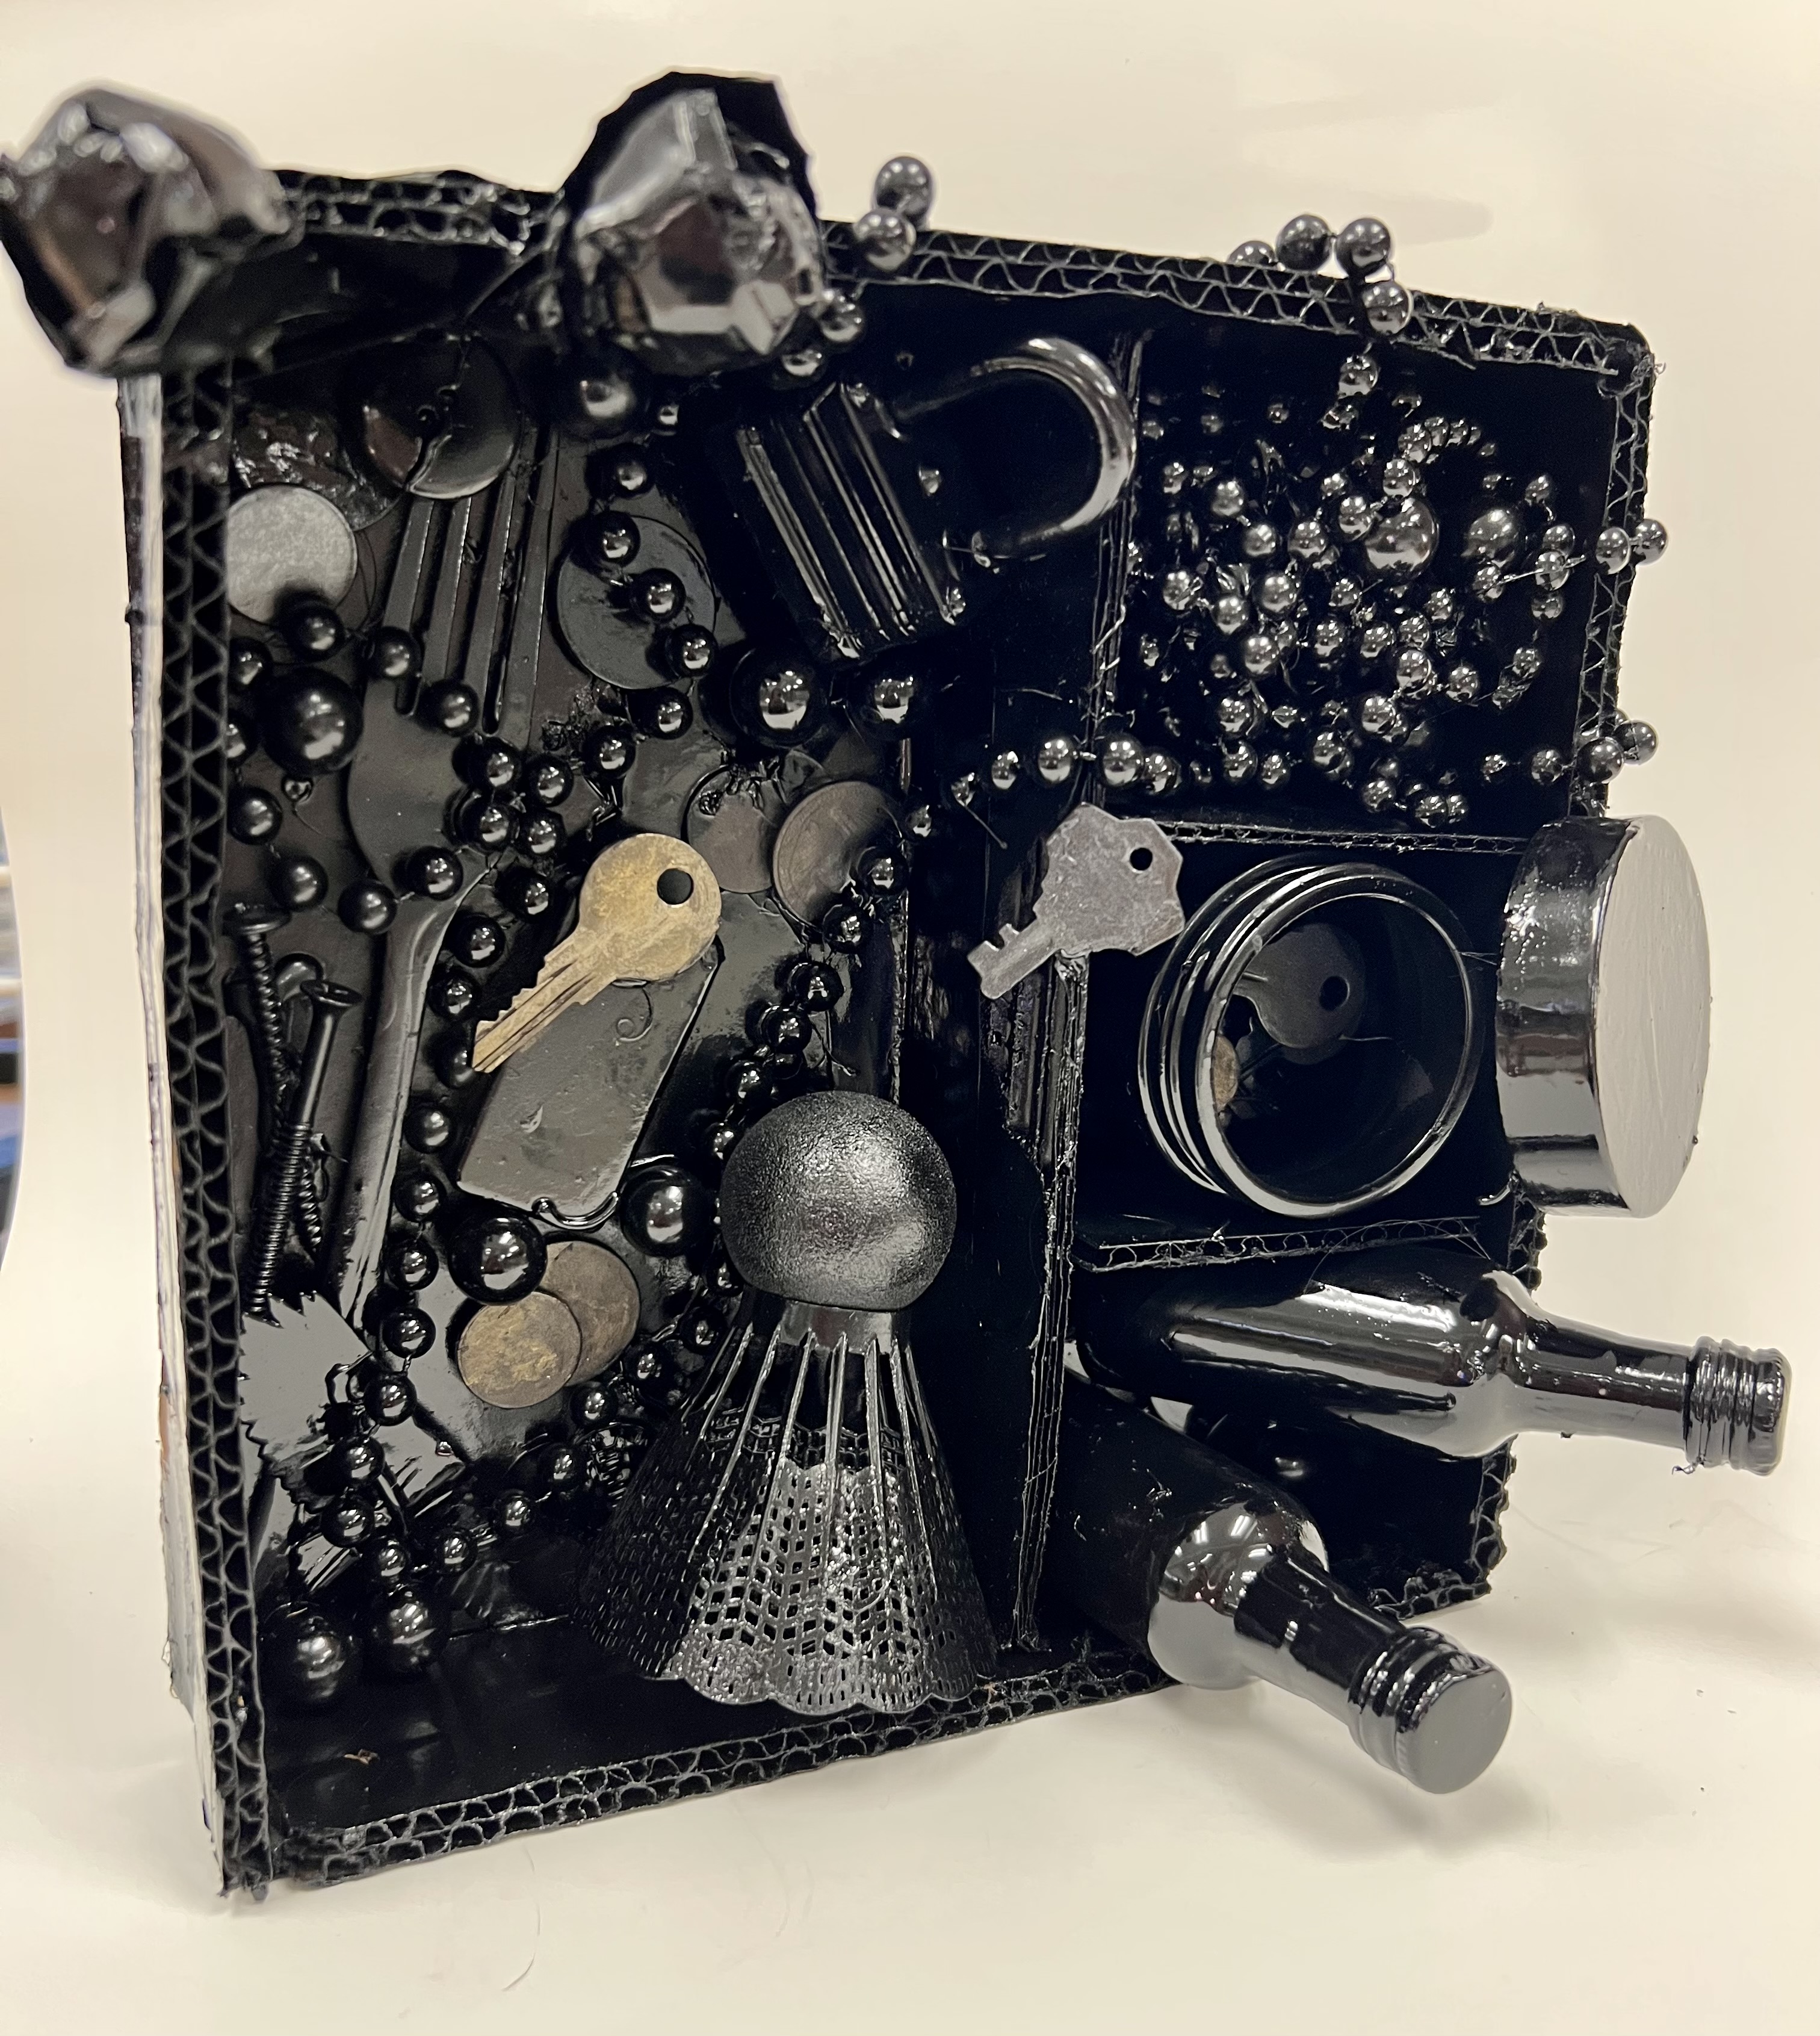
现成品集合雕塑是我历来最钟爱的课程之一。它成本低廉,且是讲解构图这一在美术教室中常令人头疼的主题的绝佳入门方式。我很喜欢看到学生们内心“寻宝者”特质被激发出来。现成品集合创作方向丰富多样,可供借鉴的当代艺术家也数不胜数。
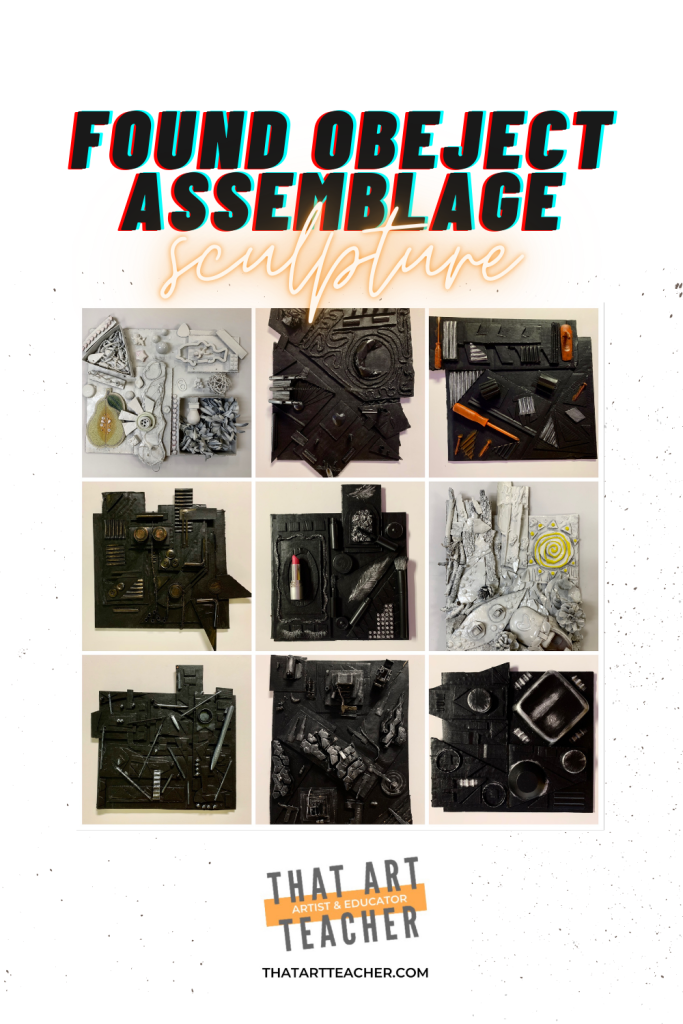
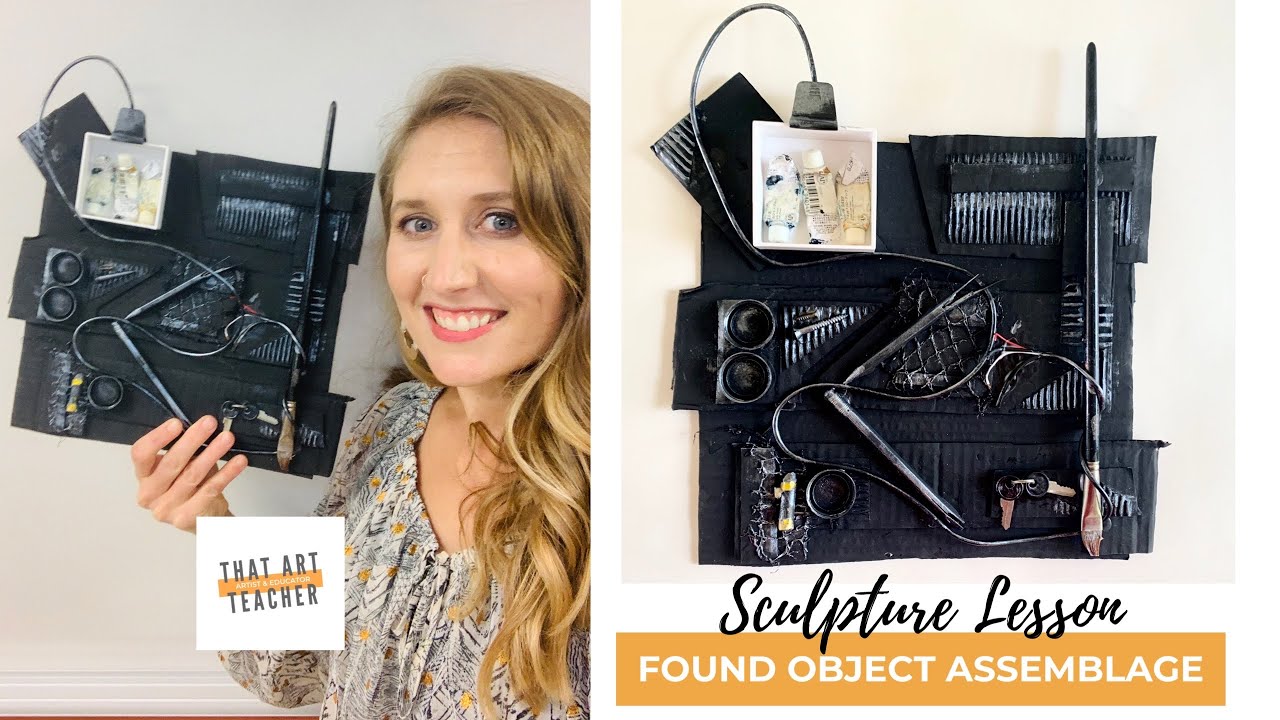
如果你和我一样注意力持续时间较短,这段简短视频将为你展示全部步骤:
我倾向于聚焦于受Louise Nevelson单色集合雕塑启发的抽象风格。Nevelson 是最具创新精神的雕塑家之一,我的学生也很欣赏她作品中那种抽象特质。当艺术不必“表现某种具体事物”,也不必“看起来像某样东西”时,对学生而言往往是一种释然。
可探究的现成品集合艺术家
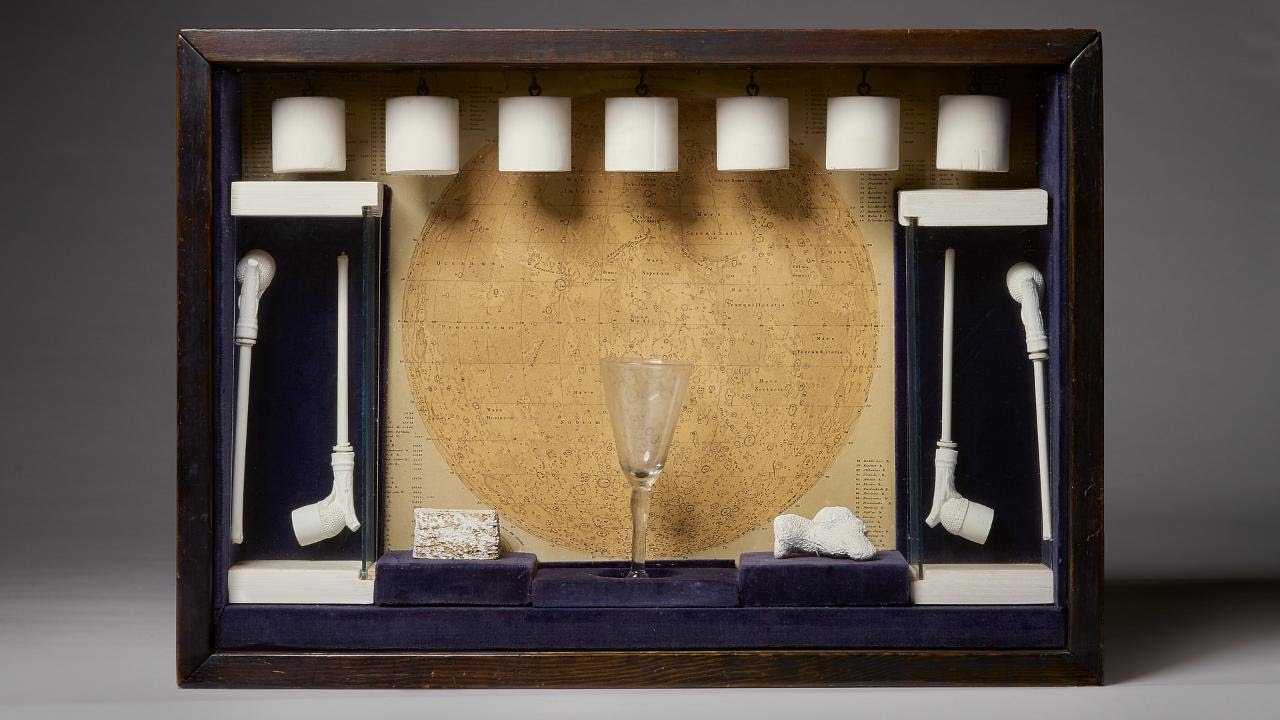
我们重点赏析了 Louise Nevelson、Betye Saar 和 Joseph Cornell 的作品。我们每天开展艺术史热身活动,帮助学生发展艺术批评讨论与写作能力。
Louise-Nevelson免费下载!

Betye-Saar免费下载!
Joseph-Cornell下载
现成品集合雕塑教程
本教程已为课堂教学(或远程教学!)做好准备,将完整呈现我在指导学生完成此次现成品集合雕塑课程时所采用的浮雕技法全部步骤。你只需准备一块基底纸板(我首选亚马逊快递箱)和白乳胶(Elmer’s glue)。真的,白乳胶适用于99%的物体。对于更牢固的物件,也可使用热熔胶或强力胶,但我们极少偏离传统白乳胶。
我还喜欢变换形式,让学生自制三维纸盒来收纳其现成品。这对中学阶段尤为适用,更能强化雕塑元素。不妨试试这个教程来自制纸盒——超级简单!
第一部分:构图组织
纸板是集合雕塑的理想材料:质地轻盈、完全免费、随处可得——对公立学校美术教室而言堪称完美!我也曾用木材进行过此类雕塑创作,但那还是在我之前任教的高中尚设有木工课的年代。我确实更偏爱纸板,因其操作友好度极高,学生可用剪刀自行裁剪并调整形状。
我首先为学生提供预制好的纸板基底。基底尺寸与形状取决于我手头库存的纸板。我尽量保持统一,但切割时未必总能精准把握。上一次开展此项创作时,我手头恰好有一大堆学校全校义卖活动后剩余的披萨盒——太棒了!
首日课堂,我向学生提出如下要求:
- 包含一个对角线形
- 包含一个水平形
- 包含一个垂直形
- 至少一处延伸出基底边缘
- 这些形状须覆盖基底面积的75%
构图组织
部分学生极其喜爱这一步骤,概念立刻就能领会;那些天生对形状与组织有敏锐感知力的学生往往能迅速掌握要领。而另一些学生则完全被这种非具象构图搞得不知所措。我班上总至少有一名学生想画个笑脸或其他具象图形。我始终强调“构图”即“元素的安排”,而此环节正是确保雕塑整体不致杂乱无章的关键组织结构。
三维纸盒制作
本项目一个有趣的变体,是让学生用纸板自制三维纸盒。我们制作的是8×8英寸纸盒,使用美工刀(Xacto knife)、遮蔽胶带(masking tape),以及可选的热熔胶。
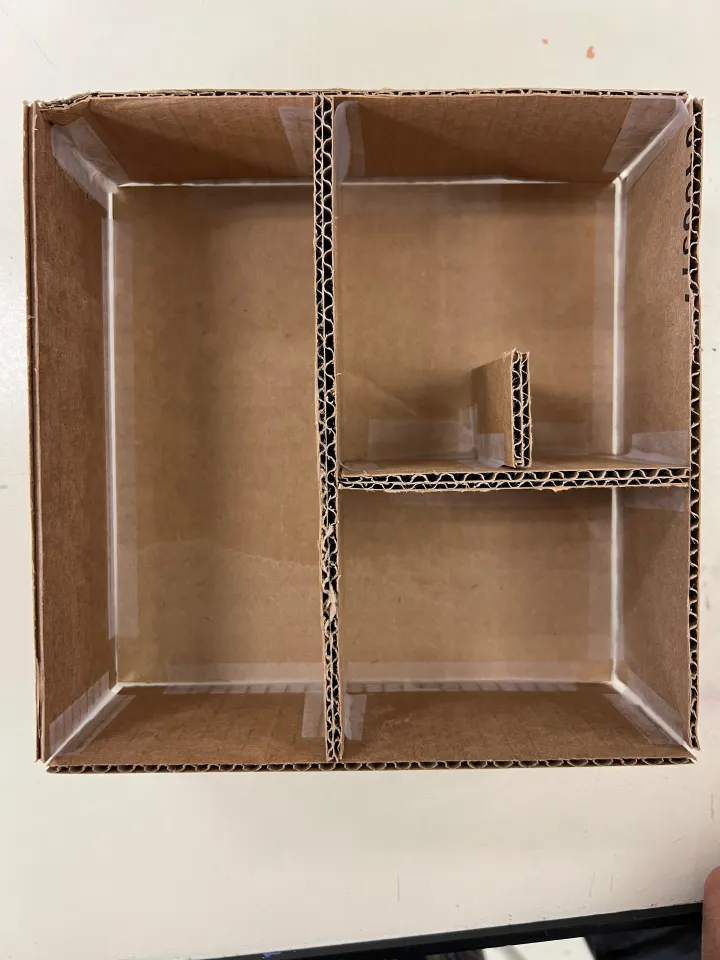
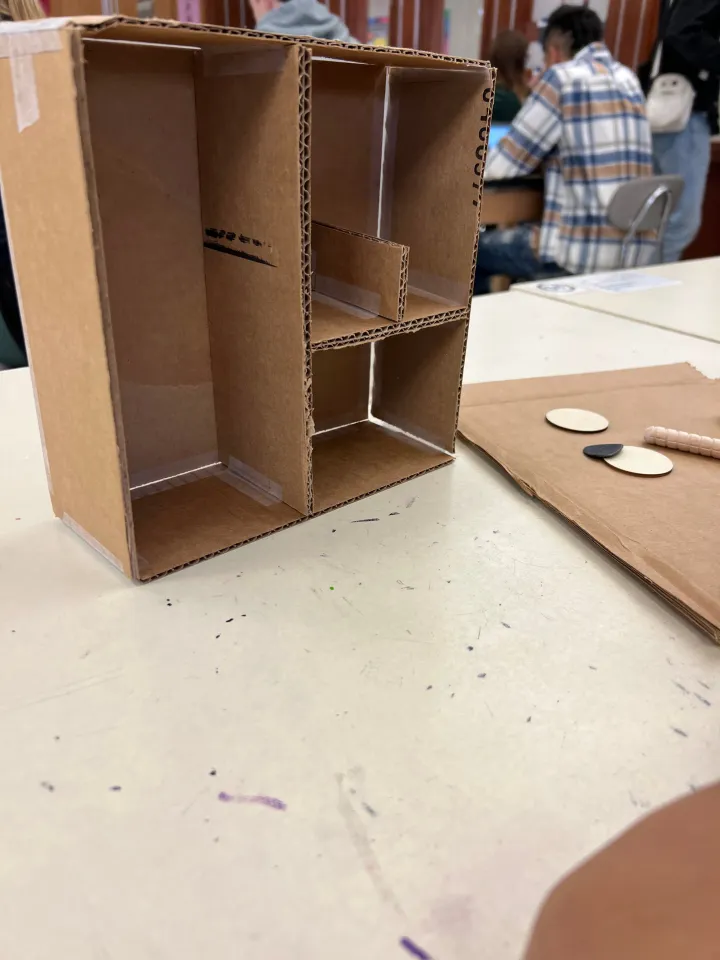
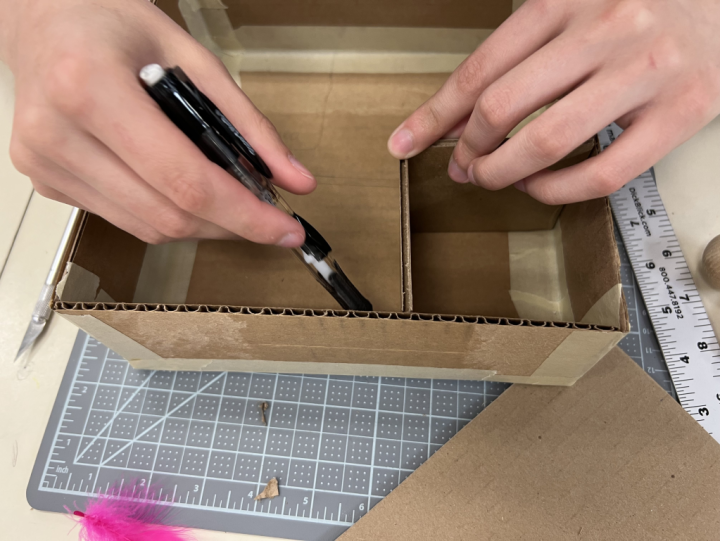
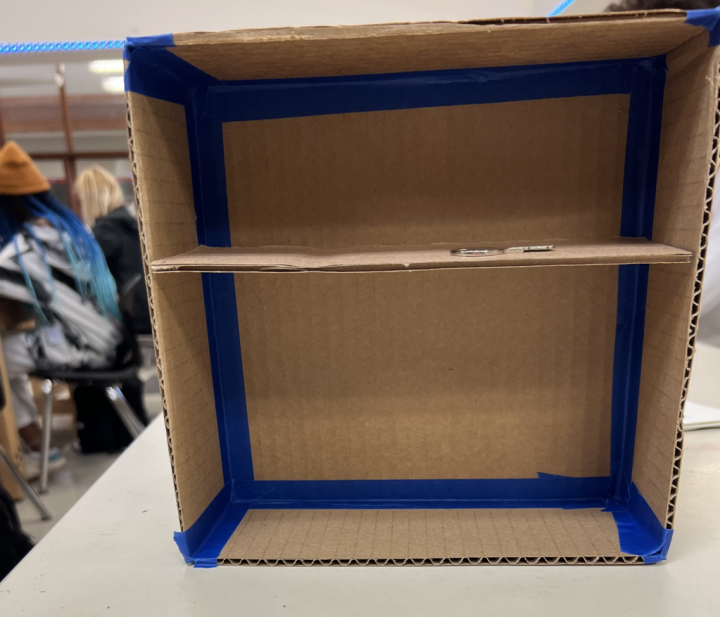
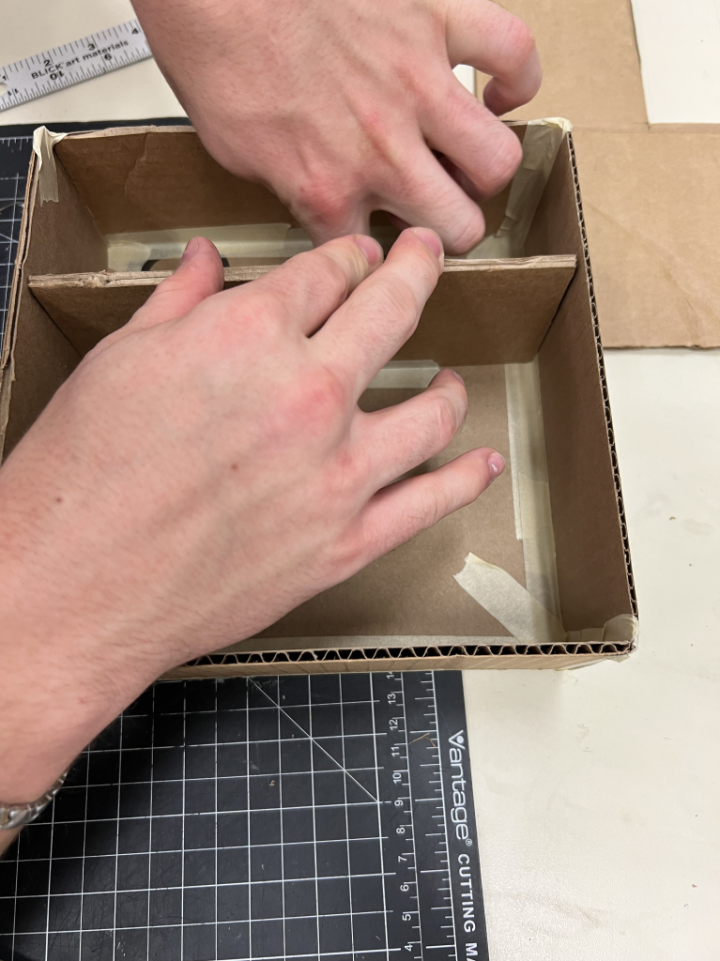
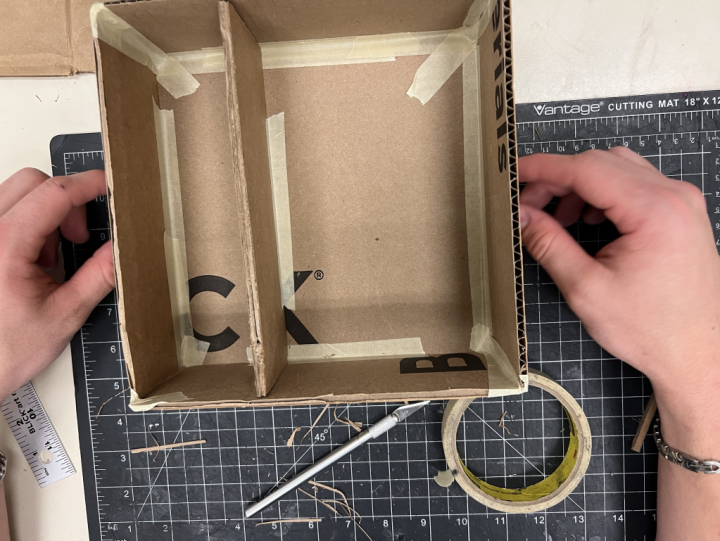
学生先在一大块纸板边缘量取基底尺寸,我要求所有学生采用相同尺寸。我告诉学生:纸盒无需尺寸均一;若有人希望突破常规,我表示支持,但不会协助计算相关数学问题。(#数学不行)
基底尺寸确定后,学生需裁切四块尺寸一致的矩形作为纸盒四边。我们采用8×3英寸规格,但该尺寸亦可灵活调整。我们用遮蔽胶带粘合全部接缝(前后均需粘合),最终纸盒坚固无比!我的视频教程为需要额外测量指导的学生提供了极大帮助。
更小形状、肌理与基础现成品
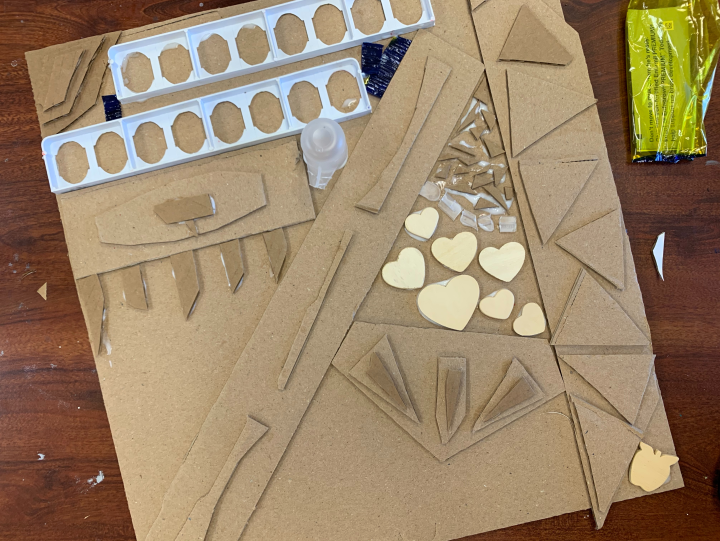
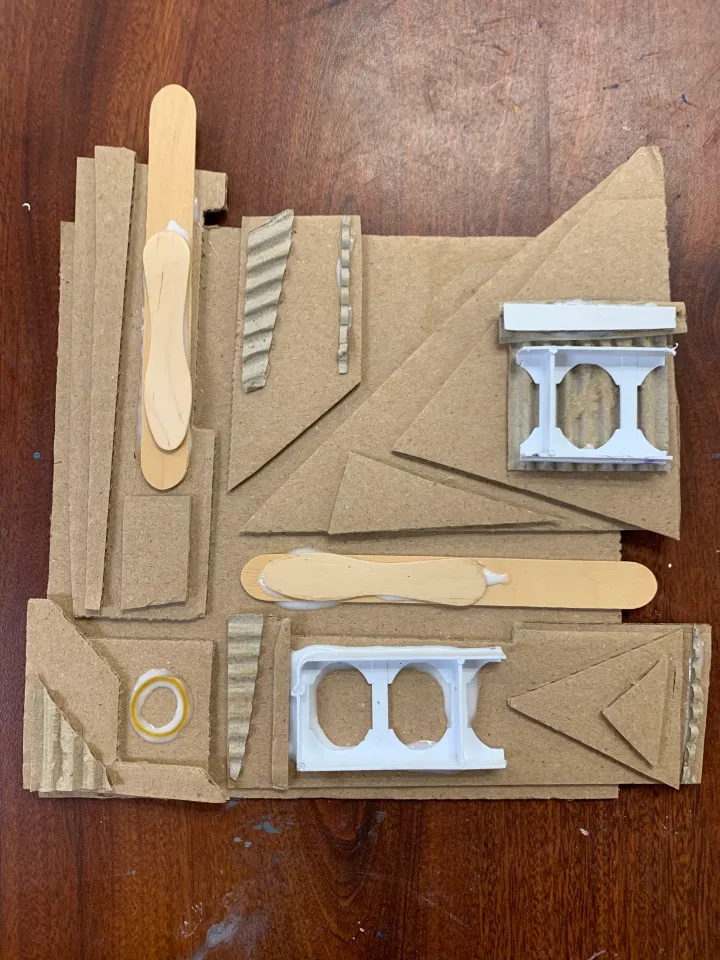
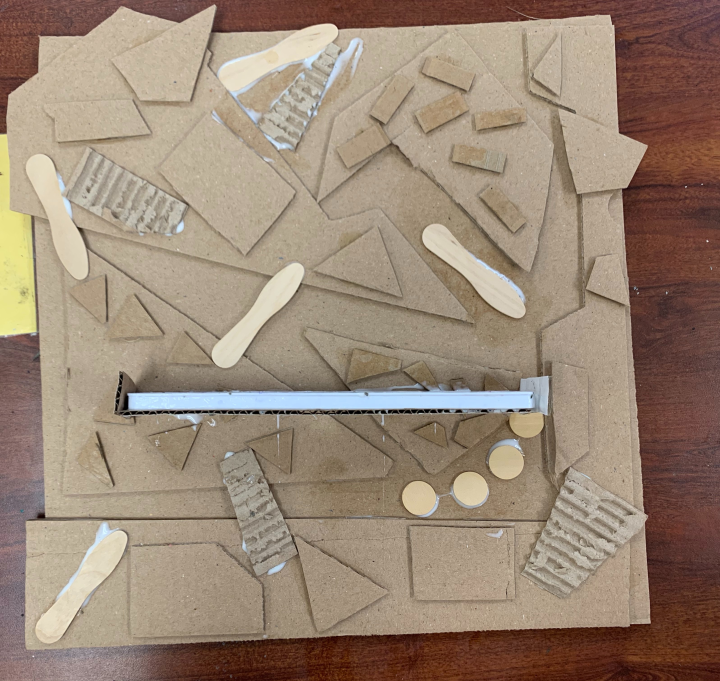
接下来是更小的重叠形状与肌理。当我采用90分钟大课时制教学时,所有这些内容都在一节课内完成;如今改用45分钟课时制,我则将其拆分为两节课。我始终提醒学生保持作品整洁有序——尽管我们回收利用“废旧”材料,但绝不能让成品看起来邋遢凌乱。组织性至关重要!此时,我还会引入一些现成物(found objects)。
我通常会提前收集一些零散物品,例如矿泉水瓶盖、绳子、断掉的铅笔、冰棒棍等。我喜欢在学生实际使用这些现成物前两三天,先介绍艺术家路易斯·内维尔森(Louise Nevelson)及其“现成物”概念。学生往往需要两三天时间陆续带来自己的现成物。当然,有时现成物最终也未能到位——我已将这一项列入评分量规(rubric)的评估类别中。
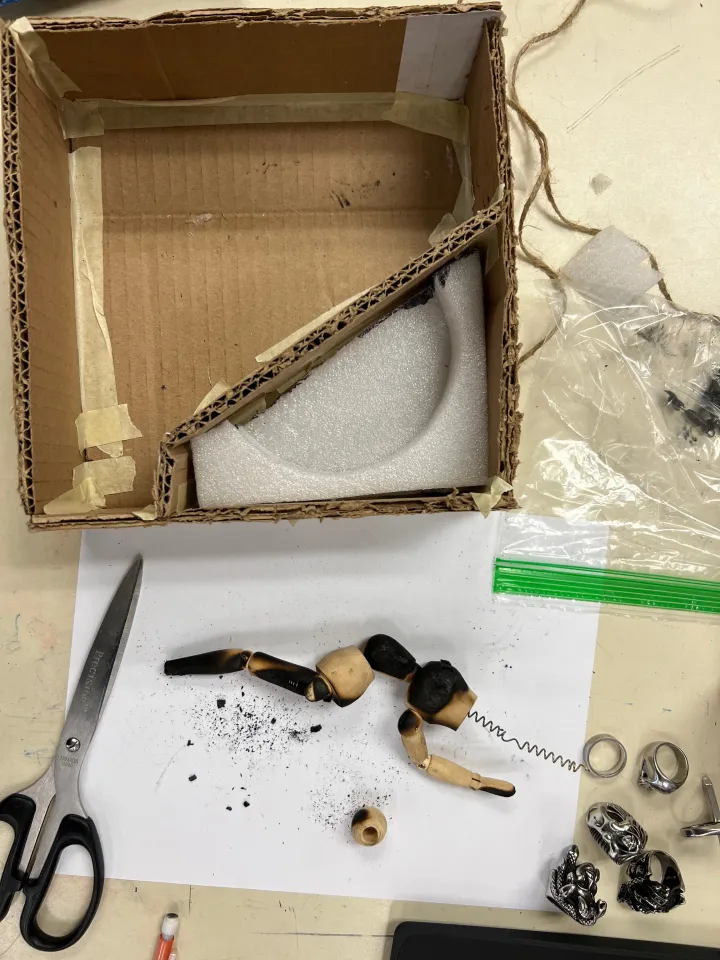
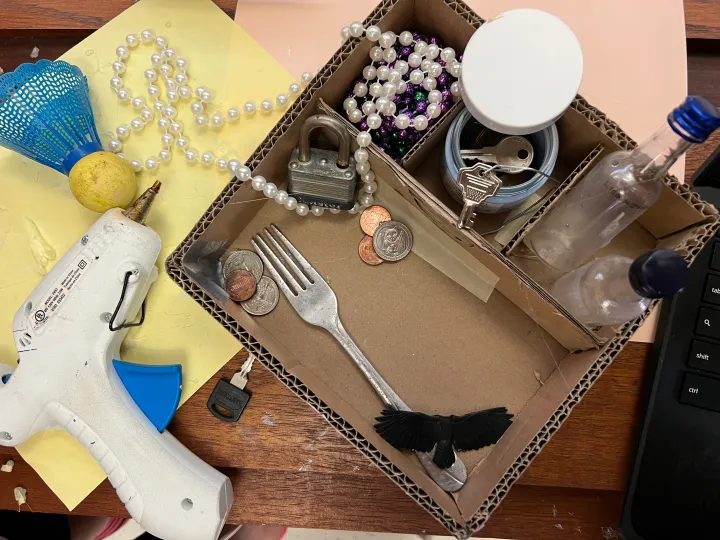
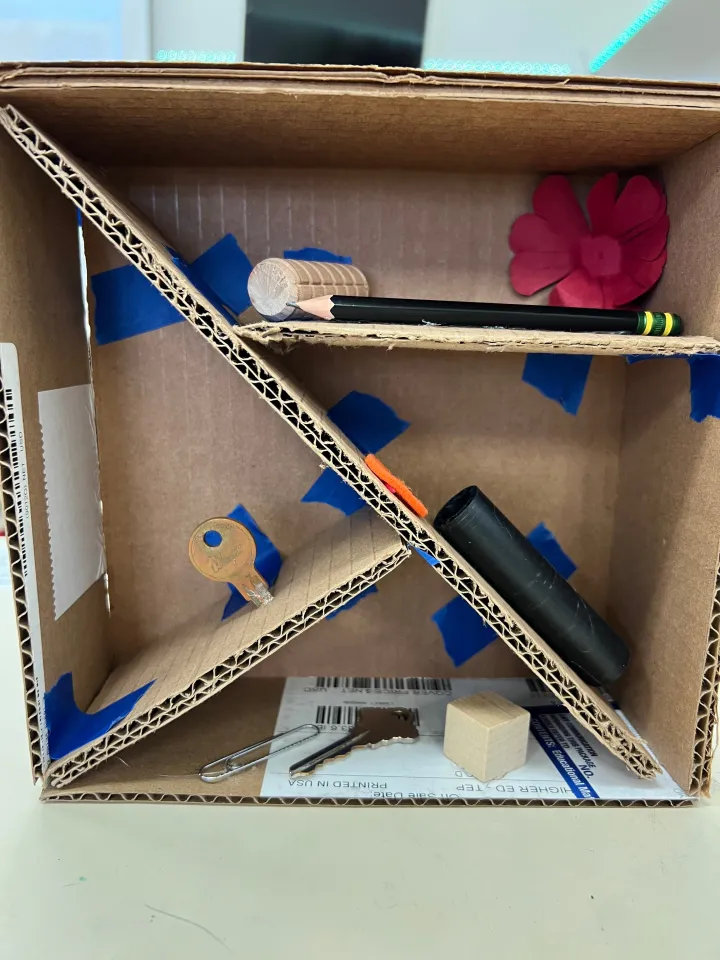
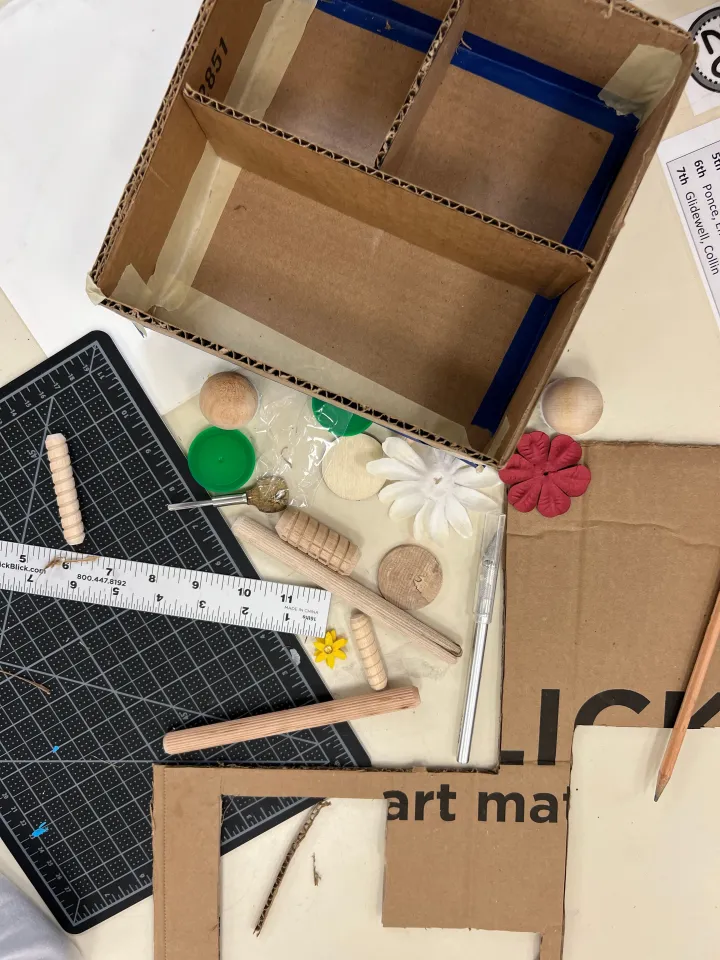
我反复大声强调:学生个人搜集的现成物,才是真正成就拼装雕塑(assemblage)的关键。作为教师,我仅提供少量基础材料;而作品的重点区域或视觉焦点,则完全取决于学生自身的搜寻能力。针对低龄学生,一个有趣的热身活动是:向他们展示往届学生创作的拼装雕塑图片,并玩“我用小眼睛找一找……”的游戏,指定几种现成物让他们去寻找。这不仅能帮助他们观察拼装艺术,更能激发思维,启发他们思考自己可以找到哪些物品用于创作。
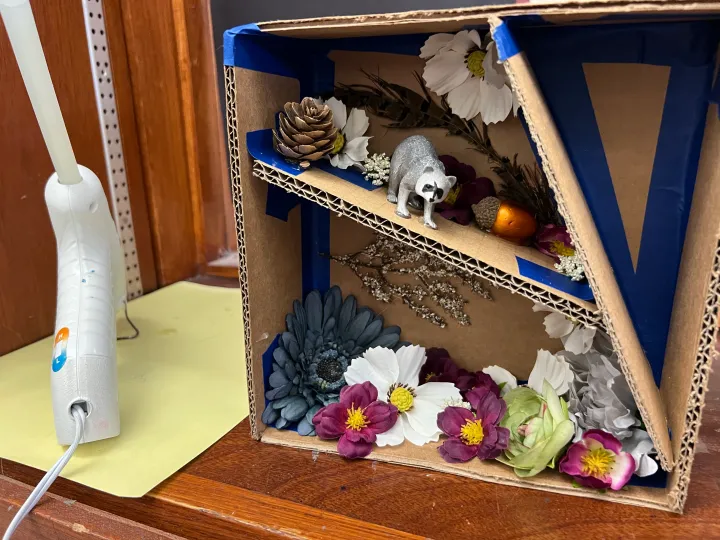
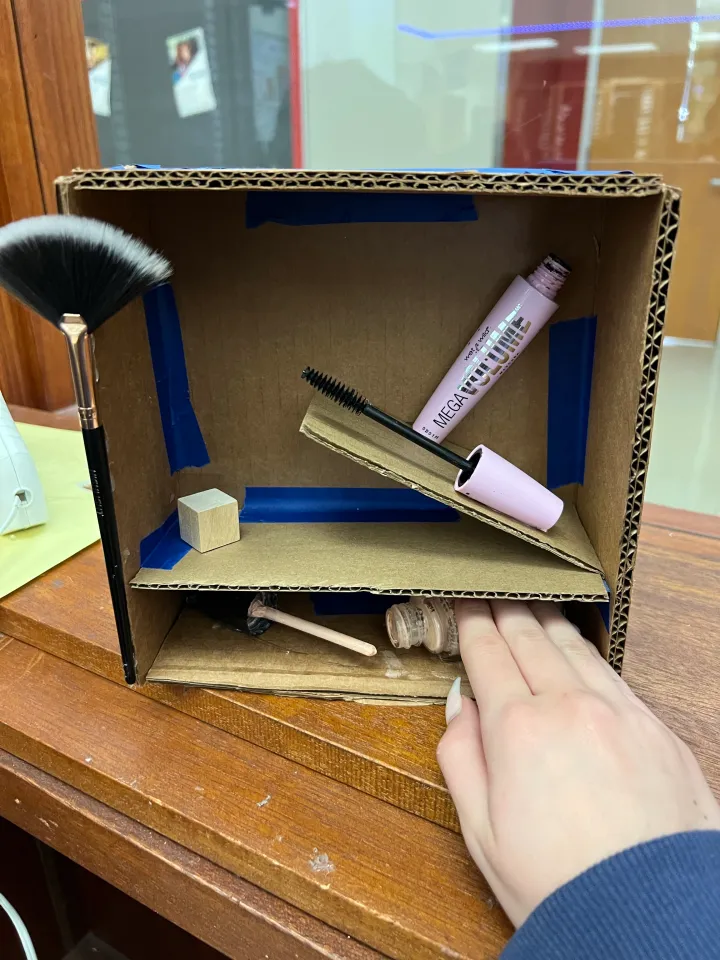
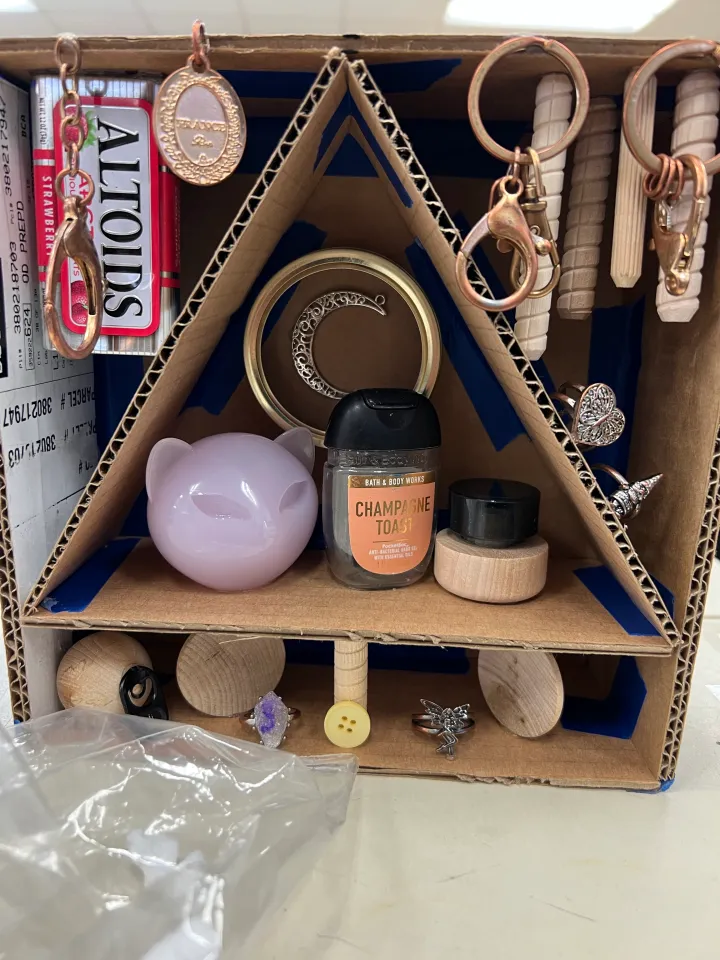
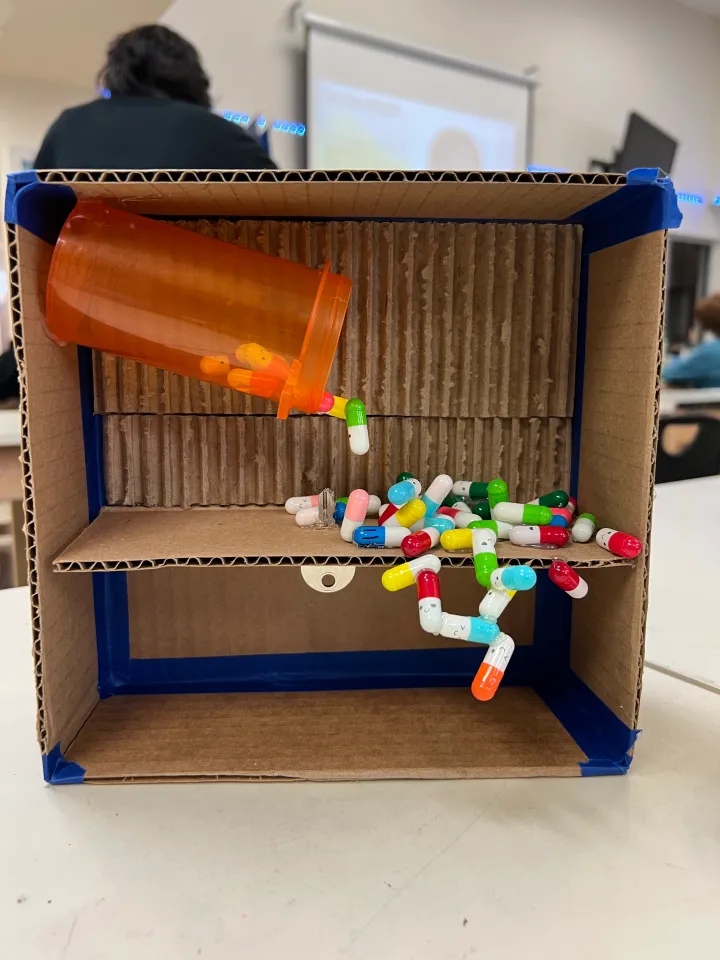
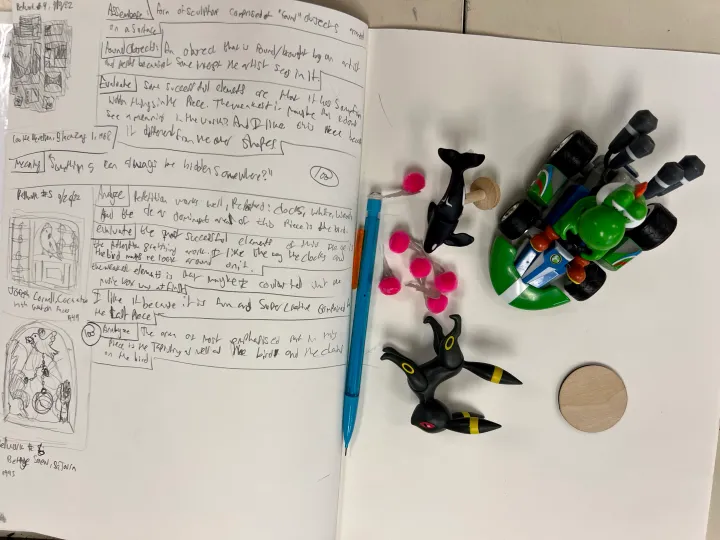
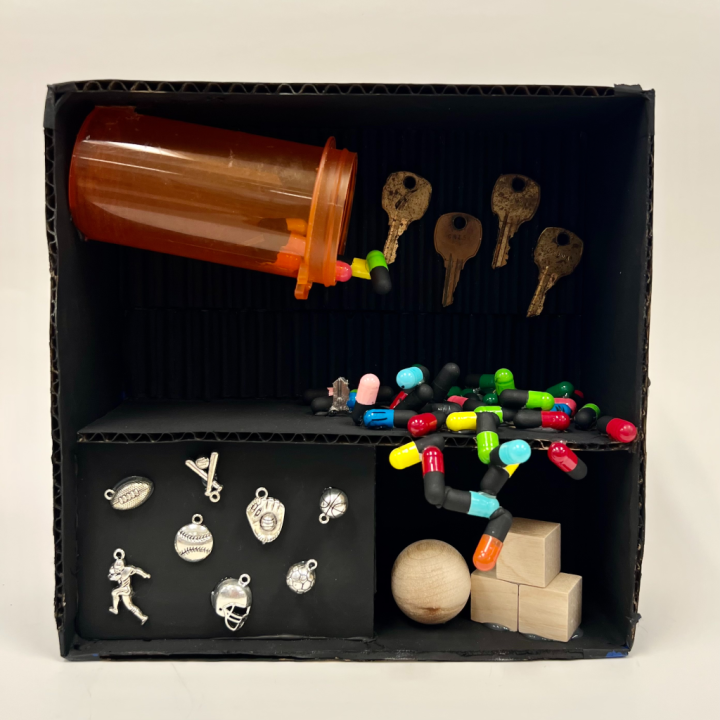
这位学生在反复斟酌后,决定不保留仿制药片原本的鲜艳色彩,而是亲手为其拼装雕塑绘制单色效果。
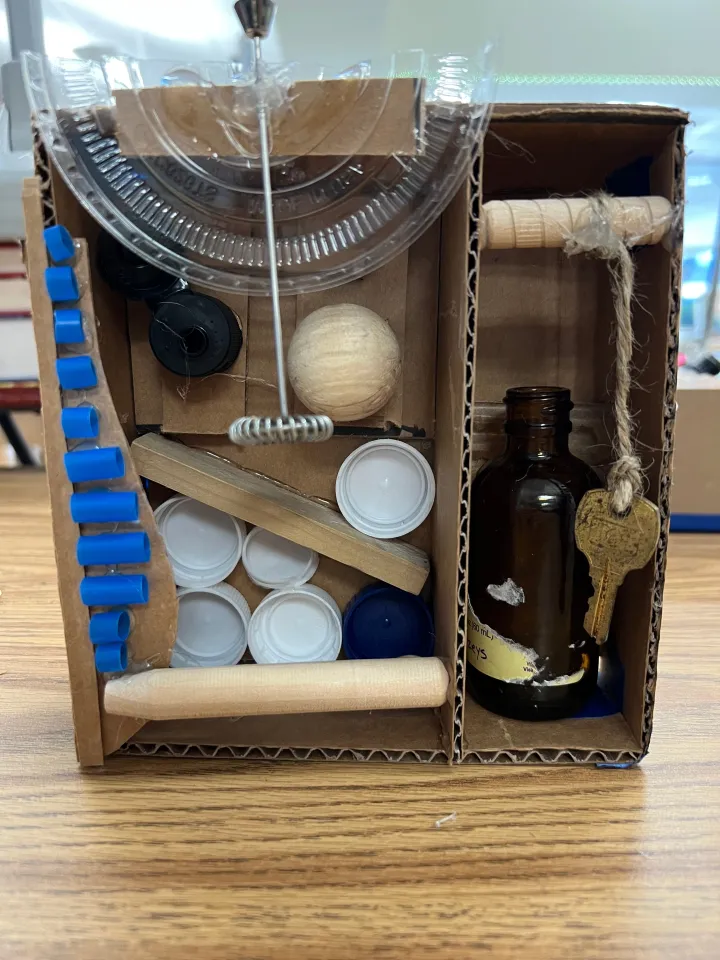
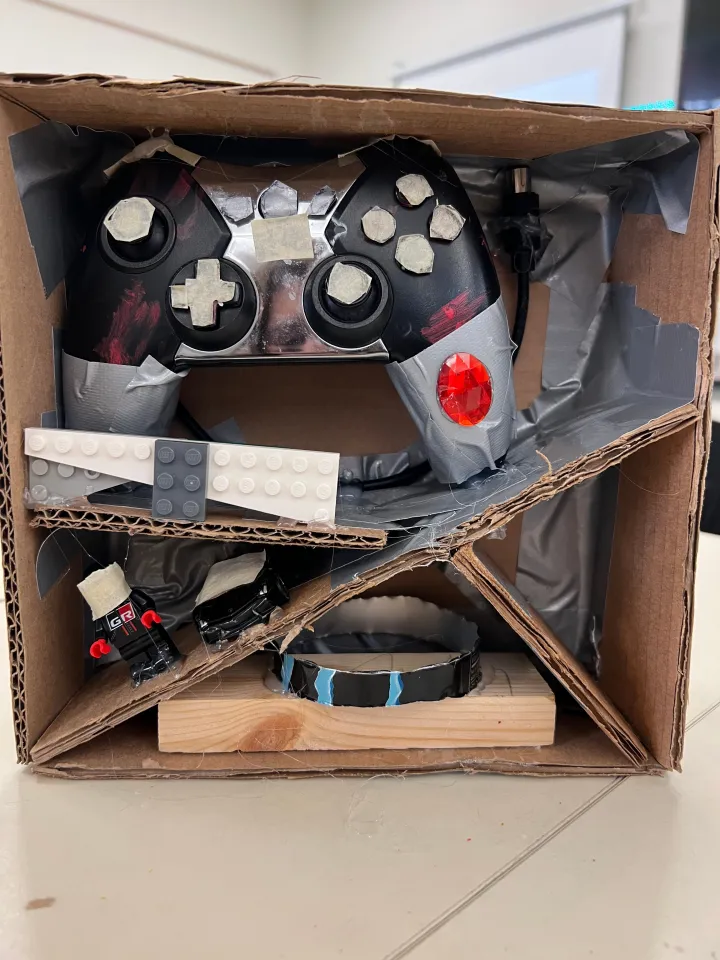
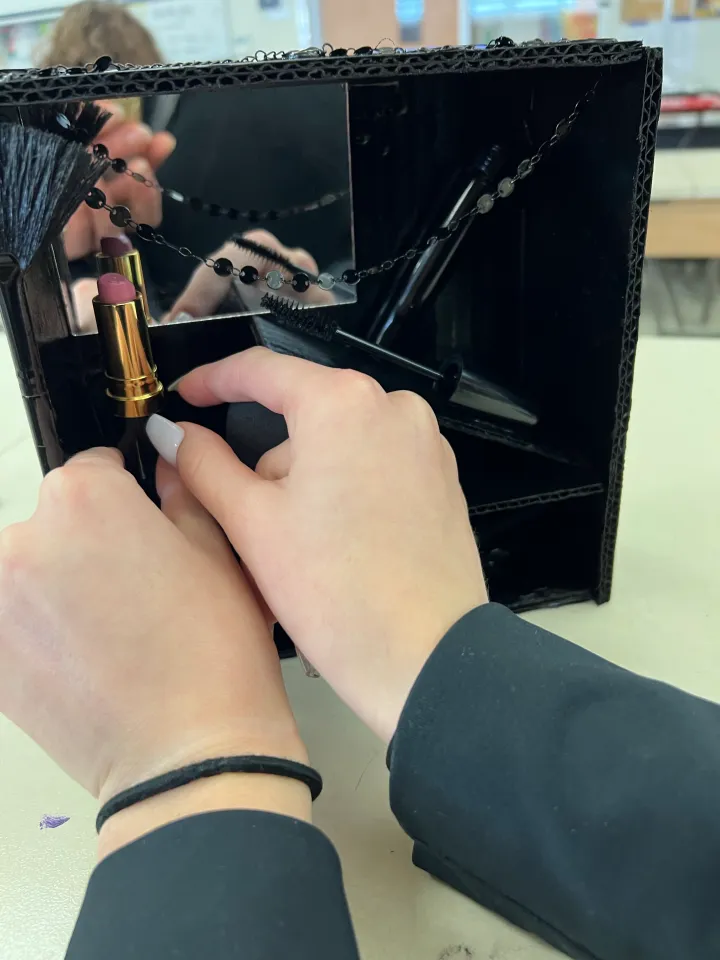
此阶段我们还会探讨主题。依据学生年龄层次,您可投入较多时间,引导他们选用能体现更广泛主题的物品;若面向低年级学生或课时紧张,也可为全班统一设定同一主题。我校高中生曾探索的主题包括:自然 vs. 人造物、科技、沟通、回收再利用、被丢弃之物、环境问题以及消费文化。
单色绘画
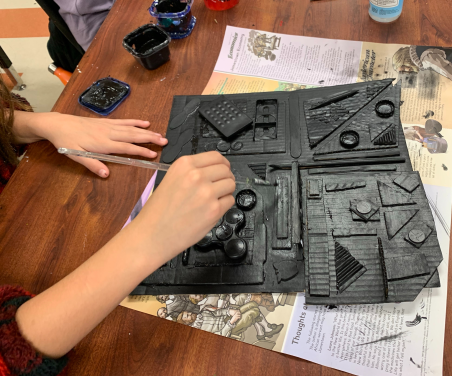
这对学生而言总是一次极具转化意义的时刻:一切看似杂乱无章、堆砌凌乱,而一层单色颜料却能瞬间赋予整体统一感。除非您拥有90分钟课时,否则即使速度最快的学生,也极少能在一节课内完成此项任务。我喜欢在所有现成物尚未全部粘贴固定前就开始上色——这样能为关键现成物预留出干净画布,便于学生探索视觉重点。
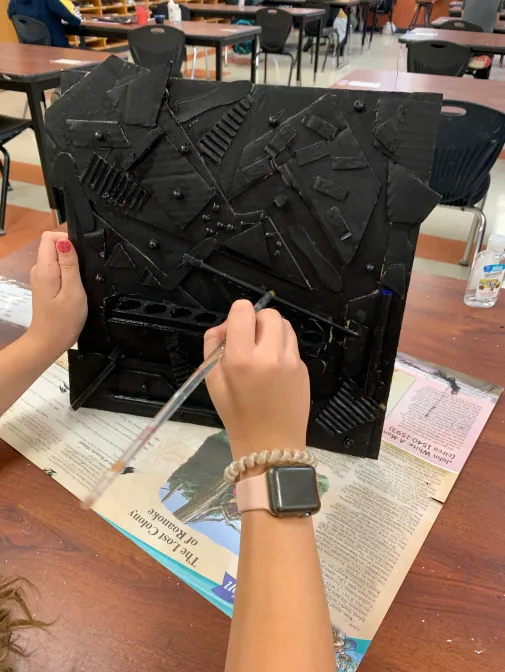
我鼓励学生边绘画边旋转作品,以便发现所有缝隙与凹陷处。不同材质吸色效果不尽相同,但纸板特别容易上色!我们使用干燥后呈哑光效果的丙烯颜料。此前我也尝试过光泽感更强的油性颜料,有时还会在表面喷涂或涂刷一层透明亮光漆。具体选择,取决于您希望达成的视觉效果(及预算)!
另一种选择是喷漆。这种方法效率极高且效果出色,但存在一定限制:我发现其成本明显更高;此外,并非所有美术教室都邻近室外空间以满足通风要求。该方式还需教师对学生具备更高程度的信任。一切,终究取决于您当前所处的美术教师生涯阶段 : )。
上色,还是不上色?
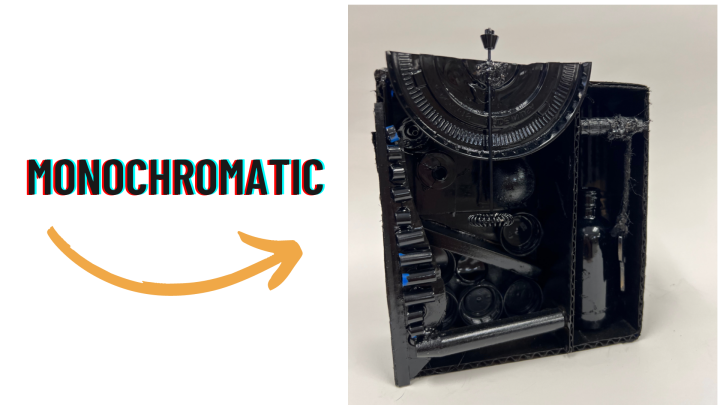
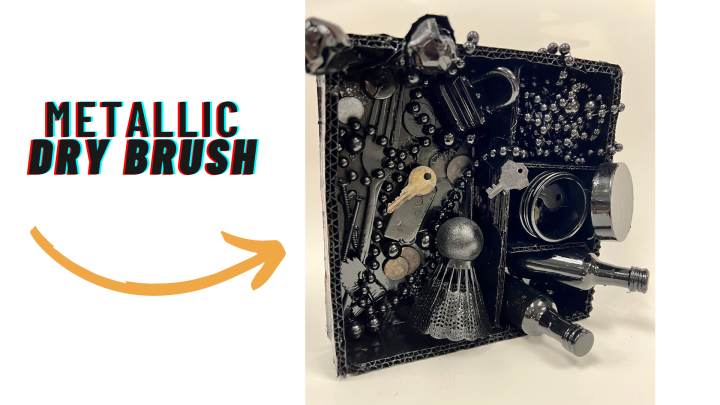
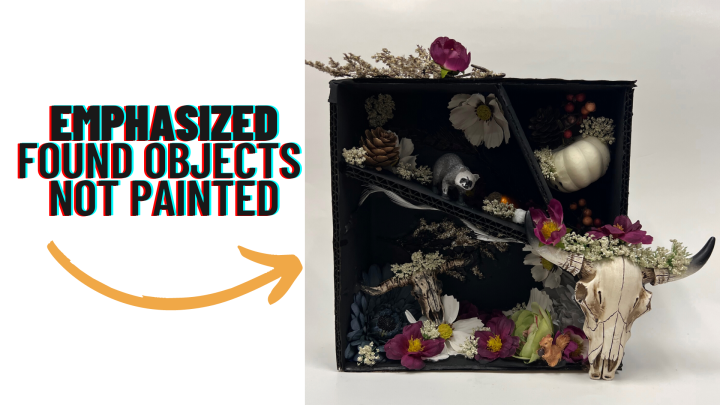
路易斯·内维尔森以单色雕塑闻名,其单色处理常掩盖或改变物件原有身份。部分学生深受这种美学风格吸引,而另一些学生则希望强化某些元素的表现力,或让特定物件保有其原始的“现成品”面貌。因此,我给予学生三种选择:整件拼装雕塑统一单色上色;待全部上色完毕后再粘贴物件,使其脱颖而出;或采用金属色干笔扫绘技法进行微妙提亮。每种技法各具优势,我希望学生通过实践,自主探索并做出属于自己的选择。
现成物拼装雕塑展示
今年,我们将所有学生的盒子统一固定于一块胶合板上,全体学生的现成物拼装雕塑将在本学区艺术展中集体展出。这些作品本身已是令人惊艳的独立装置,而以群组形式呈现,则为学生之间创造了极佳的联结契机。当学生们仅在我教室中看到自己作品以协调统一的整体面貌陈列时,那份由衷的自豪感令我倍感欣喜。相关照片即将发布!
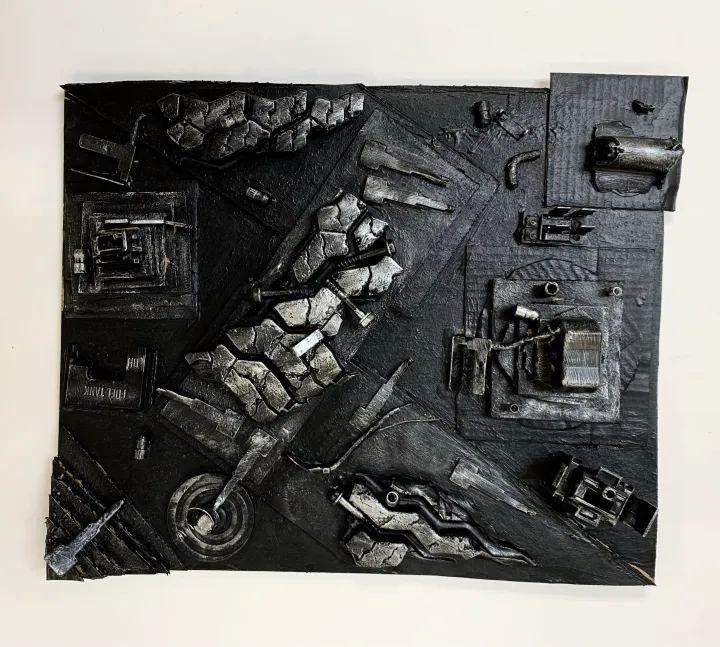
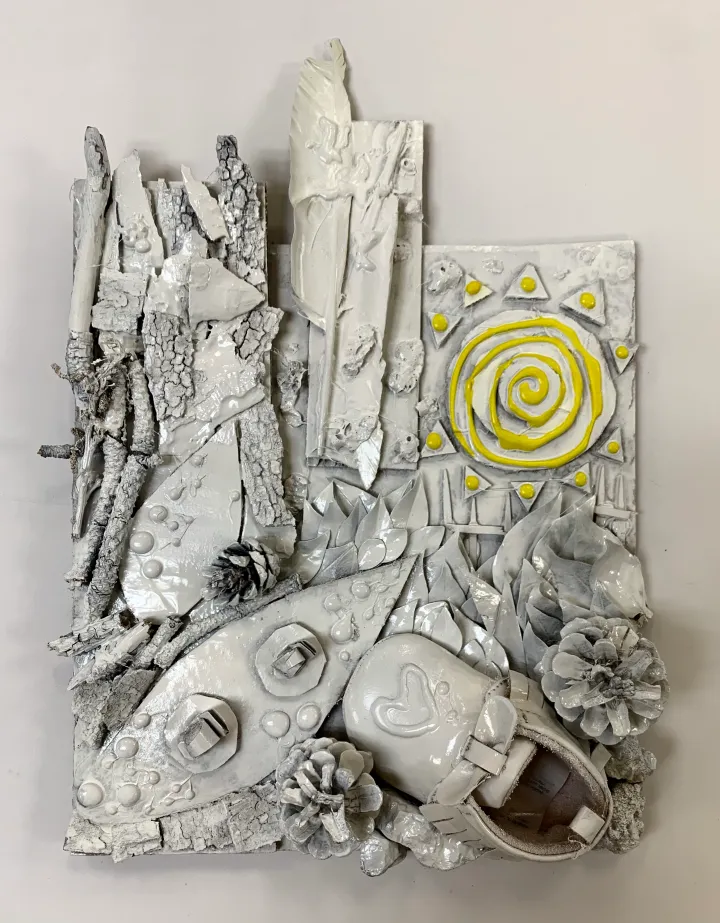
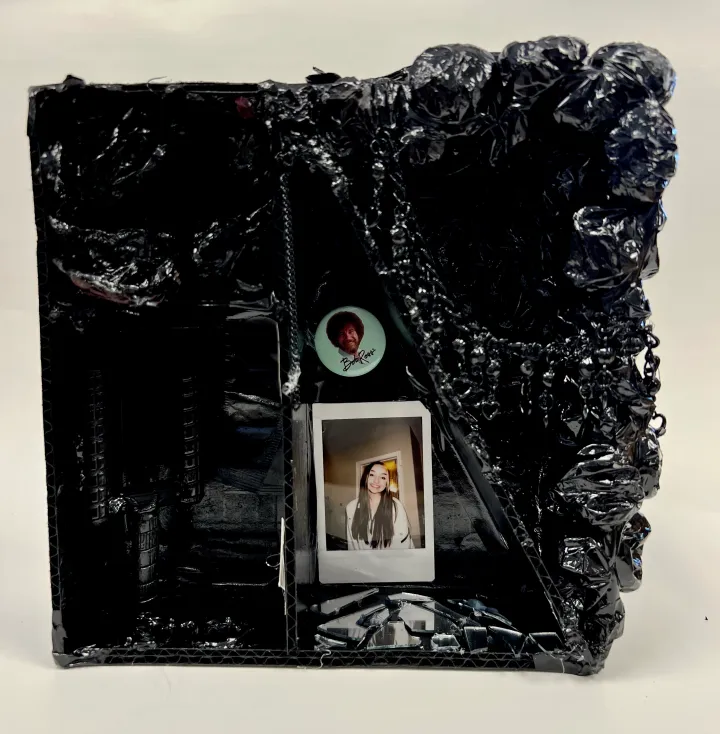
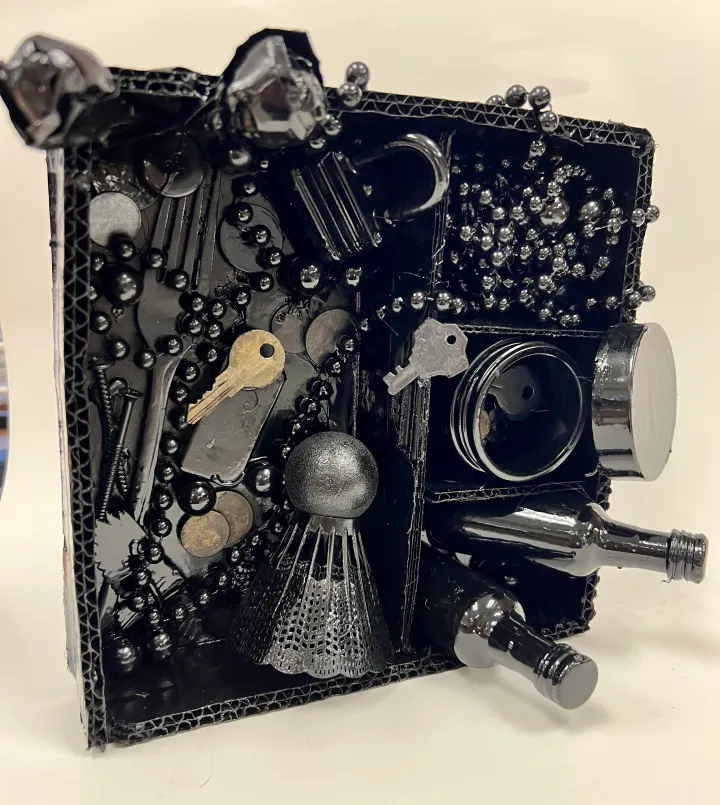
浮雕技法完成作品
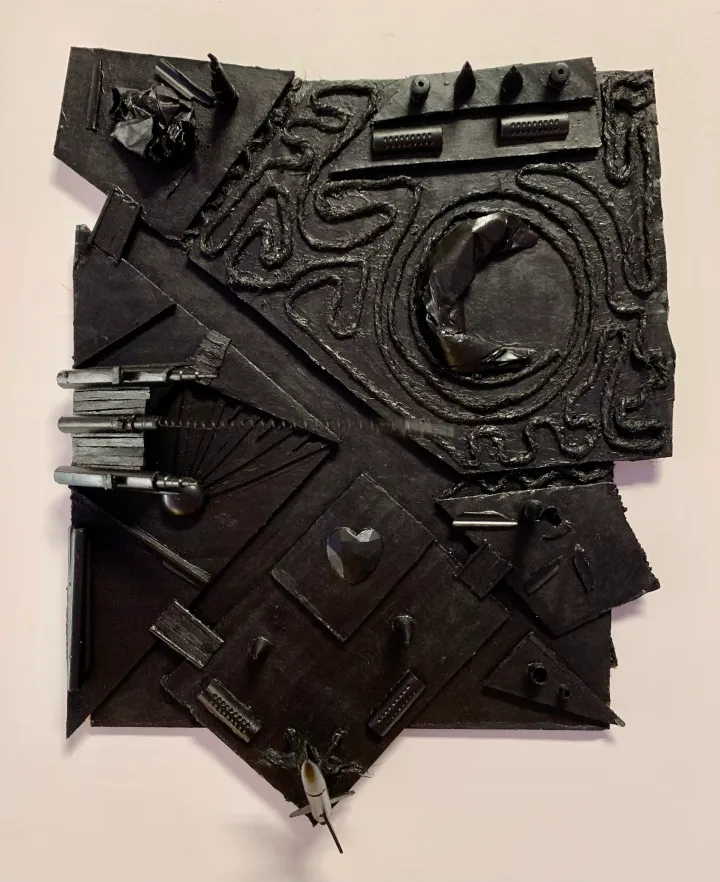
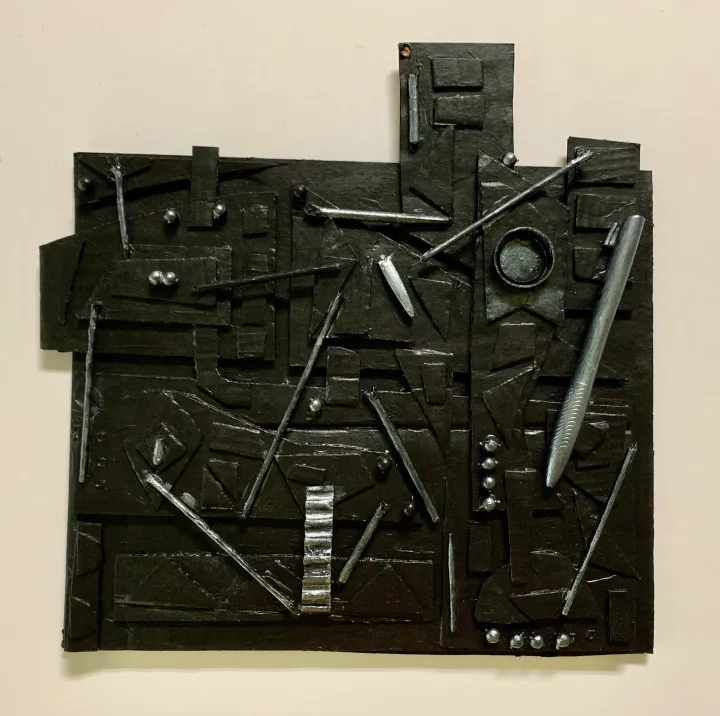
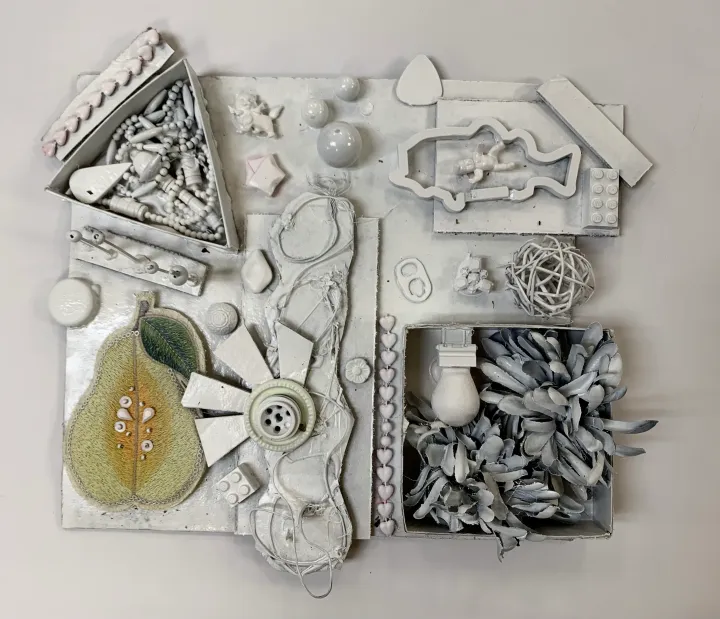
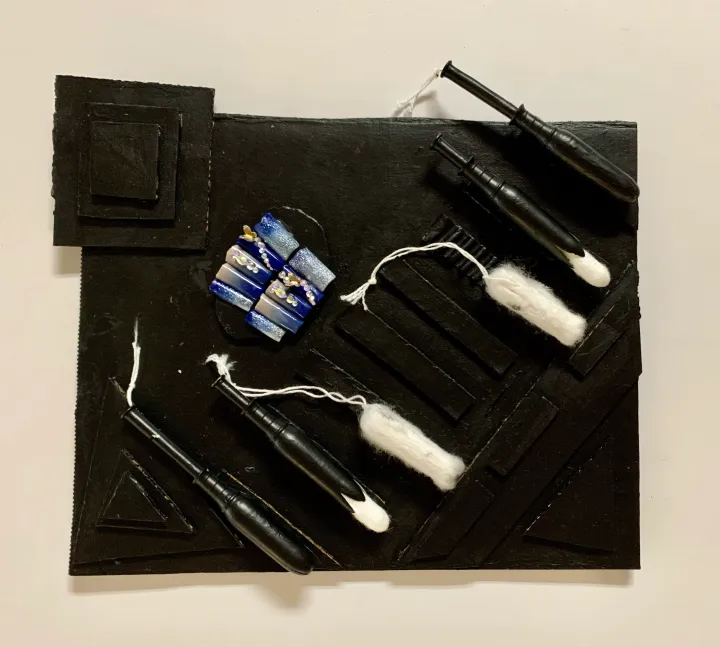
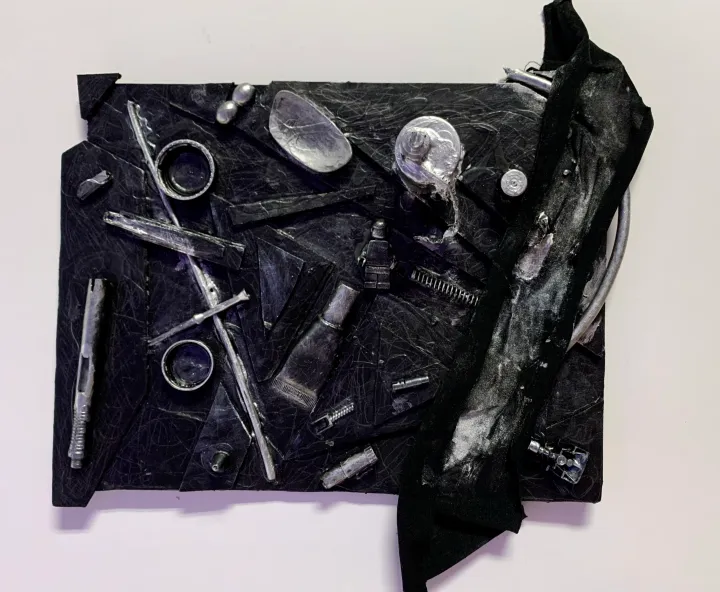
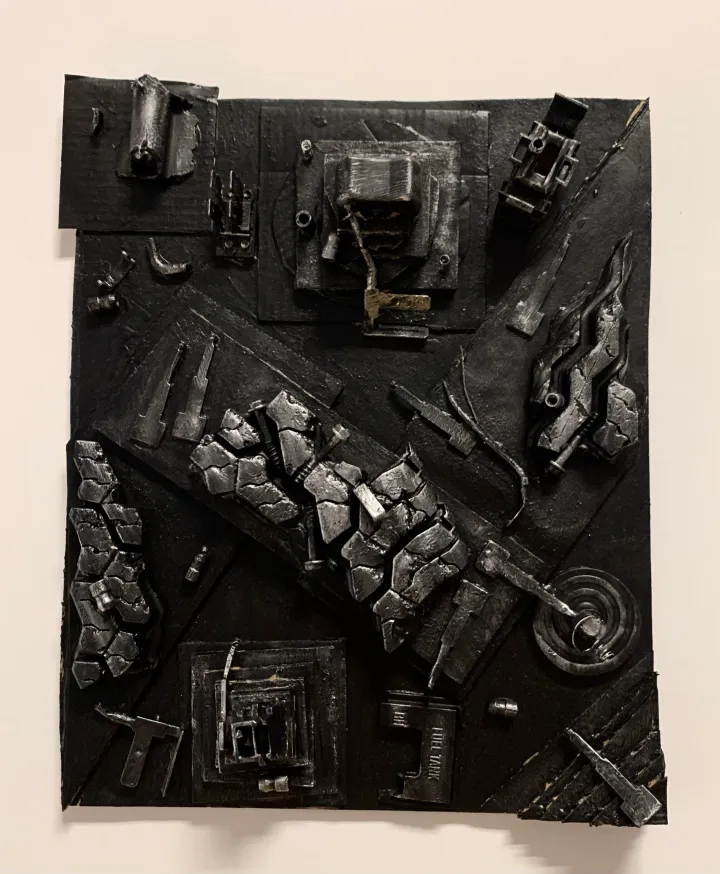
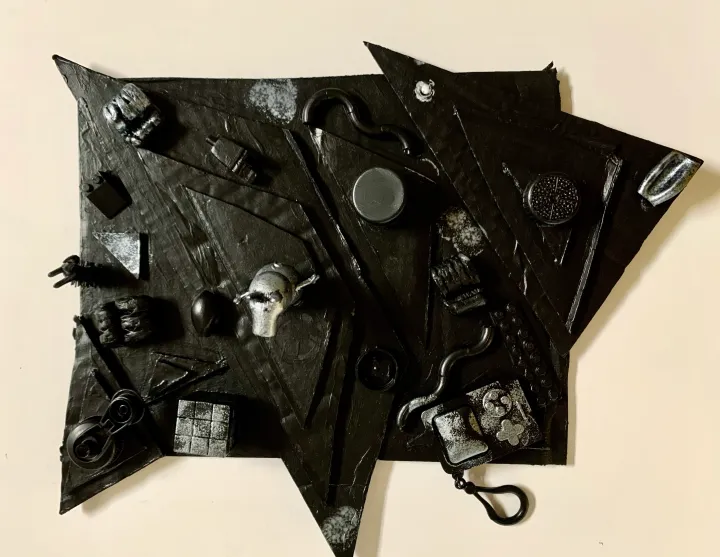
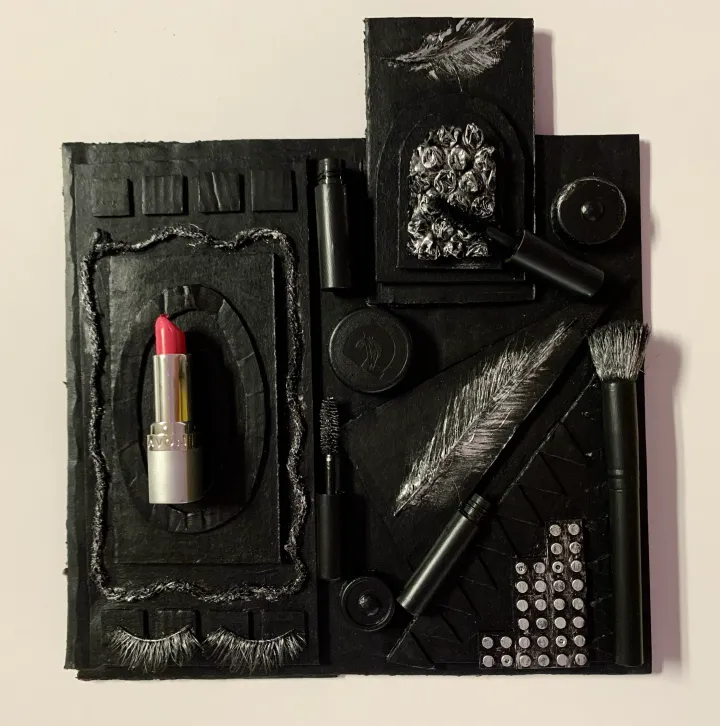
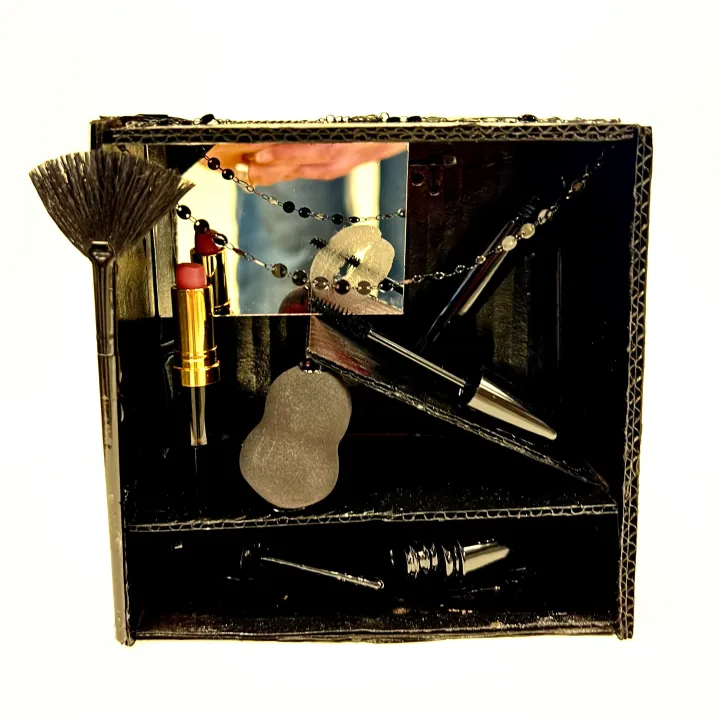
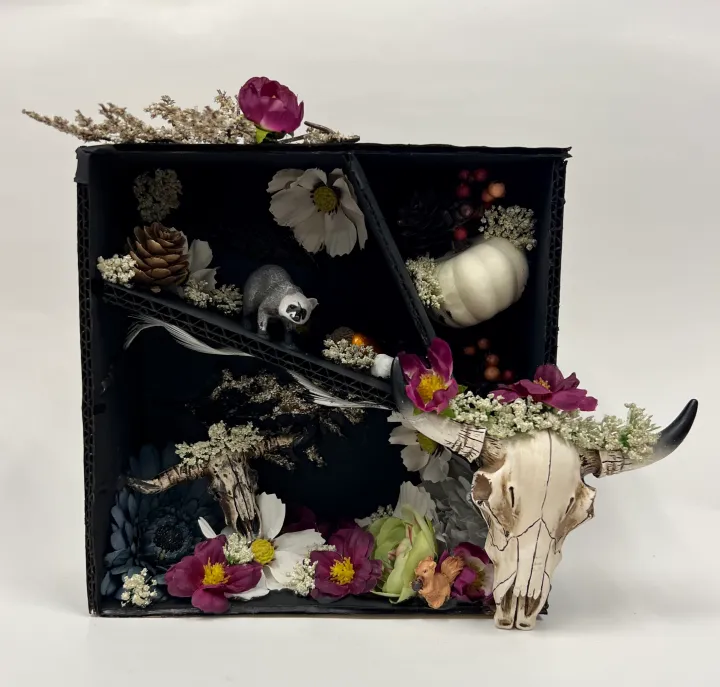
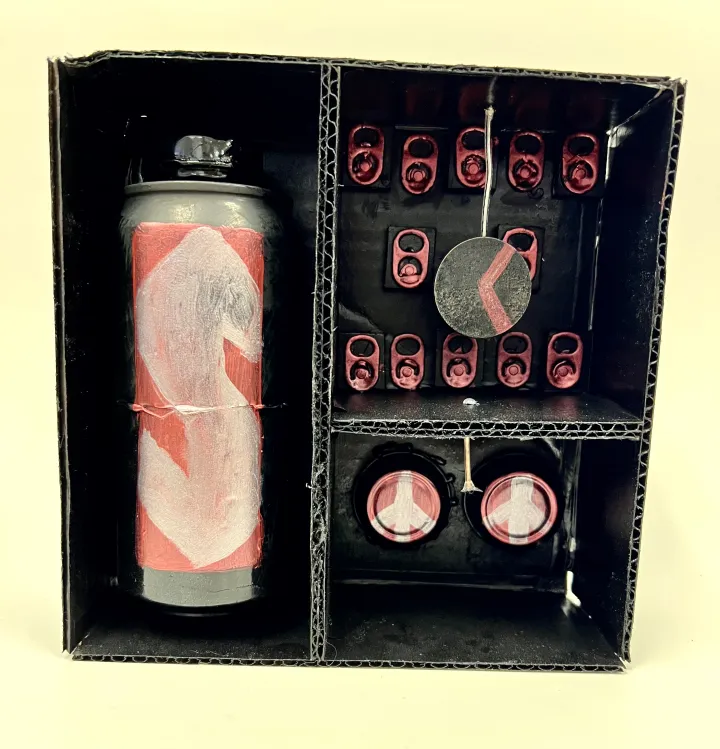
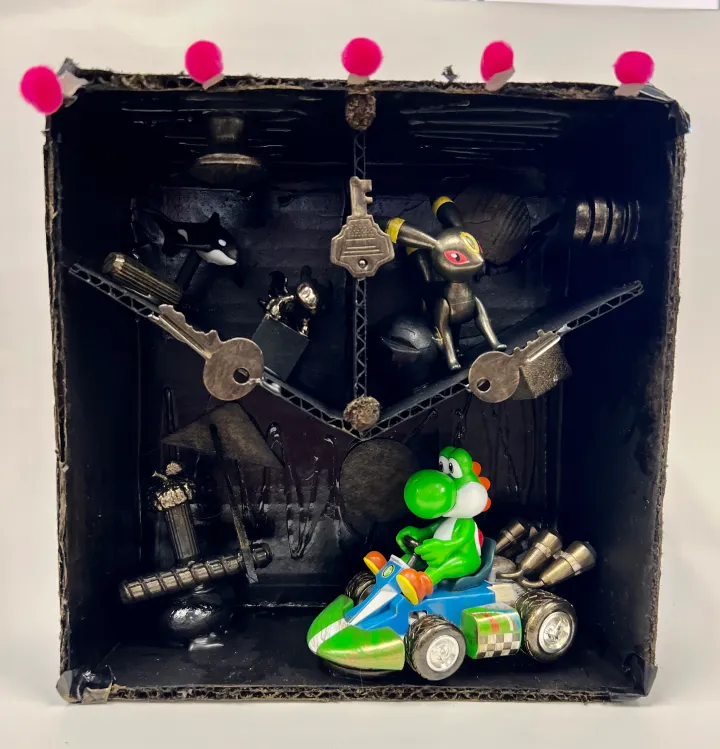
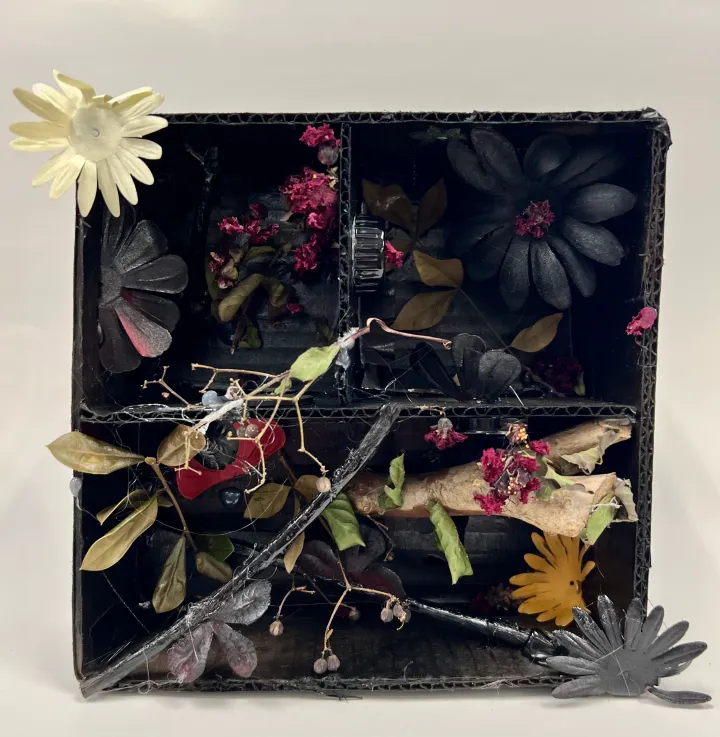
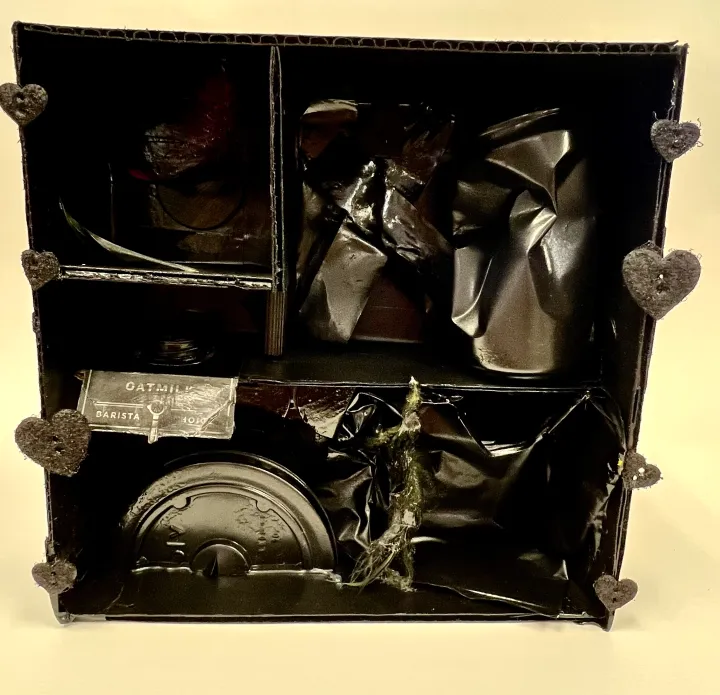
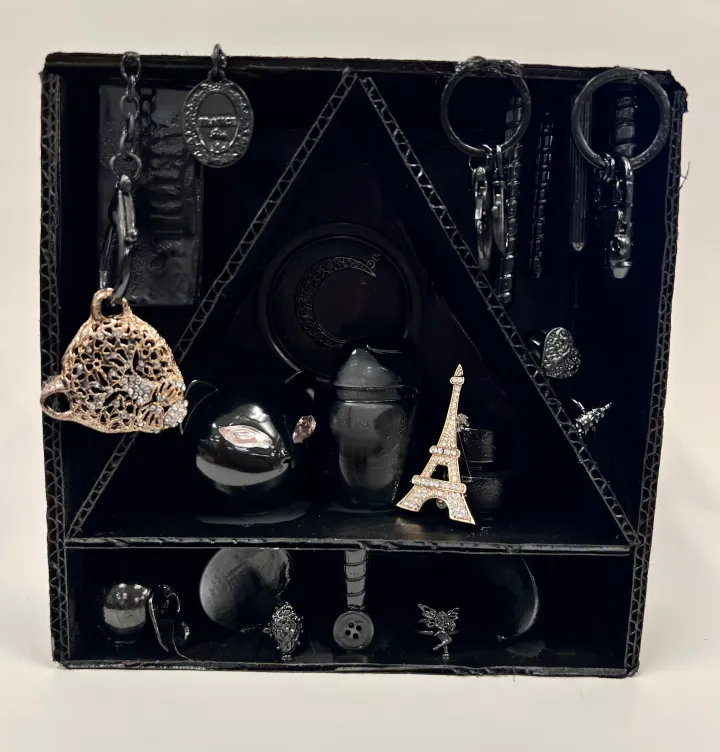
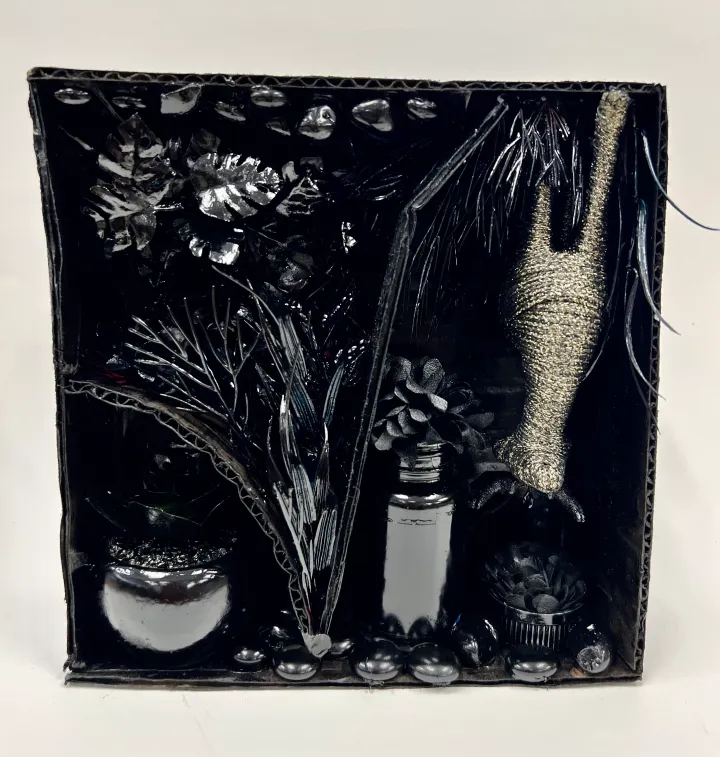
三维盒子完成作品
订阅,以免错过任何一篇推送!
订阅!
不妨试试这堂模块化雕塑课——另一节低成本雕塑课程。
模块化雕塑美术课
您最钟爱的雕塑课程是什么?非常期待听到您的分享!
提交表单。

作者:Sierra Machado
2020年7月29日

作者:Sierra Machado
2020年7月21日
作者:Sierra Machado
2020年7月11日
Found Object Assemblage Sculpture
Original: https://thatartteacher.com/2022/09/30/found-object-assemblage-sculpture/
Date: 2022-09-30
Author: Sierra Machado
Categories: art education, long form lesson plan, sculpture
Tags: art distance learning resources, art education, art lessons for distance learning, assemblage art lesson plan, assemblage art tutorial, assemblage sculpture with recycled materials, cardboard art lesson, cardboard sculpture techniques, cardboard sculpture tutorial, distance learning lessons, easy cardboard sculpture, easy sculpture lesson, featured, found object art lesson, Found Object Assemblage Art Lesson, found object sculpture, louise nevelson art lesson, louise nevelson inspired art, middle school assemblage art lesson, middle school cardboard sculpture, middle school found object art lesson, sculpting tutorial, that art teacher
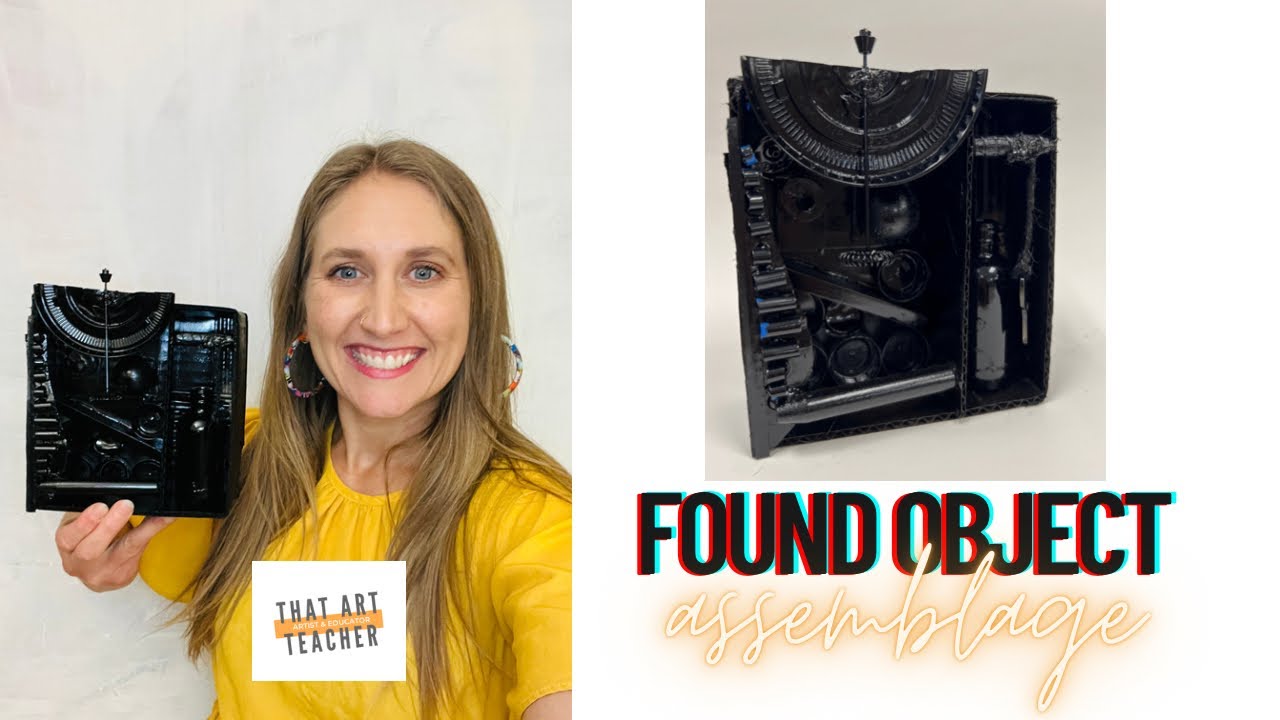
Found object assemblage sculpture is one of my all time favorite lessons. They are budget friendly and a great introduction to composition, which can be a tricky topic in the art room. I love seeing my students’ inner scavenger come alive. There are so many directions to take a found object assemblage and many contemporary artists to draw inspiration.
If you have a short attention span like I do, this short video will show you every step:
I like to focus on an abstract style inspired by Louise Nevelson’s monochromatic assemblage sculptures. Nevelson is one of the most innovative sculptors and my students enjoy the abstract qualities of her assemblage. It can be a relief when art doesn’t have to “be anything” or look like something in particular.
Found Object Assemblage Artists to Explore
We looked at Louise Nevelson, Betye Saar and Joseph Cornell. We do daily art history warm-ups that help students develop their art criticism discussion and writing skills.
Louise-Nevelsonfree Download!
Betye-Saarfree Download!
Joseph-CornellDownload
Found Object Assemblage Tutorial
This classroom ready (or distance learning!) tutorial will show you every step I take with my students for this found object assemblage lesson using a relief technique. All you need is a piece of base cardboard (Amazon boxes are my go-to) and Elmer’s glue. Seriously, Elmer’s glue will work with 99% of objects. Hot glue or super glue can be used for sturdier items, but we rarely deviate from old fashioned Elmer’s.
I also like to switch things up and have students create 3D boxes to organize their objects. This is great for the secondary setting and pushes the sculptural element even more. Try this tutorial to create your own box, it’s super easy!
Part One: Organizing Composition
Cardboard is a great material for assemblage sculptures because it is lightweight, FREE, and readily available. Perfect for a public school art room! I have also done this sculpture with wood, but that was back in the day when my former high school had a woodworking class. I really prefer cardboard because it is way more user friendly and students can use scissors to cut and adjust their own shapes.
I start by giving students a pre-made cardboard base. The size and shape depend on what cardboard I have stockpiled. I try to keep things consistent, but I don’t always have good aim with the cutting board. The last time I did this artwork I had a ton of unused pizza boxes leftover from a school wide fundraiser. SCORE!
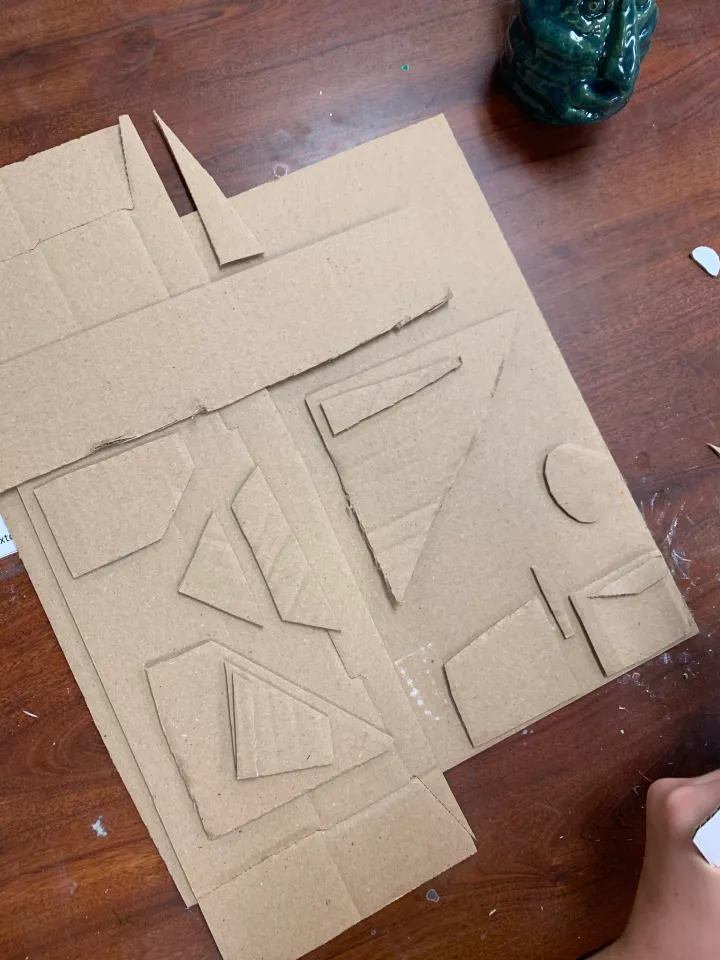
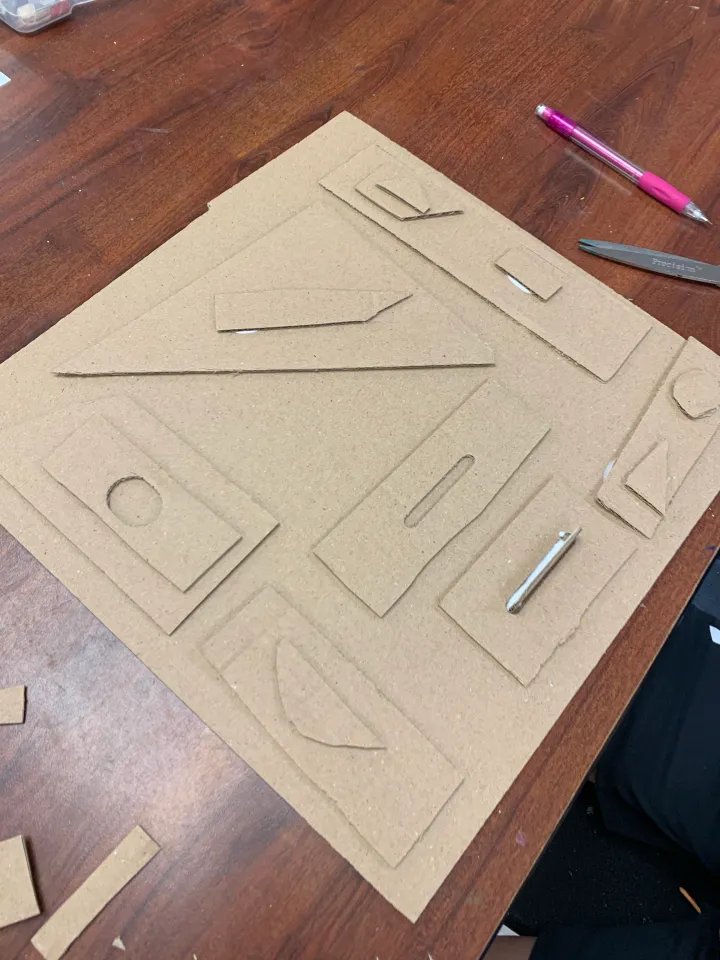
One the first day, I give students these guidelines:
- Include one diagonal shape
- Include one horizontal shape
- Include one vertical shape
- Extend off the edge at least once
- Cover 75% of your base with these shapes
Organizing Composition
Some students love this step and the concept clicks immediately. Students that have a natural understanding of shape and organization tend to grasp the concept right away. Some students are totally thrown off by the non-objective quality of the composition. I always have at least one student who wants to draw out a smiley face or something else recognizable. I try to reinforce the concept of composition, or arranging elements, and that this will be the organization that keeps the sculpture from looking like a hot mess.
3D Box Construction
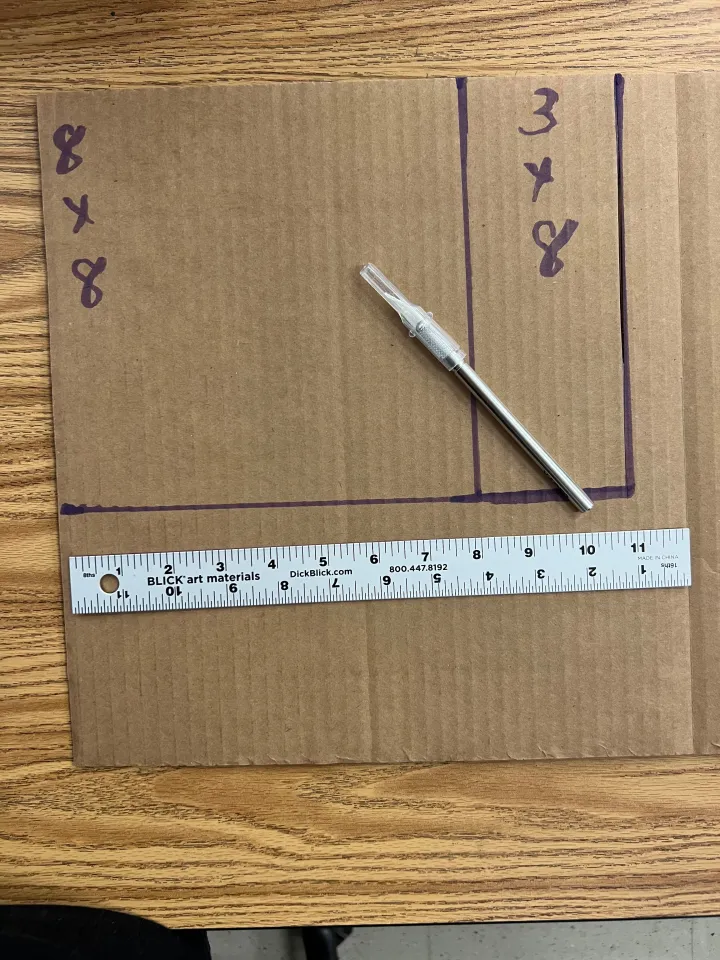
A fun deviation for this project is to have students create their own boxes using cardboard. We did 8×8 inch boxes and used Xacto knives, masking tape and the optional hot glue.
Students measure their base on the edge of a larger piece of cardboard and I have students the same measurements. I told students that their box did not have to be a uniform size and that if they wanted to branch out, I supported them but would not help with the math. (#cantmath).
Once their base is measured, they cut four uniform rectangles for the edges of the box. We did 8×3 inches, but these measurements can be adapted. We used masking tape to attach all seams (front and back) and the boxes were sturdy as heck! My video tutorial really helped students who needed extra guidance with the measurements.
Smaller Shapes, Texture & Basic Found Objects
Next is smaller overlapping shapes and texture. When I taught on a block 90 minute schedule, I did all of this in one class period. Now that I am in a 45 minute schedule I break it up into two sessions. I always remind students to keep things neat and organized, because although we are recycling “junk” materials, we don’t want it to look junky. Organization is key! I also introduce some found objects at this point.
I usually have some random things collected like water bottle tops, string, broken pencils, popsicle sticks etc. I like to introduce Louise Nevelson and the concept of found objects a couple days before they will use them. It usually takes a couple days for them to trickle in. And yes, sometimes the found objects never arrive. I put that as a category on my rubric.
I reinforce loudly and often that the personal found objects really make the assemblage. As the teacher I will provide a few things, but the area of emphasis, or focal point, really depends on their scavenging skills. A fun warm-up for a younger group is to show them images of assemblage sculptures of former students and say “I spy with my little eye…” and pick found objects for them to search for. This is a great way for them to observe assemblage art and get the wheels turning in their head for what they can find for their own artworks.
This student hand painted her assemblage after debating on leaving her fake pills colorful or monochromatic.
We also discuss theme at this stage. Depending on your age group, you can really invest time in having students use objects that represent a broader theme. Or, you can give all of your students the same theme if you are teaching younger grade levels or short on time. Some themes my high schoolers explored are nature vs. man made, technology, communication, recycling, things that are discarded or thrown out, environment issues and consumer culture.
Monochromatic Painting
This is always a transformative moment for students. Everything seems chaotic and junky, but a monochromatic layer of paint provides instant unity. Unless you have 90 minute class periods, even the fastest student rarely finishes this in one session. I like to start painting before all found objects are glued down. This provides a nice blank canvas for the important found objects for students to explore emphasis.
I encourage students to rotate their artwork as they paint to find all of the cracks and crevices. Not all materials absorb paint in the same way, but cardboard is really easy to paint! We use acrylic paint that dries somewhat matte. I’ve used a glossy oil based paint before and we sometimes spray or paint a clear gloss coat on top. It all depends on the look (and budget!) you want to achieve.
Another option is spray paint. This is much quicker with excellent results, but there are limitations. I find this to be a much more expensive option and I have not always had an art room near an exterior space. This option also requires a more enhanced level of trust of your students. It all just depends on where you are in your art teacher life :).
To Paint or Not to Paint
Louise Nevelson is famous for her monochromatic sculptures that mask or alter the identity of her objects. Some students really respond to this aesthetic, while others want to create more emphasis or let certain objects stay pure to their ready-made look. I give students the option to paint their assemblage monochromatic, glue objects after it’s all painted so they stand out, or add metallic dry brush details for subtle highlighting. Each technique has its own benefits and I like students to explore their own choices.
Found Object Assemblage Display
This year, we are connecting all of our boxes to a piece of plywood and all students will have their found object assemblage sculptures on display at our district art show. These make knock-out stand alone pieces, but the group element is a great connection for students. I was so happy at the sense of pride my students had when seeing them displayed (just in my classroom!) as a cohesive unit. Pictures coming soon!
Relief Technique Finished Pieces
3D Box Finished Pieces
Subscribe so you never miss a post!
Subscribe!
Try out this modular sculpture for another inexpensive sculpture lesson.
Modular Sculpture Art Lesson
What is your favorite sculpture lesson? I’d love to hear from you!
Submit a form.
by Sierra Machado
July 29, 2020
by Sierra Machado
July 21, 2020
by Sierra Machado
July 11, 2020