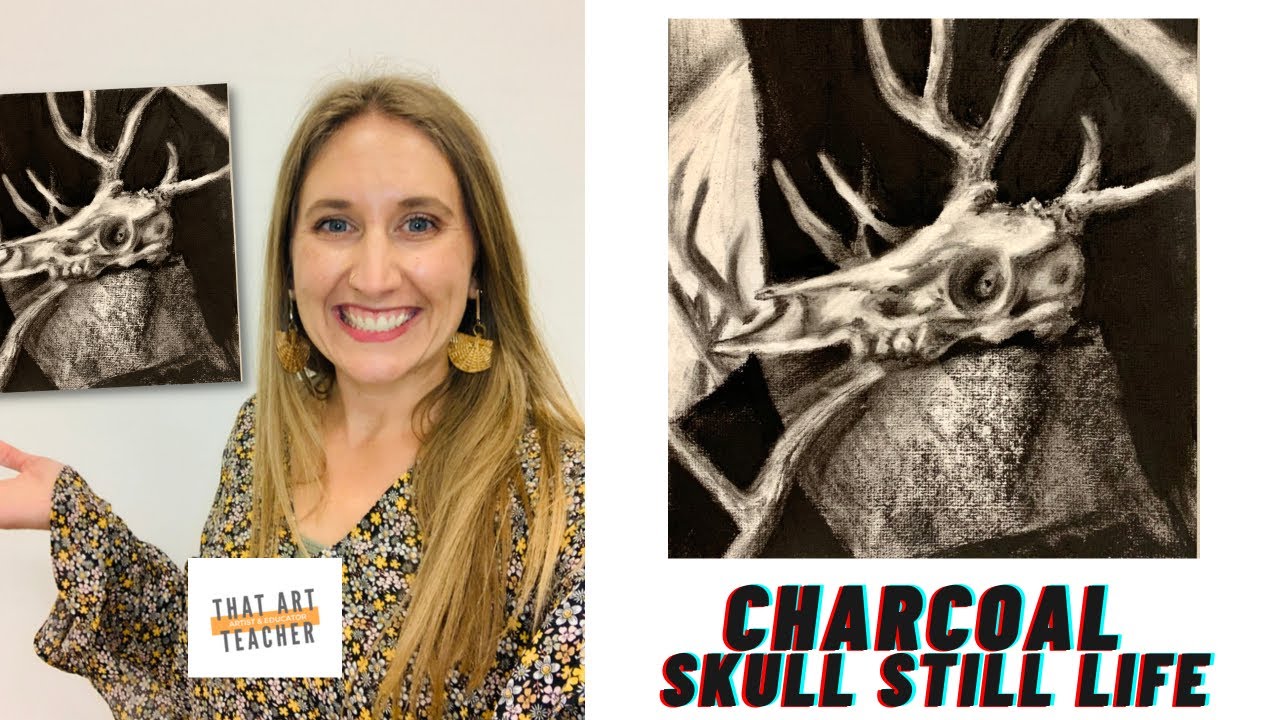
炭笔骷髅作品
原文链接:https://thatartteacher.com/2021/11/11/charcoal-skull-artwork/
日期: 2021-11-11
作者: Sierra Machado
标签: 美术教育、美术教程、炭笔艺术课、炭笔绘画分步教学、高中炭笔课、炭笔骷髅作品、炭笔明度阶调、精选内容、如何教授炭笔、如何使用压缩炭笔、那位美术老师
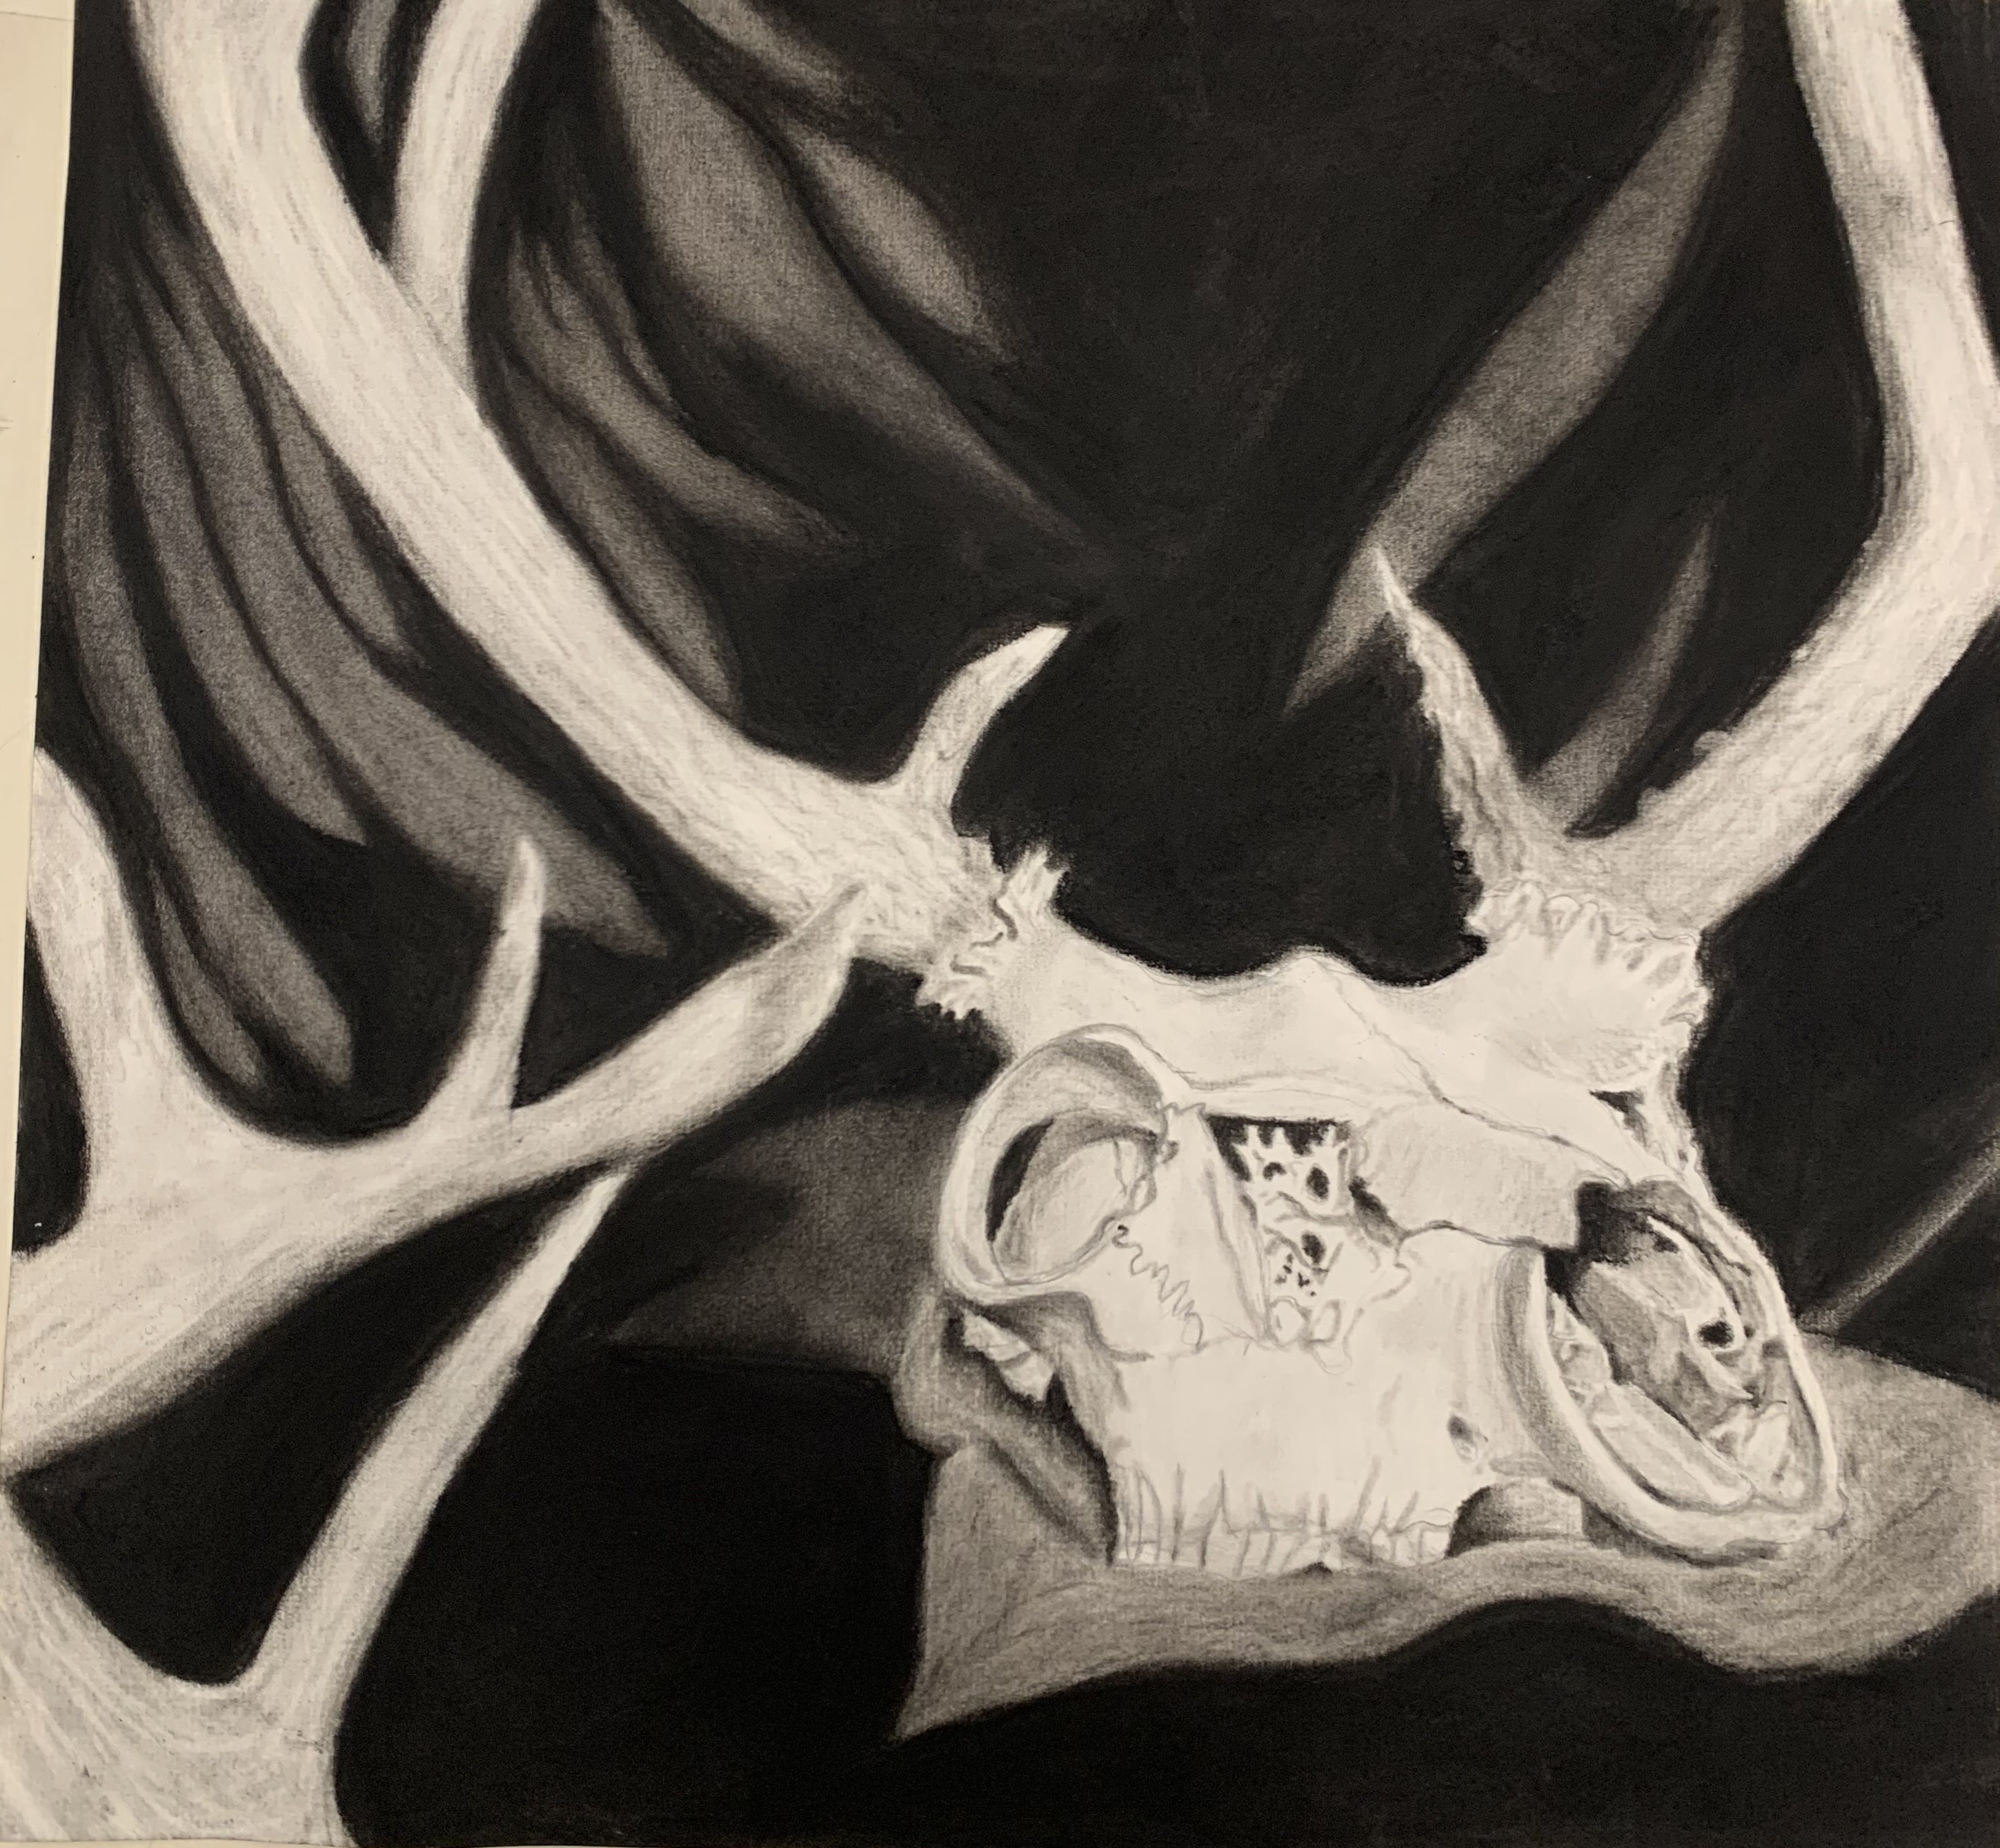
骷髅一直是我最钟爱的绘画题材之一。它既营造出诡异氛围,又呈现出优美的形态,是训练明度与排线的绝佳载体;同时,它也为探讨象征意义提供了极佳契机。我在俄克拉荷马州任教,我的学生对此类题材也始终表现出浓厚兴趣!我布置了一组静物,包含多年来收集的各类骨骼、骷髅与鹿角。本文将详述我在每班多达39名学生的超大班级中,指导学生完成炭笔鹿角骷髅作品的教学过程。该作业安排在我所授的《美术II》课程中,学生年级涵盖十年级至十二年级。
炭笔材料
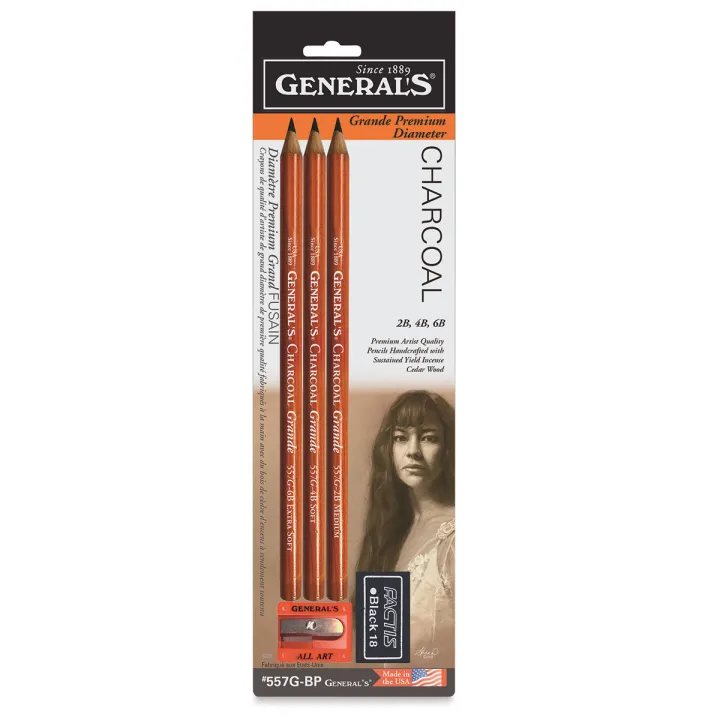
我们使用了压缩炭笔、自制木炭条、擦笔、橡皮及廉价炭笔纸。今年我还新增了炭笔(含白色炭笔),并强烈推荐在课堂中使用——此举显著减少了作画时的脏污!尽管班级规模庞大、材料获取受限,一定程度上限制了我的教学构想,但当我看到最终成果时,毫无遗憾!
***本说明中包含若干附属链接,指向本人在课堂中真实使用且真心喜爱的产品。若您通过这些链接购买商品,我可能获得佣金,而您无需额外付费。感谢您支持我的副业,让我能持续提供免费教学资源!!




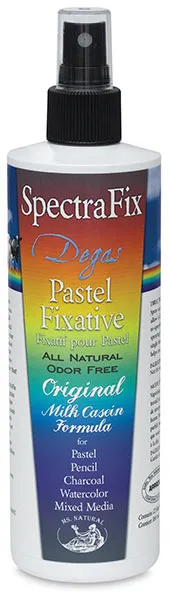

我极度推崇这款定画液! 它完全无味,室内使用安全无忧。我强烈推荐,它已成为我课堂上的“救命稻草”。
炭笔明度阶调练习
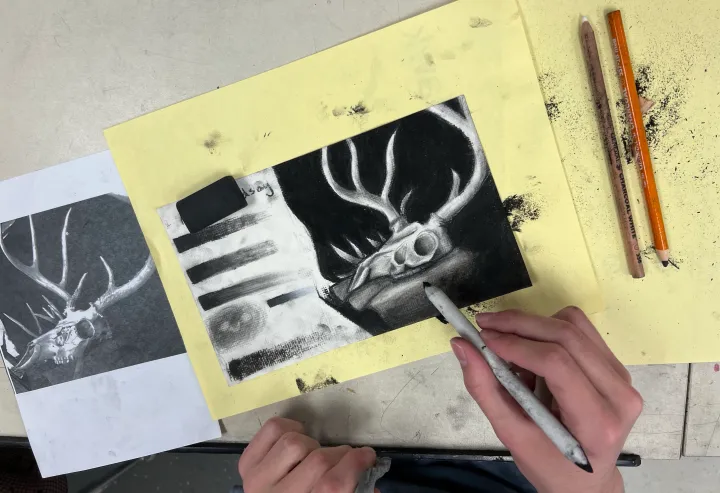
第一步是通过绘制多组明度阶调来熟悉炭笔特性。我们使用压缩炭笔,但炭笔同样效果出色!具体选用取决于您的预算与班级规模。尽管我本人极其喜爱用白色炭笔进行混色,但因班级人数达39人,为控制耗材,本次未予采用。
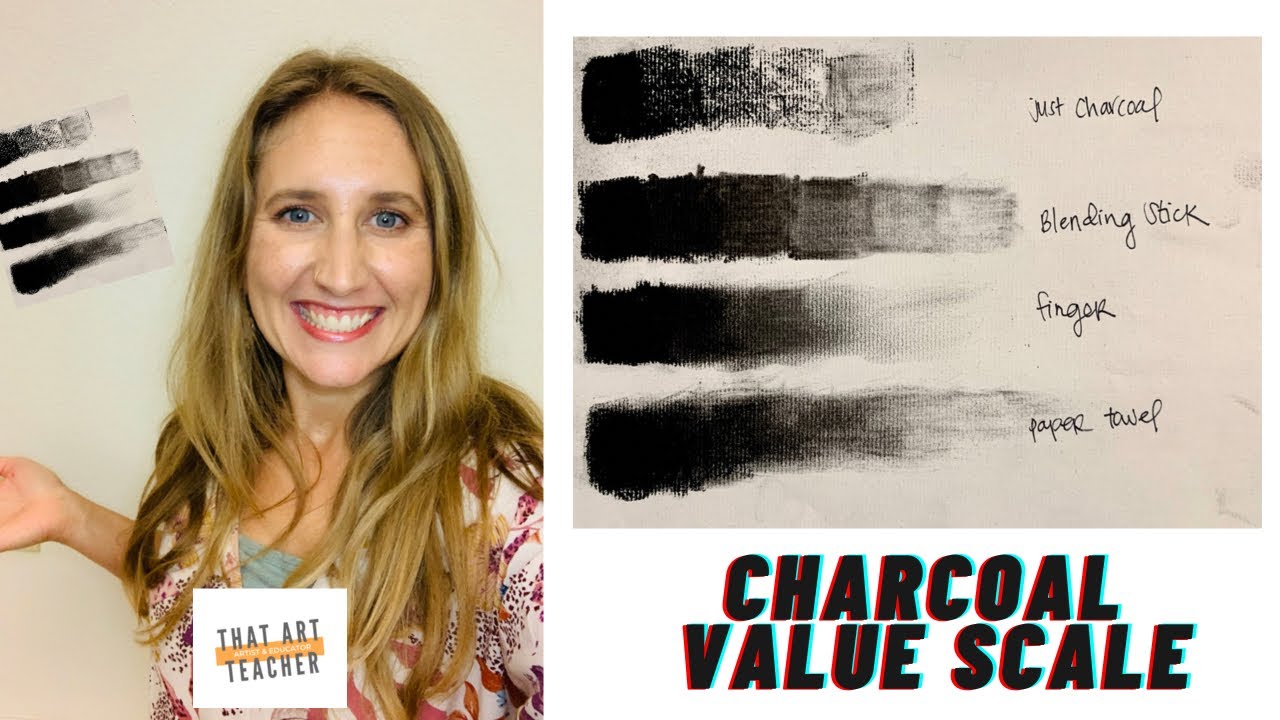
我们分别用擦笔、手指、纸巾以及仅靠炭笔本身绘制明度阶调。我认为单用炭笔作画挑战性最大!我进行了课堂示范,同时也将这段视频上传至Canvas平台,供缺勤学生或需要更多视觉指导的学生随时观看学习。
炭笔骷髅练习作品
在完成混色技法与完整明度范围练习后,学生们统一临摹同一张黑白骷髅照片。此举旨在让学生专注练习造型与明度表现,且不计入正式成绩,从而减轻心理压力。我将图片上传至Canvas平台,同时也打印约10份纸质版,以满足无网络条件学生的需求,或帮助那些更倾向脱离电子设备、专注创作的学生(2021年教学实践)。
以下为我们练习所用图片,亦同步配套我的[分步教程](https://youtu.be/09LAjJP3Fec?si=LC6JGy1S-uXaVAjP):
鹿角骷髅参考图免费下载!
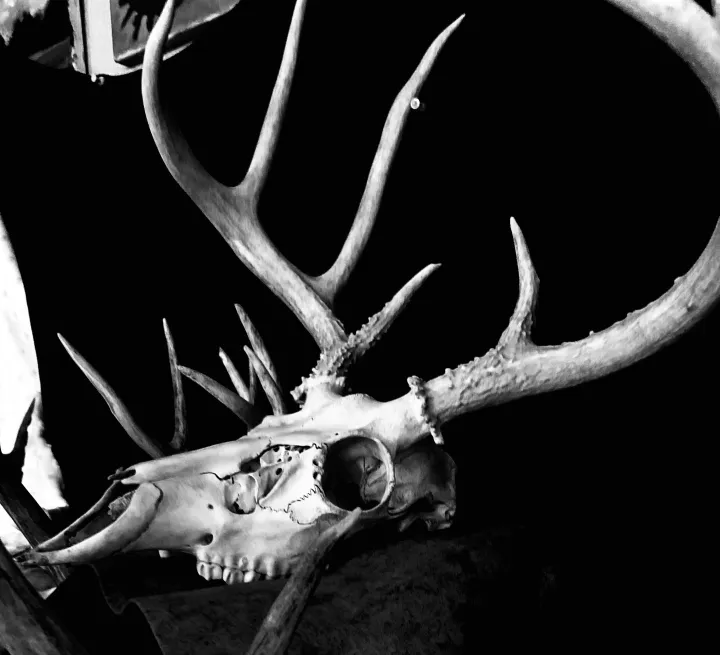
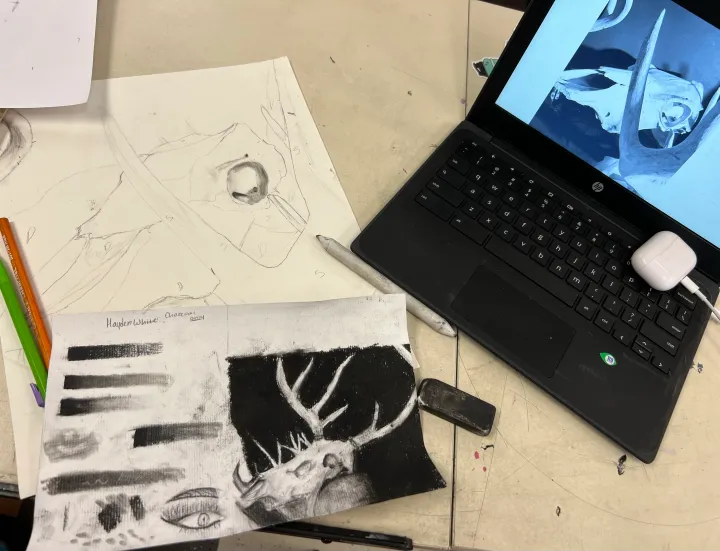
炭笔作画极易弄脏,因此我鼓励学生在用铅笔起稿前先洗手。多数学生约用15分钟完成明度阶调练习,余下课堂时间则用于细致勾勒鹿角骷髅照片。
下一节课,我们共同探讨明度分布,并集体分析该照片:首先指出画面中最暗与最亮区域,继而划分出浅灰、中灰与深灰层次;同时观察骷髅表面丰富的质感变化,并讨论细节最为密集的部位。
学生可依自身节奏逐步添加炭笔。我建议先铺绘骷髅部分最浅的明度,最后再集中处理背景中所有最暗区域。这一顺序是在我亲自尝试反向操作(即先画最暗处)并屡屡因炭粉污染画面而倍感挫败后总结出的最佳方案。
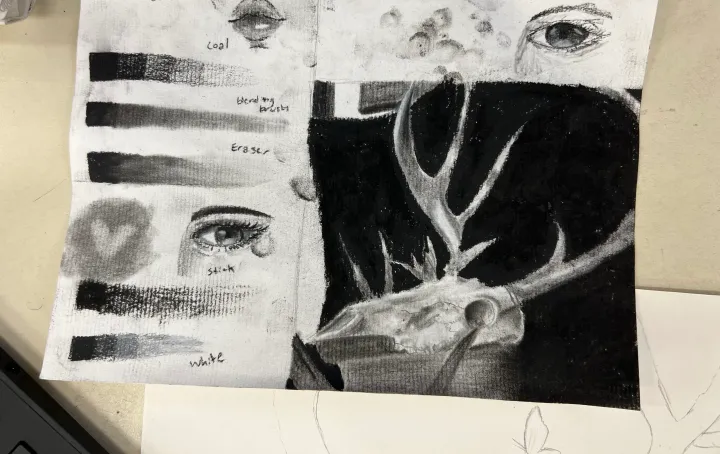
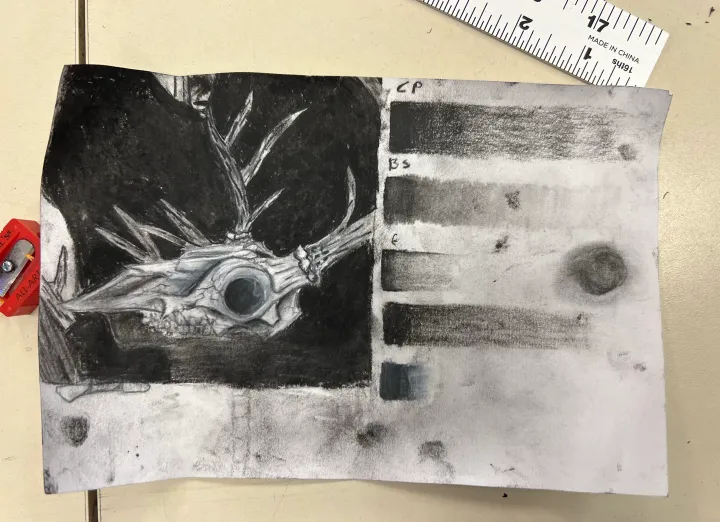
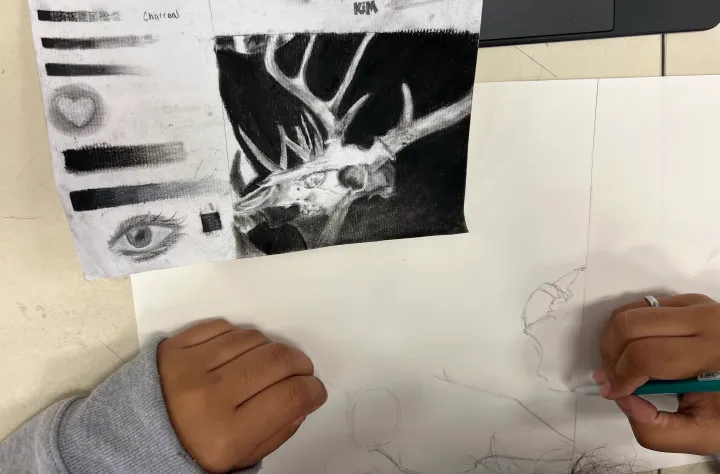
拍摄骷髅静物照片
学生练习期间,我请他们到静物桌前拍摄自己的构图。我向他们提供了以下指导原则,他们随后在自己的设备上编辑照片。我备有几台iPad供没有技术条件的学生使用,并为极少数无法使用设备的学生打印照片。
构图指南免费下载!
静物布置在我教室前方的一辆推车上,所用材料包括多年来收集的各类骨骼、骷髅及织物。我校位于俄克拉荷马州,仅向同事群发一封邮件,便收获了大量鹿头骨与零散骨骼。在学生动手拍摄前,我已从多个角度反复练习拍摄与编辑。我准备了一块黑色织物、一块白色织物和一块粉色织物,使背景呈现丰富多样的灰度明度层次。
构图素描
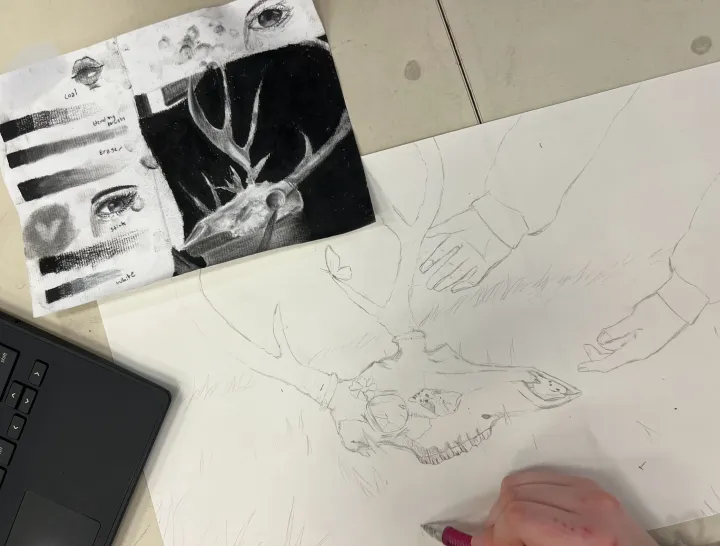
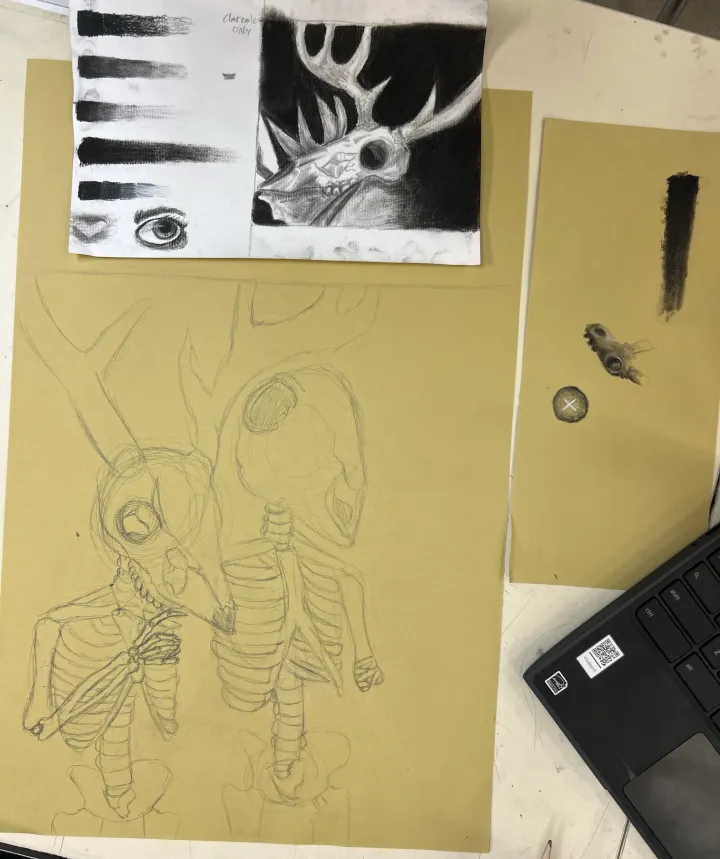
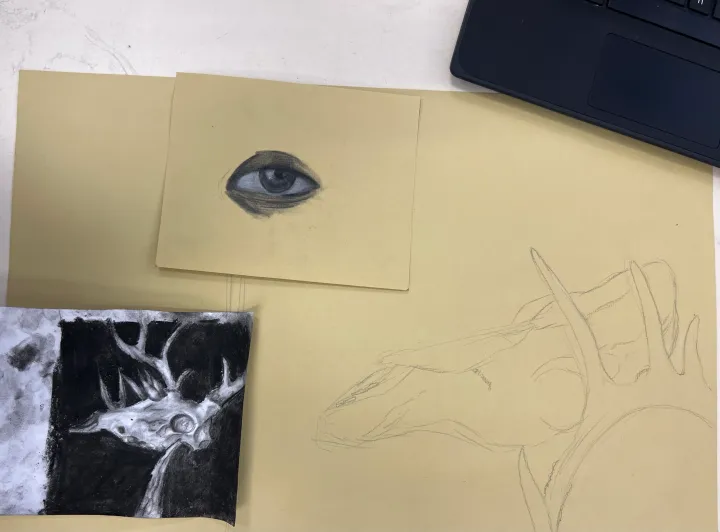
学生完成练习作品并编辑好照片后,即进入构图素描阶段。此环节耗时约一节课,具体时长因人而异。我鼓励学生仔细观察照片中的物体,也观察实物本身。本课为10–12年级的美术II课程,学生能力差异较大,水平参差不齐。我明确告知学生:素描应尽可能还原照片的构图(包括各物体间的大小比例与细节),但目标并非追求照相写实主义。
我也非常欣赏学生突破作业框架、加入个人创意元素的做法。我会提前阐明学习目标,使学生既能掌握我的教学意图,又能保有自身独特的艺术表达。
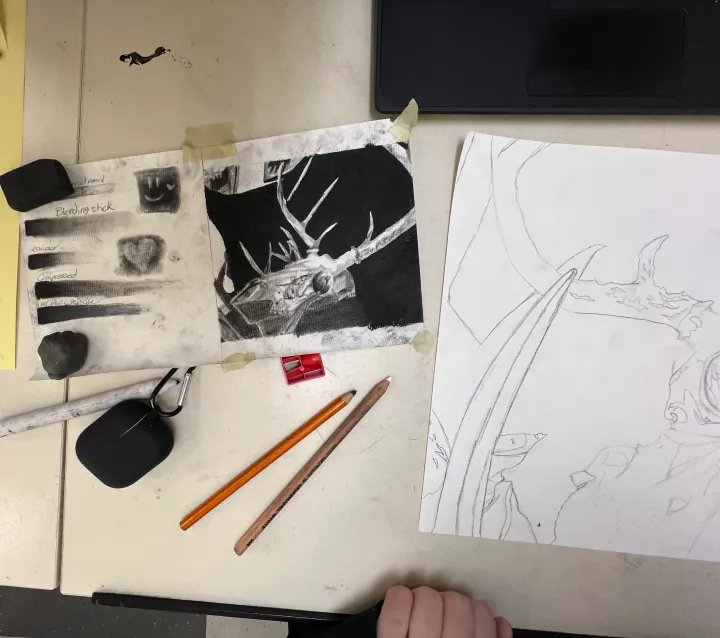
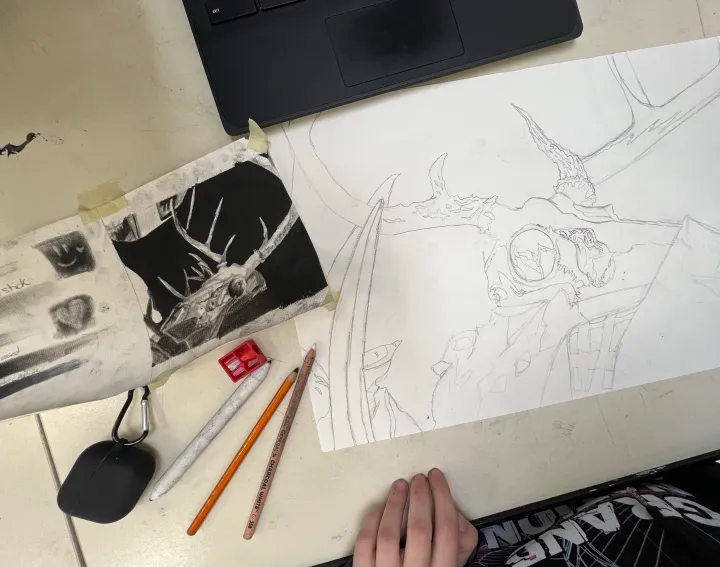
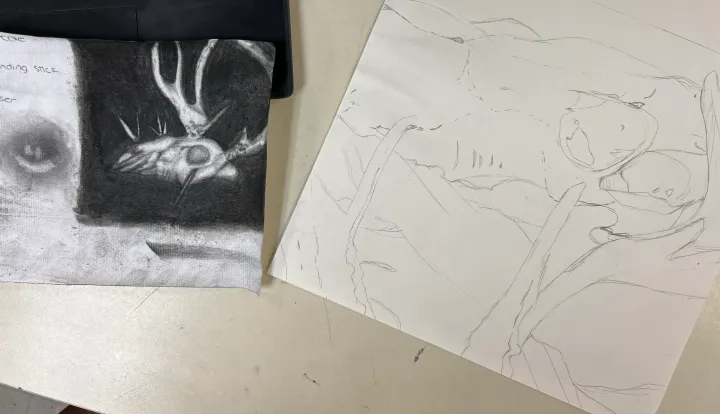
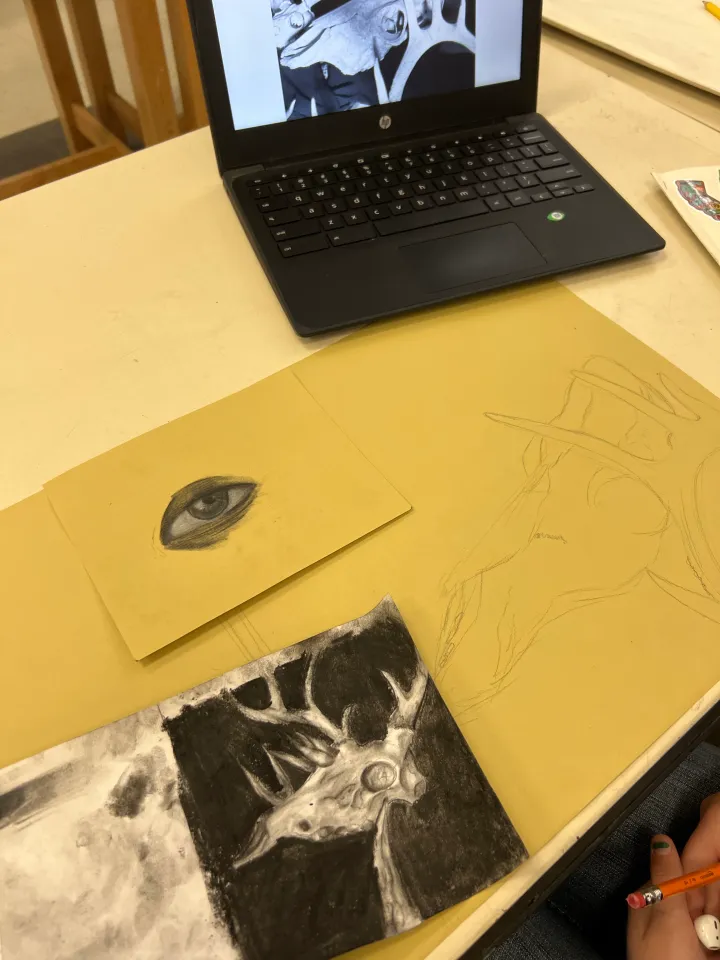
炭笔揉擦与明度映射
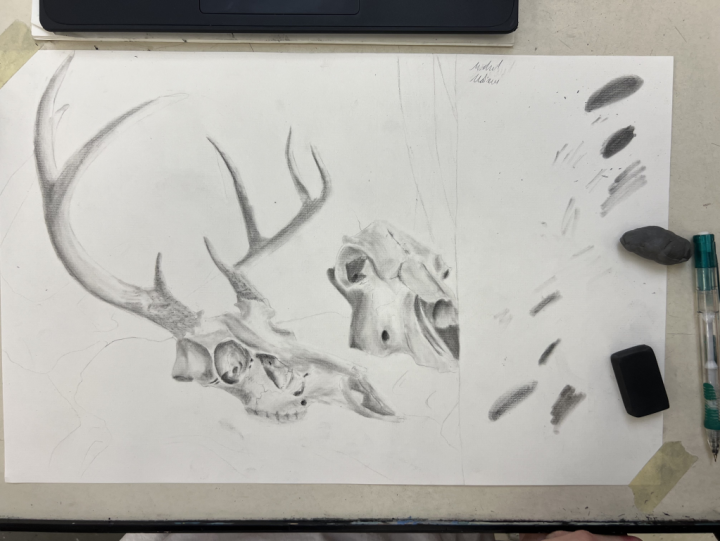
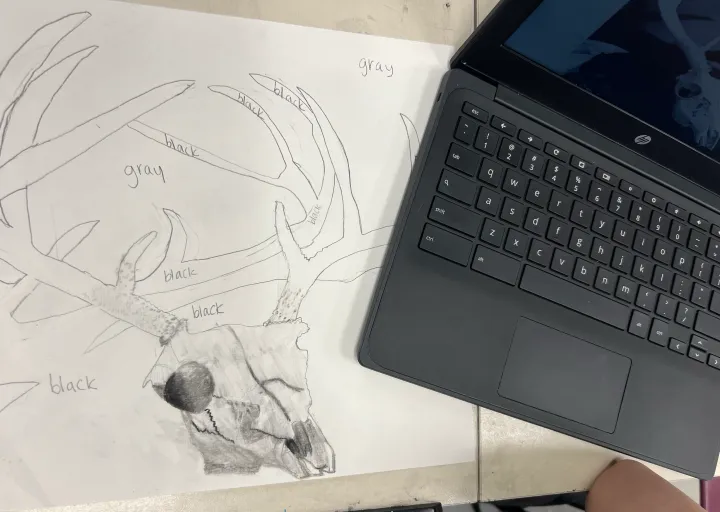
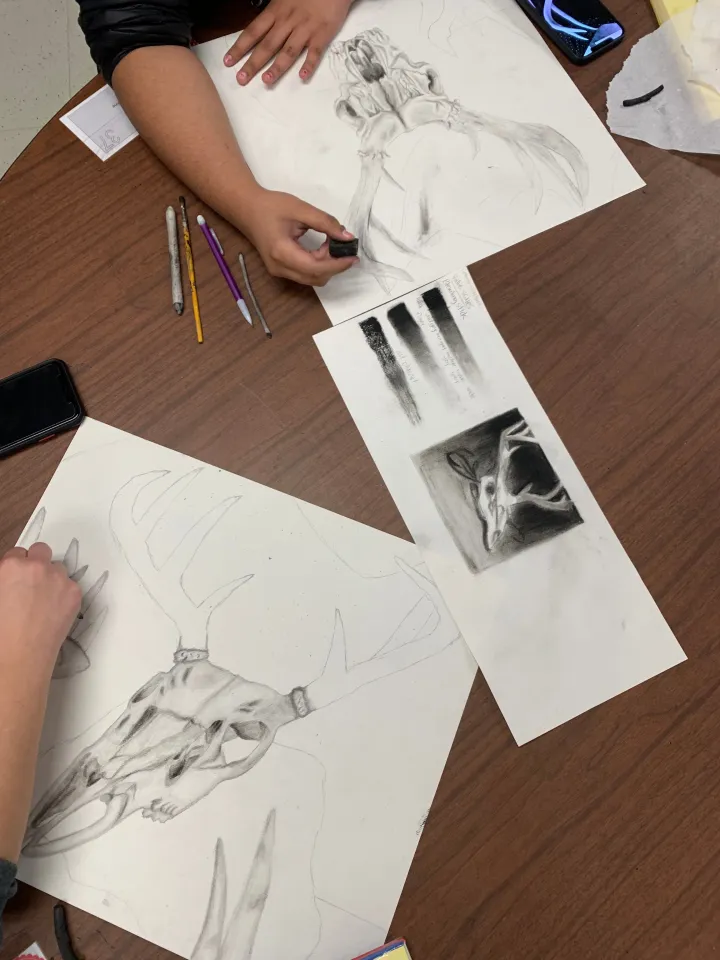
完成构图素描后,学生开始使用炭笔作画。此时,学生已对炭笔技法十分熟悉,具备较强的独立操作能力。我要求学生对照自己的照片进行明度映射,找出最暗区域、最亮区域以及其间所有过渡明度层次。为避免浓重炭粉扬尘干扰,我特别提醒学生先处理最亮的明度区域。
此步骤持续数节课。幸运的是,我为全部110名美术II学生都配备了大幅面画纸。我乐于推动学生尝试大尺幅创作——尽管受限于公立学校预算,这并不总能实现。
我使用这段视频回顾不同揉擦技法。学生常倾向于将背景完全涂成纯黑,因此我鼓励他们关注明度变化、织物褶皱及细节表现。临近作品收尾阶段,我提醒学生注意物体轮廓边缘——即物体起始与终止之处,确保每个与他物相互作用的物体,其明度细微变化均被准确捕捉。
艺术家关联
每日艺术史热身活动是我课堂的重要组成部分。每周上课最初几分钟,我们共同赏析同一幅艺术作品,并围绕其展开写作与讨论。我采用费尔德曼艺术批评法(Feldman’s Method of Art Criticism)作为范式,依次进行:素描(描述)、分析(形式要素与设计原理)、阐释与最终评价。每周五我批阅学生的速写本,作为当周成绩。初看似乎工作量巨大,但我坚信这是我在课堂中做得最有价值的事:它为学生入班建立了稳定节奏,促进对艺术更深入的探究,也为教务部门所要求的每周成绩评定提供了可靠依据。
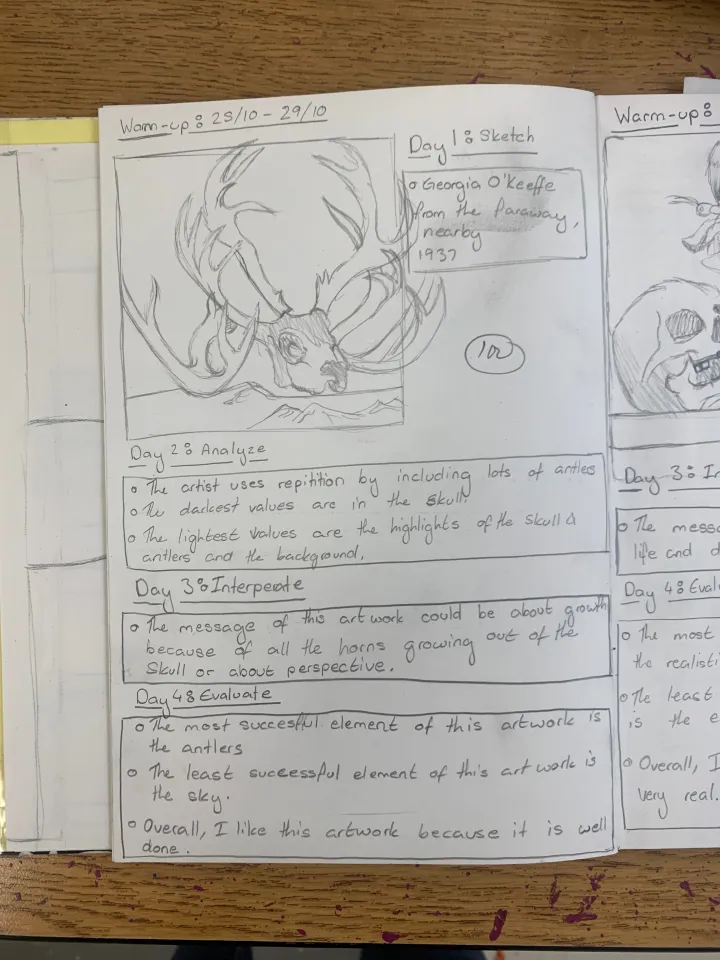
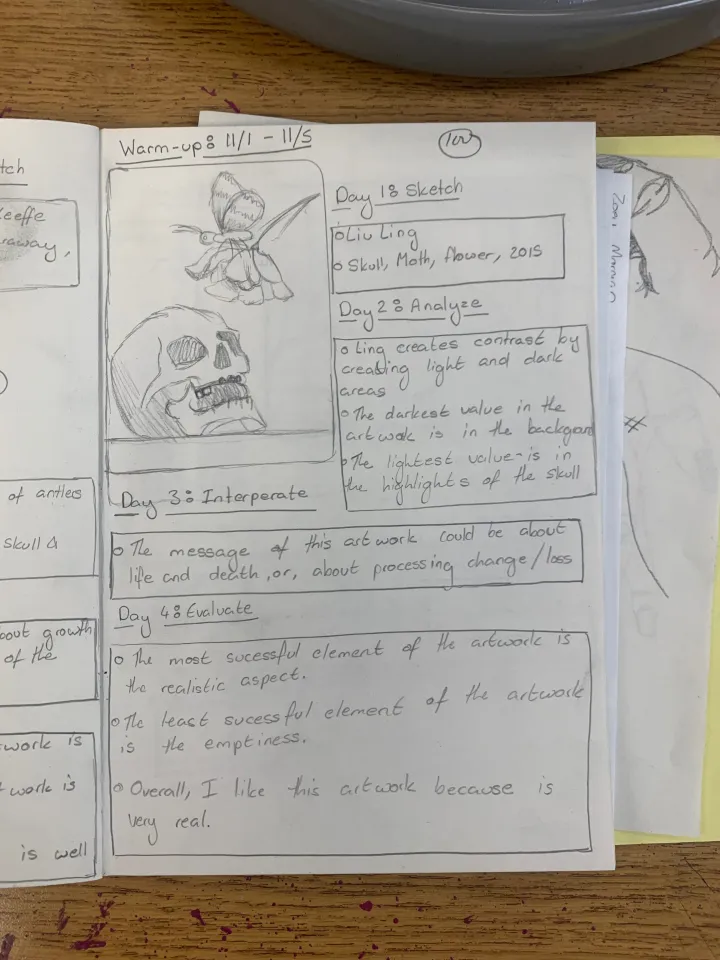
乔治亚·欧姬芙是显而易见的研究对象,因其大量作品均以骨骼为主题。
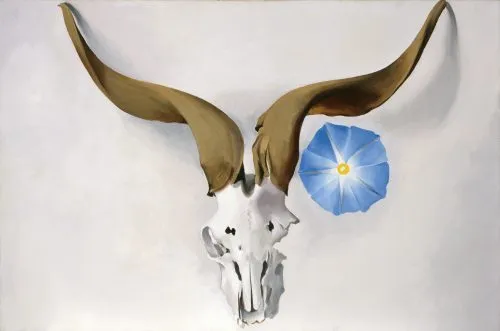
乔治亚·欧姬芙,《公羊头,蓝色牵牛花》(1938)
我发现了当代艺术家刘玲,她对炭笔充满张力的表现手法令我深深着迷。
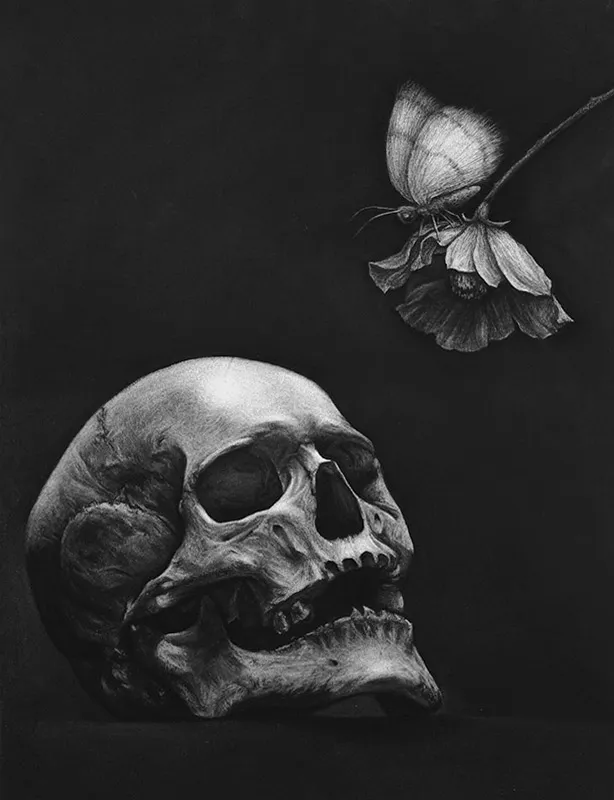
刘玲,《骷髅、飞蛾、花朵》,2015
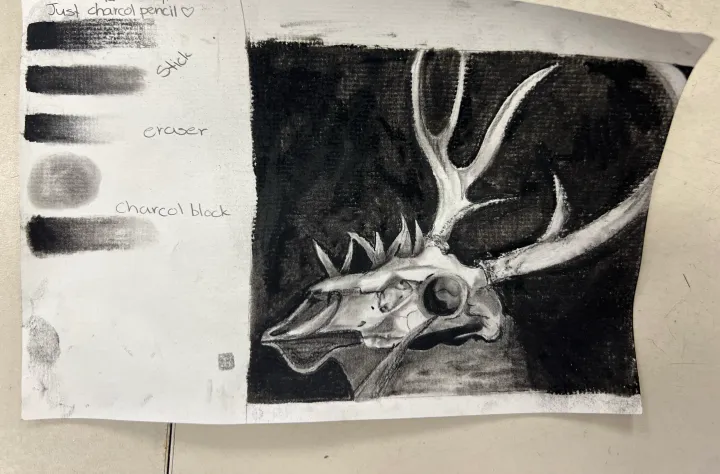
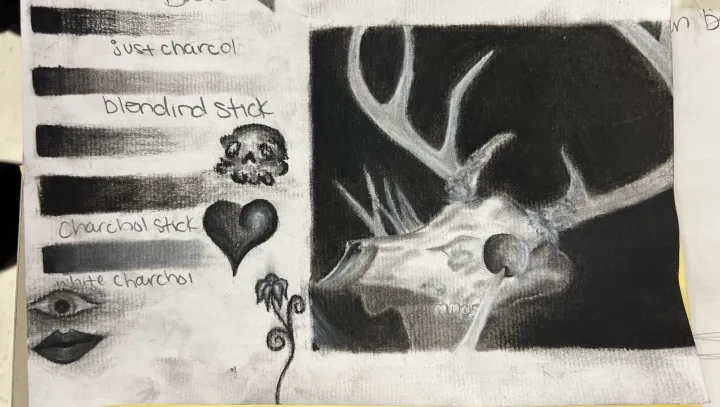
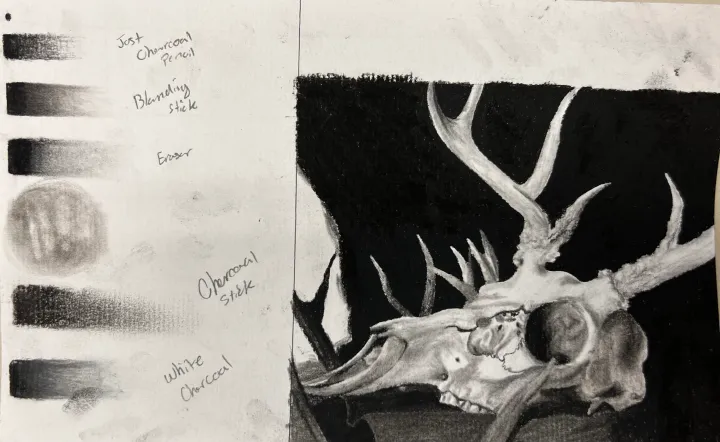
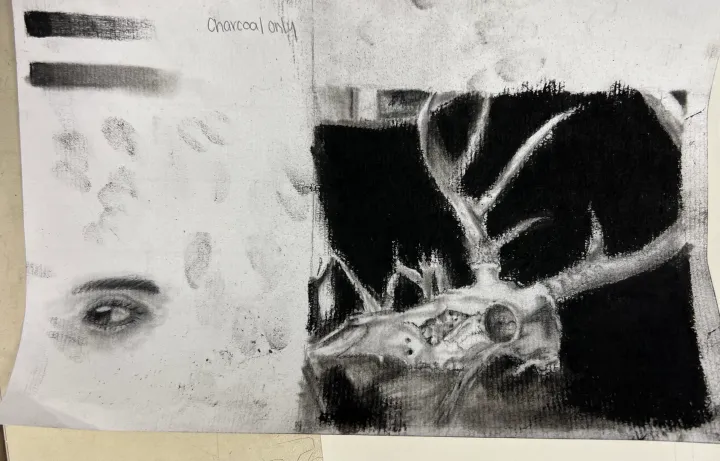
完成的炭笔骷髅作品
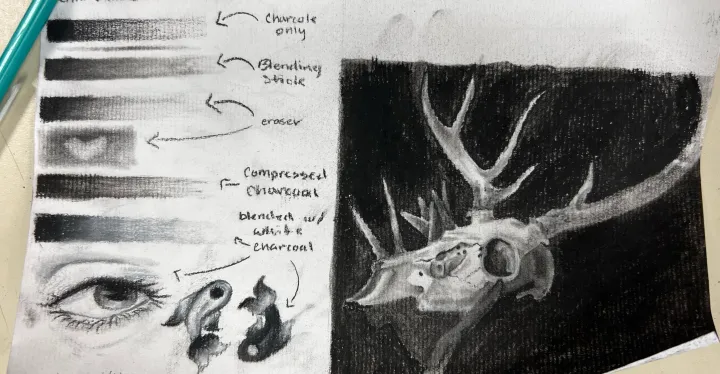
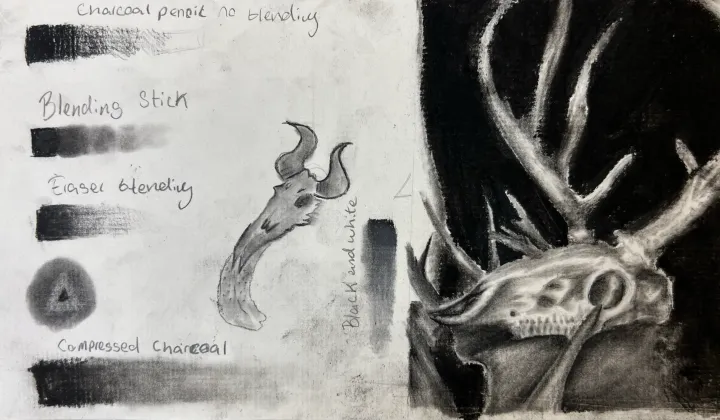
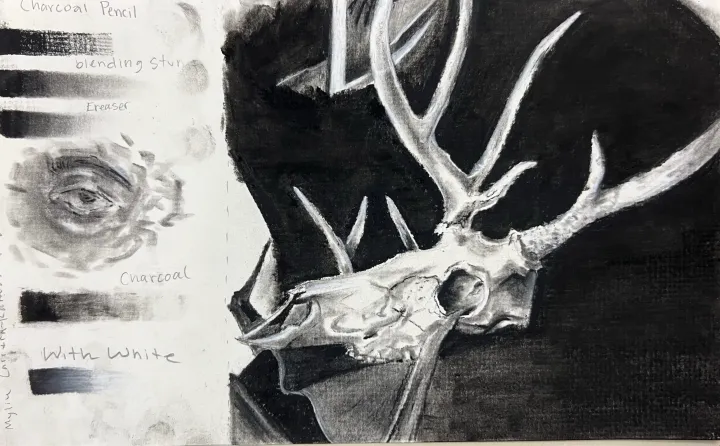
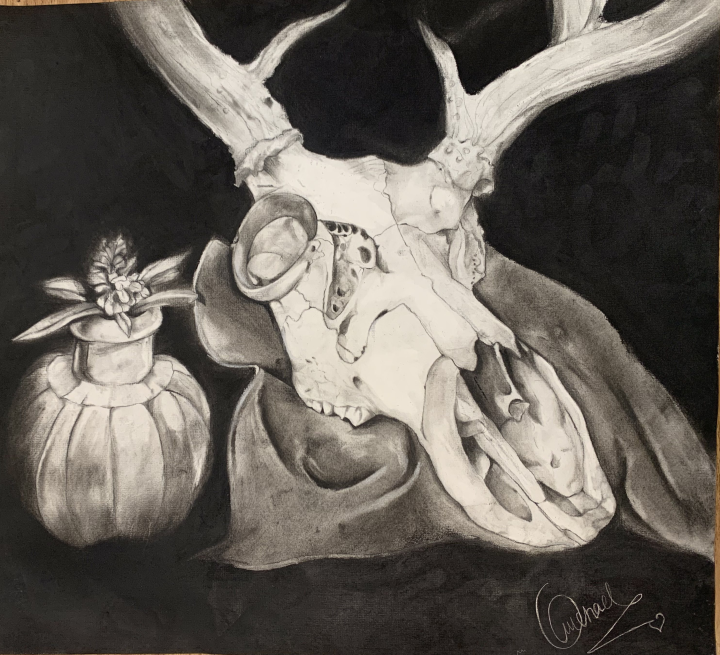
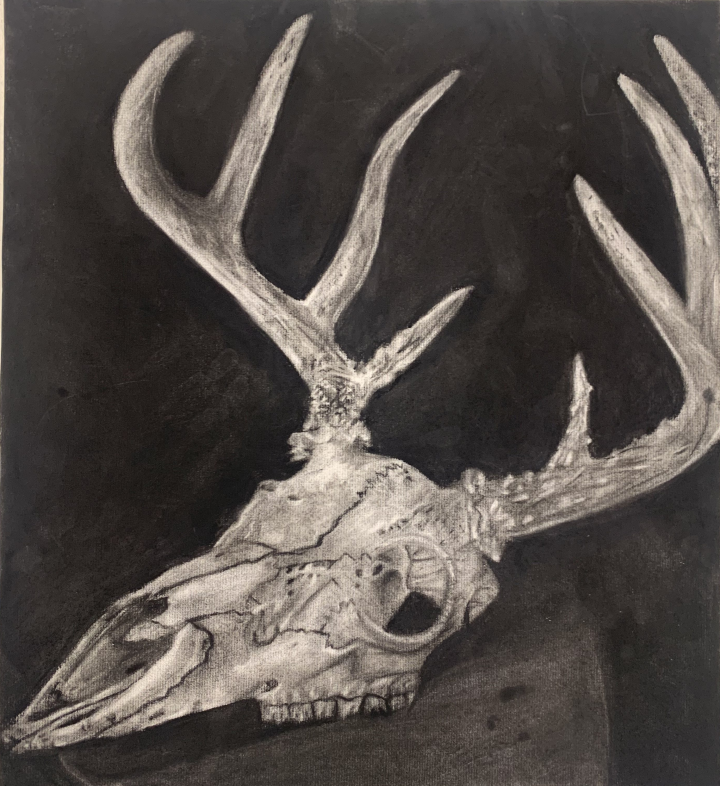
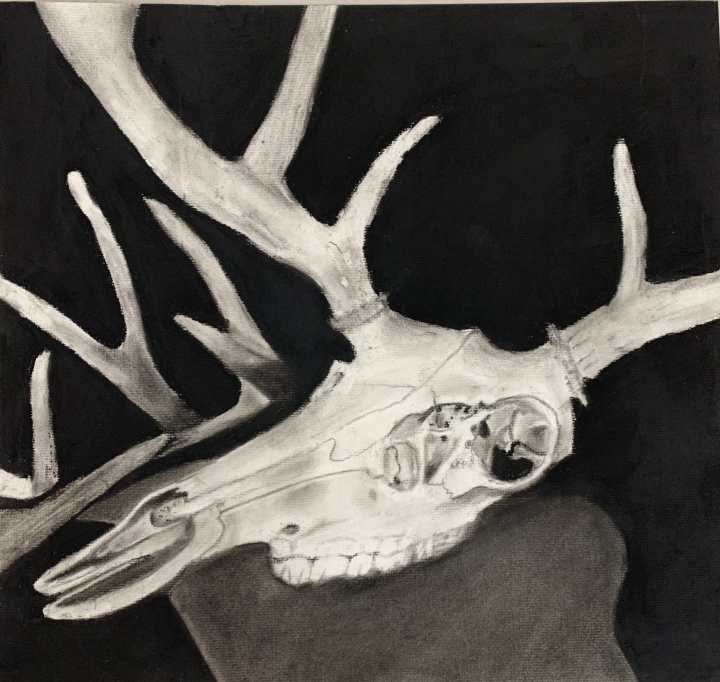
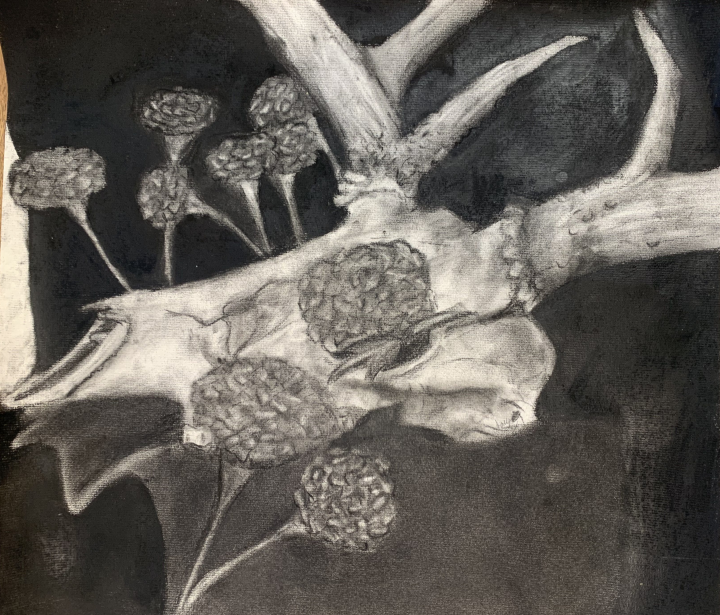
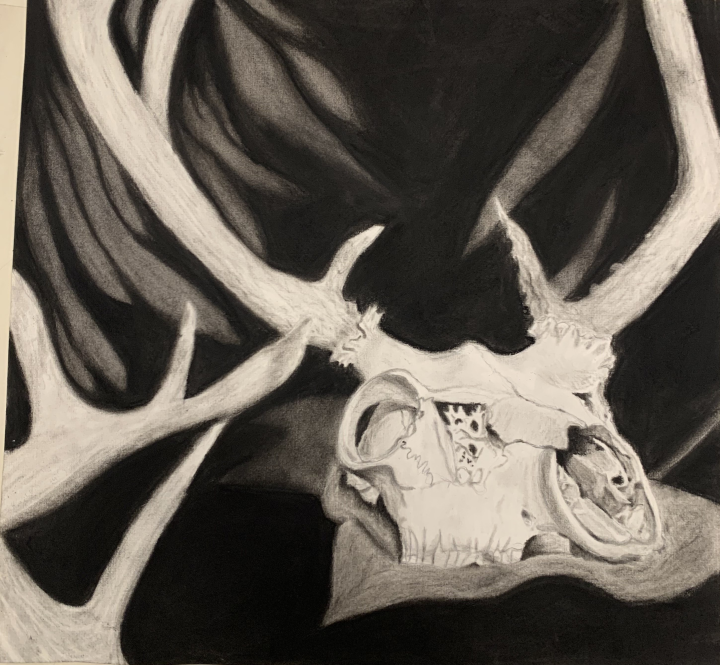
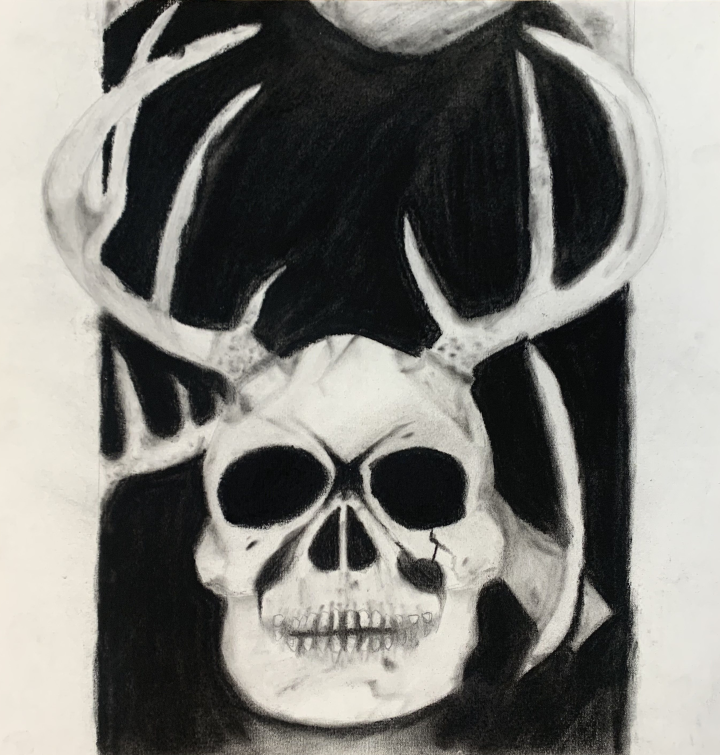
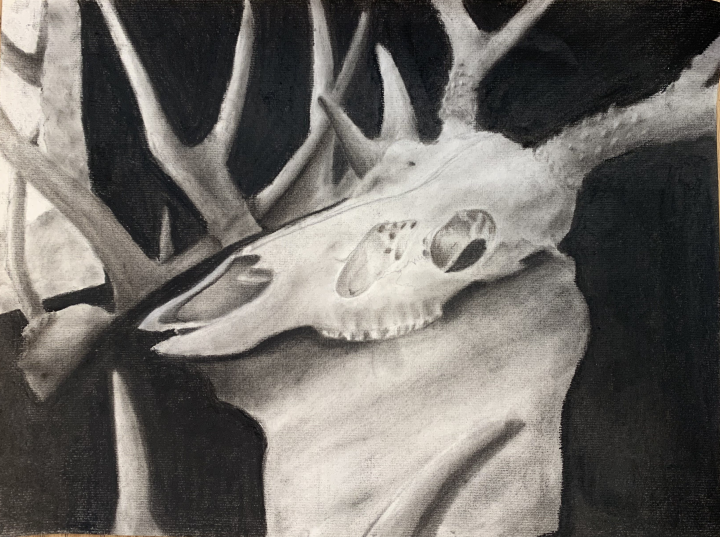
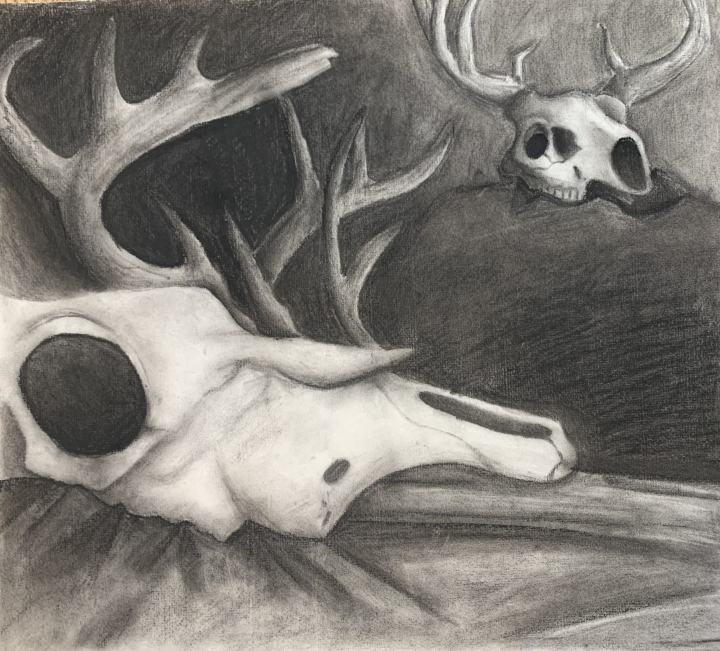
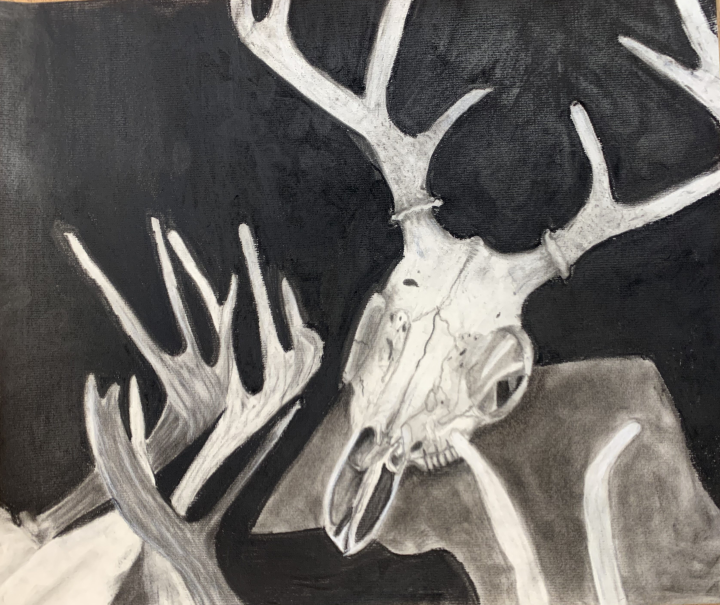
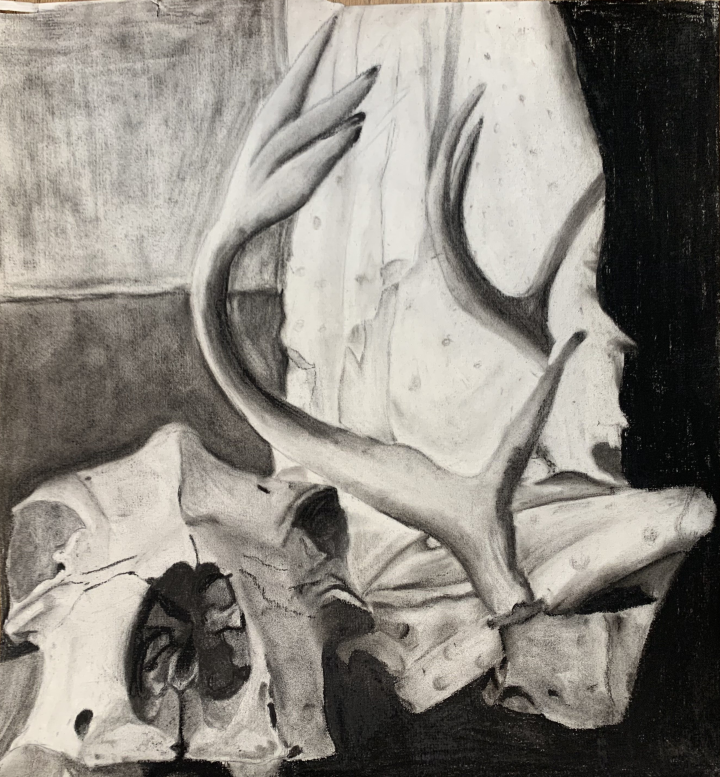
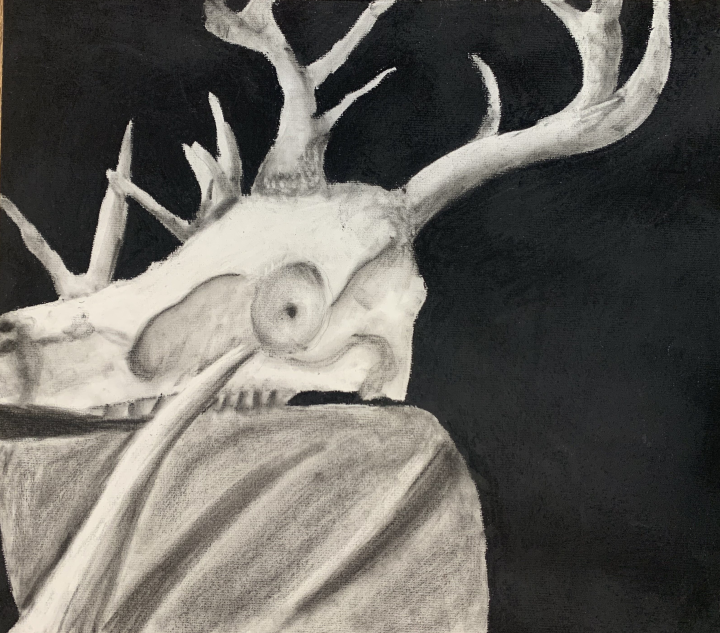
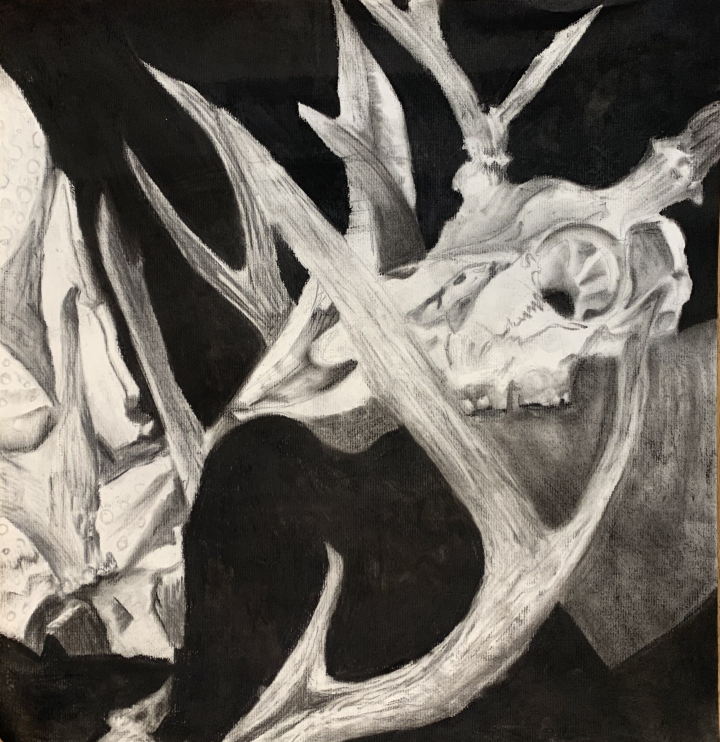
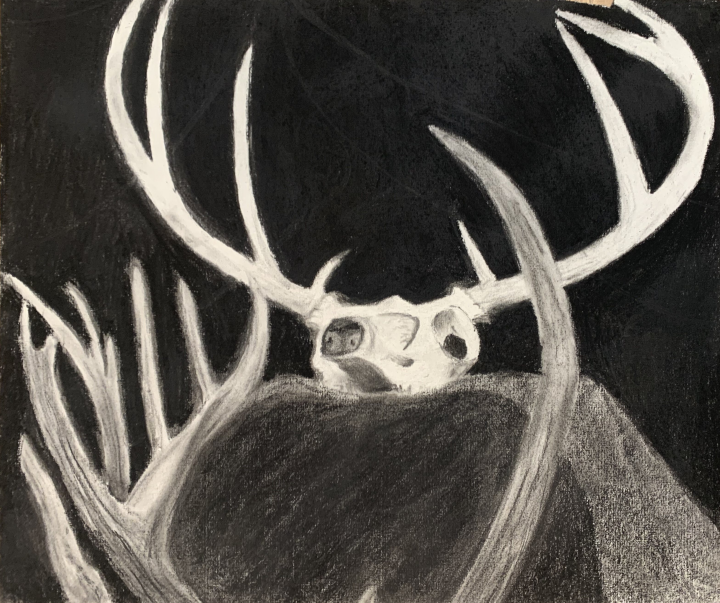
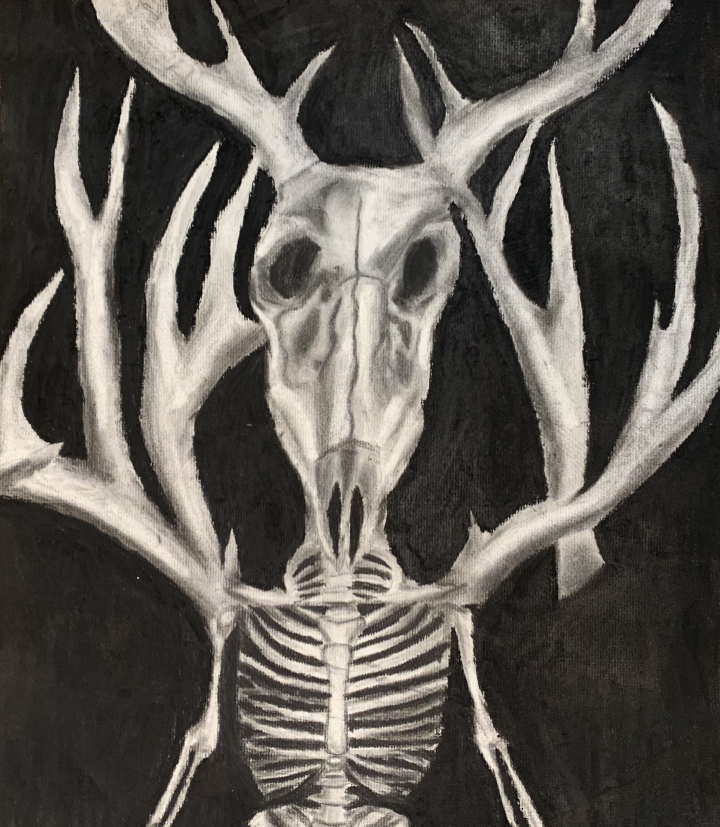
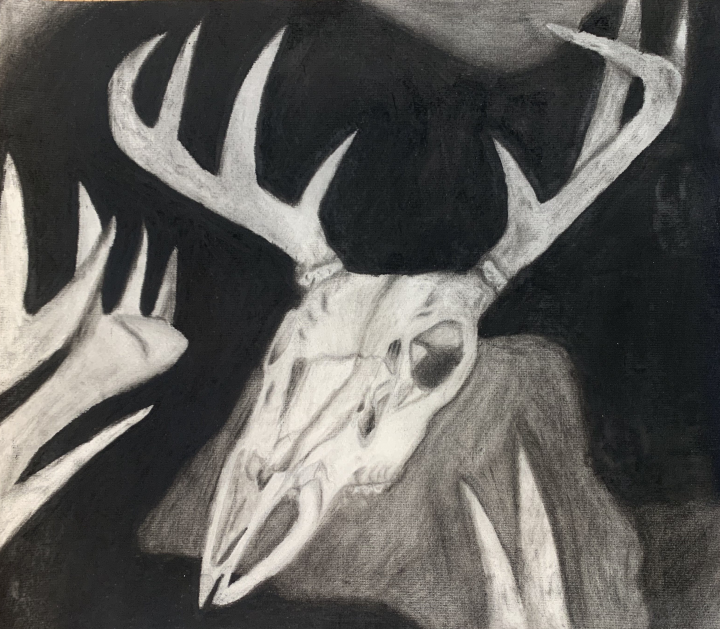
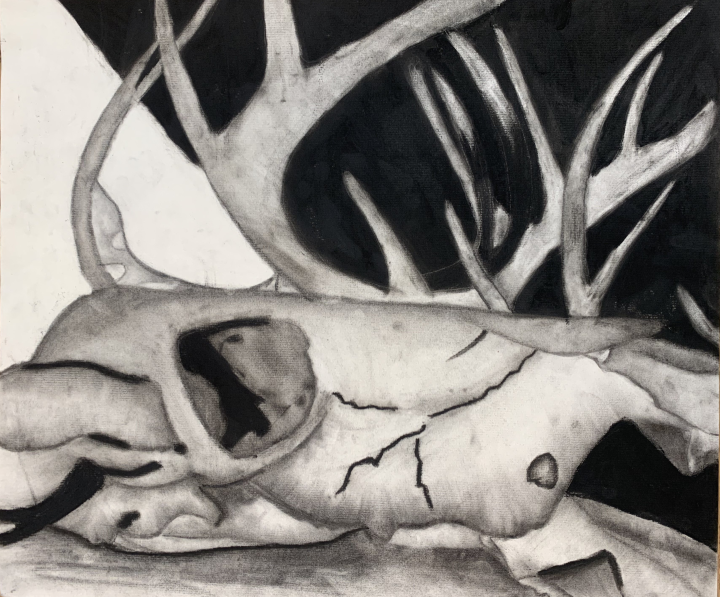
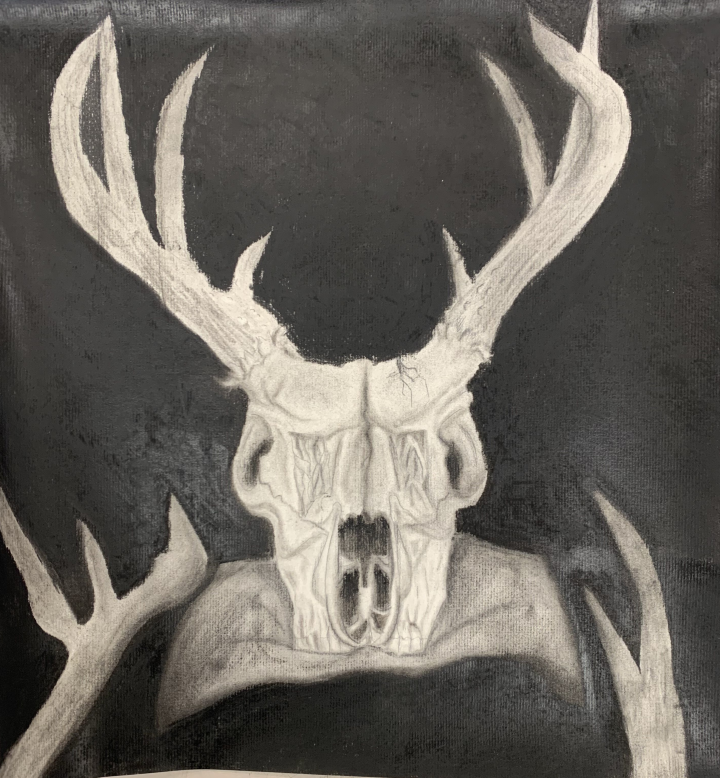
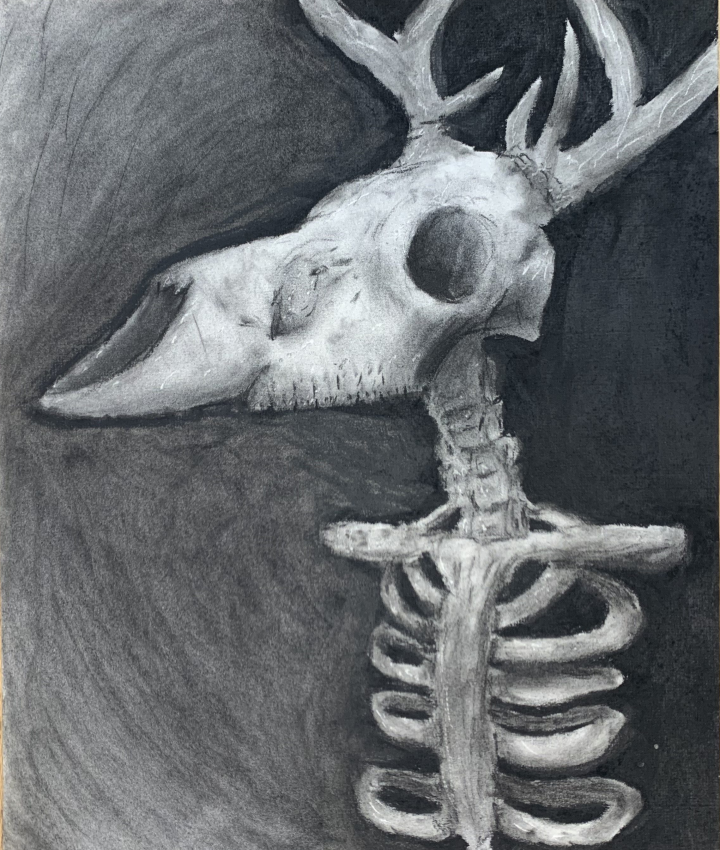
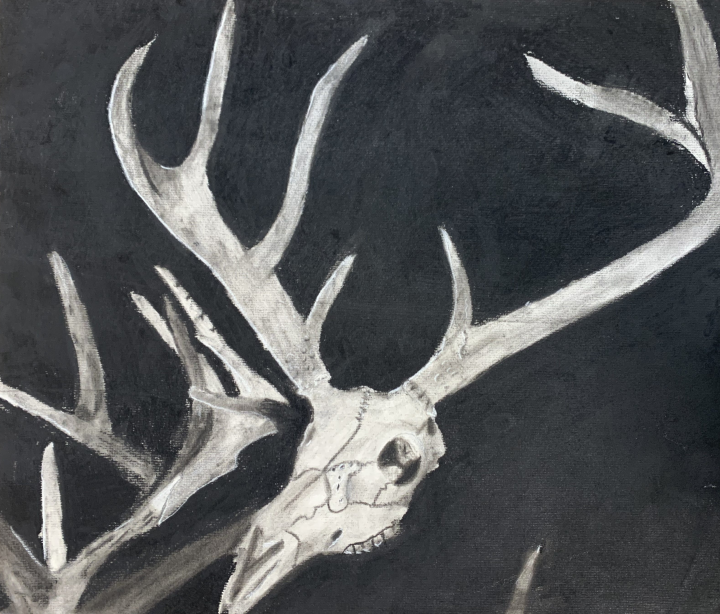
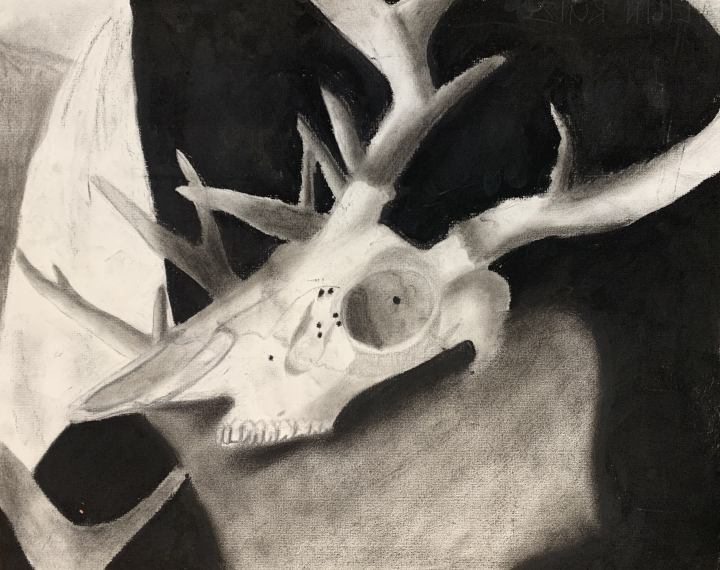
我的学生们堪称明星。他们沉心静气、全力以赴,创作出这批炭笔骷髅作品,呈现出令人惊叹的明度层次范围。我忍不住在教室里来回走动,频频俯身观看他们的创作过程。他们对作画产生的脏乱毫不介意,而我也由衷感激学校配备了不止一个水槽,方便他们反复洗手。
立即订阅,不错过任何一篇推送!
订阅!
您是美术教师吗?我非常期待听到您的声音!您最钟爱的炭笔课程是哪一节?
提交表单。

作者:西耶拉·马查多
2020年4月8日

作者:西耶拉·马查多
2020年4月6日
作者:西耶拉·马查多
2020年4月4日
Charcoal Skull Artwork
Original: https://thatartteacher.com/2021/11/11/charcoal-skull-artwork/
Date: 2021-11-11
Author: Sierra Machado
Tags: art education, art tutorial, charcoal art lesson, charcoal drawing step by step, charcoal high school lesson, charcoal skull artwork, charcoal value scale, featured, how to teach charcoal, how to use compressed charcoal, that art teacher
Skulls are one of my all time favorite subject matters. Skulls create eerie, yet beautiful, shapes and it is such a great tool for focusing on value and shading. It is also a great opportunity to explore symbolism. I teach in Oklahoma, and my students have always been very responsive to this subject matter too! I set up a still life with the variety of bones, skulls and antlers I’ve collected throughout the years. This post will describe my charcoal deer skull process with my giant classes of 39. I did this artwork in my Art II class, which is a mixed bag of 10-12th grade high school students.
Charcoal Materials
We used compressed charcoal, homemade vine charcoal, blending stumps, erasers and inexpensive charcoal paper. This year I added in Charcoal pencils, white included, and I highly recommend that for the classroom. The mess was cut down significantly! My class sizes and access to materials limited my vision a little but, but I have no regrets once I saw the finished results!
***This description contains affiliate links to products I truly love and use in my classroom. If you use these links to buy something I may earn a commission at no additional cost to you. Thank you for supporting my side hustle so I can continue to offer free content!!
I am obsessed with this fixative! It’s completely odor free and safe to use indoors. I highly recommend it, it has been a life saver in my classroom.
Practicing Charcoal Value Scale
The first step is practicing using charcoal by creating multiple value scales. We used compressed charcoal, but charcoal pencils are also great! It depends on your budget and your class sizes. I did not use white charcoal, even though I LOVE blending with it. I have classes of 39 so my supply list had to stay minimal.
We did a value scale with a blending stick, our finger, a paper towel and just the charcoal stick. I think using just the charcoal stick is so much more challenging! I did an in class demonstration, but I posted this video in my Canvas page for absent students or students who needed more visual instruction while working.
Charcoal Skull Practice Artwork
After we practiced blending and creating a full range of value, students sketched the same black and white skull photo. This was to give students a chance to practice drawing their subject and utilizing value without the pressure of a formal grade. I posted the picture in Canvas but also printed about 10 copies for students who do not have access to technology or work best without the distraction of technology #2021.
Here is the image we used for our practice that also goes along with my step by step tutorial:
Deer-Skull-Referencefree Download!
Charcoal is SO MESSY and I encouraged students to wash their hands before sketching the skull in pencil. Most students took about 15 minutes on the value scales and then the rest of class sketching out the details of the deer skull photograph.
The next class period we discussed value mapping and looked at the photograph together as a class. We pointed out the darkest areas, the lightest areas and then moved on to light, medium and dark gray. We also looked a the variety of textures in the skull and discussed where the areas with the most detail were.
Students were able to move on the adding charcoal at their own pace. I recommended doing the lightest values in the skull first and then finishing with all of the darkest areas in the background. This is after I practiced doing it the opposite way and was frustrated with the amount of black charcoal I had to avoid on my paper.
Photographing the Skull Still Life
While students were practicing, I called them up to the still life table to photograph their compositions. I gave them these set of guidelines and they edited the photograph on their own devices. I have a couple Ipads for students that don’t have access to technology and I print photographs for those small handful of students.
Composition-Guidelinesfree Download!
The still life was set up on a cart in the front of my classroom using a variety of bones, skulls and fabric I have collected throughout the years. My school is in Oklahoma and one email out to my coworkers resulted in a wonderful collection of deer skulls and random bones. I practiced taking pictures and editing from multiple angles before students took their turns. I included a piece of black fabric, white fabric and pink so the background would have a diverse range of gray values.
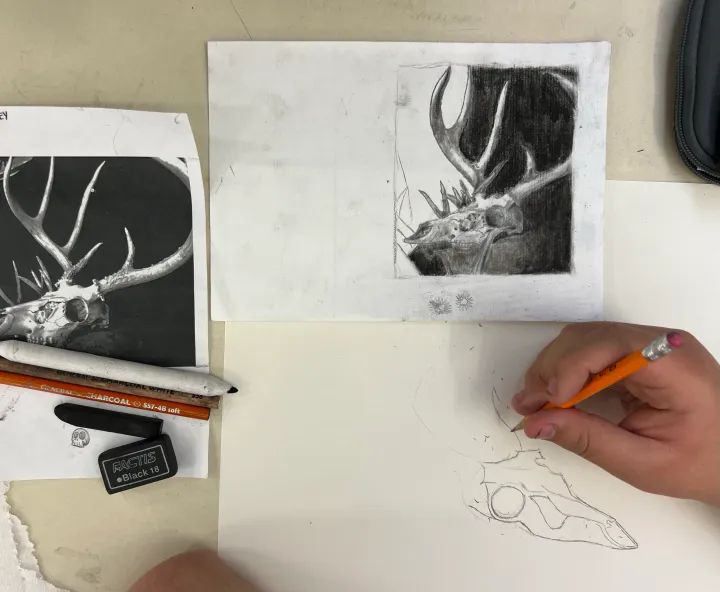
Sketching Compositions
Students moved on to sketching their compositions once they finished their practice piece and edited their composition. This took about a class period depending on the student. I encouraged students to look carefully at the objects in their photograph and in real life. This is a 10-12th grade Art II class and there are a wide variety of abilities all mixed together. I told students their drawing should resemble the photograph as much as possible as far as composition (size relationships and details) but that photorealism was NOT our goal.
I also love when students break the barriers of the assignment and add their own creative element. I tell them their learning goals up front, so they can learn my objectives while still pursuing their own creative voice.
Charcoal Blending and Value Mapping
Once their compositions were sketched out, it was time to add charcoal. By the time we got to this point, students felt very comfortable with the technique and were quite independent. I had students look at their photographs and do value mapping, finding the darkest areas, lightest areas and every value in between. I encouraged students to focus on the lightest values first to avoid the giant charcoal dust cloud from their pitch black backgrounds.
This step took several class periods and I was fortunate to have large paper for all 110 Art II students. I love when I can push students to work in a larger scale, which isn’t always possible with our public school budget.
I used this video to review different blending techniques. Students tended to want to black out their backgrounds entirely so I encouraged them to look at the values, fabric folds and details. As we were wrapping up the artwork I encouraged students to pay attention to edges where objects stop and start, making sure the nuances of value were captured in each object that interacts with another one.
Artist Connections
A huge component of my classes is our daily Art History warm-ups. We spend the first few minutes of class each week looking at the same artwork and writing and discussing aspects of it. I model it after the Feldman’s Method of Art Criticism and we Sketch (Describe), Analyze (Elements and Principles), Interpret and finally Evaluate each piece. Friday I grade sketchbooks for their weekly grade. It seems like a lot of work at first, but I swear it is the best thing I do in the classroom. It sets a routine for coming into class, allows for deeper investigation into art and makes for a consistent weekly grade administration is asking for.
Georgia O’Keeffe is an obvious artist to investigate because of her vast body of work exploring bones.
Georgia O’Keeffe, Ram’s Head, Blue Morning Glory (1938)
I found contemporary artist Liu Ling and I loved her dynamic handling of charcoal.
Liu Ling, Skull, Moth, Flower, 2015
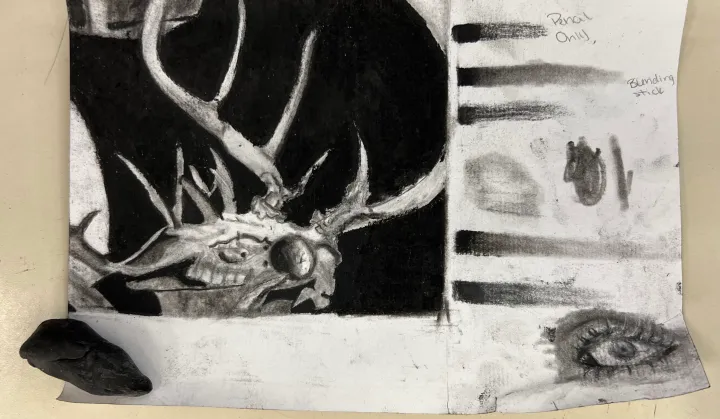
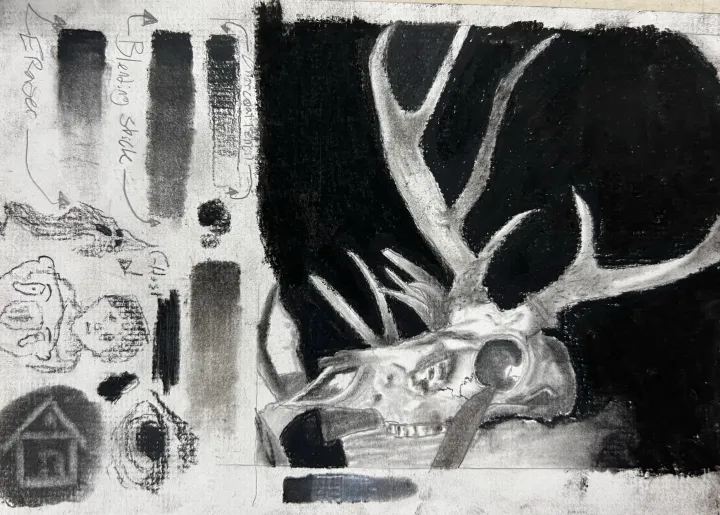
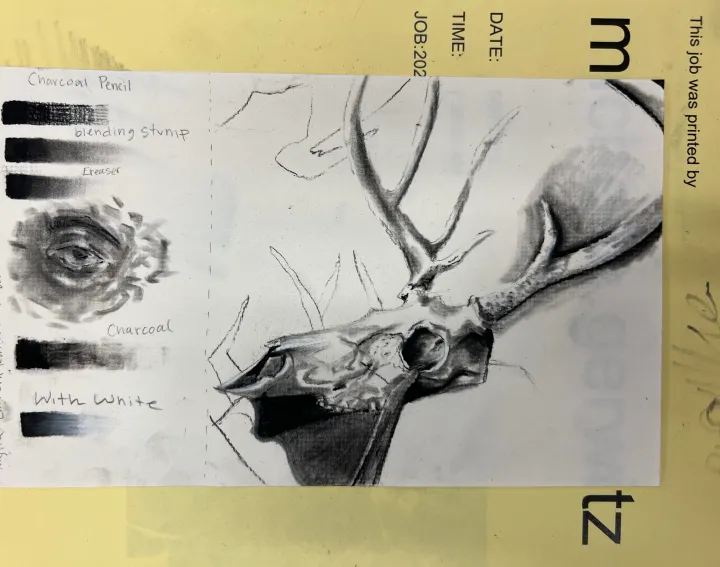
Finished Charcoal Skull Artworks
My students are rockstars. They buckled down and worked so hard to create these charcoal skull artworks with an amazing range of value. I could not stop walking around the room peering over their shoulders as they worked. They were such good sports about the mess, and I was very thankful to have more than one sink for them to repeatedly wash their hands.
Subscribe so you never miss a post!
Subscribe!
Are you an art teacher? I’d love to hear from you! What is your favorite charcoal lesson?
Submit a form.
by Sierra Machado
April 8, 2020
by Sierra Machado
April 6, 2020
by Sierra Machado
April 4, 2020


