综合材料艺术暑期夏令营项目创意
原文链接:https://createartwithme.com/mixed-media-art-summer-camp-project-ideas/
日期: 2018-07-15
作者: 米歇尔·伊斯
分类: 二年级、三年级、四年级、五年级、课后美术与美术夏令营、美术课程、拼贴课程、小学美术、幼儿园至一年级、综合材料课程、绘画课程
标签: 三维与二维项目、三维海豚绘画、三维火烈鸟绘画、美术夏令营项目创意、美术夏令营项目、美术项目创意、美术课程:、暑期夏令营、艾瑞克·卡尔《动物,动物!》、艾瑞克·卡尔美术创意、儿童综合材料美术课、综合材料美术、纸浆纸艺项目、夏令营、夏令营项目创意、儿童综合材料教学
综合材料艺术暑期夏令营项目创意
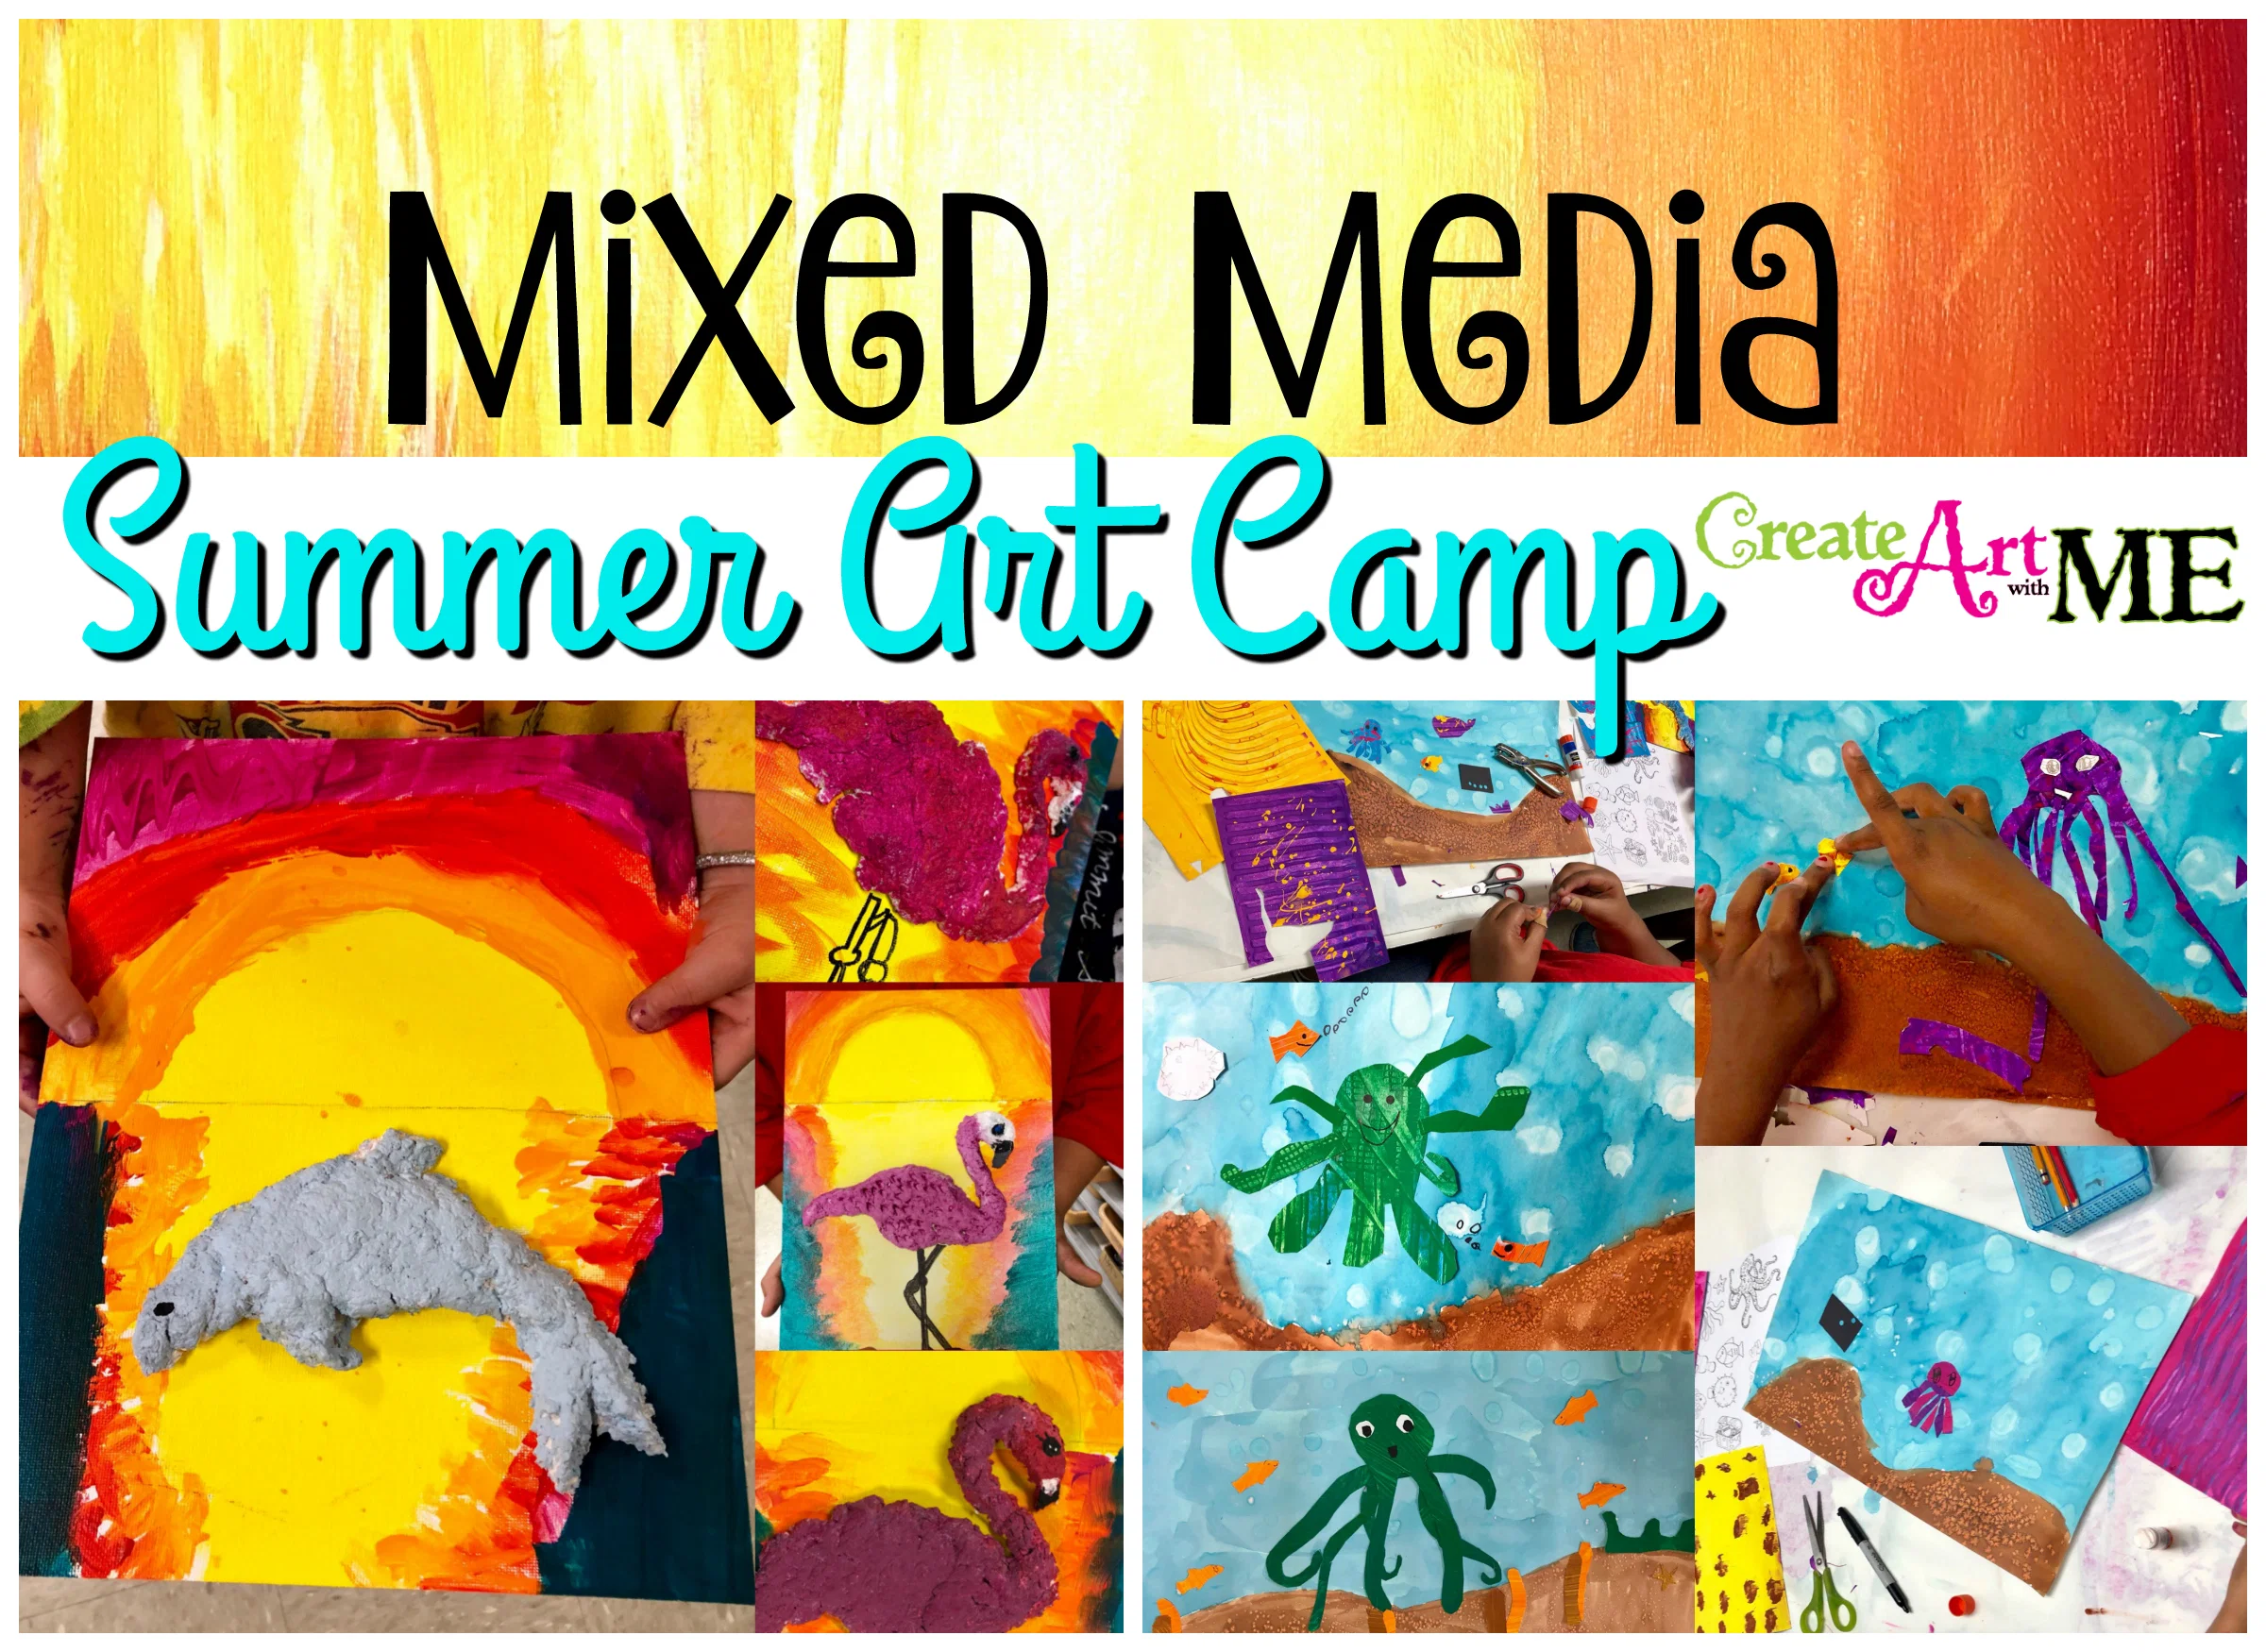
今年夏天,我将开设两期暑期夏令营美术课程:综合材料课与绘画课。每期课程每天1小时,共4天,是我校全天制夏令营的一部分。综合材料课趣味十足,因为它允许多种媒介参与,并支持不同媒介的组合运用!正因媒介种类增多,项目成功的关键在于周密的规划!以下是我们实际开展的项目,另附若干额外的综合材料项目创意。欢迎关注我的 综合材料Pinterest专题板,获取海量灵感!
(2节课——每节1小时)
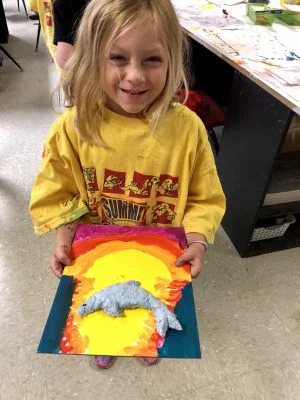
我特别希望在本次夏令营中加入雕塑内容,于是在Pinterest上发现了这个超棒的项目——请向该网址所列美术教师致以完整致谢: https://m.ok.ru/group/54775882514446,图片直链见此处。我对该项目做了几点调整:允许学生选择塑造火烈鸟或海豚;同时我们省略了画布边缘的植物装饰——这主要是出于时间限制考虑。
我们实际的操作流程如下:
所需材料: AMACO 41811R Claycrete纸浆纸艺材料,5磅装 或 Model Magic塑形泥(后者更易操作)、US Art Supply 9×12英寸画板,12片装、丙烯颜料(白色、黄色、黄橙色、橙色、粉色、青绿色)、1英寸平头画笔、调色盘、水杯、旧报纸、塑料文件夹保护套(性价比极高!)——每人一套、热熔胶或塔奇胶(Tacky Glue)
第一天 课前准备:
- 分别打印一张火烈鸟和一张海豚轮廓图(各占一页),再将两张图背对背插入同一张塑料文件夹保护套中;
- 为每位学生量取约一杯半的纸浆(棉质)并装入密封袋;
- 在12盎司量杯顶部约3/4处用永久性记号笔做一标记(即约8盎司水量);
- 将全部材料摆放在课桌上。
雕塑制作步骤:
- 学生自主选择火烈鸟或海豚造型。学生使用Vis-a-Vis马克笔,在塑料保护套上标出自己所选动物图案的那一侧,写上姓名;
- 调配纸浆: 打开密封袋,倒入清水(袋口保持敞开),轻柔揉捏挤压袋子使水分均匀混合;若仍有干纸浆残留,可少量补加清水;
- 直接在塑料保护套表面用纸浆塑造火烈鸟或海豚造型。按压塑形,确保厚度不超过1/2英寸,否则难以干燥;我们要求作品一面平整,以便后续粘贴至画板上。
-
火烈鸟造型要点:
- 用小球状纸浆塑出头部;
- 用少量纸浆添加喙部;
- 搓出一条“蛇形”或螺旋状长条作为颈部;
- 将其连接至头部,形成“S”形曲线,再用手指抹平接缝;
- 用纸浆搓成球体作为身体,再轻压拉伸其中一侧,塑出尾羽形态;
- 将身体与颈部相连,并用手指抹平接缝;
- 放置过夜自然风干。
-
海豚造型要点:
- 用大球状纸浆塑出主体,再塑成长椭圆形(或香蕉形);
- 用少量纸浆添加吻部;
- 用少量纸浆分别塑出各鳍,均呈三角形;
- 用手指抹平所有接缝;
- 放置过夜自然风干。
- 将作品置于风扇前吹拂,过夜风干;
- 次日翻转雕塑,在背面用记号笔写上姓名,再用叉子扎数个小孔,继续用风扇吹拂数小时;或使用热风枪加速干燥。
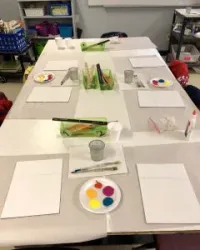
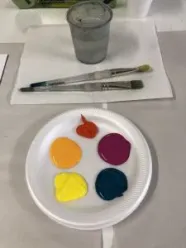
- 在调色盘(泡沫塑料盘)上,每种颜料各挤出约一枚硬币大小的量;
- 摆放好水杯、纸巾及画笔。
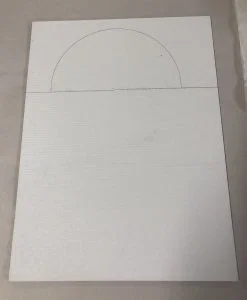
- 用直尺画出地平线。
- 用圆规在地平线上画出正在落下的太阳。
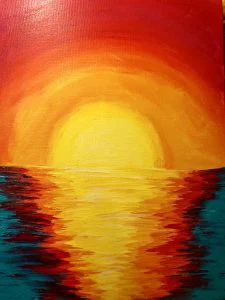
- 先画太阳,可选用纯黄色,或用白色调和后的黄色。黄色颜料通常呈半透明状;加入不透明的白色后,铅笔线便不会透出。
- 接着,在太阳周围涂上黄橙色。趁颜料未干时,让笔触相互交叠,并叠加纯橙色,再叠加纯粉色;将粉色一直涂至画面边缘。
- 为绘制太阳在海面上的倒影,从太阳边缘向画布底端画一个三角形;用水平方向的笔触填满该三角形——笔触应不规则,且可略微超出三角形边界。
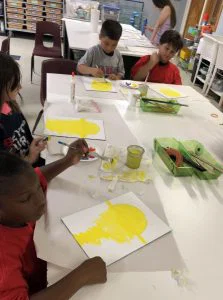
- 在三角形外侧,由内向外依次添加水平方向的黄橙色、橙色、粉色,最外缘则涂上青绿色。
- 丙烯颜料使用小贴士:
- 务必始终将画笔浸在水中。若颜料干在笔刷上,会损坏画笔。
- 取颜料前,务必先用纸巾擦干画笔。
- 先画太阳与天空,再由背景向前景逐步推进。
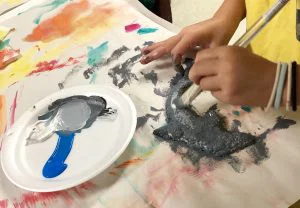
- 用丙烯颜料绘制火烈鸟或海豚,待其晾干。
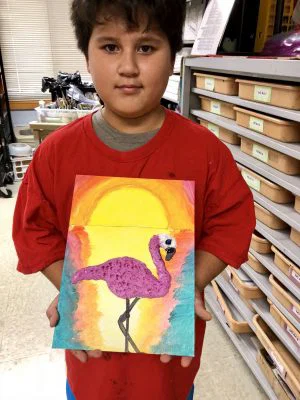
- 用热熔胶将火烈鸟或海豚粘贴到画布上;再用永久性记号笔画出火烈鸟的双腿。
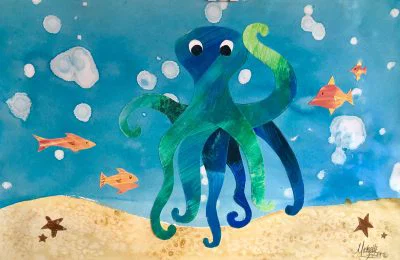
海底世界——埃里克·卡尔风格拼贴画(水彩纸)
(共2课时,每课时1小时)

 本项目灵感源自埃里克·卡尔《动物动物》(Eric Carle’s Animals Animals)一书封面。我已多次开展此项目,其成功关键在于周密规划与有序组织!建议限定主题(例如:“海底世界”或“丛林之中”),并控制生物种类数量(以一个主形象搭配两三个小型配角为宜)。
所需材料: 12×18英寸、90磅水彩纸,液态水彩——青绿色与棕色,食盐,医用酒精,手指画专用纸,蛋彩颜料——蓝色、紫色、白色、黑色、棕色、黄色、橙色与青绿色,刮刀,剪刀,胶水


第一天:课前准备
- 提前将手指画专用纸裁成:2张6×9英寸(用于鱼与海星),以及2–3张9×12英寸(用于章鱼)。
- 将液态水彩按1:1比例稀释,分装入小杯中,供绘制背景使用。
- 将食盐、滴管装医用酒精、画笔、纸巾及旧报纸摆放在课桌上。
- 设立不同颜色与技法的颜料操作站:蛋彩颜料、刮刀、圆形印章(任何能印出圆形的现成物品)、泡泡纸,或其他你希望使用的材料。根据学生人数与教室空间布局,至少设立4个操作站(我共设了6个)。每个站点需配有标识牌,注明该站功能及适用纸张尺寸。
- 如何管理所有纸张? 我使用18×24英寸旧报纸,于其上写明每位学生姓名。学生完成每个站点任务后,须将作品纸置于自己专属的旧报纸上。我的教室外有一条宽敞走廊,我便将这些旧报纸铺陈于此。
背景绘制[埃里克·卡尔风格章鱼背景](https://i0.wp.com/createartwithme.com/wp-content/uploads/2018/06/408504FC-6890-48FF-BCD1-641478C3CEB0.jpeg)
- 发给学生12×18英寸水彩纸,并指导他们在纸张背面写上自己的姓名。
- 用铅笔轻轻勾勒海底轮廓。
- 分小区域作画:先用大号画笔涂抹青绿色;趁颜料未干,用滴管滴入少量医用酒精。
- 绘制沙地时同样分小区域进行:先用大号画笔涂抹沙色颜料(我以棕色、橙色与黄色液态水彩混合调制),趁湿撒上食盐。此效果约需45分钟方能充分显现。切勿使用吹风机加速干燥——否则食盐无法缓慢吸走颜料!
- 将画纸置于晾干架上,过夜阴干。
彩绘纸制作
- 先发给学生手指画专用纸,并指导他们于每张纸背面写上姓名。
- 向学生说明各操作站使用规则:
- 操作站轮转顺序;
- 每站在规定时间内完成;
- 完成作品后放置位置;
- 若某站材料不足,应如何处理。
第二天:课前准备
- 在课桌上摆放铅笔、剪刀与固体胶。
- 给每位学生提供章鱼参考图片。
绘制与拼贴步骤:
- 发还学生的背景画纸与彩绘纸。
- 指导学生在纸张背面(即未上色面) 用铅笔大胆勾勒形状。
- 鱼: 至少剪出4条不同形状与大小的鱼。
- 海星: 至少剪出2只海星。
- 章鱼: 从一张纸上剪出章鱼头部及两条触手;其余6条触手则从其他章鱼彩绘纸上分别剪出。
*亚马逊联盟链接——所荐产品均为本人实际使用并真心喜爱!
若您选用本博客中任一部分内容(图示、图片或文字),请务必回链至Create Art with ME!
Original: https://createartwithme.com/mixed-media-art-summer-camp-project-ideas/
Date: 2018-07-15
Author: Michelle East
Categories: 2nd Grade, 3rd Grade, 4th Grade, 5th Grade, After School Art & Art Camp, Art Lessons, Collage Lessons, Elementary Art, K-1st Grade, Mixed Media Lessons, Painting Lessons
Tags: 3d & 2d project, 3d dolphin painting, 3D flamingo painting, art Camp Project Ideas, art camp projects, art project ideas, art sessions:, art summer camp, Eric Carle Animals Animals, eric carle art ideas, kids art class art with mixed media, Mixed Media Art, paper mache pulp project, summer camp, Summer Camp Project Ideas, teaching kids mixed media
This summer I am teaching two summer camp art sessions: mixed media and painting. These sessions are 1 hour per day for 4 days and are part of a full day camp at my school. Mixed media is so much fun because it is open to more mediums and combination of mediums! Because of adding more mediums there must be good PLANNING to make successful projects! Below are the projects that we created plus some additional mixed media project ideas. Please follow my Mixed Media Pinterest board for TONS of ideas!
(2 Classes-1 hour each)
I really wanted to add some sculpture in this camp and found this AMAZING project on Pinterest- Please give full credit to the art teacher at this URL: https://m.ok.ru/group/54775882514446 the direct link to the picture is here. I made some changes to this project by adding the choice of sculpting a flamingo or a dolphin and we did not do the foliage around the border of the canvas-that was more of a time limit thing.
Here’s how WE did it:
Supplies: AMACO 41811R Claycrete Paper Mache, 5-Pound Bag or Model Magic (would be easier) , US Art Supply 9 X 12 inch Canvas Panel Boards 12-Pack, acrylic paints: white, yellow, yellow-orange, orange, pink & turquoise, 1″ flat paint brushes, palettes, water cups, newspaper, plastic sheet protectors (great price!) -one per student, hot glue or tacky glue
Day 1 Preparation:
- Print an outline of a flamingo and a dolphin (on separate pages), then placed them in a plastic sheet protector back to back.
- Measure a cup and a half of paper mache pulp (cotton) and place in a zip-lock bag for each student
- Make a mark about 3/4 at the top with a permanent marker in a 12 oz cup (so around 8oz of water).
- Set out supplies on table.
Sculpture Instructions:
- Students choose between a flamingo or dolphin. Students used Vis-a-Vis markers to write their names on the side of the sheet protector that has the animal they wanted to use.
- Mixing the paper mache: open bag, pour water in, leaving bag open-gently squish and squeeze the bag to mix and distribute the water. Add a small amount of water if there is still dry paper mache pulp.
- Use the paper mache to sculpt the flamingo or dolphin directly on the sheet protector. Press it down so it’s not more than 1/2″ or it may not dry. We want it to be flat on one side so we can glue it to a canvas panel.
- Sculpting the Flamingo
- Form the head with a small ball.
- Add the nose with a small amount of clay.
- Roll out a “snake” or coil for the neck.
- Attach to head so it makes an “S”. Smooth out with your finger.
- For the body, form a ball. Then gently press and pull one side to form the tail feathers.
- Attach the body to the neck and smooth out with your finger.
- Let dry overnight.
- Sculpting the Dolphin
- Form the main body with a large ball. Shape it into a long oval shape (or banana shape).
- Add the nose with a small amount of clay.
- Add all the fins with small amounts of clay forming them into triangle shapes.
- Smooth out all seems with your finger.
- Let dry overnight.
- Let dry with fan blowing on it overnight.
- Next day, turn the sculptures over, write names in sharpie, poke holes in the back with a fork, and let the fan blow on them for a couple more hours OR take a heat gun to them to help dry faster.
- Place a quarter size amount of all the paint on a palette (Styrofoam plate).
- Set up water cups, paper towels and paint brushes
- Draw the horizon line with a ruler.
- Use a compass to draw the sun setting on the horizon line.
- Paint the sun first either pure yellow or yellow mixed with white. Yellow is usually a semi-transparent paint and by adding some white to it (which is opaque), you shouldn’t be able to see your pencil lines.
- Next, paint a yellow-orange around the sun. While the paint is still wet, overlap your strokes and add pure orange, then pure pink. Bring the pink all the way to the edge.
- To paint the sun’s reflection in the ocean, draw a triangle from the edge of the sun to the bottom of the canvas. Fill in the triangle using horizontal strokes. the strokes should be irregular and can go beyond the triangle.
- On the outside of the triangle, add horizontal strokes of yellow-orange first, then orange, then pink, and finally turquoise on the outer most edges.
- Tips on using Acrylic Paint:
- Always keep brushes in water. If the paint dries on the brush it will ruin it.
- Always dry off your brush on a paper towel before getting any paint on it.
- Paint the Sun & SKY first. Work from background to foreground.
- Paint the flamingo or dolphin with acrylic paint. Let dry.
- Hot glue flamingo or dolphin onto the canvas. Use a permanent marker to draw in the legs of the flamingo.
Under the Sea – Eric Carle Style Painted Paper Collage
(2 Classes-1 hour each)
This project is based on the cover of the book Eric Carle’s Animals Animals. I have done this project MANY times and the key to its success is PLANNING & ORGANIZATION! It is best to limit the theme (ex: Under the Sea or In the Jungle) and number of creatures (One main one a couple small extras).
Supplies: 12×18 90lb watercolor paper, Liquid Watercolors Turquoise & Brown, salt, rubbing alcohol, Finger Paint Paper, Tempera Paints-blue, purple, white, black, brown, yellow, orange & turquoise, Paint scrapers, scissors, glue
Day 1 Preparation:
- Pre-cut finger paint paper into 2-6×9 (for fish and starfish) & 2 or 3-9×12″ sheets (for Octopus)
- Dilute liquid water colors 50/50 and place in small cups for the background.
- Place salt, rubbing alcohol with droppers, paint brushes, paper towels and newsprint on the tables.
- Set up stations for the different colors and techniques with tempera paint, scrapers, circle stamps (any found objects that would make a circle), bubble wrap or anything else you want to use. Make at least 4 stations depending on how many students you have and the layout of your space. I had 6 different stations. Make a sign for each station that says what that station is for and what size paper they should be using.
- What to do with all their papers? I have 18×24 newsprint that I write each students name on. After they finish at each station, they are to place their papers on their newsprint. I have a large hallway outside my room and that’s where I put the newsprint.
- Give students the 12×18″ watercolor paper and have them write their names on the back.
- Draw the sea floor lightly with a pencil.
- Painting a small section at a time. Apply the turquoise paint with a large brush and while it is still wet, drip small drops of rubbing alcohol into it.
- For the sand, again paint a small section at a time. Apply the sand colored paint (I mixed brown, orange, and yellow liquid watercolors), with a large brush and while it is still wet, sprinkle salt into it. This effect takes about 45 minutes to have the full affect. Do not try to speed the drying time with a hair dryer because the salt will not be able to slowly soak up the paint!
- Set on drying rack to dry overnight.
Painted Papers
- Give students their finger paint papers first and have them write their names on the back of each sheet.
- Give instructions for stations:
- How you want them to rotate through them
- How much time they will have at each station
- Where to put their artwork
- What to do if a station needs a refill on supplies
Day 2 Preparation:
- Set up tables with pencils, scissors, and stick glue.
- Give each student reference pictures of octopus.
Instructions:
- Hand back students’ backgrounds and painted papers.
- Instruct students to draw the shapes on the back (unpainted) side of the paper. Draw large in pencil.
- Fish: cut out a minimum of 4 fish of different shapes and sizes.
- Starfish: cut out at least 2 star fish.
- Octopus: cut the head and 2 tentacles out of one piece. Using your other octopus papers, cut out the other 6 tentacles.
*Amazon Affiliate Links- I only link products I use and love!
If you choose to use ANY part of this blog (graphic, pictures or written text), please link back to Create Art with ME!


