陶泥板城堡(带护城河与玻璃珠)
原文链接:https://createartwithme.com/clay-slab-castle-with-moat-and-glass-beads/
日期: 2018年4月22日
作者: 米歇尔·伊斯特
分类: 五年级、六年级、美术课教案、陶艺课教案、陶泥板成型课教案、小学美术、精选内容、高中美术、初中美术、肌理
标签: 五年级陶艺、五年级陶泥、美术陶泥、美术教师失败案例、蓝色玻璃珠、城堡建筑、带护城河的城堡、陶瓷城堡、陶艺课教案、陶泥城堡、陶泥城堡项目、陶泥配玻璃、垛口墙、小学陶泥项目、窑烧玻璃、五年级、泥板城堡、泥板课
陶泥板城堡(带护城河与玻璃珠)
我属于那种不达目的誓不罢休的人——一件事,我会反复尝试,直到成功为止。去年,我曾带领五年级学生开展过一次陶泥城堡项目。但由于多种因素,该项目收效甚微。首先,我们把作品尺寸做得过大,导致在储存过程中极易损坏;其次,恰逢“冰雪天气”停课日及校外研学活动,致使陶泥制作连续数周中断,整个项目周期被迫延长至六周以上(原计划仅需三周完成主体建构)。结果,不少学生的陶泥开始开裂、作品坍塌,孩子们深受打击……美术教师失败案例!
此时,我面临两个选择:要么彻底放弃该项目,将其从今后的教学计划中删除;要么分析失败原因,并重新设计教案,确保项目成功。我非常喜爱这个创意,也决心让它真正惠及学生!
绝不让这次失败阻碍我!
失败根源正是上述两大因素:作品尺寸过大与项目周期过长。一年后,如今——项目大获成功!
- 我们将圆柱体模具由原先的一品脱装油漆罐,更换为截短至四分之三高度的纸巾筒;
- 我提前确认校历中无任何计划内教学中断,并向任课教师协调,连续三周每周额外增加十分钟课堂时间。
这些调整彻底改变了项目的最终成效,使之走向成功!
启发本项目的其他陶泥城堡教学案例:
本项目制作步骤如下:
所需材料: 画布板(覆有画布的马松尼特板)、低温烧成的陶土(我们选用奥斯汀Armardillo陶艺供应公司的陶土)、截短至四分之三高度的纸巾筒、报纸、羽毛纹压线+专业针尖细节工具、¼英寸×36英寸方形木 dowel 棒、塑形工具、蓝色玻璃珠、釉料


联盟链接——我只推荐自己使用并喜爱的产品!
教学目标:
- 学习如何利用厚度标尺(slats)作为导引,用擀棒擀制厚度均匀的陶泥片。
- 掌握正确的刮擦(score)与泥浆(slip)技法,以牢固粘接陶泥部件。
- 运用多种技法为陶泥表面添加肌理。
教学流程/课堂活动:(共3课时,每课时50分钟)
第1天:城堡主体与锯齿状城墙
- 使用¼英寸(约6.4毫米)厚度标尺与擀棒,擀制圆筒形城堡主体及顶部部件的陶泥片(顶部镂空结构称为垛口)。
- 将卫生纸筒内部塞满废报纸,以增强其刚性。
- 将城堡主体泥片缠绕在卫生纸筒上,使其重叠约¼英寸(约6.4毫米),再用针具裁去多余部分。若裁下的余料足够大,可留作城堡顶部部件使用。
- 对主体泥片两端接口处进行刮擦,并涂上泥浆后粘合;再用蘸水的塑形工具抚平接缝。
- 擀制城堡顶部部件时,需边擀边试套于主体外侧,确保尺寸吻合;但切勿擀得过薄!
- 用针具切割出锯齿状城墙。
- 分别将城堡主体与顶部部件用保鲜膜单独包裹,以防彼此粘连;随后一同装入加注学生姓名的1加仑(约3.8升)自封袋中。袋内同时放入未用完的“余料”陶泥。封紧袋口!
观看视频教程:城堡主体与垛口的制作过程
第2天:安装锯齿状城墙、制作护城河
- 小心取出城堡主体与顶部部件,揭开保鲜膜。
- 在顶部部件与主体接口处进行刮擦并涂泥浆,将顶部部件覆盖于主体之上,重叠长度不少于½英寸(约12.7毫米)。
- 给每位学生分发一个棒球大小的陶泥球,用于制作护城河。
- 使用¼英寸(约6.4毫米)厚度标尺与擀棒,反复横向、纵向擀压陶泥片,使其逐渐延展成椭圆形。
- 用手指蘸少量水,轻按陶泥片边缘内侧约½英寸(约12.7毫米)处,压出护城河轮廓;凹陷深度约为护城河基底厚度的一半。
- 利用“余料”陶泥搓制一条长泥条,围在护城河基底外缘,形成外围墙体。
- 对泥条与基底边缘进行刮擦并涂泥浆,再用塑形工具将其抹平压实,使二者融为一体。
- 切勿在最后一天之前将城堡主体粘接到基底上!(特意安排在最后一天粘接,否则需将作品置于大型托板上并装入超大塑料袋储存。)
- 分别将城堡主体与护城河基底用保鲜膜单独包裹,再一同装入加注学生姓名的1加仑(约3.8升)自封袋中。封紧袋口!
观看视频教程:护城河的制作过程
陶泥片城堡(含护城河与玻璃珠)第三部分:带护城河的基底与陶泥储存
第3天:添加门窗、将城堡粘接至基底、制作吊桥
课前准备: 提前擀制陶泥片,并预裁为约2×4英寸(约5×10厘米)规格(每人一片)
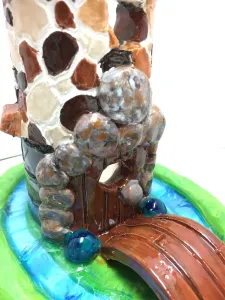
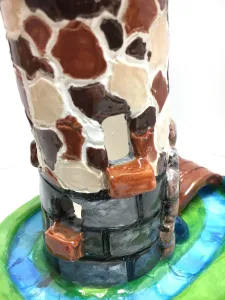
- 门: 先用针具在泥片上轻轻勾勒出门形(拱形顶或矩形);再于门形外缘添加陶泥——可用不同尺寸的小泥球模拟石砌效果,或用压扁的泥条表现木质门框。
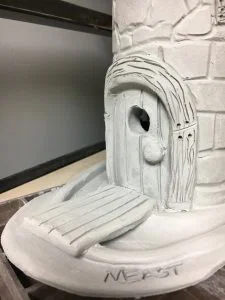
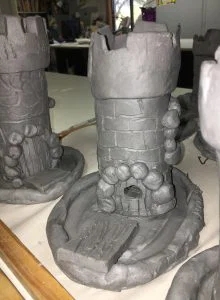
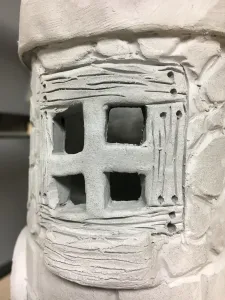
窗: 用针具切割出窗洞;可完全挖空,也可仅刻出窗格轮廓。同样可在窗洞外缘添加不同尺寸的小泥球模拟石砌边框,或用压扁的泥条表现木质窗框;再用针具刻画木纹线条。还可借助一小片陶泥泥片制作窗台。
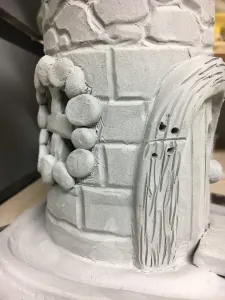
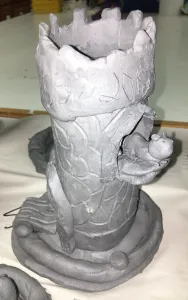
- 刻痕并抹水黏土浆,将城堡主体粘接到护城河底座上。用力按压并左右轻晃,确保牢固粘接!抚平城堡与底座周围任何粗糙部位。
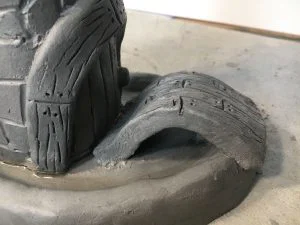
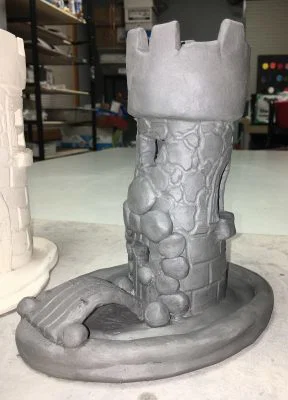
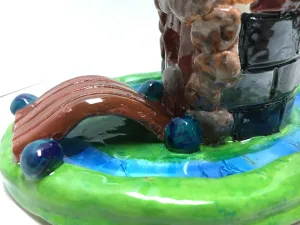
- 吊桥:发给学生吊桥部件。若需稍作擀压以适配空隙,请务必用擀面杖极轻地擀压!!若希望吊桥略呈向上弧形,需轻轻揉搓黏土背面中心位置,直至形成理想形状。刻痕并抹水黏土浆,将吊桥从城堡门洞处粘接到护城河墙顶。
- 在护城河墙体侧面刻写学生姓名与年份。
- 用塑料膜松散覆盖,开始自然阴干;保持松散包裹塑料膜状态 3–4 天。因黏土厚度不一,必须延缓干燥速度,以防开裂。
- 随后取下塑料膜,继续自然阴干至少 7 天以上。
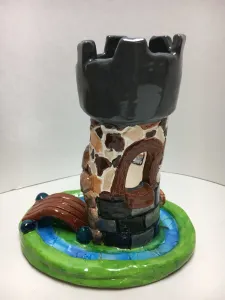
- 待完全干燥后进行素烧(预热 24 小时)。我们采用陶质低温黏土(先素烧至锥号 04),再施以锥号 06 的釉料(选用 Mayco Stroke & Coat 系列),护城河部分也需上釉。接着添加花艺区所售的玻璃珠!以锥号 06、中速烧成。切勿在窑温高于 100℃ 时开启窑门!
- 施釉(含后续安放玻璃珠的位置),再添加蓝色玻璃珠(务必在釉烧完成后再放入玻璃珠——此点极为重要!),再次以锥号 06 烧成(温度更高则易致气泡)。素烧温度过高,会使玻璃珠产生气泡甚至爆裂;而釉烧温度较低、时间较短,可避免气泡或爆裂现象。内部可能出现细微裂纹,但据我们经验,从未出现釉面剥落或产生尖锐边缘的情况。玻璃珠安放处务必留出余量(宁少勿多)! 若玻璃珠溢出或渗出黏土边界,将粘连窑板,导致作品无法安全取出,后果严重!
当然,玻璃珠纯属可选项! 若您对添加玻璃珠心存顾虑,仅将“水面”部分施以蓝色釉料即可!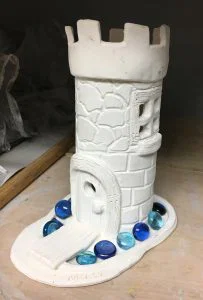
观看教学视频:我们如何制作城门、窗户、城堡肌理、将城堡粘接到底座及安装吊桥
黏土板城堡配护城河与玻璃珠——第四部分:为城堡添加城门、窗户及窗饰
黏土板城堡配护城河与玻璃珠——第五部分:城堡肌理(砖纹与石纹)、城堡与底座粘接、吊桥安装
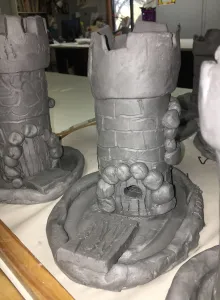
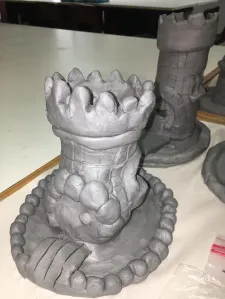
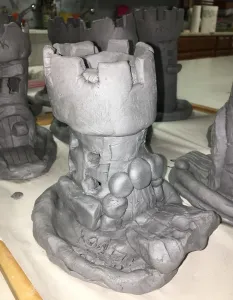
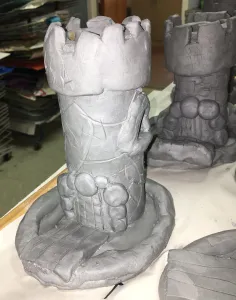
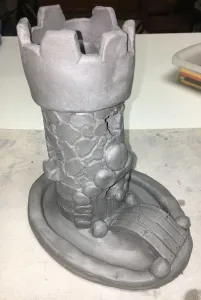
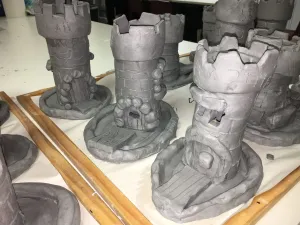
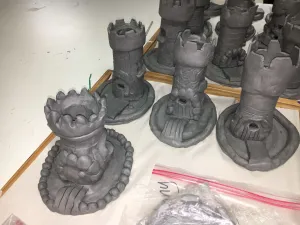
学生作品处于阴干阶段(我重新用塑料膜松散包裹前)
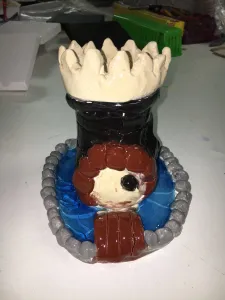
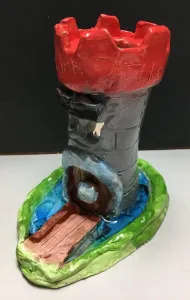
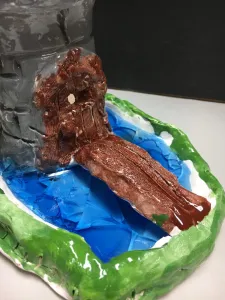
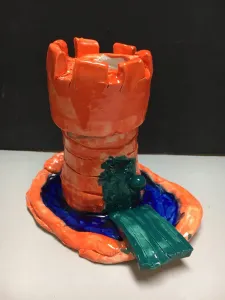
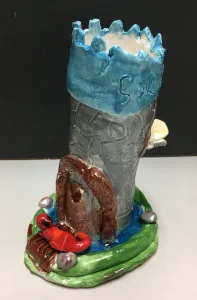
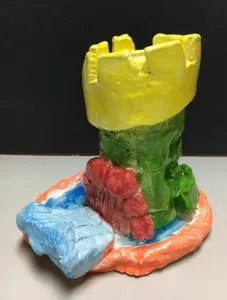
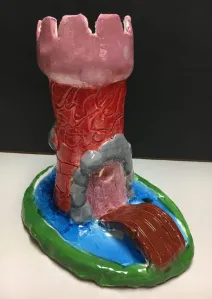
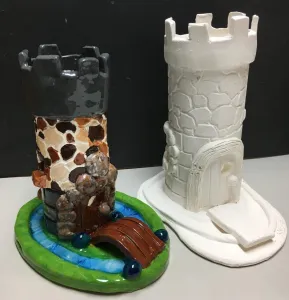
这是学生为城堡施釉及烧成后成品的视频
黏土板城堡配护城河与玻璃珠——第六部分:城堡施釉与烧成效果
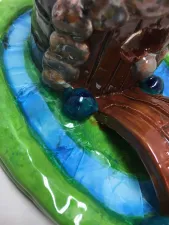
*亚马逊联盟链接——所有推荐产品均为本人实际使用且真心喜爱者!
若您选用本博客中任一部分内容(图示、图片或文字),请务必回链至 Create Art with ME!
Clay Slab Castle with Moat and Glass Beads
Original: https://createartwithme.com/clay-slab-castle-with-moat-and-glass-beads/
Date: 2018-04-22
Author: Michelle East
Categories: 5th Grade, 6th Grade, Art Lessons, Ceramics Lessons, Ceramics Slab Construction Lessons, Elementary Art, Featured, HS Art, MS Art, Texture
Tags: 5th grade ceramics, 5th grade clay, art clay, art teacher fail, blue glass beads, castle architecture, castle with moat, ceramic caslte, ceramics lesson, clay castle, clay castle project, clay with glass, Crenelated Wall, elementary clay project, glass in kiln, grade 5, slab castle, slab lesson
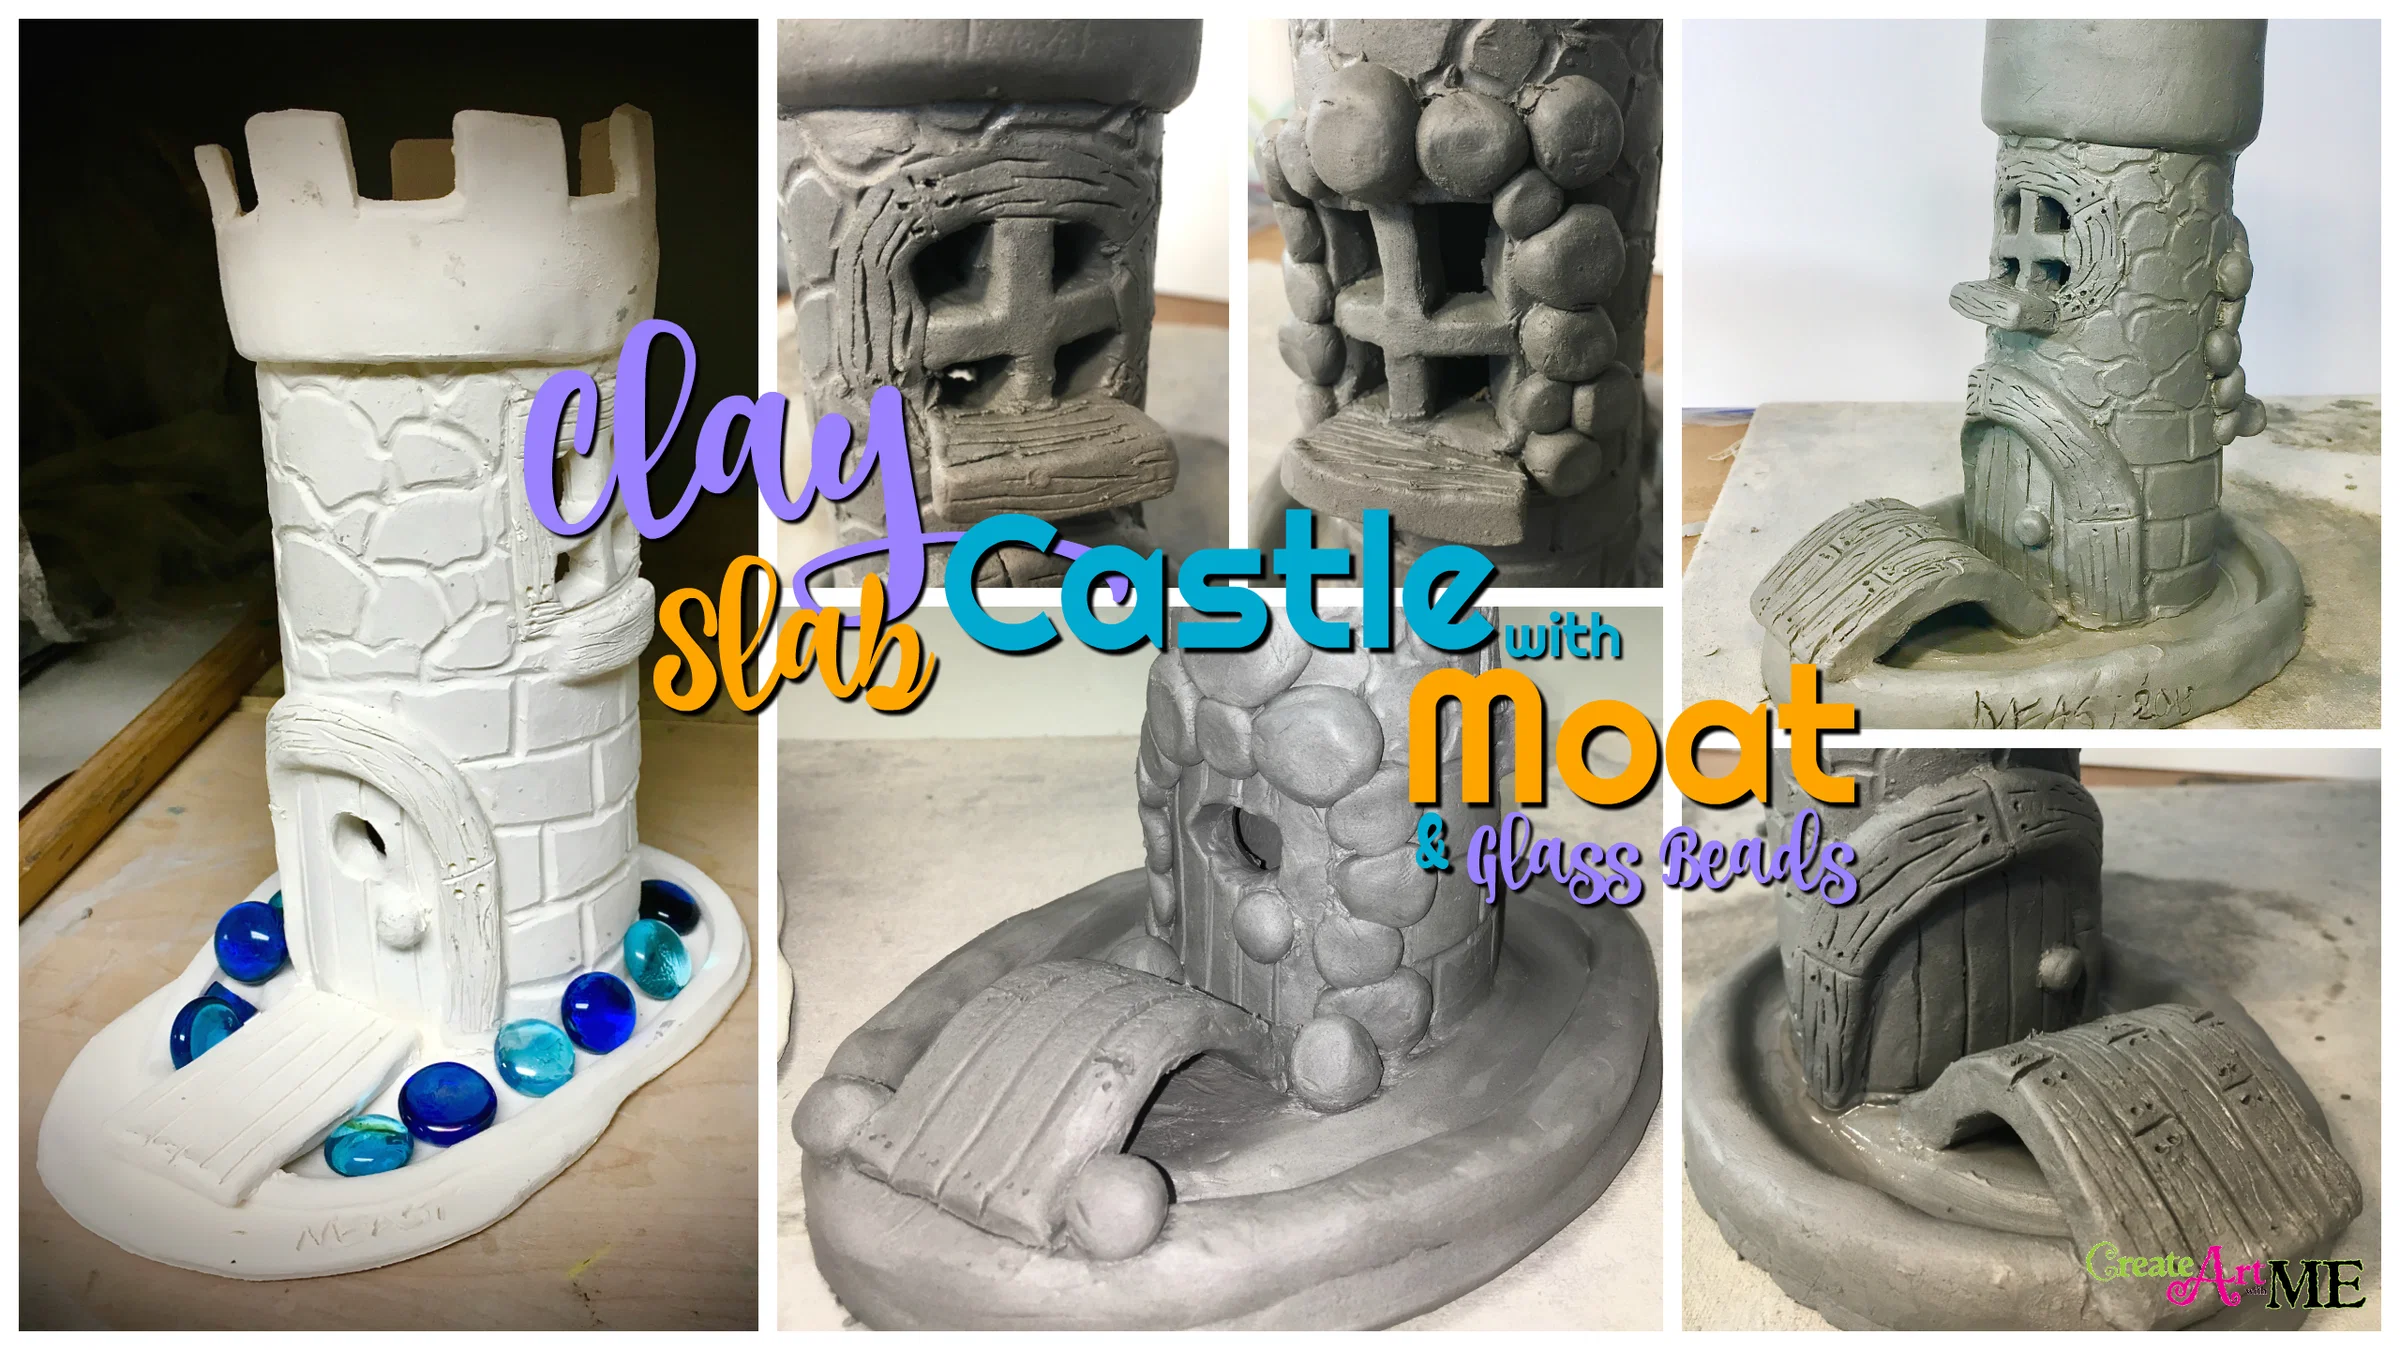
Clay Slab Castle with Moat & Glass Beads
I am the kind of person that will try something until I get it right. Last year I did the clay castle project with my 5th graders. Because of many factors the project had little success. First of all, we made the project too big which made storing it without damage difficult. Second, we had “ice” days and a field trip that prevented work on the clay for a several weeks in a row that extended the overall project to over 6 weeks (originally planned on 3 for construction). For several students the clay began to crack, projects crumbled, and the kids were devastated…art teacher FAIL!
At that point I had two choices: either scrap the project as a dud and remove it from my future lesson plans or evaluate the failure points and redesign the lesson to make it successful. I loved the idea of this project and was determined to make it successful for the kids!
Won’t let that FAIL stop me!
The failure points were the two main factors above: size and duration of project. Fast forward a year to present-PROJECT WIN!
- We changed the size of the cylinder from a pint size paint bottle to a 3/4th size cut Paper towel roll.
- I made sure that there were going to be no planned interruptions on the school calendar and asked the classroom teacher for 10 extra minutes for the class for 3 weeks in a row.
These factors changed the outcome of this project to a success!
Additional Clay Castle posts that inspired our project:
Here is how we created this project:
Supplies: Canvas boards (Canvas covered Masonite), Earthenware low-fire Clay (I get ours at Armadillo Clay in Austin), Paper towel roll cut down to 3/4th size, newspaper, Feather Wire Texture + Pro Needle Detail Tools, Square Dowel Rods 1/4″ X 36″, modeling tools, blue glass beads, glazes
Affiliate links-I only recommend products I use and love!
Objectives:
- Learn how to roll slabs of clay using slats as guides to create even thickness.
- Demonstrate proper score and slip techniques to join clay.
- Apply various techniques for adding texture to clay.
Delivery/Activity: (3-50 minute classes)
Day 1: Body of Castle & Crenelated Wall
- Using 1/4″ slats and a rolling pin, roll the slabs for the cylinder body and the top part of castle (the cutouts are called battlements).
- Stuff the paper towel roll with newspaper to help stiffen it.
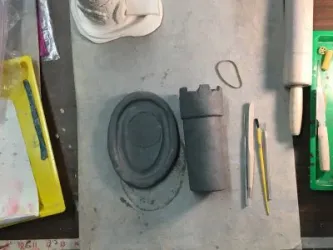
- Roll the body of the castle around the paper towel roll so it overlaps about a 1/4″, trim the excess off with a needle tool. If the excess is large enough, you may be able to use it for the top part of the castle.
- Score and slip the edges of the body together. Use a modeling tool with water on it to smooth out the “seam”.
- For the top part of the castle, roll out with a rolling pin to make sure it fits around the body of the castle, but be careful to not roll it too thin!
- Use a needle tool to cut the crenelated walls.
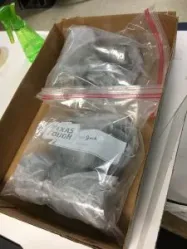
- Separately wrap the body & top of the castle in plastic wrap to prevent sticking together and then place in gallon size zip-lock bag with students name on bag. Keep any unused “extra” clay in the bag. Close the bag!
Watch the Video Tutorials of How We Made the Castle Body & Battlement
Day 2: Attach Crenelated Wall & Create Moat
- Carefully take out body and top of the castle. Unwrap the clay.
- Score and slip to attach the top part to the body overlapping the body at least 1/2″.
- Give students a ball of clay (baseball size) for the moat.
- Using 1/4″ slats and a rolling pin, roll the slabs back & forth and side to side to get the moat into an oval shape.
- Use your finger dipped in water to LIGHTLY press in the moat shape about 1/2″ from the edge. The indention should only go down about 1/2 way of the depth of the moat base.
- Using “extra” clay, roll a long coil that will build a wall around the outside of the moat base.
- Score and slip the coil onto the edge. Use a modeling tool to smooth the coil onto the moat base so they are one piece.
- Do NOT attach castle to the base until the LAST DAY! (It is intentional to attach the castle to the base on the last day otherwise we would have had to store them in large bags on bats.)
- Separately wrap the castle and moat base in plastic wrap and place in gallon size zip-lock bag. Close the bag!
Watch the Video Tutorials of How We Made the Moat
Clay Slab Castle with Moat and Glass Beads- Part Three: Base with Moat and Storage
Day 3: Add Doors & Windows, Attached Castle to Base & Add Drawbridge
Preparation: Roll out slab and pre-cut to approximately 2×4″ (one per student)
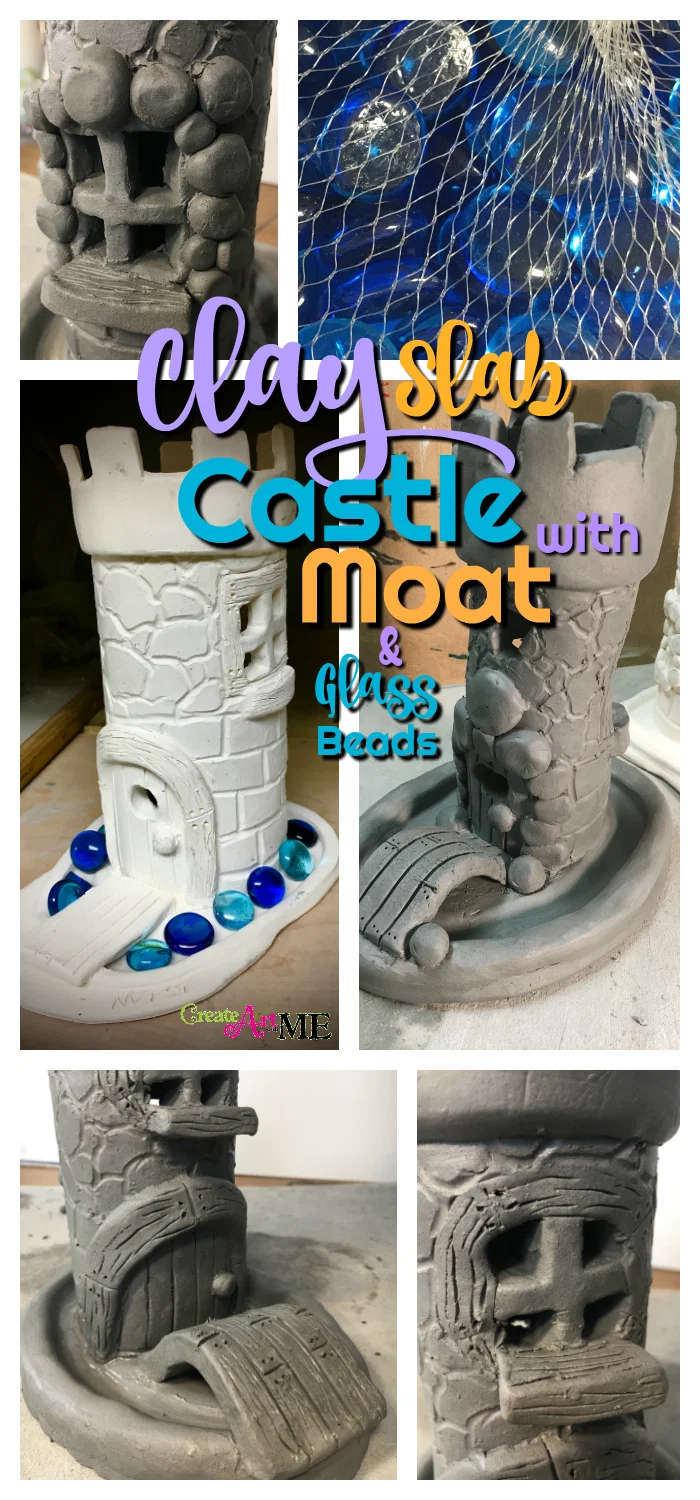
- Door: we lightly drew the door in (curved top or rectangle) with the needle tool, then added clay around the outside. Various size balls for a stone look and strips of flattened clay to look like a wood frame.Windows: Cut out windows with a needle tool. Either cut it completely out or cut out window panes. Again, to add surrounds around the outside use various size balls for a stone look and strips of flattened clay to look like a wood frame. Use the needle tool to draw in lines for the wood grain. You can also add a window ledge with a small slab of clay.
2. Score and slip to attach the body of the castle to the moat base. Press down & wiggle down to attach firmly! Smooth out any rough spots around the castle and base.
3. Drawbridge: give students draw-bridge. If they need to roll it a little to make it fit the space, make sure the press with the rolling pin very lightly!! If they want it to be slightly curved up, they need to gently rub the center of the back of the clay until the desired shape is formed. Score and slip to attach the drawbridge from the door to the top of the moat wall.
4. Scratch name/year into the side of the wall of the moat.
5. Loosely cover with plastic wrap and allow to start drying; leave loosely wrapped with plastic for 3-4 days. Because of the varied thickness of the clay, the drying time MUST be slowed down to prevent cracking.
6. Then take off the plastic wrap and allow to finish drying for another 7+ days.
7. When completely dry and bisque fire (preheat for 24 hours prior). We use earthenware-low fire clay (bisque first to cone 04), then glaze with cone 06 glazes (we use Mayco Stroke & Coat), add glaze to moat as well. Then add glass beads like the one in the floral department! Fire at cone 06 on medium speed. Don’t open kiln until the temperature is at or below 100 degrees!
8. Glaze (including where you will place the beads), add blue glass beads (don’t add them until the glaze firing-very important!) and fire again at cone 06 (any hotter cone may cause bubbling). The bisque firing is too hot for the glass and will cause bubbles and exploding of the glass inside the kiln. The glaze firing is less hot and for a shorter amount of time and the bubbling/exploding does not happen. Minor internal cracking may occur, but for us it has never chipped or left sharp edges. Always UNDER fill the area where the glass will be! If the glass overflows or leaks out of the clay it will stick to the shelf and it will be disastrous to get the piece off!
Of course, the glass beads are OPTIONAL! If you don’t feel comfortable adding the glass beads, just glaze the water part blue!
Watch the Video Tutorials of How We Made the Door, Windows, Castle Textures, Attached Castle to Base & Added Drawbridge
Clay Slab Castle with Moat and Glass Beads- Part Four: Add Door, Windows, and Window Extras to Castle
Clay Slab Castle with Moat and Glass Beads- Part Five: Castle Texture (brick and stone), Attach Castle to Base, and Add Drawbridge
Student Castles at Drying stage (before I wrapped them back up in plastic wrap)
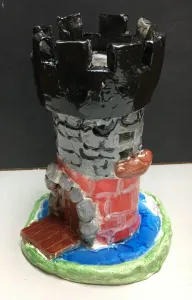
Here is a video of students glazing the castles and then the fired castles
Clay Slab Castle with Moat and Glass Beads- Part Six: Glazing Castles and Fired Castles
*Amazon Affiliate Links- I only link products I use and love!
If you choose to use ANY part of this blog (graphic, pictures or written text), please link back to Create Art with ME!


