泡沫塑料版画美术课
原文链接:https://thatartteacher.com/2021/03/10/styrofoam-printmaking-art-lesson/
日期: 2021-03-10
作者: Sierra Machado
分类: 美术教程、长篇教案、版画
标签: 美术与音乐跨学科课程、美术课版画教学、美术教育、跨学科美术课、简易版画课、精选内容、哈莱姆文艺复兴主题美术课、如何做泡沫塑料版画、如何进行版画创作、如何用泡沫塑料做版画、初中美术课、与音乐相关的美术课、乐器主题泡沫塑料版画、儿童版画课、初学者版画课、少儿版画、课堂版画教学、无需印刷机的版画、分步版画教程、泡沫塑料印刷、泡沫塑料版画美术课、那位美术老师
泡沫塑料版画美术课
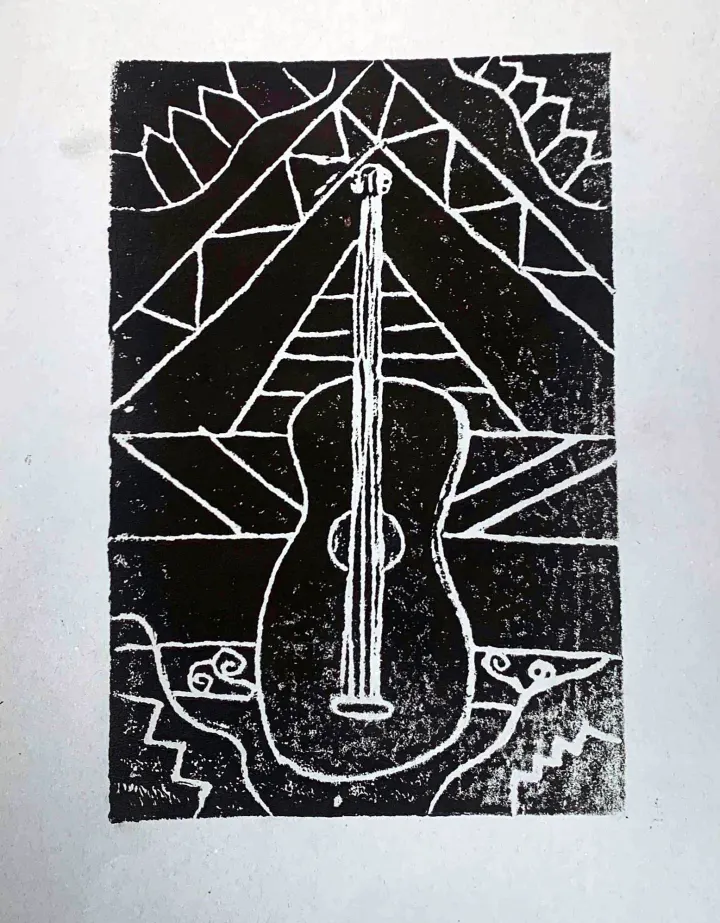
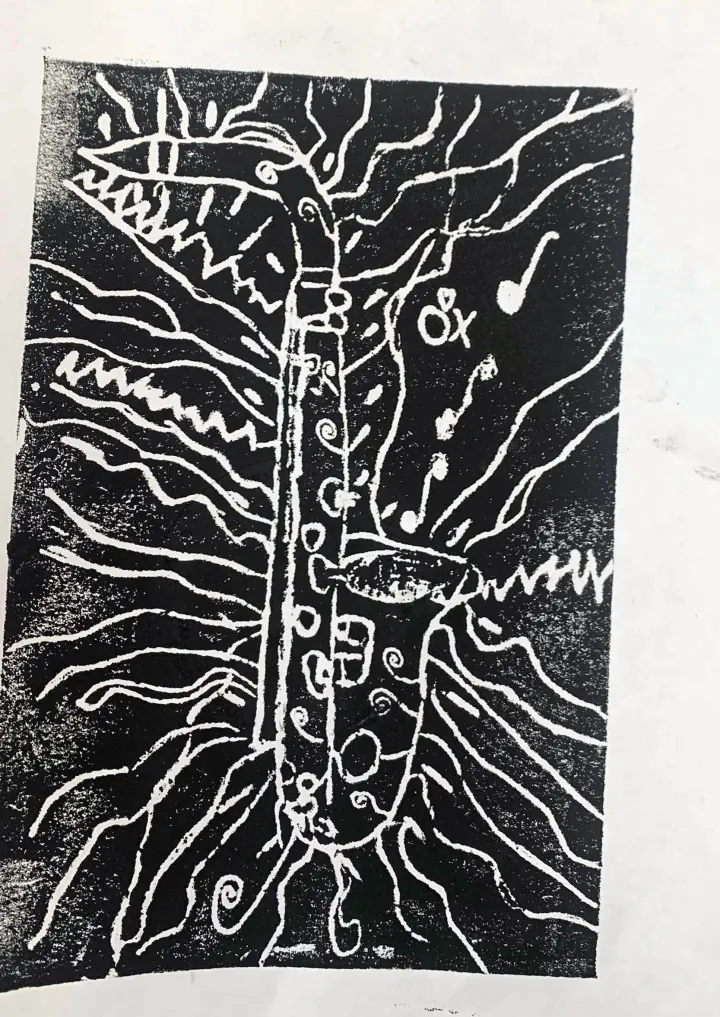
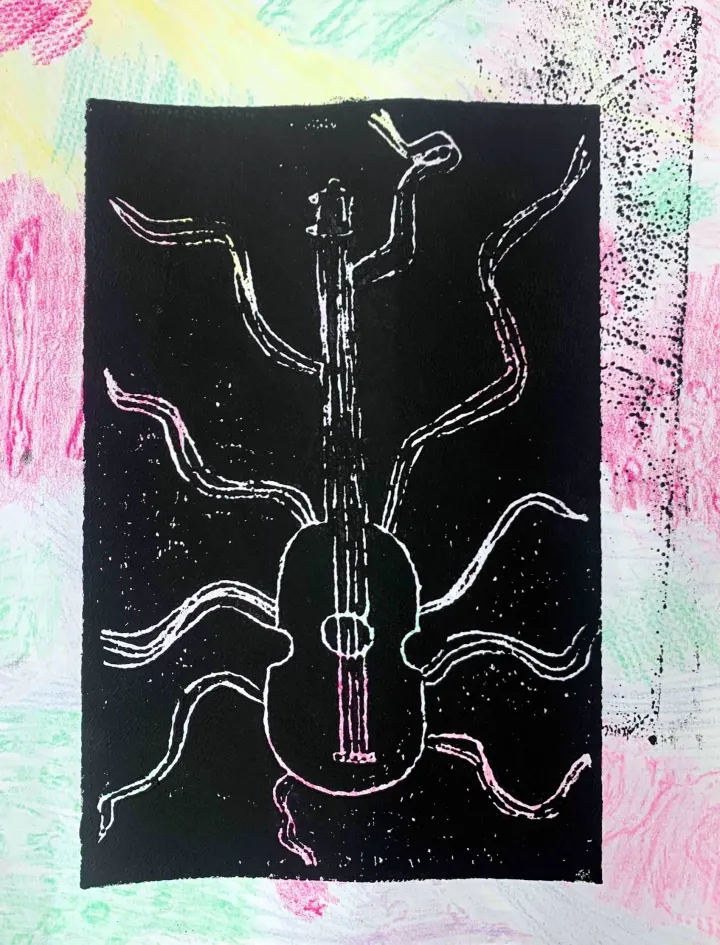
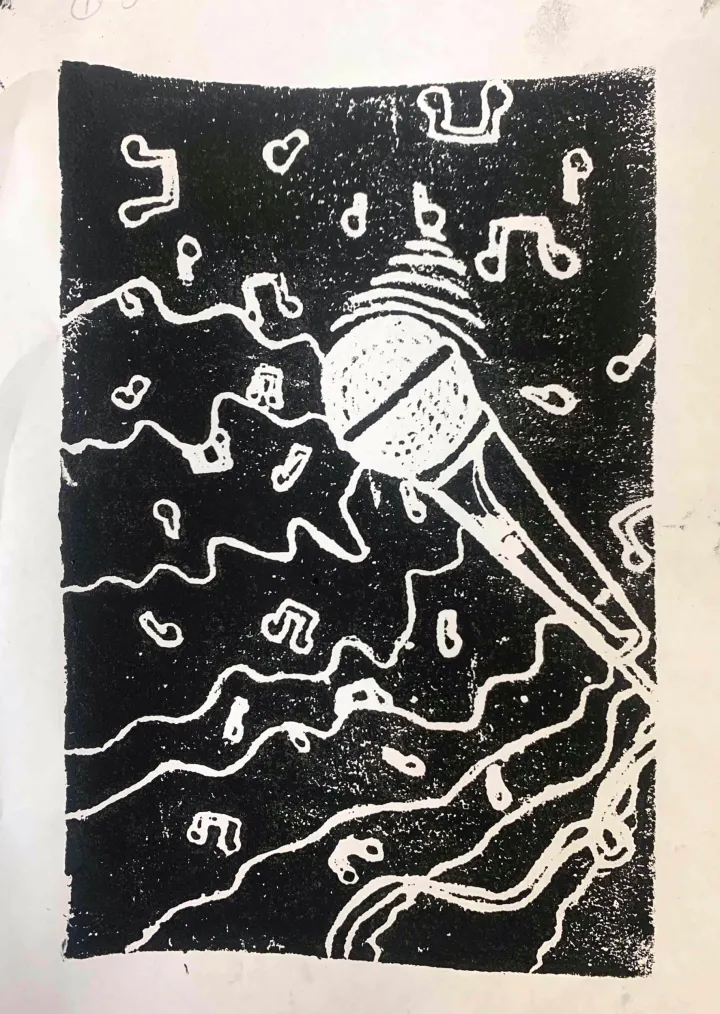
试试这堂适合班级教学的泡沫塑料版画美术课吧!课程灵感源自乐器与哈莱姆文艺复兴。我的学生非常喜爱美术与音乐的联结,而版画创作本身所具有的“魔力”更是无可替代。我在教室后方设置了多个印刷工作台,一个25人的班级通常需三天时间完成三幅印品。
本教程已为课堂教学做好准备,将详述泡沫塑料版画制作的每一步骤。我总是先向学生展示最终成果——即成功印出三幅作品的过程。有时版画对学生而言较难理解,而提前展示结果有助于他们明确整个流程的最终目标。我始终强调:版画是一种“过程”!
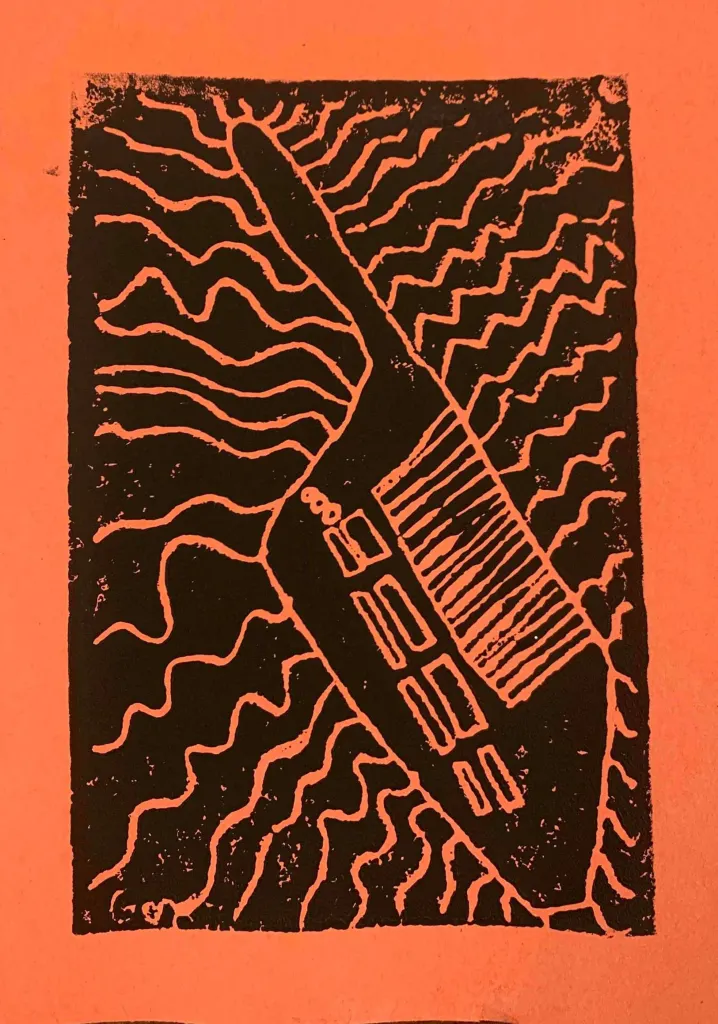
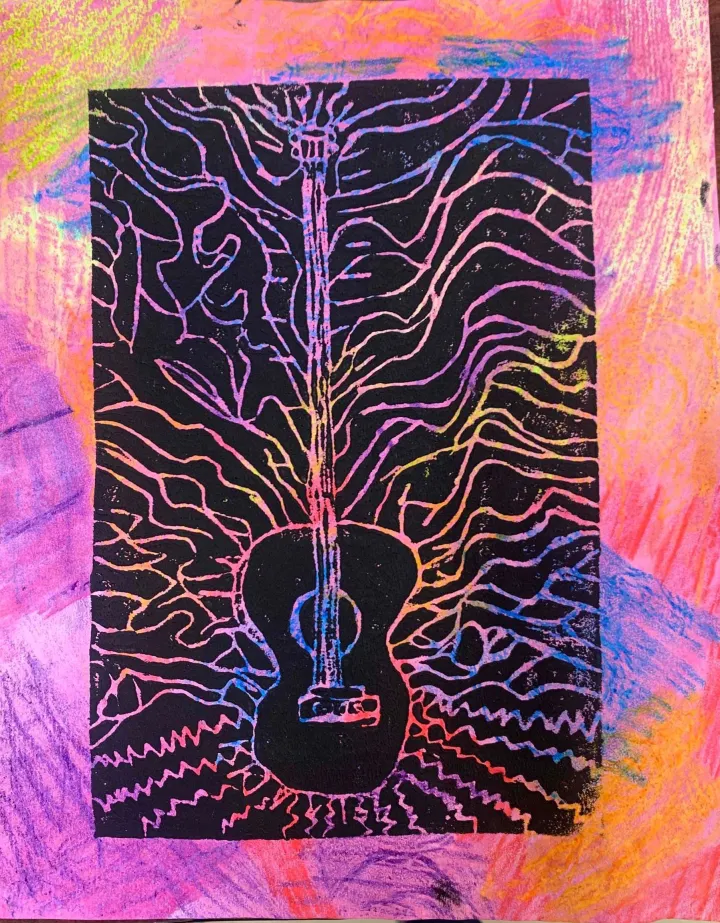
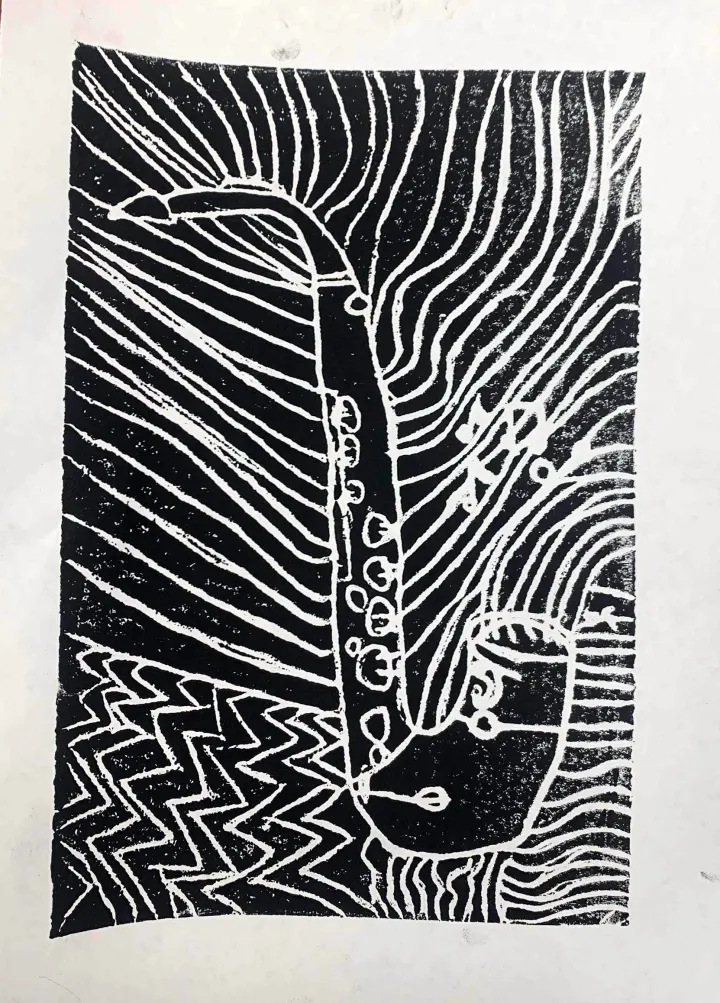
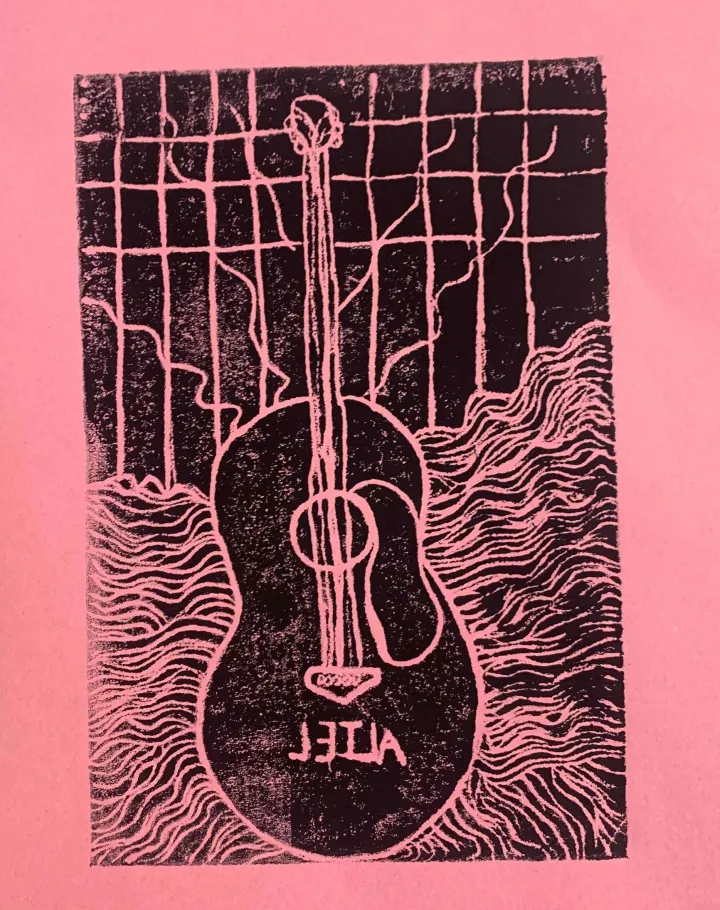
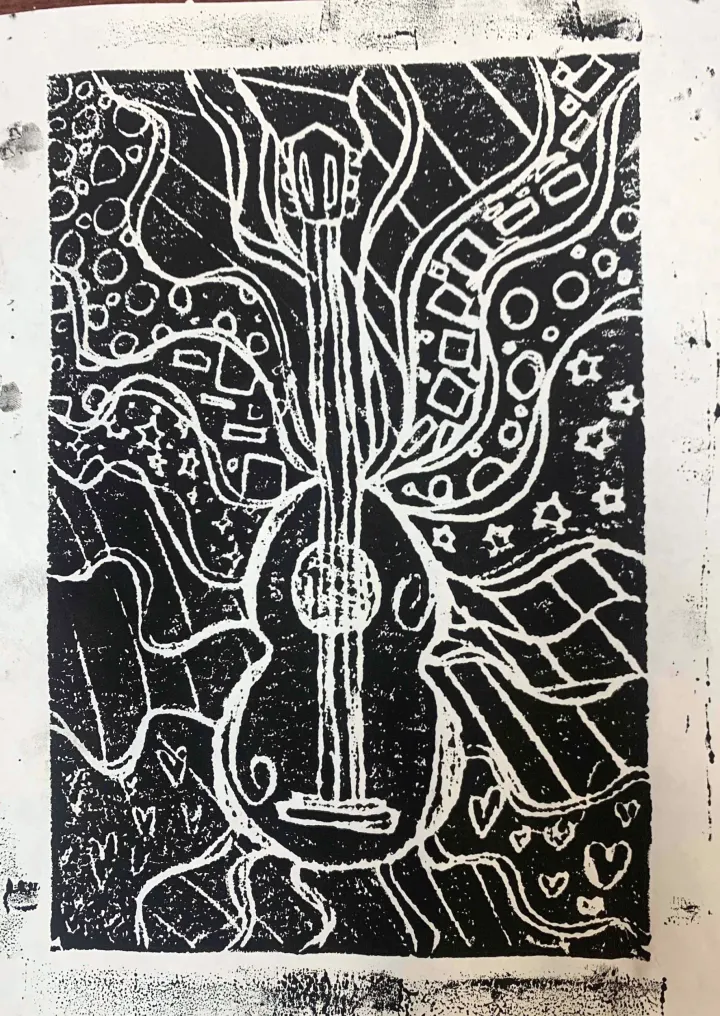
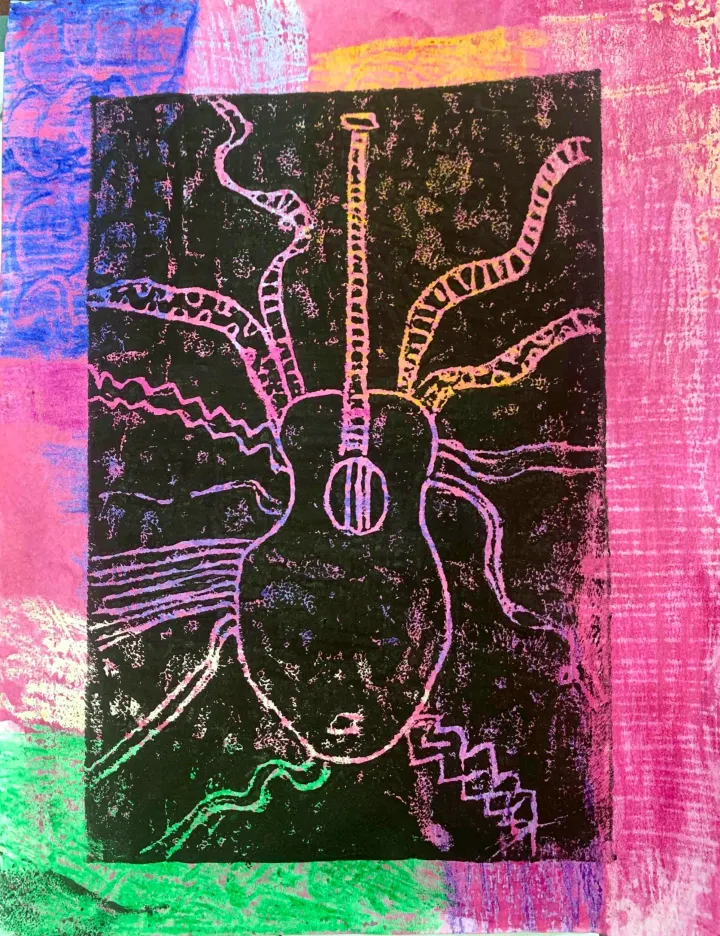
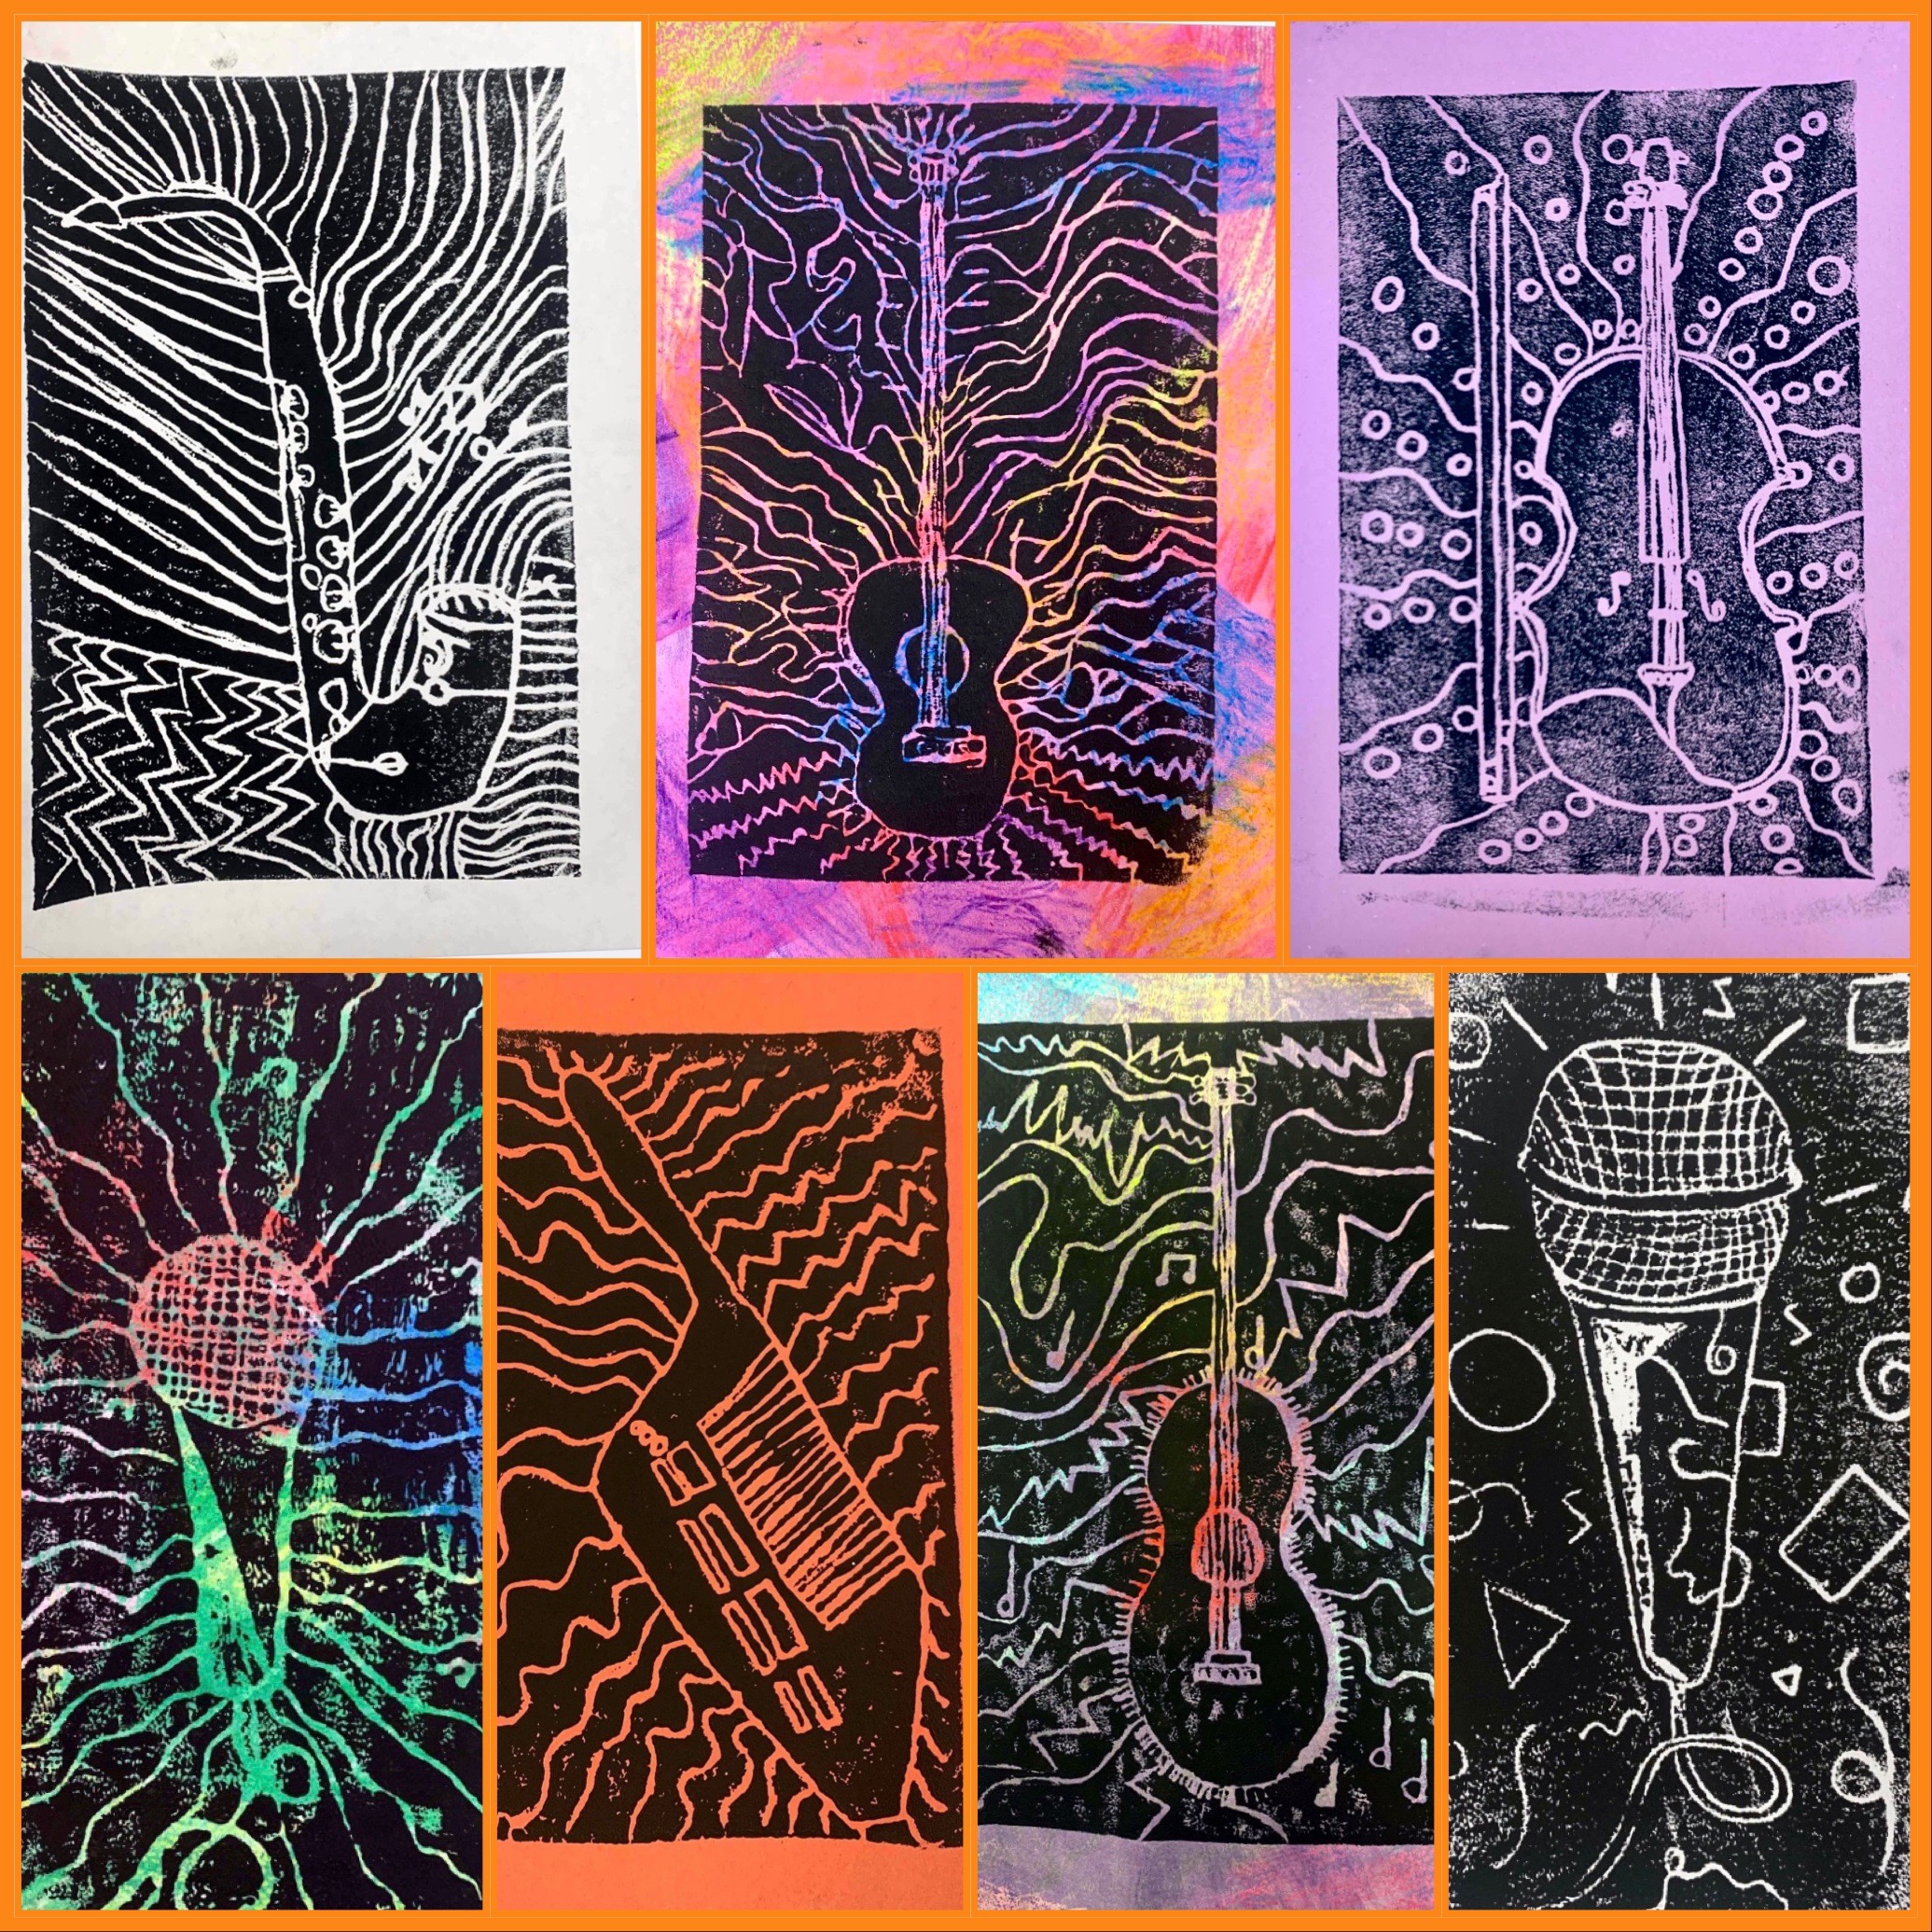
泡沫塑料版画材料
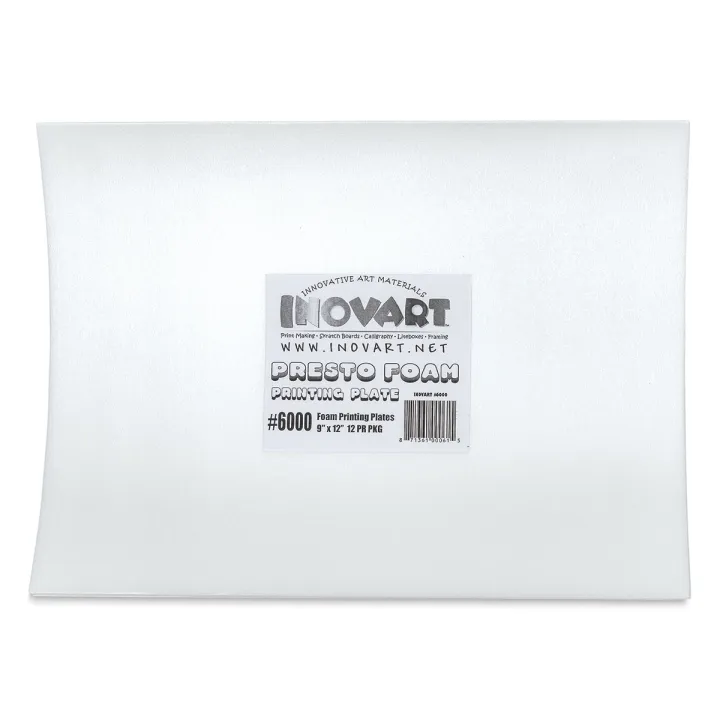

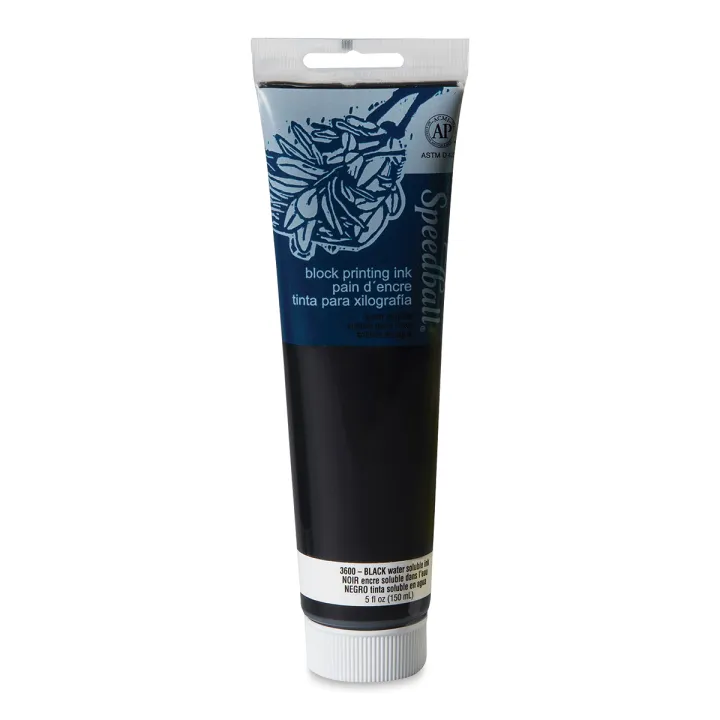

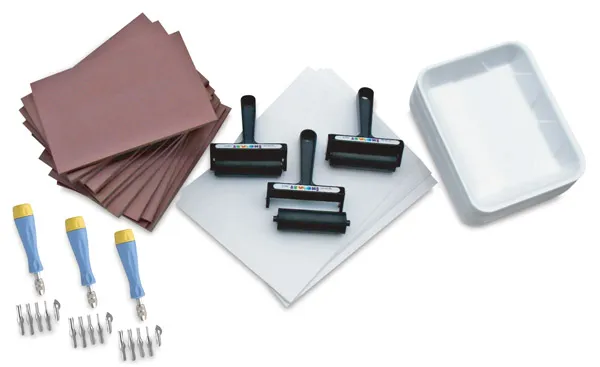

当教室中没有印刷机时,泡沫塑料是开展版画教学的理想替代方案。它价格低廉,且极易操作。我使用的是这类刻痕泡沫板,但也可选用泡沫塑料餐盘。这些材料十分便捷,且已预先裁切好。
以上均为本人在教学中真实使用并真心推荐的联盟链接商品。若您通过这些链接购买商品,我们可能获得佣金,且不会为您增加任何额外费用。#美术教师副业
我坚持使用黑色油性版画油墨,但在紧急情况下也可用丙烯颜料代替。不过丙烯颜料缺乏版画油墨特有的粘稠质感,因此无法呈现油墨所能达到的精细细节。初次购置版画工具可能是一笔不小的开支。目前我仅有六套胶辊与调墨盘,但我更倾向以小组形式进行印刷,因此这一配置完全适用于我的教学环境。
泡沫塑料版画步骤
绘制乐器与背景
第一步是在一张与泡沫塑料印版尺寸相同的纸上绘制图像。学生们起初对绘制乐器感到紧张,因此大量鼓励性语言与参考图示能有效提升他们的信心。我会打印(并塑封 #2021)一系列简明的乐器黑白图样供学生临摹参考。搜索黑白剪贴画可简化乐器造型,使学生得以专注于线条与形状本身。
Musical-Instrument-Drawing下载
学生中最常见的倾向是把乐器画得“极小”!为此,我首先示范:在纸张顶部与底部各做一个刻度标记,以此提供尺寸参照。即便如此,许多学生仍会不自觉地缩小乐器比例。这也恰好避免了学生急不可耐地直接描摹手边那份诱人的参考资料。针对不同学生群体,描摹未必是糟糕的选择——若希望某一群体学生快速获得成就感,描摹便是最佳方案。所有学生的能力水平本就参差不齐,而美术教育的核心目标之一,不正是让学生在艺术实践中体验成功吗?
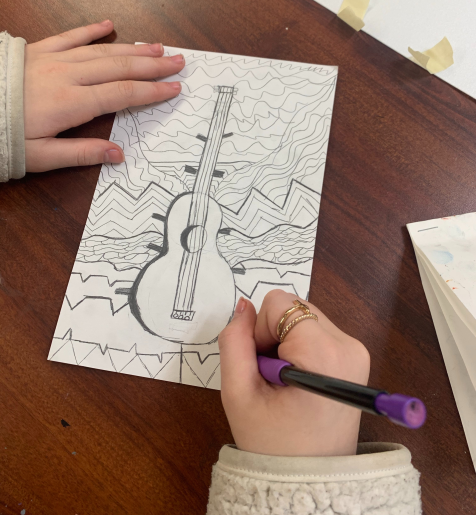
当学生对自己的乐器形象满意后,便进入背景绘制环节!本课程以禅绕画图案创作为起点,因此此时他们已是此道高手。绘制过程中,我们同步聆听风格多样的音乐——迈尔斯·戴维斯(Miles Davis)与路易斯·阿姆斯特朗(Louis Armstrong)是我最钟爱的两位音乐家,学生们也乐于辨识耳畔响起的各类乐器音色。此处线条变化至关重要:务必提醒学生交替使用细线,并在乐器轮廓周围加粗线条以强化视觉重点。
将绘稿转印至泡沫塑料
待学生对自己的图像满意后,即可将其转印至泡沫塑料上!我为每位学生提供足够长度的美纹纸胶带,用于固定纸张上下两端。我选用了红、蓝两色记号笔,只因手头恰好有大量库存。关键在于:所用颜色必须明显区别于铅笔线条,以便清晰分辨哪些线条已被描摹、哪些尚未描摹。
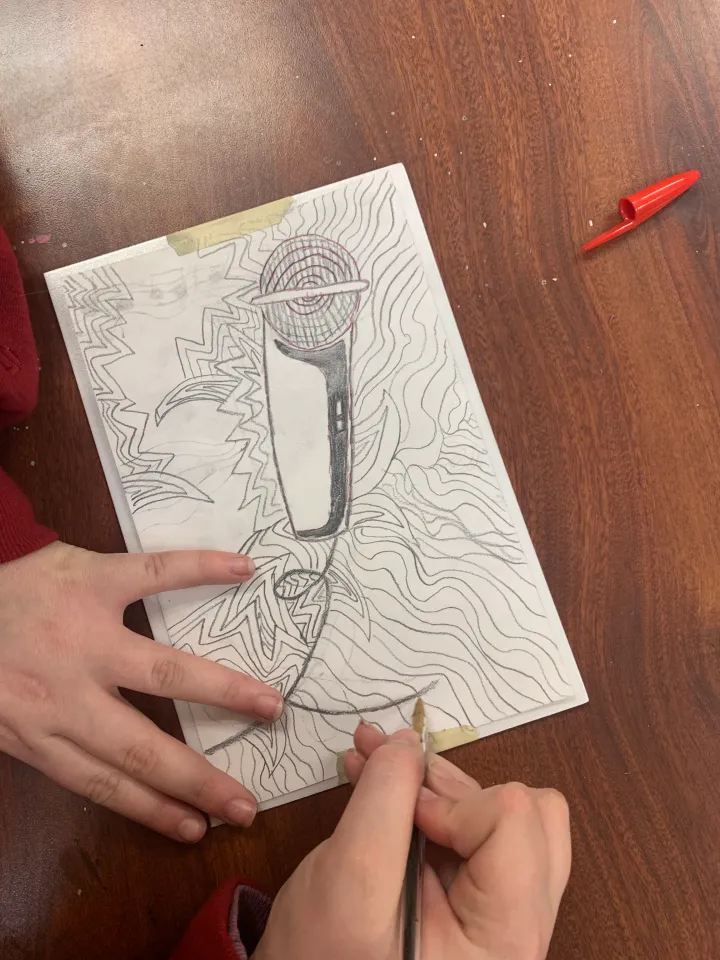
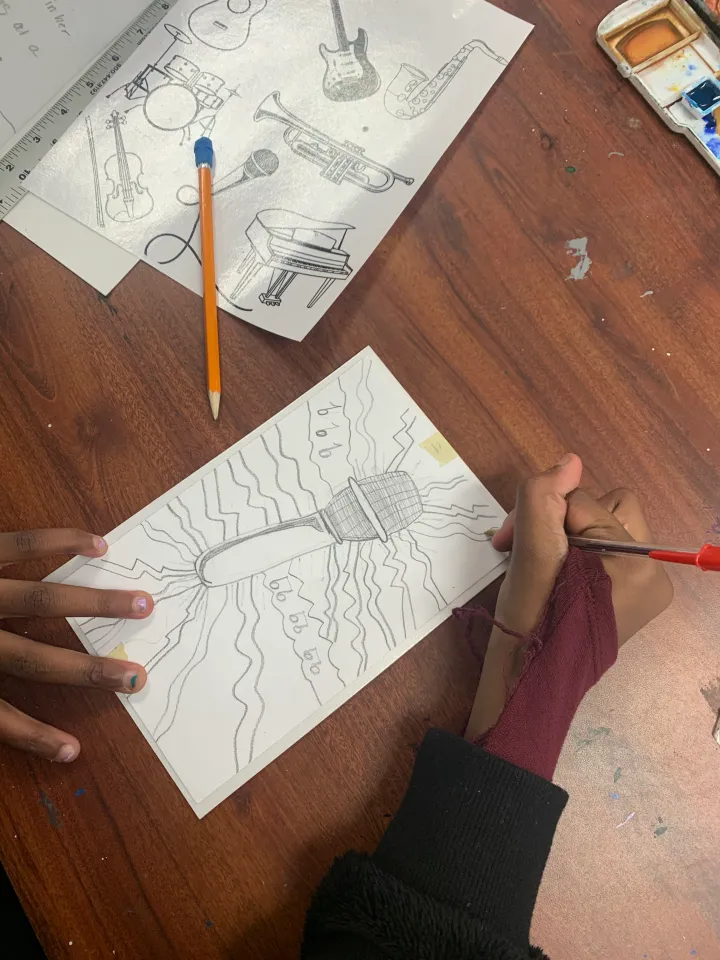
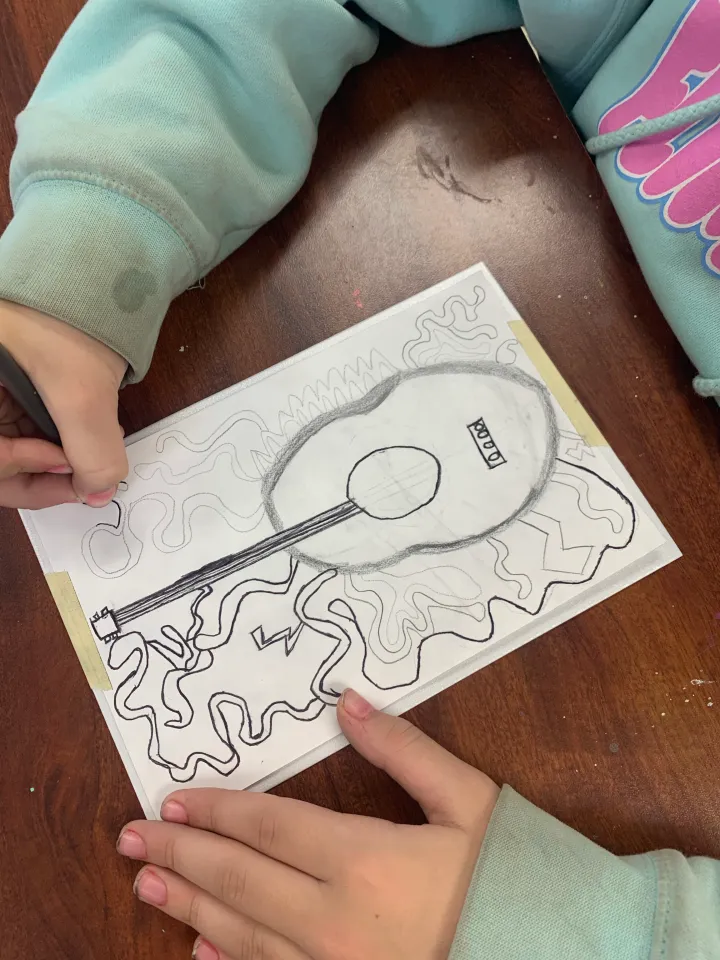
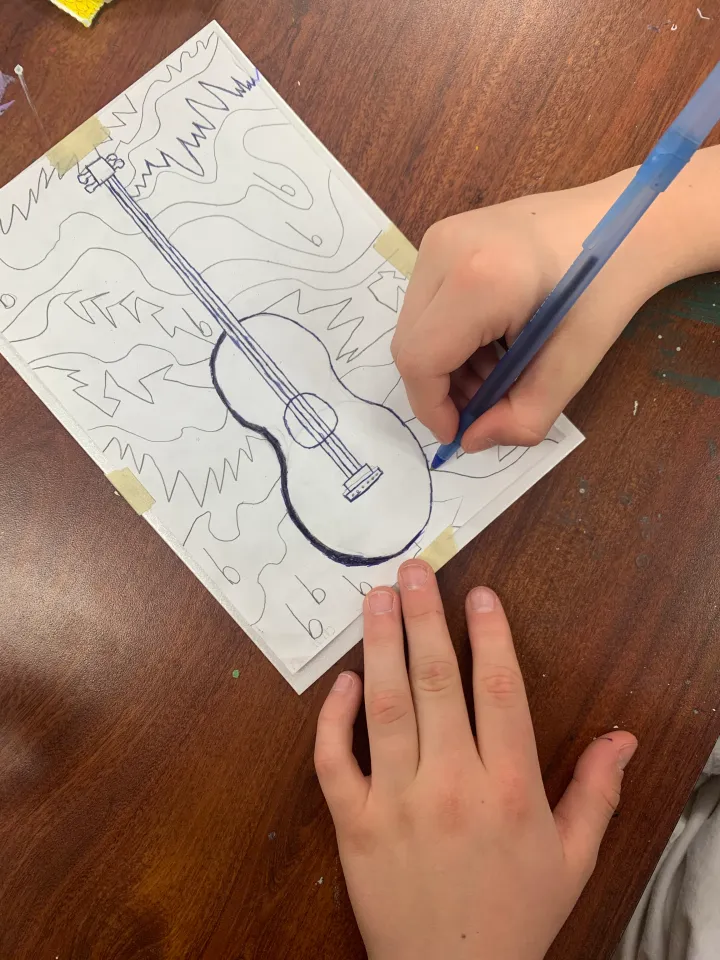
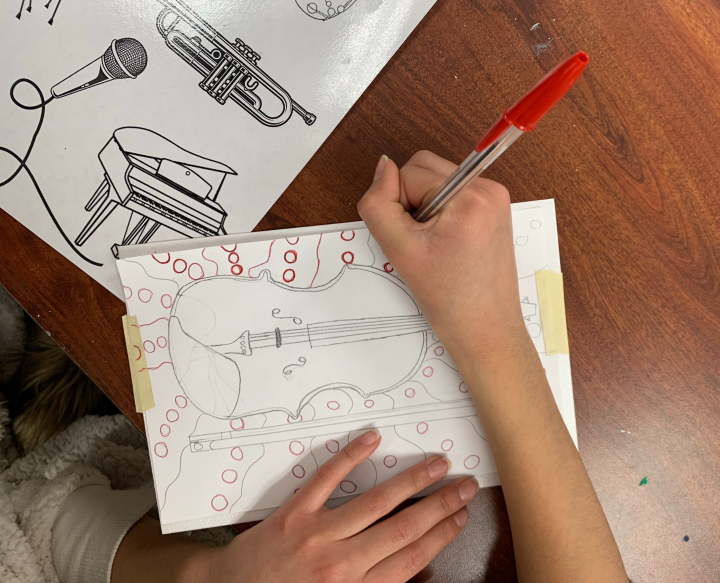
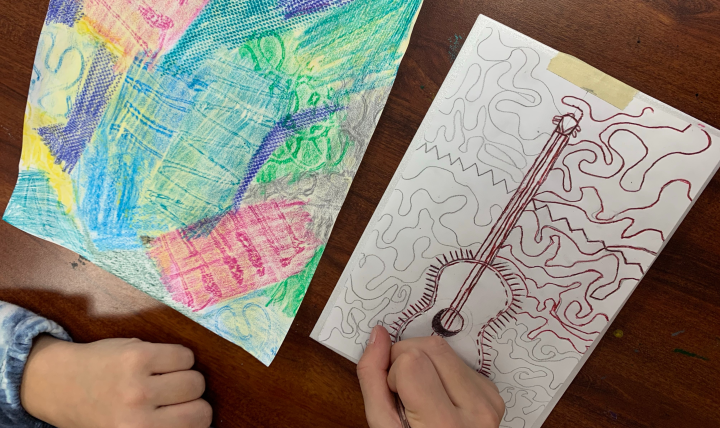
此处须特别说明:这是学生首次描摹图像。仅靠此次转印所留下的线条尚不足以形成清晰印迹。我总会提醒学生:版画是一种“过程”,而非单纯绘画。本步骤的目的在于确保图像准确转移,以便后续雕刻出自己真正满意的形象。学生们十分喜爱描摹后揭起纸张、观察线条显现的过程;同时也会略带夸张地抱怨用力按压导致手部酸痛——毕竟这叫“美术工”作,对吧?🤣
直接在泡沫塑料上刻划线条
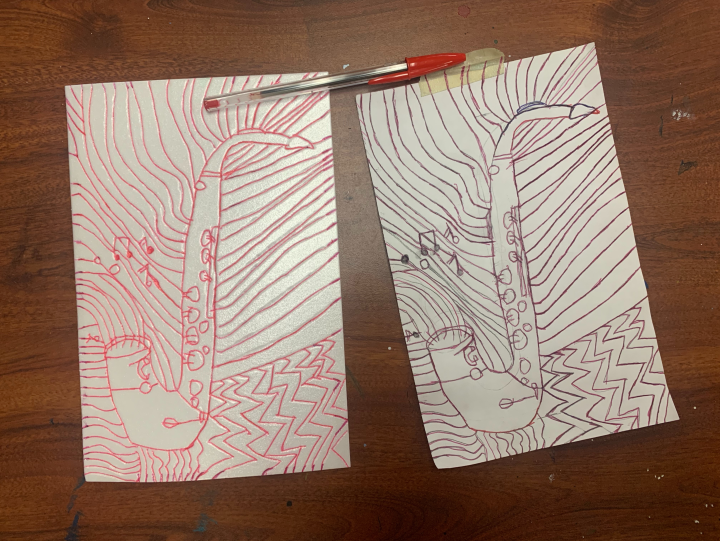
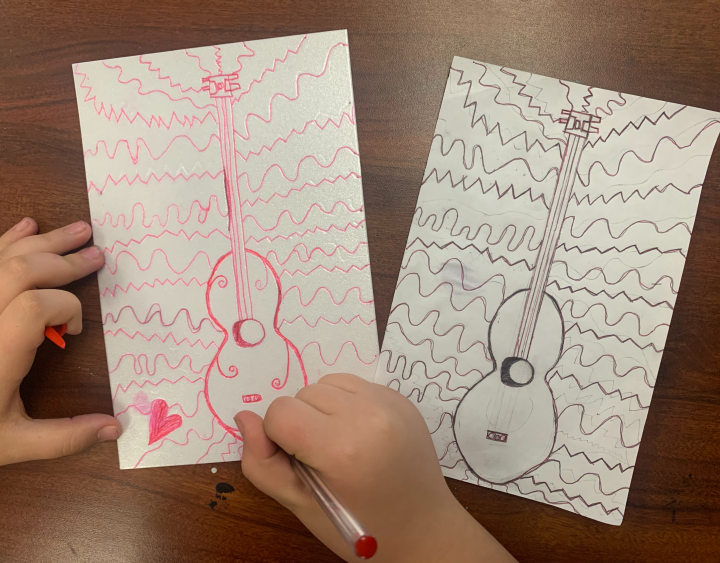
单元结束时,我喜欢让学生回答这个反思问题:“如果你要给一位从未尝试过这种技法的学生提建议,你会说什么?” 绝大多数学生都提到:直接在泡沫板上刻出深线条,是保证版画质量的关键。我当时真想大喊:“我早就告诉过你们啦!!!”但还是忍住了。我们继续使用之前用过的笔,不过任何工具都可以,只要能刻出足够深的线条即可。我原本担心学生会把泡沫板戳穿,但使用这种刮画板的过程中,我们零事故。
版画制作!
我超爱版画课的第一天!教室里洋溢着欢快的气氛,我也很乐意让学生们自主管理各个操作站。我在教室后方设置了四个操作站,用两张折叠桌(或额外的课桌,如果有的话)拼成,并铺上报纸。大多数学生尚未完成描线和刻线时,我们就已开始印刷了。我会挑选四位我认定稍后能成为优秀助手的学生。我总会重新播放版画教学视频——从第8分钟起直至结尾,并留出充足时间供学生提问。第一天总是进度最慢、完成印刷的学生人数最少的一天。
我在版画操作站旁巡视,指导学生首次选择纸张并为泡沫板上墨。全程保持“脏区”与“净区”分明至关重要。“脏区”用于用胶辊滚涂油墨;“净区”则用于放置纸张并完成拓印。总会有学生始终把操作站弄得一团糟——当他们的纸张还没拓印就已沾满油墨时,他们很快便吸取了教训!
我们先用一张白纸开始,通常是复印室剩下的废纸,或捐赠给我的廉价纸张。这是试印稿,有助于学生掌握所需油墨量及用手施加压力的力度。这一步极其极其重要。由于本工艺不使用印刷机,全靠手掌将油墨转印到纸上。我喜欢夸张地示范:用手掌沿印痕边缘及乐器图形本身用力按压。
试印完成后,学生再于水彩纹理纸上正式印刷。这些纸张是通过水彩与蜡笔防染技法制作而成,在单元进行数天后,这种活动恰如其分地缓解了持续绘图带来的疲劳。
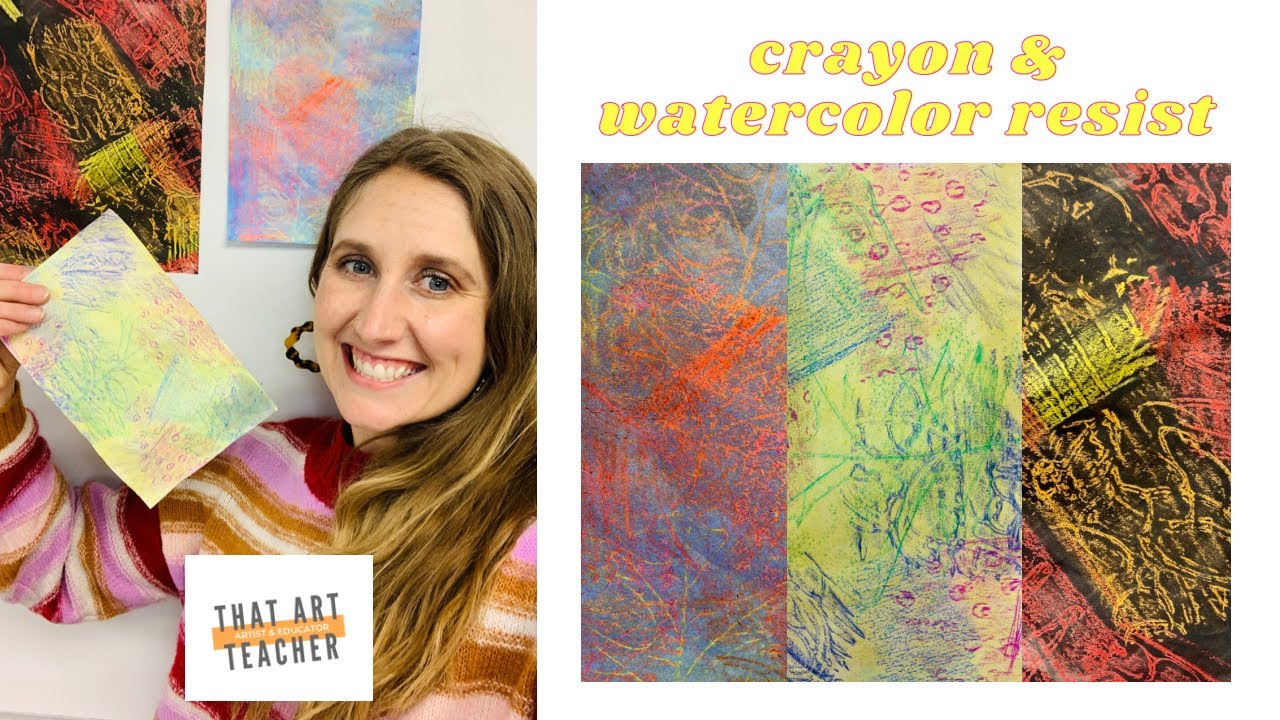
我发现,通常(但并非总是)学生的第二张印品效果最佳。由于他们对亲手制作的这些纸张怀有情感联结,我们特意将第二印安排在此类纸上,以期获得良好甚至最佳的印制效果。最后,每位学生还会获得一张彩色卡纸用于最终印刷。纯色卡纸与泡沫板印刷效果极佳,因其本身即以线条与图案为核心。
团队协作!
当某位学生成功完成三次印刷后,我会另派一名学生前往该操作站,由其担任“小老师”。当然,我始终在旁密切关注,但听到学生们一边拓印一边指导、鼓励同班同学时,身为美术教师的我内心无比欣慰。我在配对学生及分配首批领导角色时力求策略性。而那些课堂上一向内敛的学生,一旦协助同伴印刷,竟常常焕发出惊人活力——每每目睹此景,我都惊喜不已。
观看我们的印刷过程!
疫情期间开展此项活动略显复杂,但我并未大幅调整流程。学生本就全程佩戴口罩,且座位固定以便追踪接触者。我只需依据座位表,格外留意哪些学生应共同完成印刷即可。
艺术家联结
本次泡沫板版画课程的“核心意义”,即课程主旨,是爵士乐与哈莱姆文艺复兴运动。单元伊始,我们首先赏析罗玛尔·比尔登受爵士乐启发创作的拼贴作品。可供选用的艺术家还有很多,但我始终钟爱他明快鲜亮的色彩。我为学生设计了每日课前热身活动,要求他们一进教室便在素描本中完成。这类“课前任务”形式多样:简单回应、回答问题、观察描述、对比分析、反思总结等,均围绕费尔德曼艺术批评法展开。
我还特别喜欢展示费思·林戈尔德的故事被子。她童年正值哈莱姆文艺复兴时期,而雅各布·劳伦斯、亚伦·道格拉斯与杜克·艾灵顿就住在她家附近——你能想象吗?最近,我和丈夫观看了HBO纪录片《黑人艺术:在光明缺席之处》,精彩绝伦!片中收录了费思·林戈尔德坦率真诚的访谈,讲述她作为一位黑人女性艺术家,在哈莱姆文艺复兴之后的时代所经历的种种。她曾直言不讳地谈到:这场运动的领军人物罗玛尔·比尔登,曾拒绝接纳她的作品。若您关注美国艺术史,这部纪录片绝对不容错过。
我多希望能向您推荐一份免费资源,以帮助引入这段敏感却影响深远的艺术史篇章。目前我使用的是Flocabulary平台的哈莱姆文艺复兴视频,内容极为出色,但非免费资源。我校已订购该平台会员服务,其所制作的音乐视频节奏感强、信息丰富。当黑人声音以说唱形式,生动描绘出我们并不遥远的过去中种族隔离的真实图景时,那种力量令人震撼。作为一名身处非多元学区的白人教育工作者,我深知:唯有真实的声音与视角,才是我的学生真正需要的。每次观看,我都心潮澎湃、激动不已。
如果你有关于哈莱姆文艺复兴的超棒课堂适用视频,请一定一定一定要分享给我!
感谢你关注本节泡沫塑料版画课——祝你创作愉快!
提交表单。
我特别喜欢这节泡沫塑料版画课,但我也曾用拼贴版画(collograph)开展过同一单元教学。详情请见此处!
爵士乐拼贴与版画:跨学科美术单元
订阅我,不错过任何一篇推送!
立即订阅!

作者:西耶拉·马查多
2019年5月6日

作者:西耶拉·马查多
2019年5月3日
作者:西耶拉·马查多
2019年4月29日
Styrofoam Printmaking Art Lesson
Original: https://thatartteacher.com/2021/03/10/styrofoam-printmaking-art-lesson/
Date: 2021-03-10
Author: Sierra Machado
Categories: art tutorials, long form lesson plan, printmaking
Tags: art and music cross curricular art lesson, art class printmaking, art education, cross curricular art lesson, easy printmaking art lesson, featured, harlem renaissance art lesson, how do you do styrofoam printmaking, how to do printmaking, how to do printmaking with styrofoam, middle school art lesson, music related art lesson, musical instrument styrofoam printmaking, printmaking art lesson for kids, printmaking for beginners, printmaking for kids, printmaking in the classroom, printmaking without a press, step by step printmaking steps, styrofoam printing, styrofoam printmaking art lesson, that art teacher
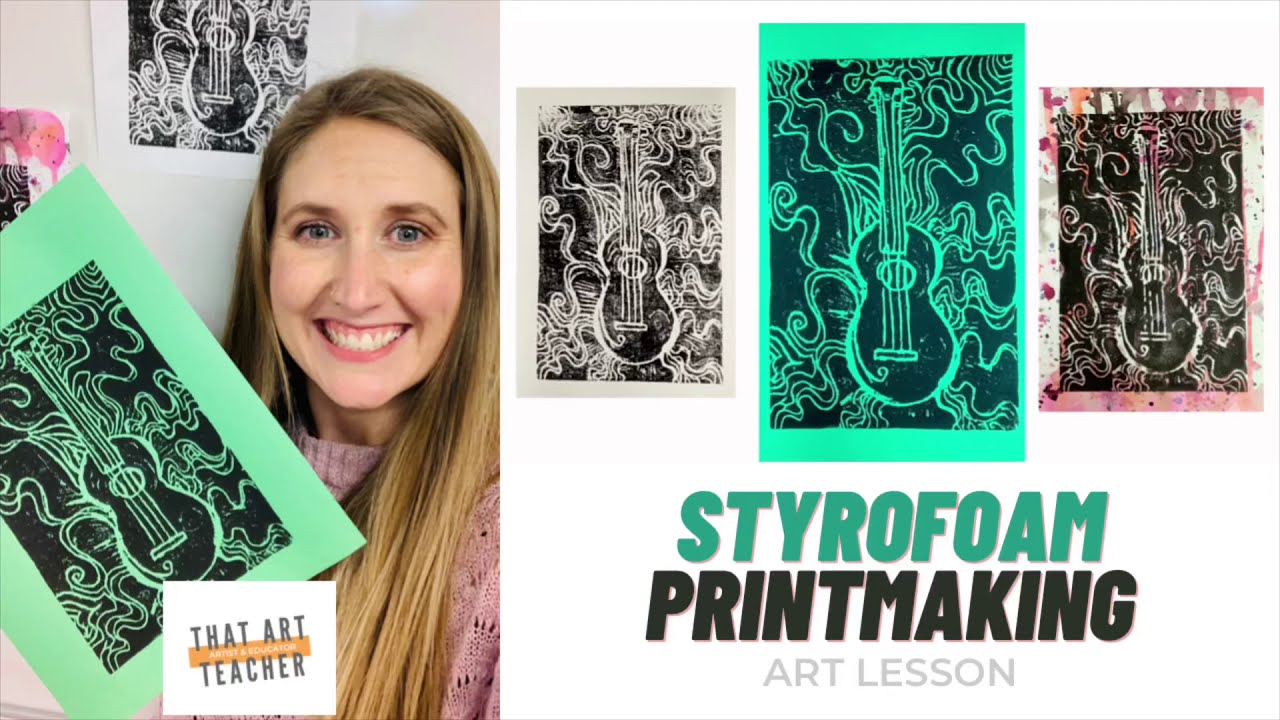
Styrofoam Printmaking Art Lesson
Try out this class friendly styrofoam printmaking art lesson inspired by musical instruments and the Harlem Renaissance! My students loved the art and music connections and there is nothing like the magic of printmaking. I set up printing stations in the back of my classroom and it usually takes three days for a class of 25 to pull three prints.
This tutorial is classroom ready and will describe every step of the styrofoam printmaking process. I always start by showing my students the very end, where I pull three prints. Sometimes printmaking can be confusing to students, and this helps them understand the end result of this process. I always emphasize that printmaking is a PROCESS!
Styrofoam Printmaking Materials
Styrofoam is a great solution to printmaking when you don’t have a printing press in your classroom. It is affordable and super easy to work with. I used these scratch foam boards, but you can also use styrofoam plates. These worked well because they were convenient and pre-cut.
These are affiliate links that are products I truly love and use in my classroom. If you use these links to buy something we may earn a commission at no additional cost to you. #artteachersidehustle
I stuck to black block printing ink, but you can do it with acrylic paint in a pinch. Paint doesn’t have the tacky qualities of block printing ink, so you won’t get the fine details that you would with printing ink. Purchasing printmaking supplies can be an expensive investment at first. I only have six sets of brayers and inking trays, but I prefer to print in small groups so it works for my setting.
Styrofoam Printmaking Steps
Draw Instrument & Background
The first step is drawing your image on a piece of paper that is the same size as your styrofoam printing plate. My students were nervous about drawing instruments, so lot’s of encouraging words and images helped their confidence. I print out (and laminate #2021) simple images of musical instruments for them to look at while drawing. Searching for black and white clip art simplifies the instruments so students can just focus on line and shape.
Musical-Instrument-DrawingDownload
The biggest trend with students is to draw the instrument TINY! I start by demonstrating putting a tick mark towards the top and then towards the bottom of their paper to give them a size reference. Even still, many students shrunk their instruments. That also prevents tracing, which students want desperately to do with the handout sitting teasingly in front of them. Depending on your particular group, tracing may not be a horrible idea. If you are looking for a tough group of students to feel successful, this is the answer. All groups of students have a wide range of abilities, and isn’t the point for students to experience success in art?
Once students are happy with their instruments, it’s time to focus on backgrounds! We start the course with Zentangle pattern making so they are pros at this point. We listen to a broad range of music while drawing. Miles Davis and Louis Armstrong are my favorite, and students love picking out the musical instruments they hear. Line variety here is key, and make sure students make some lines thin and create emphasis by thickening lines around their musical instrument.
Trace Drawing Onto Styrofoam
After students are happy with their image, it’s time to transfer it to the styrofoam! I give each student enough masking tape to tape the top and bottom. I used red and blue pens because I had a ton of them laying around. The key here is to use something that looks different than the pencil lines. You have to see which lines you have traced and which you haven’t.
It is important to mention here that this is the FIRST time students will trace their image. The lines won’t be deep enough to create a nice print from just this image transfer. I always remind students that printmaking is a process, not just a drawing. This step is to ensure they are transferring their image so they can carve the image they are happy with later. Students loved tracing and then pulling their paper back to see their lines. They were also a little dramatic about their hand hurting from pressing down so hard. That’s why it’s called artWORK, right? 🤣
Carve Lines Directly into Styrofoam
At the end of a unit, I like to have students answer this reflection question: If you could give a student advice that had never done this technique before, what would you tell them? Overwhelmingly students responded that carving deep lines directly into the styrofoam was essential to a quality print. I wanted to yell I TOLD YOU SO!!! but I held back. We used the same pens as before, but you can use any material as long as it’s carved deeply. I was afraid that students would cut through the styrofoam but we had zero incidents using this Scratch Board.
Printmaking!
I LOVE the first day of printmaking. There is such a fun energy in the room and I love putting students in charge of the stations. I set up four stations in the back of my classroom using two folding tables (or extra desks if I have them) covered in newspaper. We start printing while most students have not finished tracing and carving their lines. I select four students that I know will make great helpers later in the class period. I always re-show the printmaking video from the 8:00 mark until the end and allow plenty of time for questions. The first day is always the slowest with the smallest amount of students printing.
I monitor the printmaking station as students select their paper and ink they styrofoam for the first time. It is so important for students to have a dirty and clean area at all times. The dirty area is where they will apply the ink with the brayer, and the clean area is where they will put their paper and pull their prints. There will ALWAYS be students who just have a hot mess station at all times. They learn fast when their paper is covered in ink before they even pull a print!
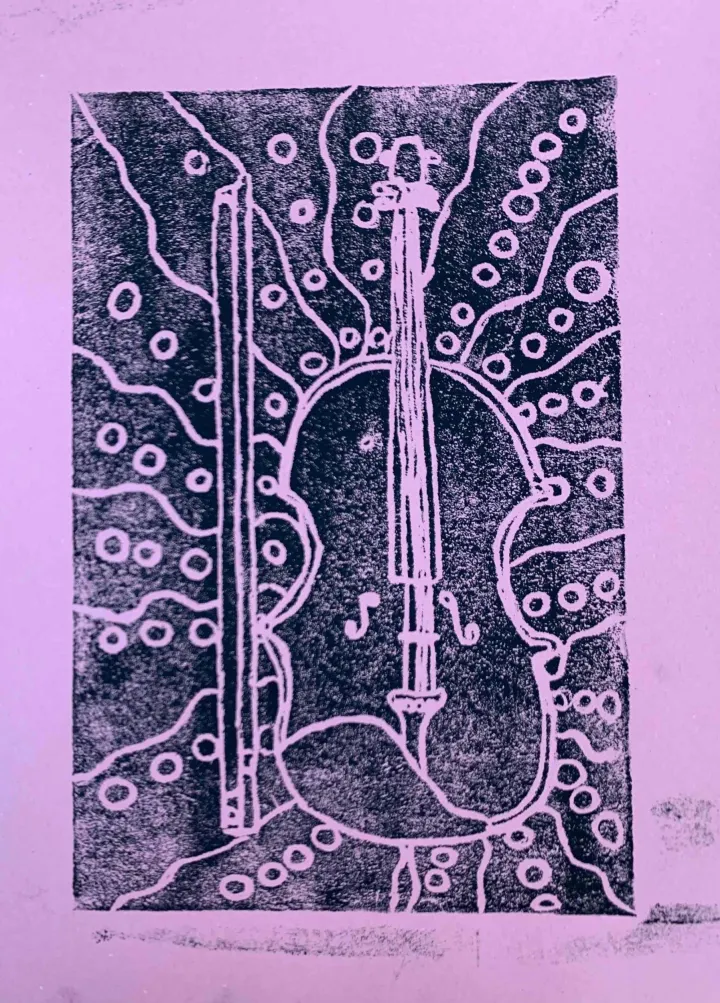
We start with a white piece of paper, usually scratch paper leftover from the copy room or cheap paper donated to my classroom. This is the test print and will help students understand how much ink they should use and how much pressure they should use with their hand. This step is SO SO important. Because this process does not use a printing press, their hand will be what transfers their ink to the paper. I like to dramatically demonstrate pressing my palm around the edges of the print and around the instrument itself.
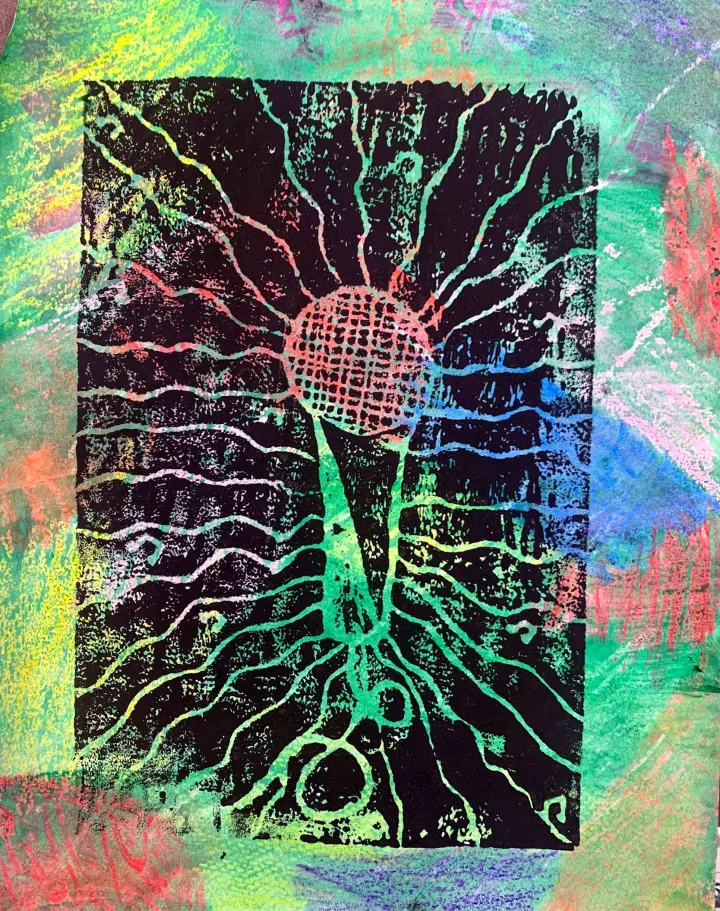
After the test print, they print on their watercolor textured papers. We used this watercolor and crayon resist technique to create them, and it was such a nice break from drawing instruments a couple days into the unit.
I have found that often, but not always, their second print was their best. Since they had an emotional attachment to these paper since they created them, we did this second to hopefully ensure a good or best print on them. Last students were given one piece of colorful construction paper for a final print. A solid color works so well with styrofoam printing since it is so line and pattern based.
Team Work!
After a student successfully printed three times, I sent another student to their station and they became “the teacher”. Of course I was always looming over their shoulders, but it made my art teacher heart so happy to hear them guiding and encouraging their classmates as they printed. I try to be strategic with how I pair students and who gets a leadership role first. I am always happily surprised watching the students who are reserved in class come alive when they are helping another classmate print.
Watch us print!
Doing this in a pandemic is a little trickier, but I didn’t change my procedures all that much. Students already wear masks 100% of class time and have a seating chart for contact tracing. I just needed to be particular about which students printed together based on my seating chart.
Artist Connections
The “why”, or the meat of this styrofoam printmaking lesson is jazz and the Harlem Renaissance. We start the unit by looking at the jazz inspired collages by Romare Bearden. There are plenty of artists that could be used, but there is something about his bright colors I’ve always loved. I have a daily warm-up that students complete in their sketchbooks as soon as they walk into the classroom. The bellwork is always a simple reaction, responding to a question, making observations, comparing and contrasting, reflecting and other activities related to Feldman’s Method of Art Criticism.
I also love showing Faith Ringgold’s story quilts. She was a child during the Harlem Renaissance, but Jacob Lawrence, Aaron Douglas and Duke Ellington lived near her family. Can you imagine? My husband and I recently watched HBO’s Black Art: In the Absence of Light documentary which was FANTASTIC. It has wonderfully candid interviews with Faith Ringgold and her experience being a Black woman artist in a post Harlem Renaissance world. She spoke directly about Romare Bearden, a leader in this movement, not accepting her artwork. If you are interested in American art, this is a must watch.
I wish I had a free resource to share with you to help introduce this sensitive and impactful moment of art history. I use Flocabulary’s Harlem Renaissance video and it is excellent, but not free. My school pays for a subscription and the music video they created is catchy and filled with information. There is something powerful about hearing Black voices describe in song what segregation looked like in our not so distant past. I am a white educator in a non-diverse school district, and it is the authentic voice and viewpoint my students need. I get chills every time I watch it.
If you have an awesome classroom friendly video about the Harlem Renaissance, please please PLEASE share it with me!
Thank you for checking out this styrofoam printmaking lesson- happy art making!
Submit a form.
I really love this styrofoam printmaking art lesson, but I have also done this same unit with collograph printing. Check out the details here!
Jazz Collage and Printmaking: Cross Curricular Art Unit
Subscribe so you never miss a post!
Subscribe!
by Sierra Machado
May 6, 2019
by Sierra Machado
May 3, 2019
by Sierra Machado
April 29, 2019