泡沫塑料杯炭笔静物素描
原文链接:https://createartwithme.com/styrofoam-cup-charcoal-drawing-still-life/
日期: 2017年10月16日
作者: 米歇尔·伊斯特
分类: 六年级、美术课、炭笔课、素描课、高中美术、初中美术、静物
标签: 炭笔技法、杯子素描、曲率程度、观察能力训练、椭圆、杯子静物、泡沫塑料杯炭笔静物素描、泡沫塑料杯素描、泡沫塑料静物、泡沫塑料静物素描
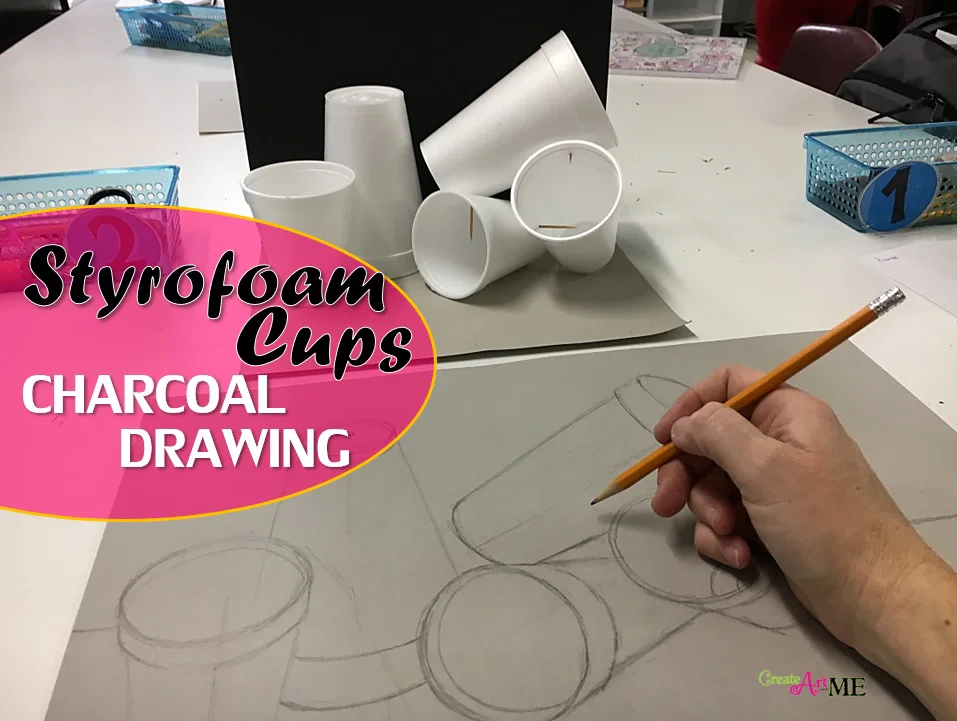
本教案由米歇尔·C·伊斯特编写,© 2017年;灵感源自DC Sketchers:空间与关系的感知——以泡沫塑料杯为媒介*
我的六年级美术课通过本次泡沫塑料杯静物素描,学习了基础构图技能及观察能力训练。
教学目标:
- 学习“曲率程度”这一观察能力训练方法,即观察线条弯曲的程度;
- 学习通过肩部与肘部的流畅摆动来绘制直线、圆形与椭圆;
- 将椭圆知识、视点概念及线条角度知识运用于小幅静物素描中;
- 学习炭笔技法,并以完整明暗表现完成素描。
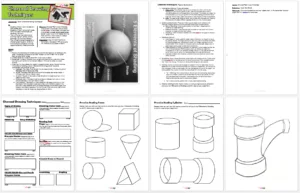
教学实施:
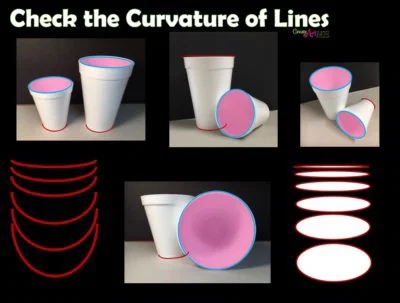
- 曲率程度:观察线条弯曲的程度。注意物体视点变化时,其曲率亦随之改变。留意杯子上椭圆形状及底部边缘线如何随视点变化而变化。
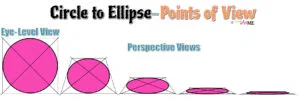
- 绘制曲线与椭圆:练习以肘部、尤其是肩部为轴心摆动手臂。保持动作自由放松。先尝试画圆——反复绕圈,直至画准。切记轻起笔!掌握画圆后,开始连续绘制一系列椭圆:起始接近正圆大小,逐步压扁变窄。当物体的视点发生变化时,圆形即转化为椭圆。 若垂直俯视圆柱体(如杯子),所见为完整圆形;当我们向一侧降低视线高度,杯口便逐渐呈现为椭圆,直至完全无法看见杯内;在视平线上,该椭圆则表现为一条直线。
a. 课堂活动:练习绘制圆形与椭圆;练习在不同视平线高度下绘制椭圆。
- 绘制圆柱体及圆柱形物体:绘制圆柱体时,先画中心线(轴线);再于轴线垂直方向画出椭圆;接着画两条斜向侧边线,连接椭圆边缘向下延伸至底部,确保两侧距轴线距离相等;若需,可旋转画纸以便更易画出直线;最后添加底部弧线。教师示范。
a. 速写本活动:绘制圆柱体、咖啡杯或泡沫塑料杯。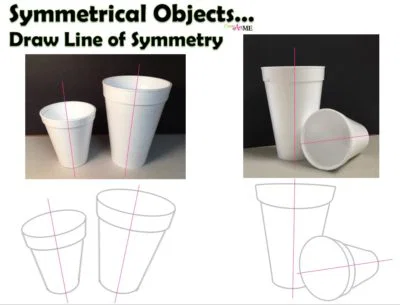
- 牢记口诀:“画得轻,直到画准为止”。
项目:泡沫塑料杯炭笔素描
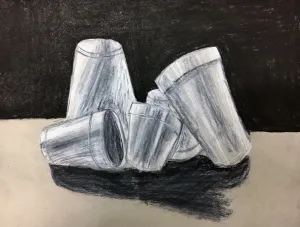
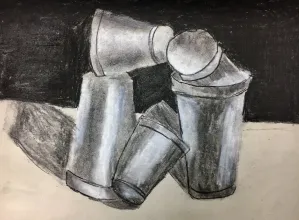
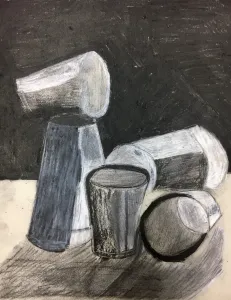
项目目标: 运用两种尺寸的泡沫塑料杯共5–7只,构成富有趣味性的构图;准确运用椭圆、视点及线条角度知识完成静物素描;使用黑白炭笔技法,以完整明暗表现完成作品。
材料: 2B炭笔、4B炭笔、白色炭笔、中灰色调纸(裁为12×18英寸)、卷笔擦(擦笔)、可塑橡皮


操作步骤:
- 选取5–7只泡沫塑料杯,包含两种不同尺寸;可用牙签辅助固定杯子位置。
- 在中灰色调纸上,用铅笔极轻地尽可能准确地勾勒构图。为辅助定位与确定线条方向,可在杯体中心加画一条辅助线。
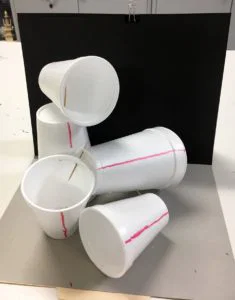
- 运用黑白炭笔技法,以完整明暗表现完成素描。
六年级学生作品
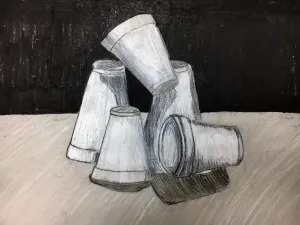
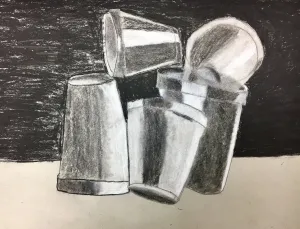
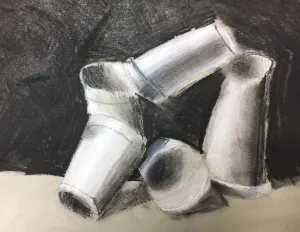
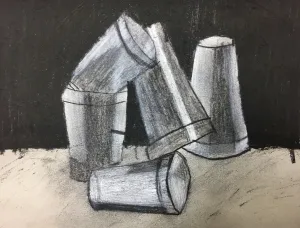
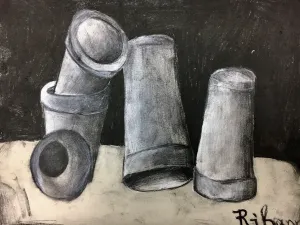
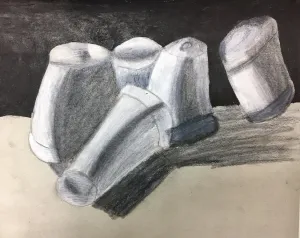
本文版权归米歇尔·C·伊斯特所有——Create Art with ME。若您引用本文任何部分,请务必回链至我的博客Create Art with ME。
Styrofoam Cup Charcoal Drawing Still Life
Original: https://createartwithme.com/styrofoam-cup-charcoal-drawing-still-life/
Date: 2017-10-16
Author: Michelle East
Categories: 6th Grade, Art Lessons, Charcoal Lessons, Drawing Lessons, HS Art, MS Art, Still Life
Tags: charcoal techniques, cup drawing, Degrees of Curvature, drawing observational skills, ellipses, still life cups, Styrofoam Cup Charcoal Drawing Still Life, Styrofoam Cups drawing, styrofoam still life, Styrofoam still life drawing
This lesson plan was written by Michelle C. East © 2017, Inspired by DC Sketchers: The Perception of Spaces & Relationships- via Styrofoam Cups**
My 6th grade art class learned basic compositional skills as well as drawing observational skills with this Styrofoam still life drawing.
Objectives:
- The will learn the observational drawing technique of observing the “Degrees of Curvature” of line.
- They will learn to draw lines, circles and ellipses by using fluid motion of swinging from the shoulder and elbow.
- They will apply knowledge of ellipses, point of view, and angles of line and apply it to a small still life drawing.
- Students will learn charcoal techniques and render the drawings with full shading.
Delivery:
- Degrees of Curvature: observing how much a line curves. Observe how the curvature of a line changes with your point of view of an object. Notice how the ellipses as well as the bottom lines on the cups change as the point of view changes.
- Drawing Curved Lines & Ellipses: Practice swinging your arm from the elbow & mostly the shoulder. Keep your movements free & loose. Begin making a circle-go round & round until you get it right. Remember to draw lightly! After you have a good circle begin making a series of ellipses beginning almost the size of a circle and progressively squashing to become thinner. Circles change into ellipses when our point of view of the object changes. If we look directly down at a cylinder, like a cup, we will see a full circle. As we lower our position to one side, the opening becomes more & more of an ellipse until we cannot see inside the cylinder any longer. At eye level, the ellipse appears to be a straight line.a. Activity: practice drawing circles & ellipses. Practice drawing ellipses at different eye levels.
- Drawing Cylinders & Cylindrical Objects: To draw a cylinder, start with center line or axis. Then draw the ellipse at the right angles to the center line. Draw side diagonal lines connecting the edges of the ellipse down toward the bottom so they are equal distance from the axis line. Turn your paper if it makes it easier to draw the straight lines. finally add a curved line at the bottom. DEMO
a. Sketchbook Activity: Draw a cylinders, draw coffee mugs or Styrofoam cups
- Remember to “Draw Light Until It’s Right”.
Project: Styrofoam Cup Charcoal Drawing
Project Objective: Create an interesting composition of 5-7 Styrofoam cups using two different size cups. Apply knowledge of ellipses, point of view, and angles of line to accurately draw the still life drawing. Use white and black charcoal techniques and render the drawings with full shading.
Supplies: 2B Charcoal Pencils, 4B charcoal Pencils, White Charcoal Pencils, Toned Paper (cut to 12×18″), Tortillions, Kneaded Erasers
Instructions:
- Choose 5-7 Styrofoam cups using two different size cups. Use toothpicks to help hold the cups in place.
- LIGHTLY draw the composition onto toned paper as accurately as possible (in pencil). To help with drawing, add a line down the center of the cup to help get the correct line direction and placement.
- Use white and black charcoal techniques and render the drawings with full shading.
6th Grade Student Artwork
This post is © Michelle C. East – Create Art with ME. If you choose to reference any part of this post, please link back to my blog Create Art with ME.


