Jelly Fish Mixed Media Value Lesson
Original: https://createartwithme.com/jelly-fish-mixed-media-value-lesson/
Date: 2013-01-29 Author: Michelle East Categories: 2nd Grade, 3rd Grade, Art Lessons, Color Contrast, Drawing Lessons, Dry Pastel Lessons, Element: VALUE, Elementary Art, Elements of Art Lessons, K-1st Grade, Mixed Media Lessons, Painting Lessons, Tempera Painting Tags: 2nd grade art, 3rd grade art, art, art class for kids, art lesson, art lessons for children, art lessons for kids, art projects, art projects children, art projects for, art schools for kids, artist painting supplies, concentric circles, elementary art, Jellyfish, kids art lessons, kids school art projects, mixed media, mixing values lesson, paint, painting, painting art projects for kids, painting lesson, repetition, teacher art projects for kids, teaching art to kids, Tempera, tints and shades lesson, tints and shades lesson for kids, Visual Arts
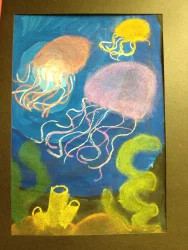
jelly fish value mixed media lesson
Jelly Fish Mixed Media Value Lesson

Jellyfish Value Lesson-Student Example (2nd Grade)
This lesson teaches children about the elements of art called value. Value is the lightness or darkness of a color. Students practiced two ways to create values with paint & dry pastels. They mixed black & white with blue to create different values of blue for the ocean.
I saw a project similar to this on pinterest & have hard time tracking down exactly who the project belongs too- so this is not my original lesson. The link I found was on Flicker called My Student’s Work By Pumpkin Chief. So credit for this lesson should go to this person! Color Like You Mean It also has an example of the value in the winter sky.
Here is how WE did this project:
Objectives:
- Students will learn about the element of art called value.
- Value can be used to show distance and give the illusion of form (3D).
- Students will learn that mixing black or white with a color will create different color values.
Supplies: 12×18″ Tag-board, tempera paint (black, white & blue or turquiose), paint brushes, dry pastels


DELIVERY:
- Value is the lightness or darkness of a color.
- ASK: How do you think different values are created? What color could you add to another color to make it lighter? (White, yellow, any color that is lighter than the original color) This is called a TINT
- What color could you add to another color to make it darker? (black, brown, blue, or any color that is lighter than the original color) This is called a SHADE
- Practice Sheet: Value-Tint & Shade of a Color-Elem
- Values can be made by a couple different ways (demo): by varying the pressure of you hand, by mixing white or black (or a darker color) to another color. We will use both of these techniques in our project.
- We looked at pictures of jellyfish under the sea (specifically with the sunlight shining behind them).
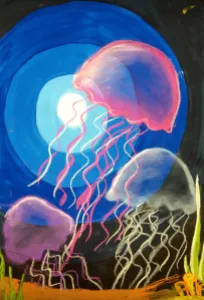
Instructions for Background:
- Have students draw 5 concentric circles on the tag-board in pencil.

Draw 5 Concentric Circles (NOT in middle of the paper!) 2. Beginning with the innermost circle mix a little bit of blue into white paint & paint the smallest circle.

TINT-mix blue with white to create lighter values 3. In the next circle, mix a little more blue into the first mixture. Make sure there is a visible difference in value. 4. Again, in the 3rd circle mix so that it is mostly blue with a little white & paint in the area. 5. In the 4th circle, paint pure blue. 6. The 5th circle mix a little bit of black into blue & paint the area. 7. Finally, in the last circle, mix more black in & paint the area.

SHADE=Mix blue with black to create darker values
Instructions for Jellyfish: (Demo how to draw a jellyfish)
- Use dry pastels in various colors to draw the outline of the jellyfish (draw 3 of varying sizes).

Student Drawing jellyfish outline in dry pastels 2. Use your finger to smudge inward toward the center of the jellyfish. This will give it a transparent look.

Student smudging inward with fingers (we LOVE to get our hands dirty in art!) 3. Add a little white to the side that is facing the sunlight shining in. 4. At the bottom of the drawing add in the sea floor with seaweed & coral.

Example for sea floor
If you choose to use this lesson or to repost it, please link it back to my blog. Create Art with ME