马克笔晕染法:梵高向日葵美术课
原文链接:https://createartwithme.com/van-gogh-sunflowers-art-lesson/
日期: 2017年7月7日
作者: 米歇尔·伊斯
分类: 三年级、四年级、五年级、六年级、美术史课程、美术课、绘画课、小学美术、精选课程、马克笔晕染、马克笔晕染技法、梵高课程
标签: 四年级美术课、五年级美术课、梵高生平简介、马克笔晕染、马克笔晕染法、马克笔晕染技法、马克笔绘画、观察能力素描、马克笔作画、后印象派艺术家、向日葵主题美术、向日葵主题美术课、梵高美术课、梵高向日葵美术课、文森特·梵高、梵高视频
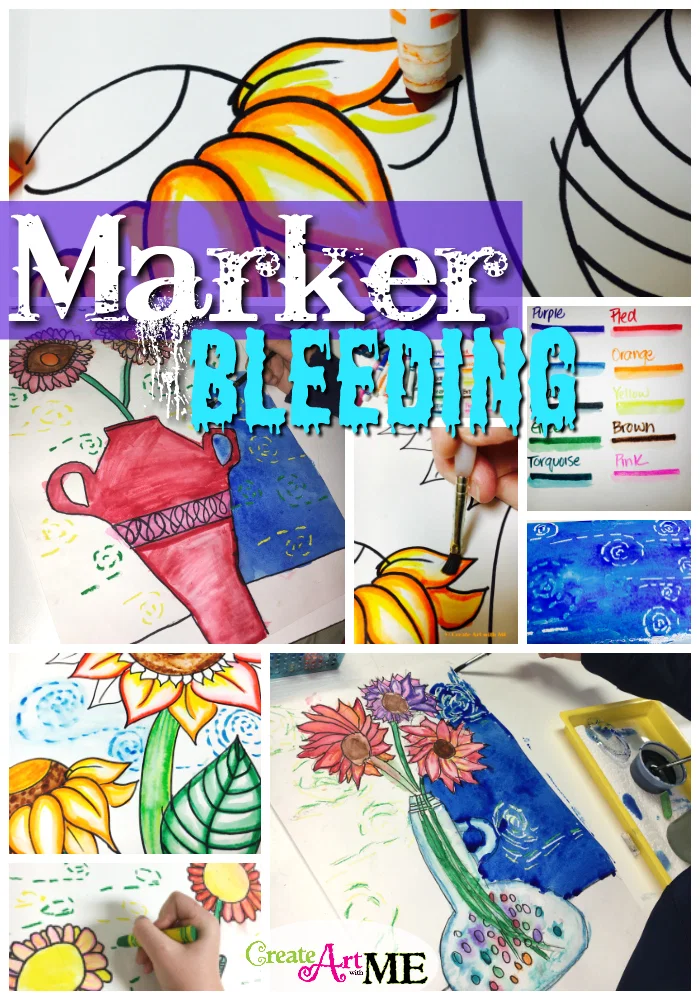
马克笔晕染美术课
线条与形状——观察能力素描
适用年级: 四、五年级(小学高段美术)
所需材料: 视频《走近世界最伟大的艺术家——文森特·梵高》、12×18英寸白纸、经典款Crayola马克笔、粗黑永久性记号笔、水杯、画笔、油画棒与液态水彩(可选)


教学目标:
- 学生将复习线条与形状的种类,并能准确说出各类线条与形状的名称;
- 学生将学习以线条和形状为基本单位观察物体,从而提升观察能力素描技巧;
- 学生将了解艺术家文森特·梵高,并赏析其代表作《向日葵》;
- 学生将学习马克笔晕染技法,用此法“绘制”自己的作品。
第一课时:认识梵高
- 观看视频——《世界最伟大的艺术家:文森特·梵高》(时长23分钟)
梵高生平简介
- 梵高是19世纪中后期活跃于法国的荷兰后印象派画家。
- 文森特·梵高于1853年3月30日出生于荷兰格鲁特-宗德特;1890年7月29日在法国逝世,年仅37岁,死因为自伤枪击。他精神状况曾严重恶化,甚至割下自己耳垂;1890年胸部中枪,两天后离世。
- 梵高直到27岁才开始绘画。此前他曾尝试多种职业,如牧师、教师与艺术品经销商,但均未获得成功。他从事绘画仅十年便去世。
- 绘画帮助梵高维持情绪稳定。
- 在巴黎期间,梵高首次接触印象派艺术,并深受其色彩与光影表现的启发。
- 尽管一生创作了870幅油画与1050幅素描,梵高在世时仅售出一幅画作——《红色葡萄园》。而自他去世后,其作品屡创天价,例如1990年《加歇医生肖像》以8250万美元成交。
- 梵高常用厚涂法(impasto),即颜料堆叠厚重,使每一笔触都凸起于画面表面。他独创标志性风格:以点、 dab(小块色斑)与漩涡状笔触塑造物象,摒弃平滑、融合的涂绘方式,转而用画笔点、 dab、旋,营造强烈的视觉动感。
-
静物指对一组静止物体的描绘。梵高的《向日葵》即为静物画范例。
-
欣赏梵高《向日葵》系列画作

 *
第二课时:
- 复习五种线条类型: 水平线、垂直线、斜线、之字形线与曲线
- 复习两类形状: 自由形与几何形
- 观察能力素描要点:
a. 将物体纯粹视为线条、形状与体块来观察;避免命名物体局部,只关注其线条与形状特征;
b. 关注线条的曲度与角度
第二课时活动: 绘制向日葵静物
在每张课桌或学生小组处布置一小组静物——花瓶中的向日葵(建议每组一套)
- 在12×18英寸白纸上,用铅笔绘制花瓶中的向日葵静物。需添加一条桌面线,避免花瓶看起来悬浮于空中!
- 运用观察能力素描技巧,准确将静物呈现在纸上。注意观察线条的角度与曲度,留意形状特征。画你所见!
- 用粗黑永久性记号笔描摹全部轮廓线。
第三至第五课时:马克笔晕染技法教学与实践
马克笔晕染是一种简单又有趣的技法! 我过去曾用多种媒介讲授过梵高《向日葵》课程,这次想尝试新方法。此前我在《雪人马克笔与水彩防染绘画》一课中使用过马克笔晕染法,孩子们非常喜欢这种创作方式!](https://i0.wp.com/createartwithme.com/wp-content/uploads/2017/07/IMG_4923.jpg) 操作步骤如下:
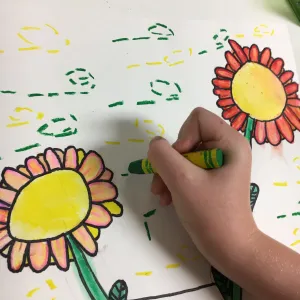
- 沿设计轮廓线涂1–2道马克笔色。我使用的是常规款Crayola马克笔(非可水洗型)。
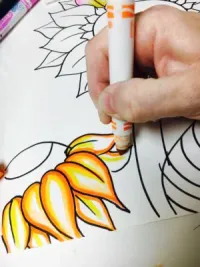
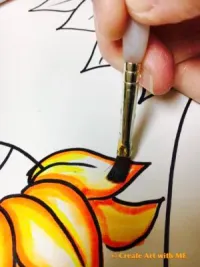
- 趁马克笔颜色仍非常湿润时,用画笔蘸少量清水,轻柔地在马克笔色迹上涂抹,将其向纸面白处晕染扩散。*切勿过度揉擦纸面,否则易破损——尤其若未使用水彩纸!*
-
可通过以下任一方式为背景添加漩涡纹样:
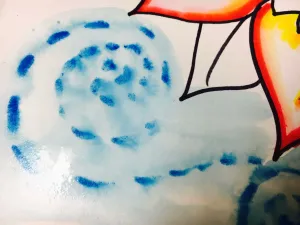
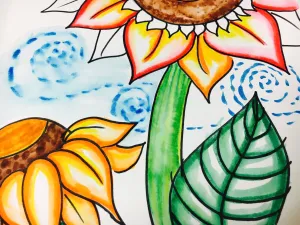
a. 使用不同明度的蓝色马克笔,以马克笔晕染技法绘制漩涡;
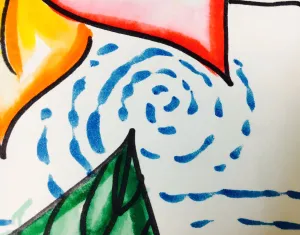
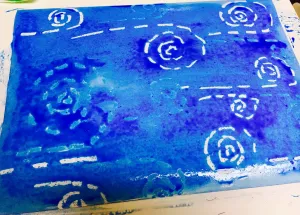
b. 先用蓝色、白色与青绿色油画棒绘制漩涡,再整体覆盖水彩。
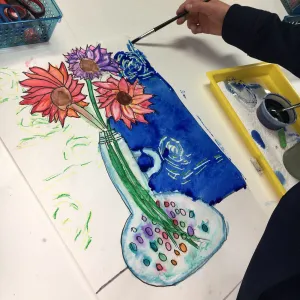
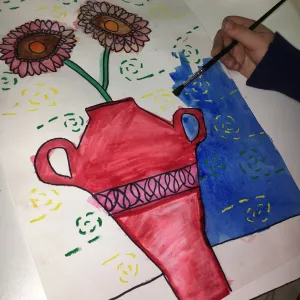
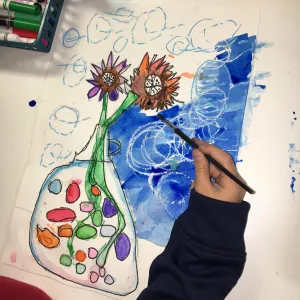
四年级学生创作过程:
本教案由米歇尔·C·伊斯(Michelle C. East)于2017年撰写 ©(版权所有)。若您选用本教案内容(文字或图片),请务必附上本博客链接:Create Art with ME!
*本文含亚马逊联盟推广链接。
Marker Bleeding Van Gogh Sunflowers Art Lesson
Original: https://createartwithme.com/van-gogh-sunflowers-art-lesson/
Date: 2017-07-07
Author: Michelle East
Categories: 3rd Grade, 4th Grade, 5th Grade, 6th Grade, Art History Lessons, Art Lessons, Drawing Lessons, Elementary Art, Featured, Marker Bleeding, Marker Bleeding Technique, Vincent Van Gogh Lessons
Tags: 4th grade art lesson, 5th grade art lesson, Facts About Vincent Van Gogh, marker bleed, marker bleeding, Marker Bleeding Technique, marker painting, observational drawing skills, painting with markers, post impressionism artist, sunflower art, sunflower art lesson, van gogh art, Van Gogh Sunflowers Art Lesson, Vincent Van Gogh, Vincent Van Gogh video
Marker Bleeding Art Lesson
Lines and Shapes-Observational Drawing Skills
Grades: 4th & 5th Grade (Upper Elementary Art)
Supplies: “Video-Getting to know the world’s greatest artists-Vincent Van Gogh”, 12×18 white paper, Classic Crayola Markers, thick black permanent marker, water cups, paint brushes, oil pastels & liquid watercolors (optional)
Objectives:
- Students will review types of lines and shapes and identify lines and shapes by name.
- They will learn to look at an object in terms of lines and shapes in order to draw it-drawing observation skills.
- They will also learn about the artist Vincent Van Gogh & study his “sunflower” painting.
- Students will learn the technique of marker bleeding to “paint” their artwork.
Delivery Day 1: Learning about Van Gogh
1. Video-“World’s greatest artists-Vincent Van Gogh” (23 minutes)
Facts About Vincent Van Gogh
- Van Gogh was a Dutch post-impressionist painter in the mid to late 1800’s France.
- Vincent Van Gogh was born on March 30, 1853, in Groot-Zundert, Netherlands. Van Gogh died in France on July 29, 1890, at age 37, from a self-inflicted gunshot wound. He mentally “lost it”, cutting off his own earlobe, dying in 1890, two days after shooting himself in the chest with a pistol.
- Van Gogh did not begin painting until he was 27 years old. He had tried several careers like being a minister, teacher and art dealer, but he did not find success in these careers. He was only a painter for 10 years before he died.
- Van Gogh’s art helped him stay emotionally balanced.
- In Paris, van Gogh first saw impressionist art, and he was inspired by the color and light.
- Although he painted 870 paintings and drew 1050 drawings, Van Gogh only succeeded in selling one painting in his lifetime “The Red Vineyard”. Since his death, his paintings have been sold for many millions of dollars, including Portrait of Dr. Gachet, which went for $82.5m. in 1990.
- Van Gogh used thick brush strokes called impasto in which each brush stroke remained raised because of the thick application of paint. He created a signature style of art by using dots, dabs, and swirls to make the objects in the painting. Instead of smooth, blended applications of paint, Vincent used his brush to paint dots, dabs, and swirls creating a feeling of visual movement.
-
Still life is a picture of a collection of objects. Van Gogh’s “Sunflowers” is an example of a still life.
-
View picture of Van Gogh’s Sunflowers paintings
*
Delivery Day 2:
- Review 5 types of lines: horizontal, vertical, diagonal, zig-zag, & curved
- Review types of shapes: free-form & geometric
- Drawing observation skills:
a. Looking at objects purely as lines, shapes, and forms. Avoid naming parts of the object and instead think only as line and shape.
b. Looking at line curvature and angles of lines
Day 2 Activity: Draw Sunflower Still Life
Set up a small still life with a sunflowers in a vase (preferably at each table or group of students)
- On 12×18″ white paper, in pencil draw the still life of sunflowers in a vase. Include a table line so it doesn’t look like the vase is floating in the air!
- Use observational drawing skills to accurately draw the still life onto the paper. Look a line angles and curvature. Look a shapes. DRAW WHAT YOU SEE!
- Trace over all lines with thick permanent marker.
Day 3-5 Delivery & Activity: Marker Bleeding Technique
Marker Bleed is a simple and fun technique to use! I have done the Van gogh Sunflowers lesson using many different mediums in the past and wanted to try something different. I used the marker bleeding technique on my Snowman Painting with Markers & Watercolor Resistlesson and the kids LOVED creating with this methodHere is how we do this technique:
- Apply 1-2 lines of marker. I use REGULAR crayola markers ( NOT washable). We followed the outline of our design.
- While the marker is still very damp use a paint brush with a small amount of water and GENTLY rub over the the marker pulling into white areas of the paper. *Be careful not to over rub the surface because it will rip especially if you are not using watercolor paper!
- Add swirls to the background either by:
-
Using the marker bleeding technique with different values of blue marker
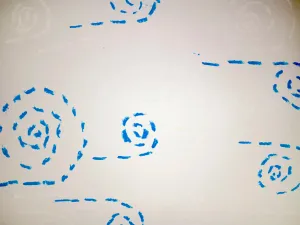
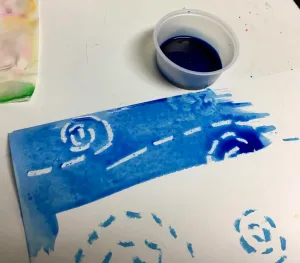
2. By drawing swirls with oil pastels in blue, white and aqua then painting over with watercolors.
Work in Progress by 4th graders:
This lesson was written by Michelle C. East 2017 © (All rights reserved). If you choose to use any of this lesson (written or photos), please link back to this blog Create Art with ME!**
*This post contains Amazon affiliate links.


