树木与根系
原文链接:https://tabithaannthelostsock.blogspot.com/2014/05/trees-and-their-roots.html
日期: 2014-05-28
标签: 艺术、美术教师、同心圆、课程、丢掉的袜子、根系、树木、暖色与冷色

最近,我反复被这种重复性构图所吸引。
一幅枝叶繁茂的树形图,下方重复呈现其根系图像。
每次看到它,我都着迷于树冠枝条的形态几乎与根系完全对称。
于是,这给了我一个教学灵感……
教孩子们画树与根系时,聚焦于枝干“分叉”的规律。
我将从以下这节课开始讲授分叉技法:
http://tabithaannthelostsock.blogspot.com/2014/05/tree-silhouette-with-concentric-sky.html
再顺势引入下方这些步骤……
- 将一张大幅纸沿对角线对折两次,使纸张中心点落在右下角……
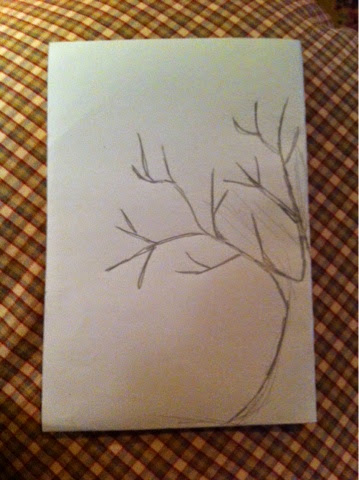
树干从底部起画得粗壮,向上延伸至中心位置时,开始向两侧分出更细的枝条。
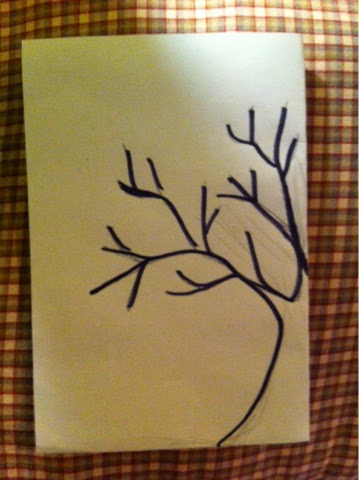
- 用记号笔勾勒轮廓……
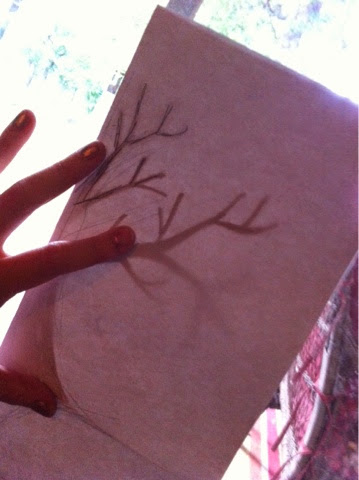
- 展开纸张,仅对折一次(而非四等分),再将记号笔线条透过描图台或窗户,用铅笔描摹到其余三处位置。
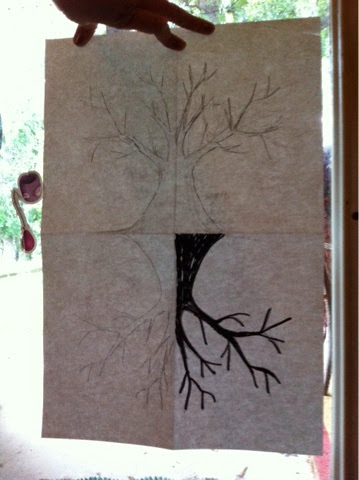
最终应得到如下图像……
- 纸张顶部的树可处理为灌木丛。我首先向学生说明:我们仰视树木,因此看到的是树冠内侧与底面——有点像撑开的伞。
所以,我让他们画一条“云朵状”曲线,截去部分枝条末端(参见下方照片中那些被截断的铅笔线条枝梢)。
接着,以树干底部中线为基准,在该曲线外围画一个椭圆形辅助线。
-
在此椭圆辅助线外围,再画一个更大的“云朵状”轮廓。我特别强调:它不必完美,否则反而显得虚假。
-
沿树干向上画线,并随枝条走向自然弯曲,以此表现树皮肌理。
-
用点绘法(stippling)绘制灌木丛:将“伞”形内部区域点得更密集,以表现灌木的阴影;而树冠顶部则将点绘向外疏松延展。
添加灌木后的最终效果……
- 回到根系部分,继续添加更多分叉……
可选上色方案——
横向 的浅色/暖色线条用于根系一侧;
同心圆 构成的深色/冷色线条用于天空部分。
* 我原本随意为天空上色,但完成后才意识到:若天空只用冷色,便能更强烈地衬托出白色灌木与根系,使整堂课获得全新维度……实践出真知!
树木与根系
Original: https://tabithaannthelostsock.blogspot.com/2014/05/trees-and-their-roots.html
Date: 2014-05-28
Tags: art, art teacher, concentric circles, lesson, lost sock, roots, tree, warm cool colors
I have been hit over the head with this repeated design lately.
The image of a leafy tree with the repeated image of the root system below.
Every time I see it I am fascinated by how the top of the tree's branches is basically a symmetrical image of the roots.
So, this gave me an idea...
Teach kids to draw trees and roots by focusing on the "branching off" of the limbs.
I would begin teaching the branching of technique with this lesson below...
http://tabithaannthelostsock.blogspot.com/2014/05/tree-silhouette-with-concentric-sky.html
Then roll into the pictures beneath...
- Fold a large paper into quarters with the center point of the paper being in the bottom right corner...
Draw the trunk thick at the bottom and as you go up the center begin branching off into finer limbs.
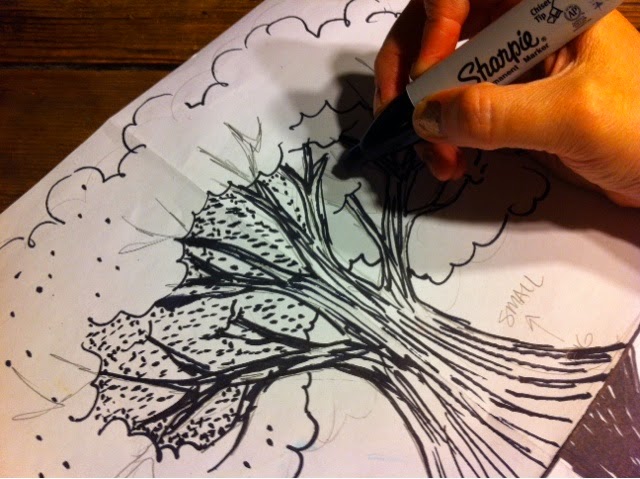
- Outline this with a Sharpie...
- Open up the paper and fold just in half (instead of quarters) and trace the Shapied lines onto other 3 spots with a pencil on a tracing table or a window.
You should end up having an image like this...
- The tree at the top of the paper can be the bush. I try to explain first to the students that we look UP to trees. So, we see the inside and underside... kindof like an open umbrella.
So... I have them draw a "cloud"like line that cuts off some of the tips of the limbs (see in the photo below the pencil tipped limbs that got cut off?).
Then draw an oval guideline around that keeping the the center bottom line of the tree.
-
Around this oval guideline, make a larger "cloud" around it. I emphasize that it does not have to be perfect or else it looks too fake.
-
Draw in lines that go up the trunk and bend with limbs to act as texture for the bark.
-
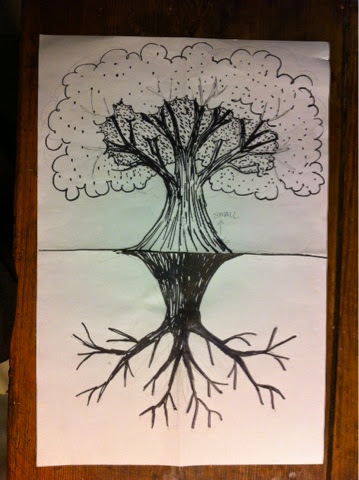
Use stippling for the bush, making the inside of the "Umbrella" the place that has more condensed stipples to show the shadow of the bush. SPread the stippples out further on the top of tree.
Final after the bush is added...
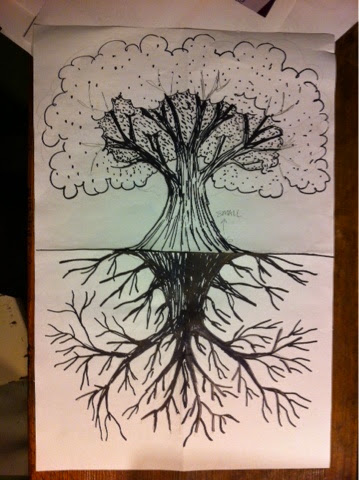
- Go back to the roots and add more branching off...
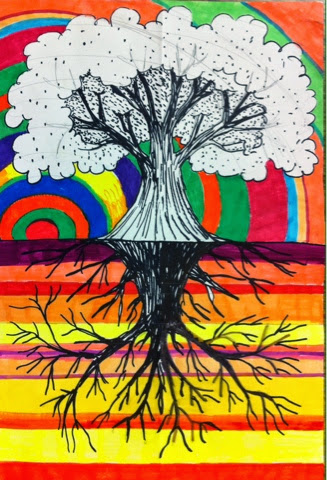
Optional color-
Horizontal lighter/warmer lines for the root side
and
Concentric Circles with darker/cooler lines for the sky.
* I was coloring the sky randomly, but when I was done, I wished I would have only used cool colors for the sky. This would POP out the white bush and POP out the roots giving the lesson an entire new dimension.... live and learn :)


