手部轮廓线描
原文链接:https://thatartteacher.com/2023/09/09/hand-contour-drawing/
日期: 2023-09-09
作者: Sierra Machado
分类: 长篇教案
标签: 美术教育、盲轮廓线描、课堂盲轮廓练习、经典素描课、经典素描技法、各年龄段适用的轮廓线描、素描美术课、高中素描课、写生画手、不枯燥的素描课、精选内容、免费高中教案、手部轮廓线描、手部轮廓线描灵感、高中美术课、高中素描课、如何提升素描能力、如何学习素描、如何教授轮廓线描、如何教授观察式素描、如何画手、如何写生、学习素描、改良轮廓线描、改良轮廓练习、观察式素描课、中学美术教案、那位美术老师、什么是轮廓线描
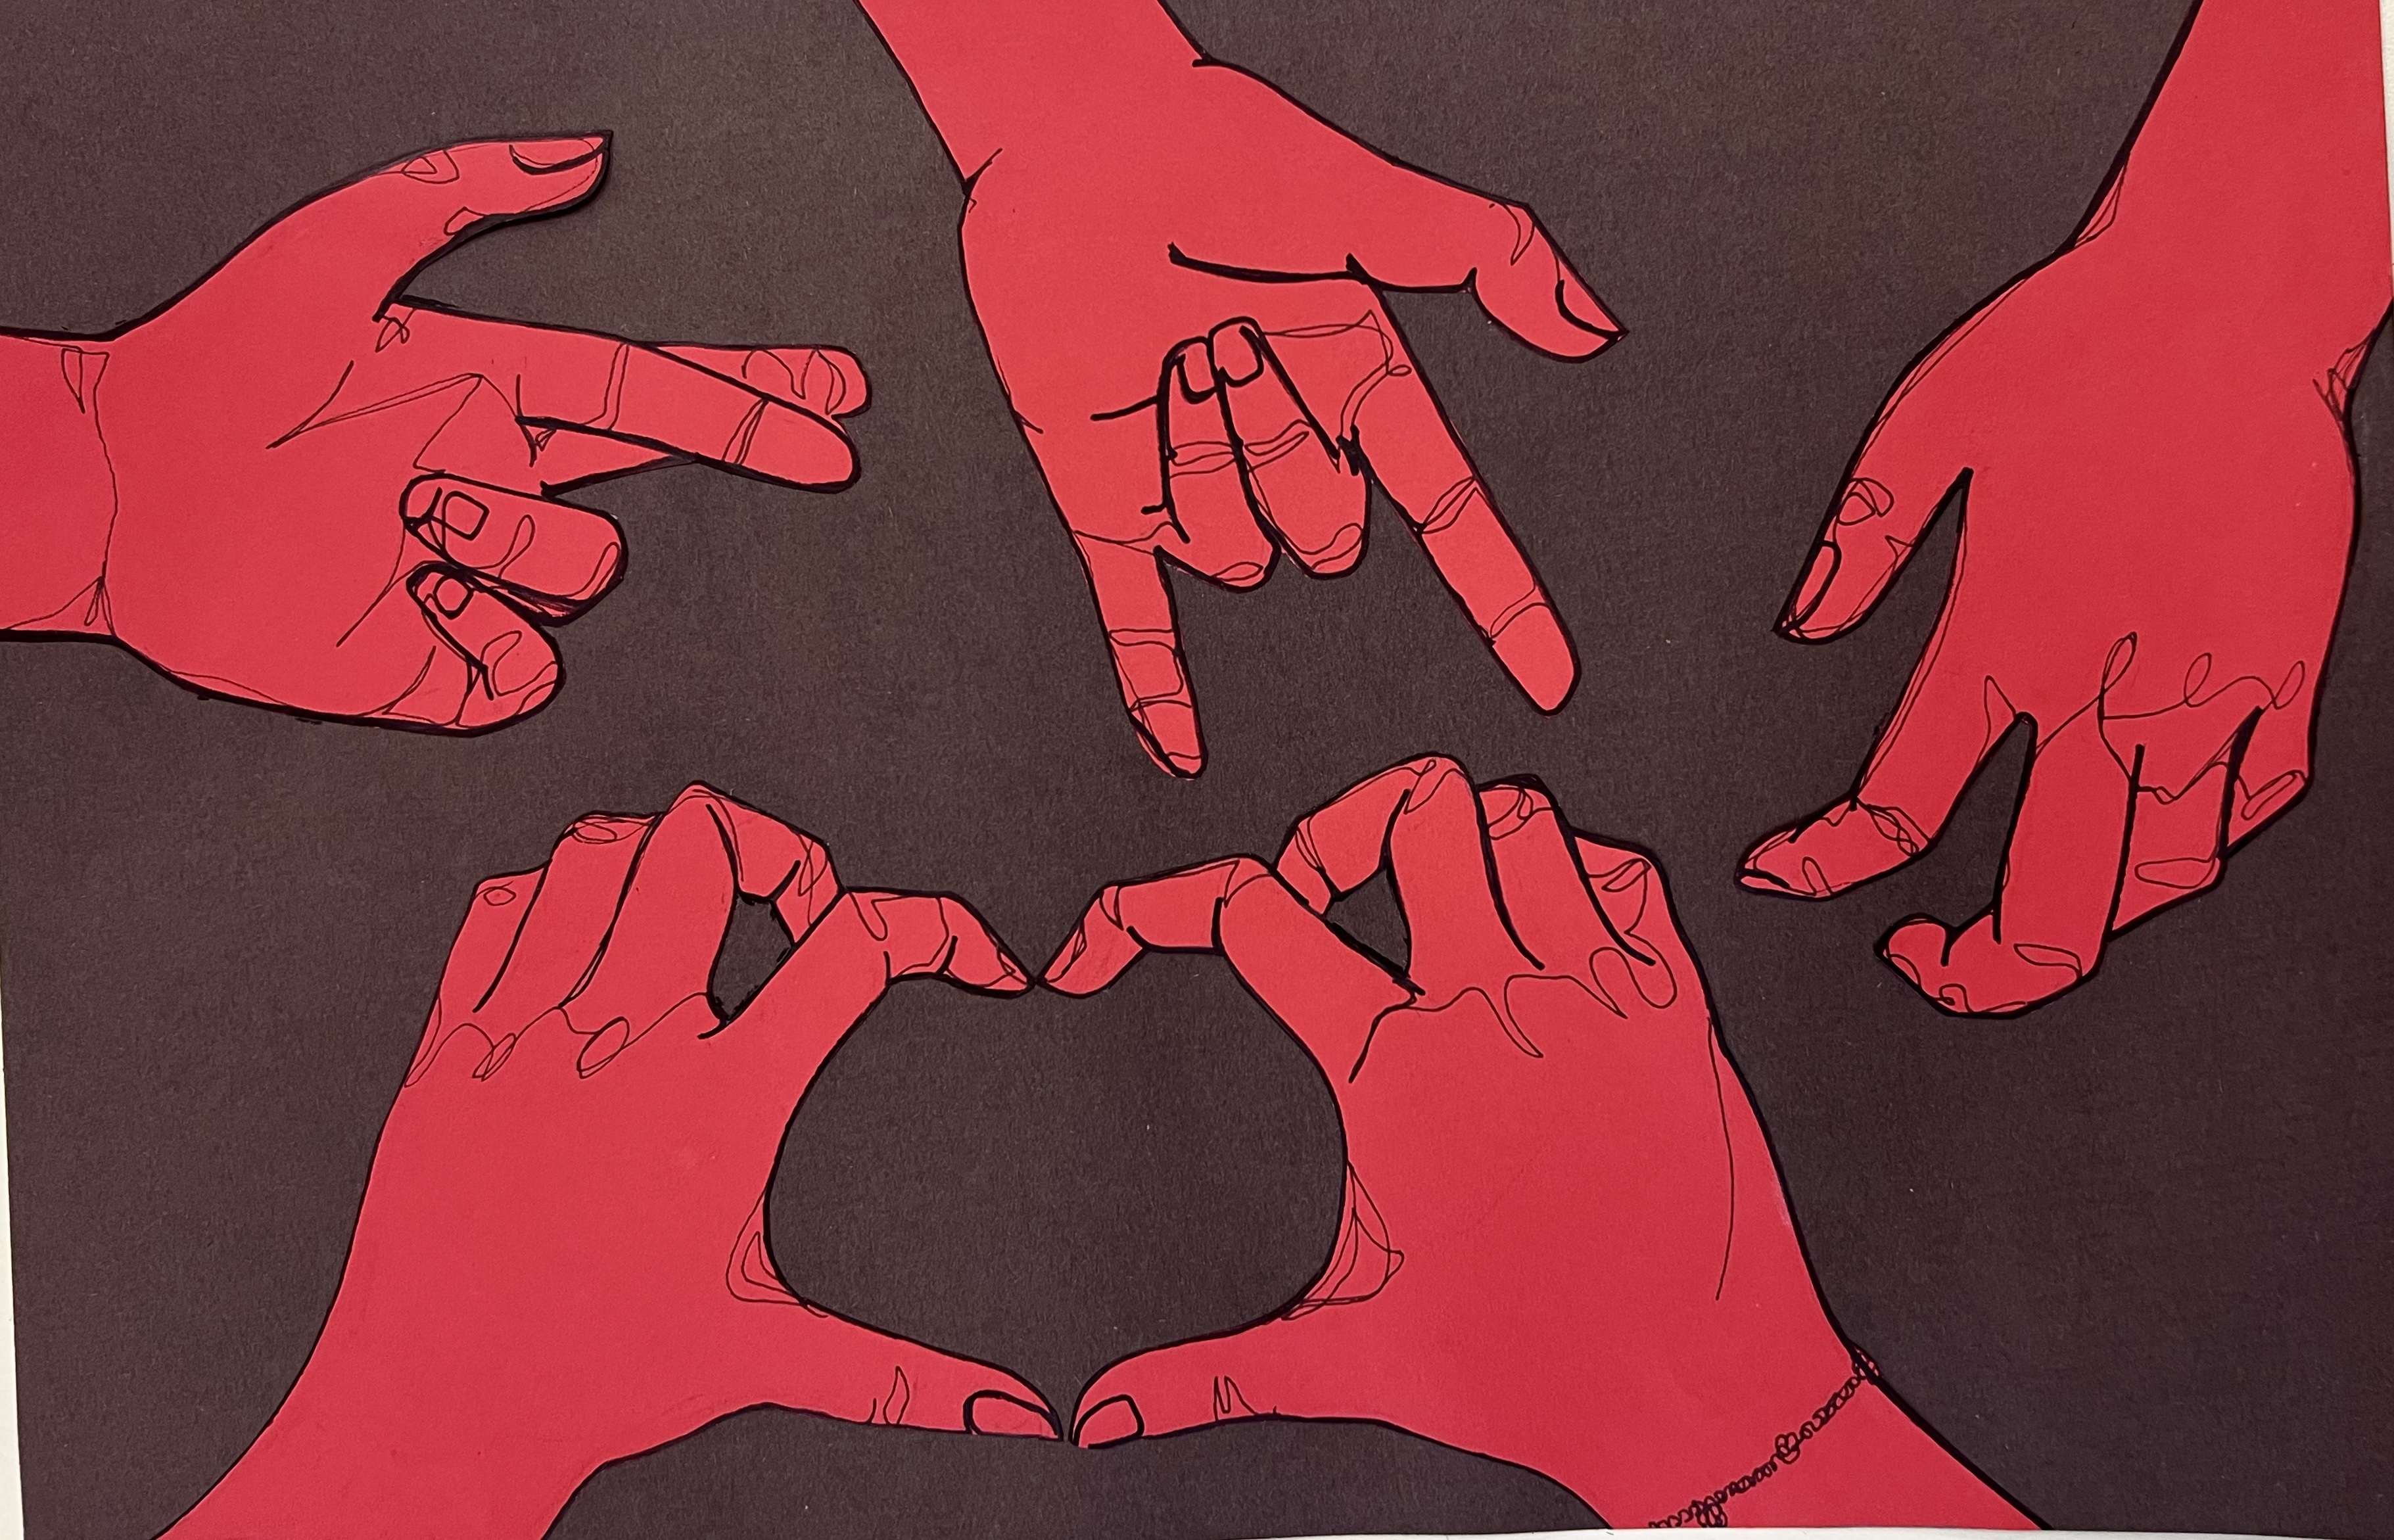
手是极富挑战性的绘画主题。每当我宣布本单元将聚焦于写生画手时,学生们的眼睛都会睁得大大的。这一手部轮廓线描单元需要大量引导性练习,以及全程持续不断的鼓励。
手是非常理想的绘画题材——它平易近人、随时可取,并且是传达思想、情感与氛围的绝佳工具。你仅凭双手就能表达丰富含义,而学生则可在掌握一项基础技能的同时,探索并发展自己的艺术语言。学生虽会面临挑战,但经过严格训练后,这一主题能极大增强他们的自信心。
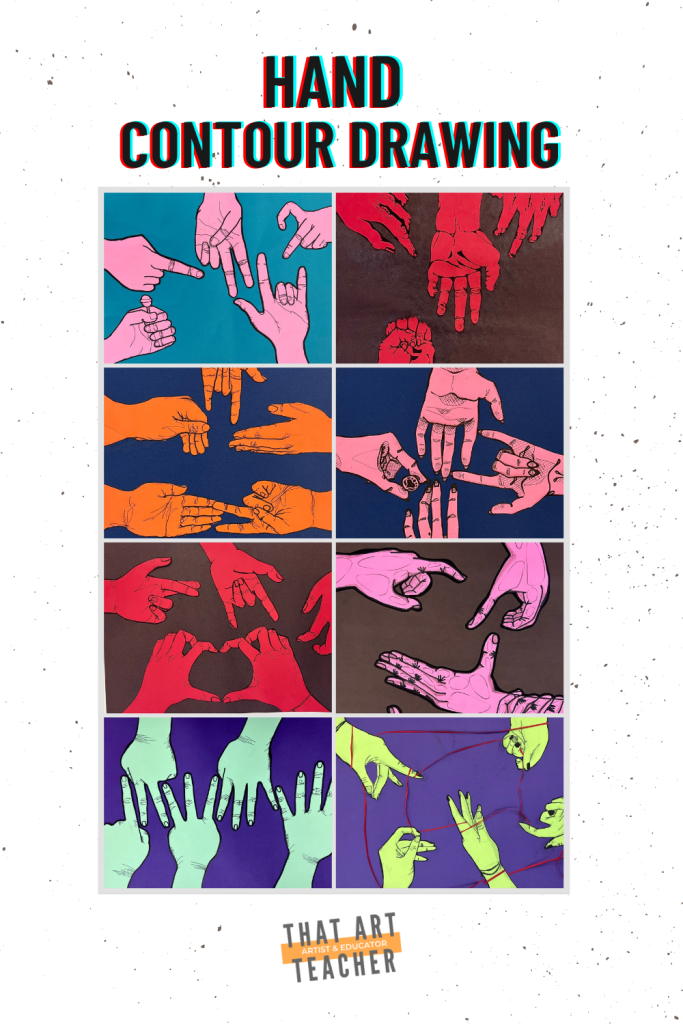
手部轮廓线描速览:
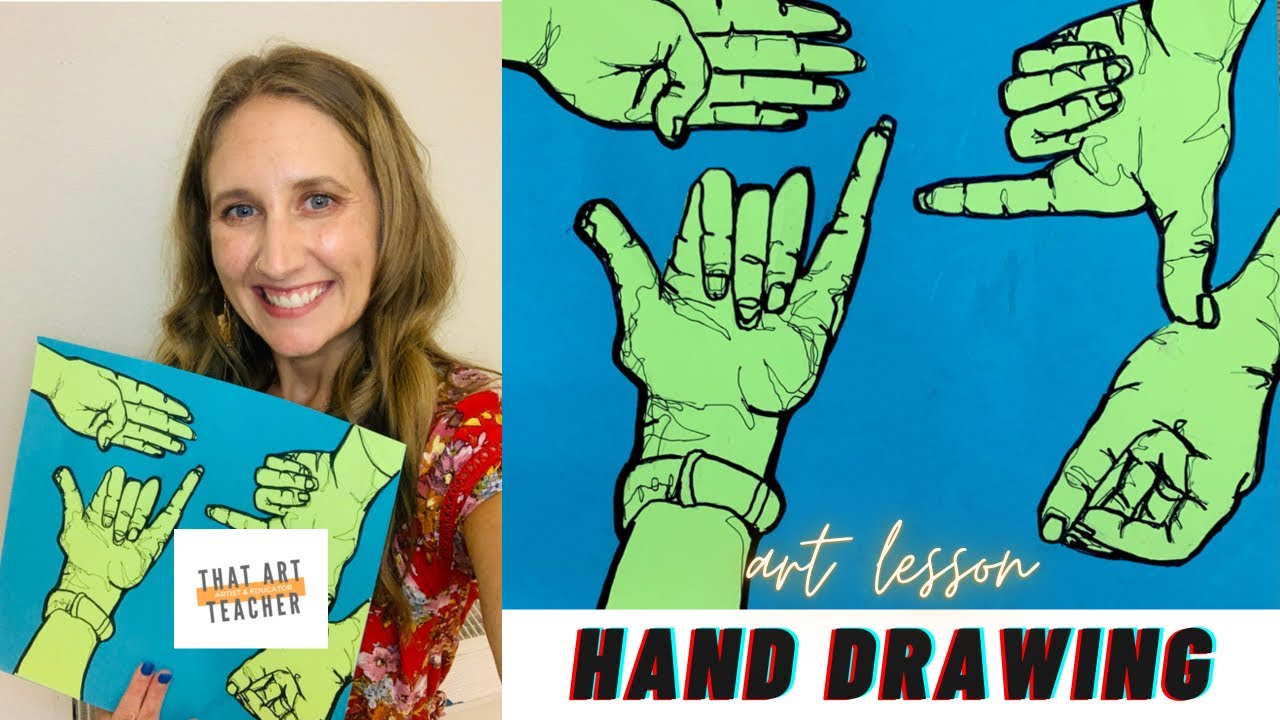
若您更偏好视频而非文字教程,本视频将为您(及您的学生)完整演示本文所述全部内容。该视频已适配课堂教学与Canvas平台!
手部轮廓线描灵感
在Pinterest出现之前,曾有「不可思议美术教学网」([Incredible Art Department](https://incredibleart.org/))。您可按主题与媒材搜索数百位美术教师慷慨分享的教案。2008年我实习期间,指导教师向我推荐了这个网站,当时我如释重负地浏览着海量教案。
其中,戴夫·海恩斯(Dave Haines)发布的一则「手部素描课」([hand drawing lesson](https://www.incredibleart.org/files/hands.htm))立刻吸引了刚入职一年的我的注意。
受他学生作品的启发,我首次为Art I班学生讲授轮廓线描,令我惊喜又宽慰的是,他们表现极为出色。此后多年,我不断调整并沿用这一教案,始终聚焦于观察式素描,并以“沟通”为主题贯穿教学。
什么是轮廓线描?
本视频将逐一讲解三种轮廓线描类型:
本视频专门聚焦于手部轮廓线描:
轮廓线描是一项极佳的技法,有助于建立自信、培养观察能力,并引导学生将物体简化为其基本形与线条。我深信,这是帮助学生学会素描最有效的方式;直至今日,我仍常在速写本中运用轮廓线描!许多学生已有自己固有的风格与对物体的认知方式,而轮廓线描则是一种严谨的方法,促使他们真正直面物体本来的样貌。
我的丈夫是俄克拉荷马州某大学的绘画教授,他将“观看”本身视为一种冥想形式。他常让学生长时间进行盲轮廓线描练习,全程禁言、禁音乐、杜绝一切干扰,唯余双眼专注观察,双手如实呈现所见。
尽管我的高中生很难在无干扰状态下做任何事,但在轮廓线描最初的几轮练习中,教室里却静得连一根针落地都清晰可闻。当学生终于真正凝视纸面时,那种集体情绪的涌动清晰可感。我珍视课堂上的这些时刻。
这一技法适用于所有年龄段,绝非仅限于高中生。以下图片出自我的Art II班(含10至12年级学生,据称均已修过Art I)。此前我也成功将此课用于Art I班,甚至在制作金属丝肖像前,先教给Sculpture I班学生。
我曾非常享受为昔日六年级学生授课,其成果与高中生作品高度相似。
贝蒂·爱德华兹(Betty Edwards)所著《在右脑中绘画》([Drawing on the Right Side of the Brain](https://amzn.to/467NMuP))是此类技法及其他诸多方法的经典著作,它将素描分解为可操作的步骤。我很欣赏该书持续修订更新的特点。


课堂盲轮廓练习
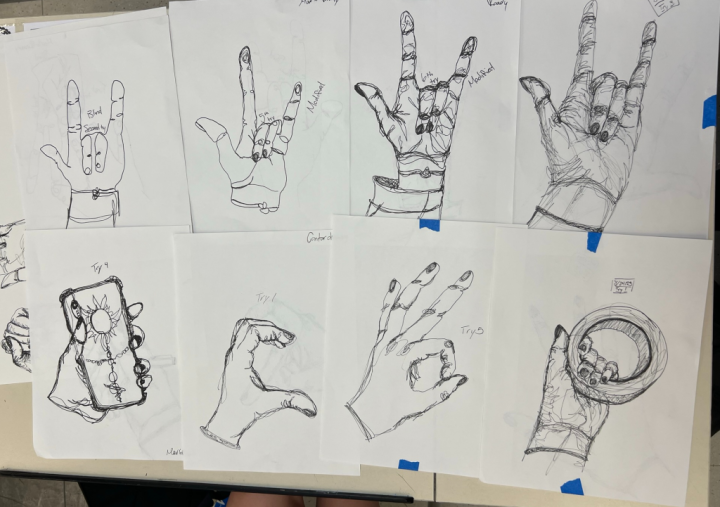
我们从引导式盲轮廓线描练习开始。我设定两分钟计时器,每次时间到即更换手部姿势。许多学生两分钟内无法完成,也常有人因被计时而倍感烦躁。我反复提醒他们:放慢速度、专注双眼实际所见至关重要。请将画笔视作眼睛的延伸——它须与视线同步,沿着物体边缘移动。
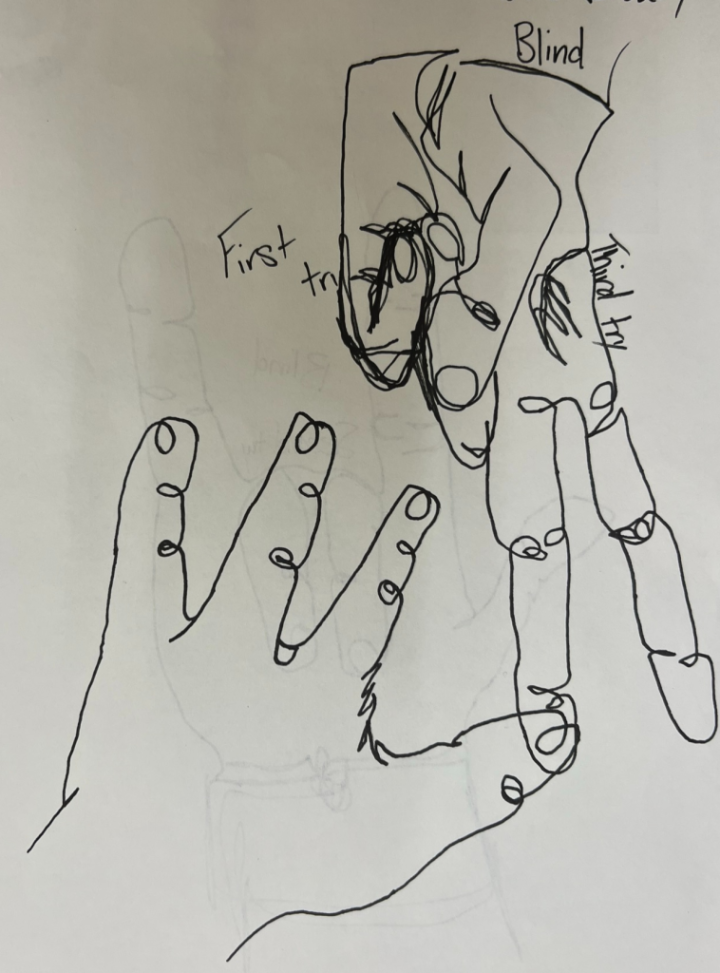

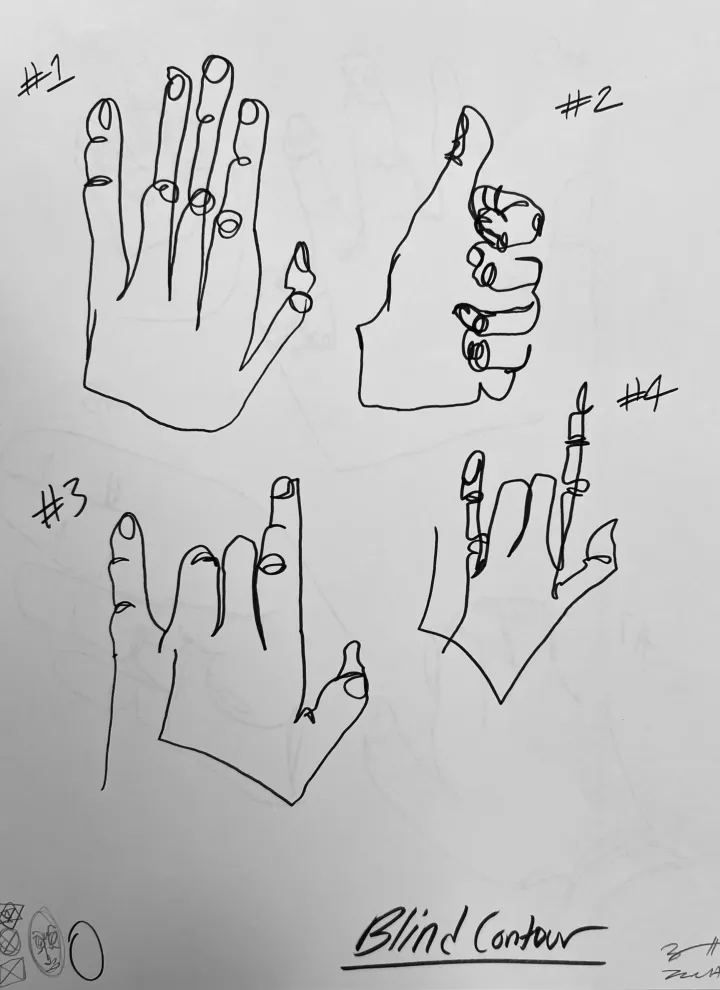
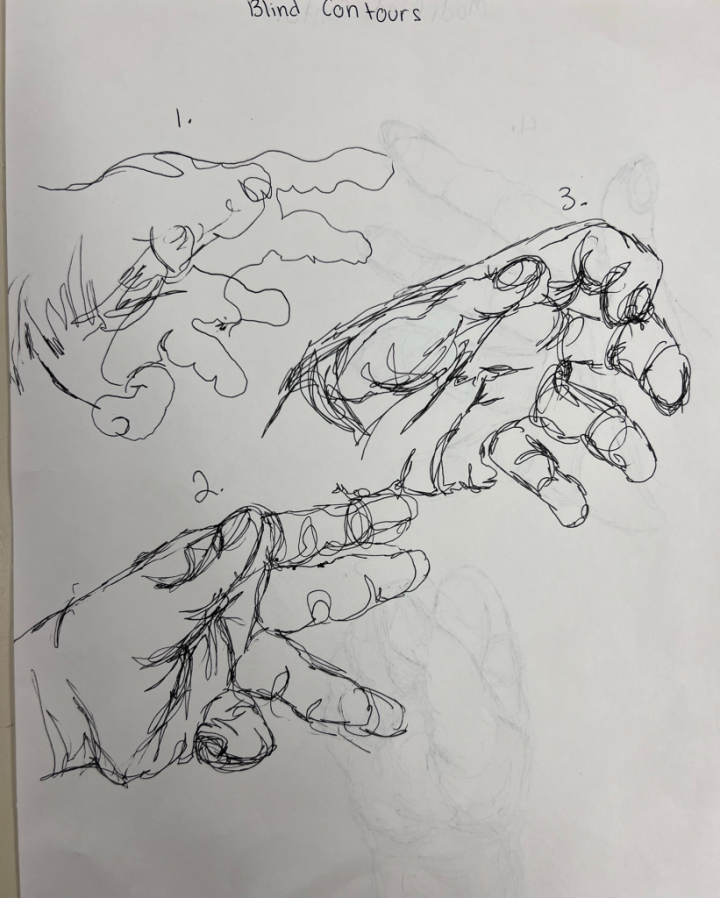
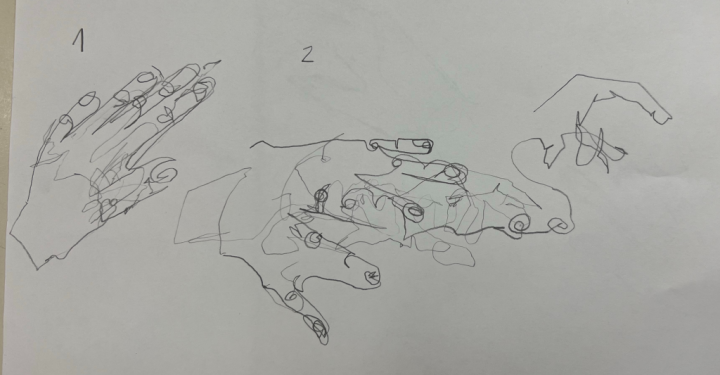
盲轮廓线绘画总会引发笑声,因为……这些画看起来就像你根本没看自己的画纸!总会有学生放不下对“准确”的执念,试图假装自己没在看纸。我见过老师用文件夹遮挡视线,或用其他东西挡住手,但我选择相信学生会真正投入这一练习理念。失望本就是生活的一部分,我早已坦然接受。
改良式轮廓线练习
接下来我们进入改良式轮廓线练习:学生可在绘制过程中的关键过渡时刻稍作停顿,低头看一眼画纸。但其余时间仍需将90%的注意力放在观察对象上。这类画作依然略显“歪斜”,但由于能偶尔检查画面,整体写实感会有所提升,位置与比例也会略微更准确。我会提醒学生:画得像一只“完美”的手,从来就不是我们的目标;真正的目标是训练手眼协调能力、纯粹的观察式绘画能力,以及放下对描绘对象的固有成见。
手部轮廓线绘画练习
最后,我们进入正式的轮廓线绘画练习。学生可更频繁地查看画纸,约80%的时间可以低头,但仍须以观察手部为主进行绘制。我喜欢在引导练习中设定三分钟计时器,让学生放慢节奏,真正聚焦于细节。学生常会忍不住提起笔来刻画皱纹和指关节,而我则需不断提醒他们:必须用一条连续不断的线条,勾勒出手部外缘的全部轮廓。
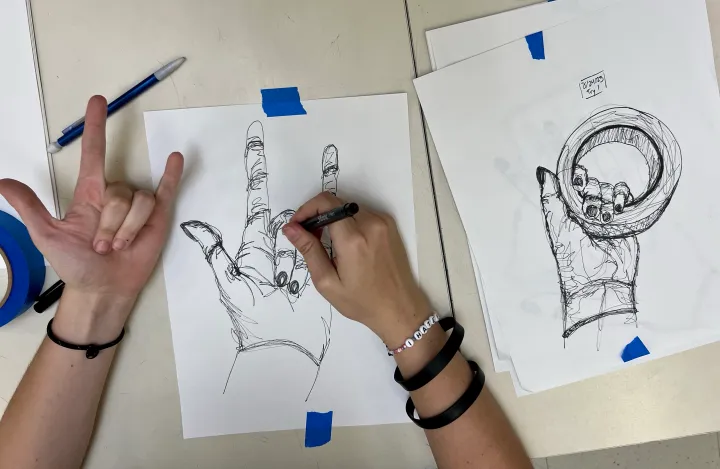
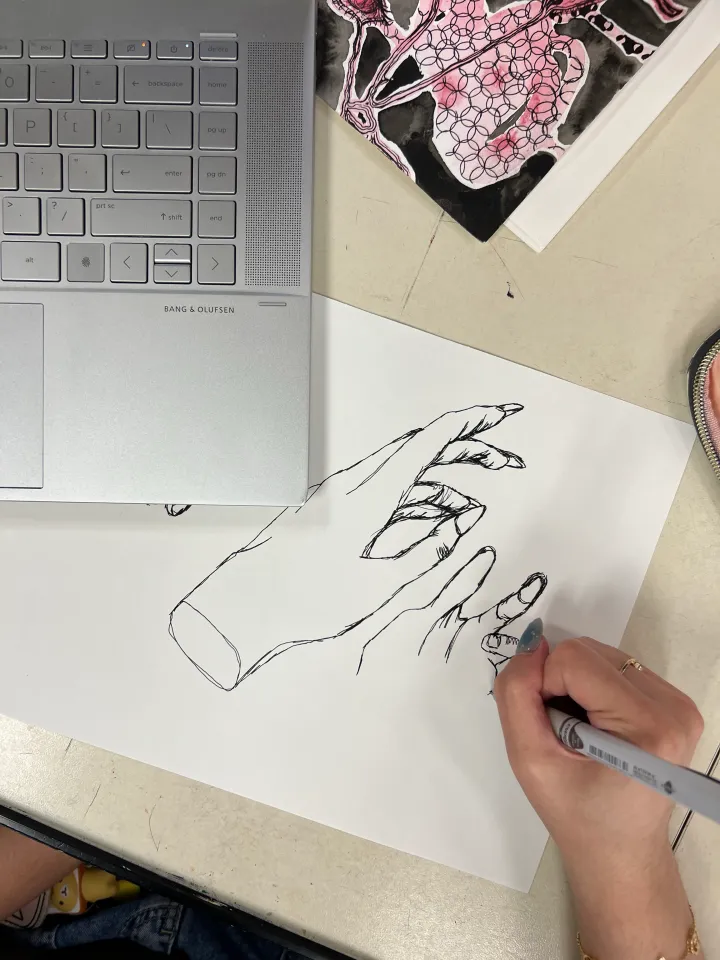
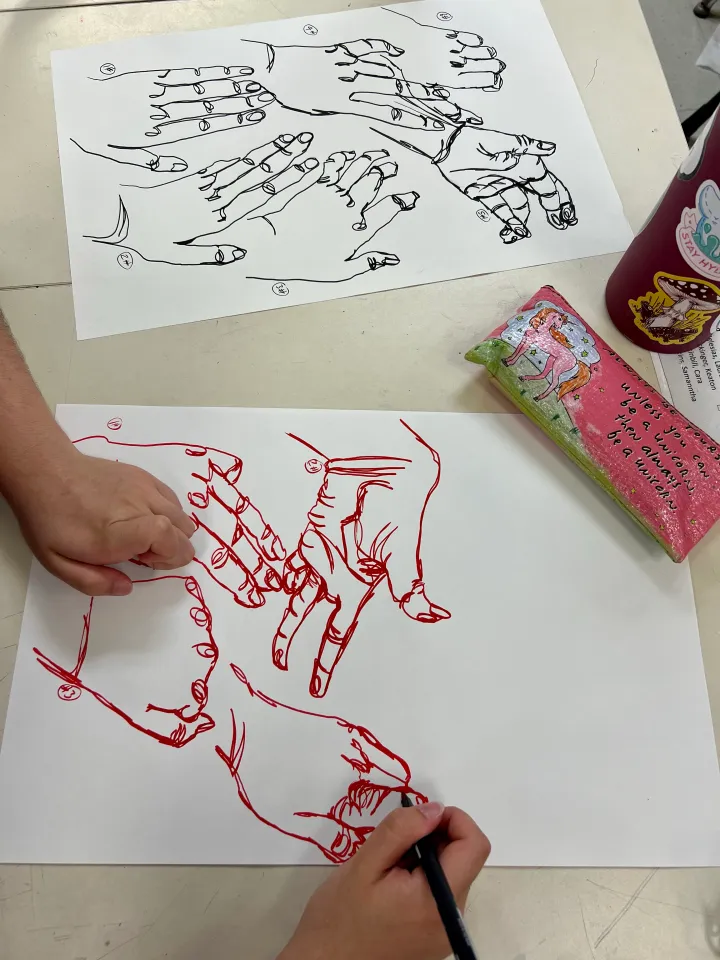
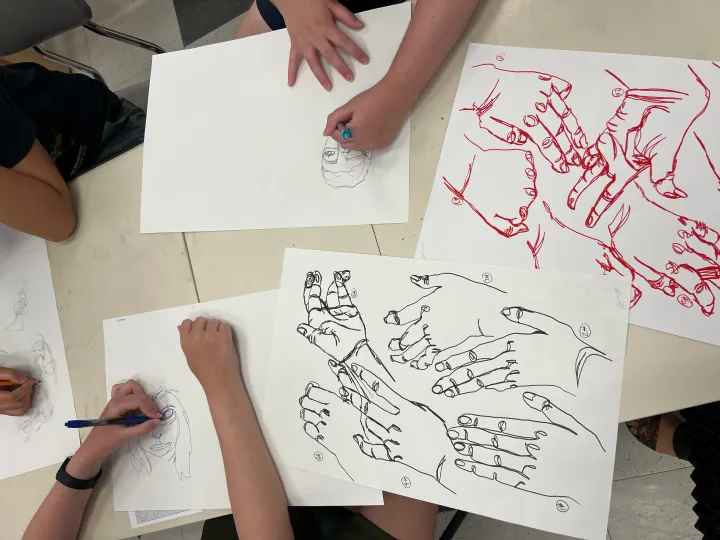
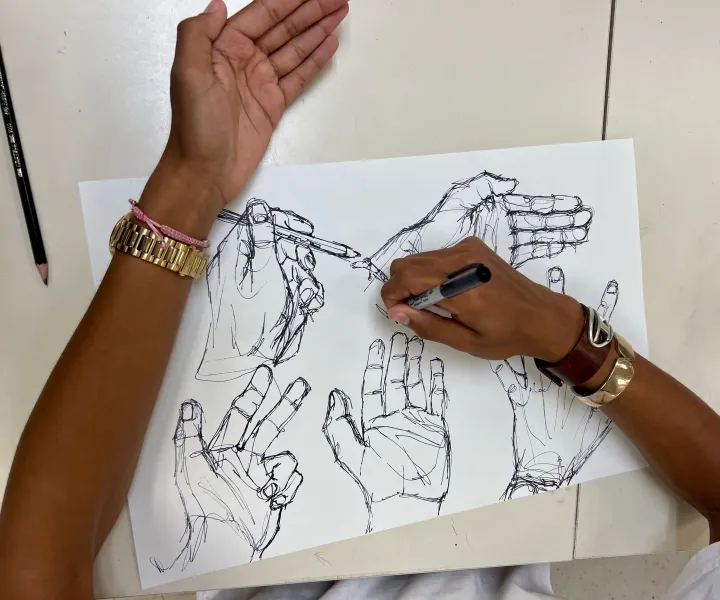
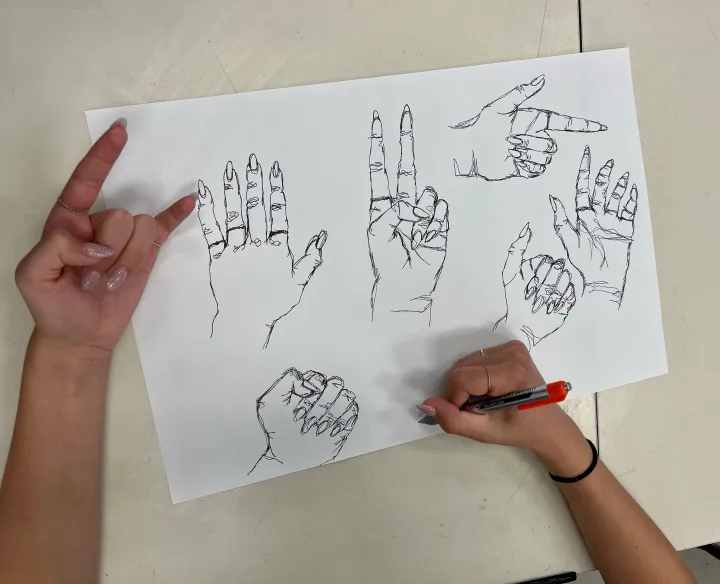
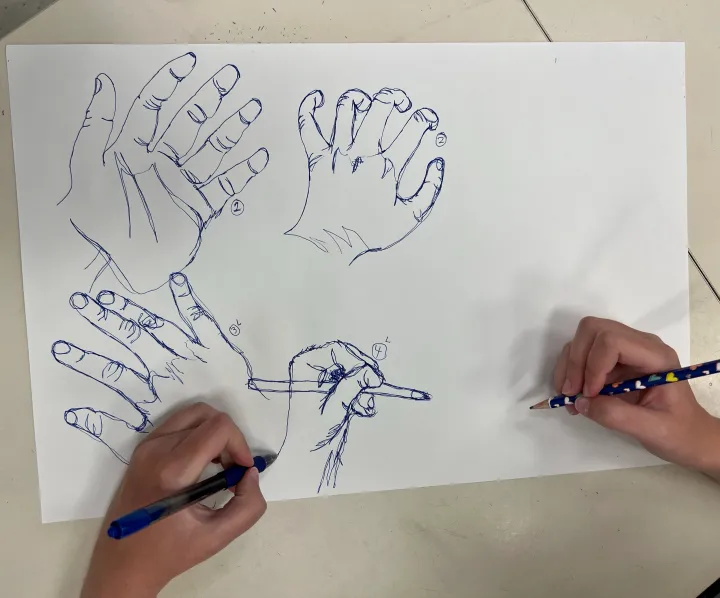
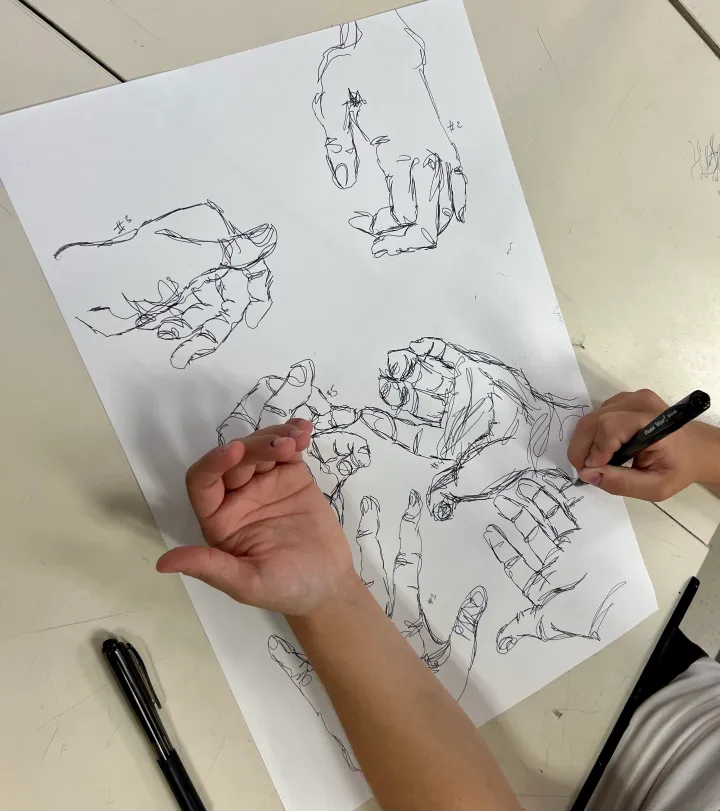
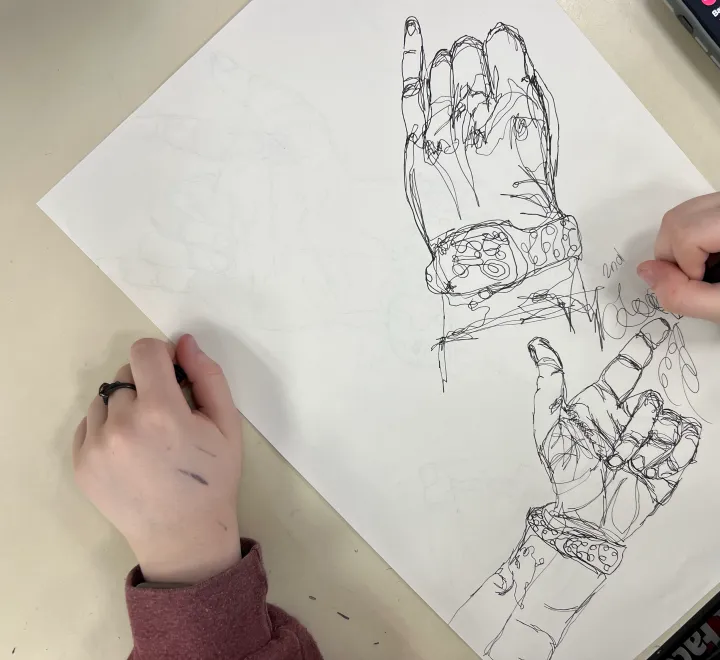
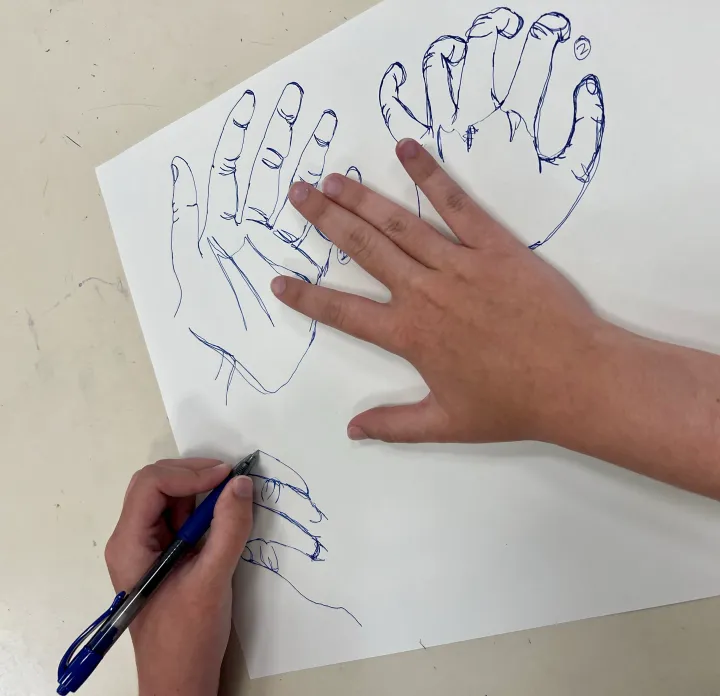
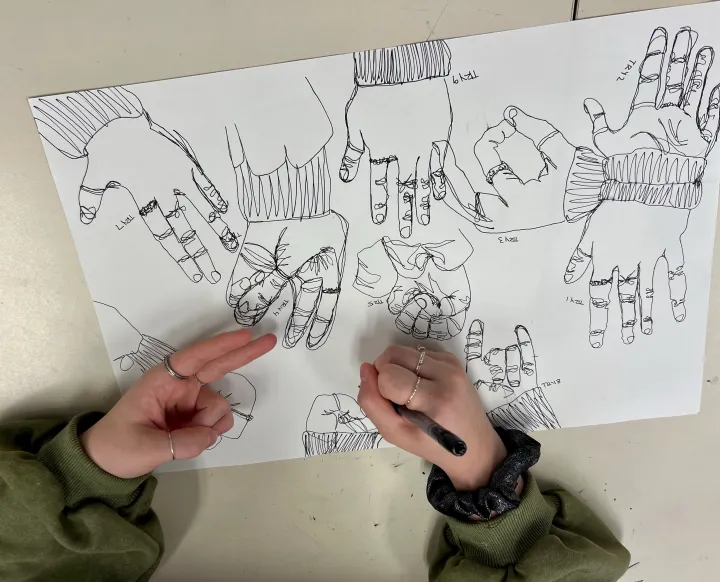
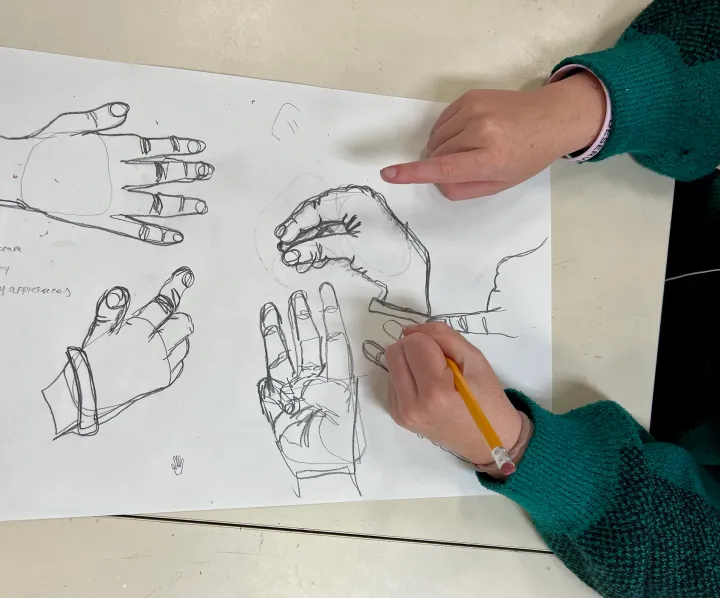
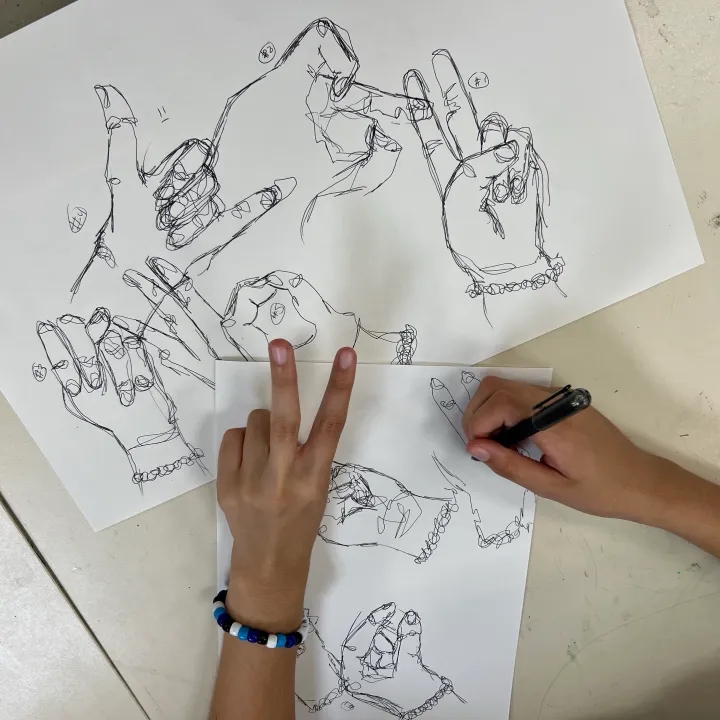
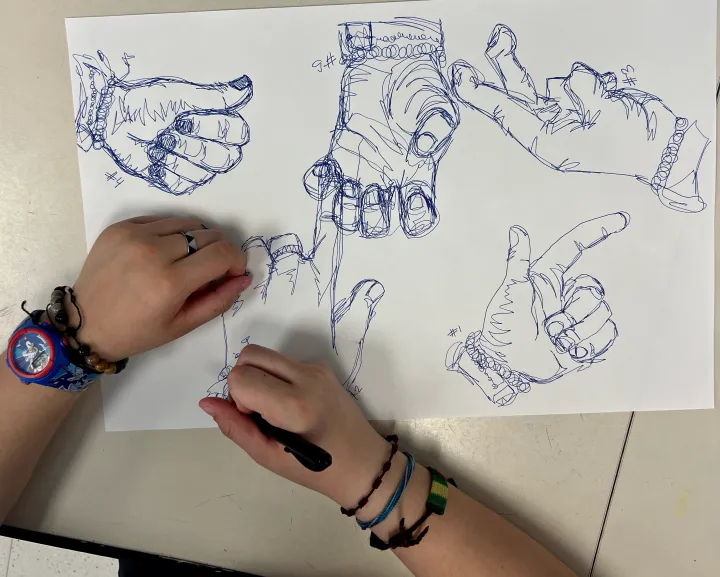
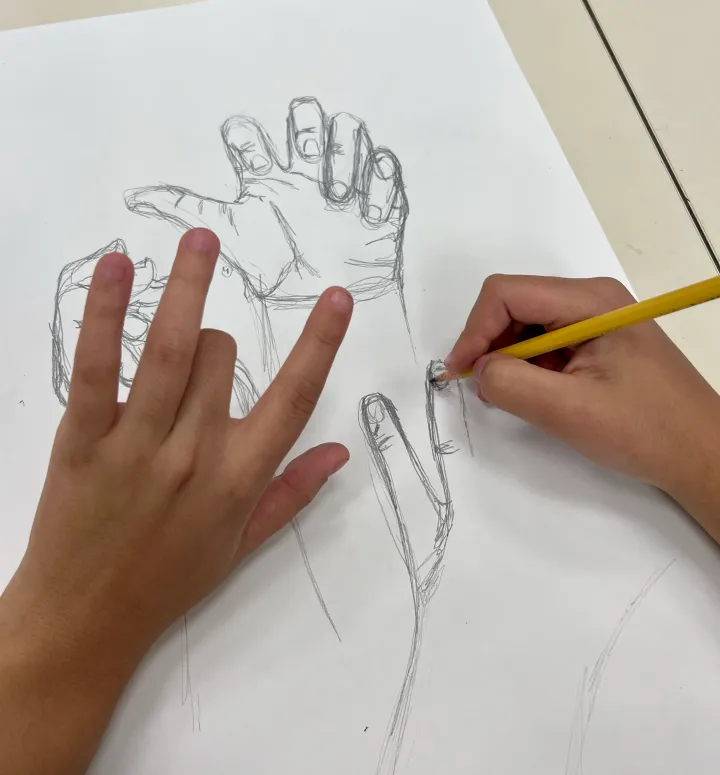
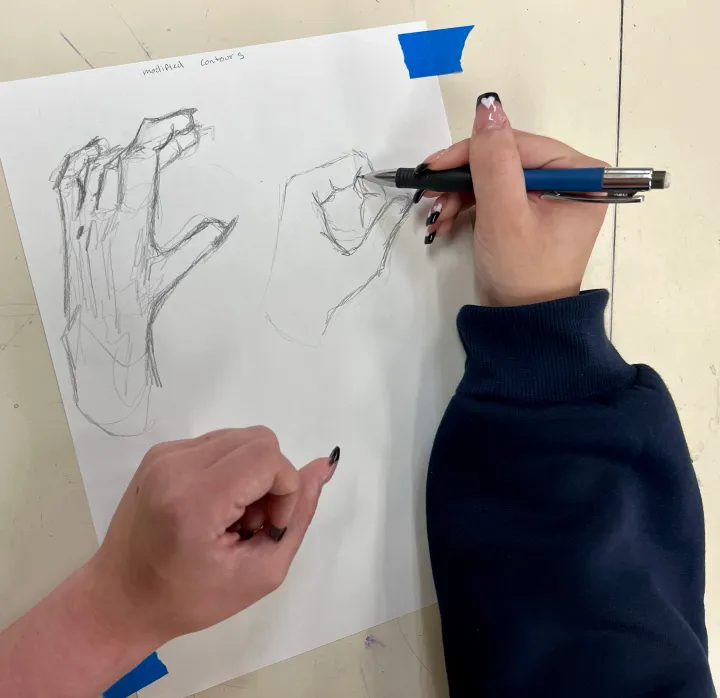
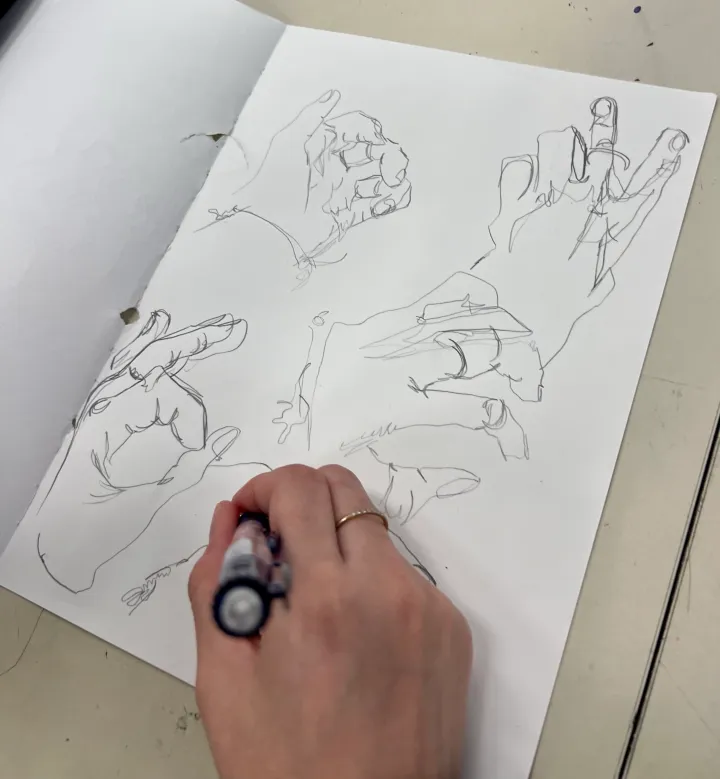
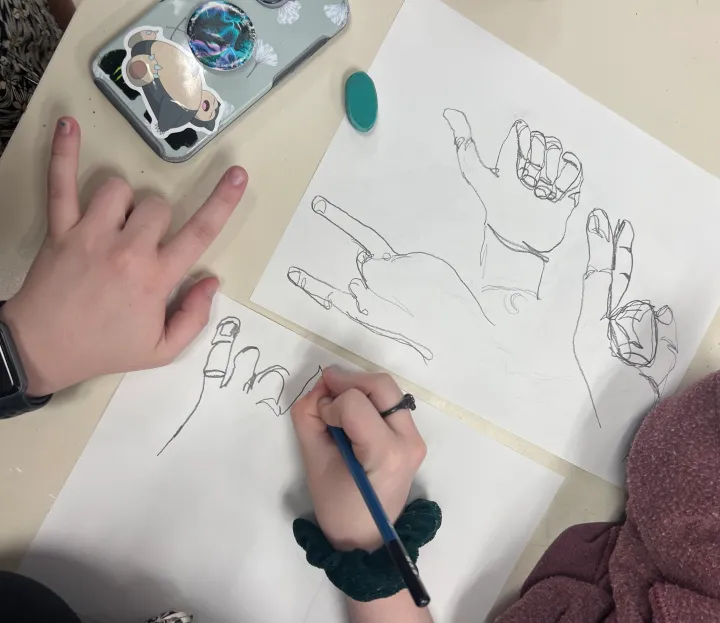
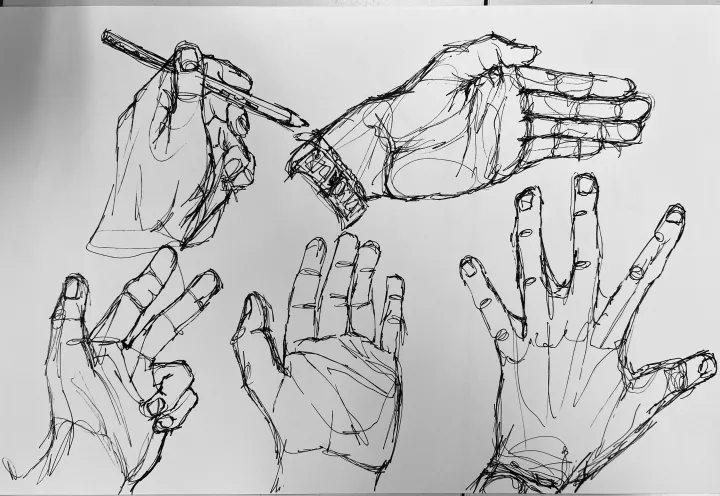
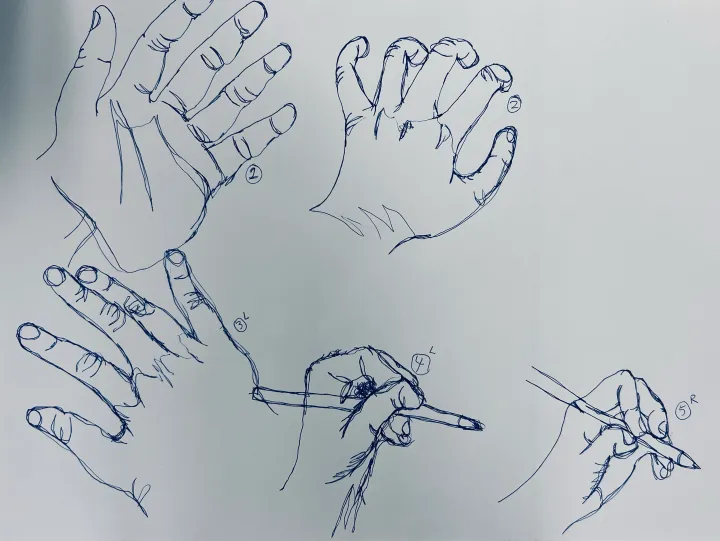
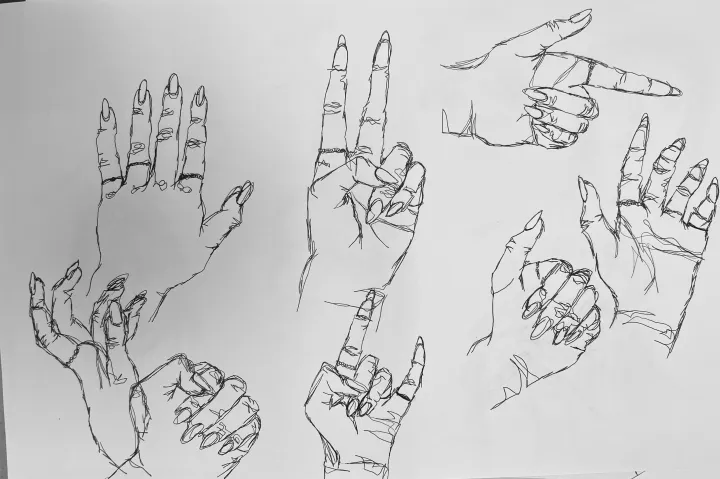
此时,我能真切看到学生自信心的增长。此刻他们已持续观察自己的手达一个半课时之久(我每节课45分钟),结果往往令他们惊喜又欣喜。我鼓励他们尝试更具挑战性的手部姿态——最终效果常比预想更好。对进阶学生而言,一个不错的挑战方式是让他们单手持物,并将该物品一并纳入画面。
最终纸面的手部轮廓线绘画
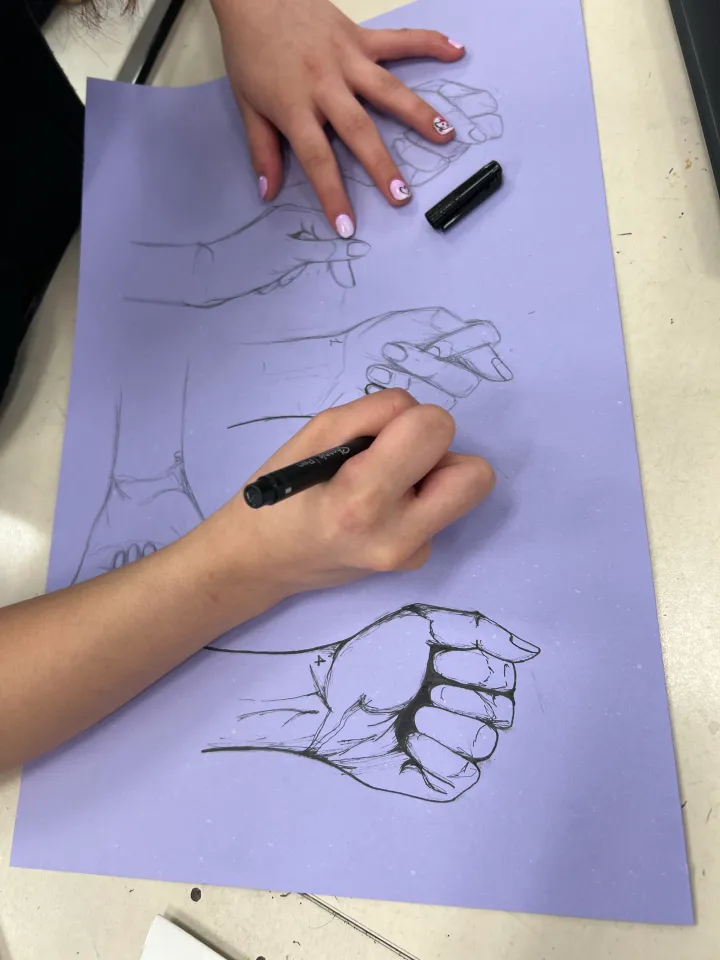
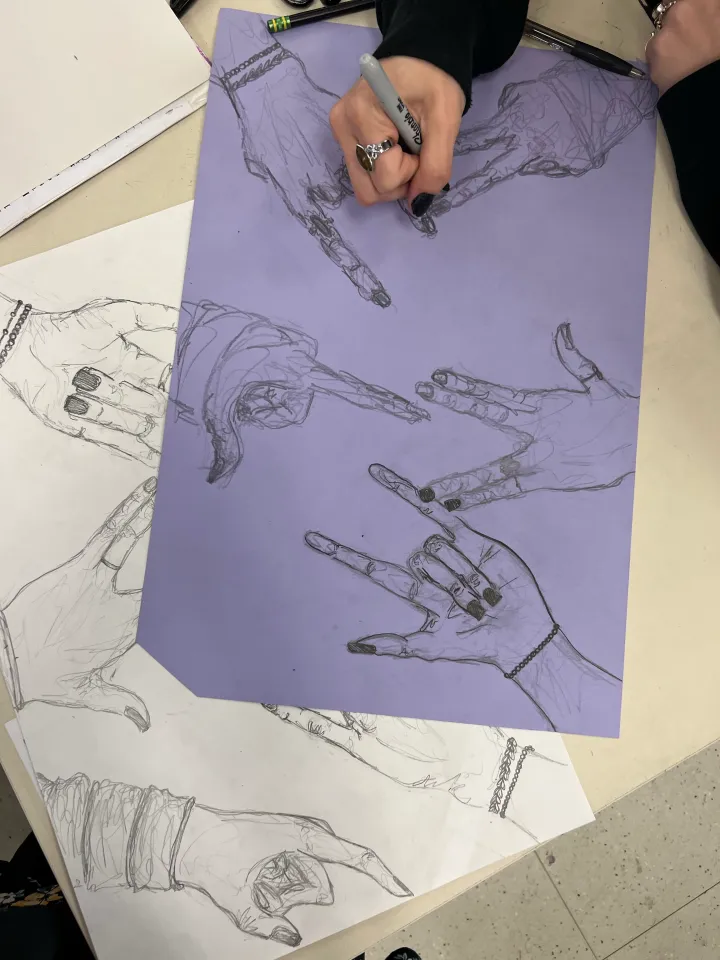
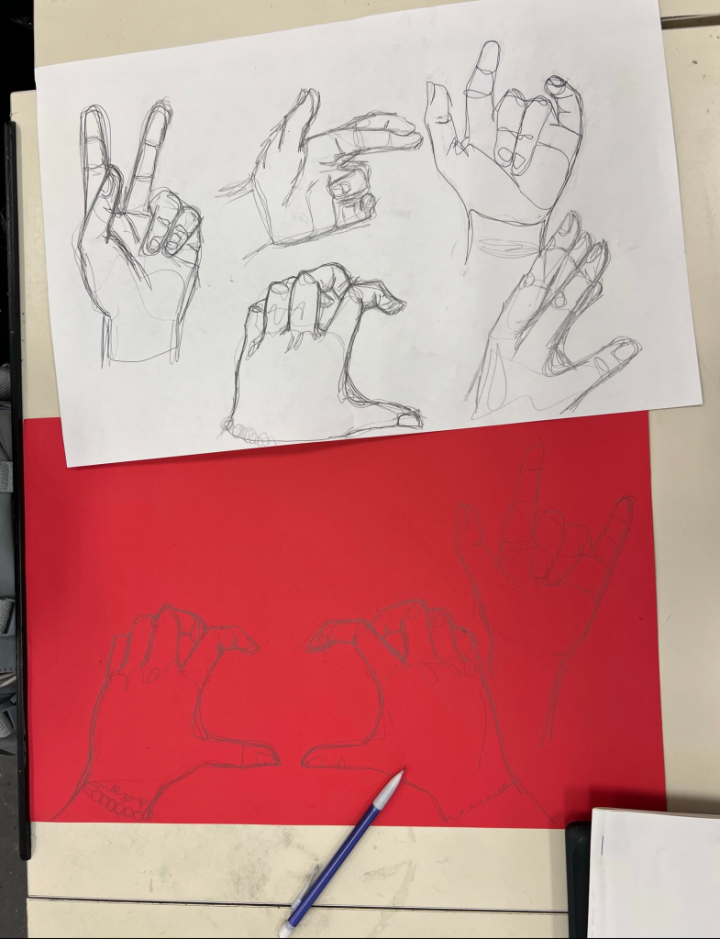
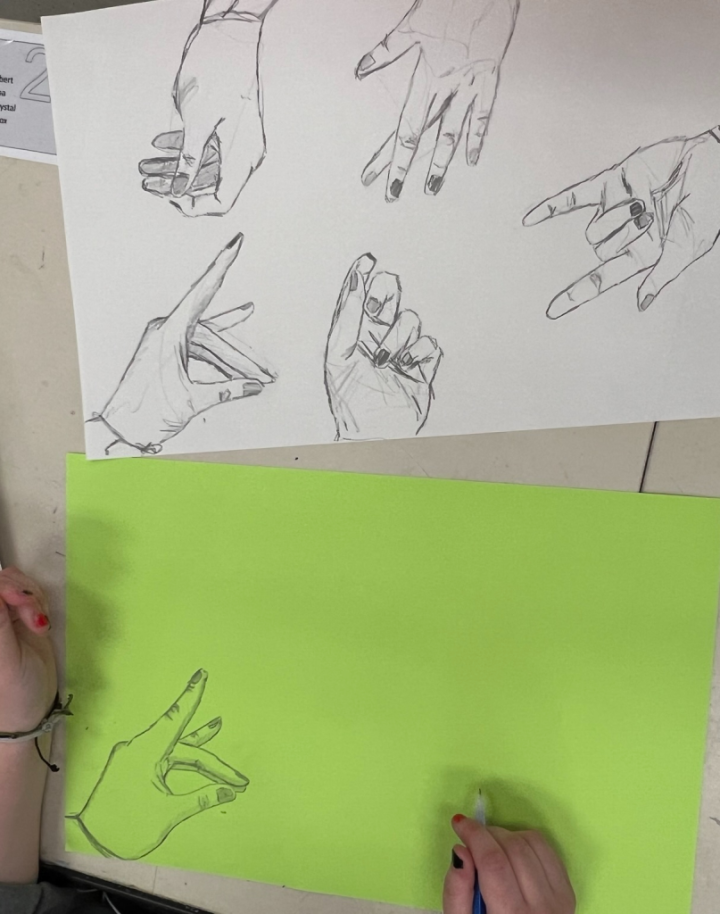
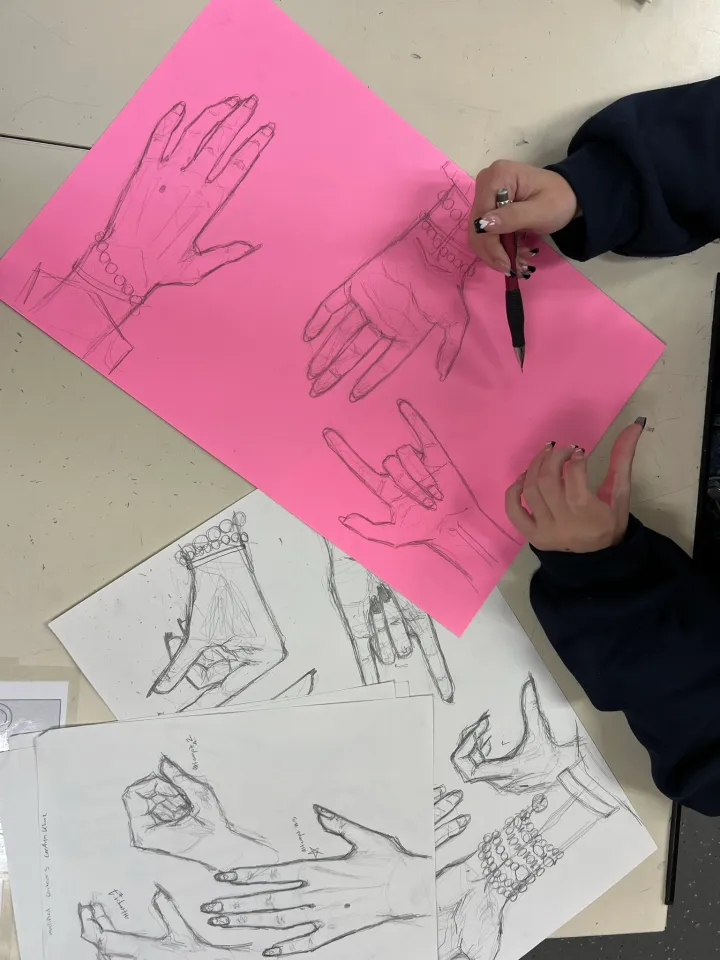
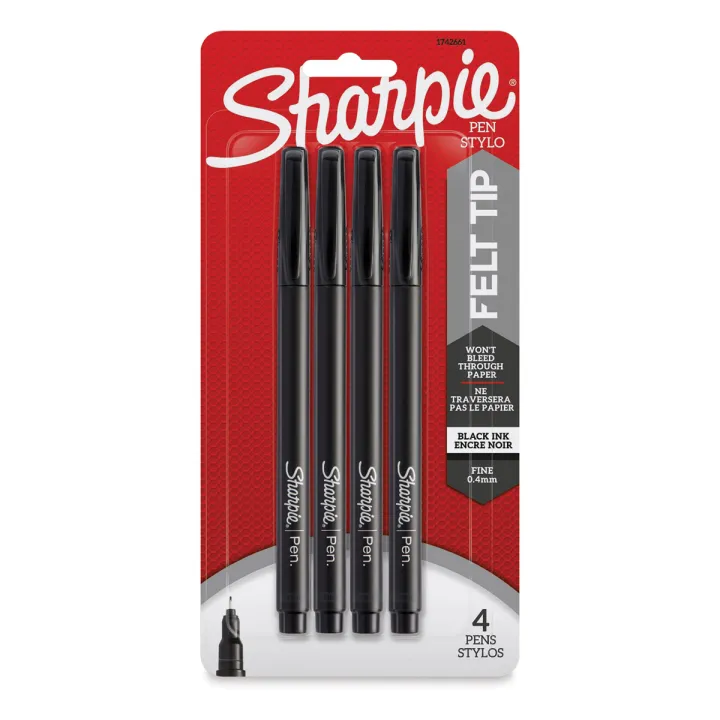
完成练习后,我们进入最终创作阶段。学生最习惯先用铅笔(当然仍是轮廓线风格)画出手势,再用记号笔描边定稿。这种记号笔性能极佳,即使运笔稍有迟疑,也不会留下墨点污渍。

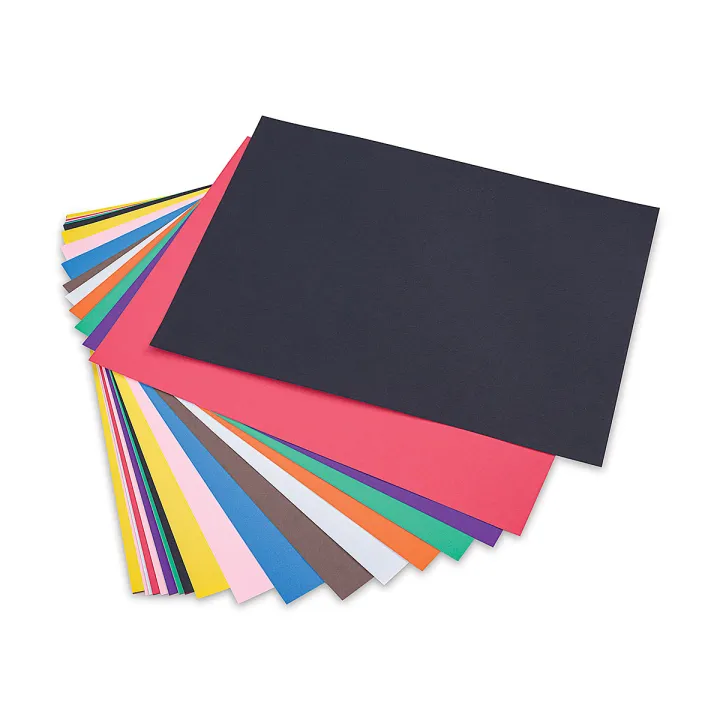
我特别喜欢Blick美术用品公司的这款画纸——质感出色,且不易褪色。

***本文含部分我真心喜爱并日常用于课堂的推荐商品联盟链接。若您通过这些链接购买商品,我可能获得佣金,而您无需额外付费。衷心感谢您支持这位公立学校教师的副业,让我得以持续提供免费教学资源。
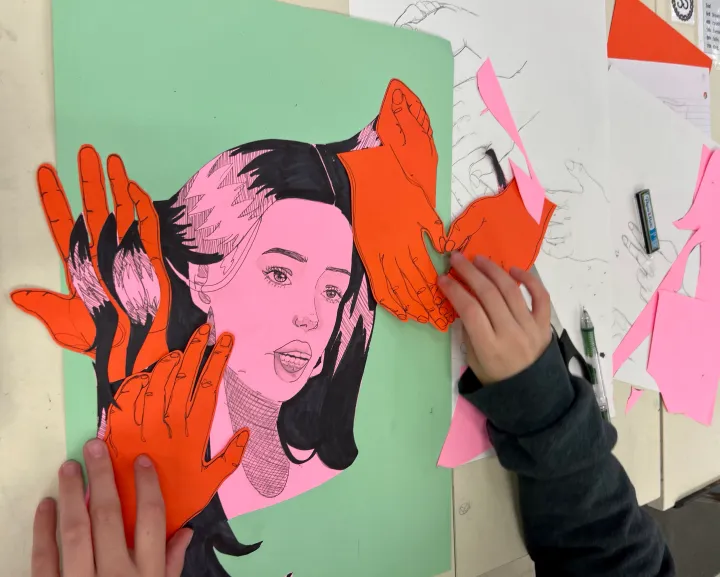
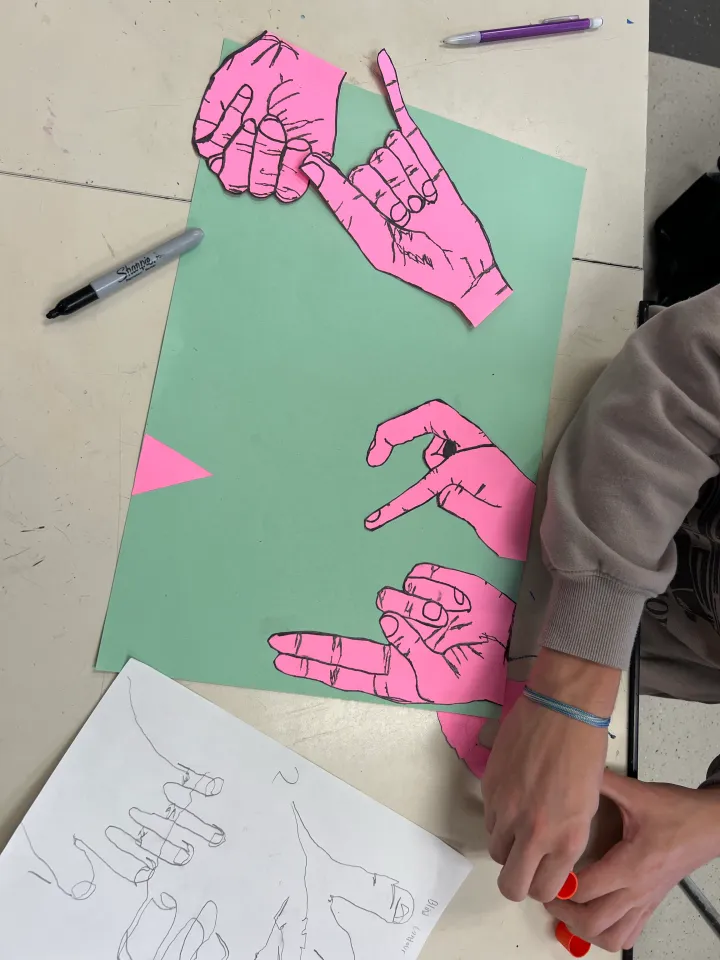
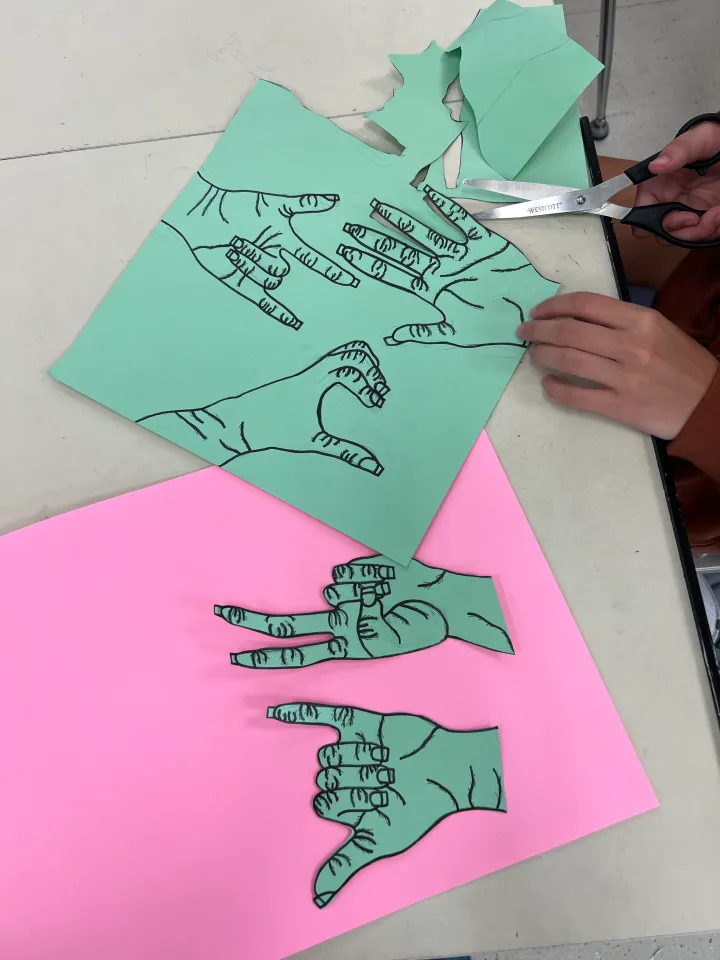
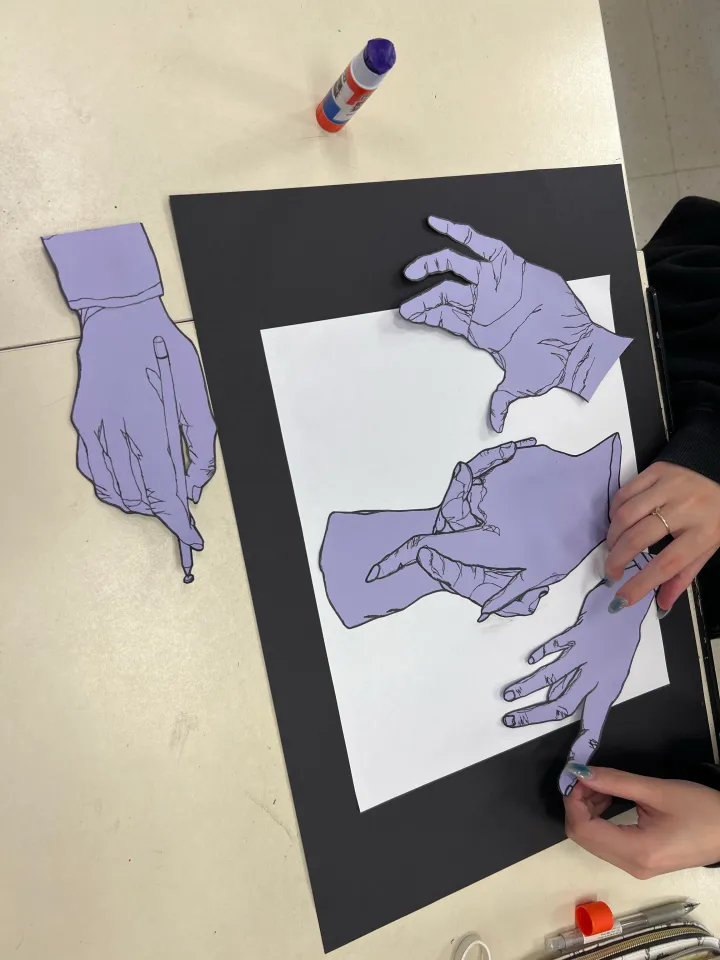
有些学生喜欢参考美国手语(ASL)来创作富有意义的作品;也有人热衷组合多种手势,以传达特定观念或情绪。我尤其欣赏学生为背景添加创意细节,并在观察式绘画中注入鲜明的个人风格。
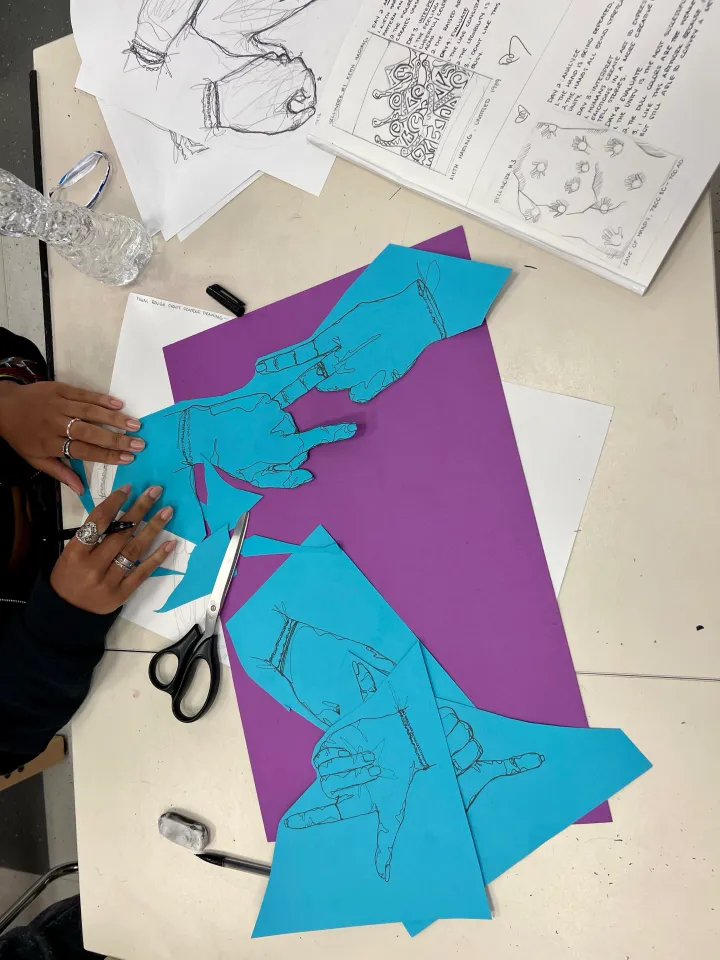
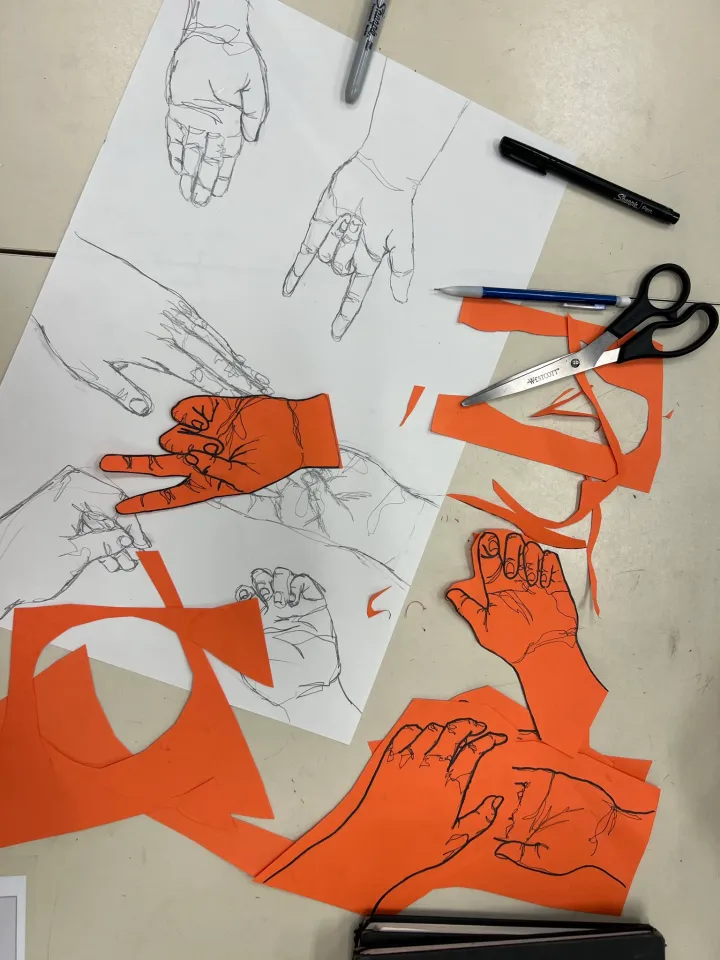
当他们完成五幅(或更多!)满意的手势作品后,便将其剪下,在另一张纸上自由安排构图。
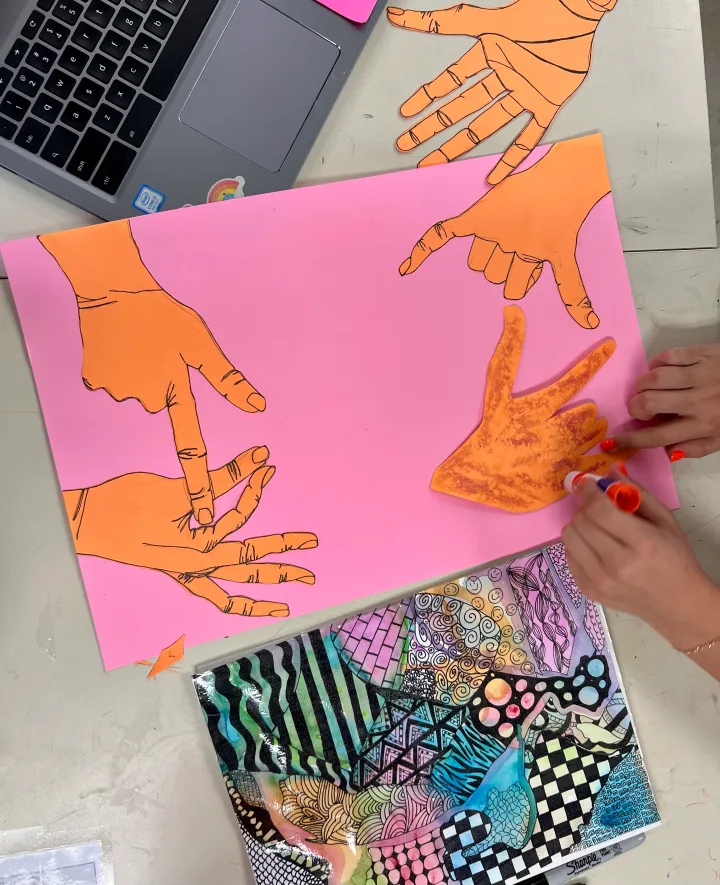
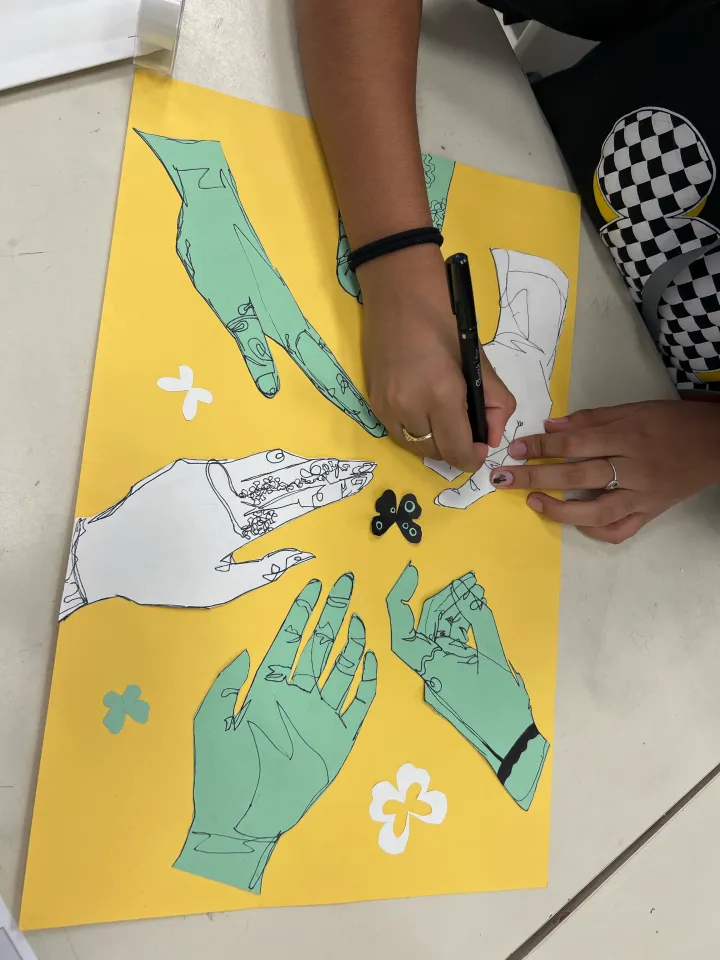
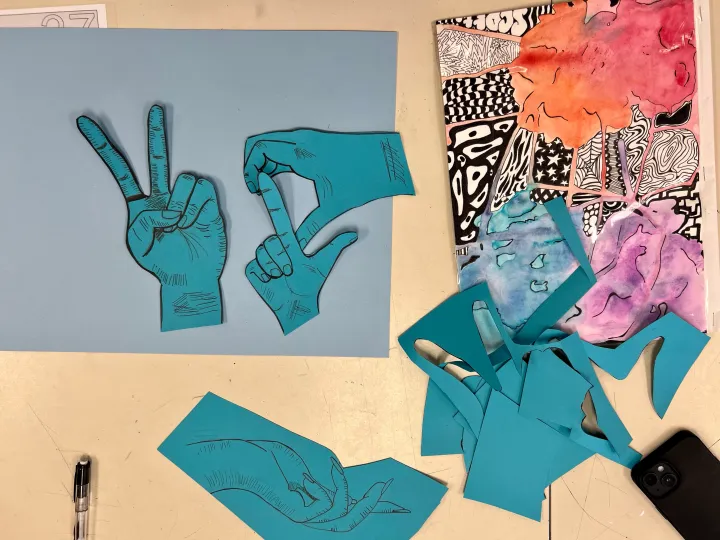
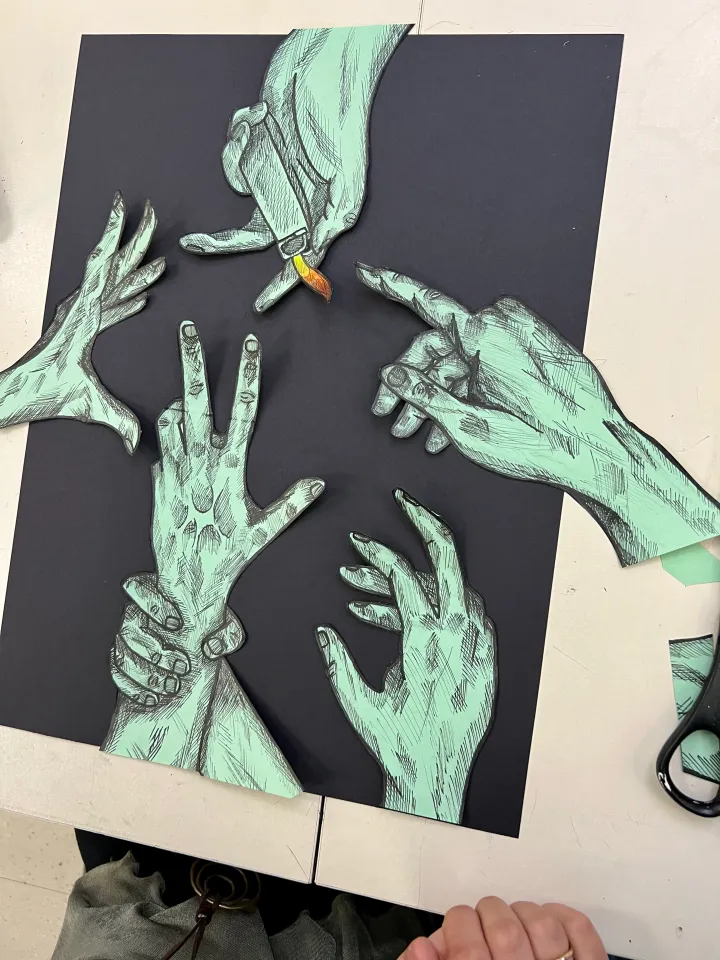
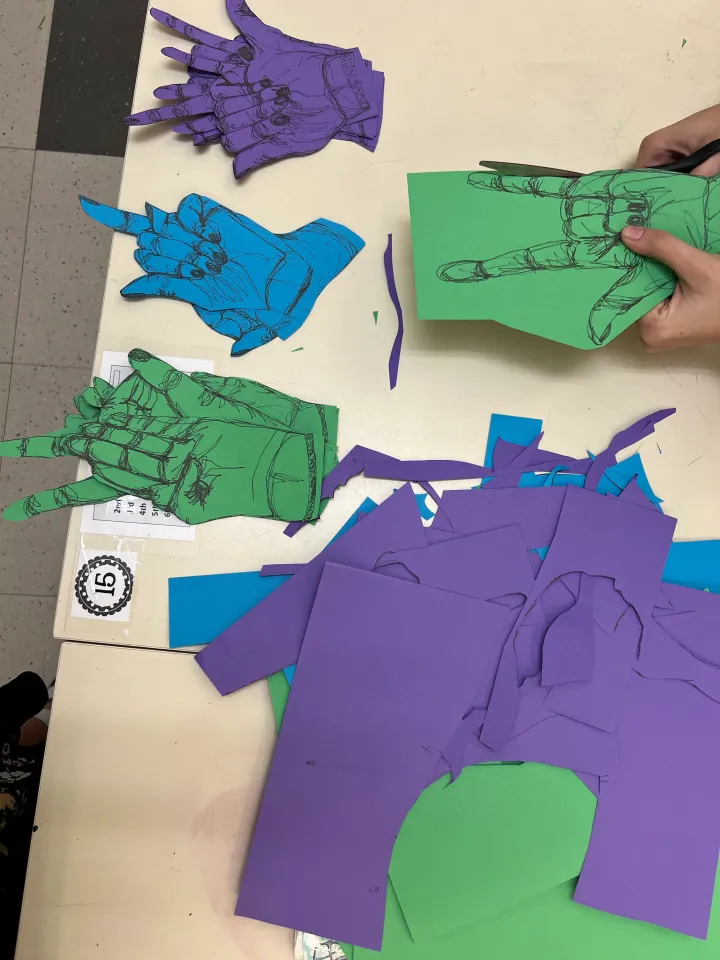
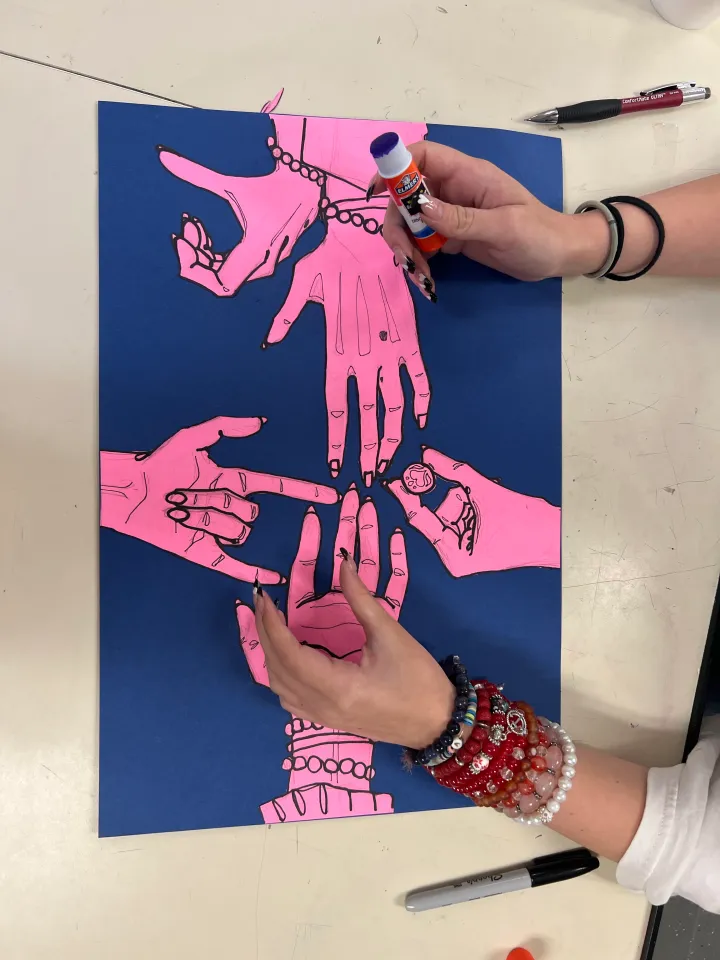
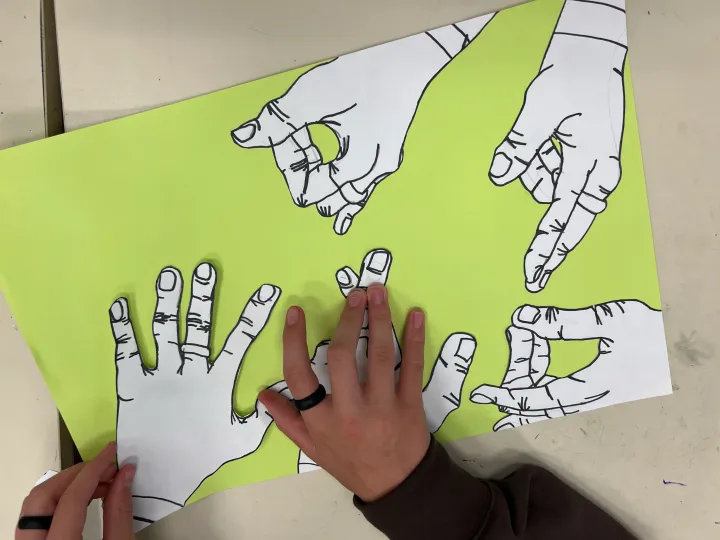
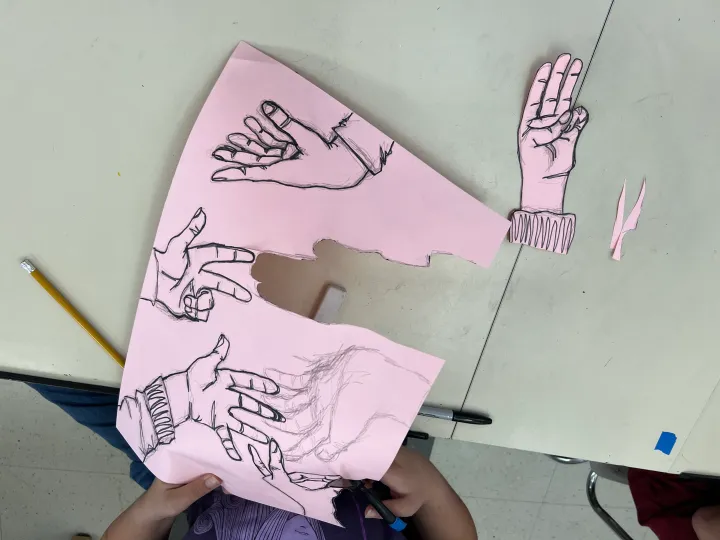
手部轮廓线绘画成果
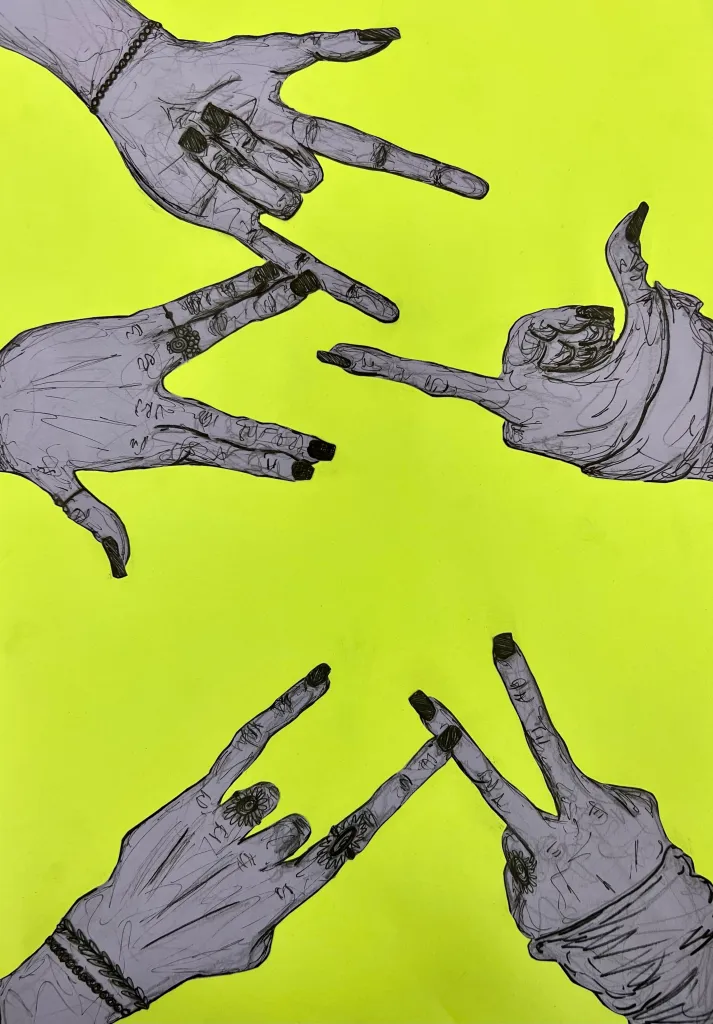
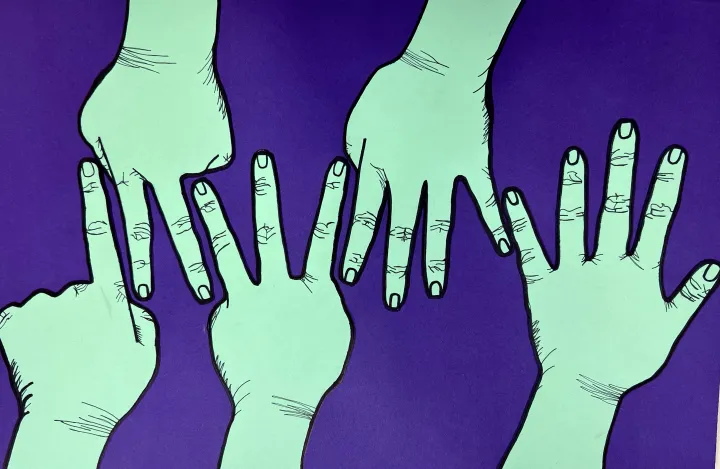
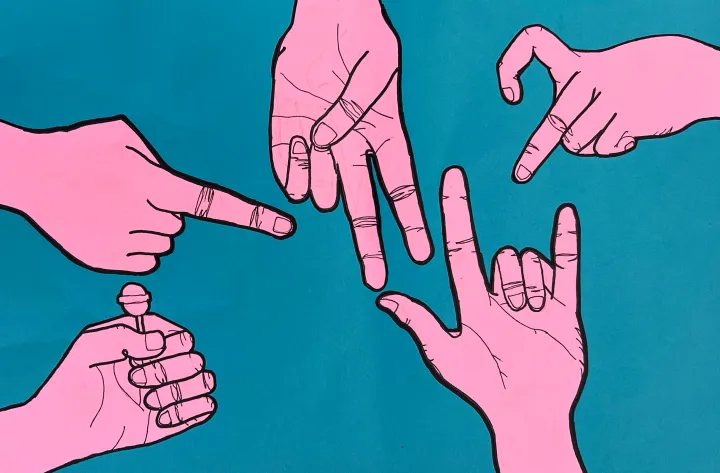
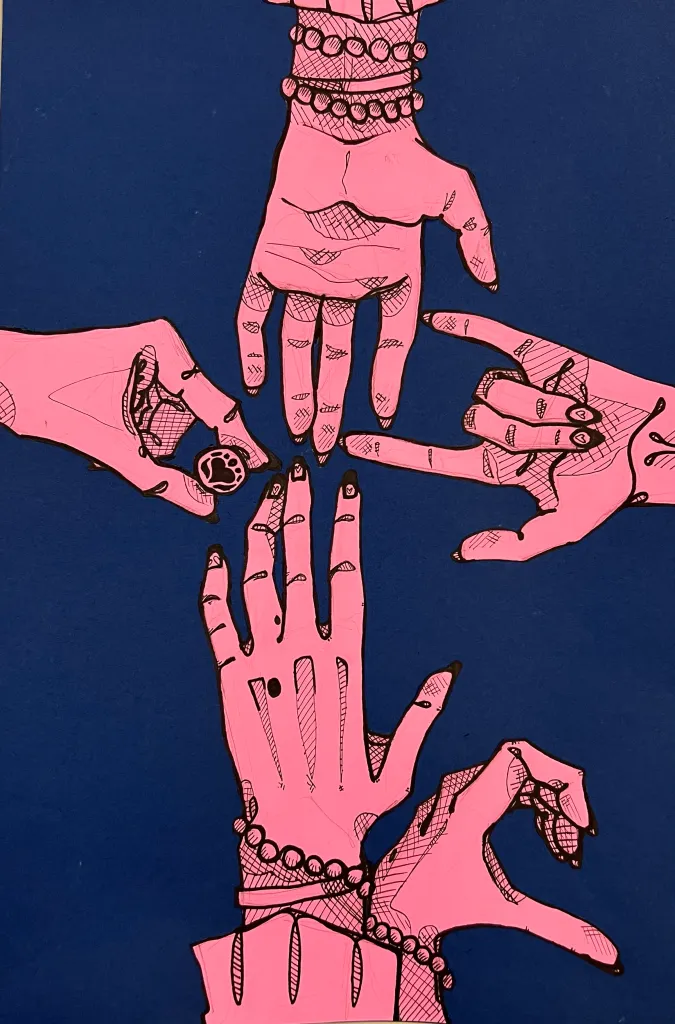
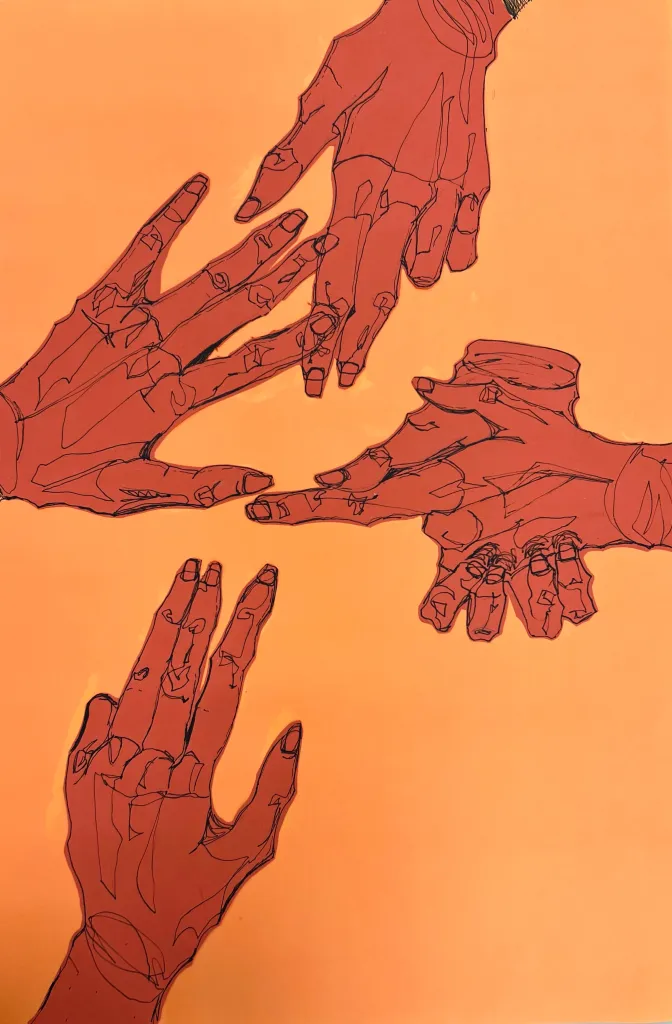
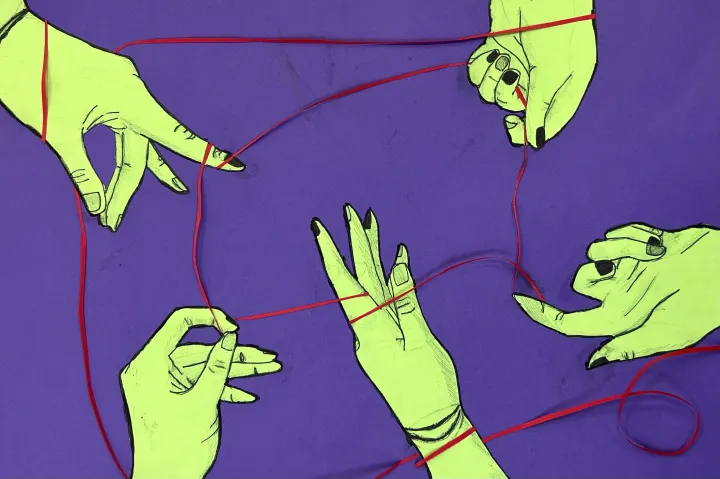
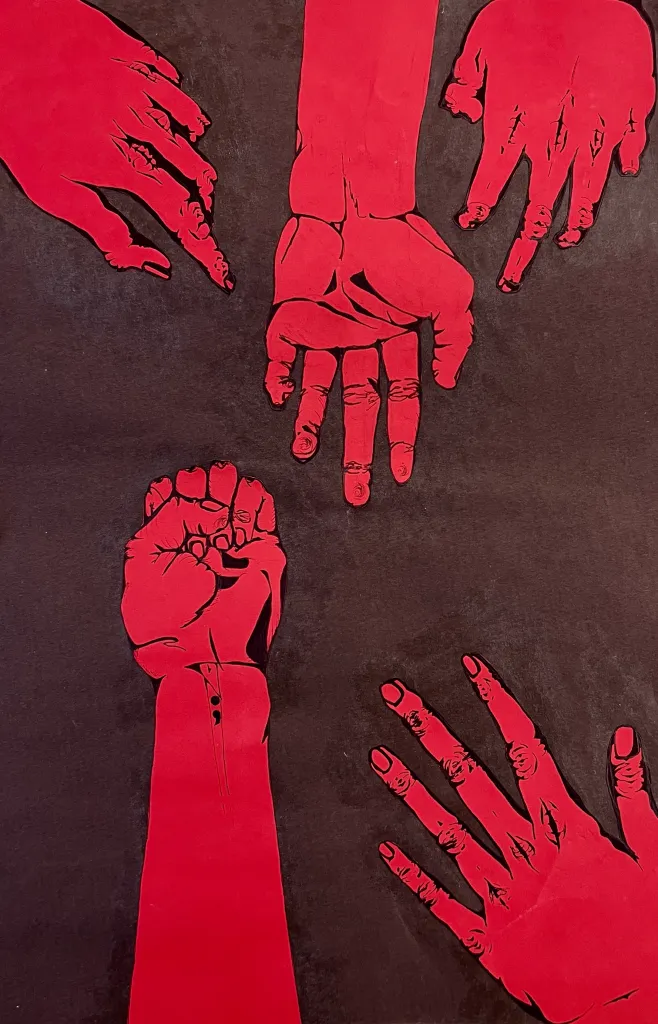
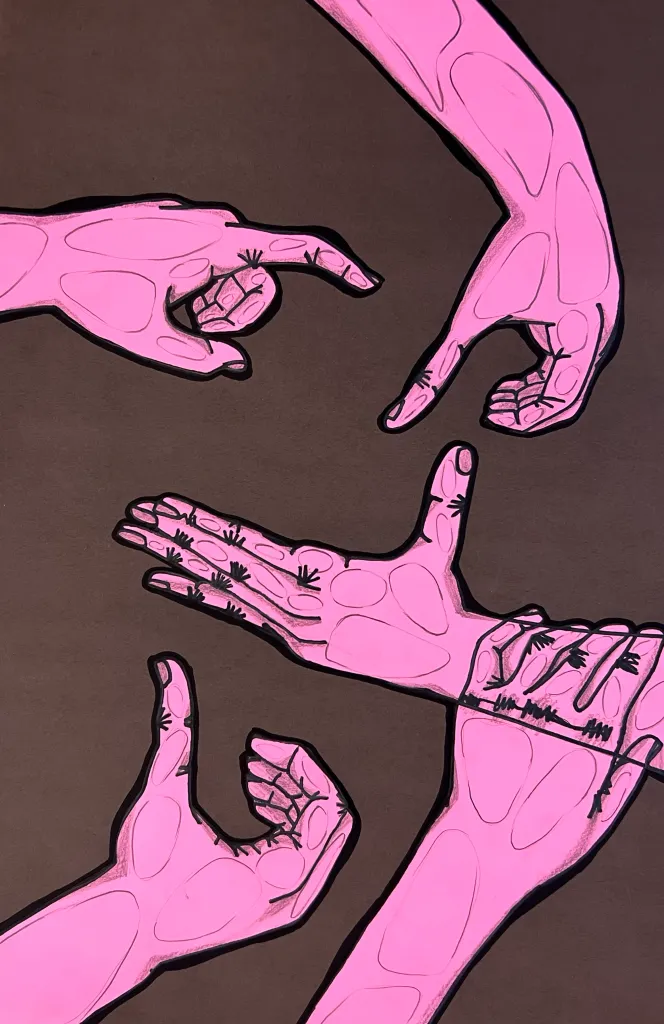
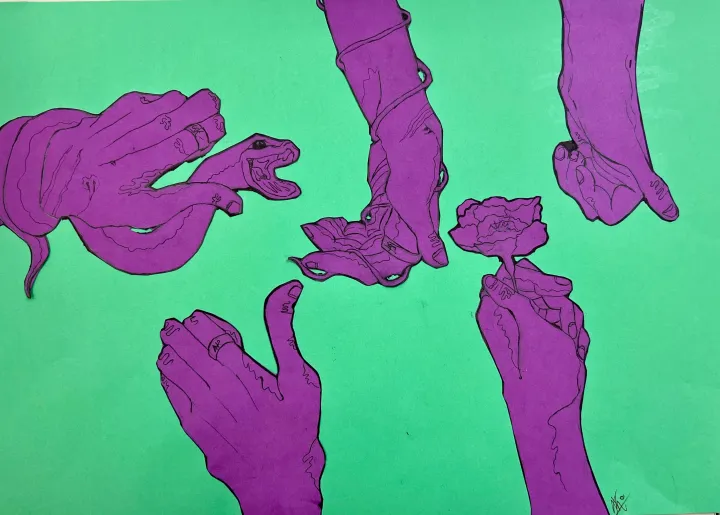
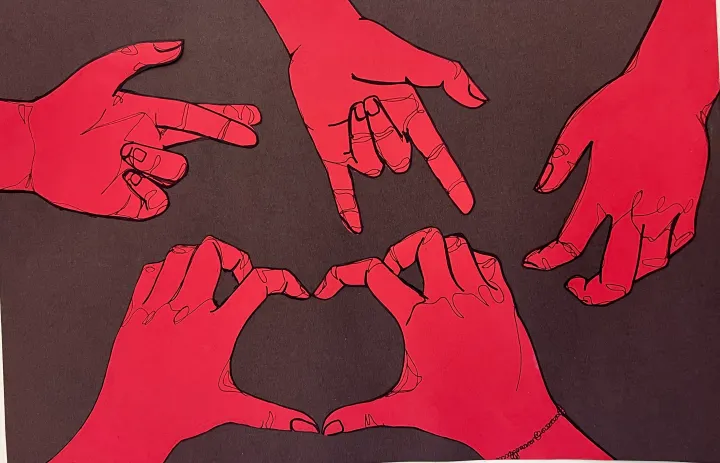
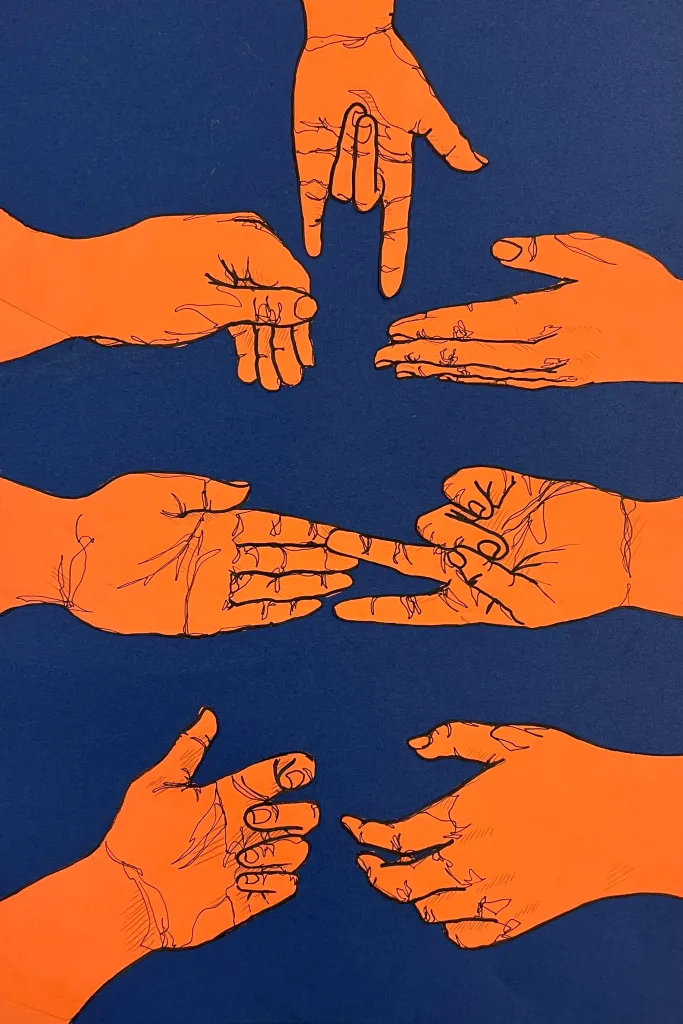
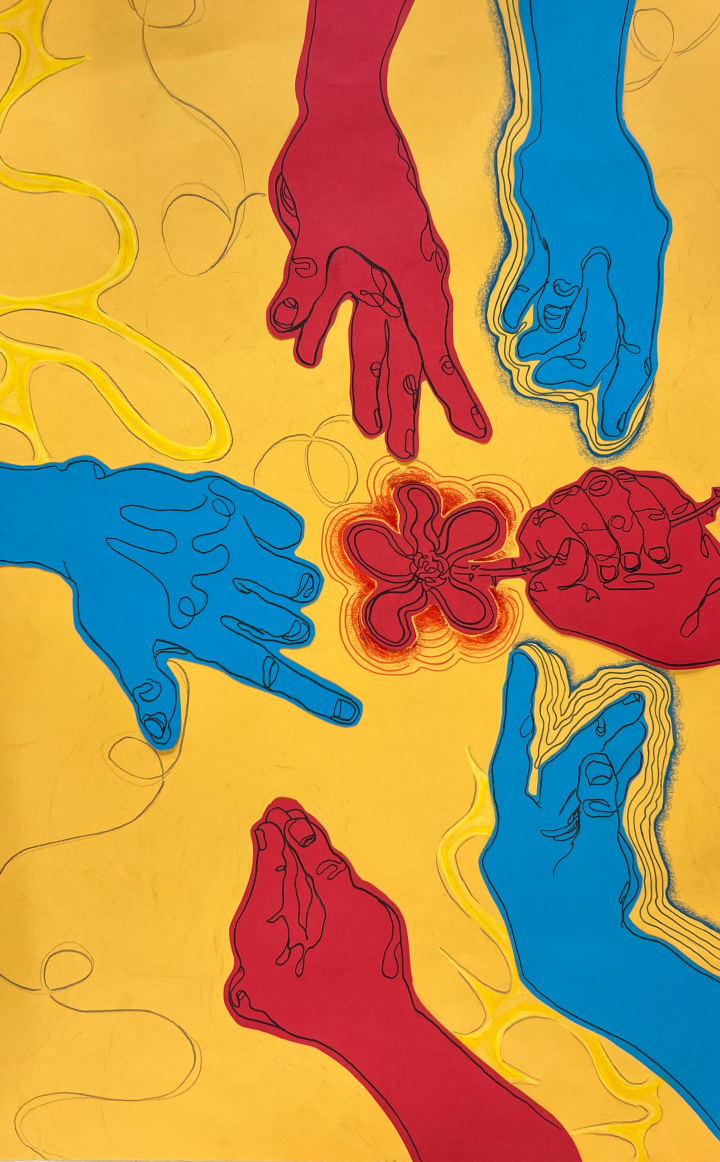
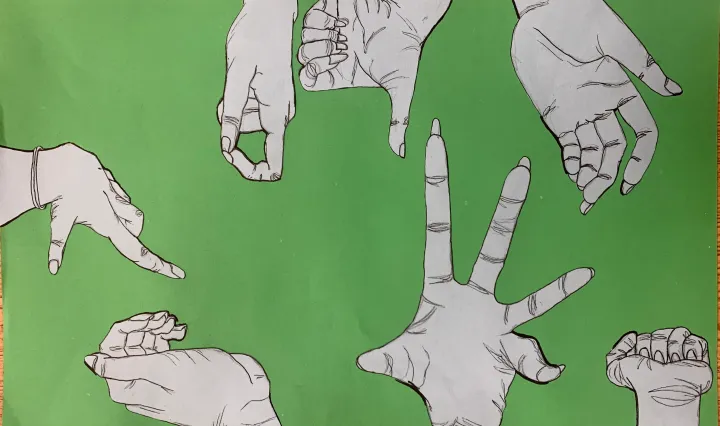
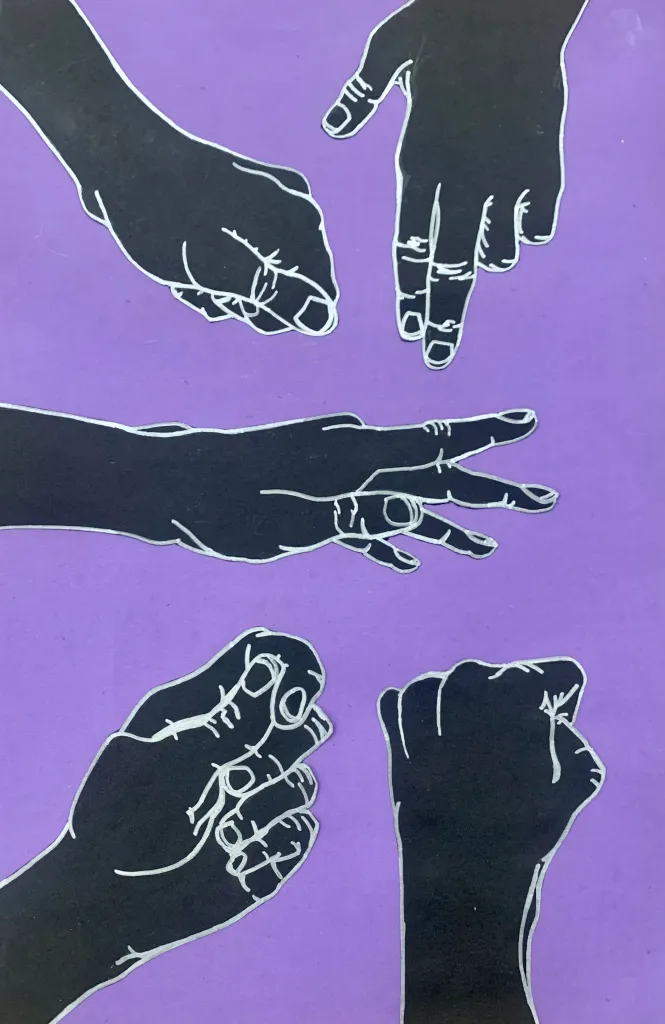
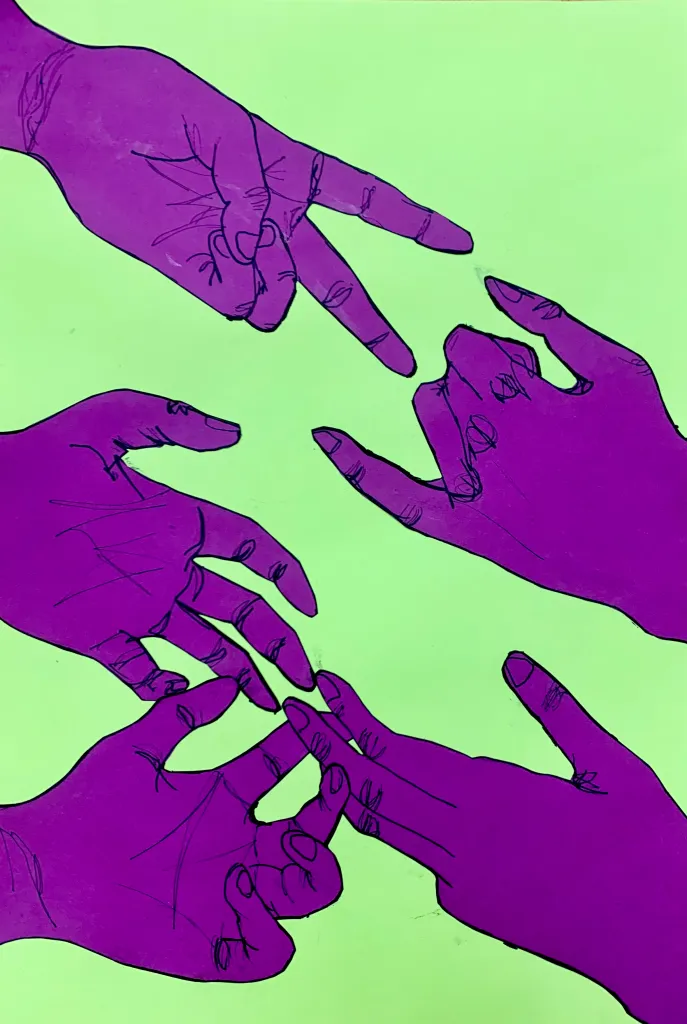
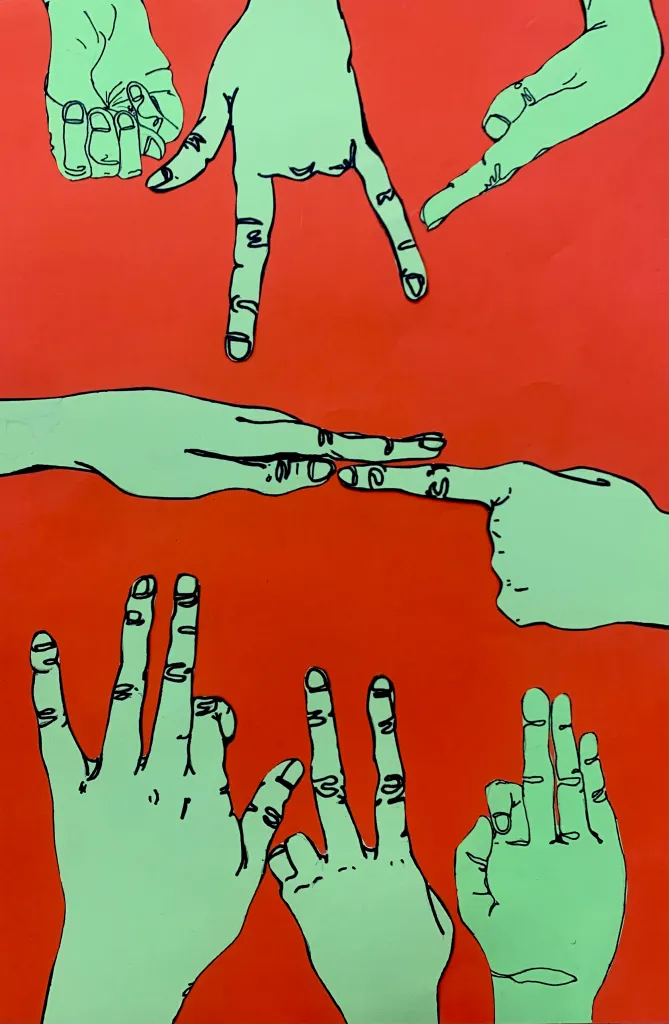
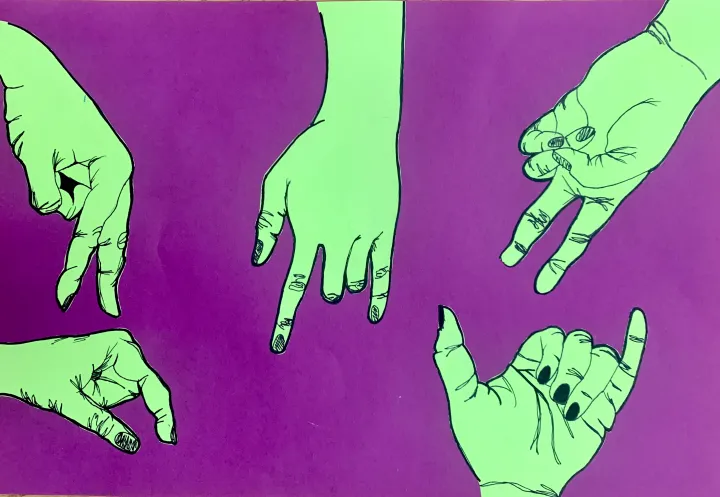
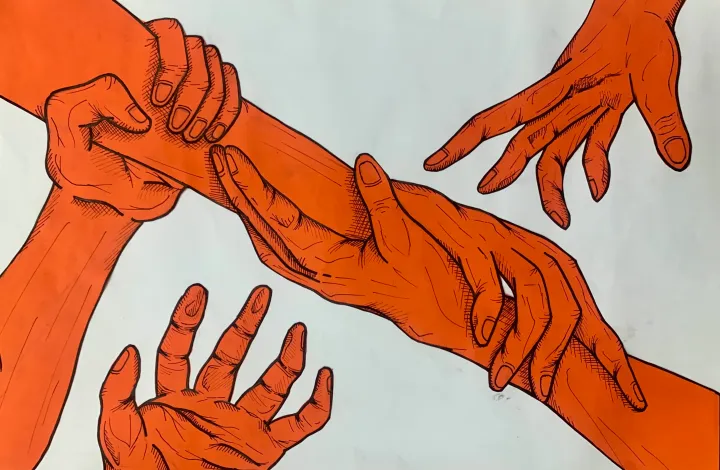
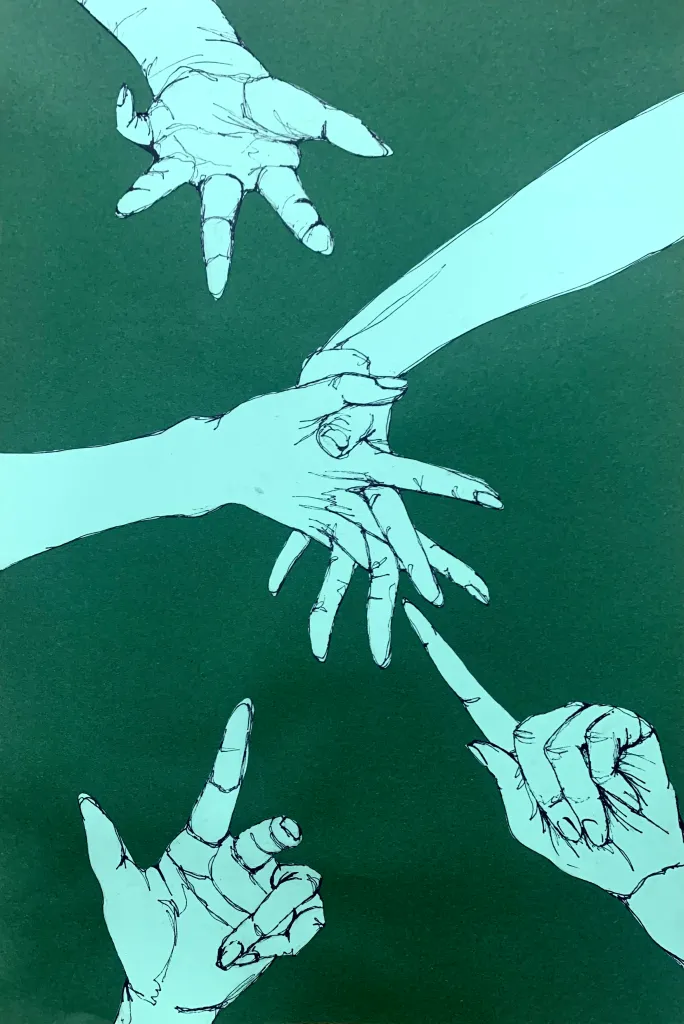
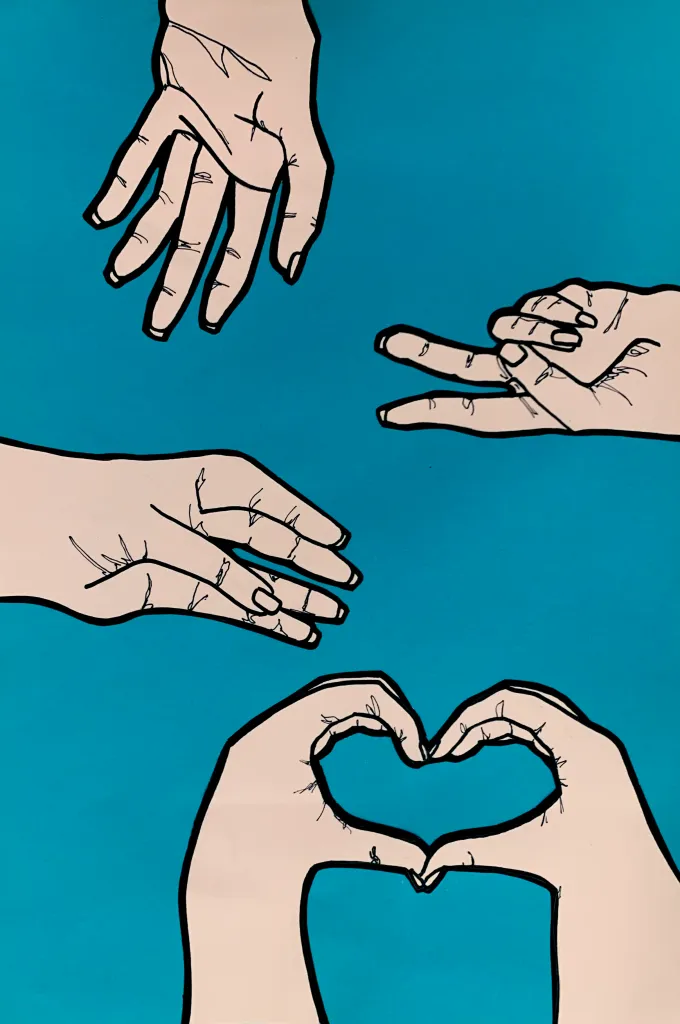
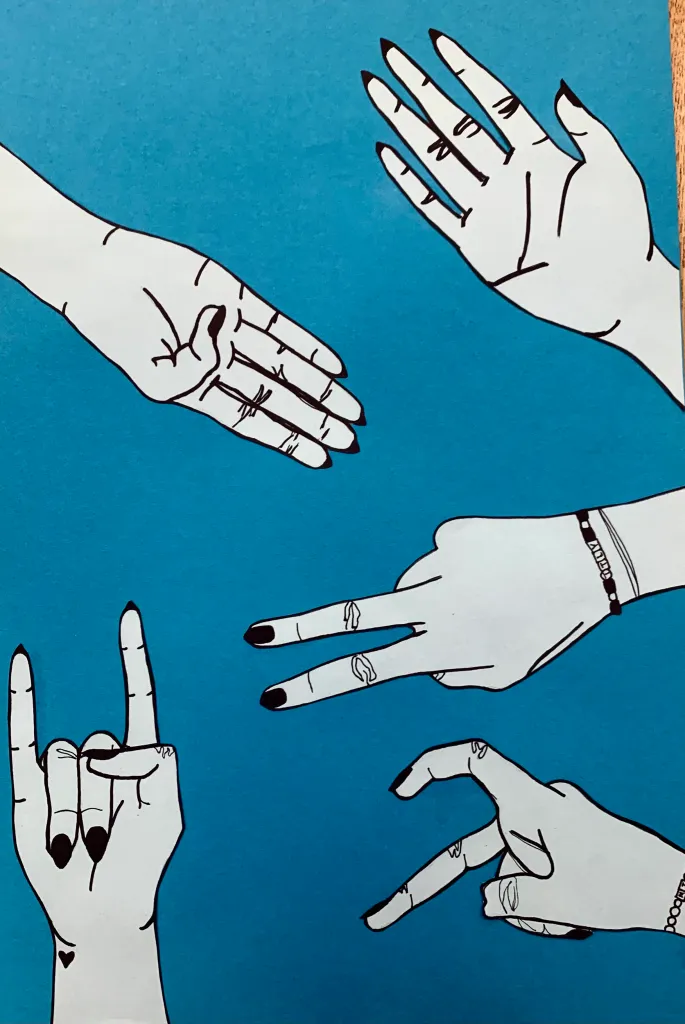
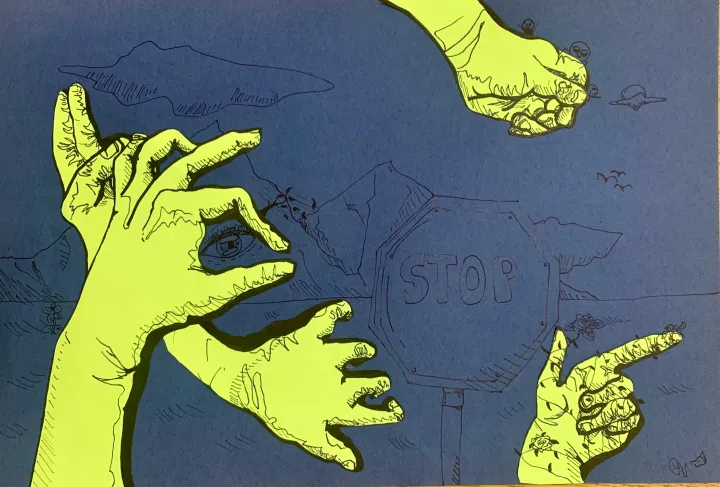
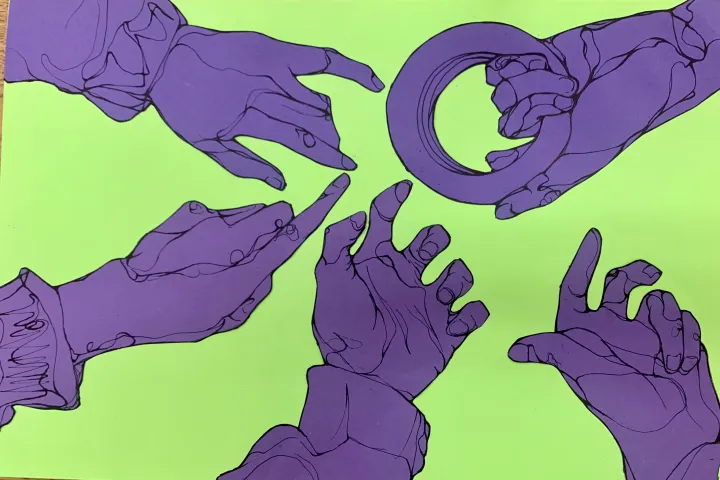
每次看到成果,我都惊叹不已。这些作品线条优美,意蕴丰沛。整个教学过程中,我最钟爱的环节,便是见证学生自信日益增长——他们的绘画能力正以肉眼可见的速度进步。当然,过程亦伴随压力,但最终呈现的成果,始终是学习成效最有力的明证。
美术史关联
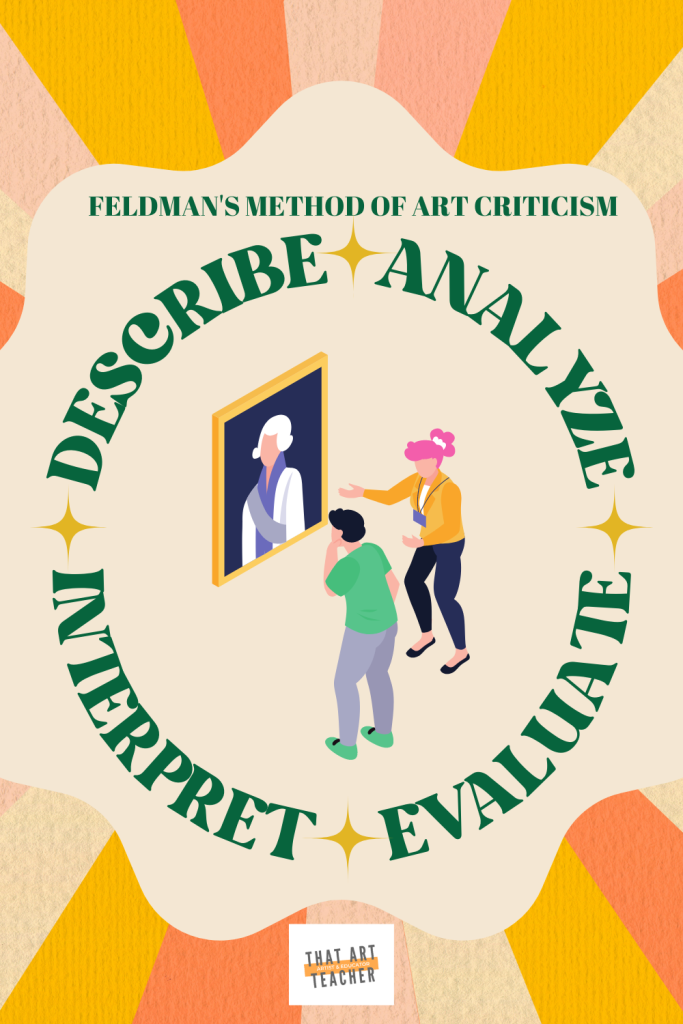
我的课堂每日以“费尔德曼艺术批评法”为切入点开展课前暖身活动。我会精选一件契合当周教学主题的艺术作品。谈及轮廓线绘画,毕加索自然成为首选——他那些高度简化的线条素描极具代表性。细观米开朗基罗《创世纪·亚当的创造》(没错,就是那著名的裸体形象)也饶有趣味:这幅图像家喻户晓,学生极易展开深入而富思辨性的解读。此外,我也乐于引入卡韦拉德拉斯马诺斯洞穴壁画(即“手洞”),探讨人类为何创作艺术,以及“手”何以成为如此强有力的主题。当然,还有许多当代及非著名艺术家同样运用此类风格进行创作。
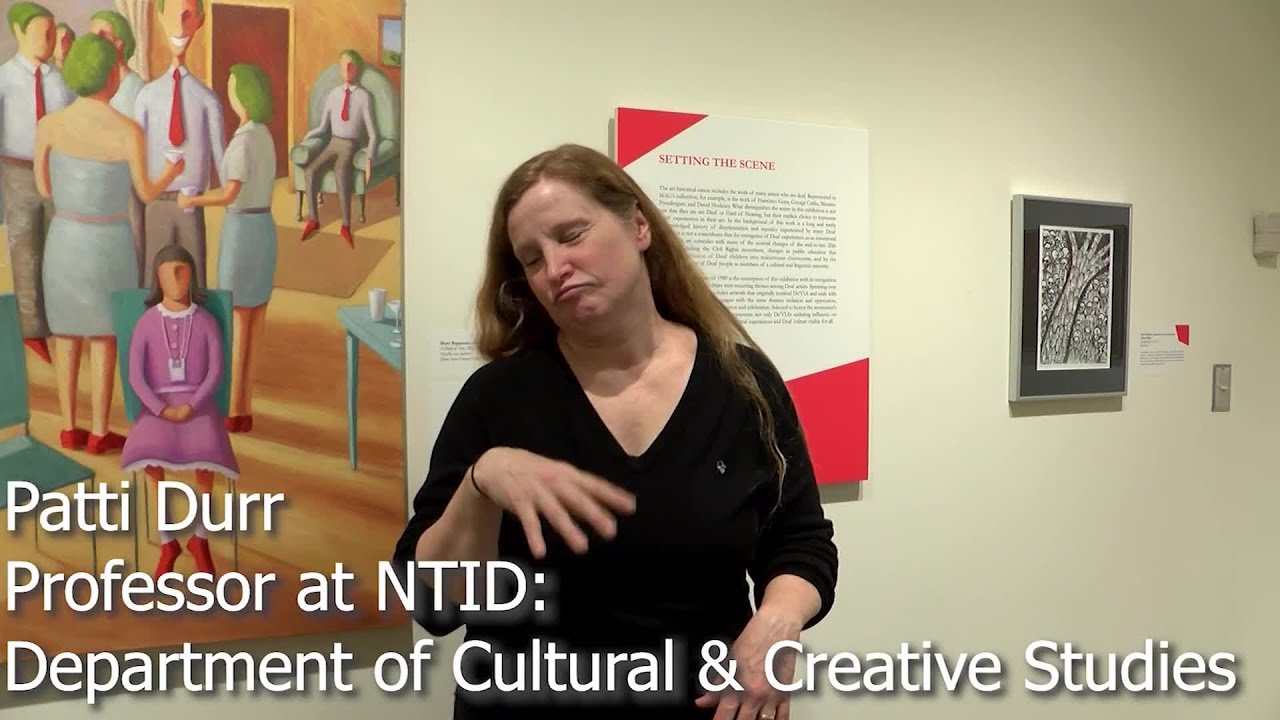
另一项绝佳的关联是De’VIA艺术运动。该运动旨在从文化、语言及交叉性视角出发,审视并表达聋人群体的生命经验。我们会赏析贝蒂·G·米勒的艺术作品,并配合观看以下视频:
这篇博文详述了每日美术史暖身活动的操作流程;您还可免费下载我的《手洞》讨论课件!
美术史暖身活动
手洞免费下载!
贝蒂·G·米勒课前暖身下载
万分感谢您一路坚持读到最后!欢迎订阅,以免错过任何一篇更新。
订阅那位美术教师

作者:希拉·马查多
2023年7月28日

作者:希拉·马查多
2023年7月15日
作者:西耶拉·马查多
2023年5月12日
Hand Contour Drawing
Original: https://thatartteacher.com/2023/09/09/hand-contour-drawing/
Date: 2023-09-09
Author: Sierra Machado
Categories: long form lesson plan
Tags: art education, blind contour drawing, Blind Contour Practice in the Classroom, classic drawing lesson, classic drawing technique, contour drawing for all ages, drawing art lesson, drawing for high school, drawing hands from life, drawing lesson that is not boring, featured, free lesson plans for high school, hand contour drawing, Hand Contour Drawing Inspiration, high school art lesson, high school drawing lesson, how do I get better at drawing, how do I learn to draw, how do I teach contour drawing, how do I teach observational drawing, how to draw a hand, how to draw from observation, learn to draw, modified contour drawing, Modified Contour Practice, observational drawing lesson, secondary art lesson plan, that art teacher, what is contour drawing
Hands are a tough subject. My students eyes get wide when I say we are going to focus on drawing hands from life. This hand contour drawing unit requires tons of guided practice and lot’s of encouragement along the way.
Hands are a great subject matter because they are so approachable, easy to come by, and are an incredible tool to communicate ideas, emotion and mood. You can say so much with your hands and students can explore a fundamental skill while learning to use their artistic voice. Students will be challenged, but it is a subject that builds so much confidence after disciplined practice.
Hand Contour Drawing At a Glance:
If you prefer a video over a blog post, this video will walk you (and your students) through everything I will outline in this blog post. It is classroom and Canvas ready!
Hand Contour Drawing Inspiration
Before there was Pinterest, there was the Incredible Art Department. You could search for lesson plans by topic and media that hundreds of art teachers generously shared. When I was student teaching in 2008, my cooperating teacher showed me the website and I was so relieved scrolling through a wide range of lessons.
There was a hand drawing lesson posted by Dave Haines that grabbed my attention as a first year high school teacher.
Using his student’s results as inspiration, I taught contour drawing to my first ever batch of Art I students, and to my amazement and relief, they absolutely excelled. I have tweaked and used this lesson to focus on observational drawing and given students the theme of communication throughout the years.
What is Contour Drawing?
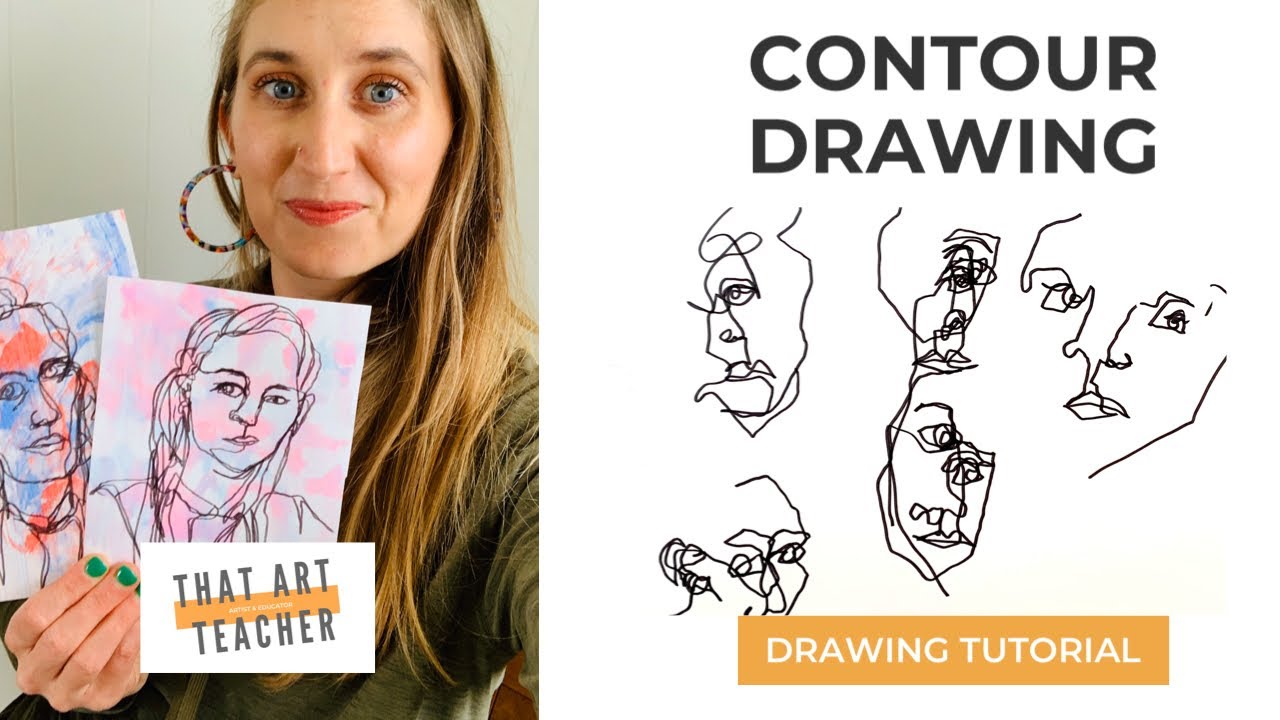
This video will walk you through each of the three types of contour drawing:
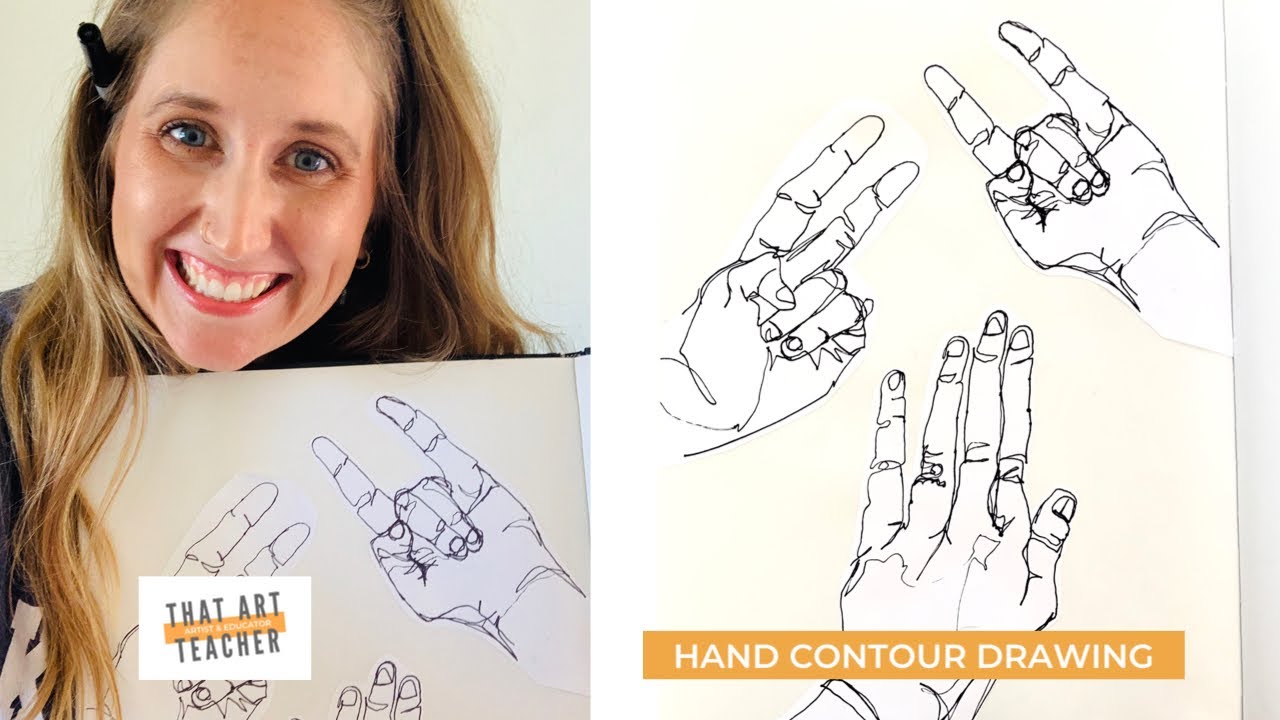
This video specifically focuses hand contour drawing:
Contour drawing is a fabulous technique to build confidence, develop observational skills and help students simplify objects to their basic shapes and lines. I truly believe this is the most helpful way to help students learn to draw, and I still use contour drawing in my sketchbooks all the time! Many students have their own style and perception of what objects look like, and this is a disciplined approach at looking at objects as they actually are.
My husband is a painting professor at a University in Oklahoma, and he views the practice of looking as a form of meditation. He often has his students draw blind contours for extended periods of time without any talking, music or any distraction besides looking with your eyes and letting your hand create what it sees.
Although my high school students have a hard time doing anything without distractions, you can hear a pin drop the first few exercises of contour drawing. The collective emotions of students finally looking at their paper is palpable. I LIVE for these moments in the classroom.
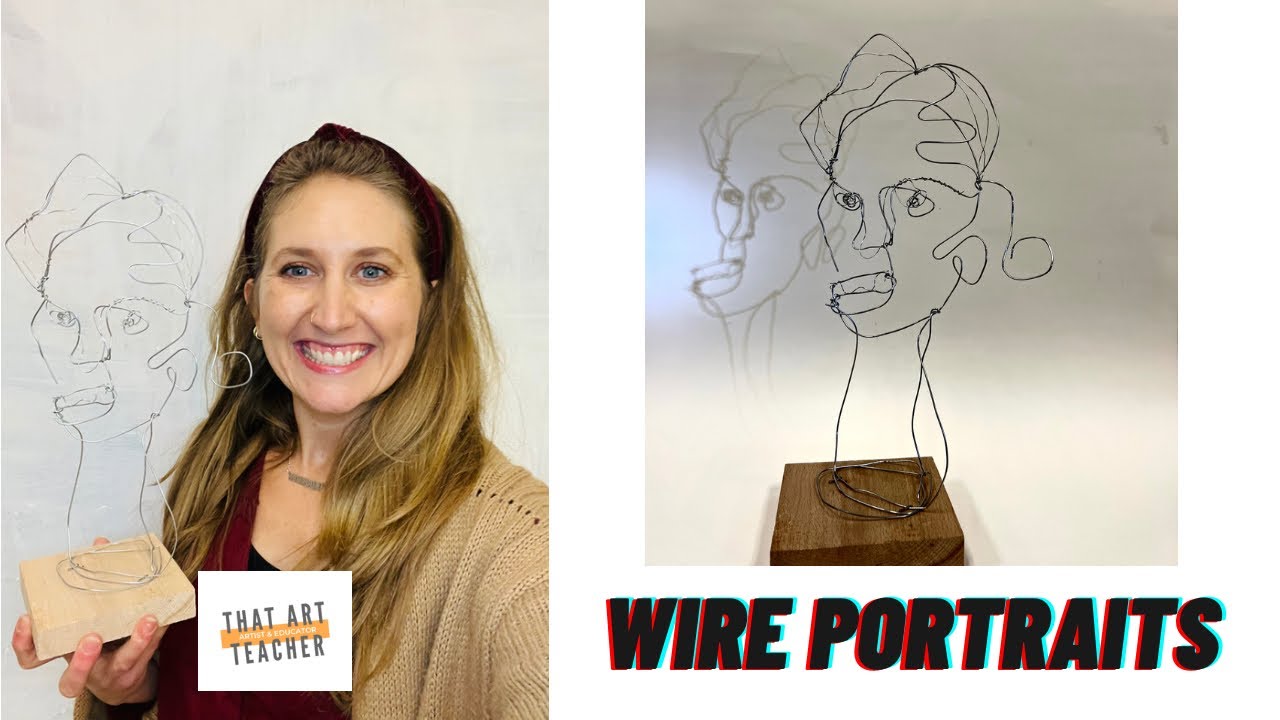
This technique is great for all ages, not just high school. These images are from my Art II students (a mix of 10th-12th grader who allegedly took Art I). I have successfully taught this to Art I and even Sculpture I students before we made wire portraits.
I loved teaching this to my former 6th graders and the results were VERY similar to what my high school students created.
Drawing on the Right Side of the Brain by Betty Edwards is a classic for this technique and many others. It helps break down drawing into manageable steps. I love that it has been continuously revised.
Blind Contour Practice in the Classroom
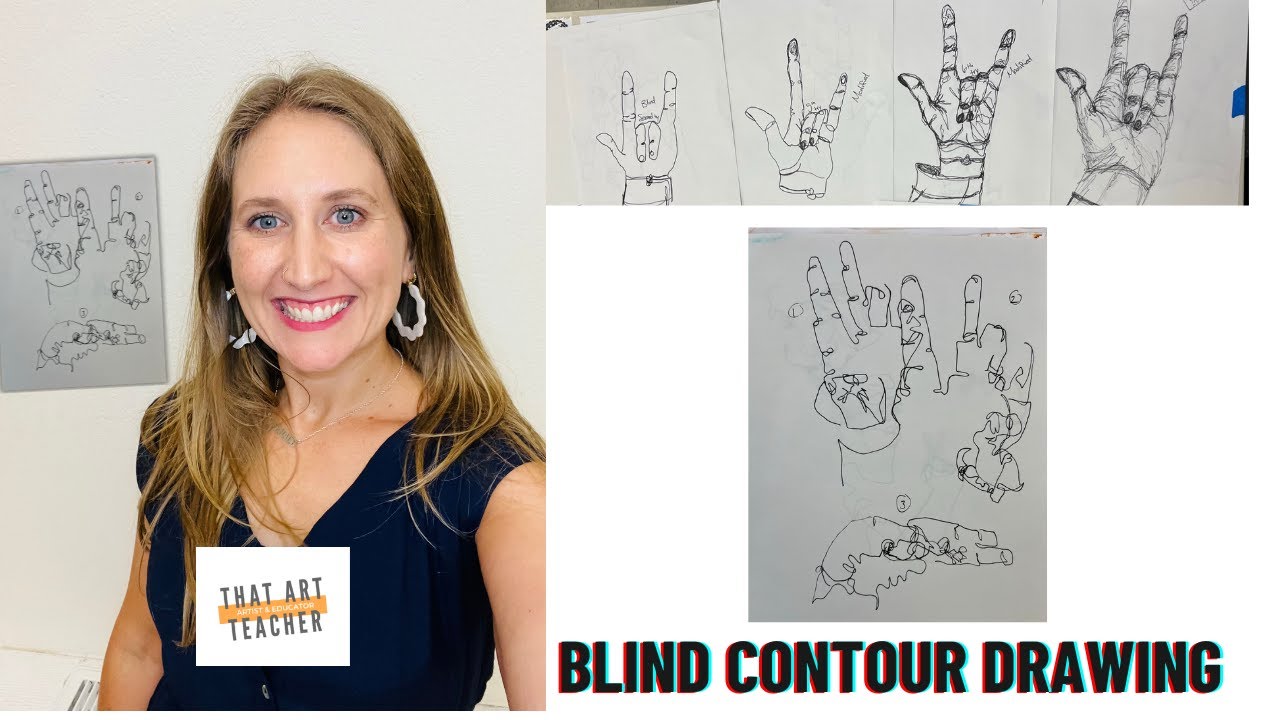
We start by doing guided practice with blind contour drawing. I set a timer for two minutes and they change their hand position each time. Many students will not be finished by the two minute mark, and many students will be very annoyed that you are timing them at all. I continuously remind them how important it is to slow down and focus on what the eye is actually seeing. Think of your pen as an extension of your eye- it moves around the object in tandem.
Blind contour drawing always creates laughs because…the drawings look like you aren’t looking at your paper! There will always be the student who just can’t let go of accuracy and tries to pretend they weren’t looking. I’ve seen teachers put up folders or have something to block their hand, but I just trust that students will commit to the concept. Disappointment is a part of life I’ve accepted.
Modified Contour Practice
We move on to modified contours where students can look at their paper a little at key transitional moments in the drawing. They should still look at their subject 90% of the time. The drawings still look wonky, but there will be more of a realism since they can check their work a little. Placement and size will become slightly more accurate. I remind students that their drawing looking like a perfect hand is still not the goal. Practicing hand eye coordination, pure observational drawing and letting go of preconceived notions of their subject is the goal.
Hand Contour Drawing Practice
Finally, we move on to contour drawing. Students can check their paper more often, maybe 80% of the time, but still rely on drawing while looking at the subject. I like to do a three minute timer for our guided practice so they can slow down and really focus on the details. Students will try to pick up their pen to capture their wrinkles and knuckles, and I have to continuously remind students that it is one continuous line capturing the outer edges of their hand.
This is where I really see confidence grow. They have been looking at their hand for a class period and a half at this point (I teach 45 minute classes) and they are typically happily surprised at their results. I encourage them to try a hand gesture that challenges them, it may turn out better than they think. A good way to challenge more advanced students is to have them hold something in their hand and add that to their drawing.
Hand Contour Drawing on Final Paper
Once we have practiced, we move on to our final paper. Students are most comfortable drawing their hand gestures in pencil first (contour style, of course) and then outlinelining them in Sharpie. These Sharpie pens are great, and don’t leave little ink blots when you hesitate in your drawing.
I really like this paper from Blick Art Materials because it has a great texture and does not fade.
***This post contains affiliate links to products I truly love and use in my classroom. If you use these links to buy something I may earn a commission at no additional cost to you. Thank you for supporting this public school teacher’s side hustle so I can continue to provide free content.
Some students like to look at American Sign Language to create meaningful pieces. Students also like to create hand gestures that communicate ideas and emotions in combination. I love when students add creative details to the backgrounds and add some signature style to their observational drawing.
Once they have the five (or more!) hand gestures they are happy with, they cut them out and arrange their compositions on a second piece of paper.
Hand Contour Drawing Results
I am always blown away by the results. They are beautifully drawn and communicate so much. My favorite part of the whole experience is seeing students confidence grow as their drawing abilities noticeably improve. There is also stress involved, but the end results are always a powerful evidence of learning.
Art History Connections
My classes do daily bellwork focusing on the Feldman’s method art criticism. I pick an artwork that highlights the topics we are covering in class. With contour drawing, Pablo Picasso is a natural fit with his simplified line drawings. It’s fun to look at a detail (you know, the nudity and all) of Michelangelo’s The Creation of Adam. It’s SUCH a famous image and students can interpret very easily and thoughtfully. I also love to throw in Cueva de las Manos (Cave of Hands) to discuss why humans create art and how hands can be such a powerful subject matter. There are many more contemporary and less famous artists that use this style in their work as well.
Another fantastic connection is the De’VIA art movement. This art movement seeks to examines and express the Deaf Experience from a cultural, linguistic, and intersectional point of view. We look at art from Betty G. Miller and follow it up with this video:
This blog post details the daily art history warm-up procedure, and you can download my Cave of Hands discussion powerpoint for free!
Art History Warm-Ups
Cave-of-HandsFREE Download!
Betty G. Miller BellworkDownload
Thank you so much for sticking it out to the end! Subscribe so you never miss a post.
Subscribe to that art teacher
by Sierra Machado
July 28, 2023
by Sierra Machado
July 15, 2023
by Sierra Machado
May 12, 2023
