肌理瓷砖|陶艺教案
原文链接:https://thatartteacher.com/2019/11/09/how-to-make-textured-tiles-slab-clay-lesson-plan-art-teacher-diy/
日期: 2019年11月9日
作者: Sierra Machado
分类: 长篇教案、雕塑
标签: 艺术、艺术教育、艺术教案、美术教师、艺术教程、艺术家、艺术家社群、陶艺、陶土、陶艺教案、小学美术、精选内容、高中美术、如何教学、如何教授陶艺、如何使用陶土、电窑、初中美术、油画棒、制陶、刻痕与抹泥、泥板、泥板成型、教学、肌理、That Art Teacher、YouTube、YouTube艺术家
陶土可能是美术教室里最令人欣喜、也最令人头疼的材料。它既为学生和美术教师带来奇妙而强烈的体验,又充满挑战。一旦学生克服了陶土“脏乱”的心理障碍,便会完全沉浸于这种触感丰富且耗时漫长的创作过程——那神秘莫测的电窑、反复不休的修坯打磨、永无止境的刻痕与抹泥……
我超爱教陶艺!
话虽如此,教学过程也可能令人倍感压力:清晨赶在上课前烧窑、不得不告诉学生——他们花了一个月精心制作的作品在窑中炸裂了、指甲缝里洗不净的泥垢、从美术教室一路延伸至校园各处的泥脚印……
我依然超爱教陶艺!
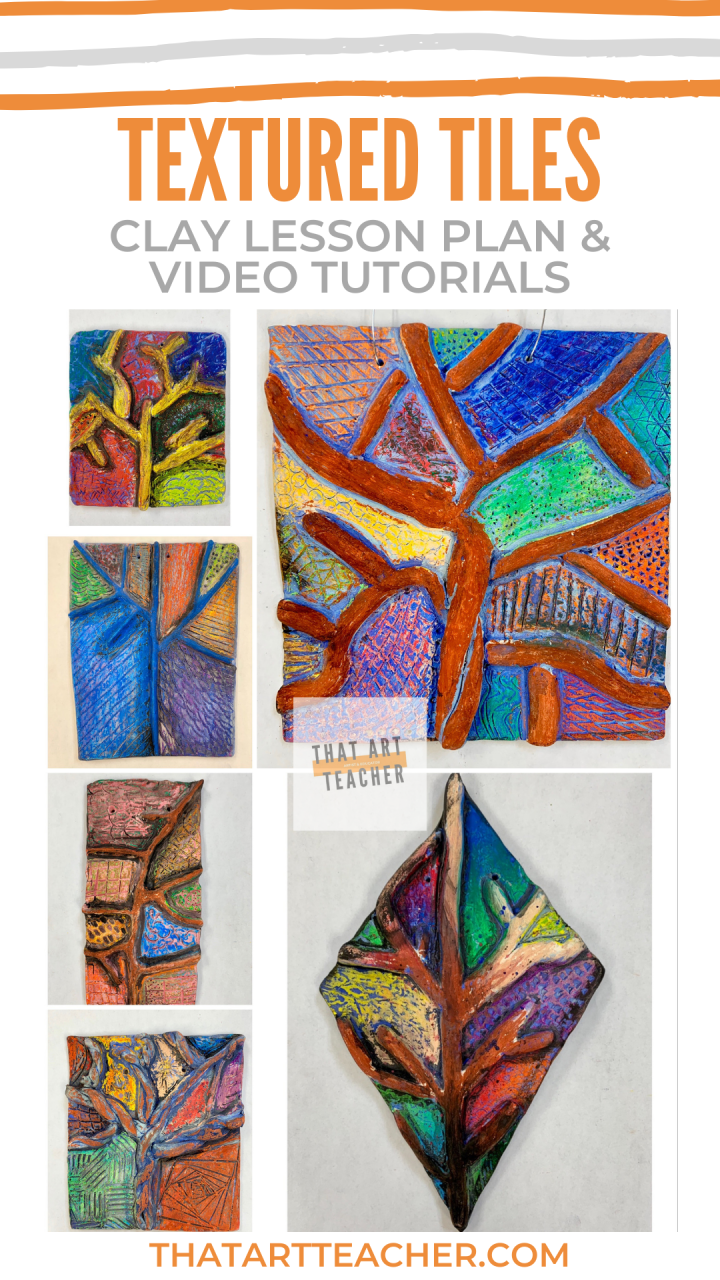
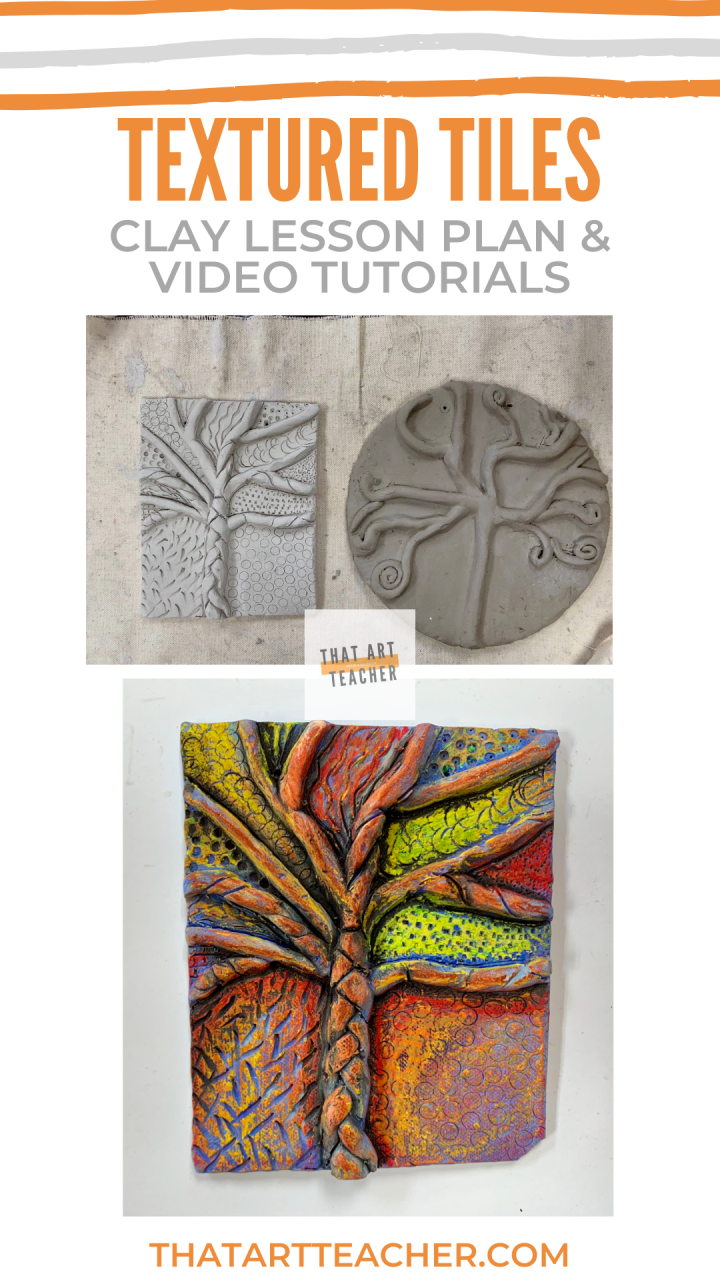
我首次将这堂泥板课授给五年级学生,正值学年伊始。我校学区近期刚完成为全区美术教师统一采购电窑的工作,并随窑一并运来几箱陶土。我想为这群坐不住的10–11岁孩子设计一堂动手性强、又易于上手的课程。此前我们刚完成单色风景画练习,因此我认为“生命之树肌理瓷砖”这一主题,能完美衔接我们正在研究的艺术家们。
第一部分:泥板擀制!
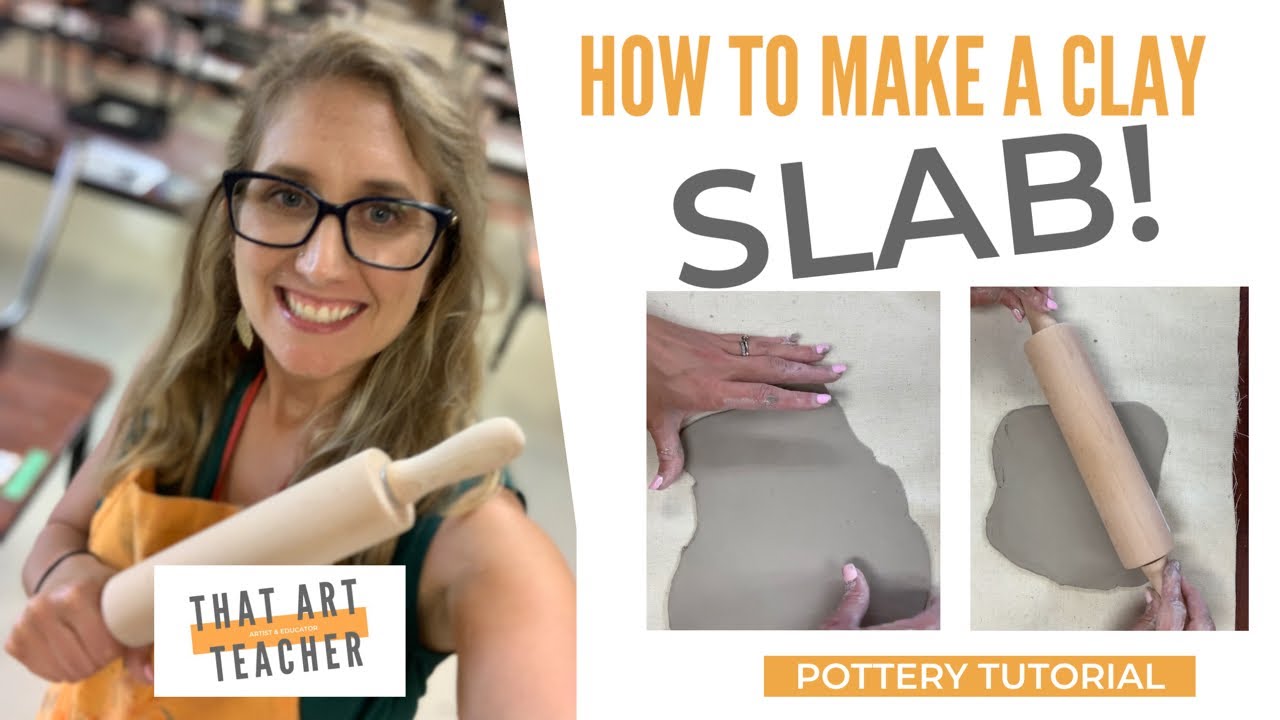
学生正式擀制泥板的前一天,我们先观看这段视频,并围绕相关问题展开讨论。每位学生领取一个自封袋,并在袋上写明自己的姓名;同时领取一块硬纸板或卡纸,作为泥板晾置的基底。由于我每节课仅有40分钟,因此前一日的充分准备至关重要!
下一节课,我们再次播放该视频,并重点回顾关键步骤或答疑解惑。学生已穿好围裙,个人专属收纳袋也已备妥待用。每位学生取一小块帆布铺于桌面(旧报纸亦可),并与同桌共用一根擀面杖。#公立学校预算限制。
我强烈建议在课前一日或当天清晨,就将陶土预先分割成便于操作的小块。我做到了吗?并没有。结果导致整个流程比预期耗时长得多。
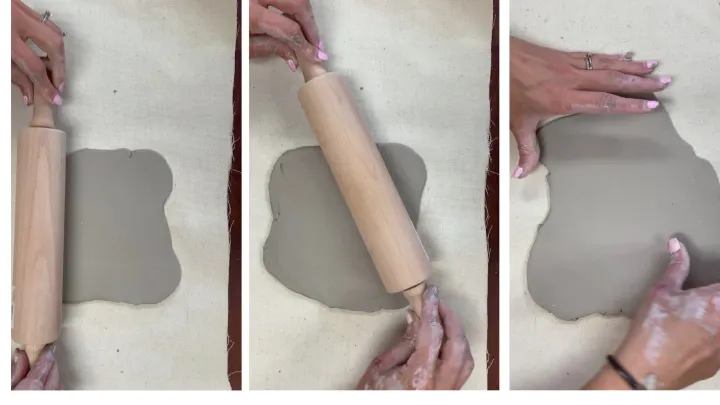
学生回到座位后,立即开始揉泥,并随即擀制泥板。提醒学生:揉泥应压成扁平状而非球形;持泥时需悬空于桌面之上,切勿用力按压桌面。正式擀制泥板时,务必让学生使用帆布(或旧报纸)垫底,否则泥板极易粘连桌面——不妨问问我的第一节学生。还有学生试图用拳头捶打陶土,不知这招从何学来;我只得不断提醒:“擀、擀、擀,翻面、转动!” 我一边循环播放视频,一边在教室里来回巡视,指导这群正专注擀泥的十岁孩子。有那么一刻,我的心率飙升至每分钟130次——已达有氧运动区间!我甚至分不清自己该为此自豪,还是该为此担忧。
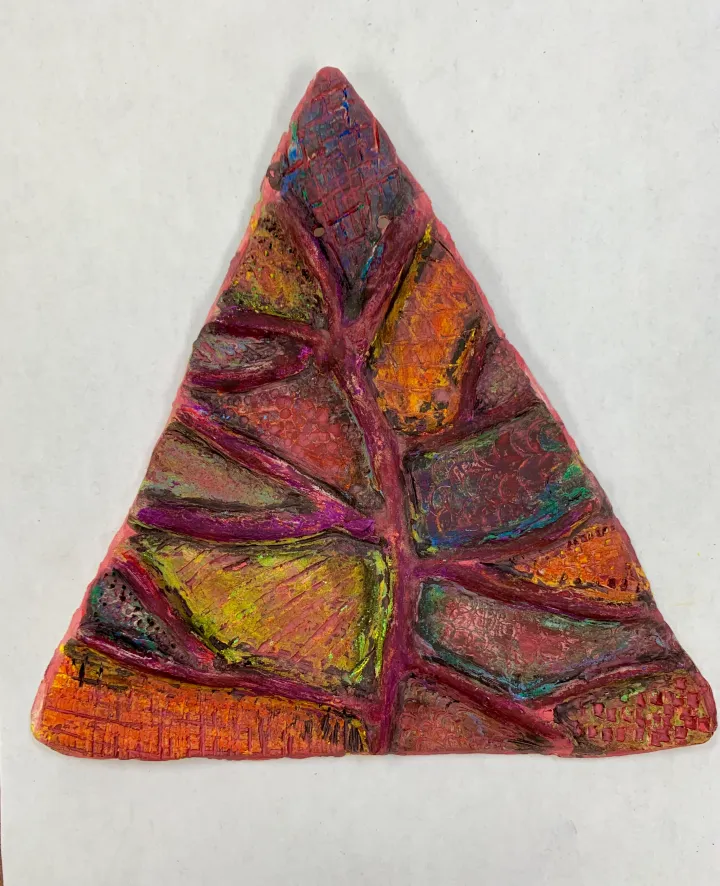
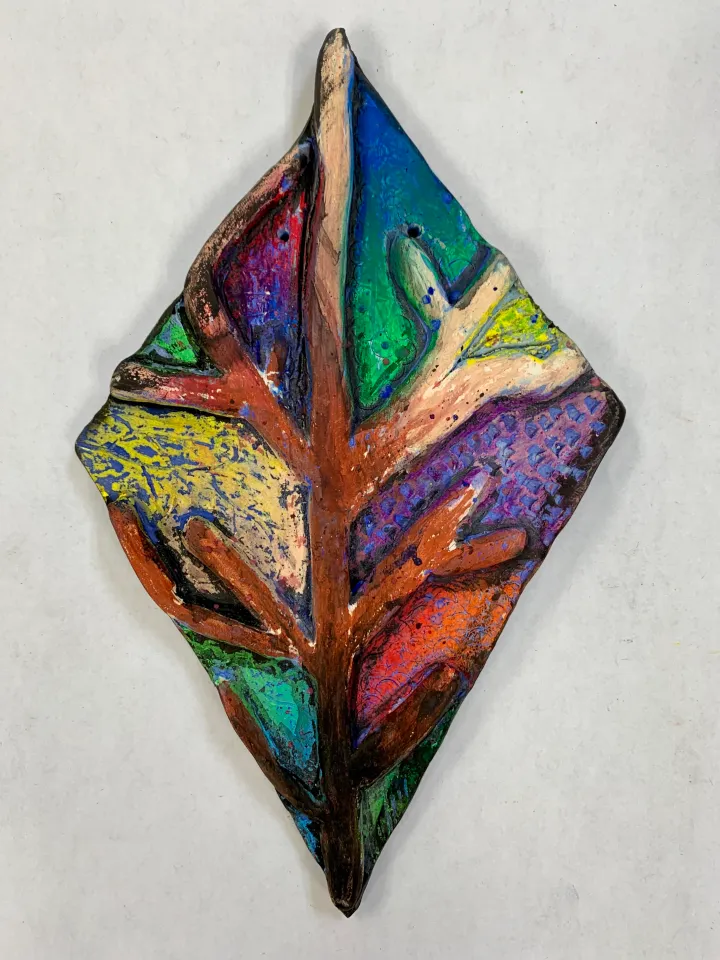
下课时,大多数学生应已擀出厚薄均匀、不过于单薄的泥板。我曾以“煎饼厚度”作比喻,但这其实并不精准——毕竟每张煎饼厚薄不一。不过学生心领神会。随后,学生可自由裁剪泥板形状。圆形数量最多(因桌上已有圆形调色盘可供描摹);方形与矩形也颇受欢迎(或许受视频范例为方形的影响);此外还出现了不少富有趣味性的自由形态、菱形及三角形泥板。
所有剩余陶土均交还给我,喷水保湿后存入密封容器,留待明日——即“泥条成型”环节使用!
第二部分:泥条!
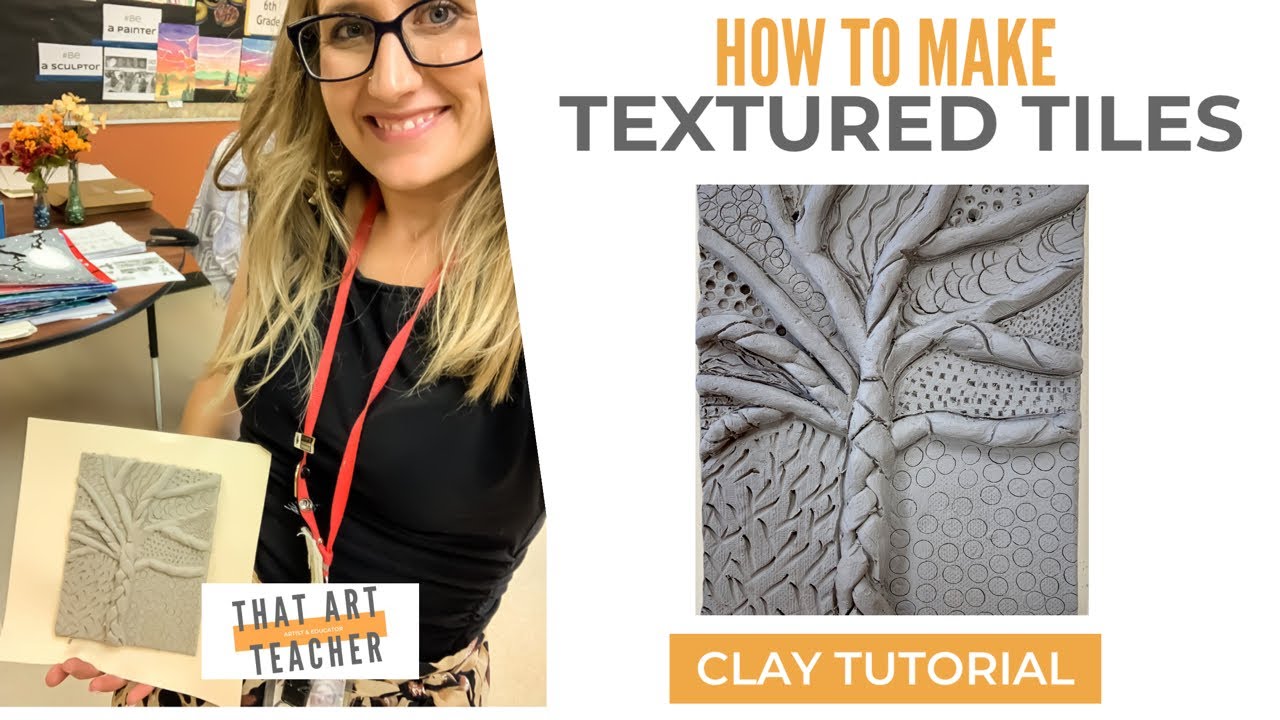
第二节课,我们观看我的教学视频,至3分30秒处暂停。本节课聚焦泥条制作;而“刻痕、抹泥与揉合”技法则留待第三天讲授。
这一环节趣味十足。学生首先用约鸡块大小的一小块陶土练习搓制均匀泥条——并非麦当劳那种大鸡块,而是更接近赛百味(Chick-fil-A)的小鸡块。学生们对这段即兴的“鸡块讨论”兴致盎然。我在教室中巡回指导,边走边为学生竖起大拇指或提出建议。获赞者即可前往陶土供应台领取另一块“鸡块陶土”。没错,我吸取了教训:所有“鸡块”均已提前切好、整装待发。(特别鸣谢六年级高级美术班同学,他们于前一天为我预备好了全部鸡块!)
本节课不进行任何刻痕与抹泥操作。 搓制泥条对部分学生而言是本能反应,上手极快;但对另一些学生却可能造成压力。到第二天结束时,所有学生都已成为泥条高手。(感谢橡皮泥的日常训练!)我很欣慰地看到学生信心渐增,开始尝试编辫、扭转等进阶手法。
实用小贴士:务必要求学生将整块“鸡块陶土”全部用于搓制泥条。 切勿允许学生交回任何“已用陶土”——这些泥料很快变干、质地污浊,最终只能由你这位老师独自承担回收再利用的繁重工作。每位学生最多领取三块“鸡块”(通常两块足矣),且必须将每一块都搓成泥条。学生将所搓泥条逐一平铺于自己的泥板之上,以便明日……
第三部分:刻痕、抹泥与揉合!

我们上课时先观看一两分钟的泥条盘筑视频作为复习,再继续看到第6分30秒处。我特别强调这一步的重要性:一旦陶泥完全失水,各部件就再也无法粘合了。
我们花几分钟时间,用竹签在陶板上画出一棵基础树形。原以为这步会耗时更久,但其实最初只需画出主干和几根主要枝杈即可。学生一边制作枝杈,我一边巡视检查;他们需先刮擦(score)、再涂泥浆(slip),最后揉捏融合(blend)其中一根枝杈。我告诉他们:泥浆用量要足够,当把泥条按压到陶板上时,应有少量泥浆从边缘挤出——就像咬一口冰淇淋三明治那样。(我真的很爱用食物作比喻。)
学生最常忘记的是:同时刮擦泥条与陶板两面。另一个反复出现的问题是:他们没有将泥条充分按压下去,或未将泥条边缘与陶板揉捏融合,我称其为“分离线”。这一点我几乎每天都要重申并再次示范。
整整两个课时都用于刮擦、涂泥浆与揉捏融合泥条。大多数学生已在泥条制作日完成了全部所需泥条;少数人还需再取一小块陶泥补做。我要求每位学生至少做出七根枝杈,且其中大部分枝杈须延伸出至少一根分枝,直至陶板边缘。
我让学生在陶板背面刻上自己的名字;随后我用针具在陶板顶部打两个孔,以便日后用金属丝悬挂展示。此举也给了我机会逐一检查学生的刮擦、涂泥浆与揉捏融合效果。我甚至曾戏剧性地当场拆下那些明显未牢固粘接的泥条。
第四部分:肌理
这才是真正最有趣的部分!此时学生已自信满满,俨然成为熟练的陶艺师,且清洁整理流程早已驾轻就熟。学生观看我的教程剩余部分,随即开始添加肌理与雕刻纹样。此前,我的学生已创作过禅绕画(Zentangle),对设计纹样早已得心应手。这一环节进展相当迅速——第一节课结束时,大多数学生已几乎填满所有区域。接着,他们迎来了……令人着迷又略带强迫症的打磨与清理!
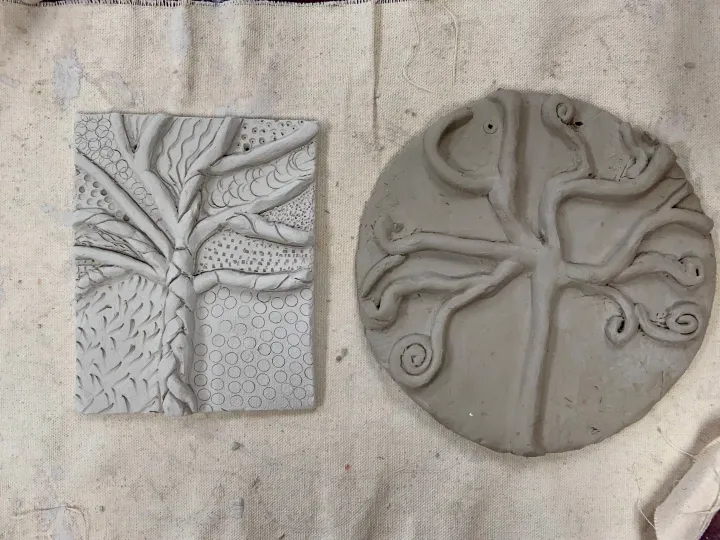
我们用海绵与泥浆刷,将树干与枝杈边缘抹平。完成第二天的肌理制作后,学生需将陶板取出布袋,仅以布袋轻覆于陶板之上。这样既可使陶泥自然阴干至皮革硬度,又避免干燥过快。第三天——也是最后一天——学生用竹签精细修整肌理,并用一支干燥的画笔拂去表面碎屑(我称之为“脆皮渣”)。我提醒他们:一天之内不可能将陶板彻底清理干净,但务必尽可能清除所有散落的陶泥碎屑。
textured-clay-tile-rubric
学生在进行作品评估与量规打分当天,连同布袋一起提交陶板。我会一直用布袋盖住陶板,直至评分完毕,再统一装窑。我已发现:待陶板达到皮革硬度时装窑,能有效防止破损——因为此时它远比完全干透时结实得多。但请务必确认陶板已彻底干透,方可启动电窑!陶板需在窑内静置至少48小时,具体时长则取决于初始干湿程度、环境湿度、陶板厚度等因素。我喜欢把“难搞的作品”集中放置,并置于窑内易取位置:若遇到特别厚实的陶板,我希望能赶在窑温升至1900华氏度前及时取出——否则残留水分受热汽化,将导致陶板爆裂飞溅!若陶板摸起来仍凉,说明尚未干透;若你还在犹豫它是否够凉——那它就是凉的。再等一天。
第五部分:表面装饰!

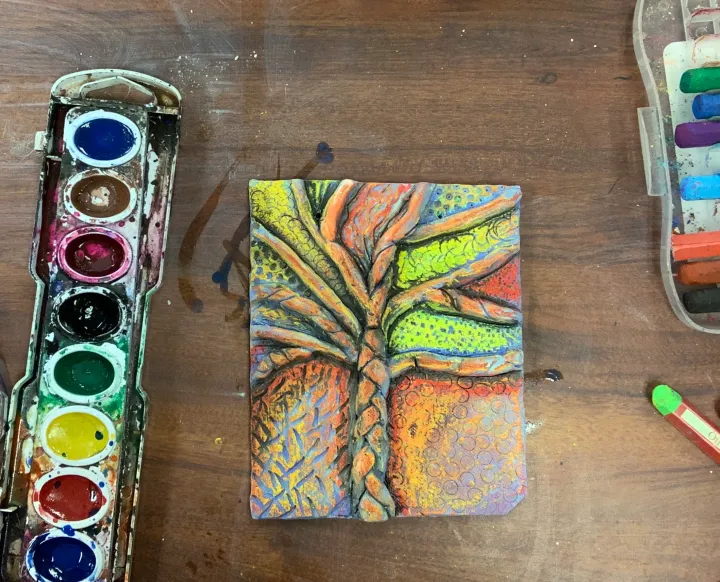
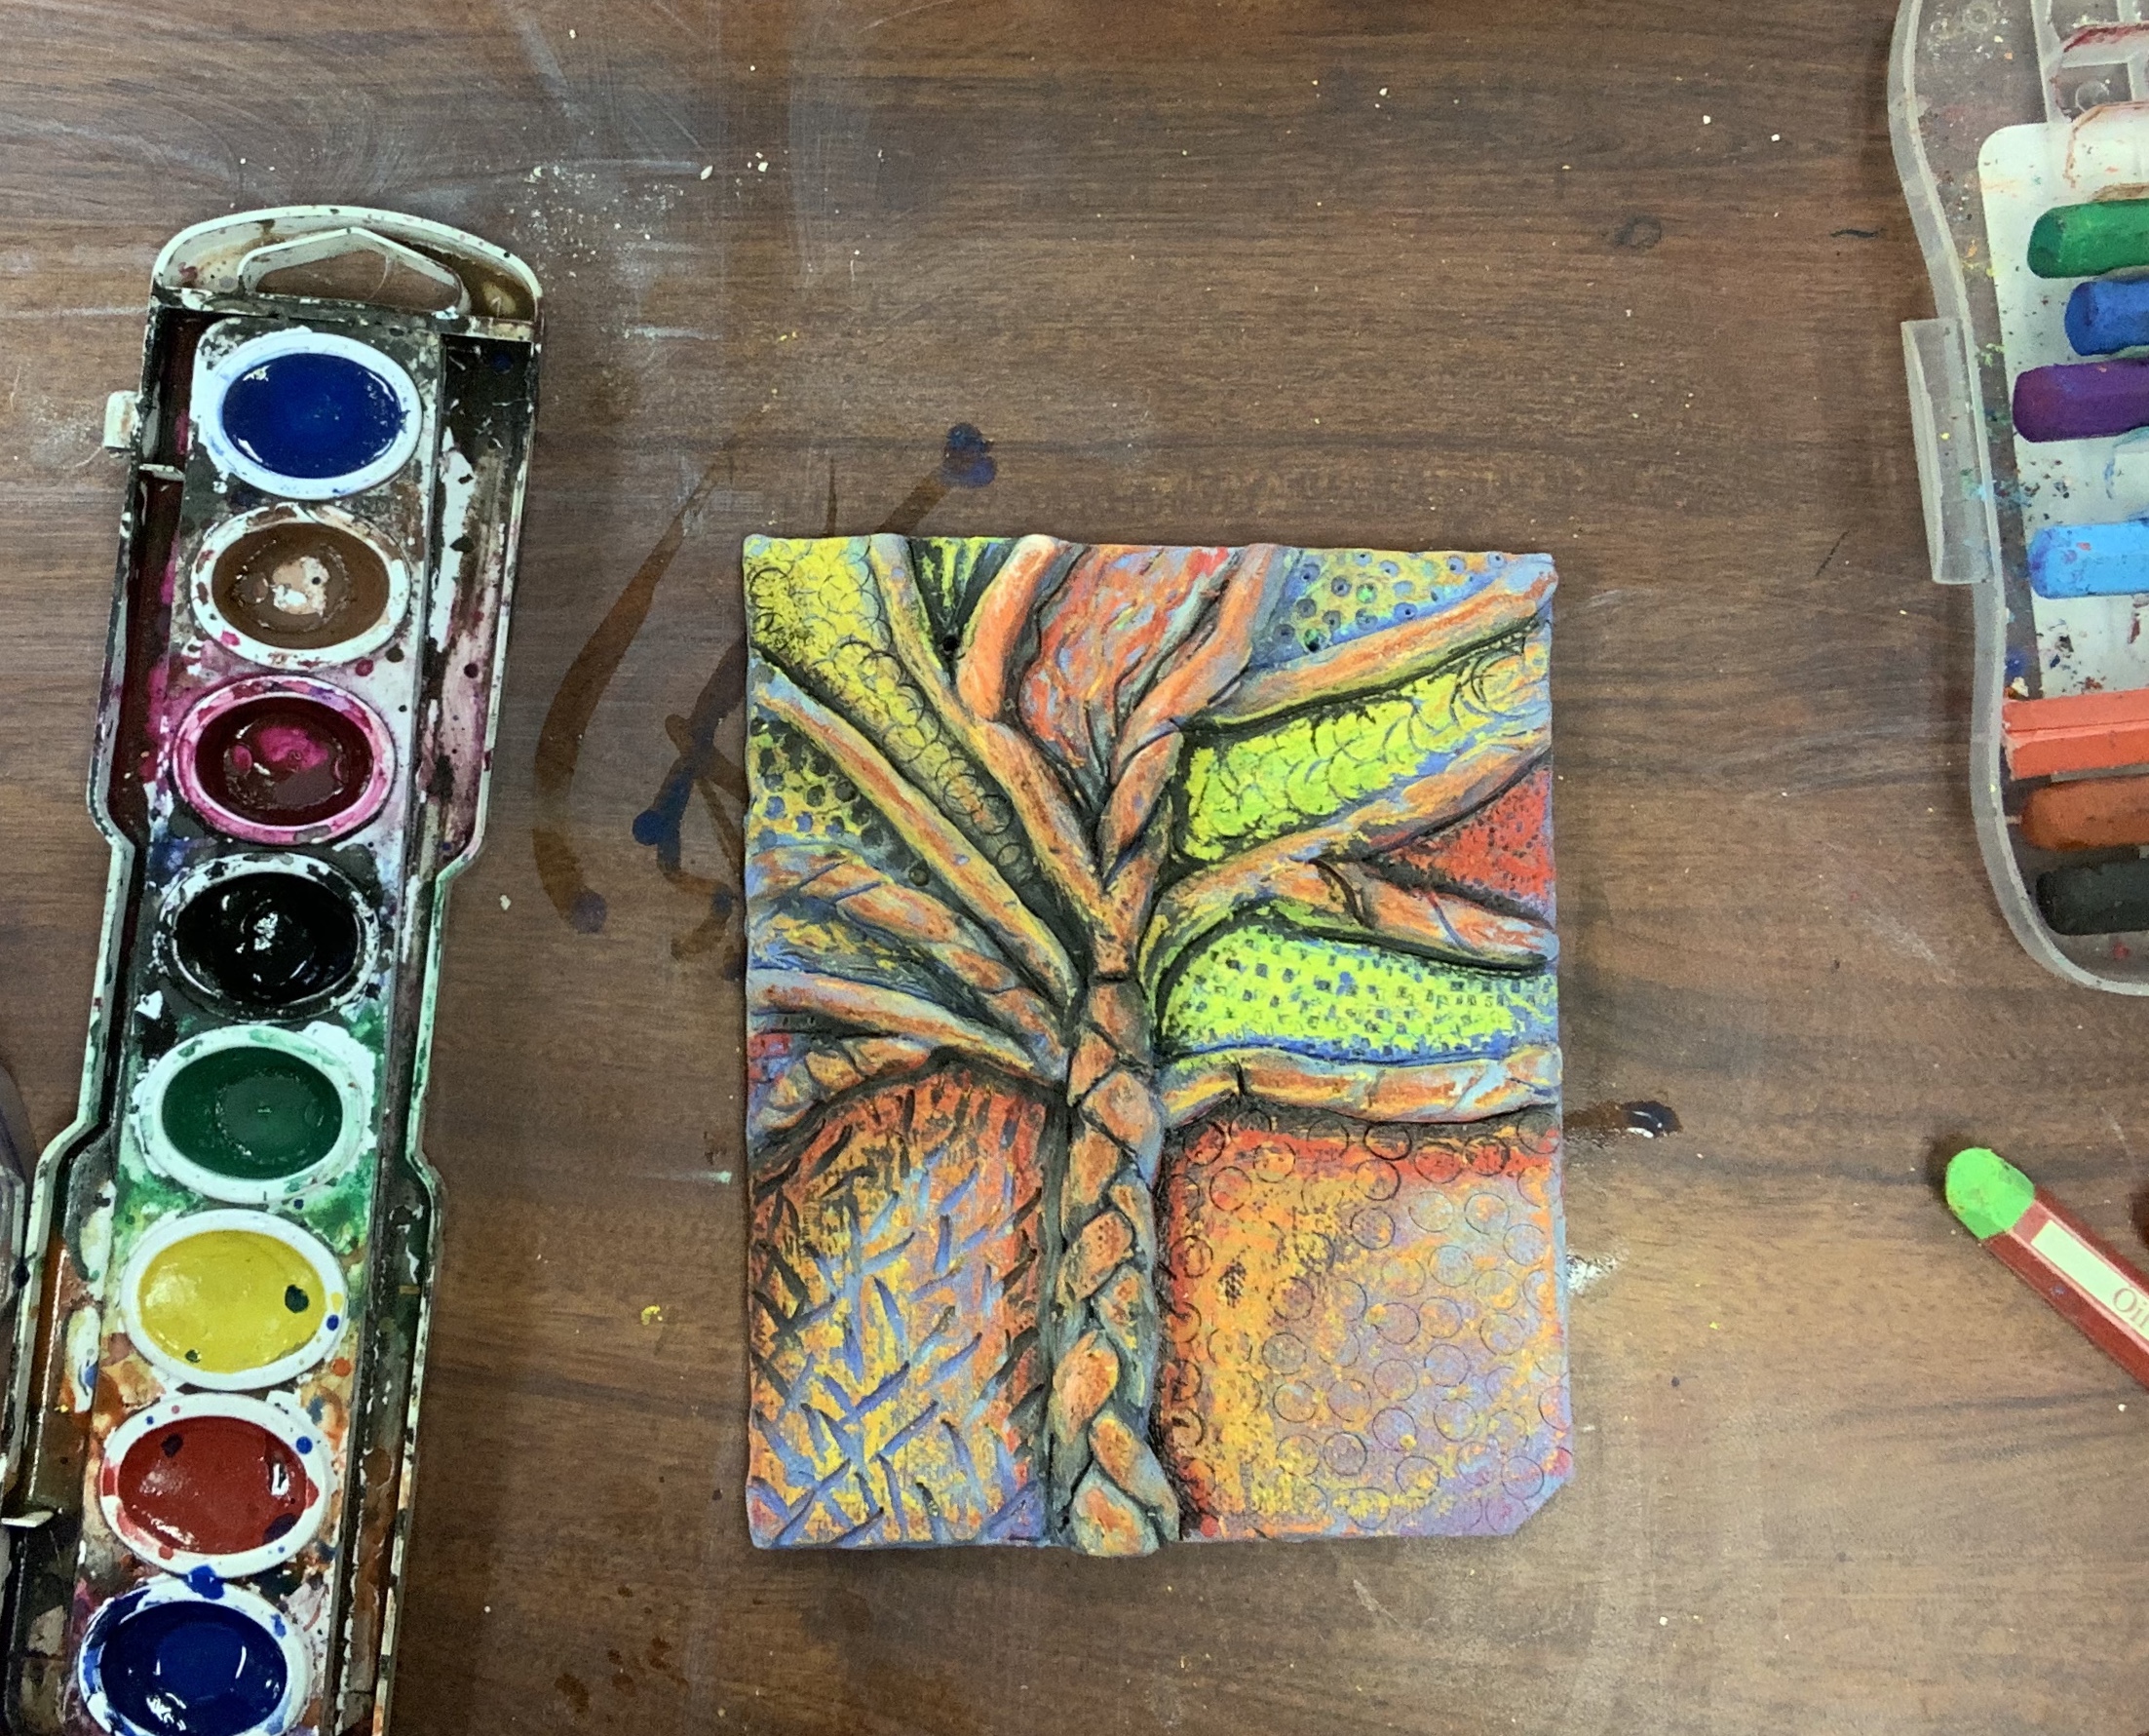
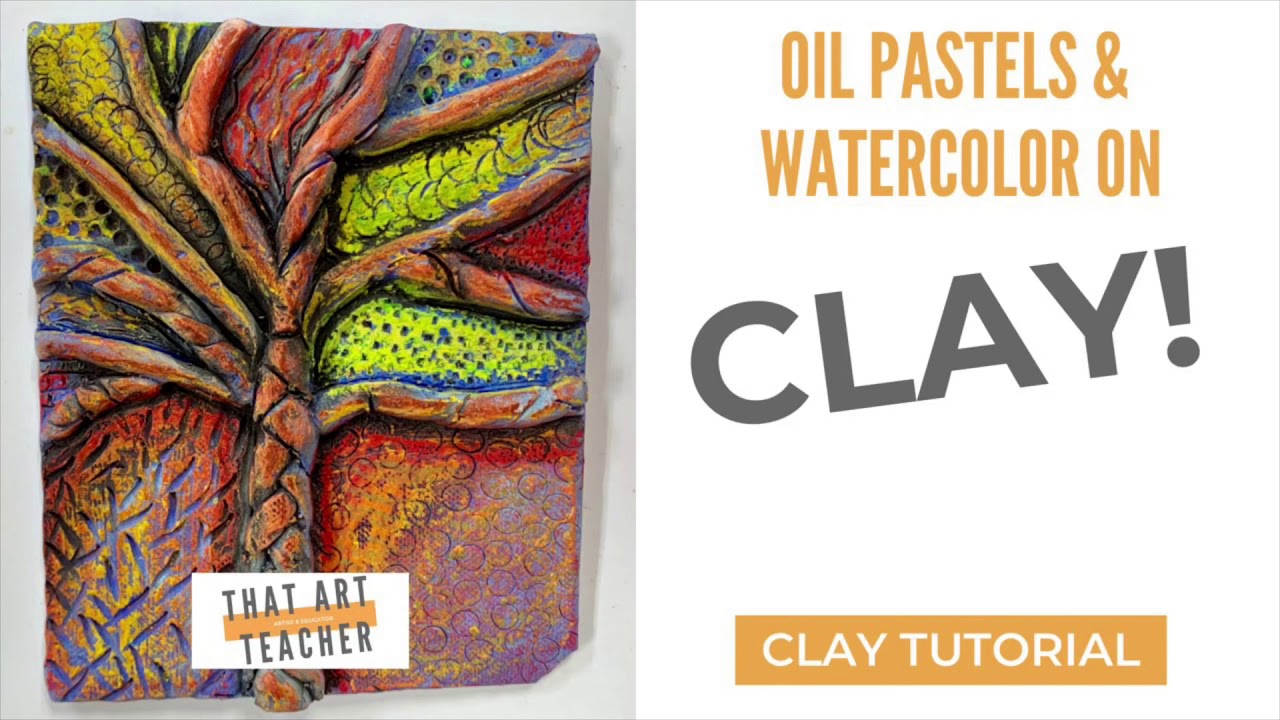
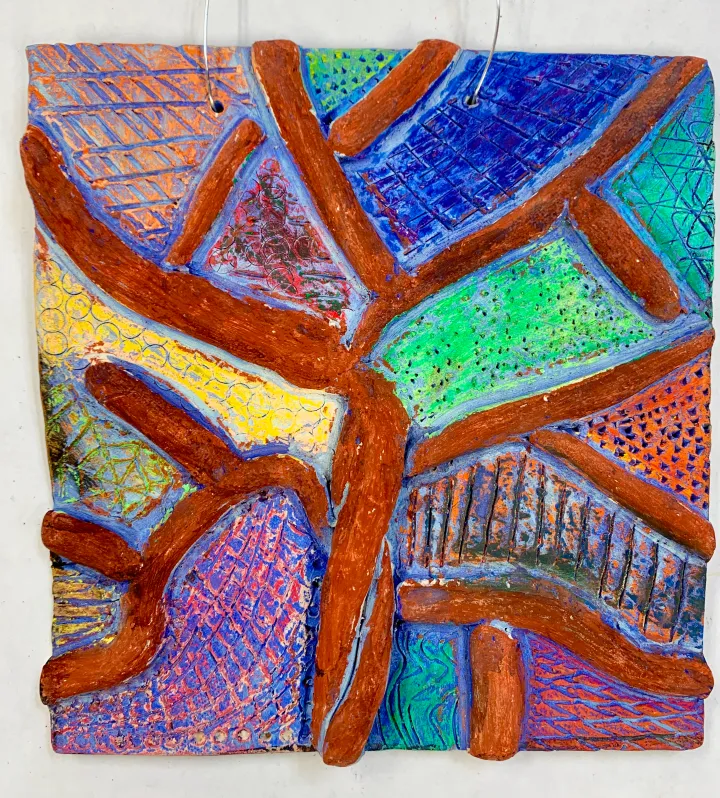
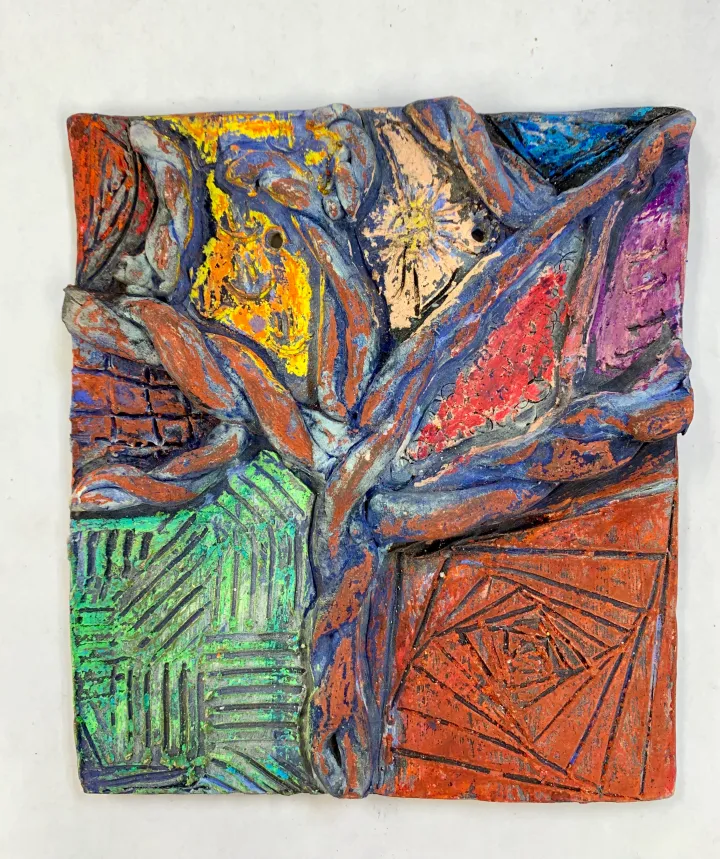
可选方式无穷无尽:施釉、彩绘、彩铅等等。这次我尝试了一种新方法:水彩与油画棒防染技法。起初,我极其讨厌它——油画棒在生坯表面涂抹时显得非常粗糙,手感也极不协调。然而,啊哈!水彩的魔力来了。水彩的对比色衬托在油画棒线条之后,令所有肌理瞬间跃然而出。这项技法不仅节省大量时间,更省下巨额开支(为什么施釉总是最昂贵又最不可控的工艺呢?),同时还巩固了学生已掌握的绘画技能。快试试吧——你的学生真的会当场惊呼!
若您希望融入精彩的艺术史内容,欢迎参考我的《生命之树》教案。我在本陶艺单元中沿用了相同的艺术家案例与课堂讨论要点。
若您尝试了该技法,欢迎告诉我您的实践心得,以及您如何将其调整优化,使之更契合您自己的艺术教学世界!
Textured Tiles | Clay Lesson Plan
Original: https://thatartteacher.com/2019/11/09/how-to-make-textured-tiles-slab-clay-lesson-plan-art-teacher-diy/
Date: 2019-11-09
Author: Sierra Machado
Categories: long form lesson plan, sculpture
Tags: art, art education, art lesson plan, art teacher, art tutorial, artist, artist community, ceramics, clay, clay lesson plan, elementary art, featured, high school art, how to teach, how to teach clay, how to use clay, kiln, middle school art, oil pastels, pottery, score and slip, slab, slab building, teaching, texture, that art teacher, youtube, youtube artist
Clay can be the best and worst thing to happen in an art room. It can be a magical and intense experience for both the students and the art teacher. Once students get over the messy aspect of clay, they are completely mesmerized by the tactile and time consuming process. The illusive kiln, the obsessive smoothing, the endless need to score and slip….
I LOVE teaching clay.
That being said, it can be stressful. The early morning kiln firings, breaking the news to a student that their artwork they spent a month on exploded in the kiln, the messy fingernails, the dusty footprints trailing from the art room into all areas of the school…
I still LOVE teaching clay.
I taught this slab lesson for the first time to fifth graders at the beginning of the year. My school district recently finished the process of purchasing a kiln for all art teachers in the district and shipped several boxes of clay along with it. I wanted to teach a hands on but approachable lesson to my wiggly 10-11 year olds. We had just finished the monochromatic landscape painting and I thought a “Tree of Life Textured Tile” would time in beautifully with the artists we had been studying.
Part One: SLAB ROLLING!
The day before students roll their slab we watch this video and discuss questions. Students are given their ziplock back and they label it with their name along with their cardboard or cardstock their slab will rest on. I only have my students for 40 minutes so organization the day before is KEY!
The next class period we rewatch the video and discuss key points or questions. Students suit up with their aprons and already have their personalized storage bags ready to go. Each student uses a small cut piece of canvas to cover some their table (newspaper works too!) and share a rolling pin with their table partner. #publicschoolbudget.
I highly recommend dividing the clay into manageable pieces the day before or morning before class. Did I do this? Nope. And it made the process take much longer than necessary.
As students return to their seats they immediately wedge and begin rolling their slabs. Remind students to wedge into a flat shape, not a sphere, and hold the clay in the air, not squishing it to the table. When it’s time to roll the slab make sure students use the canvas (or newspaper if that’s what you have) because it will stick to the table. Just ask one of my first period students. I also had students try to beat the clay with their fist. Not sure where they picked that up, but I constantly reminded students to “Roll, roll, roll, flip and turn!” I had the video on a loop while I made constant laps around my slab rollin’ ten year olds. At one point my heart rate was 130 bpm. Cardio zone. I didn’t know if I should be proud or concerned.
At the end of class MOST students should have an even slab that isn’t too thin. I said the thickness of a pancake, which is tricky because all pancakes are different. They get the idea. Students had the option to cut their slab into any shape they wanted. I had a lot of circles because there were round paint palettes already sitting on the table that they could trace. Squares and rectangles were a popular choice (probably because my sample in the video was a square) and there were some really fun free form, diamond and triangular slabs.
All extra clay was returned to me to be sprayed and stored for tomorrow…which was COIL BUILDING!
Part Two: COILS!
On the second class period we watched my tutorial until the 3 minute 30 second mark. This class period’s focus is on coils and I save the score, slip and blend technique for day three.
This part was so much fun. Students first practiced rolling an even coil with a piece of clay about the size of chicken nugget. Not a large McDonalds nugget, but closer to a Chic-fil-a nugget. My students intensely enjoyed this ad-lib nugget discussion. I walked around the room and gave thumbs up and suggestions to students as they work. A thumbs up was permission to go get another “nugget of clay” I had sitting out on the clay supply table. And yes, I learned my lesson. All nuggets were pre-cut and ready to go. (Shout out to my 6th grade Advanced Art class for making these for me the day before!)
We did NOT score and slip anything. Rolling coils is either second nature and students pick up the technique quickly, or it’s a source of stress for those that have a little more difficulty. By day two all students are pros. (Thanks, Play Doh!) I loved seeing students build up their confidence and start to braid and twist the clay.
Pro Tip: Make students use 100% of their nugget to shape a coil. Do not let them hand back any “used clay”. It will be dry, gross and you the teacher will be the one laboring through the recycling process. Students get no more than three nuggets (two is the usual) and they need to make a coil out of each piece. They lay however many coils they’ve created on top of their slab so that tomorrow they can….
Part Three: SCORE, SLIP & BLEND!
We start class by watching a minute or two of coil building as a review and then until the 6 minute and 30 second mark. I emphasize how important this step is. Once clay loses all of its moisture the pieces will no longer stick.
We spend a couple minutes drawing a basic tree design with their bamboo skewer. I thought this step would take longer, but a general trunk with several branches is all that is needed at first. Students score, slip and blend one branch while I walk around checking their work. I tell them they need to use enough slip that when they press the coil to the slab a little comes out like they are biting into an ice cream sandwich. (I really love food references.)
Students most often forgot to score BOTH the coil and the slab. The other reoccurring issue was them not pressing the coil down or blending the edges of the coil to the tile, which I called “the line of separation.” This was something I reviewed and re-demonstrated almost every day.
Two whole class periods were spent scoring, slipping and blending their coils. Most students made enough coils on the coil day, others had to get one more nugget of clay. I tell students they should have at least seven branches and most of these branches should have at least one sub-branch that extends to the edge of their tile.
I have students carve their name on the back of their tile and I come around with a needle tool and put two holes in the top of their tile so it can be displayed with wire. This also gives me the opportunity to check in with students and check their score, slip and blending. I have been known to dramatically remove coils that I can tell weren’t properly attached.
Part Four: TEXTURE
This is truly the most fun part. Students are already confident ceramicists at this point and have clean-up down to a science. Students watch the rest of my tutorial and start adding their texture and carved designs. My students have previously created a Zentangle artwork and are pros at adding designs. This part moves pretty quick. By the end of the first class period most students have filled up almost all of their sections. And then they are introduced to…obsessive smoothing and cleaning!
We use a sponge and their slip paint brush to smooth out the tree branches and edges. After the second day of texture, students leave their tile out of their bag with the bag draped over the slab. This will allow the clay to get leather hard without drying out to quickly. The next and final day is spent cleaning up textures with the bamboo skewer and using a DRY paint brush to dust off the “crispies”. I tell them there is not enough time in the day to perfectly clean your tile, but try to get as many stray pieces of clay as you can.
textured-clay-tile-rubric
Students turn in their tiles along with their bags the day we do our assessment and rubric. I keep the bag over the tile until it is graded and then I load the kiln. I learned that loading the kiln when the tiles are leather hard helps make sure that they don’t break because they are waaaaaay less fragile than when they are bone dry. Just BE CERTAIN that they are bone dry before you press start on that kiln. They need to sit in there for at least 48 hours, or more depending on how dry out they were, the humidity, how thick the tiles are etc. I like to put my “troublesome pieces” together and in an easy to reach spot. If there is a really thick tile I want to be able to get my hands on it before the kiln heats up to 1900 degrees. The clay will create steam and explode everywhere if there is still moisture in it. If it’s cold to the touch, it ain’t ready. If you’re questioning if it’s cold, it’s cold. Wait a day.
Part Five: SURFACE DECORATION!
The options here are endless. Glazing, painting, colored pencils etc. I decided to try something new and do a watercolor and oil pastel resist technique. At first, I HATED IT. I thought the oil pastels looked really sloppy and felt wrong going over the awkward bisque ware. Then ahhhh, the magic of the watercolor. The contrasting colors behind the oil pastel really makes all the textures pop. This technique saved time, SO MUCH MONEY (why is glazing the most expensive and unpredictable technique ever?) and builds on skills my students have already learned. Try it, your students will literally gasp.
If you are looking for some great art history connections, check out my Tree of Life Lesson Plan. I used the same artists and discussion points with this clay unit.
Let me know if you try out this technique and how you changed it to work for your own art world!