夜间城市天际线绘画课
原文链接:https://createartwithme.com/night-city-skyline-painting-lesson/
日期: 2012年10月4日
作者: 米歇尔·伊斯特(Michelle East)
适用年级: 二年级、三年级、四年级、五年级、丙烯绘画课、课后美术班与美术夏令营、色彩对比、小学美术、学年末项目、幼儿园至一年级、绘画课、蛋彩画
标签: 课后美术班、课后美术创意、美术课教案、小学美术、美术元素、中学美术(MS Art)、夜间天际线绘画、颜料、绘画、儿童绘画艺术项目、城市景观绘画、绘画课教案、分步绘画课、绘画项目、美术原理、重复、艺术中的节奏感、天际线、天际线绘画、日落天际线、教师用儿童美术项目、儿童美术教学、蛋彩画、蛋彩画材料、蛋彩画课
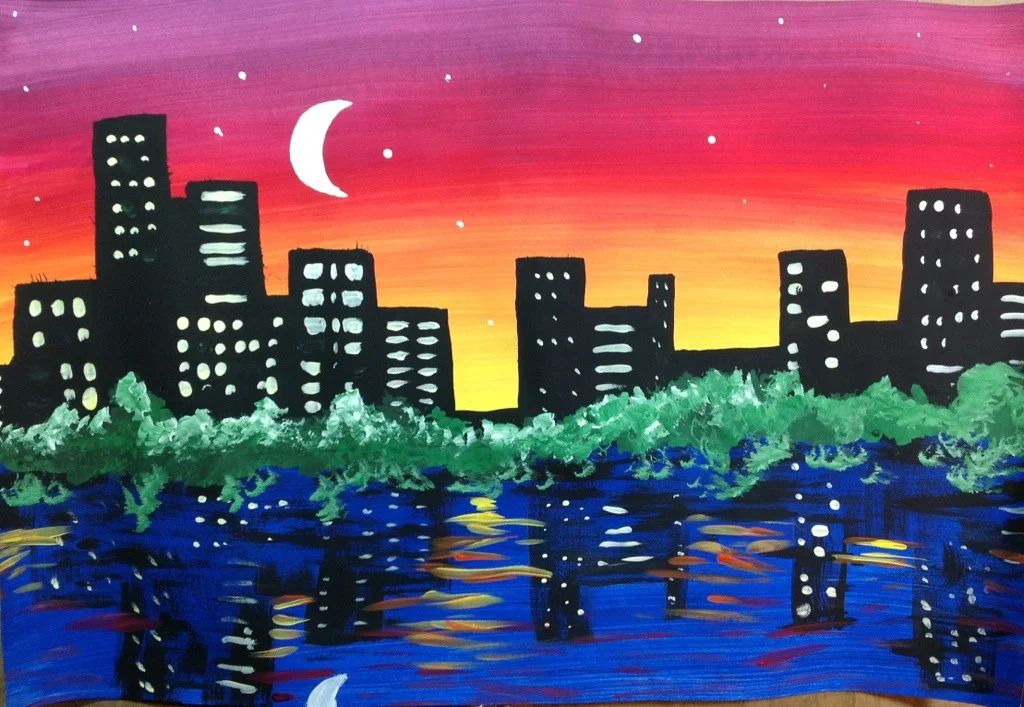
夜间城市天际线绘画课|夜空下的城市景观绘画
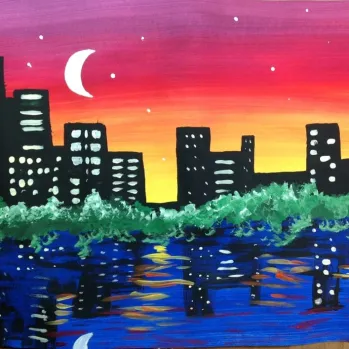
这是一个构思简洁却视觉冲击力极强的课题!深色夜幕下的天际线与绚烂日落形成强烈对比,效果格外醒目! 我在课后美术班中面向一至六年级学生开展了这一项目,成效卓著。所有年龄段的学生都能轻松完成这幅城市景观绘画,最终作品令人惊艳!
本课基础源自《绘画技法》(Painting Techniques)一书(现已绝版),但我对其做了若干调整。
所需材料: 12×18英寸卡纸板、蛋彩颜料、画笔、水杯、预先剪好的城市天际线模板、铅笔


绘画步骤
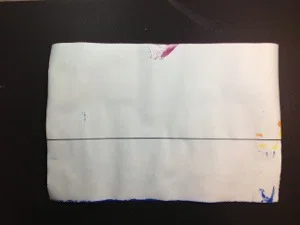
- 画出地平线(切勿画在纸张正中央——那样太单调!)
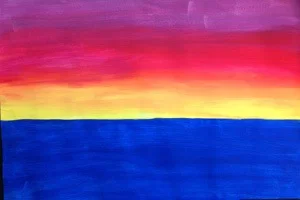
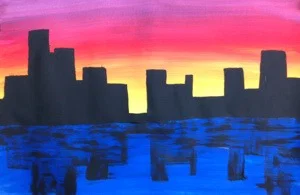
- 在地平线以上区域绘制日落背景。我们讲解了如何通过颜料笔触的重叠来实现色彩自然过渡。由于使用的是蛋彩颜料,需快速操作,在颜料干透前完成混色;若已干结,可蘸清水轻涂覆盖,以助调和色彩。
- 在地平线以下区域涂绘蓝色,表现水面。
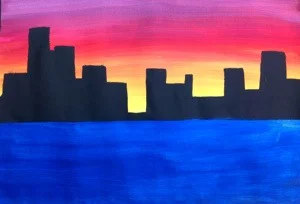
- 沿模板描摹城市天际线轮廓。我特地从文件夹上剪出多种不同造型的天际线模板,尤其方便低龄学生使用。(高年级学生则鼓励自主绘制天际线。)为各模板编号,因后续还需用同一编号模板绘制水中倒影。请学生将所用模板编号写在画纸背面。
- 将模板翻转,使其成为地平线上方天际线的镜像,用于描绘水面中的倒影。
- 使用平头画笔,以纯黑色平涂法绘制地平线以上建筑。
- 采用干刷法绘制建筑倒影:先将黑色颜料在纸巾上擦去部分,再用平头画笔沿轮廓线轻点、向下轻弹刷毛。向学生示范如何擦拭画笔以减少颜料量,再将笔尖置于线条上并轻弹下压。
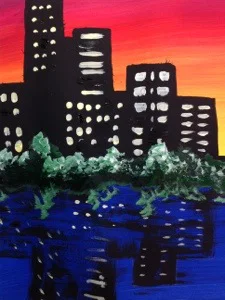
- 利用小号圆头画笔的两端,蘸取白色颜料点绘窗户。我鼓励学生变化窗户造型(如圆形、方形、矩形及线性窗),并在水中倒影里重复部分窗型。
- 在水面区域,用全部日落色系颜料绘制细短的横向线条。
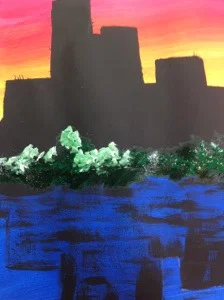
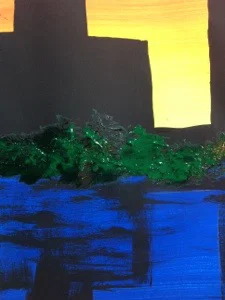
- 沿地平线以点彩法绘制高低错落的绿色色点;将少量白色与绿色调和后,仅于绿色顶端点彩,营造月光/阳光洒落其上的效果。
- 最后,用小号画笔的另一端点绘几颗星星,并添画一弯新月。
**本课教案由米歇尔·C·伊斯特(Michelle C East)撰写。若您选择转载或以任何形式(文字或图片)使用本教案,请务必注明来源并链接至Create Art with ME。
Night City SkyLine Painting Lesson
Original: https://createartwithme.com/night-city-skyline-painting-lesson/
Date: 2012-10-04
Author: Michelle East
Categories: 2nd Grade, 3rd Grade, 4th Grade, 5th Grade, Acrylic Lessons, After School Art & Art Camp, Color Contrast, Elementary Art, End of the Year Projects, K-1st Grade, Painting Lessons, Tempera Painting
Tags: after school art class, after school art ideas, art lesson, elementary art, elements of art, MS Art, night skyline painting, paint, painting, painting art projects for kids, painting city scape, painting lesson, painting lesson step by step, Painting project, principles of art, repetition, rhythm in art, skyline, skyline painting, sunset skyline, teacher art projects for kids, teaching art to kids, Tempera, tempera paint supplies, Tempera painting lesson
Night City SkyLine Painting LessonNight SkyLine Cityscape Painting
This is a simple concept with big visual impact! The contrast of the night skyline against the colorful sunset really pops! I did this project with 1st-6th grade students in my after school art class with great success. All ages were able to paint this city scape with eases and they turned out stunning!
The foundation of this lesson came from the book “Painting Techniques” (no longer in print), but have made some alterations.
Supplies: 12×18″ tag board, tempera paint, brushes, water cups, per-cut city skylines, pencils
- Draw the horizon line (not in the middle of the paper-that’s boring!)
- Paint background sunset above the horizon line. We talked about overlapping your paint strokes to blend the colors together. Because we used tempera paints, we had to work quickly to blend colors before the paint dried. If it dries out, you can always go over the paint with just water to blend colors.
- Paint blue for the water below the horizon line.
- Trace outline of city scape. I cut several different skylines out of folders, especially for the younger kids. (Older students were encouraged to draw their own skyline.) Number the templates because we will use them again to draw the reflection in the water. Have the students write the number of the templates they used on the back of their paper.
- Flip templates over so they are mirror image to the ones above the horizon line foe the reflection in the water.
- Paint the buildings above the horizon line with a flat brush using solid black strokes.
- Dry brush paint the building reflection with black paint that has been wiped off on a paper towel. Use a flat brush. Show the students how to wipe the brush to remove some of the paint then place the brush on the lines & flick the brush down.
- Using both ends of a small round brush, paint the windows with white paint. I encouraged the students to vary the kinds of windows they painted in (round square, rectangle & linear.) repeat some of the windows in the reflection in the water.
- Paint small horizontal lines using the all the sunset colors in the water.
- Stipple paint green along the horizon line varying he height. Mix some white in with the green & stipple on top of the green-just at the top, so it looks like the moonlight/sunlight is hitting it.
- Finish the painting by paint in a few stars (using the opposite end of a small paint brush) & a crescent moon.
This lesson was written by Michelle C East. If you choose to re-blog or use this lesson in any way (written or photos), then please make sure to link/credit to Create Art with ME.**