动态构图:野生动物丙烯画课程
原文链接:https://createartwithme.com/dynamic-composition-wild-animal-acrylic-paintings/
日期: 2015-04-12
作者: 米歇尔·伊斯(Michelle East)
分类: 丙烯课程、美术课程、构图课程、素描课程、高中美术、初中美术、绘画课程、水彩课程
标签: 12×24 英寸画板、丙烯绘画技法课程、构图、艺术中的构图、对比色、对比肌理、强调、以对比实现强调、视觉中心、毛发、如何营造强调效果、米奇·里德(Mitch Ridder)、米奇·里德水彩作品、绘制动物肌理、绘制动物毛发、《用彩铅表现光》(Cecile Baird 著)、鳞片、选择性裁切、教授美术构图、绘制动物肌理视频教程、野生动物丙烯画、工作表
我读到一句名言,彻底改变了我对艺术中动态构图重要性的认识。这句话出自塞西尔·贝尔德(Cecile Baird)所著的《用彩铅表现光》(Painting Light With Colored Pencil)一书(http://www.amazon.com/gp/product/1600611672/ref=as_li_tl?ie=UTF8&camp=1789&creative=390957&creativeASIN=1600611672&linkCode=as2&tag=crarwime-20&linkId=H24RJNFU7C7URCZN) ……
***“……一幅构图良好但技法尚不完美的画作,仍可成为一幅成功的作品;
而一幅技法精湛却构图拙劣的画作,则绝不可能成功。”***
受此启发,我开始在教学中及个人创作中,前所未有地重视构图训练。如今,我们从高年级小学阶段即开始讲授构图与物象布局,并在初中与高中美术课中予以重点强化。结果是,学生作品的整体表现力显著增强!
大约八年前,我在2002年《艺术家杂志》(Artist’s Magazine)上读到一篇图文并茂、极具创意的文章,堪称动态构图的典范。文中重点介绍了艺术家米奇·里德(Mitch Ridder)及其作品。他对构图拥有非凡的敏锐度,这种天赋如今也体现在其摄影创作之中。(下文教案中将详述里德的相关内容)
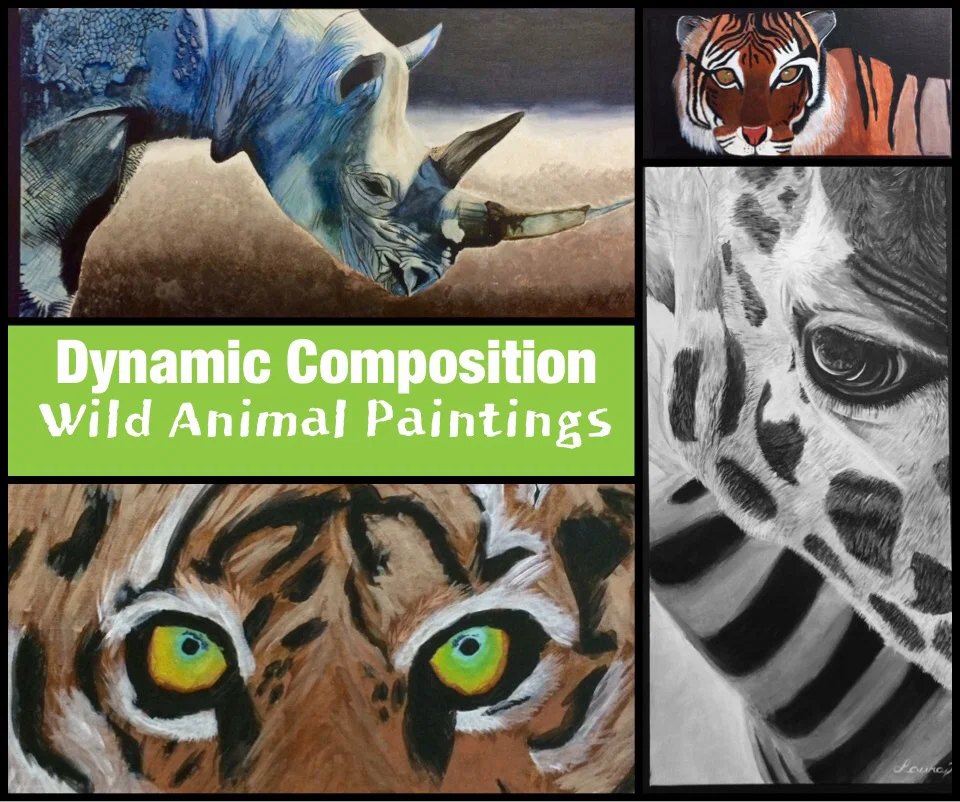
本《动态构图:野生动物丙烯画课程》面向高中美术学生,共授课三天。(该课程亦可调整后用于初中美术教学)课程中,我们学习运用三分法确定视觉中心、采用戏剧性裁切手法,并选用非常规尺寸画布(如12×24英寸),从而构建动态构图。此外,我们还练习了丙烯绘画技法,掌握动物毛发及其他动物肌理的表现方法。
教学目标:
- 复习“如何构建动态构图”
- 界定“强调”概念,观察其在视觉艺术中的实际应用
- 归纳五种营造强调效果的方法
- 学习为提升视觉趣味而进行画面裁切
- 练习绘制动物毛发及其他动物肌理的技法
- 了解当代艺术家米奇·里德(Mitch Ridder)如何通过裁切手法营造富于张力的构图
所需材料: 12×24 英寸画板、温莎·牛顿画廊系列丙烯颜料套装、画笔、丙烯绘画技法工作表
教学过程:
1. 什么是构图?它为何对一件艺术作品至关重要?
a. 构图指作品的整体组织方式,即艺术家如何有意识地运用美术的造型元素与形式原理来完成创作。
b. 画面中各物象的位置安排绝非随意之举,而是经过深思熟虑后的决策结果。
c. 音乐家在音乐厅演奏前,必先完整规划整部乐曲;同理,艺术家也须投入同等程度的前期规划,方能在观者心中激起强烈的视觉冲击。
-
“一幅构图良好但技法尚不完美的画作,仍可成为一幅成功的作品;而一幅技法精湛却构图拙劣的画作,则绝不可能成功。”——塞西尔·贝尔德(Cecile Baird)《用彩铅表现光》
-
题材选择——选取令你感到有趣或富有意义的主题。若你对所选题材缺乏兴趣,这种情绪必将流露于作品之中——投入的努力也将随之减弱。
4. 强调或视觉焦点
a. 《北光艺术术语词典》将视觉焦点定义为画面中的兴趣中心。
b. 在日常生活中,我们用眼睛观察时,往往聚焦于正在注视的对象。作为艺术家,你需要判断:你希望画面中的哪个部分成为“视觉焦点”。
c. 问问自己……
i. 你的主题中,哪一部分最重要或最富趣味性?
ii. 你想让观众首先看向哪里?最终又反复回到哪里?
5. 如何营造强调效果(讨论并赏析体现“营造强调的五种方法”的艺术作品范例)
a. 通过对比实现强调
i. 色彩对比——明亮的色彩在灰暗或深色背景中更醒目;暖色在冷色背景中更突出;黑白对比则是最强的色彩对比。
ii. 形状对比——圆润的形状在直线形中更醒目;自由形态在几何形状中更突出。
iii. 大小对比——大尺寸的形状在小尺寸形状中更醒目。
iv. 肌理对比——平滑的肌理在粗糙肌理中更醒目。
b. 通过孤立实现强调——画面中仅放置一个物体,且与其他所有物体保持距离。观众视线自然被引向这个孤立的物体。
6. 裁切(Cropping) 是精心选择进入画面视野的内容(亦称“画面平面”)。
7. 裁切的目的:
a. 删去图像中不必要的或不理想的局部,以帮助集中观众注意力。
b. 突出前景,从而构建一幅最能传达你所追求的故事性与核心信息的画面。
艺术家米奇·里德(Mitch Ridder):
来自加利福尼亚州拉古纳海滩的艺术家米奇·里德专攻水彩创作。他曾在加州州立大学长滩分校接受插画专业正规教育。里德富有创新性的作品,在色彩表现、细节刻画与空间深度方面达到了令人惊叹的高度——而这些成就,通常被认为难以在这一公认最难掌握的媒介中实现。其水彩画作《大象》荣获《艺术家杂志》(The Artist’s Magazine)2002年艺术大赛“动物类”奖项。里德本人亦荣膺该杂志动物类艺术大赛冠军,并于2001年入围决赛。
此外,里德曾多次亮相《水彩魔力》(Watercolor Magic)杂志,并见诸《水彩》(Watercolor)、《野生动物艺术》(Wildlife Art)、《艺术商业新闻》(Art Business News)、《道路与赛道》(Road & Track)及《橙县海岸》(Orange Coast)等刊物;亦获颁加州水彩协会(California Watercolor Association)“签名会员”称号。如今,里德专注于摄影创作,其作品可在Flickr平台 MitchRidderPhotography 查看。正因里德在其艺术创作中采用独具一格的图像裁切手法,他成为本项目极佳的学习范例。
“通过裁切——仅呈现主体的一部分——我制造了一种‘未见之谜’。这使我得以掌控观众的视觉焦点,赋予我的水彩作品以强烈的戏剧张力与视觉冲击力。”——米奇·里德
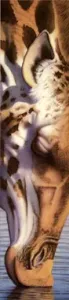
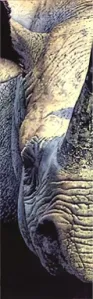
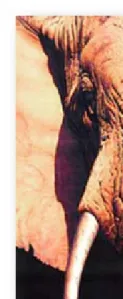
欣赏米奇·里德的水彩画作(经授权使用)
- [
## Acrylic Painting Techniques Lesson Plan & Worksheet
$3.25](https://createartwithme.com/shop/lesson-plans-worksheets/art-technique-lesson-plans-and-worksheets/painting-lessons-worksheets-pdf/acrylic-painting-techniques-lesson-plan-worksheet/)加入购物车
活动 #2:动物肌理绘画练习
我们观看了这些关于如何绘制动物毛发与肌理的极佳视频教程:
动物肌理绘画视频教程:
全部由安德鲁·蒂施勒(Andrew Tischler)发布于YouTube
毛发:
• 老虎:https://www.youtube.com/watch?v=qcUaQo28ZoY
• 雪豹:https://www.youtube.com/watch?v=P2pKZ02ELYU
• 猫:https://www.youtube.com/watch?v=-tXUP_n7xJ4
• 狗:https://www.youtube.com/watch?v=zwRSUXY8Tyw
鳞片:
• 蛇:https://www.youtube.com/watch?v=PxxA8Jl5TZg
• 海龙:https://www.youtube.com/watch?v=5yNvjzT4FvE
• 龙:https://www.youtube.com/watch?v=WlSBKobJsfM
羽毛:
• 猫头鹰:https://www.youtube.com/watch?v=ggC30BcYLOM
• 鹰:https://www.youtube.com/watch?v=BFUVrUqOl5k
白鹭: https://www.youtube.com/watch?v=rM3kZn24s6o
大象:
https://www.youtube.com/watch?v=xuwqRIiMG2M
项目:野生动物丙烯画创作
项目目标: 运用选择性裁切手法,构建一幅富有动感的动物构图;以丙烯颜料写实描绘,准确呈现肌理细节与明暗关系。
操作步骤:
- 选定一种陆生动物、鸟类或昆虫。
- 寻找一张彩色参考图片作为绘画依据。
- 反复尝试不同裁切方式,直至获得最具表现力的构图!
- 将图像按1:2长宽比进行裁切,形成一个矩形画面,展现动物面部约一半区域。
- 将裁切后的图像绘制于一块12×24英寸的画布板上。
- 最后,使用丙烯颜料完成完整明暗塑造。你必须真实表现动物肌理——如毛发、鳞片等。
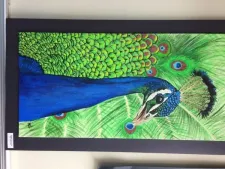
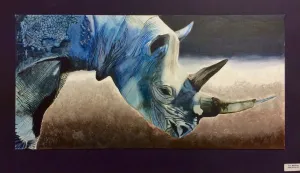
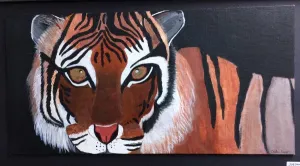
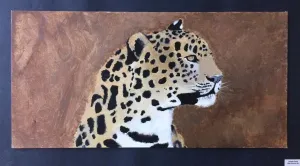
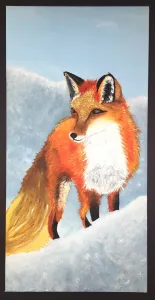
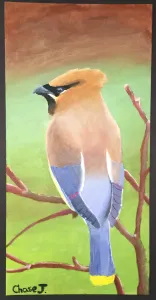
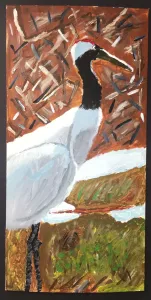
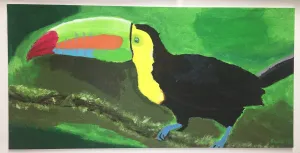
以下为部分学生作品范例(9–12年级):点击可查看原图!
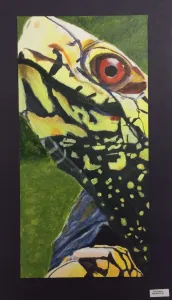
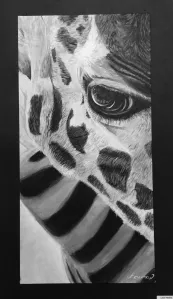
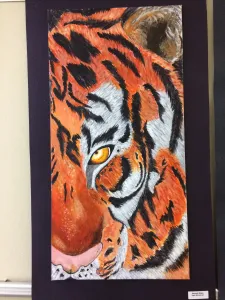
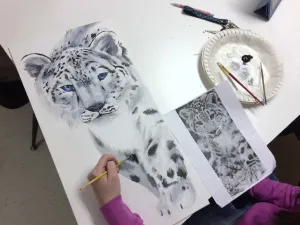
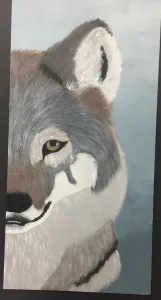
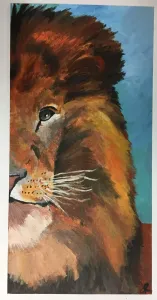
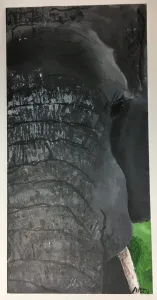
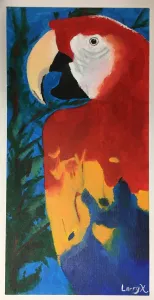
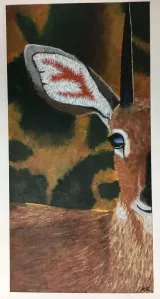
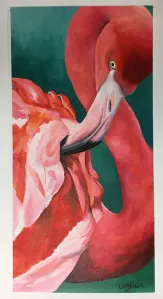
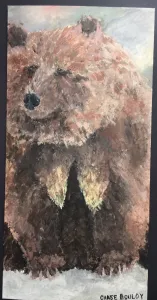
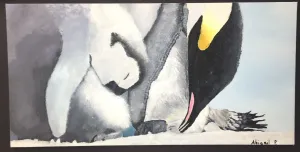
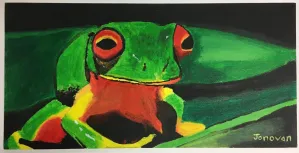
如您选择转载、引用本教案(含文字或图片),请务必注明并链接至Create Art with ME.
参考资料: 《艺术家杂志》2002年——米奇·里德;http://www.asingularcreation.com/articles/how-to-paint-animal-fur.htm
Dynamic Composition Wild Animal Acrylic Paintings Lesson
Original: https://createartwithme.com/dynamic-composition-wild-animal-acrylic-paintings/
Date: 2015-04-12
Author: Michelle East
Categories: Acrylic Lessons, Art Lessons, Composition Lessons, Drawing Lessons, HS Art, MS Art, Painting Lessons, Watercolor Lessons
Tags: 12x24 canvas panel, Acrylic Painting Techniques Lesson, composition, composition in art, Contrasting COLORS, Contrasting TEXTURE, Emphasis, Emphasis by Contrast, focal point, fur, How to Create Emphasis, Mitch Ridder, Mitch Ridder watercolor paintings, PAINT ANIMAL TEXTURE, painting animal fur, Painting Light with Colored Pencil, Painting Light with Colored Pencil by Cecile Baird, scales, selective cropping, Teach art composition, Video Tutorials on Painting Animal Textures, Wild Animal Acrylic Painting, worksheet
I read a quote that changed my view on the importance of dynamic composition in art. The quote was in the book Painting Light With Colored Pencil by Cecile Baird…
“…You can have a SUCCESSFUL PAINTING with good composition and less than perfect technique, but you CANNOT have a successful painting with great technique & poor composition.”
As a result of this quote, I began to put a whole lot more emphasis in teaching composition to my students, as well as in my personal art. So now we start learning about composition and object placement in upper elementary & strongly emphasize it in middle and high school art. As a result, the students artwork became more dynamic!
About 8 years ago, I came across an article in Artist’s Magazine in 2002 that was a beautiful & creative example of dynamic composition in art. Mitch Ridder was a featured artist and the article showcased Ridder’s work. He has an amazing eye for composition which now shows through his photographic work. (more about Ridder in the lesson plan below)
Dynamic Composition Wild Animal Acrylic Paintings Lesson is geared toward high school art students and was taught over 3 days. (This lesson could be adapted to middle school art) We learned to create dynamic compositions by using the Rule of Thirds to place the focal point, use dramatic cropping, and use an unusual size canvas. In addition, we also practiced Acrylic painting techniques and therefore learned how to paint animal fur and other animal textures.
Objectives:
- Review “Creating Dynamic Compositions”
- Define emphasis, observe how it is applied to visual art
- Identify 5 ways to create emphasis
- Learn how to crop for visual interest
- Practice techniques of how to paint animal fur and other animal textures.
- Contemporary artist Mitch Ridder & how he uses cropping to create dramatic compositions.
Materials: 12×24” canvas panels, Windsor Newton Galleria Acrylic paint set, paint brushes, Acrylic Painting Techniques Worksheet
Delivery:
1. What is composition, why is it important to a piece of art?
a. Composition refers to how the artwork is put together. It is how the artist INTENTIONALLY used the elements and principles of art to create the artwork.
b. The placement of objects within the picture plane is not an arbitrary act, but is the result of calculated decisions.
c. A musician sits down and completely plans out his piece before playing it in a concert hall. An artist needs to do the same amount of planning in order to create visual impact on the viewer.
2. “You can have a successful painting with good composition and less than perfect technique, but you cannot have a successful painting with great technique & poor composition.”– Painting Light with Colored Pencil by Cecile Baird…
3. Subject Matter– Choose a subject that is interesting or meaningful to you. If you are not interested in your subject matter, it will show in your artwork-the effort will not be there.
4. Emphasis or Focal Point-
a. The North Light Dictionary of art terms defines focal point as the center of interest in a picture.
b. In using our eyes in daily life, we tend to focus on the thing that we are looking at. As an artist, you need to assess what you want to be your “focal point” in your picture.
c. Ask yourself…
i. What part of your subject is most important or the most interesting?
ii. Where do you want your viewer to look first & eventually keep coming back to?
5. How to Create Emphasis (Discuss & view examples of artwork illustrating the 5 Ways to create emphasis)
a. Emphasis by Contrast
i. Contrasting COLORS– Bright colors stand out from dull or dark colors, Warm colors stand out from cool colors. Black against white is the strongest contrast possible
ii.Contrasting SHAPE– Rounded shapes stand out from straight ones, Free-form shapes stand out from geometric shapes
iii.Contrasting SIZE– Large shapes stand out from smaller shapes
iv. Contrasting TEXTURE– Smooth textures stand out from rough textures
b. Emphasis by Isolation– One object is placed alone and away from all other objects in the artwork. The viewer’s eye looks at the isolated object.
6. Cropping is carefully selecting what will go in your picture’s view (also called picture plane).
7. Cropping Objectives:
a. To cut away unnecessary or unwanted portions of an image to help focus the viewers attention.
b. Brings attention to the foreground creating an image that best depicts the story and message you are striving for.
Artist Mitch Ridder:
From Laguna Beach, California, artist Mitch Ridder works exclusively in Watercolor. With a formal education at California State University, Long Beach in Illustration, Ridder’s innovative work reaches a level of color, detail and depth thought to be unobtainable in the medium considered to be the most difficult to master. Ridder’s painting “Elephant” won the animal category for “The Artist’s Magazine’s 2002 Art Competition”. Ridder was named the winner of The Artist’s Magazine Art Competition for animals and was a finalist in 2001.
Additionally, Ridder has been featured in Watercolor Magic, has appeared in Watercolor, Wildlife Art, Art Business News, Road & Track and Orange Coast magazines and has also been honored as a Signature Member in the California Watercolor Association. Ridder now focuses on photography and his work can be found on Flickr at MitchRidderPhotography. Therefore, because of Ridder’s unusual cropping of images for his artwork, this made him a perfect example for us to follow with our project.
“Through cropping, showing only a portion of the entire subject, I create a little mystery by what you can’t see. This allows me to control the viewer’s focal point, giving my watercolors a dramatic power and impact.”– Mitch Ridder
View Mitch Ridder watercolor paintings (used with permission)
- [
## Acrylic Painting Techniques Lesson Plan & Worksheet
$3.25](https://createartwithme.com/shop/lesson-plans-worksheets/art-technique-lesson-plans-and-worksheets/painting-lessons-worksheets-pdf/acrylic-painting-techniques-lesson-plan-worksheet/)Add to cart
Activity #2: Practice Painting Animal Textures
We watched these EXCELLENT videos on how to paint animal fur & textures:
Video Tutorials on Painting Animal Textures:
All Youtube videos by Andrew Tischler
Fur:
• Tiger: https://www.youtube.com/watch?v=qcUaQo28ZoY
• Snow Leopard: https://www.youtube.com/watch?v=P2pKZ02ELYU
• Cat: https://www.youtube.com/watch?v=-tXUP_n7xJ4
• Dog: https://www.youtube.com/watch?v=zwRSUXY8Tyw
Scales:
• Snake: https://www.youtube.com/watch?v=PxxA8Jl5TZg
• Sea Dragon: https://www.youtube.com/watch?v=5yNvjzT4FvE
• Dragon: https://www.youtube.com/watch?v=WlSBKobJsfM
Feathers:
• Owl: https://www.youtube.com/watch?v=ggC30BcYLOM
• Eagle: https://www.youtube.com/watch?v=BFUVrUqOl5k
Egret: https://www.youtube.com/watch?v=rM3kZn24s6o
Elephant :
https://www.youtube.com/watch?v=xuwqRIiMG2M
PROJECT: Wild Animal Acrylic Painting
Project Objective: Use selective cropping to create a dynamic composition of an animal. Paint realistically with acrylic paints to include details of texture and shading.
Instructions:
- Decide on a land animal, bird or insect.
- Find a COLOR reference picture to work from.
- Play with the cropping until you have the most interesting composition!
- Crop the image (1:2 aspect ratio) so that is a rectangle showing half of the animals face.
- Draw the image onto a 12×24” canvas panel.
- Finally, paint with FULL SHADING with ACRYLIC paint. YOU MUST PAINT ANIMAL TEXTURE-fur, scales, etc.
Here are some student examples (9-12th Grades): Click to see the full picture!
If you choose to re-blog or use this lesson in any way (written or photos), then please make sure to link/credit to Create Art with ME.
Resources: Artist Magazine 2002-Mitch Ridder, http://www.asingularcreation.com/articles/how-to-paint-animal-fur.htm

