仙人掌丙烯绘画课
原文链接:https://thatartteacher.com/2021/02/26/cactus-acrylic-painting-lesson/
日期: 2021-02-26
作者: Sierra Machado
分类: 艺术教程
标签: 丙烯绘画、丙烯绘画课、分步丙烯绘画课、丙烯绘画教程、美术教育、仙人掌丙烯绘画、仙人掌艺术、仙人掌丙烯绘画教程(简易版)/丙烯绘画教程/初学者简易绘画、简易仙人掌绘画教程、面向初学者的简易绘画课、简易静物绘画、精选内容、趣味绘画教程、如何绘画、如何在课堂中绘画、学习画仙人掌、初中美术课、初中绘画课、初中静物课、儿童绘画课、初中绘画课、绘画教程、分步丙烯绘画教程、静物艺术课、教学、那位美术老师、湿画法绘画
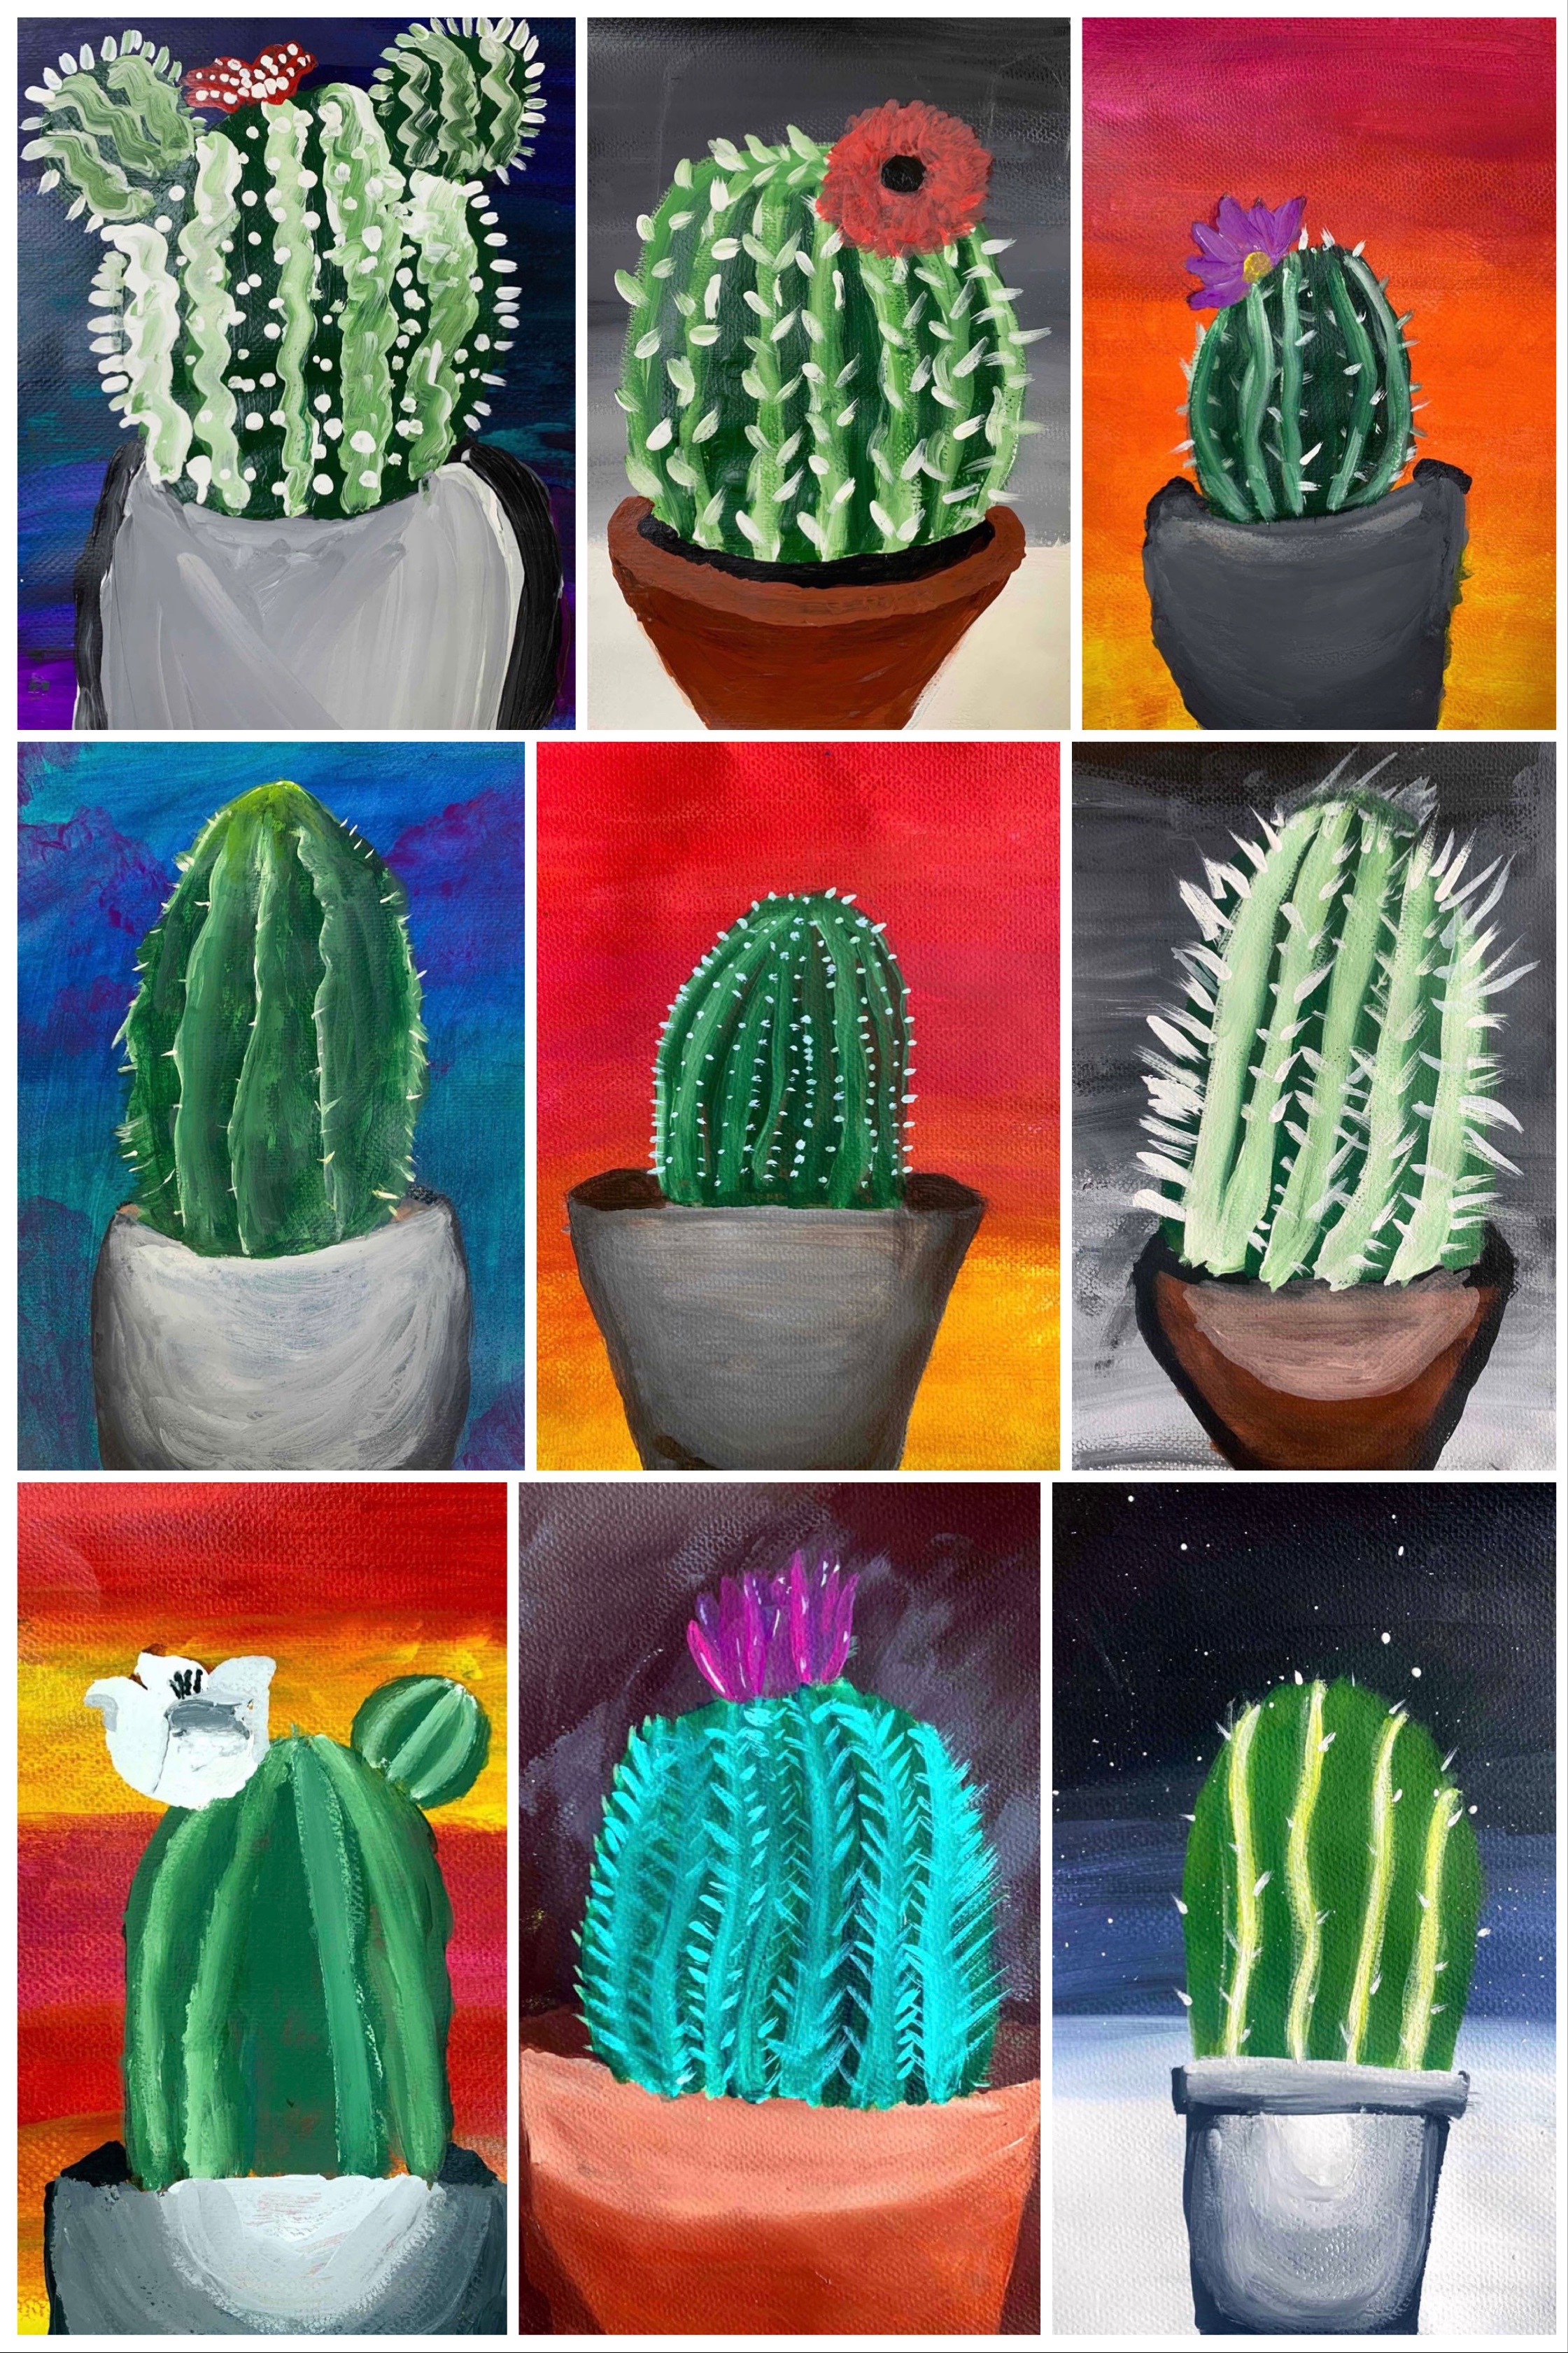
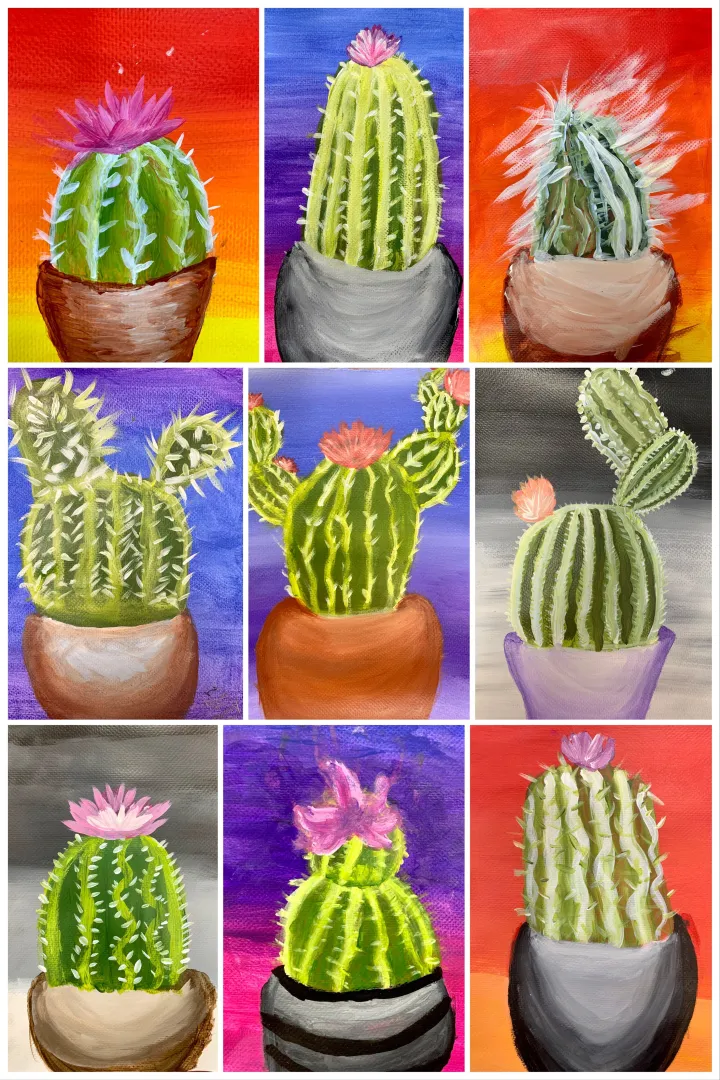
试试这节简单的仙人掌丙烯绘画课吧!本课聚焦于直接在画面上调和色彩,以及通过直接观察绘制一个简单物体。我在六年级课堂上实施此课,但也可轻松调整适用于不同年龄段的学生。本课包含三个简洁步骤,助你在课堂中培养自信而富创造力的小画家。
仙人掌丙烯绘画
仙人掌丙烯绘画教程
本仙人掌丙烯绘画教程将带你逐步完成整幅作品!若你更习惯阅读文字说明,本文也已逐项拆解全部内容;不过该视频教程已可直接用于课堂教学。
第一步:背景
绘制背景是我在这幅作品中最喜欢的部分。它最自由、最放松,学生也总是乐于接受这种无需精确描摹某物的绘画课时——写实风格对年幼的艺术学习者或初学者而言,往往令人望而生畏!
我曾尝试让学生先勾勒仙人掌轮廓,再画背景,结果他们很难绕着已有草图作画。而先画背景,既有助于画面整体统一,又能增强学生信心。我的学生有三种配色方案可选:暖色、冷色或灰色。
我预先调配好(好吧,好吧……实际由几位值得信赖的学生助手协助预调)每种配色方案各八块调色板。每次授课所用颜料略有不同,取决于我手头现有的丙烯颜料,但我严格限定每套方案仅使用三种颜色。选择灰色方案的学生,还可从暖色或冷色方案中任选一种颜色加入自己的调色板。
我的教程演示呈现了极为顺滑的色彩过渡效果;我也鼓励学生尝试不同方向的笔触,并按自己喜爱的顺序进行湿画法调色。仅限同色系内三种颜色作画,能极大减轻学生的心理负担,让他们敢于自由实验——无论怎样调色,背景色彩都必然协调。多数学生可在一节课内完成此步骤,具体取决于课时长短及纸张尺寸。
第二步:勾勒与容器
下一节课,我们仅用几分钟时间,在已干透的背景上直接勾勒。我喜欢鼓励学生以画笔代铅笔作画;坦白说,他们总想抗拒这一做法!不先精确打稿似乎令人胆怯,但我努力引导他们走向更直觉化的绘画方式。实践发现,若将容器轮廓画得稍细致些,学生会明显更有信心。
我准备了多种小型仙人掌与多肉植物,置于实物投影仪下展示。我们一起观察容器的外形,以及如何表现其三维感。我尤其喜欢将容器正对镜头放置,使其开口呈完美圆形,再缓缓倾斜为椭圆,最后又转回圆形——这一过程直观而有效。我还为学生提供简易剪贴画图片,帮助他们提升勾勒容器基本形状时的信心。
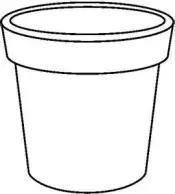
最后,我们仅用极简线条勾勒出仙人掌的大致形态,以确定其大小比例。我会现场展示几株实物,并建议学生让仙人掌顶端大致位于纸面高度的三分之二处。我们测量吗?不测。
在勾勒的同一节课中,我们即开始绘制容器。学生观看我的教程视频中9:07至12:57片段,而我则利用这段时间为他们调好白色颜料。容器可选用任意颜色,但我近期常用灰色、熟褐与熟褐红,所得自然效果令我十分满意。
我发现,当我与学生同步在实物投影仪前作画时,教学效果更佳,学生也更自信。看别人示范一次是一回事,而同步绘画则能让学生大脑实时聚焦、即时领悟。我总会用一张小得多的白纸作示范,以免浪费材料与时间。若某天略感懈怠,我也会选择巡视课堂、随时指导进度;但只要我花时间与学生同步示范技法,成果 invariably 更出色。
第三步:仙人掌!
终于到了绘制仙人掌的环节。学生自行调制绿色,每次只画一至两个垂直色块,并加入白色以营造纵深感与肌理感。学生还会在颜料未干时拖拉画笔形成刺状纹理,或依据观察添加小圆点等其他肌理细节。
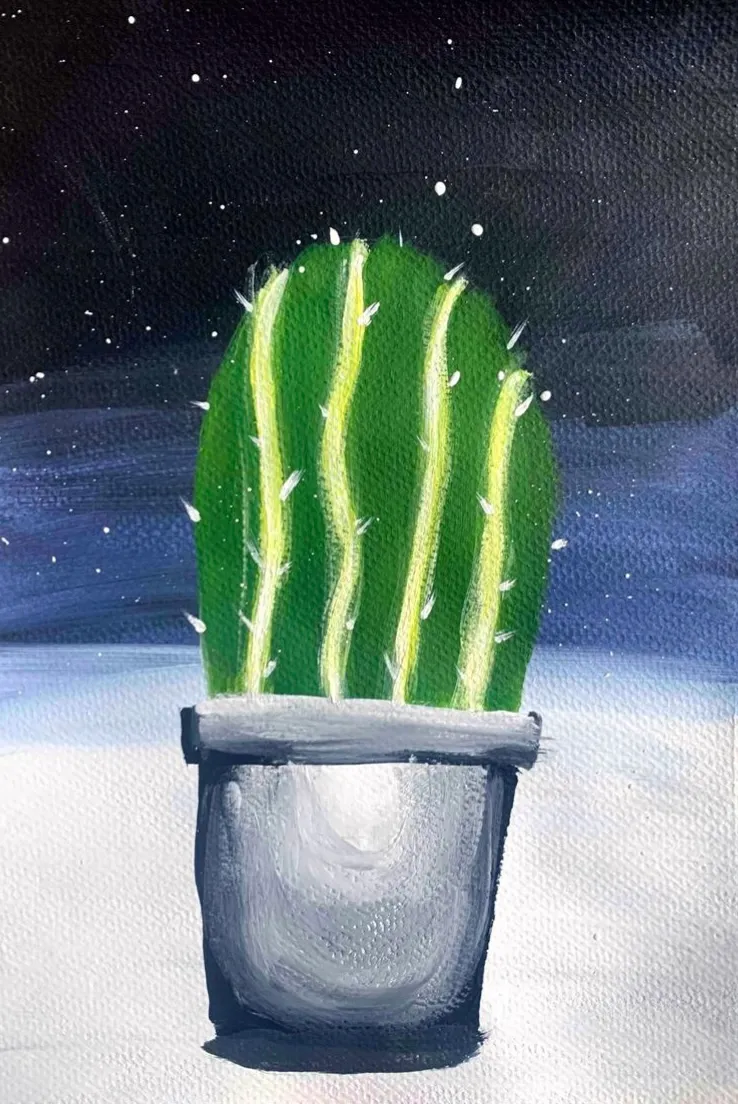
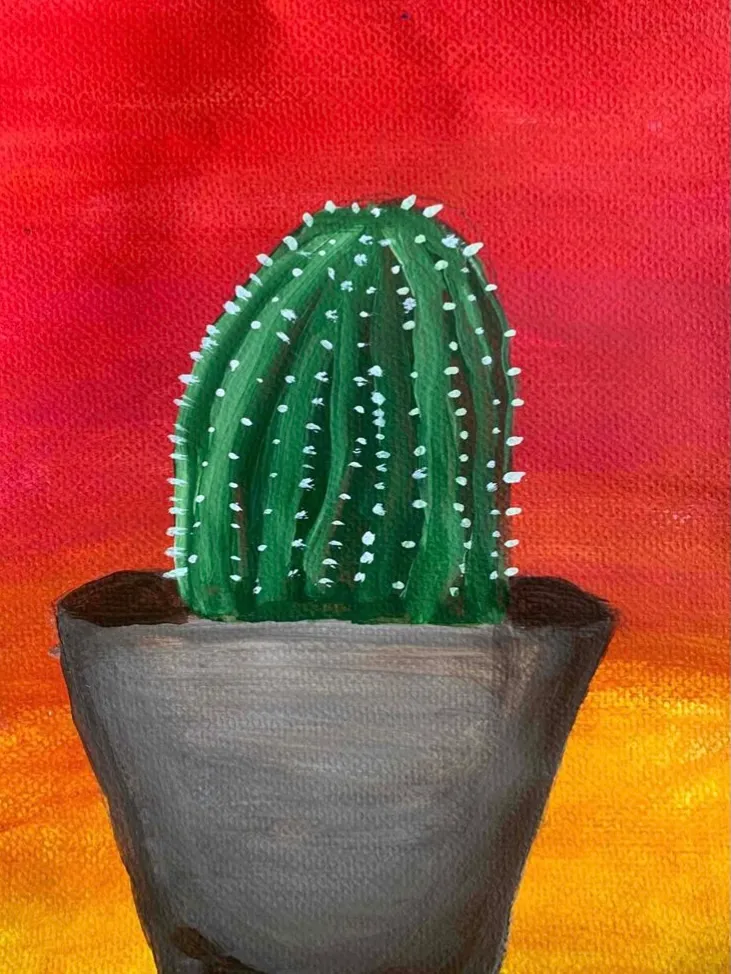
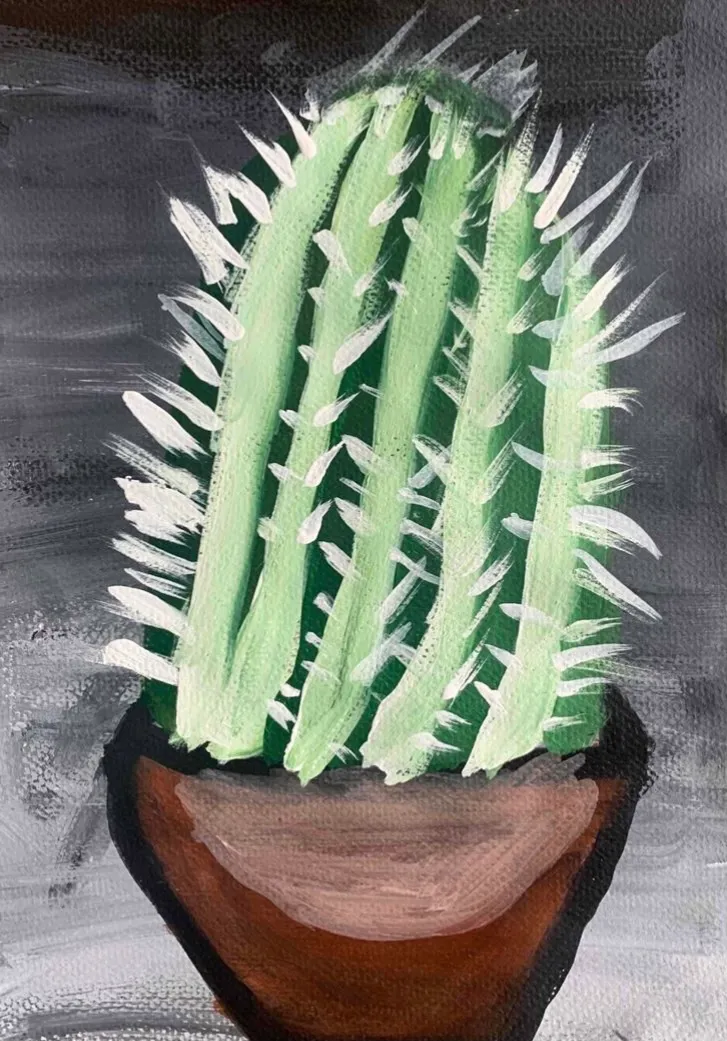
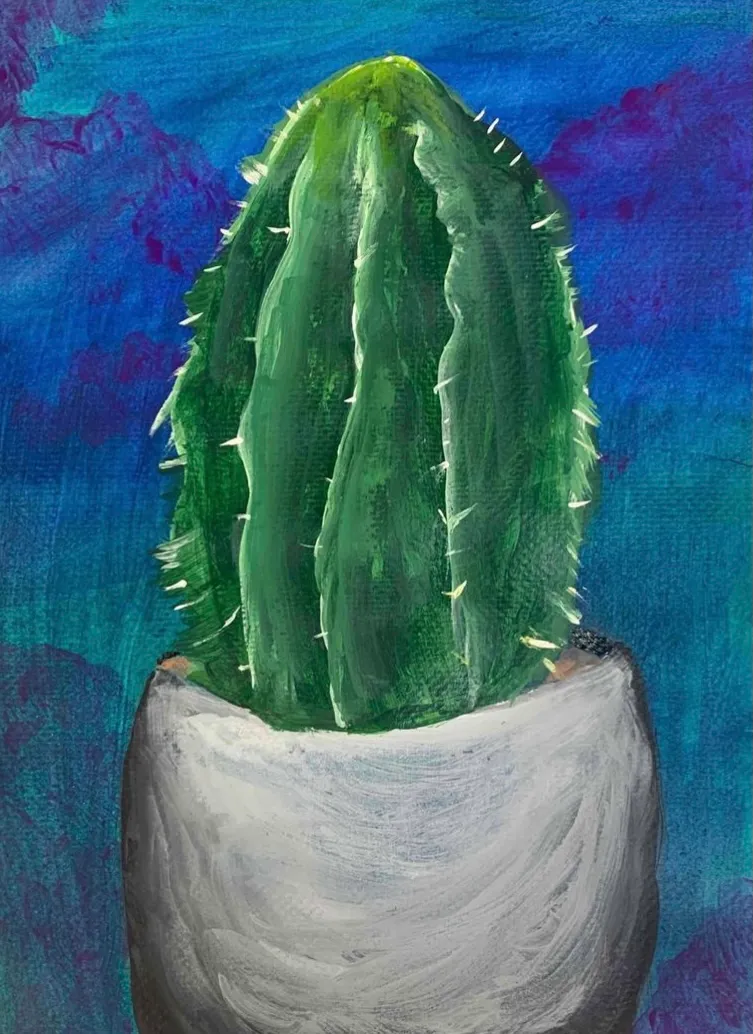
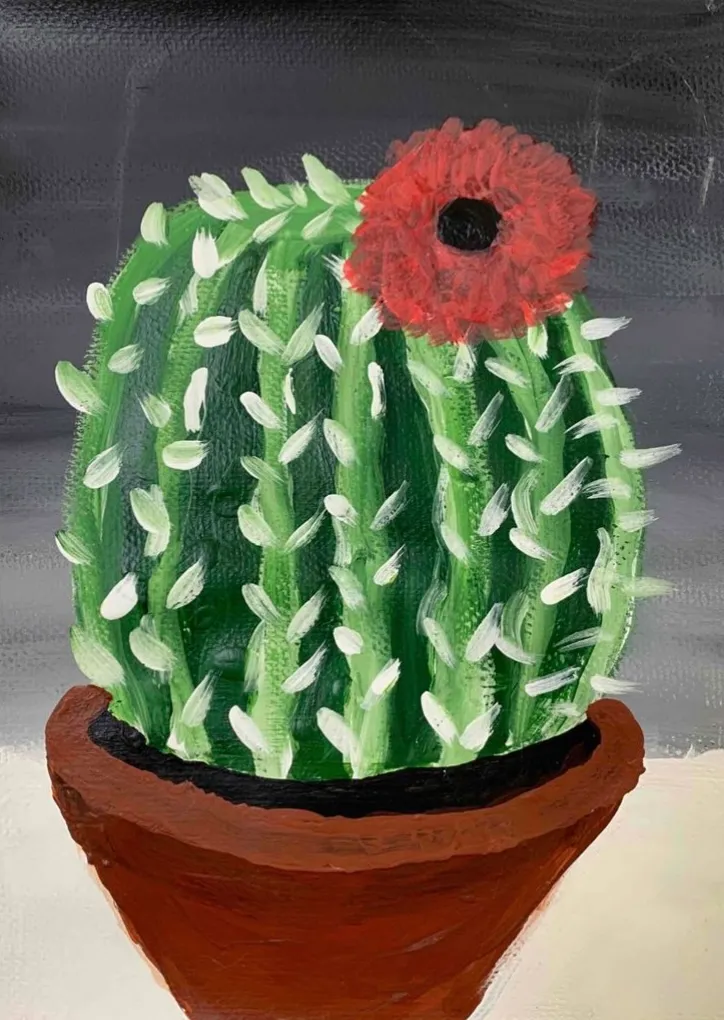
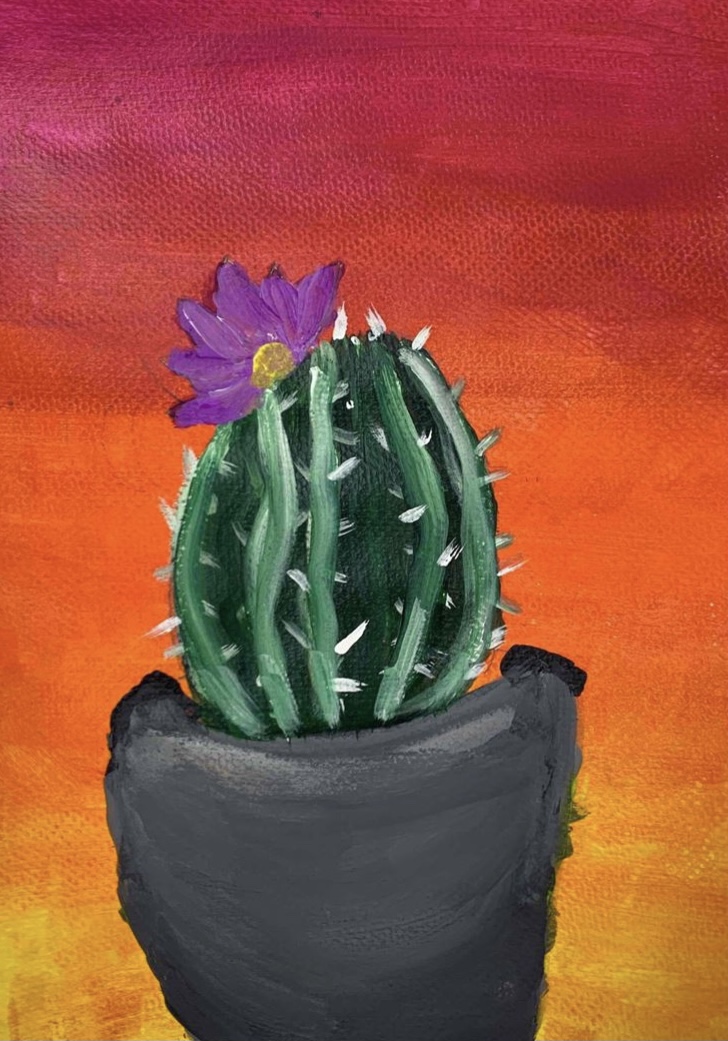
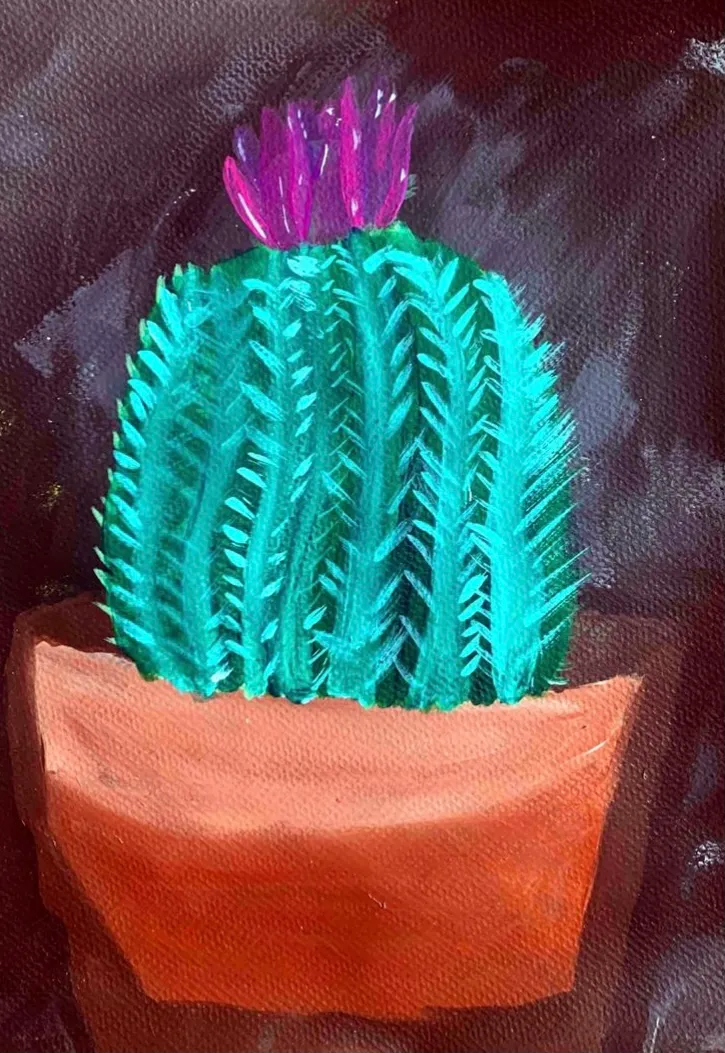
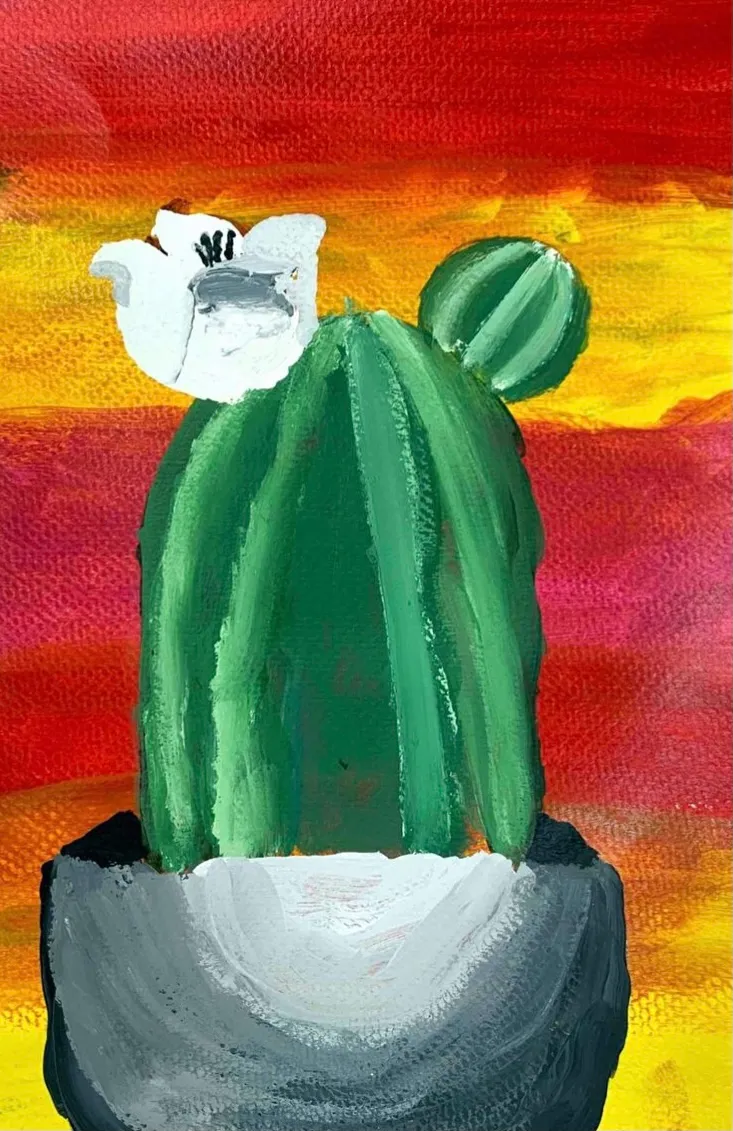
最后一步是可选的花朵绘制。我了解到,在绘制这一收尾细节前,先练习笔触非常有帮助。我会让学生在画纸背面勾勒一朵极简的花朵,然后练习笔触——在选定的底色中加入少许白色或黑色,以增强画面纵深感。所有技法均采用“湿画法”直接在画纸上完成,当然,也可选择先在调色板上调和颜色。
若您想将本课拓展为综合材料课程,不妨试试这节综合材料仙人掌静物课。我很喜欢其中的拼贴元素,而芦荟植物的绘制过程更是趣味十足!本学年我决定简化教学内容,仅聚焦于单株仙人掌的纯绘画训练。不过,此前更深入的综合材料教学方式也取得了极佳效果!
综合材料仙人掌静物
值得了解的仙人掌静物画家
将艺术史与当代实践型艺术家联结起来,是实现均衡美术教育的关键。在本次仙人掌丙烯绘画课的素描本热身环节中,以下是我最常向学生介绍的几位画家:
您最钟爱的丙烯绘画课是哪一节?非常期待听到您的分享!
提交表单
订阅我们,不错过任何一篇推送!
立即订阅!

作者:希拉·马查多
2019年4月28日

作者:希拉·马查多
2019年4月26日
作者:希拉·马查多
2019年4月26日
Cactus Acrylic Painting Lesson
Original: https://thatartteacher.com/2021/02/26/cactus-acrylic-painting-lesson/
Date: 2021-02-26
Author: Sierra Machado
Categories: art tutorials
Tags: acrylic painting, acrylic painting lesson, acrylic painting lesson step by step, acrylic painting tutorial, art education, Cactus Acrylic Painting, cactus art, cactus painting tutorial acrylic easy/ acrylic painting tutorial/easy painting for beginners, easy cactus painting tutorial, easy painting lesson for beginners, easy still life painting, featured, fun painting tutorial, how to paint, how to paint in the classroom, learn how to paint a cactus, middle school art lessons, middle school painting lesson, middle school still life lesson, painting lesson for kids, painting lesson for middle school, painting tutorial, step by step acrylic painting tutorial, still life art lesson, teaching, that art teacher, wet on wet painting
Try out this simple cactus acrylic painting lesson! It focuses on blending colors directly on the surface and painting a simple object from direct observation. I do this with my sixth graders, but it could totally be adapted for a range of age groups. This lesson has three simple steps to grow confident and creative painters in your classroom.
Cactus Acrylic Painting
Cactus Acrylic Painting Tutorial
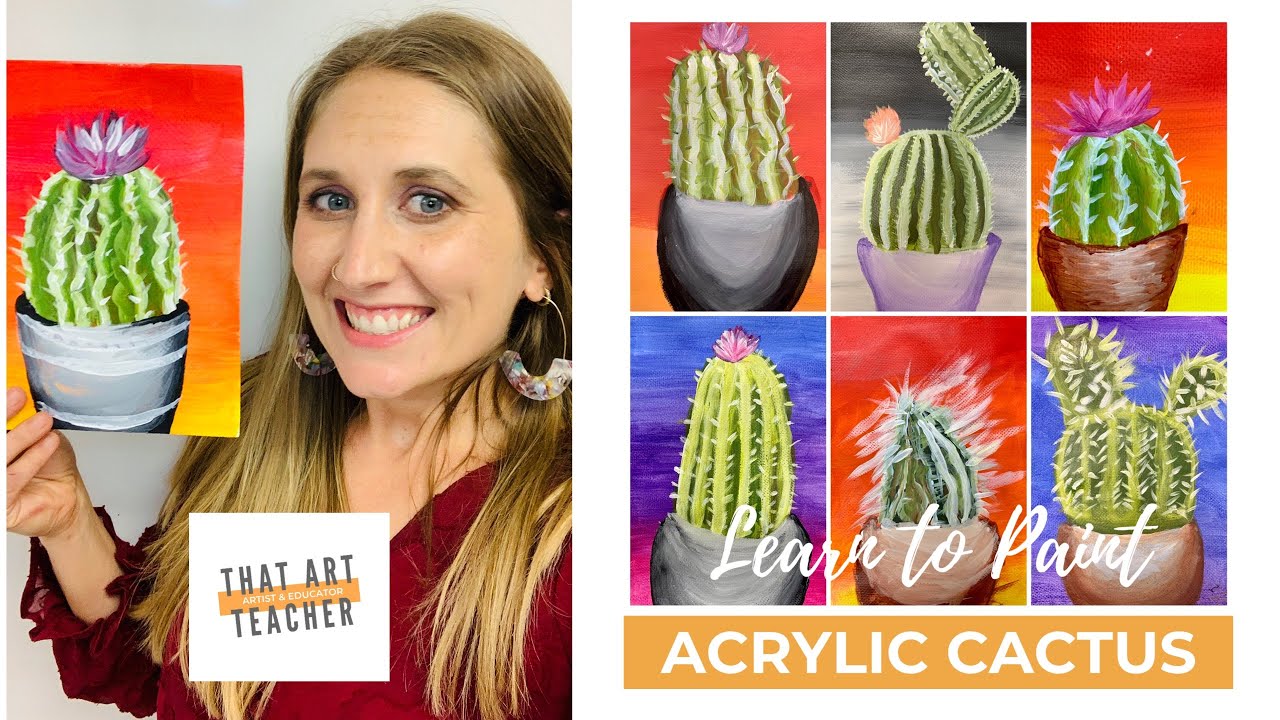
This cactus acrylic painting tutorial will walk you through each step of this painting! I also break everything down in this post if you prefer to read instead, but this tutorial is ready for your classroom.
Step One: BACKGROUNDS
Painting the background is my favorite part of this artwork. It is the most free and loose method and students are always receptive to class periods of painting without it having to look exactly like something. Realism can be scary for young art students or beginners!
I have done this where students sketch their cactus first and then paint their background, and students had a really hard time trying to paint around their sketch. Starting with backgrounds first allows for unity within the painting as well as building confidence. My students have three color scheme options: warm, cool or gray.
I pre-poured (okay, okay…I had some trusted student helpers pre pour) about eight palettes of each color scheme. Each time I teach this the colors change slightly, depending on what acrylic paint I currently have, but I limit to three colors. Those who choose gray can pick one other color from either color scheme to add to their palette.
My tutorial demonstrates really smooth blending, and I like to encourage my students to experiment with directional brush strokes and to mix their colors wet-on-wet in whatever order they find appealing. Having only three colors from the same color scheme to work with really helps students feel free to experiment because no matter what their backgrounds colors work together. Most students will finish this in one class period, depending on how long it is and the size of the paper.
Part Two: SKETCH & CONTAINER
The next class period we spend only a few minutes sketching on top of our dried backgrounds. I like to encourage students to use their paintbrush as their pencil, and let me tell you they always want to rebel against this concept! It seems so scary to not draw it out exactly, but I try to encourage more intuitive painting. I do think having the container being sketched in more detail has helped students feel more confident.
I have a variety of mini cactus and succulent plants I hold up to the document camera. We look at the shape of the container and how to make it look 3D. I love holding it directly under the camera so the opening is a perfect circle and then slowly changing it into an ellipse and then back to a circle again. I have found having simple clip-art images available help with students confidence when sketching their general container shape.
Finally, we draw a very simple cactus shape to make out the size of their cactus. I have a few that we look at directly and I advise students to have the top of their cactus hit about the 2/3 mark of their paper. Do we measure? Nope.
During the same class period as the sketching, we start painting our container. They watch my tutorial from the 9:07-12:57 mark and I use that time to pour white paint on their palettes. Containers can be any color, but I have been using gray, burnt umber and burnt sienna lately and loving the natural results.
I have found that if I paint at the document camera as they paint, the results are stronger and students feel more confident. It’s one thing to watch someone do something once, but painting synchronously allows for their brains to snap into focus in real time. I always do this with a MUCH smaller piece of white paper so I don’t waste materials or time. If I am feeling lazy, I just walk around and monitor progress as they paint, but the results are always better when I take time to model the technique along with them.
Part Three: CACTUS!
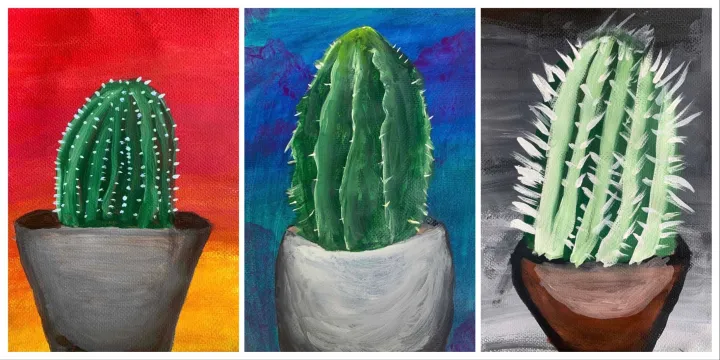
Finally, it’s time to paint the cactus. Students mix their own green and paint a vertical section or two at a time, adding white to create depth and texture. Students also pull their brush to create spikes before the paint dries, or add small dots or other areas of texture based on their observations.
A final step is the optional flower. I have learned that practicing brushstrokes is very helpful before we painting this finishing detail. I have students sketch a very basic flower on the back of their paper. Then we practice brush strokes adding a little white or black the their chosen base color for depth. Every technique is wet on wet directly on their paper, but color mixing on their palette is certainly an option.
If you want to make this a mixed-media lesson, try out this Mixed Media Cactus Plant Still Life lesson. I love the collage element and the aloe vera plant is SO much fun to paint! I decided to simplify my life this school year and teach a single cactus focusing just on painting. I have gotten some fantastic results with the more in-depth mixed media approach!
Mixed Media Cactus Plant Still Life
Cactus Still Life Painters to Explore
Connecting art history and practicing artists is key to a balanced art education. Here are my favorites to show students during our sketchbook warm-ups during this Cactus Acrylic Painting Lesson.
- Anna Valdez: I love her bold colors and busy compositions. I also love that she is young, alive and still making art!
- Fritz Schwimbreak: His cactus paintings are gorgeous and his craftsmanship
What is your favorite acrylic lesson to teach? I’d love to hear from you!
Submit a form.
Subscribe so you never miss a post!
Subscribe!
by Sierra Machado
April 28, 2019
by Sierra Machado
April 26, 2019
by Sierra Machado
April 26, 2019