面部陶罐课程教案|陶艺与美国历史
原文链接:https://thatartteacher.com/2019/05/13/face-jug-lesson-plan-clay-pottery-art-teacher-diy/
日期: 2019-05-13
作者: Sierra Machado
分类: 陶艺、陶土、长课时教案、陶器、雕塑、教学
标签: 艺术、艺术教育、艺术教案、美术教师、艺术教程、艺术家、艺术家社群、陶艺、陶土、盘条成型法、面部陶罐、精选内容、高中美术、如何使用陶土、初中美术、Jim McDowell、教案、中学美术、捏塑法、陶器、陶艺技法、南方陶工、教学、美术教学、那位美术教师
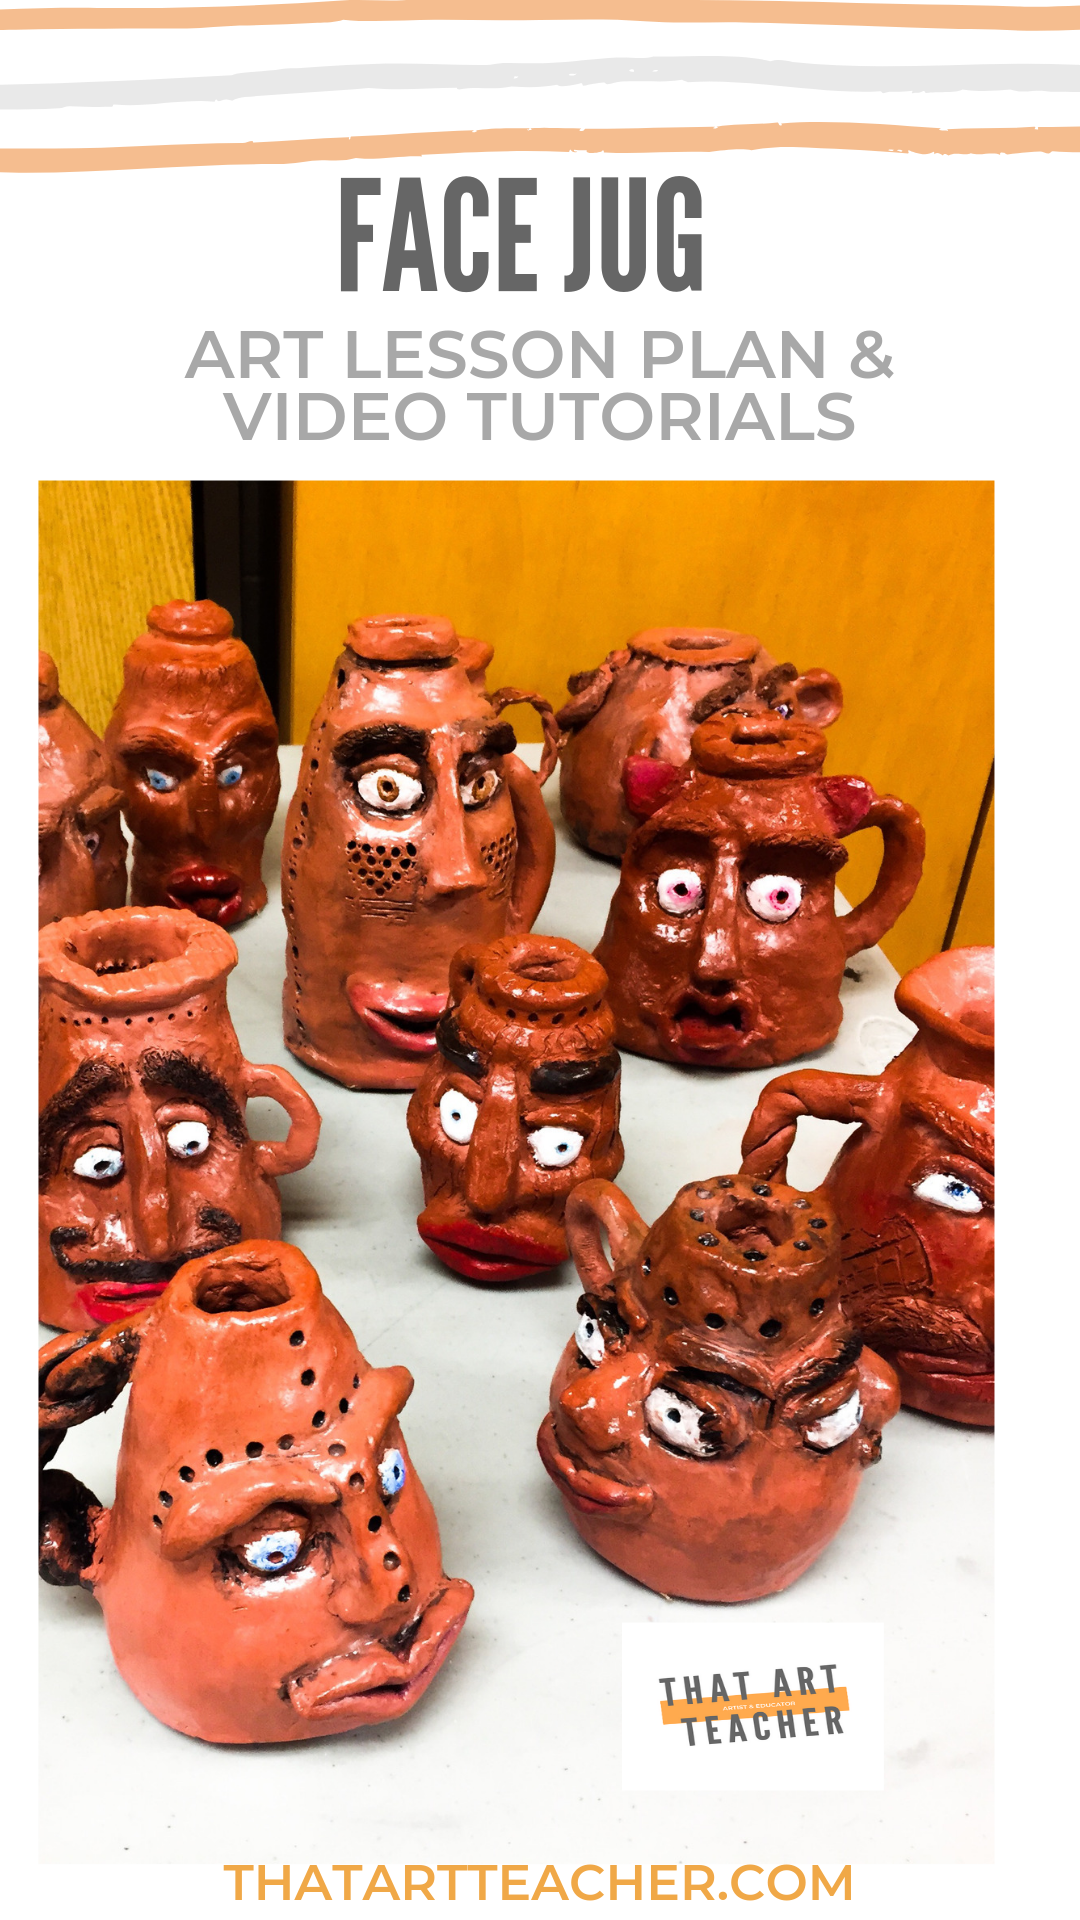
我毕生最喜爱的艺术作品之一,是七年级美术老师Lenzo先生教我的。我们用陶土制作面部陶罐,施以滴釉,并在眼睛部位嵌入玻璃弹珠,营造出令人惊叹的效果——当时12岁的我从未见过如此震撼的呈现。显然,陶艺正是他的专长所在。我对初中生活所剩记忆寥寥(我想大概是出于自我保护而主动屏蔽了……),但我清楚记得美术课,也从未忘记Lenzo先生。
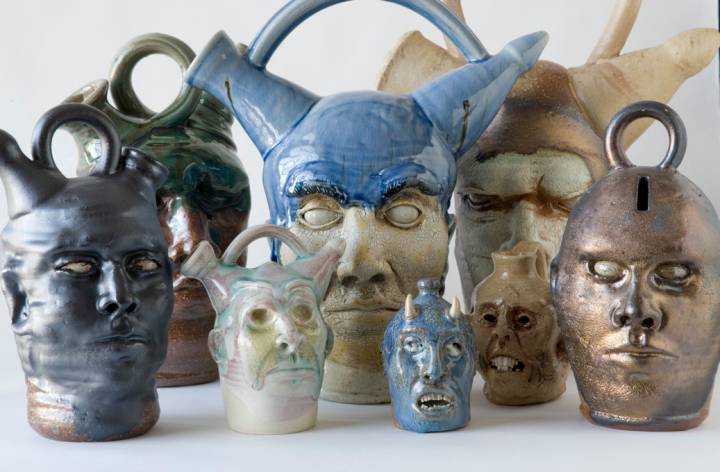
http://www.peterlenzopottery.com/Peter_Lenzo_Pottery/Intro.html
面部陶罐已成为我面向所有年龄段学生的首选陶艺课程。我曾将这一课题教授给五至十二年级学生,成果斐然。它也是传授手工成型基础技法的绝佳载体:捏塑法、盘条成型法,以及陶土的刮擦与泥浆粘接技法。
在掌握上述基础后,学生将学习如何徒手塑造面部特征。我尤其钟爱最终作品所呈现出的广阔风格光谱——从高度抽象到惊人写实,不一而足。各年龄段学生均能全情投入创作过程,并依各自能力水平找到个性化的表达路径。
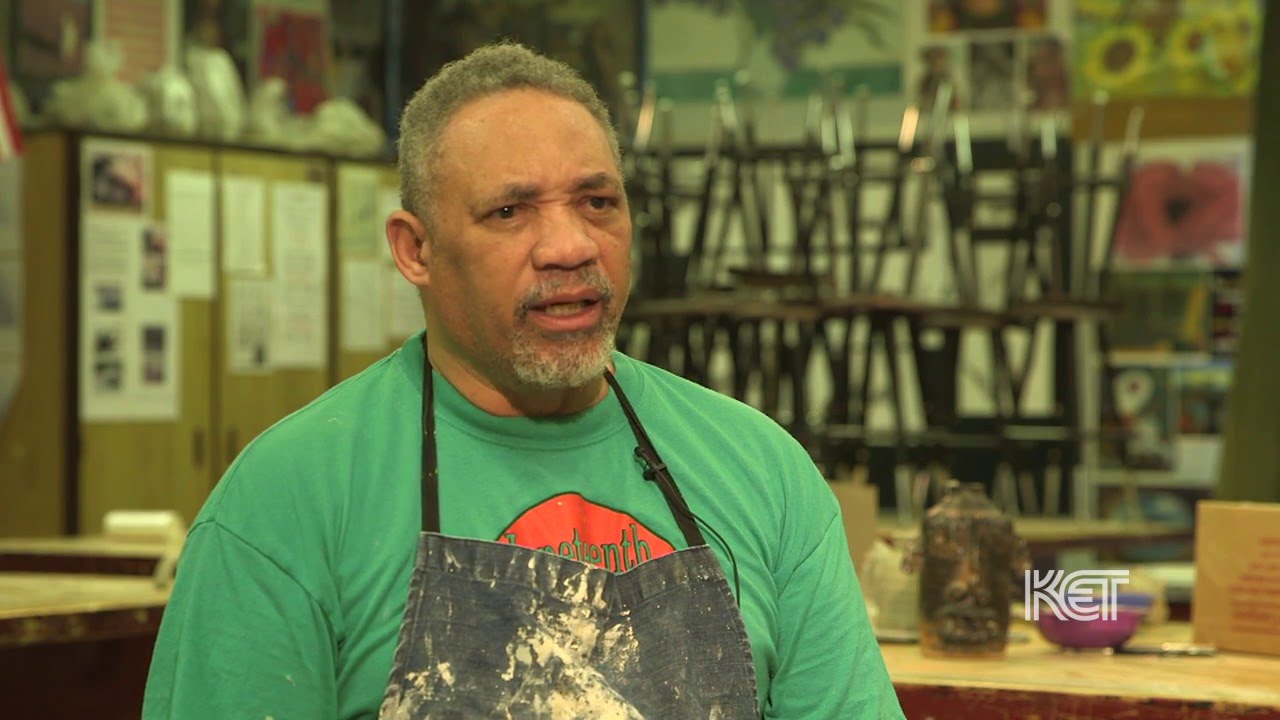
尽管陶土是我最钟爱的教学媒介,但本课最令我珍视的部分,却是它所引发的关于美国历史的重要对话。面部陶罐起源于美国南卡罗来纳州埃奇菲尔德地区,由非洲裔奴隶首创。我们会观看Jim McDowell讲解面部陶罐的历史渊源与文化意义的这段视频。 他饱满的热情与真挚的投入,瞬间感染每一位学生。他们迅速领会到面部陶罐传入我国背后所承载的严肃历史分量;而Jim McDowell的讲述,则赋予这场讨论以我独自无法企及的真实性与厚重感。
有时我会让学生在接触陶土前先绘制构思草图;有时则安排他们在观看视频并练习盘条数日后,再进行草图绘制。
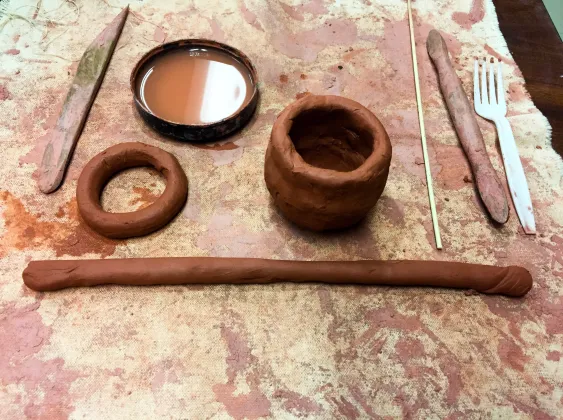
第一天:捏塑法与清洁规范
更新版教程:
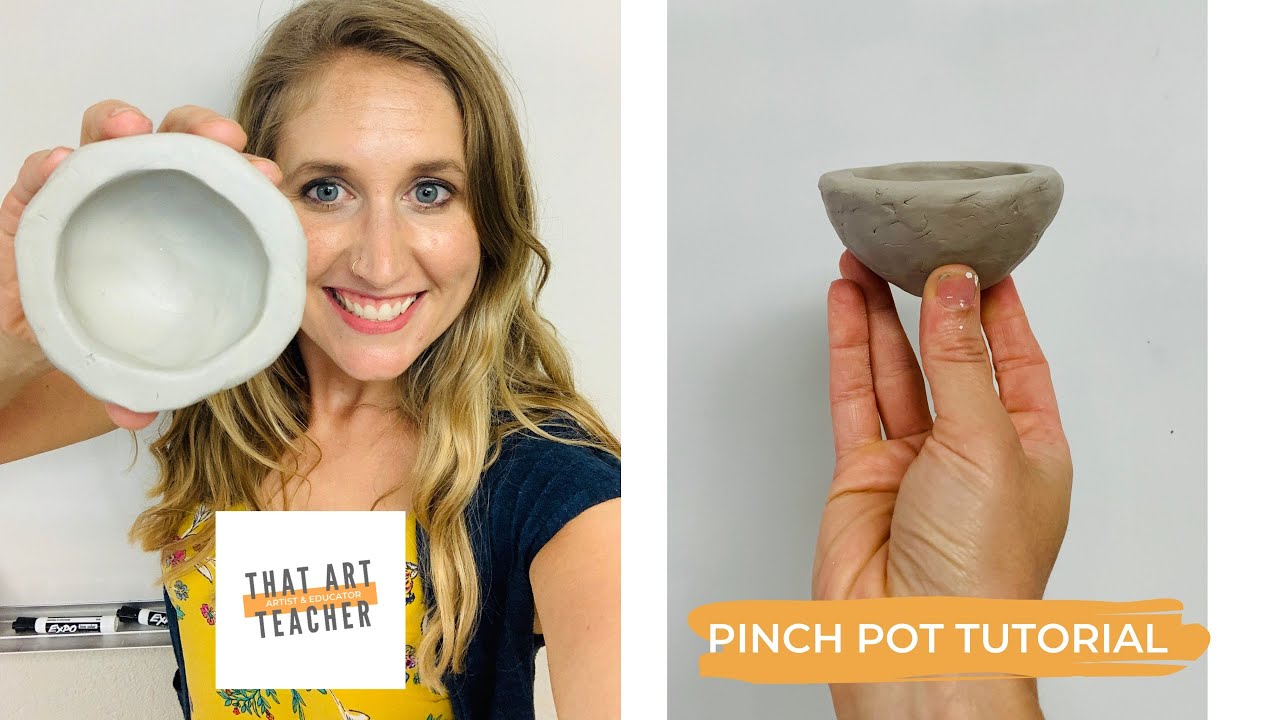
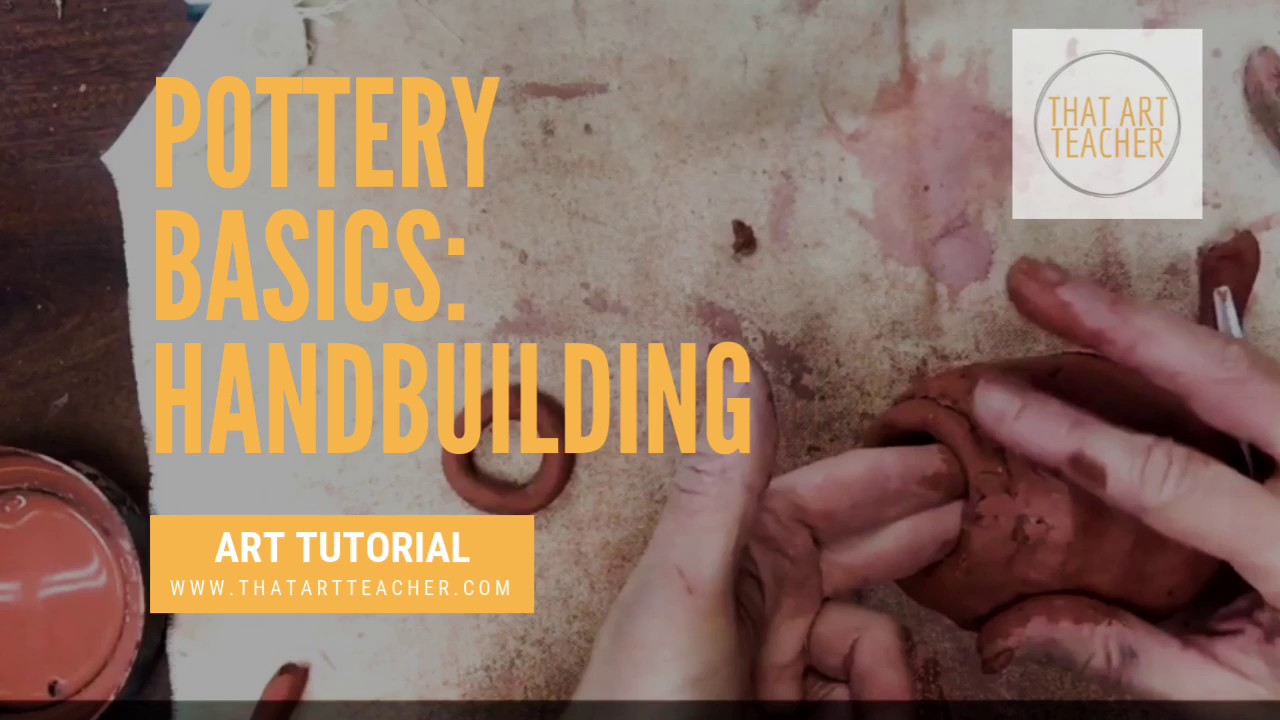
初次接触陶土的课堂可能略显纷乱。我习惯提前做好充分准备,例如预先分配学生储物架位置、整理好材料桌等,以减轻当日工作负担。学生往往被陶土强烈的触感所吸引,但也有部分人初时对其产生排斥。一旦他们适应了泥料带来的“脏乱感”及其对手部的独特触感,便会欣然接纳陶艺本身所兼具的乐趣与凌乱特质。
捏塑法是学生首日即可轻松上手的入门技法,能助其建立扎实信心。本教程 在动手实践前即引导学生进行清晰的视觉化预演。观看完捏塑法演示环节后,我按小组分批派学生领取陶土与工具。我已发现:待示范结束再发放材料,更能确保学生专注聆听我的讲解,而非被桌上琳琅满目的有趣又“ messy”的材料分散注意力。
捏塑成形耗时极短,若首次尝试效果欠佳,亦可轻松揉成团后重做。我郑重其事地逐一检查每位学生的捏塑作品,或赞许道:“很好!继续打磨光滑!”或直言:“抱歉,请揉团重来。” 对于有焦虑倾向的学生,我必保持温和友善;但多数学生反而乐于接受这种直率坦诚的反馈。
首日教学的核心实为清洁规范。我为学生分配具体职责:水槽管理员、纸巾分发员、排队领队、护手霜管理员、陶土桌整理员。我常让早完成任务者或需短暂离座休息的学生轮值这些岗位,学生们非常享受在美术教室中承担一份责任。我还会以夸张方式演示“绝对不可为之事”(如吞食陶土、向天花板抛掷陶块、用陶土在桌面上书写“蒂米到此一游”),以此为严肃对待昂贵教学材料的规范注入一丝幽默感。此时学年已过半,学生深知我毫不迟疑联系家长或实施惩戒措施,因此通常表现得极为自律(至少在陶艺单元最初几天里……)。
第二天:盘条成型法
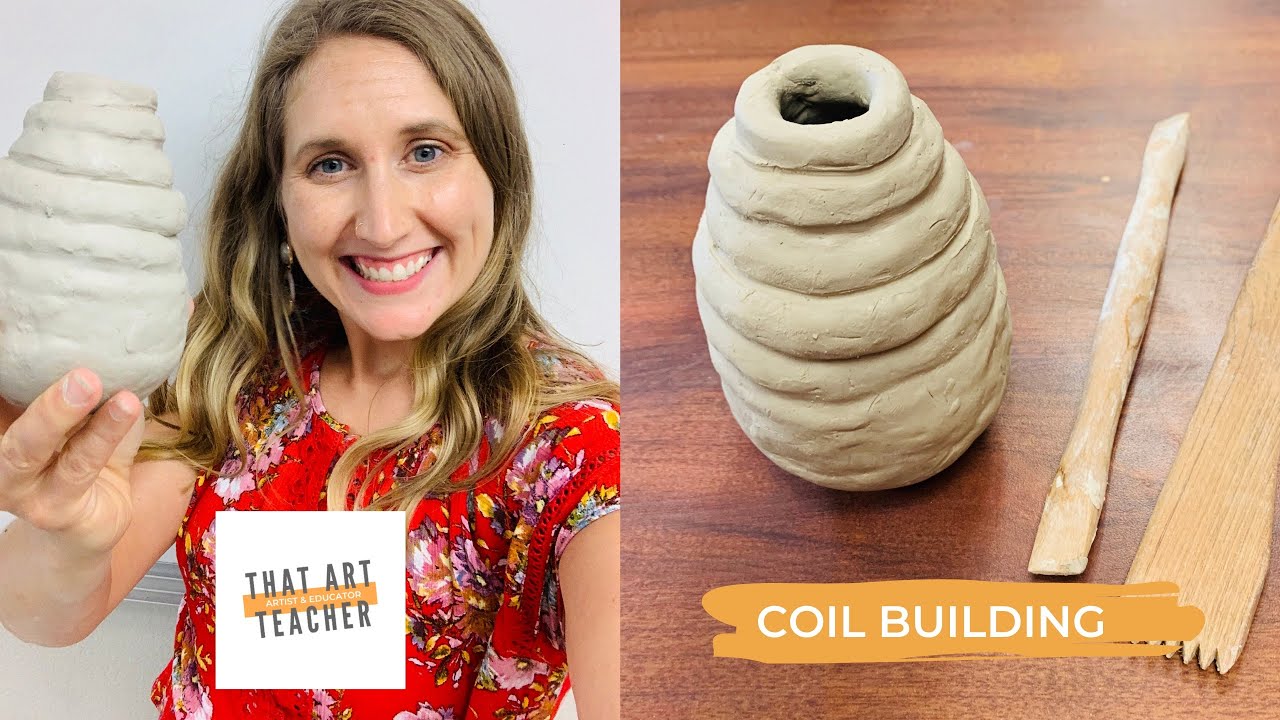
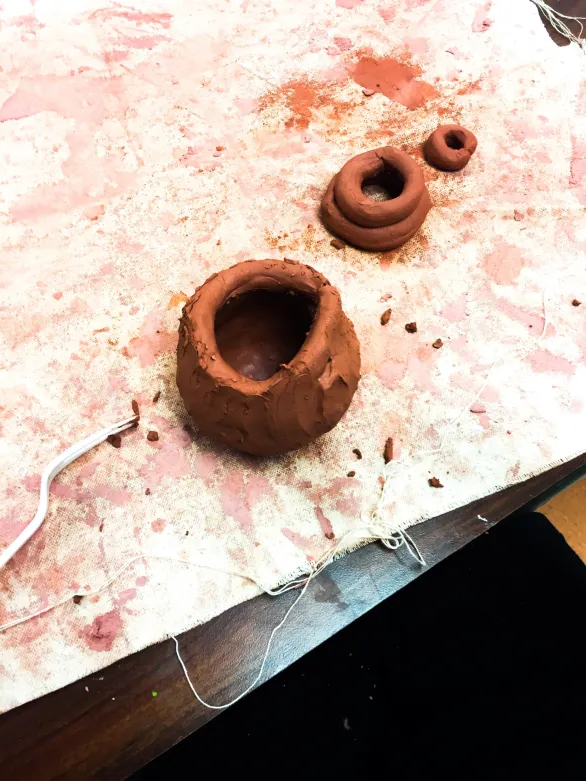
课程伊始,我们集体观看本视频 的开篇部分(既可作为捏塑法复习,也为缺勤学生提供入门导引!),直至盘条成型法演示环节。答疑解惑、领取材料后,全班共同搓制一条陶条。我热衷于示范“错误范例”——展示一条令人沮丧的粗细不均、长度不足的陶条。学生或能立即掌握要领(多亏童年玩橡皮泥的经验!),或需反复练习手部动作。我持续走动巡视全班,亲手指导每位学生。学生根据剩余时间与陶土余量,尽可能多地制作陶条“环圈”。最快的学生一节课可完成五条,最慢者仅能完成一条。首日不进行刮擦、泥浆粘接与融合操作,以便学生专注练习技法,而不必承受“必须一次成功”的心理压力。

第三至四天:刮擦、泥浆粘接与融合
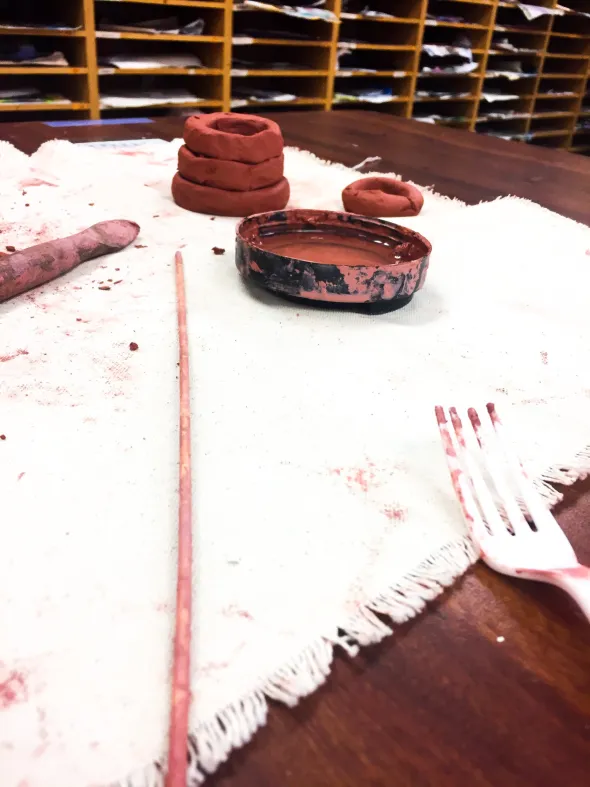
“划痕、抹泥浆、揉合!划痕、抹泥浆、揉合!” 我让学生们跟着我反复念诵,几乎像在念咒语。黏土只有在湿润状态下才能粘合,靠的就是水分。学生们特别爱听一个故事:有位学生做的脸壶眼球在批改时掉了下来——因为他忘了划痕、抹泥浆和揉合!第一天,我们一同观看这个教程,从“划痕与抹泥浆”部分一直看到结尾。
学生使用上一节课制作的其中一只指环,我们一起练习该技法。他们一边看着我通过Elmo实物展台投影的操作,一边同步操作自己的黏土。我会暂停并检查划痕痕迹,因为学生常对用力戳进黏土感到胆怯,也容易忽略让划痕方向相互交叠。我常常提醒学生:务必确保划痕彼此相接,这样泥浆才能像“胶水”一样把各部件牢牢粘在一起。
第一天,学生需对三圈盘条进行划痕、抹泥浆与揉合,并将其连接到捏塑而成的壶身底部,再逐圈向上堆叠。若某位学生仅成功做出一只指环,或曾缺课,则需自行搓制足够数量的盘条以供使用。
第二天进度快得多。我边口头简要回顾要点,边将我的教程静音循环播放于教室电视上,学生边看边做。我提醒学生暂勿制作壶口边缘(即“唇边”),那将是最后的收尾步骤,以便下节课添加面部特征时,双手能顺利伸入壶内。
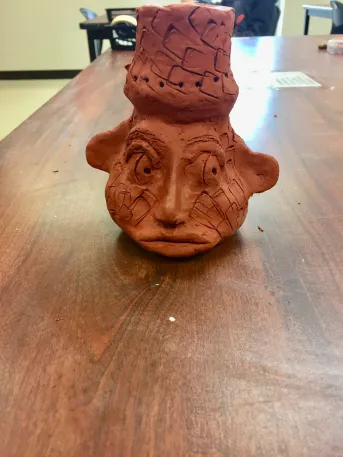
第5天:眉毛与鼻子
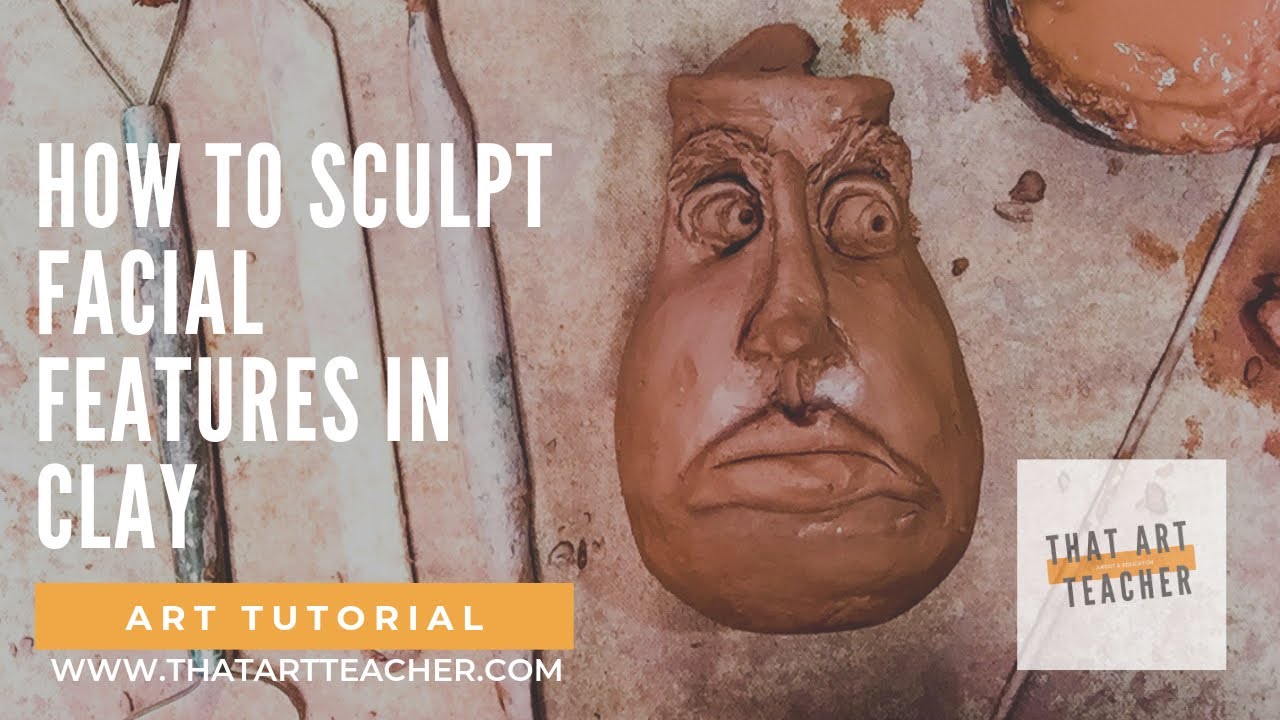
我过去习惯先做眼睛,结果学生全都慌了神。现在我仍让他们先用拇指按压黏土,做出眼窝雏形——许多学生依然会惊慌失措。他们需要一段时间才能意识到:黏土其实比自己想象中更结实耐用。
眉毛是极佳的入门起点,只需两根极细小的盘条,而这正是他们早已熟练掌握的技法!我每天(真的,每天都)强调:哪怕是最微小的附加部件,也必须严格完成划痕与抹泥浆步骤。我还向学生示范如何使用黏土工具(我们用的是竹签而非针具!)为眉毛增添肌理。
鼻子稍显复杂。我让学生搓一根盘条,将其置于两眼窝之间。接着提问:“太大?太小?还是正合适?”然后演示如何增减黏土,直至比例令其满意。
我们将鼻部盘条塑造成胡萝卜状:先用手指捏出锥形,再将另一端轻叩画布,使其形成较宽的底端。此时进行划痕与抹泥浆,随后进入最有趣的环节——我将竹签插入脸壶鼻孔以塑造鼻孔,学生们看得目瞪口呆。我再示范如何轻柔地向侧方拉伸,从而获得更自然、有机的形态,而非两个刻板完美的圆圈。
鼻子确实稍难,因此我告诉学生:若不满意,可推倒重来……但请等到明天!有时学生当场就把鼻子团成一团,随即惊呼:“等等……这到底怎么做的?”将重做时间延至次日,可避免因一时冲动而做出日后懊悔的激烈修改。
第6天:嘴巴与眼睛
一旦鼻子完成,嘴巴便易如反掌。我示范如何搓出两端渐细的两根盘条。我们讨论下唇通常更饱满,并讲解连接鼻与嘴的“丘比特之弓”结构。学生乐于尝试不同嘴型表情,此时他们才发现还能添加牙齿与舌头。
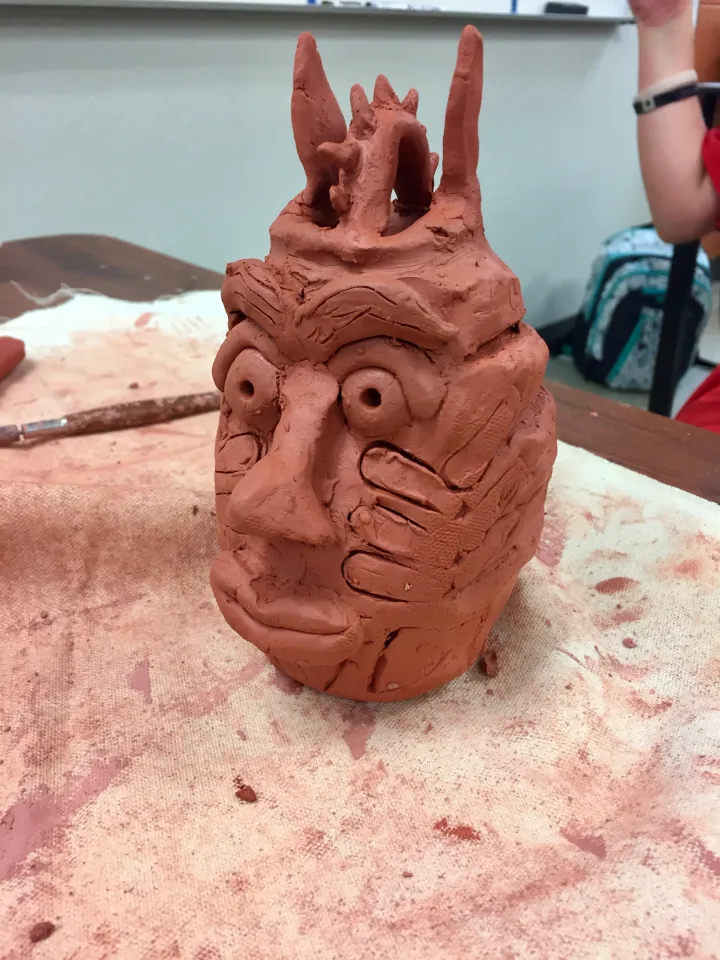
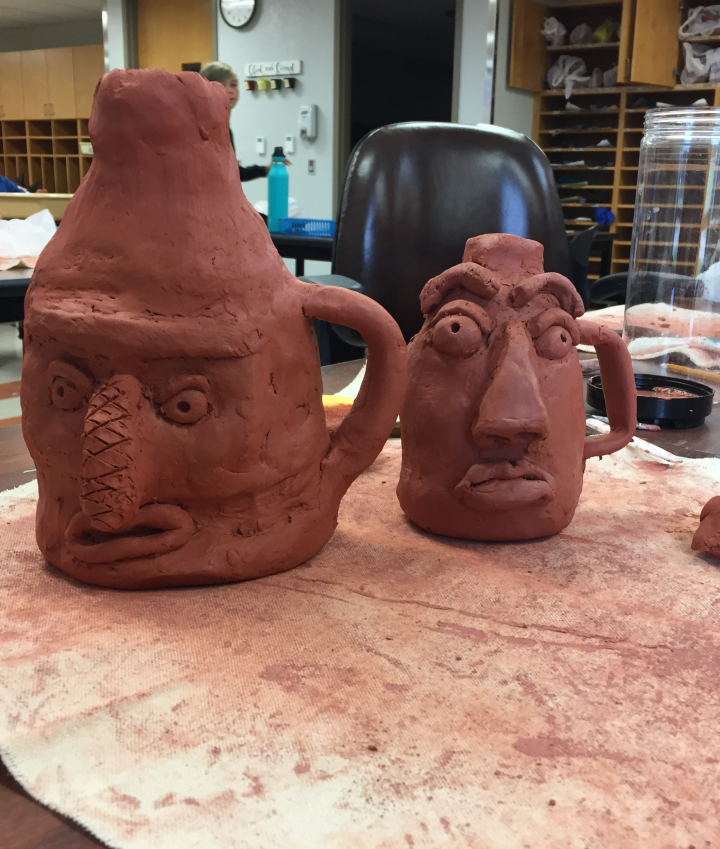
眼睛,我已学会留到最后制作。我示范如何搓出一颗黏土球(或称“球体”)。请相信我:切勿说“ball”(球),艺术课上永远不要说“balls”(复数形式)!我们同样采用尺寸检验法——将球体置入眼窝,询问:“太大?太小?还是正合适?”接着,我演示如何将球体精准对半切开,使两只初具雏形的眼睛从凹陷的眼窝中自然浮现。
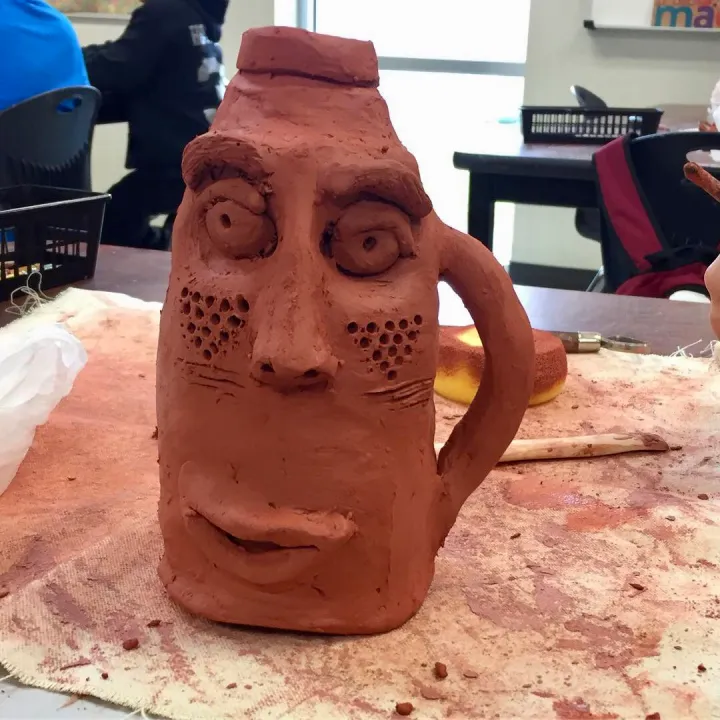
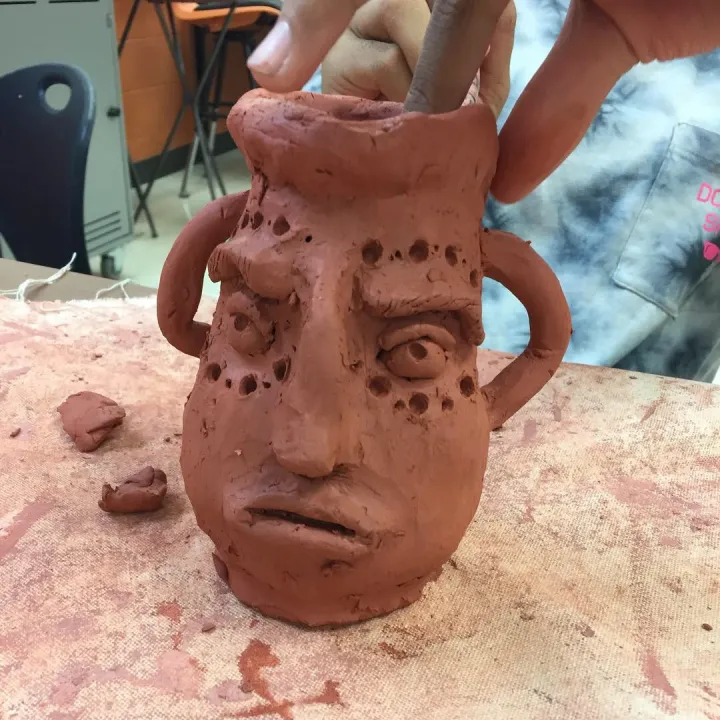
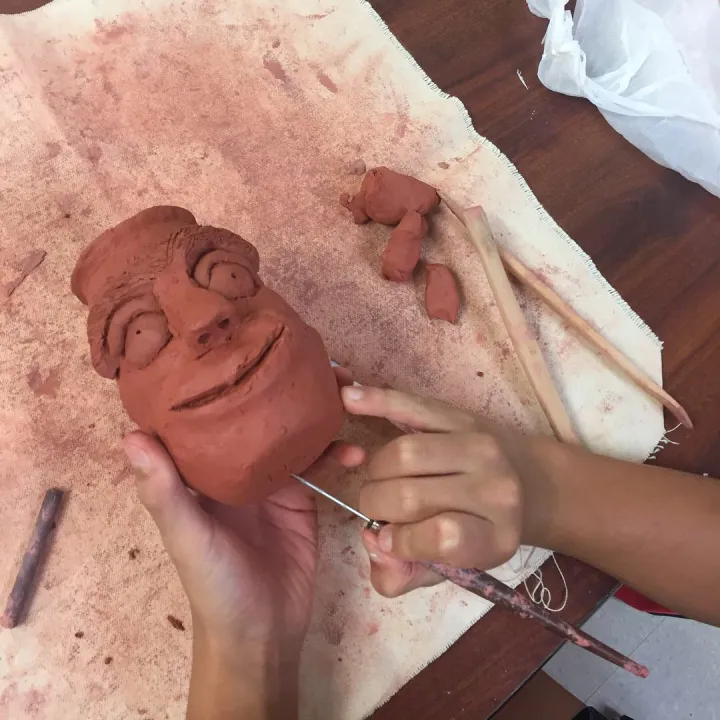
此时再次执行划痕与抹泥浆步骤,且今日不接受任何修改——明日再说!随后,我展示如何制作所有部件中最小的部分:上眼睑,并再次强调划痕与抹泥浆的重要性。绘制瞳孔总是最令人兴奋的环节,因为学生的脸壶仿佛瞬间活了过来。
若有剩余时间,我还会教他们用已练习多日的盘条技法制作壶柄。学生在制作壶柄时最大难点在于比例关系——他们常做出又细又长、突兀外伸的怪异壶柄。
第7–9天:肌理与精饰细节
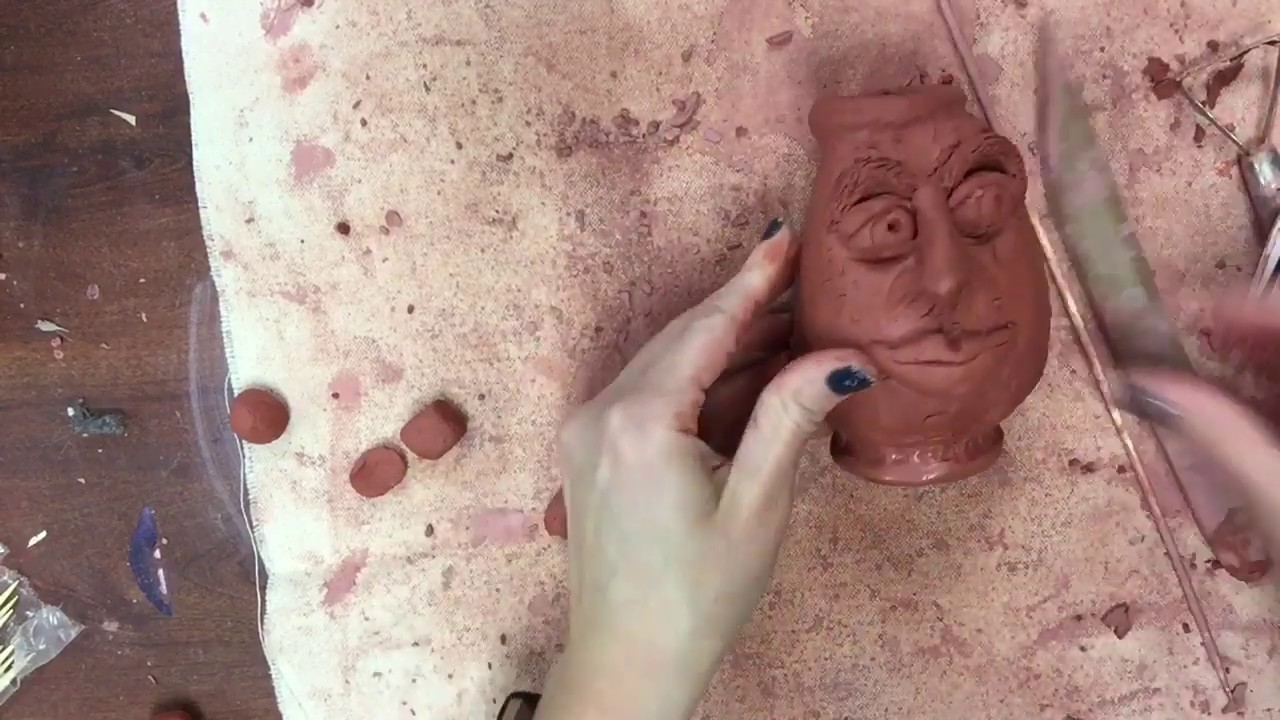
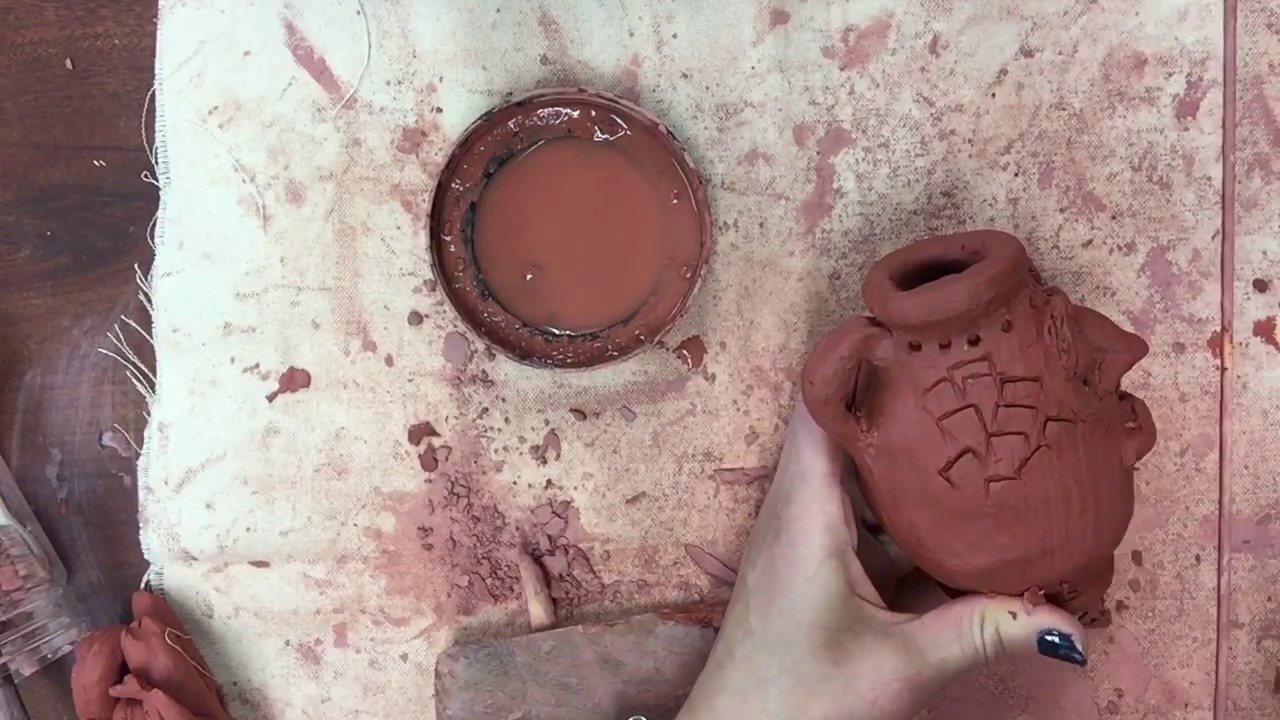
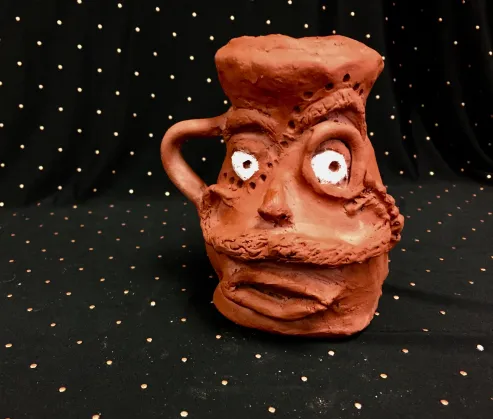
这是我最钟爱的创作阶段。此时学生已充满自信,完全能够独立操作。当给予充分时间与黏土材料后,他们的创造力喷薄而出,每只脸壶都变得独一无二。那些额外添加的细节与雕刻纹样,始终新鲜而精彩——无论我已看过多少百只学生创作的脸壶!
上釉、彩绘与罩光清漆
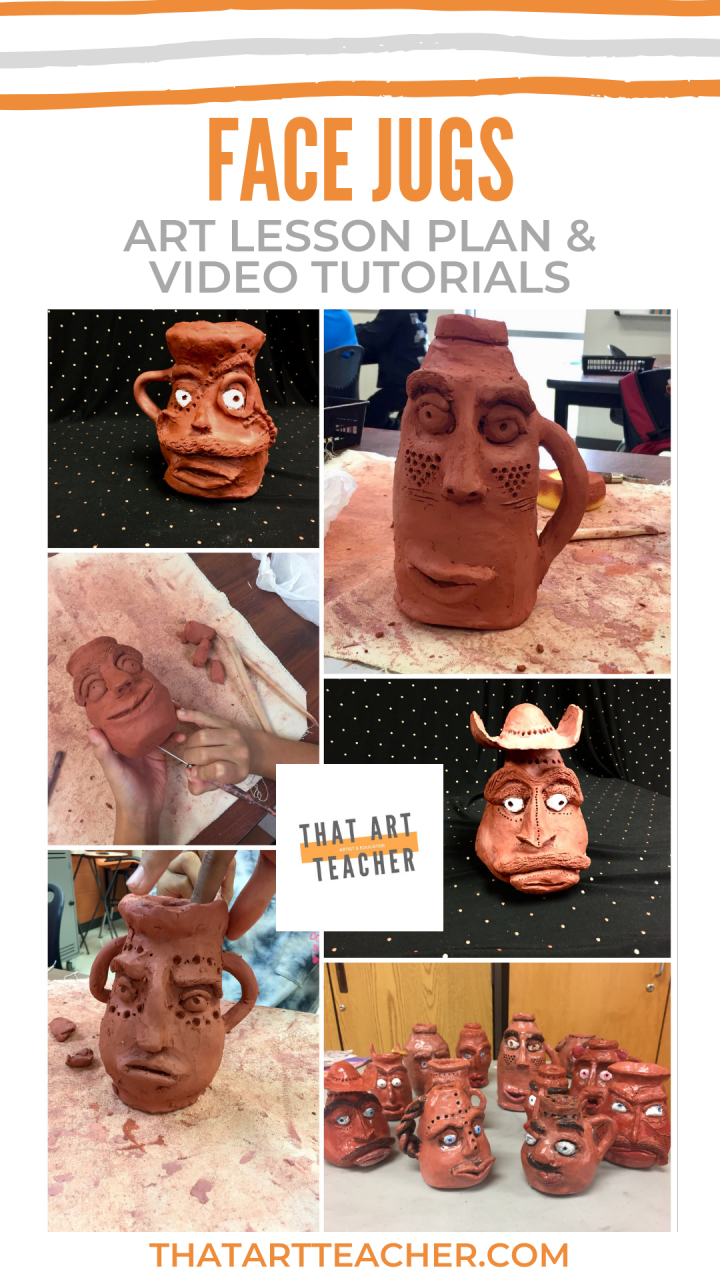
在我过去的职业生涯中,我曾是一名高中陶艺教师。搬到俄克拉荷马州后,我进入了一所没有窑炉的初中任教。坦白说,不用整天沾染陶土粉尘,反而让我略感轻松;但更令我兴奋的是,我为本次创作找到了[Amaco空气干燥墨西哥陶土](https://www.dickblick.com/products/amaco-mexican-pottery-clay/?clickTracking=true&wmcp=pla&wmcid=items&wmckw=33205-3005&gclid=Cj0KCQjwzunmBRDsARIsAGrt4muC0tYYN9hm6p_FnAbVLlaxftQTAYwS2ab3Hb6DBW_TzPjzVB9s7TUaAuAhEALw_wcB)。
它的质感与色泽几乎与我当年在南卡罗来纳州常购的[Amaco红色低温陶土](https://www.dickblick.com/products/blick-red-earthenware-clay/?clickTracking=true&wmcp=pla&wmcid=items&wmckw=30543-3550&gclid=Cj0KCQjwzunmBRDsARIsAGrt4msixXBmMBX6iYKVnqXxeXQtcCfXqEWAUlS698wUqHI-IrvAVI0MVJoaAjFnEALw_wcB)完全一致。这是货真价实的材料,且完全无需入窑烧制。
多亏了积极支持教学的家长教师协会(PTO),再加上学生们每逢周五在小卖部抢购Takis辣条和Jolly Ranchers水果糖的热情,我得以为整个学年备足空气干燥陶土。
我尝试过用丙烯、水彩和油画棒为陶土表面装饰,效果参差不齐。我认为[油画棒](https://youtu.be/z3j5zGknllM)最容易驾驭,能避免把陶土作品变成幼儿园母亲节手工那样失控的涂鸦。
对于低温陶土,我特别钟爱使用[Amaco釉下彩](https://www.dickblick.com/products/amaco-lead-free-velvet-underglazes-classroom-packs/?clickTracking=true&wmcp=pla&wmcid=items&wmckw=30411-1103&gclid=Cj0KCQjwzunmBRDsARIsAGrt4msBmEUnGvcmhSlDeKsPq38ME2x2Df-zDu0samcTpm71XUUnz6KNgU8aAnEjEALw_wcB)——本质上就是掺入颜料的陶土。学生可轻松绘制精细图案,待其干透后,再于整个表面施加一层[透明釉](https://www.dickblick.com/products/amaco-lead-free-clear-transparent-glazes/?clickTracking=true&wmcp=pla&wmcid=items&wmckw=30413-1026&gclid=Cj0KCQjwzunmBRDsARIsAGrt4msUhUU-_Pe8tP6bEU_BddzGeY0aAG-Cl_ogSN4N0ES_AYEGl1Qt95UaAoRAEALw_wcB)。
欢迎订阅本博客,获取更多美术教育资源与视觉艺术教程!
[订阅](https://thatartteacher.com/?post_type=post&p=1026)
你最钟爱哪种陶土创作方式?
这是你第一次接触“人脸陶罐”(Face Jugs)吗?
Face Jug Lesson Plan | Pottery & American History
Original: https://thatartteacher.com/2019/05/13/face-jug-lesson-plan-clay-pottery-art-teacher-diy/
Date: 2019-05-13
Author: Sierra Machado
Categories: ceramics, clay, long form lesson plan, pottery, sculpture, teaching
Tags: art, art education, art lesson plan, art teacher, art tutorial, artist, artist community, ceramics, clay, coil building, face jugs, featured, high school art, how to use clay, intermediate school art, jim mcdowell, lesson plan, middle school art, pinch pot, pottery, pottery techniques, southern potter, teaching, teaching art, that art teacher
One of my favorite artworks of all time was taught to me by my 7th grade art teacher, Mr. Lenzo. We created face jugs using clay, drip glazes and even added marbles to the eyes for an amazing effect that my 12 year old self had never seen. It was clear that ceramics was his area of expertise. I don’t remember a lot about middle school (I think I blocked it out for self-protection…) but I definitely remember art class and I’ve never forgotten Mr. Lenzo.
http://www.peterlenzopottery.com/Peter_Lenzo_Pottery/Intro.html
Face jugs has become my go-to ceramics lesson for all age levels. I’ve taught this to every grade from 5th-12th with amazing results. It is a great way to teach hand building basics: pinch pot, coil-building and how to score and slip clay.
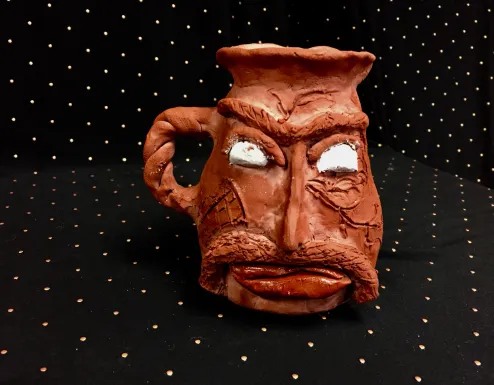
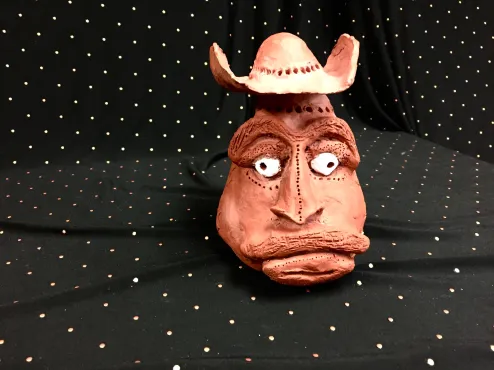
After these basics are mastered, students are taught how to use their hands to model facial features. I love the wide range of abstract to shockingly real results. Students of all ages buy in to the process and can find a way to express themselves at their individual level.
Although working with clay is my favorite medium to teach, my favorite part of this lesson is the important conversation it brings up about American history. Face jugs originated in the United States by african slaves in Edgefield, South Carolina. We watch Jim McDowell explain the history and importance of face jugs in this video. His energy and passion for the subject is instantly absorbed by the students. They pick up quickly the serious nature of why face jugs were brought to our country and Jim McDowell gives the conversation authenticity that I am not able to create alone.
Sometimes I have students sketch ideas before we learn how to work with clay or sometimes we watch this video and sketch after students have worked with coils for a couple days.
Day 1: Pinch Pot & Clean-Up Expectations
Updated tutorial:
The first day working with clay can feel a little hectic. I try to do prep in advance to make my life easier, like having student shelf assignments done or the supply tables organized before the day of. Students are mesmerized by the tactile quality of clay and some are turned off by it at first. Once students get used to the mess and how it makes their hands feel, they give in to the fun and messy nature of pottery.
Making a pinch pot is an easy introduction to clay that students can confidently create on day one. This tutorial sets the stage for great visualization before students get their hand dirty. After we watch the pinch pot section, I send students in groups to get their clay and clay supplies. I’ve learned that waiting until after the demo to get supplies helps keeps students’ focus on me and not all of the fun and messy things on their table.
A pinch pot does not take long to make and can easily be balled up and repeated if the first attempt needs improvement. I make an ordeal of inspecting each pinch pot and either saying “Great! Keep smoothing!” or “Sorry, ball it up and do it again.” I make sure to be kind and gentle to my students with anxiety, but most students get a real kick out of some brutal honesty.
Clean-up is the real focus of day one. I give students jobs: sink bouncer, paper towel giver, line leader, lotion kid and clay table organizer. I rotate through my early finishers or students that need a break from their seat and students love having a responsibility in the art room. I give dramatic examples of what NOT to do (eat the clay, throw pieces of clay onto the ceiling, write “Timmy wuz here” with clay on the table) to bring some humor to the seriousness of messing around with expensive materials. By this point in the school year students know that I have no problem calling parents or assigning consequences so they are usually on their best behavior (at least for the first few days of clay…).
Day 2: Coil-Building
We start by watching this video from the start (makes a great pinch-pot review or introduction for absent students!) to the coil-building section. Once questions have been answered and supplies have been retrieved, we roll a coil together. I love to demonstrate the what not to do coil and show an upsettingly uneven and short coil. Students either get the hang of it immediately (thanks, Play Doh!) or struggle with the hand movements. I am constantly moving throughout the room and getting my hands dirty with individual instructions. Students make as many “rings” as they have time and clay for. The fastest student usually makes five in a class period and the slowest student gets one. We don’t score and slip anything on the first day so that students have time to practice the technique without feeling like they have to master it.
Day 3-4: Score, Slip & Blend
“Score, slip blend! Score, slip, blend!” I have students repeat after me almost like a chant. Clay only sticks together when it’s wet because of the moisture. Students love the story of a student’s face jug’s eyeballs falling out while I was grading it because he forgot to score, slip AND BLEND! The first day we watch this tutorial from the score and slip section until the end.
Students use one of their rings from the previous class period and we do the technique together. They watch me on my Elmo document camera as they follow along with their own clay. I stop and check score marks because students are often timid about digging into the clay and overlapping score directions. I often have to remind students to make sure their score marks touch each other so the slip can “glue” each piece together.
The first day students will score, slip and blend around three of their coils to their pinch pot and move upwards. If a student only made one successful ring or was absent, students roll coils until they have enough to work with.
Day two moves much quicker. I do a quick verbal review with my tutorial playing on a silent loop on the TVs as they work. I tell students to not make a lip yet, that will be a finishing touch, so that their hands can get inside their jug when they add their facial features next time.
Day 5: Eyebrows & Noses
I used to start with the eyes, and students totally freaked out. I still have them use their thumbs to press their clay in to create eye sockets first, and many students totally panic. It takes awhile for them to see that their clay is more durable than they think.
Eyebrows are an easy starting point because it’s just two really small coils, which they are already masters at making! I reiterate (every.single.day.) the importance of scoring and slipping even the smallest additions. I show students how to use clay tools (we use a shishkabob stick instead of a needle tool!) to create texture on their eyebrows.
Noses are a little trickier. I have students roll a coil and then set it on their face jug between their eye sockets. I ask them: “is it too big, too small or just right?” and then show them how to add or take away clay until their happy with the proportions.
We sculpt the nose coil into the shape of a carrot by pinching and then tapping the other end on the canvas to create a larger end. At this point we score and slip, and then it’s time for the fun part. I love watching their reaction when I stick the shishkabob stick up my face jug’s nose to create nostrils. I demonstrate how to gently pull to the side to create a more organic shape and not just two perfect circles.
The nose is a little tricky and I tell them they can start over and remake it…TOMORROW! Sometimes students ball up their noses right away and then are like wait…how do you make that again? Waiting to start over until the next day discourages passionate revisions they may later regret.
Day 6: Mouth & Eyes
Creating a mouth is easy as pie once you have the nose out of the way. I demonstrate how to make two coils that get smaller on each end. We discuss how the bottom lip is larger and talk about the “cupids bow” that connects the nose and mouth. Students have fun playing around with mouth expressions, and this is when students realize they can add teeth and tongues.
They eyes I’ve learned to save for last. I show how to roll a marble or sphere of clay. Take it from me, don’t say balls. Never say balls in art class. We do the same size check by placing it in the socket and asking “too big, too small or just right?”. Then I demonstrate how to cut the sphere in half so there are to emerging eyes coming from the indented eye socket.
At this point we score and slip, no revisions until tomorrow! I then show how to make the tiniest part of all, the top eye lid, reiterating how important it is to score and slip. Drawing the pupil is always a fun part because students’ face jugs just come to life.
If there is time I show them how to create a handle using the same coil building technique they’ve been practicing for days. The biggest struggle students have with handles is size relationships. They tend to make these really thin, akwardly large sticking out handles.
Day 7-9: Texture & Fancy Stuff
This is my favorite stage of this artwork. Students are confident and totally self-sufficient at this point. The creativity just explodes as students are given time and clay to make their face jugs unique. The extra details and carved designs are always fresh and exciting, no matter how many hundreds of face jugs I’ve seen students create!
Glazing, Painting & Clear Coats
In my former life, I was a high school ceramics teacher. My move to Oklahoma put me in an intermediate school that doesn’t have a kiln. Honestly it was a little bit of a relief to not be kicking around clay dust all day, but I am so excited to have found Amaco’s Air Dry Mexican Pottery for this artwork.
It has almost the identical texture and color with the Amaco red low fire clay I used to buy back in South Carolina. It’s the real deal and it doesn’t even need to be kiln fired.
Thanks to a supportive PTO and students obsession with buying Takis and Jolly Ranchers on concession stand Fridays, I was able to stock up with air dry clay for the whole school year.
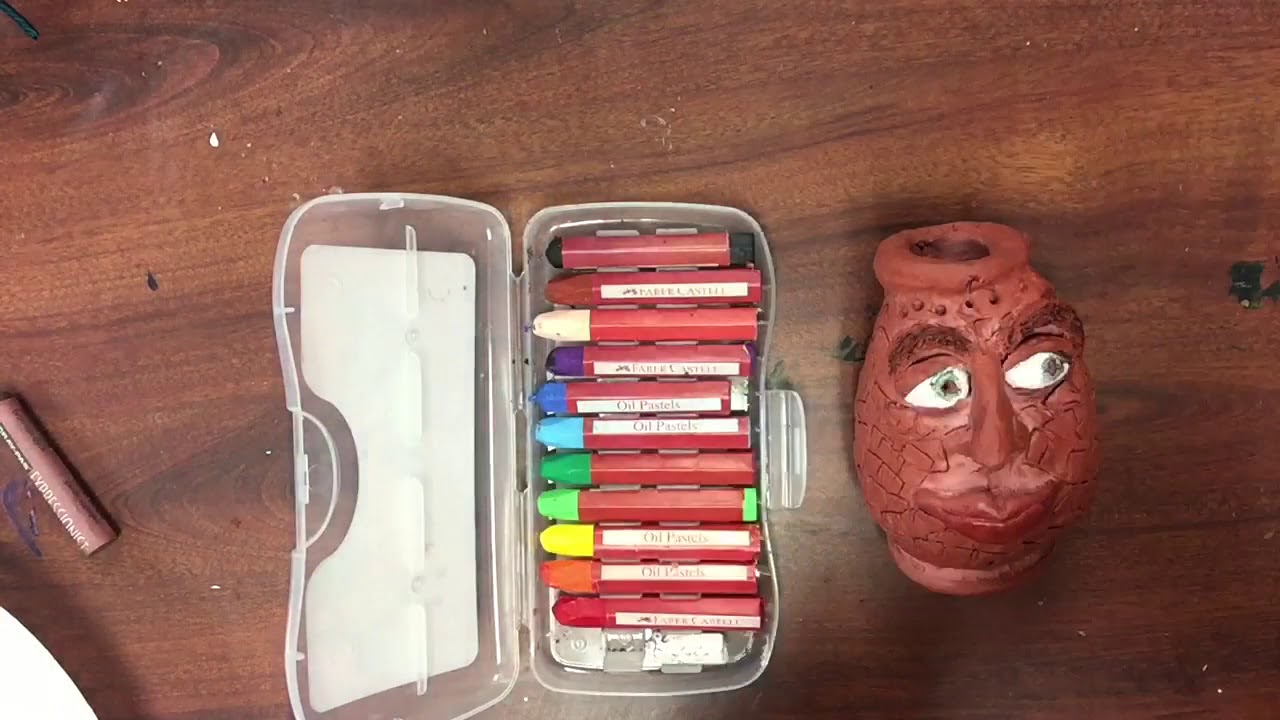
I’ve experimented with acrylic paint, watercolor and oil pastels for surface decorations with mixed reviews. I think the oil pastels are the easiest to work with without turning the clay into a kindergarten Mother’s Day painting gone wrong.
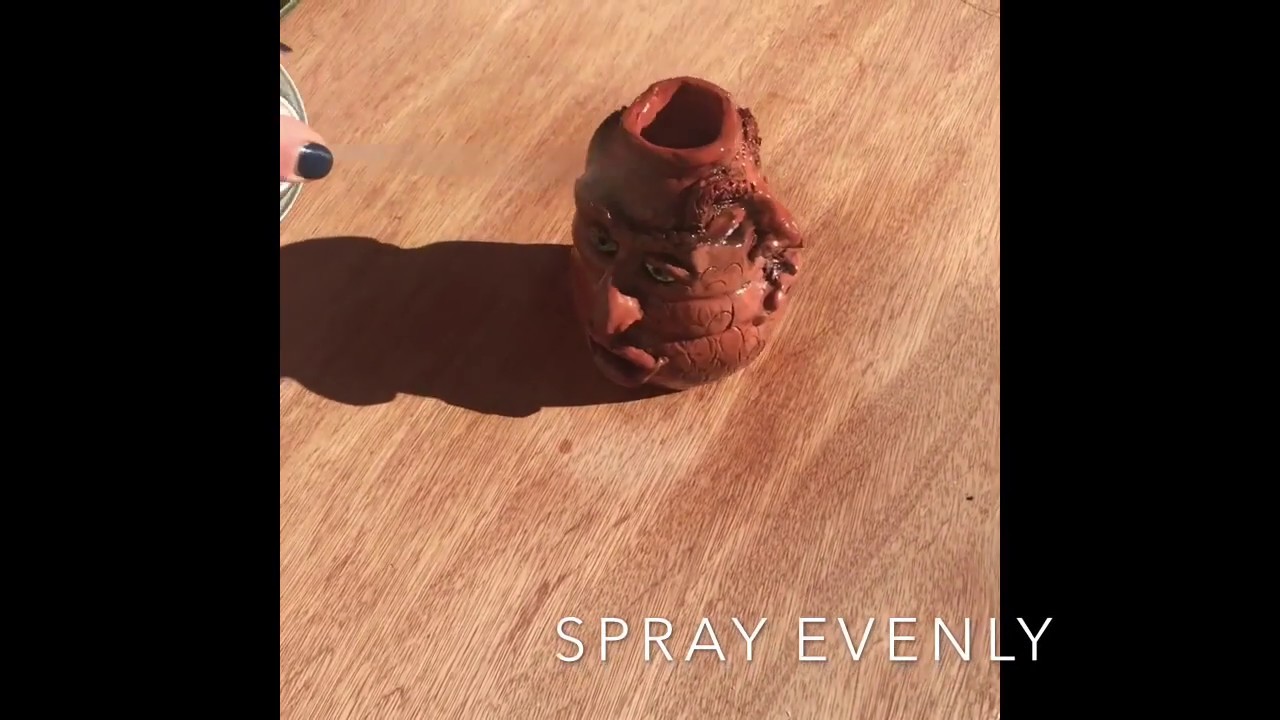
With low fire clay, I LOVE using Amaco’s underglazes, which is basically just clay with a pigment mixed in. Students can easily paint small details and then once it’s dry put a clear glaze on the entire surface.
Subscribe to this blog for more art education resources and visual art tutorials!
Subscribe
What’s your favorite way to create with clay?
Is this your first encounter with Face Jugs?