人体比例——木质人偶写生——两课时
原文链接:https://createartwithme.com/body-proportions-wooden-mannequin-drawing-lesson/
日期: 2014-09-29
作者: 米歇尔·伊斯特(Michelle East)
分类: 五年级、六年级、美术课、炭笔课、素描课、干性粉笔课、高中美术、初中美术、美术原理课
标签: 人体比例、人体比例——木质人偶写生课、儿童人体比例、素描准确性、素描课、素描模特、素描观察能力、黑纸素描、绘画用人体解剖学、比例课、教授比例、限时人偶速写、白色炭笔素描、木质人形模型、木质人偶、木质模特
第一课:初中美术——人体比例——木质人偶速写本写生
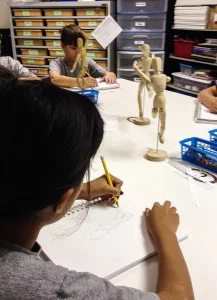
过去几周,我所带的六年级美术课一直在专注训练素描观察能力。我们已开始训练眼睛观察线条的角度与弧度,现在则进入比例学习阶段——重点是掌握人体比例。本课亦可适用于高年级小学及高中美术课堂。


教学目标(IO):
学生将了解人体比例;
学生将运用比例知识与观察能力,准确描绘木质人偶;
学生将通过完整明度范围的明暗/排线表现,塑造出体积感与对比度。
教学流程:
- 定义“比例”:比例是美术原理之一,指各部分之间在尺寸上的相互关系。
- 以头长为单位的人体测量法(展示图片并示范):
- 成年人平均身高约为七个半头长;
- 髋部顶端高度约为四个头长;
- 骨盆区域高度约等于一个头长;
- 肘部至指尖长度约为两个头长;
- 腕部至指尖长度约为一个头长。
- 为何理解并正确运用比例至关重要?
- 为何理解并正确运用比例至关重要?
- 视频资源:《人体比例——素描技法》https://www.youtube.com/watch?v=laWSSkcn8Lg
- 教师引导示范: 正确人体比例
- 活动:学生同步在速写本中绘制;
- 教师引导示范: 人偶写生
- 活动:学生同步在速写本中绘制。
课堂活动——第一日:限时人偶速写速写本作业
学生需在速写本中完成2–3幅不同姿态的人偶速写。(每幅限时12分钟)
所需材料: 人体艺术家模型——12英寸——绘画用人偶躯干、绘图铅笔、学生速写本
操作说明:
- 打开速写本至下一页空白页;
- 在页面顶部写上“限时人偶速写”(共需使用3页);
- 每张课桌摆放4个人偶,分别摆出不同姿态(切勿触碰人偶!)。每位学生有13分钟时间绘制其中一人偶。请将3个不同姿态的人偶分别画在3页独立页面上;
- 教师将提示大家按顺时针方向轮换至同桌另一座位,以便绘制新人偶。无需更换整张课桌;
- 若在13分钟内提前完成,可为人偶添加明暗/排线;
- 若课堂末尾尚有余裕时间,可继续为人偶速写添加明暗/排线。
第二课:人偶白色炭笔写生项目
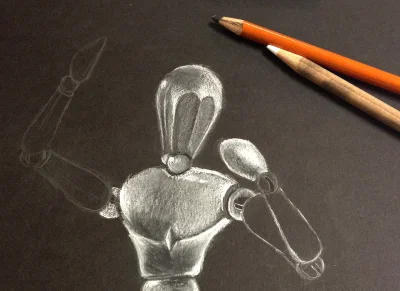
黑纸白炭笔
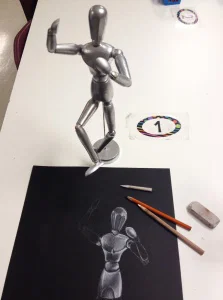
 项目目标: 运用同一张画纸,呈现三个不同姿态的人偶,构成富有趣味性的构图;通过黑白炭笔表现,营造出体积感——要求完成完整明暗/排线(每一局部均须呈现从最亮到最暗的完整明度范围!)。
操作说明:
- 将人偶摆成富有趣味性且恰当的姿态;
- 在一张特制黑纸上,先用铅笔仅勾勒所见轮廓(仅画外轮廓线)。应尽量展现其大部分身体,但允许小部分超出画面边缘(我们至少应看到其四分之三以上的身体!),同时预留空间供另外两幅人偶绘制;
- 重复步骤1与2两次,使同一张纸上共呈现3幅不同姿态的人偶写生;
- 待全部三幅草图完成后,使用黑色与白色炭笔进行完整明暗/排线表现——须体现从最亮至最暗的完整明度范围;
- 用发胶轻喷定画。
评价标准(考试成绩): 视觉表现——学生是否准确绘制了人偶?是否通过完整明暗/排线成功营造出体积感?其画面空间利用是否合理?
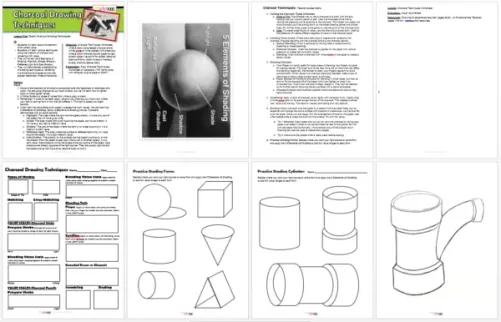
所需材料: 人体艺术家模型——12英寸——绘画用人偶躯干——木质人偶、炭笔技法工作表、黑白炭笔、12×18英寸黑纸、聚光灯(可选)
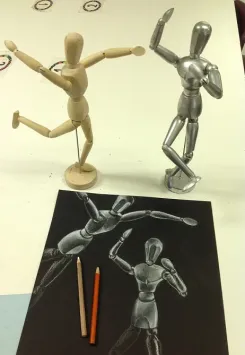
教师示范画
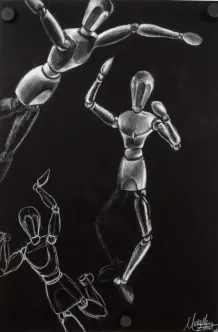
教师范例
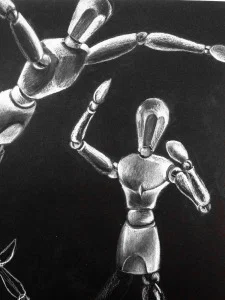
教师范例
若您选用本博客中任何内容(图片或文字),请务必回链至Create Art with ME!
延伸观察能力素描课程:
Body Proportions – Wooden Mannequin Drawings – 2 Lessons
Original: https://createartwithme.com/body-proportions-wooden-mannequin-drawing-lesson/
Date: 2014-09-29
Author: Michelle East
Categories: 5th Grade, 6th Grade, Art Lessons, Charcoal Lessons, Drawing Lessons, Dry Pastel Lessons, HS Art, MS Art, Principles of Art Lessons
Tags: body proportions, Body Proportions - Wooden Mannequin Drawing Lesson, body proprotions for kids, drawing accuracy, drawing lesson, drawing model, drawing observation skills, drawing on black paper, human anatomy for drawing, proportion lesson, teach proportion, Timed Mannequin Sketches, white charcoal drawing, wooden manikin, wooden mannequin, wooden model
My sixth grade art class has been busy over these past weeks with Drawing Observation Skills. We have been training our eyes to look at angles of lines, line curvature and now we are working on proportions. Specifically, we are learning about human body proportions. This lesson can be adapted to upper elementary and to high school art classes.
IO: Students will learn about human body proportions. Students will learn to use proportion and drawing observations skills to accurately draw a wooden mannequin. They will create form and contrast by rendering the final drawing with a full range of value.
Delivery:
- Define Proportions: Proportion is the principle of art that is concerned with the size relationships of one part to another.
- Body measurements based on HEAD height: (show photo & demonstrate)
- The average adult is seven and a half heads tall.
- The tops of the hips are four heads high.
- The pelvic region is about one head high.
- Elbow to fingertip is about two head lengths.
- Wrist to fingertip is one head length.
- Why is important to understand apply correct proportions?
- Why is important to understand apply correct proportions?
- Video: Body Proportions – Drawing Techniques https://www.youtube.com/watch?v=laWSSkcn8Lg
- Teacher Guided Demo of Correct body proportions
- Activity: Students draw along in sketchbook
- Teacher Guided Demo of Mannequin Drawing
- Activity: Students draw along in sketchbook
Activity-Day 1: Timed Mannequin Sketches Sketchbook Assignment
Students will draw 2-3 sketches of mannequins in different positions in their sketchbook. (Timed drawings- 12 min each)
Materials Needed: Human ARTIST MODEL – 12″ inch – Drawing Mannequin Body , drawing pencils, student sketchbooks
Instructions:
- Open your sketchbook to the next clean page.
- Write “Timed Mannequin Sketches” at the top of the page (you will use 3 pages).
- At each table there are 4 mannequins in posed in different positions (Do NOT TOUCH THE MANNEQUINS!). You will have 13 minutes to each mannequin. Draw the 3 different mannequins on 3 separate pages.
- The teacher will tell you when to rotate clockwise to another seat at your table, so you draw a new mannequin. You will NOT need to change tables.
- If you finish the drawing before the 13 minutes is up, then add shading to the drawing.
- If there is time at the end of the class, add some shading to the drawings.
Lesson #2: Mannequin White Charcoal Drawing Project
White charcoal on black paper
Project Objective: Create an interesting composition using a mannequin in three different positions (on the same drawing). Create the illusion of form by using white and black charcoal pencils to render the drawing with FULL shading (should see a full value scale on each part!).
Instructions:
- Position the mannequin in an interesting and appropriate pose.
- On a sheet of special black paper, use a pencil to draw exactly what you see, outline only. Show most of his body, but small parts may go off the edges (we should see at least ¾ of his body!) Leave room for 2 more drawings.
- Repeat #1 & 2 two more times so you have 3 different mannequin drawings on the same paper.
- After all three drawings are complete, use charcoal & white charcoal pencils to render the mannequins with FULL shading-showing full value ranges from light to dark.
- Spray lightly with hair spray.
Evaluation: Test Grade Visual- did students accurately draw the mannequins? did they create the illusion of form through the use of full shading? How did they use the space on the paper?
Materials Needed: Human ARTIST MODEL – 12″ inch – Drawing Mannequin Body–Wooden mannequins, Charcoal Techniques Worksheet, white & black charcoal pencils, 12×18″ black paper, spot lights optional
Teacher Drawing
Teacher Example
Teacher Example
If you choose to use ANY part of this blog (pictures or written), please link back to Create Art with ME!
Additional Observational Drawing Skills Lessons:
